A Crag Guide gives an extensive view of all sub areas and climbs at a point in the index. It shows a snapshot of the index heirachy, up to 300 climbs (or areas) on a single web page. It shows selected comments climbers have made on a recently submitted ascent.
At a minor crag level this should be suitable for printing and taking with you on a climbing trip as an adjunct to your guidebook.
This guide was generated anonymously. Login to show your logged ascents against each route.
Warning
Rock climbing is extremely dangerous and can result in serious injury or death. Users acting on any information directly or indirectly available from this site do so at their own risk.
This guide is compiled from a community of users and is presented without verification that the information is accurate or complete and is subject to system errors. By using this guide you acknowledge that the material described in this document is extremely dangerous, and that the content may be misleading or wrong. In particular there may be misdescriptions of routes, incorrectly drawn topo lines, incorrect difficulty ratings or incorrect or missing protection ratings. This includes both errors from the content and system errors.
Nobody has checked this particlular guide so you cannot rely on it's accuracy like you would a store bought guide.
You should not depend on any information gleaned from this guide for your personal safety.
You must keep this warning with the guide. For more information refer to our:
Usage policy
Contributors
Thanks to the following people who have contributed to this crag guide:
Mark Gamble
Tamati Kennedy
Dan Roe
Lee Cujes
brent
Alexander Jones
Josiah Hess
Bruce Schneider
jayden desmond
Adam Kerz
The size of a person's name reflects their Crag Karma, which is their level of contribution. You can help contribute to your local crag by adding descriptions, photos, topos and more.
Some content has been provided under license from: © Australian Climbing Association Queensland (Creative Commons, Attribution, Share-Alike 2.5 AU)
Table of contents
- 1.
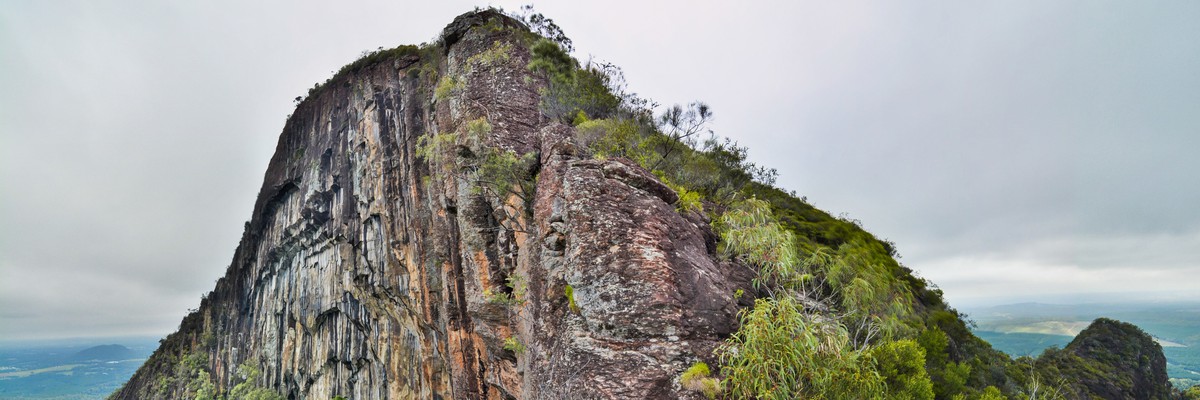
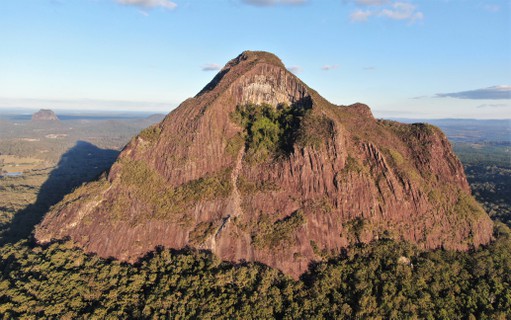
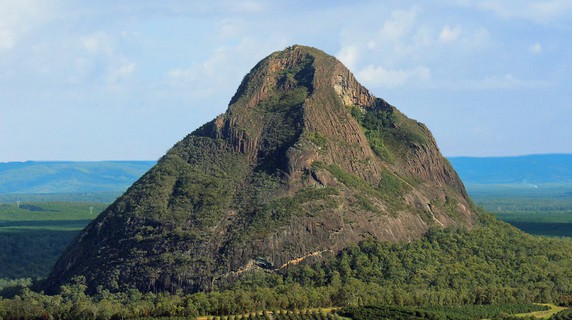
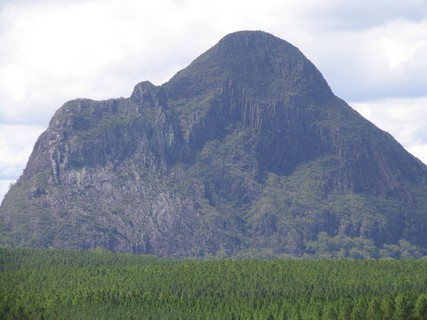
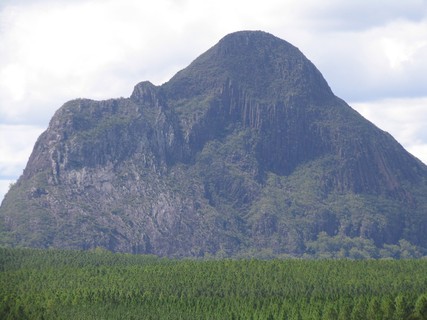
Mt Beerwah
259 in Area
- 1.1. The Secret Garden 17 in Crag
- 1.2. North-east face 8 in Sector
-
1.3.
The Organ Pipes 10 in Sector
- 1.3.1. Alien 2 in Sector
- 1.4. Mosquito Wall 12 in Sector
- 1.5. Garden World 2 in Sector
- 1.6. Thanksgiving Wall 21 in Sector
-
1.7.
West Face 21 in Sector
- 1.7.1. Detached Pillar 4 in Crag
- 1.8. Fern Wall 8 in Sector
- 1.9. The Underworld 9 in Sector
- 1.10. Wayne's World 29 in Sector
- 1.11. South Face 19 in Sector
- 1.12. Turtle's Back Wall 4 in Area
-
1.13.
Wailing Walls Sector 1 in Cliff
- 1.13.1. Purgatory Wall 1 in Sector
-
1.14.
Short Cool Ones Wall 43 in Crag
- 1.14.1. Just Juice 4 in Area
-
1.15.
Spikey Green Jelly Slope 39 in Field
- 1.15.1. Alfalfa Boulder / Riverside Transit Boulder 12 in Boulder
- 1.15.2. Lilliputian Boulder 0 in Boulder
- 1.15.3. Ring Finger Shadow Boulder / Crumbling Crimps 4 in Boulder
- 1.15.4. The Yowie House Boulder / Choss Face 4 in Boulder
- 1.15.5. Jurassic Jaws 2 in Boulder
- 1.15.6. Coming Up for Air Boulder 1 in Boulder
- 1.15.7. Bluebird Sam Boulder 2 in Boulder
- 1.15.8. Jared Boulder 2 in Boulder
- 1.15.9. The Uncut Diamond 9 in Boulder
- 1.15.10. Sitting Buddha Boulder 2 in Boulder
- 1.15.11. Metropolitan Transport Boulder 1 in Boulder
- 1.16. Other Ground Routes 6 in Unknown
-
1.17.
Foamy Castle Slope 10 in Field
- 1.17.1. Foamy Castle 5 in Area
- 1.17.2. Lionturtle Boulder 4 in Boulder
- 1.17.3. Creekside Boulder 1 in Area
- 2. Index by grade
1. Mt Beerwah 259 routes in Area
- Summary:
-
Trad climbing, Sport climbing and other styles
Lat / Long: -26.896646, 152.884649
description
First Nations Information
The First Nations people from this area are Jinibara.
Beerwah meaning: Sky (birra) Climbing Up (wandum) in the Turrbal language. Bira-wa meaning up in the sky. The Glass House Mountains area was a special meeting place where many First Nations Peoples gathered for ceremonies and trading. It is considered spiritually significant with many ceremonial and cultural sites still present and protected today. The Glasshouse Mountains hold significant cultural meaning to First Nations people with Mount Tibrogargan (the father), Coonowrin and Mount Beerwah (the mother) being central in local Dreamtime Legend.
*The Dreaming: https://visitsunshinecoasthinterland.com.au/things-to-do/glass-house-mountains-aboriginal-legend/
All information collected has been carried out with research, respect and best interest however, we welcome feedback from the community.
access issues
Most 'Glasshouse Mountains' climbing is within the Glass House Mountains National Park. Please respect the environment and other people's enjoyment of it. Access to climbing here is a privilege, not a right.
The 2019 Ngungun track expansion & fortification work is now complete, and the mountain is once again fully open.
approach
The rock apron can be accessed via south as per Wayne's World access track and west via an easy bush-bash starting from a closed 4x4 track at S26.897070, E152.876763 (20 min). From here head west through the bush, the rock is 300m away from the track (20 min). Once the rock apron is reached (S26.897876, E152.879982) follow it to the right to access fern wall (3 min). Thanksgiving Wall and Mosquito Wall via tourist track (right when reaching the slab) and Short and Cool Ones sector and Turtles Back Wall can be accessed by heading left. The Underworld can be accessed by scrambling the West Beerwah Route. The east side is accessed by a well formed downhill track starting just east from the carpark at S26.89052, E152.88797 that will lead all the way to the beginning of East Beerwah route.
ethic
Modern climbers establishing new routes have taken great pains to ensure any new routes do not interfere with the historic routes established many decades ago.
Retro-bolting of existing routes is unacceptable!
New routes shall make use of traditional protection where available.
 |
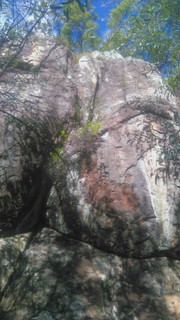
1.1. The Secret Garden 17 routes in Crag
- Summary:
-
Mostly Sport climbing
Lat / Long: -26.897308, 152.888629
description
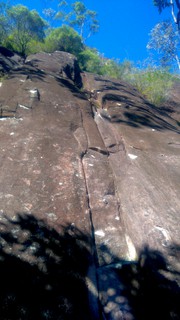
Clean, dry rock that's perfect for afternoon climbing in summer (even if it rained in the morning) or all day in winter. Mostly sport routes, along with some trad where adequate protection is available. Most of the loose flakes and rocks came out in our hands, but be wary since they are virgin climbs and may still have loose holds.
The grades are offered as a guide based on the first assencionists' experiences on each climb, but are of course subjective and open to change based on other climbers' experiences and constructive input.
There are some great beginner single and multi pitch climbs, as well as some fun harder stuff. Training bolts and anchors have been set up on Soiled Plans to hone your skills if you're new to leading or multi pitching.
All bolts and anchors are marine grade stainless steel (SS-316), many of which are camouflaged to minimise their impact, so you may need to look hard at times. Most climbs can be belayed all day in the shade.
Picnic Rock at the base is perfect for a shaded snack time.
There are a number of projects at this crag that are not yet listed here, so please ask if you're thinking of establishing a new route. Please also respect the flora; it is a garden and national park after all.
approach
Take the East Route approach from the carpark for 15 minutes. Just after the start of the final rise toward the start of the East Route scramble, turn left onto a pig trail. Follow the pig trail for 5 minutes to reach The Secret Garden. You will cross over 1 fallen tree along the pig trail, then at the next fallen tree, follow it up toward the cliff. At the end of the tree log, turn sharp right and go up steeply toward the cliff. Turn left at the cliff base and you will enter The Secret Garden. Climbs are named from left to right.
Simplified approach: the crag is located 5 minutes left of East Beerwah Route.
/95/6e/956e602c4cec817d40621eff6d2cabf0c3c0f792) /b8/64/b86425a3ee42e6c4a1a1ecd360909eac304a258e) /f8/56/f8568fb1cae4fbf7f2dad9e5d6be3ca4aa5870f0) |
||||||||
| Route | Grade | Style | Selected ascents | |||||
|---|---|---|---|---|---|---|---|---|
| 1 |
Don't Bring a Peashooter to a Gunfight / DBPG
The proud right-trending arch/roof starting at the far left of the crag. Place gear in the crack on the left of the climb all the way to the anchors. Plenty to choose from. Avoid using any bolts. The FA used a full set of cams from micro to #6, plus some nuts and hexes, but you might be braver. Crux is the last few metres. Bolted top anchor. Rap or belay down to the 1st Maiden Voyage anchors, then rap to the base. Or rap as far as you can (tie end knots) and scramble down the rest. FFA: Mike D & Ian Lim, 2020 | 19 | 35m | |||||
| 2 |
Warrior Princess / WP
Easy start, clipping first bolt of Maiden Voyage, then trending left and up to the tree at the base of the chimney. Climb the left wall and follow bolts up and then trend right to the Maiden Voyage top anchors, or continue to the DBPG anchors for some extra spice. Rap or belay down to the 1st MV anchors, then rap to the base. Or rap as far as you can (tie end knots) and scramble down the rest. FA: Mike D, 2020 | 21 | 41m, 10 | |||||
| 3 |
★★ Panic Attack / PA
Easy start, clipping first bolt of Maiden Voyage, then trending left and up to just right of the tree at the base of the chimney. Climb the headwall, avoiding the right wall if possible or the grade drops significantly. Follow bolts up and then trend right to the Maiden Voyage top anchors, or continue to the DBPG anchors for some extra spice. Descend as per Warrior Princess. FA: Mike D & ClaudiuX, 2020 | 17 | 40m, 10 | |||||
| 4 |
★ Needles
Easy start, clipping first bolt of Maiden Voyage, then slightle left and up to the right side of the chimney. Follow bolts up and then trend right to the Maiden Voyage top anchors, or continue to the DBPG anchors for some extra spice. Descend as per Warrior Princess. FA: Mike D & ClaudiuX, 2020 | 16 | 39m, 10 | |||||
| 5 |
Maiden Voyage / MV
Free soloed and downclimbed gingerly in hiking boots upon discovery of the area. First pitch is an easy beginner lead climb. Pitch 1 (12). Either climb straight up the runnel to 1st belay/rap anchors using trad gear, or climb a metre or so left of the runnel using bolts to anchor. 4 bolts. Pitch 2 (16). Directly up to top anchors. 3 bolts. Rap or belay down to the 1st MV anchors, then rap to the base. Or just rap as far as you can (tie end knots) and scramble down the rest. FA: Mike D & ClaudiuX, 2020 | 16 | 36m, 2, 7 | |||||
/02/9c/029cc7bc7f90ddb8cf97a2bf78841dec89aa958e) |
||||||||
| Route | Grade | Style | Selected ascents | |||||
| 6 |
★ Goanna Piss
Starts at the 1st anchors of MV. Up and veer right, then follow bolts up to DBPG anchors. Fun, slabby mental game. Descend as per DBPG. FA: Mike D & Ian Lim, 2020 | 20 | 15m, 7 | |||||
| 7 |
Boulderdash
Fun, bouldery 2nd pitch and cruxy start to 3rd. P1 - 12, 30m Climb Needles or Maiden Voyage to the first belay station. Stay off the flora. P2 - 18, 30m Enter the Secret Garden, following the left line 10m up to the 1st boulder move, placing gear on the left if you wish. 1st bolt is just below the boulder. Climb up and rightward to the anchors. P3 - 22, 30m Climb the stiff boulder directly on it's left. Going around to the right reduces the grade to 15. Follow the spaced, disguised bolts up easy contour rightward to the top anchors, shared with Quandary and others. Descend via Quandary. FA: Mike D, 2020 | 22 | 90m, 3, 30 | |||||
| 8 |
Meh
Easy beginner lead climb. Starts to the right of Maiden Voyage. FA: Mike D, ClaudiuX & Tony L, 2020 | 12 | 25m, 8 | |||||
| 9 |
So Close / SC
Easy beginner lead climb. Starts to the right of Meh. Shares the Meh anchors. FA: Mike D & Josh W, 2020 | 13 | 25m, 8 | |||||
| 10 |
Round the Bend / RB
Easy beginner lead climb. Starts to the right of So Close. Shares the Just Enough anchors on the ledge to the right. FA: Mike D & ClaudiuX, 2020 | 14 | 28m, 8 | |||||
/5b/a0/5ba008f70c151416313ba544376786477d11fa03) /6b/4e/6b4e347f5251bd5cff3c2351cc90077f21eae0ba) /ad/6d/ad6d9c2ddd001219f7bba585b59a341c3875cd5a) |
||||||||
| Route | Grade | Style | Selected ascents | |||||
| 11 |
Just Enough / JE
Runs up the chimney to the right of Round the Bend. When above the chimney, stick to the slabby slide all the way to the anchors. If you touch either side with your hands or feet, it reduces to a 12. FA: Mike D & ClaudiuX, 2020 | 16 | 30m, 8 | |||||
| 12 |
★ Holey Frog / HF
Fun multi pitch climb for newbies or oldies alike. P1 (14 or 16) Either climb Round The Bend or Just Enough up to the Secret Garden. 4 to 6 bolts, depending which route you climb as a first pitch. P2 (17) Follow 8 bolts up to the shaded belay station. Crux is half way up; try not to cheat by going left or right or it becomes a 15. P3 (15) Cross the rocky ledge to the right side, then follow disguised bolts up, trending right all the way to the anchors. 7 bolts. Descend as per Quandary. Update Sept 2023: The bolts no longer appear to be disguised. The camouflage used appears to have washed/worn off. FA: Mike D, ClaudiuX & Tony L, 2020 | 17 | 87m, 3, 20 | |||||
| 13 |
★ Blow Harder / BH
Starts to the right of the Just Enough chimney. Go directly up the crux, at half way, or it becomes a 15. 60m rope will get you near to the bottom and scramble the remaining few metres. Tie a stopper knot. Update: The FA and co found a bolt on this route with glue soft, likely due to the epoxy not mixing evenly due to being at the end of the tube. So we checked every bolt at the crag again and this was the only bad one. We believe the rain must have washed it out, thus revealing its condition now and not earlier. We chopped it. It's a bit runout now at that point, but it is above the crux on easier climbing and near the top with no ground fall. Just wanted to give you a headsup before you climb it. When we get around to replacing the bolt we'll remove this update. FA: Mike D & Ian Lim, 2020 | 18 | 32m, 10 | |||||
| 14 |
★ Pass the Brush / PB
Starts to the right of Blow harder. Be careful of the Monkey Rope vines. The flora here are precious, so please take care. Descend via Blow Harder. FA: Mike D & Ian Lim, 2020 | 17 | 33m, 10 | |||||
| 15 |
★ Quandary
Fun climb at the grade with enough to keep you guessing, including where the bolts are. P1 17/18, 30m Start at either Blow Harder or Pass the Brush. 7 bolts if climbing Blow Harder. P2 17, 28m Follow the bolts up and rightward to anchors. 7 bolts. Climbs very close to Soiled Plans in places. P3 17/16, 27m Choose either the LHV or RHV. Both fun and contrasting. Don't touch the loose rock on the LHV. 8 bolts on LHV. Descent: Rap the RHV of the 3rd pitch. Then rap the 1st two pitches of Soiled Plans. Top 2 pitches are slight leftward abseiling so take care. Don't trample the flora, especially the Monkey Rope on the bottom pitch of Soiled Plans. FA: Mike D, 2020 | 18 | 85m, 3, 22 | |||||
/01/6f/016f8ad036fb1d1057cc9cd0e8941ea11066d6ea) |
||||||||
| Route | Grade | Style | Selected ascents | |||||
| 16 |
Soiled Plans / SP
Arguably the funnest multi pitch sport climb at the crag. Starts to the right of Pass the Brush, up the groove under the trees. There are practice bolts and anchors in this groove to hone your lead and multi skills, while being in all day shade. P1 17, 30m Straight up the groove, past the two sets of training anchors, then straight up. P2 18, 30m Straight up, then follow the shiny bolts that veer off right and around the corner then up rightward between the trunks of a small, bifurcated tree. If you're following disguised bolts, you're on Quandary. However, just before the 2nd bush that you would normally climb below and around rightward, there is a steep, fun grade 21 variant on the left with disguised bolts (so you know it's different) that leads to a separate set of anchors. If following this variant, you'll end up climbing the RHV of the 3rd pitch of Quandary. P3 21, 30m Straight up the flat wall. If you veer off the flat wall, you bring it down to an 18. Then straight up the grippy slab to the top. Descend as per Quandary. FA: Mike D, Ryan M & Brendan G, 2020 | 21 | 90m, 3, 30 | |||||
| 17 |
Lucky Plans
Super fun sport/trad/adventure/alpine summit route via The Secret Garden. More info/updates to come. Some info is tentatively inserted as a guide. The FA free soloed this while exploring the possibility but will return with a partner to gauge the length and to install anchors if need be. FA: 29 Jan 2021 | 18 | 200m, 5, 20 | |||||
1.2. North-east face 8 routes in Sector
- Summary:
-
Trad climbing and Alpine climbing
Lat / Long: -26.895890, 152.886226
| Route | Grade | Style | Selected ascents | |||||
|---|---|---|---|---|---|---|---|---|
| 1 |
Gambier I
Start: about 275m right of hiker's track. Possibly still marked with "GI" after 55 years? Climb up to 2 small ledges, then delicate moves up to a ledge at the base of a corner. Up using potholes, then thin wall and layback flake lead to easy slab & tree belay (still there 55yrs later?) FA: Rick White, 1968 | 14 | 30m | |||||
| 2 |
Gambier II
Start: 3m Left of Gambier I - possibly still initialled "GII" after 55yrs? Up 3-4m to base of crack, delicate moves up to potholes, follow crack up 6m to easy slab & tree belay (still there, 55yrs later?). FA: Greg Sheard, Chris Meadows & Bob Anthony, 1968 | 14 | 30m | |||||
 |
||||||||
| Route | Grade | Style | Selected ascents | |||||
| 3 | ★★ Hiker's Route | 1 | 360m | |||||
| 4 |
Hiker's Route Left Variant
From the Organ Pipes area follow the track left. The well worn track becomes steep until an exposed move is encountered. The fall from here would be fatal. Past this move, scramble over a series of boulders and bushes until the hiker's track is rejoined. | 2 | 360m | |||||
| 5 |
★★★ Send In The Clowns
tend left off hikers and head straight up middle of landscape. FA: jayden desmond | 18 | 350m | |||||
| 6 |
★ North cave route
FA: Cris & Russell Denny, 2018 | 13 | 360m, 2 | |||||
| 7 | ★★ North East Beerwah | 9 | 340m, 3 | |||||
| 8 |
★★ East Beerwah
An excellent alternative to the Hiker's route. This route has frequent red paint marks from base to summit. A well formed downhill track starting just east from the carpark at S26.89052, E152.88797 will lead to the beginning of the route. From here scramble up easy slabs traversing towards north-west following the marks. The track then climbs straight up for the central part followed by a leftward traverse on easy slabs to a small cave before veering right and up to an exposed and highly scenic finish to the summit. An alternate finish to this route that goes north at the top (but a bit more exposed) is mapped at https://www.google.com/maps/d/viewer?mid=1ULqnVajNBViUxVymtbjh6jbnrcM&ll=-26.89356304264415%2C152.88713100000007&z=17 | 2 | 390m | |||||
1.3. The Organ Pipes 10 routes in Sector
- Summary:
-
Aid climbing, Bouldering and Sport climbing
Lat / Long: -26.896483, 152.883819
| Route | Grade | Style | Selected ascents | |||
|---|---|---|---|---|---|---|
| 1 | Tribute | AID:A3 | 110m | |||
| 2 | Ten Thousand Maniacs | AID:A4 | 50m | |||
| 3 |
★★ Cuddles
P1 A2 20m. Free to BR at 4m then thin seam running up then diag. R under arching roof, to arete. Straight up through steep bit then up corner to TBB with small foot stance. P2 A2+ 25m Continue up corner passing 4 BR. Pass rooflet then straight up widening then narrowing crack with some looseness, to the Fireman's Hat belay (TBB). P3 A3 20m Pass roof to R and on up thin cornern with fixed KB to negotiate another roof (2BR). Up R leaning orange line widening from beaks to medium cams, returning to beaks as it reaches the hanging TBB. P4(?A3) 20m Continue up line a bit then veer diag. L (BR) heading for corner above roof. Up corner. A rivet (as for COD) is the last placement. Bolt and groove belay. Note: bat hook off first FH on P4 appears blown out 17/07/2020. 50m of 4th class poo to the top. FA Gareth Llewellin, Chris Finn, Scott Lawrence, Ray B. 05/99 FA: FA Gareth Llewellin, Chris Finn, Scott Lawrence & Ray B. 05/99, 1999 | AID:A3+ | 90m, 4 | |||
| 4 | Crack Of Dawn | AID:A3+ | 85m | |||
| 5 | Agitator | AID:A3 | 90m | |||
| 6 |
★★★ Stainless Anticlimb / Beerwah Bolt Route
Start 20m left of where the tourist track meets the beach. There is a sport route on RB's but the aid route is on (sometimes questionable) carrots. Its not unheard of for the carrots to pop so take care. Once you start the roof it is very difficult to bail. Final straightforward bail option is at the top of pitch two where a 55m rap will get you back on the ground (two 60m essential) | {US} C1 | 130m, 4 | |||
| 7 |
★★★ Stainless Climb
FFA: Lee Cujes & John J O'Brien, 2012 | 27 | 65m, 2, 36 | |||
| 8 | Leviathan | AID:A2+ | ||||
1.3.1. Alien 2 routes in Sector
- Summary:
-
All Bouldering
Lat / Long: -26.896555, 152.883774
description
The beautiful promethean boulders at the base of Organ Pipes
approach
On hikers route
  |
||||||||
| Route | Grade | Style | Selected ascents | |||||
|---|---|---|---|---|---|---|---|---|
| 1 |
★★★ Bishop
Sit start. Ends on sidepull sloper jug thing. FA: jayden desmond | V0 | 4m | |||||
| 2 | Xenomorph | V3 | 5m | |||||
1.4. Mosquito Wall 12 routes in Sector
- Summary:
-
Mostly Sport climbing
Lat / Long: -26.895049, 152.882600
description
Great beginner crag with easy but interesting face climbing. Most routes climb 10m or so of vertical wall before ramp to the chains. Clean falls and varied grades make this a great place for new leaders. Entirely rebolted with ringbolts in 2018 by Safer Cliffs Queensland funds and uni clubs manpower.
approach
From the Mt. Beerwah picnic area, walk up the tourist track and look for a big fallen tree on the RHS in the steps section just before the track veers left. There are two fallen trees that match this description - the first is perpendicular to the track, the second runs parallel with the track. When you come to this second large fallen tree, head right by stepping over it. Continue down hill and along a well-trodden path through lush ferns to get to a rock apron. Continue right hugging the wall and you will shortly arrive at the bolted section.
| Route | Grade | Style | Selected ascents | |||||
|---|---|---|---|---|---|---|---|---|
| 1 |
★ Larva
A traverse over to 'Tropical Strength'. FA: 2005 | 15 | 18m | |||||
/30/ab/30ab6db583ec6d9d03ad642106c7805539f3ffbe) /33/01/3301ee7c6d8412a13b28332c02e6bf8ee03d4504) /07/85/0785dbf497791f238468db4d473921ccff9ab9f7) |
||||||||
| Route | Grade | Style | Selected ascents | |||||
| 2 |
★ Low Irritant
Hard at the bottom, easy at the top. Stick clip first bolt to prevent an awkward fall. Trend past 3 RBs to a DBB on a nice Beerwah slab. FA: Darrin Carter & Wayne Mieth, 2005 | 15 | 12m, 3 | |||||
| 3 |
★ Ava Good Weekend
Thought-provoking bottom section. Stick clip first bolt to protect tricky moves off the ground (potential for awkward fall). A straight forward climb past 3 bolts to a DBB anchor. FA: Darrin Carter, Wayne Mieth & ross ferguson, 2005 | 15 | 12m, 3 | |||||
| 4 |
★ Malaria
FA: Wayne Mieth & Darrin Carter, 2005 | 13 | 14m, 3 | |||||
| 5 |
★ Aeroguard
FA: Wayne Mieth, ross ferguson & Darrin Carter, 2005 | 11 | 14m, 4 | |||||
| 6 |
★ Tropical Strength
FA: Wayne Mieth & Darrin Carter, 2005 | 15 | 14m, 4 | |||||
/7f/07/7f07252aab40f878829cceba33bca18af6dcdffb) |
||||||||
| Route | Grade | Style | Selected ascents | |||||
| 7 |
★ Bitten
FA: Wayne Mieth, ross ferguson & Darrin Carter, 2005 | 15 | 14m, 4 | |||||
| 8 |
Ross Linker Fever
A traverse from 'Bitten', back to 'Low Irritant'. FA: ross ferguson & Gareth Llewellin, 2005 | 15 | 16m | |||||
| 9 |
★ Rid
FA: Wayne Mieth & Wilfred Bos, 2005 | 16 | 14m, 4 | |||||
| 10 |
★ Dengue Fever
FA: Wayne Mieth & Wilfred Bos, 2005 | 14 | 15m, 4 | |||||
| 11 |
★ Bug Off
FA: Wayne Mieth, Russell French & Roxy Mieth, 2005 | 14 | 14m, 3 | |||||
/0f/67/0f67e7f471d4f50abccf0da5f0cf851875f18cb8) |
||||||||
| Route | Grade | Style | Selected ascents | |||||
| 12 |
★ A Tick Among Mozzies
5m right of last bolted route "Bug off". Climbs past dodgy flake to high pockets, finishing at a tree belay on a vegetated ledge. Better gear and climbing than it seems from the ground. Take a size 2 & 3 camalot to protect top section, and a sling on a low knobby jug protects the main climbing. FFA: Thomas Gissing & Cris, 3 Aug 2015 | 10 | 12m | |||||
1.5. Garden World 2 routes in Sector
- Summary:
-
Rock climbing and Trad climbing
Lat / Long: -26.895674, 152.882614
description
The bluff above and between mosquito wall and thanksgiving wall.
approach
Keep walking right past mosquito wall. track drops down from apron then traverses before rising to apron once again. You are there.
descent notes
Up ridge trough bush to meet tourist track at right end of organ pipes.
 |
||||||||
| Route | Grade | Style | Selected ascents | |||||
|---|---|---|---|---|---|---|---|---|
| 1 |
★ Adventure gardeners of Australia
Start is found by walking 50 m past mosquito wall. Track heads away from apron and when it ascends back up to rock apron walk left up tongue of vegetation to gain rock. Quite the adventure was had on the first ascent. Ground up on sight, with a 10 meter slide on the descent by Tony Barten which was fielded by Hamish Ousby who then joined in untill the slide was arrested. (Note, descent is slippery in the rain.) 1 80m. 4 runners Startup slab towards bushes. Break out left to avoid the bushy gully. Up steepening slab. Boldly looking for runners, at about 30 meters a runner appears. Continue straight up on crossly flakes and nonexistent foot smears for a bit. When all looks, bad remember the rule, climbers do not cry. Continue towards vegetated ledge, moving left at last instance, crossing water polished holds to gain vegetated ledge. Runners are noticeably lacking. Belay on nonexistent gear above vegetation. 2 30m Move belay up to next island of vegetation. Easy climbing, no runners, no bolts, no belay, no fun. 3 55m. Up the water polished slab moving left to bottom of crack. Gently up start of crack passing block balancing in bush. Try not to let it drop on your belayer on the imaginary belay below. The crack offers up a good runner above the block just as the the rock gets friable. A few jams, some lay backing, some edging gets you well above your runner and into the crux. Remember the rule, climbers do not cry! Struggle up the off widthy, chimney, thrutchy crack thing, for a bit until a handy chock stone presents itself which you can sling. Unfortunately, the top of said chock stone is just sitting there waiting to be dropped on the belayer on the imaginary belay. Remember Climbers DON’T CRY. Once past this continue up to second tree where a bomb proof runner was excavated from the dirt filled crack. You will see why you do not belay at first tree. 4 45m. Up crack on the left with a good runner. Think its over. Ha! Move up slabs till able to place a runner. Now continue up the slab. It gets a bit thin, friable and that runner you thought was so good before now gets hard to see as it fades into the distance. Remember that rule from the previous pitches? Continue onwards. Soon the angle eases, the holds get better the climb ends. The runners still do not appear. To get off walk bush bash up ridge above till tourist track is gained. It is actually quite good. FFA: Hamish Ousby & Antonius Barten, 20 Sep 2020 | 20 | 180m, 4 | |||||
| 2 |
★★★ Adventure gardeners take it in the arse.
Start 20m right of Adventure Gardeners Scramble up to right hand side of vegetated ledge, then scramble left to slab with lots of peeled flakes. Named in honor of Mr Ousbys massive bruised buttocks obtained from a 8 meter fall on the first attempt at the route. Lovely purple blue and yellow. A fantastic effort by Hamish in establishing this route ground up on sight, placing bolts whilst hanging on for life. Destined to be a mega classic test route. Can be a bit run out in places. 1.55m Start is a very tenuous slab so it may be best to stick clip the first bolt. Smear and edge up slab always trending slightly left. Passing 5 bolts to DB belay. 2 40m Continue up and left of vegetation to steepening buttress above, move diagonally left past bolt then up crack and corner till able to step left to DB belay 3 55m Climb right over crack to gain slab on steep buttress. Place a cam blindly in crack on left. Get your belayer to confirm that it is placed well.(this will let you know if you are good friends.) Up wards passing 4 bolts and gear till able to pull into cave at end of pitch. Room for 2 to bivy if your belayer proved there friendship earlier! 4 10m Its all over. (Well sort of ) Out of cave hand traverse left for a few moves. Then up easily on loose shattered blocks. Bush bash up hill till tourist track is met at right side of organ pipes then down the horror of the tourist track fielding questions all the way back to car FA: Hamish Ousby & Antonius Barten, 11 Oct 2020 | 20 | 200m, 3, 12 | |||||
1.6. Thanksgiving Wall 21 routes in Sector
- Summary:
-
Mostly Trad climbing
Lat / Long: -26.895713, 152.882004
approach
As per Mosquito Wall up to the rock apron, then walk right for 5 minutes.
| Route | Grade | Style | Selected ascents | |||||
|---|---|---|---|---|---|---|---|---|
| 1 |
Beginners To Advanced
FA: Darrin Carter & Sean Smith, 1996 | 14 | 27m, 1 | |||||
| 2 |
The Phantom Walks
FA: Darrin Carter & Helen Conn, 1995 | 15 | 27m, 1 | |||||
| 3 |
★ Tides Out
FA: Darrin Carter, Helen Conn & Alex McConnell, 1995 | 12 | 12m | |||||
| 4 |
★ Chips Ahoy
FA: Darrin Carter & Helen Conn, 1995 | 13 | 12m | |||||
| 5 |
Gambier II
FA: Greg Stead, Chris Meadows & Bob Anthony, 1968 | 14 | 30m | |||||
| 6 |
★ Gambier I
FA: Rick White, 1968 | 14 | 45m | |||||
| 7 |
Medosa
FA: John Tillock & Pete Giles, 1966 | 16 | 2 | |||||
| 8 |
First Come First Served
FA: Darrin Carter & Sean Smith, 1996 | 14 | 25m | |||||
| 9 |
★ Release The Hounds
FA: Darrin Carter & Sean Smith, 1996 | 20 | 25m, 3 | |||||
| 10 |
★ Ants Without Pants
FA: Darrin Carter & Helen Conn, 1995 | 18 | 25m, 3 | |||||
| 11 |
Ants Without Pants VF
FA: Darrin Carter & Sean Smith, 1996 | 19 | 3 | |||||
| 12 |
Edward Scissor Hands
FA: Darrin Carter & Sean Smith, 1996 | 23 | 25m, 3 | |||||
| 13 |
Mixed Emotions
FA: Darrin Carter & Helen Conn, 1995 | 20 | 25m, 2 | |||||
| 14 |
★★ We Don't Do Thickshakes
FA: Darrin Carter & Sean Smith, 1996 | 18 | 40m, 3 | |||||
| 15 |
Drope Rag
FA: Darrin Carter & Helen Conn, 1995 | 17 | 40m | |||||
| 16 |
Thanks For The Plum
FA: Sean Smith & Darrin Carter, 1995 | 17 | 45m | |||||
| 17 |
★★ Flight Of The Phoenix
FA: Alex McConnell & Helen Conn, 1996 | 14 | 40m | |||||
| 18 |
★ Surf's Up VS
FA: Sean Smith & Darrin Carter, 1996 | 20 | 3 | |||||
| 19 |
★ Surf's Up
FA: Darrin Carter & Sean Smith, 1996 | 17 | 13m, 2 | |||||
| 20 | ★★ Project ,ross. | 27 | 10m | |||||
 |
||||||||
| Route | Grade | Style | Selected ascents | |||||
| 21 |
★ Mr Busy
FA: Darrin Carter, 1999 | 25 | 12m, 4 | |||||
1.7. West Face 21 routes in Sector
- Summary:
-
Mostly Trad climbing
Lat / Long: -26.897117, 152.881346
approach
Easy bush-bash starting from a closed 4x4 track at S26.897070, E152.876763 (20 min from carpark). From here head west through the bush, the rock is 300m away from the track (approx. 20min). Alternatively, walk in to Thanksgiving Wall, past Mosquito Wall. First route is approx. 15m past Thanksgiving Wall (approx. 30min).
     |
||||||||
| Route | Grade | Style | Selected ascents | |||||
|---|---|---|---|---|---|---|---|---|
| 1 |
Obscuria
15m right of Mr. Busy on the slab. The left facing corner. Up this, continue up the line to tree belay. FA: Lee Cujes & Erik Smits, 1997 | 15 | 15m | |||||
| 2 |
North West Track (Grade 2 Alternate Start) / Bushwalk Route
About 20m right of Mr. Busy Pillar, just as the cliff-base starts to descend (towards the original start of the Alpine Route/NW Track, which is ~40m away), you can scramble up through several ledges and bushes at grade 1 or 2 to reach a large ledge system. Bushwalkers have placed tape and a track is starting to form. Follow a track along the ledge system southwards, exposed in a couple of places, to join-up with the Alpine Route. At the junction, this alternate track is more prominent than the original Alpine Route / NW Track. Follow the Alpine Route up to the Tourist Track. This route is an easy solo down-climb too. | 2 | ||||||
| 3 |
★★ Lonely Boy
Committing start up the lefthand side of the slab to first FH at 10m. A small wire below this is possible. Balancy move to 2nd FH, up slab, passing 3rd FH, to RBs. FA: Darrin Carter, 16 Oct 2016 | 16 | 15m, 3 | |||||
| 4 |
★ Summer Daze
Up the rh side of the slab on thin holds, passing 2 fixed hangers, step up & left, using undercling, to 3rd FH on face, thin crimping to 4th FH, then easier ground to RBs. FA: Darrin Carter, 16 Oct 2016 | 18 | 15m, 4 | |||||
| 5 |
Dicky Knee
10m down R of Summer Daze, up the crackline (small gear), past some small saplings, passing 2 carrots, continue up the slab, passing another BR, move R & up, passing another 3 BR's to TB. FA: Darrin Carter, Oct 2016 | 14 | 20m, 6 | |||||
     |
||||||||
| Route | Grade | Style | Selected ascents | |||||
| 6 |
Hoover's Knee
3m R of Dicky Knee, up fused cracks, (hard start) passing 2 carrots, to left facing corner, then gear (hexes + cams) to TB. FA: Darrin Carter, Oct 2016 | 15 | 15m, 2 | |||||
| 7 |
Reflections
3m R of Hoover's Knee, start below FH (secure belayer), up fused crackline, past the FH & 3 carrots, then small gear past left facing corner, to TB. FA: Darrin Carter, Oct 2016 | 15 | 20m, 4 | |||||
| 9 |
★ Break Of Noon
Starts 60m down past the Mr.Busy pillar. About 15m below right of Reflections. This route has some poor rock and an abundance of loose blocks and detached flakes due constant north sun exposure. The crux at 30m on first pitch is protected by a single carrot bolt and the belay consists of 2 FH. The second belay is a rusty piton + gear in the crack behind. The whole route can be rapped, but the tape on the anchors will need replacing. A better option is to exit to the tourist track = an easy scramble or a short bush-bash through thick scrub on the right will lead to the faint knob track. You will need 2x60m ropes to rap this route. Can be lead on a single rope, if walking off. FA: Pitch 1, 2, 3: Darrin Carter, John Hattink 22/12/1996, Pitch 3 (extension), 4, 5 Wayne Meith & Darrin Carter 30/07/2004 | 16 | 200m, 4 | |||||
| 10 |
★ Alpine Route / North West Track
Starts 60m right of Mr. Busy Pillar, 2m right of Break of Noon at the half chimney (S26 53.768 E152 52.870) and it's the easiest route to the summit from the west side. Originally on FA, this route was climbed on trad gear for 3 pitches at grade 10, straight up on clean rock from the chimney at the start. Later on, several bushwalkers have bypassed the roped section on the right and placed tape on trees to mark the way. Now is a defined route. Past the initial bypass, the track rejoins the original route and is well worn all the way to the tourist track. A nice steep hike if compared to the horrendous scrub bash of the first ascent. Some isolated sections are still hard (about grade 5) and the rock can be friable and slippery.
| 5 | 380m | |||||
| 11 |
Scotch Mist
FA: John Veasey & Rick White, 1968 | 17 | 140m, 4 | |||||
| 12 |
Bombastic
FA: Darrin Carter & Grant LeLievre, 1998 | 18 | 25m | |||||
| 13 |
Acoustic Motorbike
FA: Darrin Carter & Grant LeLievre, 1998 | 15 | 22m, 1 | |||||
| 14 |
What's Cooking
FA: Mike Cook & Garrie O’Neil, 1998 | 18 | 20m, 3 | |||||
| 15 |
Shiver Me Timbers
FA: Gareth Llewellin & Darrin Carter, 1997 | 19 | 20m | |||||
| 16 |
By Hook Or By Cook
FA: Mike Cook & Garrie O’Neil, 1998 | 15 | 60m, 2 | |||||
| 17 |
Too Many Cooks
FA: Mike Cook & Garrie O’Neil, 1998 | 18 | 60m | |||||
| 18 |
★ West Beerwah
2016 route description: 230m from the base of the mountain to the top of the shoulder. Start: Starts about 400m R of Mr Busy pillar near the southern end of the west wall. The beginning of the route is painted with a very small WB mark. Up zigzagging over easy rock for 70m or so and bush-bash up through low scrub and over bands of rock to find the line of least resistance to reach the big ledge below the rock face (this is the ledge that serves the Underworld routes). Walk to the right at the end of the ledge, the first pitch was marked with a white arrow but we think is now worn off.
From here bush-bash for another 20m or so to the top of Beerwah west shoulder and walk along the ridge, skirting left around the knob and across to the hikers route. The old description can be found on the Qurank guide. Alan Frost, Dave MacGibbon 1956 FA: Alan Frost & Dave MacGibbon, 1956 | 10 | 230m, 6 | |||||
1.7.1. Detached Pillar 4 routes in Crag
- Summary:
-
All Trad climbing
Lat / Long: -26.895754, 152.881322
description
Pillar about 20-30m downhill from Lazy Boy + Summer Daze
| Route | Grade | Style | Selected ascents | |||||
|---|---|---|---|---|---|---|---|---|
| 1 |
★★ Why Can't It Be Longer
FA: Lee Cujes, 1999 | 7 | 6m | |||||
   |
||||||||
| Route | Grade | Style | Selected ascents | |||||
| 2 |
★ Emma's Dilemma
FA: Alexis Bull & Emma Greenbank, 1996 | 13 | 15m | |||||
| 3 |
★★ Bolts And Chips But No Mushy Peas
FA: Stuart Lancaster & Sean Smith, 1996 | 14 | 15m | |||||
| 4 |
Bully's Bulge
FA: Alexis Bull & Emma Greenbank, 1996 | 16 | 15m | |||||
1.8. Fern Wall 8 routes in Sector
- Summary:
-
Trad climbing, Sport climbing and Aid climbing
Lat / Long: -26.899175, 152.880057
approach
| Route | Grade | Style | Selected ascents | |||||
|---|---|---|---|---|---|---|---|---|
| 1 |
★ Kokoda
FA: Lee Cujes & Erik Smits, 2004 | 21 | 12m | |||||
| 2 |
★ Ski Nautique
FFA: Still waiting. FA: Chris Gibson, 2004 | 21 | 12m, 2 | |||||
| 3 | (Open Project) | ?(S) | 12m, 2 | |||||
| 4 |
★ Plastic Fantastic
FA: Lee Cujes, Chris Gibson & Erik Smits, 2004 | 22 | 12m, 2 | |||||
 |
||||||||
| Route | Grade | Style | Selected ascents | |||||
| 5 |
Lost World
An almost clean aid route. Start at obvious corner capped by roofs. Start up corner. Traverse straight L under the daunting roof and finish up short corner (BR) to the top. Bring a wide range of gear including big SLCDs and lots of small wires. No pins required. The rock is fairly hollow - beware. FA: Neil Monteith, 1996 | AID:A1+ | 18m, 1 | |||||
| 6 |
★★ Super League
Start as for Lost World corner. Up corner to below first roof. Traverse R under roof (#4 SLCD) to crux layback from horizontal to vertical crack. Up easy finger crack above to scree slope and TB. FA: Neil Monteith, 1996 | 16 | 15m | |||||
|
The next routes are below Super League on a vertical wall with FH’s. | ||||||||
| 8 |
★ Satan Spawn
Start in front of tree at base. Up wall, diagonally L to pocket and FH. Hard move follows to #4 SLCD placement. Up bulging wall above (two-finger pocket) to jug and FH. Crimp up to stance and last FH. Up big pockets on R to slab and chain belay. FA: Neil Monteith & Mark Bennett, 1996 | 22 | 15m, 3 | |||||
| 9 |
Timecode
Start as for Satan Spawn. Up wall, diagonally R past FH to scoop. Up wall above (SLCDs/wires) to a stance and BR. A reach move to small crack (SLCD) and slab up to the L to chain belay of SS. FA: Neil Monteith, 1996 | 20 | 15m, 2 | |||||
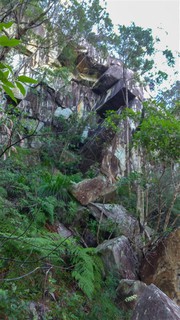
1.9. The Underworld 9 routes in Sector
- Summary:
-
All Trad climbing
Lat / Long: -26.897924, 152.880607
 |
||||||||
| Route | Grade | Style | Selected ascents | |||||
|---|---|---|---|---|---|---|---|---|
| 1 |
Kenny Moans
FA: Mike Cook, Steve McMillan & Garrie O’Neil, 1997 | 17 | 130m, 3 | |||||
| 2 |
★★ Hades
FA: Mike Cook & Darrin Carter, 2000 | 20 | 65m | |||||
| 3 |
★ Polydegmon
FA: Darrin Carter, Aaron Jones & Mike Cook, 2000 | 17 | 65m | |||||
| 4 |
★ Vulcan
FA: Darrin Carter & Mike Cook, 2000 | 15 | 55m, 4 | |||||
| 5 |
Midas
FA: Darrin Carter & Chris Poole, 2000 | 16 | 60m | |||||
| 6 |
★ Hermes
FA: Scott Lawrence & Brett Jewel, 2000 | 18 | 50m, 3 | |||||
| 7 |
Hermes DS
FA: Darrin Carter & Scott Lawrence, 2000 | 17 | ||||||
| 8 |
Medusa
FA: Scott Lawrence & Aaron Jones, 2000 | 17 | 50m, 3 | |||||
| 9 |
Interview With A Vampire
FA: Darrin Carter, 2002 | 22 | ||||||
1.10. Wayne's World 29 routes in Sector
- Summary:
-
Sport climbing, Trad climbing and Rock climbing
Lat / Long: -26.899671, 152.881997
description
As Wayne's World is on the southern face there is no sun all day from mid March till early November. During these shaded times it is best to give it about 2 days to dry after rain. Most routes are fully bolted but take a light rack for the mixed routes (I have marked these and listed what gear to use). Take about 10 draws and bolt plates for the routes on the left and right ends. As with all Glasshouse destinations bring the Aerogard. Development is continuing so keep off the projects please.
I would like to thank Height Dynamics for donating the anchor stations, the thoughtful few that donated bolts, and the handful of dedicated climbers that helped me develop this area. Play safe! Wayne.
Addendum: Gone are the horribly rusty anchors! A rebolt of most routes has occured in early 2020 (thanks SCQ and QUT Cliffhangers) and all routes have new anchors at the top (first pitch only for multipitches) and most routes are now on ringbolts. Routes that still require bolt plates have that information in their description. These last routes will be rebolted in the near future.
approach
Make your way to the 'Glasshouse Mountains Lookout' (last toilets). Pass this and keep going and onto the gravel road for another 200 meters then turn right into Connection Rd. Follow this (very rough logging road), for about 3.5 kilometers (passing the old carpark, if you knew where that was) and then taking the right fork and driving along under the power lines for a few hundred meters. Just before the big power line tower on the hill, there are a few roads off to the right. Take the last one (it's flattest) and park without obstructing the gate.
Car park: https://goo.gl/maps/6kgzoQYHNDtCxLwg7
Coords: -26.900995, 152.873766
Walk through the gate and down the fire break (rough road) for about 8mins until you see a narrow motorbike trail on the right that bypasses a big puddle in the main road. Head into the bush perpendicular and gently uphill until you hit a tall gum. Head rightwards towards the next big gum. Right again along the top edge of the gulley (on your right) for a few meters then the trail bends left, through some close saplings. Follow the trail along the flat until you head right and down. Head downhill until you intersect a creek bed on your left; cross it and pass the cairn on a boulder to the left. Up beside the dead and burnt tree then right across the ferny slope. After a bit more bush, head up abruptly to the cliff and turn right. Follow the cliff along to the crag.
Routes are listed from right to left in the South East Queensland printed guide, but left to right here.
| Route | Grade | Style | Selected ascents | |||||
|---|---|---|---|---|---|---|---|---|
Far Left SideThe following two routes are 75m left of the main wall of Wayne's World, directly above where the approach trail hits the base of the mountain the second time. Scramble up the right trending ramp to get to the base of the slabby face. | ||||||||
| 2 |
★★ Burnt Cookies
Follow line of right trending bolts to chains. The first bolt is an Allen head, and watch the loose blocks above the 4th bolt. Rap off down "The Nut". FA: unknown (climbed, graded by Wayne & Debra), 2000 | 10 | 28m | |||||
| 3 |
★ The Nut
Straight up the line of bolts, then at the 4th bolt to avoid the choss above trend left to pick up the last 2 bolts of "Burnt Cookies". Named after Debra. FA: Debra & Wayne Mieth, 2007 | 11 | 22m | |||||
Main Wall | ||||||||
| 5 |
★★ Bohemian Rhapsody
The crack corner system on the left end of wall. FA: Unknown | 16 | 60m, 2 | |||||
| 6 |
★ Foxy Lady
Start at flake left of 'Extreme Close Up'. Fairly straight up passing four ring bolts and optional gear (nuts, small hexes) for runouts in easy sections. Use the new anchor, but the old anchor has been left as requested by Wayne for a little bit of history - this is one of the anchors that hadn't completely rusted away! FA: Wayne Mieth & Debra Mieth, 2007 | 14 | 28m, 4 | |||||
| 7 |
★ Extreme Close Up
Start at small featured groove and head up and slightly right passing four rings bolts and optional gear (nuts and small hexes) in the easy runouts. No longer joins No Honk but has it's own anchors. (For an easy multipitch, continue up right to the anchors of No Honk and do its pitch 2) FA: Wayne & Debra Mieth, 2006 | 13 | 30m, 4 | |||||
| 8 |
★ No Honk
FA: Wayne & Debra Mieth, 2006 | 17 | 57m, 2, 12 | |||||
| 9 |
★★ Game On
The bolted corner to the right of where the approach track meets the face. Easy scramble past 2 bolts, then things get a bit more serious. Work your way up the corner to DBB above. There is an optional cam placement between the 4th and 5th bolt (yellow alien) but the climbing here is easy. FA: Wayne & Debra Mieth, 2007 | 18 | 32m, 7 | |||||
| 10 |
★★ Dream Weaver
Easy block hop up to high first bolt then follow ringbolts to DBB. Fun, thought provoking moves. There is an optional med/large hex between 4th & 5th bolt but the climbing here is easy. FA: Wayne & Debra Mieth, 2007 | 19 | 31m, 7 | |||||
| 11 |
★ It Will Be Mine
FA: Wayne, Debra Mieth & Darrin Carter (pitch 1), 2005 FA: Wayne & Debra Mieth (pitch 2), 2006 | 16 | 52m, 3, 8 | |||||
| 12 |
★ Party Time
Straight up to chains. (Yes, the second bolt of this and Excellent are very close, this may be fixed soon) FA: Wayne Mieth & Ross Ernst., 2006 | 19 | 30m, 7 | |||||
| 13 |
★ Excellent
Great moves for the grade. Climb to high first bolt and up face to faint corner and DBB above. Quite runout at the end, take care, but easier climbing. FA: Wayne Mieth & Ross Ernst, 2006 | 16 | 27m, 5 | |||||
| 14 |
★★ White Castle
Follow line to DBB under roof. Fun move off last bolt. FA: Wayne & Debra Mieth., 2006 | 18 | 18m, 4 | |||||
| 15 |
★ Murphy's Love
Left-hand extension to "White Castle". Step left at the anchors of White Castle and pull the rooflet FA: Brendan Coulter & Tristan Baskerville, 10 Oct 2020 | 20 | ||||||
| 16 |
★★ White Tower
Right-hand extension to "White Castle". Punchy move through the rooflet past 2 bolts gets you to new anchors. Something a little harder at Wayne's World - Grade needs confirmation | 22 | ||||||
| 17 |
★ Bite Me
Start 4m to the right of White Castle. Stay left of the ledge and arete up top to finish at anchors below the rooflet. FA: Wayne Mieth & Ross Ernst., 2006 | 17 | 22m, 5 | |||||
| 18 |
★ No Stairway To Heaven
Climb line to chains behind the small tree, keeping bolts on your right. (If the bolts are on your left it is only a 16). FA: Wayne Mieth & Wilfred Bos., 2006 | 17 | 20m, 5 | |||||
| 19 |
★★ Party On Dude
Blast up the mossy crack then straight up the thin face as the crack trends left. finished at DBB below the second pitch of We're not Worthy. Great at the grade. Start: Crack line left of We're Not Worthy. FA: Wayne & Debra Mieth, 2007 | 17 | 23m, 6 | |||||
| 20 |
★★ We're Not Worthy
You will need to trail a rope to get off this one.
FA: Wayne, Debra Mieth. (Wayne Mieth, Darrin Carter & pitch 1), 2005 | 16 | 58m, 2, 6 | |||||
| 21 |
★ Yes Way
The last route, in the trees, before the ground drops down. Straight up then keep overhang on your right, continue onto chains. FA: Wayne Mieth & Alex Cruz., 2005 | 16 | 23m, 6 | |||||
| 22 |
★ No Way
Up water runnel (gear on left, small hexes and cams) then hard move on right side of overhang, continue onto chains of 'Yes Way'. bolts + trad. FFA: Wayne Mieth & Wilfred Bos., 2005 | 16 | 23m | |||||
| 23 |
★ Mr. Biggg
3 bolts to DBB below roof. FA: Wayne Mieth & Max Cruz., 2006 | 12 | 14m, 3 | |||||
| 24 |
★★ As If
FA: Wayne Mieth & Darrin Carter., 2005 | 14 | 25m, 2, 2 | |||||
| 25 |
★ Megga Happy Ending
First route done here and was bolted on lead. Carrots. Up line of pockets to overhang with small cam and wire then on to chains. FA: Wayne Mieth & Darrin Carter, 2005 | 13 | 25m | |||||
| 26 |
★ Gas Works
FA: Wayne & Debra Mieth, 2006 | 12 | 26m, 2, 5 | |||||
| 27 |
★ Gas Works DS
Hard start then easy climbing to fun top section. Start a couple of meters right of the "GW" mark. Up to carrot, then climb continues up and left joining Gas Works. 5 carrots. Mar 2020 anchors replaced. FA: Wayne & Debra Mieth, 2006 | 15 | 26m, 5 | |||||
| 28 |
RH Corner
The corner on the right hand side of Wayne's World. FA: Unknown | 18 | 110m, 4 | |||||
To be deleted | ||||||||
| 30 | Steep wall left of crack corner (project) | |||||||
| 31 | Ballroom Blitz (project) | |||||||
| 32 |
Noah’s Arcade (project)
Start: Just left of previous climb. | |||||||
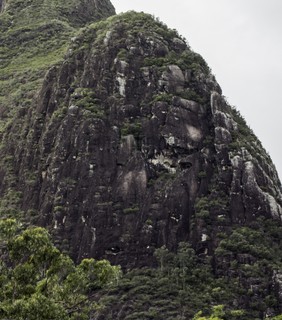
1.11. South Face 19 routes in Sector
- Summary:
-
All Trad climbing
Lat / Long: -26.898370, 152.884518
approach
Several ways exist to approach the South Face and Wayne's World. The quickest and most convenient is by walking on the fire trail from the picnic area near tourist car park and keeping on fire trails to stay close to the mountain.
Once near the middle of the western side, the 4X4 track will cross a couple of watercourses. Here, a faint trail heading east and going over a big burned log, will reach a more defined track, once established and maintained by bushwalkers.
This is now an overgrown ring track. Turn right in the proximity of a large white gum and follow this trail southward, getting faint and scrubby, passing an area of tall black boys.
Soon the trail will turn in a ESE direction downhill towards the rock apron and Fern Wall. From here keep getting closer to the rock face until you reach Wayne's world in approx 40 minutes from car park.
The crags of the south face can easily be approached by walking by the apron.
This approach has the benefit of having a car at a convenient location, doesn't not require a 4X4 and is fairly flat along the way, unlike the old Wayne's World approach route.
descent notes
The quickest way to descend from the top of the South Face, is to reach the tourist track. A defined but faint trail exist from the western shoulder above shell rock/the Underworld to the upper tourist track. Be careful to stay on this trail and avoid further erosion to this fragile and unique scrub.
  |
||||||||
| Route | Grade | Style | Selected ascents | |||||
|---|---|---|---|---|---|---|---|---|
| 1 |
The Legend of the Barbed Wire Banshee to Shell Rock VF
Variant finish of The Legend of the Barbed Wire Banshee linking to Shell Rock and finishing up West Beerwah final pitch to chains, for cleaner climbing. After completing pitch 7 of Banshee, climb the steep tree filled gully to the back door of Shell Rock with two sets of old chains. Continue up as per last pitch of West Beerwah to rap chains then scramble up through thick scrub to the top of the shoulder. FA: Jack Denny & Russell Denny, Jul 2016 | 16 | 260m | |||||
| 2 |
★ The Legend of the Barbed Wire Banshee
This route climbs the south-west corner to the top of the shoulder, directly up through a cave and long chimney. The climb is long, the rock surprisingly good and the features vary from pitch to pitch to keep things very interesting although it has a fair bit of shrubs and scrub to negotiate. It has few isolated 16 moves and one hard cave exit move with some runouts. P1 - 7: C. Brazzelli, B. Cobb in April 2015. P8 - 11:D. Luton, R. Denny in April 2016/ APPROACH: The route starts few metres left of Burnt Cookies and The Nut, marked 'TN', at Wayne's World left end. Locate the start 3m left of BC and start the bushy scramble ascending left and occasional zig zag to LLR until reaching clear rock at the end of the terrace/ledge and the beginning of the proper climb. This pitch is similar to the lower Caves Route of Tibro. From a split corner/flake climb up to ledge staying left of a big white overhanging roof cap. Up easy slab sections to cave. Top belay in upper-right end of cave on good gear. Climb out of the right side of the cave with an overhanging move on good holds and keep scrambling up and right slabby sections to find the base of a long chimney chocked with debris and vegetation, hidden behind a corner ledge on the RHS. A long chimney that gets gradually narrow, runout and cruxy at the top. Ends into a small cave/groove. An overhanging move off the ground from the cave the cave will set you on a low angle dirt filled crack leading to chimney above. Avoid the chimney and head out right above cave across bulging face, good pro in small horizontal slot, trending right and up, increasingly runout to series of ledges, go to 2nd ledge up and a good belay tree at 27m. Up from belay about 10m to ledge at base of bare rock face, go right a few meters, cam in horizontal crack, bring second up here, then traversing right, drop down into a chimney and keep going right and up across chimney about 15m to belay tree and tree lined shelf, might be ugly to retreat from here. Beyond the right end of the shelf, there's a sheer face dropping towards the South East, no route that way. Pack rope and scramble up a steep bushy gully ending in a cul-de-sac of rockfaces. Rope up in awkward location, starting up arete on left then straight up over belay and up eventually to find ledge and small gum tree for belay. Pack rope and bulldoze up narrowing gully with thick scrub and rock faces either side, gully tops out on ridge, cliff edge on the right drops down to a bushy terrace/ramp about 50m below. Keep going straight to the summit of the Western shoulder. The variation of proceeding towards shell rock is a better variant and a cleaner finish of the route. FA: D. Luton, brent, Cris & Russell Denny, 26 Apr 2015 | 16 | 260m, 10 | |||||
| 3 |
★★ Banshee to Cyclop Cave Linkup Route
This is a good route linking the base of Banshee long chimney with the lower Cyclop cave, in an airy diagonal traverse on the right. The first 20m are easy climbing with 4 good placements, passing a carrot bolt. The mid section (crux) is exposed, extremely thin and runout. Below the cave the route gets easier but long runouts are unavoidable. The Cyclop cave offers also a sheltered bivouac if needed. FA: Russell Denny | 16 | 55m, 1 | |||||
| 4 |
Pilgrim's Progress
Start from a point a little to the right of a series of overhangs, slightly behind a prominent dead tree at the left hand end of the south wall. This climb is a direst route to the lower shoulder. From the start, an ascending traverse left is made to a large veranda. Climb the corner to the left of the ledge. An awkward overhang is surmounted and the nose of the buttress circumvented. A steep wall then leads to a broad sloping ledge, above this climb the wall to a timbered shelf. From this point, ascend a series of easy slabs in the direction of the now visible 'Garden of Eden' cave. Continue on a series of steep holdless slabs leading to the cave. Traverse from the cave on steep slabs to the left into a small groove which leads to a timbered ledge. Ascend a steep gully to Shell Rock (a prominent outcrop with a hold through the centre). A scramble over easier ground leads to the shoulder. FA: W. Peascod, N. Lamb & Donn Groom, 1960 | 13 | 260m | |||||
| 5 |
★ Cyclops
This route is a great adventure climb starting in Waynes World and passing through the South Face via a large cave, to the West shoulder. The cave is probably the "Garden of Eden" described in the 1960’s route Pilgrims Progress. From there you follow the old route to the shoulder via Shell Rock. It’s a big day out so start early, take lots of water, head torches and charged phones. The route has a few vertical sections and a number of steep slabs with varied protection. Pitch 7 is particularly run out with poor protection- be aware. This route was the result of many sessions by R. Denny, W. Kite and D. Luton through the middle of 2016. The first full ascent to the shoulder was made in November 2016- 12 hours car to car. APPROACH: At the west end of Waynes World (S-26.89879,E+153.88150), walk further west up the slope as far as you can to reach a belay ledge at the obvious corner. GEAR: A full set of cams, nuts, hex's and tricams plus plenty of slings. Take 2x60m ropes to allow a retreat. 1- 20m (10) Climb up the steps in the corner to a ledge then left to go around the arête. Scramble upwards along the bottom of the rock face to a tree belay. 2- 25m (13) Scramble about 10m up to next corner and belay on the large ledge. Use the vertical crack for protection and climb onto the arête to find further cracks. Second half is a bit run out to the trees on the next large ledge- keep left to avoid the large loose block. 3- 31m (12) Straight up the steep face to the left of the corner. Towards the top, step right into the corner to avoid some scrub and find the base of a bare slab. Aim for the trees at the top of the slab without much protection. A shrub well to the left can be used about halfway- long sling to minimise drag. Tree belay on small ledge. 4- 35m (10) Scramble up about 10m up and over the corner to a tree belay at the base of the next slab. Easy climbing with a few pockets for protection. Straight up then to the right of the scrub to find a tree belay in depression at the base of another slab. 5- 18m (10) Up the slab to find protection under the roof on the right hand side. Use a long sling then traverse up to the left along the base of the roof. Step onto the ledge at the base of a chimney. Belay off gear in the back of the cave. 6- 20m (13) Climb the chimney and step left to place a large hex in the narrow top section. Easy climbing up the slab trending right, but minimal protection till a corner is reached. Aim for the clump of trees on the right which has a wide ledge behind. Belay off gear and/or tree. 7- 30m (16, crux) Straight up to underside of the cave (probably the "Garden of Eden" described in Pilgrims Progress- 1960’s). Not a hard grade but it’s extremely run out with a lot of slippery lichen on a bare slab with very poor protection- use caution. Belay at the first reasonable shrub available. The cave is now a 15m scramble away. Halfway there, a ledge on the left has a large leaning block that provides a good rapping anchor- 40m to bottom of pitch. The next four pitches go the shoulder via Shell Rock following the top part of Pilgrims Progress. 8- 20m (16) From the ledge to the left of the cave, traverse left very exposed over a bare slab. It’s only this one move that’s hard- beware the hollow-sounding flake above you. Once some decent holds are found, it ease’s to more like 13 going up the small groove which leads to a timbered ledge. Tree belay or use the fixed hanger. 9- 20m (-) Scramble up the steep gully then up the right side of a chimney. Keep going till the rock face becomes steep and the vertical crack is visible. 10- 20m (-) This is also pitch 9 of Legend of the Barbed Wire Banshee. Straight up the steep face on the right of the tree filled gulley to reach the 2nd set of chains just below Shell Rock cave. Take some time to enjoy views out of the cave. 11- 20m (-) Follow the last pitch of West Beerwah. Trend right towards the top then up to find the chains. A bush-bash up and over easier ground leads to the shoulder. Follow the ridge around to find the walking track. FA: R. Denny, W. Kite & Dean Luton, Nov 2016 | 16 | 290m, 11 | |||||
| 6 |
★ Lhotse Flake
Lhotse Flake (grade 15) - 10 pitches to summit South West Shoulder of Beerwah starting at the bottom of No Honk at Waynes World. Good protection, trad route, solid rock, getting steeper towards top, set of cams, larger hexs, nuts, rap from anywhere on a single 60, knotted ends a must, rope stretch required rapping lower 35m pitches.
Pack up gear, follow the well worn track about 50m to the western shoulder along the ridge towards the knob, then over slabs to hook up with the tourist track. FA: Kerrie McMartin & Russell Denny, 25 Apr 2017 | 15 | 310m, 10 | |||||
| 7 |
★★ Mopoke Slabs
The start of this climb is about 400m to the right of Pilgrim's Progress and is supposedly marked by a large grey gum tree with a heavy top and a badly burnt base. Who knows if it's still there? Two short pitches traverse to the left and a steep 20m wall is climbed directly to a veranda of shrubbery. The climbing continues until a series of small overhangs are reached. Traverse right and then continue up the weathered walls until a short traverse left leads to the south-west shoulder. FA: W. Peascod, N. Lamb & L. Upfold 1960s | 13 | 260m | |||||
| 8 |
Rambles in the Brambles
This climb starts to the right of Wayne's World sector and meanders its way up the south wall topping out at the left shoulder of the summit. The FA's did not plan on going all the way but a lack of any real plan and sketchy lower offs meant this appeared as the only real option! Start early, avoid rainy weather, carry head torches for all climbers, take phones and be willing to run it out. There are probably far better equipped routes so this is not recommended unless you are up for an adventure
Pitches 7 - 10 are a good practice in slinging marginal gear comprising of hedges and shrubs. Memory of this is hazy due to one head torch used between 2 climbers, who were on occasions up to 50 metres apart! Having several footholds break off in total darkness, part-way up a grade 13 pitch, was the most vivid memory of this section of the climb! Especially as there wasn't a lot in the way of good placements. FA: Patrick & Adrian Woodcraft, 17 Mar 2015 | 16 | 420m, 10 | |||||
 |
||||||||
| Route | Grade | Style | Selected ascents | |||||
| 9 |
Thunderball
Start by climbing " It will be mine " or " We're not worthy " located at Wayne's world. These are both 2 pitch climbs with carrot bolts so take bolt plates. The new route continues up and slightly right. "It will be mine " is the better option. Mixed protection but definitely take a set of cams from 0.1 to #3 and nuts. Hexes and tri-cams also possible.
Escape left to gum tree and scrub. Caution needed leaving anchors. Follow faint track up and right 30m through scrub. Take care to stay on track, once at the rock apron continue right and up 30m along shoulder west of the knob. From here follow track right to join the tourist route. Alternatively a straight forward rap down the variant pitches to avoid the roof. Variant pitches 6,7,8. 6 Variant. 30m (15) Up and trend right on gear to DBB on the slant under the right end of the roof line. 7 Variant. 30m (15) Up to clip hanger and then trend right with limited protection but over easy terrain to alcove and DBB. 8 Variant. 30m (16) Take a couple steps right and climb up to hanger. Follow the arete line as it gets steeper with various protection and 2 hangers to meet the original routes DBB above alcove. FA: 3 May 2020 FFA: Russell Denny & Damien Shields, 3 May 2020 | 16 | 300m, 10 | |||||
| 10 |
Food is Aid (Sit Start)
A bog-standard South Face route which fills in a few gaps. It was climbed ground-up with a double rack, and although this might seem like overkill, individual pitches do have a strange tendency to require multiple cams of the same size. There are three main cruxes - the 40m slab traverse forms the mental crux, the horrific bushwhacking exit forms the emotional crux, and climbing without snacks forms the culinary crux. One of the FA's ate two muesli bars enroute, therefore lowering his personal grade to M0, because food is aid. While it is possible that some/much/all of this terrain has been climbed in the past, none of the existing route descriptions appear to match this route. Due to the extremely vague documentation of the old South Face routes, the FA's humbly submit this as a new line unless anyone provides compelling evidence to the contrary.
Descent: Pack your rope, unsheath your machete (but not really, it's a National Park) and sally forth into the shrubbery. Head painfully upward to meet with Beerwah's western shoulder where a footpad will contour east toward the Tourist Track. Down this and head to the cafe for milkshakes. FFA: Morag Stewart, Peatey & Ryan Siacci, 30 May 2020 | 16 | 340m, 7 | |||||
| 11 |
★ The Martian Moon Flake Variant
Just as you start pitch 3 of the Martian follow the traversing hangers that go left to vegetated ledge. You can continue up to the midway flake anchors but it's better for visibility to anchor off trees and bring your follower to the ledge. The 2 pitches of the flake feature can be linked on a 60m rope. From the top anchors climb diagonally right about 5m to continue on the Martian. FA: Russell Denny & Damien Shields, 10 Aug 2019 | 16 | 350m | |||||
| 12 |
★★ The Martian
The Martian Multipitch. 320m grade 17 50m or so east from right end of Wayne's World, a few metres past a very large burned tree stump at a low point adjacent to the rock apron, as the track gradient starts to rise but before the big left facing corner. This is a clean and safe route to the top of the western shoulder ideal for beginners but long enough to engage the experience climber for a relaxing day out, with terrific top out pitches, all with bolted belays. Rock is great all the way. A set of cams up to #4, nuts and hexes. 10 draws. Slings and extenders. FA: R. Denny and C. Brazzelli
1x60m rope sufficient to climb the route. From top belay, scramble up the wide gully between the west shoulder and the knob. The arch is visible on the RHS. Once on the saddle ridge, descend and traverse contours towards the north-east to meet the tourist track. Try to stay on existing foot pad to avoid erosion. FA: Russell Denny & Cris, 28 Apr 2019 | 17 | 320m, 10, 22 | |||||
| 13 |
★ Phobos
Approach: This route tops out the prominent knob on the Western shoulder of Beerwah below the summit. Can be accessed via a number of different hiking routes. First ascent was done as a tasty addition to The Martian. After Olympus mons (pitch 10 of the Martian) scramble approximately 50 m up the exit gulley towards the western shoulder, until you begin to pass the base of the knob and it's south west facing wall, 15m to the right of the exit track. Description: Climb starts at the vertical crack, just left of center of the wall (avoiding the overhung lips to the right) Crack 15m before stepping right and up onto sustained slab with left-facing corner. Done with cams .3-2, nuts 1-13. Natural belay(trees and boulder) perched on the knob with awesome western outlook. FFA: 10 Sep 2023 FFA: Samuel Gough & Julian Miller, 10 Sep 2023 | 18 | 35m | |||||
|
|
||||||||
| Route | Grade | Style | Selected ascents | |||||
| 14 |
★ Divine Comedy
A bit of a journey! This route features 210m of independent climbing, however access involves a lengthy vertical approach. Distance from base to summit of Beerwah is some 650m, including 7 pitches of The Martian and a rising scramble traverse through typical Glassies scrub. The wide range of experiences on this route inspired the name. One for the adventure climbers! For pitches 1 through 7, climb The Martian. 240m of good rock with mixed protection, mid teen grades at most. Simul-climbers will move quickly here. Half-way up the 7th pitch, just above the only hanger on the pitch, traverse right. Follow blue tape for an easy scramble a la Caves Route. Perhaps 200m right and 100m+ height gain, heading for the landmark double roof. Back on rope for pitches 8 to 11 up a generally left-facing corner to terrace 100m above. Full rack of cams 0.1 to #4, stacks of gear options, traffic needed to clean this section, rock quality improving with height. Pitch 8 – 20m, Grade 18. Four fixed hangers lead to belay on spacious vegetated ledge. A thin, balancy crux with a weird mantle. Pitch 9 – 40m, Grade 22-23 or A1. Getting steeper and harder now, follow the corner crack system with some bolts to guide the way. Well protected pitch to a semi-hanging belay below roof. Fairly sustained free climbing or a good aid pitch. Free grade is still anyone's guess until properly clean, but it's hard work. Pitch 10 – 20m, Grade 20 A0. Easing off up corner under classic double roof with good cracks. 5m horizontal "Thank God" ledge leads left under roof to join bolt ladder up blank wall. This has not yet been freed, might go at 21 or so. Up to DBB and stance just left and above the roof with good visuals to seconder. Exposed. Option for the better climbers is to ignore the ledge and bolt ladder and to follow the corner crack all the way to meet the roof line. Trace the line where the roof blocks meets the wall - "Great Roof" style except backhand to the left. This option should be classic but looks hard, someone might get it. Pitch 11 – 20m, Grade 18. Continue to top via vertical crack, take cams all the way. An awkward move in the middle, after which you will reach a vegetated terrace for a tree belay. Pitch 12 – 30m. Coil ropes and scramble up with a slight leftward trend to an alcove where rock face starts again. Pitch 13 – 25m, Grade 13. Unpack ropes again and climb up past four hangers trending left to DBB. Follow goat track with old tape up and right for 20m or so to base of headwall with a single ring anchor. Pitch 14 – 30m, Grade 13. Up and right of ring through shrubbery with a few hangers to help route finding. DBB at the base of steep slab on final pitch. Pitch 15 - 25m, Grade 18/19. Tricky slab, harder than it looks. Following shallow groove/runnel to ledge and left facing corner, thru head wall to DBB out of sight below summit, then top out on the Western end of the summit ridge. Decend via tourist route. Still awaiting an FFA, get after it! FA: Russell Denny & Brett Caldwell, Dec 2019 FFA: Alex Mougenot & Kyle Addy, 27 Nov 2022 | 23 | 650m, 15 | |||||
| 15 |
★★★ The General
This climb starts off on the big vegetated ledge after climbing the first pitch of DIVINE COMEDY. We found the rock quality to be better this way and it finishes up a unique water runnel. The best time to climb on the south side is from April until August as it has all day shade. Because of the all day shade allow for significant drying times after rain. The name for this climb is after an experience we had upon our FA attempt. We were walking around to the south side and almost at waynes world when 2 hikers appeared from the bush. "Is this the way to the general " they asked. We all look at each other puzzled " Do you mean the tourist track " I ask. "yeah you know, the general way up " they reply. We joked about it the rest of the day and the name stuck. PITCH 1 Grade 19, 15m. From the pitch 1 anchors of DIVINE COMEDY start traversing right around arete following fixed hangers. Good to use an extender on bolt just around arete to stop rope damage if falling. PITCH 2 Grade 18, 30m. From DBB climb up through chimney to ledge then follow flake feature up to DBB. PITCH 3 Grade 20 From DBB climb straight up keeping the fixed hangers on your left until you reach water runnel feature in which you climb through the middle. From the top of Pitch 3 you can scramble up to a vegetated area and go off rope. From here you can either follow the goat track left and continue on with DIVINE COMEDY or keep going left to meet up with the tourist track. FFA: Dave Westby, Matthew Kievel, Russell Denny & Damien Shields, 18 Jun 2022 | 20 | 75m, 3 | |||||
| 16 |
Why Not
The start is located on the left of the ridge on the south face. The first four pitches are up a wall on good rock, then 200m of mank and bush to the middle cliffs. The next four pitches are up from a small pinnacle against the face, up and over a small overhang and into a crack. Up the crack until it rises to a huge overhang. Traverse right onto the right wall and across to another crack and up. The last four pitches are clean climbing on the steep ribs that lead to the top. FA: Les Wood & Donn Groom, 1966 | 13 | 350m | |||||
| 17 |
★★ Slip Knot
Start two ridges west of the Central Rib, at the base of the large, clean wall on the south face. Up left to a sloping ledge. Traverse leftward under an overhang to a grassy ledge. Up a rather water-worn groove to the right of a corner. up rightward over slabs to a projecting rock, right of an overhang. Up the slabs below the overhand and then up the groove and into a cave. Out of the cave to a crack on the left of an overhang. FA: Les Wood, Donn Groom & Brian Driscoll, 1966 | 10 | 350m | |||||
| 18 |
★★ South Face Direct Route
FA: Cris, Russell Denny & Dani, 6 Jan 2018 | 16 | 400m | |||||
| 19 |
Central Rib
Start about 500m right of Mopoke Slabs. The climb commences just to the left of 'Barrier Wall'. Follows up a series of slabs until the veranda is reached. Traverse to the right for about 30m until a large prominent rib bounding the south and east faces is reached. A difficult chimney is surmounted which leads to the crest of the rib. 115m of climbing on the face of this immense rib leads to a belt of scrub below the summit pyramid. The final wall is well provided in knobbly excrescences and a direct route is followed over this wall to the summit. FA: J. Stephenson, G. Broadbent & N. Lamb, 1953 | 12 | 400m | |||||
1.12. Turtle's Back Wall 4 routes in Area
- Summary:
-
All Trad climbing
Lat / Long: -26.895371, 152.888530
approach
A small track starting a the carpark entry (S26.89050, E152.88791) will lead to the rock apron (15 minutes) between Short and Cool Ones (to the right 10 minutes) and Turtle's Back Wall (left 2 minutes).
| Route | Grade | Style | Selected ascents | |||
|---|---|---|---|---|---|---|
| 1 |
Dot Soul
FA: Chris Finn & Darrin Carter, 1998 | 16 | 45m | |||
| 2 |
Reunion
FA: Darrin Carter & Chris Finn, 1998 | 18 | 45m, 2 | |||
| 3 |
New Shoe Shuffle
FA: Darrin Carter & Chris Finn, 1998 | 13 | 45m | |||
| 4 |
Foot Fetish
FA: Chris Finn & Darrin Carter, 1998 | 15 | 45m | |||
1.13. Wailing Walls Sector 1 route in Cliff
- Summary:
-
All Trad climbing
Lat / Long: -26.896583, 152.885016
description
Historical crag. Some ancient hand-made bolts and rusty pitons are scattered around the left side of the wall.
An amphitheatre of walls on the upper east side. Rock quality is very bad overall, but some sections maybe climbable such as the right hand side upper wall (directly below the east ridge).
approach
Accessible either from East Beerwah or North East Beerwah Route, 1 to 1.5 hrs from carpark.
descent notes
Descent from east beerwah route.
 |
1.13.1. Purgatory Wall 1 route in Sector
- Summary:
-
Lat / Long: -26.896688, 152.884973
description
The small wall sitting in front of Wailing Walls.
 |
||||||||
| Route | Grade | Style | Selected ascents | |||||
|---|---|---|---|---|---|---|---|---|
| 1 |
★★★ Aionios Kolasis
Follow seem all the way up. FA: jayden desmond | 15 | 20m | |||||
1.14. Short Cool Ones Wall 43 routes in Crag
- Summary:
-
Mostly Trad climbing
Lat / Long: -26.894481, 152.885961
summary
Slab climbing par excellence. Be prepared for run-out placements, with the occasional bolt here & there.
description
Mostly slab climbing + a bit of face climbing. Almost exclusively trad, with a few select sports routes at the far LH end.
approach
Follow the hiker's track in to the last 10m, below the slab, where the hiker's track turns 90° right, up some stone steps: you will see another track heading off left, through some trees:

Short Cool Ones Wall - Path to Short Cool Ones
Follow this track about 100m down a slope to the crag.
ethic
Developed as a trad crag, with trad in mind. Do NOT add bolts to existing routes.
history
First honours go to Robert Staszewski, who established the first route here, in 1971. Developed & named by Darrin Carter in the 90s, with many contributors adding routes over the years.
| Route | Grade | Style | Selected ascents | |||||
|---|---|---|---|---|---|---|---|---|
| 1 |
★ I'll Think Of Something Else
Look for the prominent jug on ITOS, about 6-7m up, and start 4m right of this. Or, alternatively, look for a prominent block, sticking out 15cm, about 10-12m up, the route starts below & right of this and heads up through an inverted "v" & much welcome gear. From the inverted "v", head left, towards the block (more gear), then keep trending slightly left, to ITOS anchors at the grass tuft above. FA: Mark Gamble & Jack Williams, 2007 | 8 | 28m | |||||
| 2 |
I'll Think Of Something
Now the second route at the crag; look for the prominent jug, about 6-7m up, up the double cracks, till they merge, straight up to grass tuft & anchors. FA: John Hattink & Darrin Carter, 1998 | 12 | 25m | |||||
| 3 |
★ What A Dish
Start: about 5m left of ITOS, at a vague line of weakness, below the start of the overhanging blocks at the top. Easy climbing with spaced gear. Up to DBB & rap. FA: Darrin Carter & John Hattink, 1998 | 10 | 25m | |||||
| 4 | Avenger VS | 8 | 15m | |||||
| 5 |
Avenger
This is an old school grade 10, runout, with poor gear in the lower half, treat it as a 12. Start:
FA: Rob Staszewski & Clive Heckenberg, 1971 | 10 | 80m, 2 | |||||
| 6 |
Acquitted
Start: About 4m left of Avenger, below the shallow right facing corner. No gear for 10m, then small gear in corner, up this to shallow roof, step onto slab, up slab to a stance & trad belay below the main roofs about 15m up. From here, traverse 15m left to small tree & rap station. FA: Lee Cujes & Philippa Newton, 1999 | 8 | 30m | |||||
| 7 |
★ Order In The Court
Start: 5m left of Acquitted, at pockets below the smooth right facing corner. Up these on gear, then up the smooth corner with adequate gear available, slightly right at top blocks, up a thin crack to trad belay at 15m. Traverse 10m left to tree & rap station. FA: Lee Cujes & Philippa Newton, 1999 | 11 | 25m | |||||
| 8 |
Jury's Out
A hard 15. Start: about 3m left of OITC, the thin face crack, just right of the prominent Third Degree left facing corner. Now filled with ferns. Up thin crack on scant gear to roof & critical gear, over the rooflet, continue to trad belay, below big roofs. Traverse 10m left to tree & rap station. FA: Lee Cujes & Philippa Newton, 1999 | 15 | 25m | |||||
| 9 |
Third Degree
Start: the prominent left facing corner, 1.5m left of Jury's Out. Layback up the corner on good gear to roof, traverse left to handcrack, mount this, up to large roofs above, then traverse 8m left to tree & rap station. FA: Sean Smith & John Hattink, 1997 | 16 | 25m | |||||
| 10 |
Don't Scratch My New Ute
Rather daunting test piece. Start: the slab, 4m left of the Third Degree corner.
FA: Darrin Carter & John Hattink, 1997 | 18 | 80m, 2 | |||||
| 11 |
★ Sharks Patrol These Waters
Start: The thin crack/seam, 1.5m left of DSMNU. Not for the faint hearted: Up the thin seam, to the one & only piece of gear, at 10m, then continue up thin slab, to big blocks above, and step 2m left to tree & rap station. FA: FSA Darrin Carter, 1997 | 17 | 17m | |||||
| 12 |
★ Barracuda
Another test piece, with very limited trad gear. Start: 1.5m left of SPTW, directly below the tree. Up the seam, finding critical sparse gear placements as you go, to the tree & chain belay. FA: John Hattink & Darrin Carter, 1997 | 15 | 15m | |||||
| 13 |
Mistaken Identity
Another test piece of sparse gear. Start: Seam 1m left of Barracuda. Very thin holds up to marginal gear about 8m up, then better placements above that. Continue up to chains left of tree. FA: Darrin Carter & Gareth Llewellin, 1997 | 15 | 15m | |||||
| 14 |
The Lady With The Handbag
About 1m left of Mistaken Identity: thin crack or weakness in the rock. Up this, with no gear, to top, then traverse 2m right to rap anchors on MI. The original ascentist graded it at 10. I would take that with a grain of salt, especially given that there's no gear or protection on it. Bold Climbing. FA: Terry Svingen & Lillian Sando, 2007 | 10 | 17m | |||||
| 15 |
★ Circumstantial Evidence
Starts 2m left of The Lady with the Handbag. This route climbs under the tree rather than over it. Climb up on some delicate holds with no pro for the first 5 meters or so (crux) before reaching some nicely featured rock with better holds. Duck under the tree (sling the tree if you dare!), then continue up much more easily following the obvious groove/crack which provides mostly adequate gear placements. A few meters before reaching the overhangs, step right to traverse several meters across to the bolted anchors of Barracuda. FA: Bruce Schneider & Aaron, 15 Apr | 15 | 20m | |||||
| 16 |
★ Mr Lazyboots
Start: 6m left of Mistaken Identity. As of 2023, with a fallen tree on the slab.
FA: Pitch 1: Darrin Carter, John Hattink, 13/02/1997. Pitch 2: Sean Smith & John Hattink 16/02/1997, 1997 | 16 | 85m, 3 | |||||
| 17 |
The Artful Dodger
Start 6m left of Mr. Lazyboots, 2m right of Dark and Stormy.
Descent option 1: To rap from pitch 2 will require the joining of two 70m ropes to reach the ground. This will also require you to leave your own bolt plates/slings/mallion or carabiner, as there is no rap hardware on this anchor. Descent option 2: Continue climbing the slab upwards to the scrub, bush bash through this, and eventually walking off to the tourist track off to the right. Descent option 3: 1x60m rope - traverse left from pitch 2 anchors, about 15m, find the most stable looking tree, rap from this tree down about 10/15m to the top anchors of Proven Guilty, rap from here to the pitch 1 anchor, then to ground. FA: Darrin Carter & John Hattink, 1997 | 13 | 70m, 2, 1 | |||||
| 18 |
★ Dark And Stormy
Start: 2m left of The Artful Dodger.
FA: Darrin Carter & Gareth Llewellin, 1997 | 15 | 60m, 2 | |||||
| 19 |
★★ Assumed Innocent
Start: 3m left of DAS, initialled "AI".
FA: Sean Smith & Darrin Carter, 1997 | 17 | 60m, 2 | |||||
| 20 |
★ Proven Guilty (PG)
Start: 4m left of Assumed Innocent, initialled "PG".
Optional pitch
Descent option 1) Rap off tree, to Proven Guilty anchors. Descent option 2) Continue on up to ledges, walk off right to hiker's track. FA: Darrin Carter & John Hattink, 1997 FA: Bruce Schneider & Aaron, 21 May 2023 | 16 | 100m, 3, 2 | |||||
| 21 |
Wandering Madness
Start: 10m left of Proven Guilty, below the small tree, next to the projecting knob of rock.
(NB: A piton runner was replaced by a carrot on p1) FA: Sean Smith & Simon Moser, 1997 | 14 | 60m, 2, 1 | |||||
| 22 |
Short Circuit
Start: 4m left of WM, beneath the bulging block.
FA: Darrin Carter & Kevin Coleman, 2003 | 15 | 60m, 2, 1 | |||||
| 23 |
Sizzler
Start: 2m left of Short Circuit. Up the featured face, to the big block, and left side of this. FA: Darrin Carter & Bill Cotman, 1998 | |||||||
| 24 |
Columbian Necktie
Start: 2m left of Sizzler, just right of leaning slab up to Burke's Backyard, a featured slab. Very bold climbing on thin gear. Will not see many ascents, with the first bolt at around the 18-20m mark.
FA: Darrin Carter & John Hattink, 1998 | 17 | 85m, 2, 3 | |||||
| 25 |
Burke's Backyard
Start: 1.5m left of Columbian Necktie, or 5-6m left of Short Circuit, at the right facing ramp, leading up to the crack. Bold climbing at the grade: big run-outs, esp. on p2.
FA: John Hattink & Darrin Carter, 2008 | 14 | 80m, 2 | |||||
| 26 |
★ Weight Watchers
Start: 3-4m left of Burke's Backyard, below shallow left facing, broken corner. Another bold route, with thin gear & run-outs, committing move at the crux (1st BR). Up to small ledge & follow the shallow corner, with small gear, to the BR on the left, past this, up to roof above, through this to another BR, then follow the shallow groove to a DBB. FA: Kent Jenson & Darrin Carter, 1998 | 17 | 40m, 2 | |||||
| 27 |
Drop Zone
Start: 2.5m left of WW, at the pocketed seam. More bold climbing at the grade.
FA: Darrin Carter & Kent Jenson, 1998 | 15 | 75m, 2 | |||||
| 28 |
★ Drop Zone Variant
Start: As for Drop Zone, up to small rooflet/overlap, then up the left trending line on good gear. Either head left, to trad belay on Blackout, then finish up p2 of this, or, head right, to DBB on WW & rap from here. Gets 1* for good gear + no run-outs. FA: Wayne Meith & Darrin Carter, 2004 | 15 | 45m | |||||
| 29 |
Blackout
Start: 2m left of Drop Zone, pocketed crack, leading up to a small block.
FA: Darrin Carter & Kent Jenson, 1998 | 16 | 85m, 2 | |||||
| 30 |
★ Cut Short
Start: About 3m left of Blackout, in the wide fern filled crack. Very tricky & dodgy gear placements up to first bolt = decking out is a possibility here, requires a confident leader, with a cool head. Bridge up the gap, finding gear as you go, committing move to bolt, then up passing another 2 BRs, to anchors. FA: Ross Ferguson & Darrin Carter, 2003 | 18 | 20m, 3 | |||||
| 31 |
★ Guillotine
Start: 1.5m left of Cut Short, at slab with vines growing across it. Up the blank slab to first bolt, then to anchors, passing another 2 BRs. Committing moves at the top, on no gear. A hard 16. FA: Darrin Carter & Ross Ferguson, 2003 | 16 | 15m, 3 | |||||
| 32 |
★★ Gun Control
The first ascent was done just after the Port Arthur Massacre - and the subsequent gun buypack scheme, thus the name. It was also Neil's first ever use of a handrill - the tedium of bashing and twisting certainly controlled the bolt gun! Starts 12m left of Guillotine (or 13-14m left of the big white gum).
From here, continue up the ridge to the summit & down the hiker's track. To gain the ridge, a fun option is step onto the dome from the belay ledge and climb the crack/flake which has some nice moves with good pro for about 20m, to tree belay in the forest. Variant finish to pitch 6 (if the chimney is slimy wet): 6b. 30m 16. Up chimney to a good hex placement, then out right onto a small ledge & up the face on good holds, but no pro, to tree belay. Pitch 1 & 2 anchors replaced September 2021 FA: Neil Monteith, Mark Bennett & Marten Blumen, 1996 FA: Craig Molloy & Wayne Meith, 2004 | 14 | 230m, 6, 1 | |||||
| 33 |
★ Eye On Crime
35m left of Gun Control (Head on up the slope, past Gun Control, past the overhang, down the slope, to the prominent sports slab) The pocketed line, just right of Super Size Me (carroted route), behind a sapling. Up the slab, on large pockets & good gear, till it eases, then trend left, to a block & belay stance, about 10m below the big roofs. Escape: down-climb, trending slightly left, to chains on Super Size Me. FA: Lee Cujes & Erik Smits, 1999 | 14 | 30m | |||||
| 34 |
★ Super Size Me
Start: Below the starting block for Eye On Crime, route is 1.5m left of EOC. below the first carrot bolt. A nice line, well protected. Up, passing 5 bolts, to chains. (Take bolt plates.) FA: Darrin Carter, Ross Ferguson & Christian Jones, 2004 | 15 | 15m, 5 | |||||
| 35 |
★ Entrapment
Start: 2m left of Super Size Me (carroted route), below the right facing corner. Nice, well protected face climbing. Up face, to first u-bolt out left, the up corner crack, passing 2 more u-bolts, chains up left, above Shanny. FA: Lee Cujes & Erik Smits, 1999 | 19 | 15m, 3 | |||||
| 36 |
★ Shanny
Start: 1m left of Entrapment. Up the face, to first U-bolt, follow the next 4 to chains. Nice face climbing. FA: Ross Ferguson & Darrin Carter, 2005 | 21 | 15m, 5 | |||||
| 37 |
★ Two & A Half Squirts
Start: 1m left of Shanny. Good value face climbing up a well protected route. Up face to U-bolt, up passing another 4, to rap station. FA: Ross Ferguson & Darrin Carter, 2004 | 21 | 18m, 5 | |||||
| 38 |
★ Chocolates VS
Start: 3m right of the original start. Up the low angled arete, passing 2 BRs to a solid horizontal move back left, into the original line, then up to chains. FA: Darrin Carter & Ross Ferguson, 2004 | 13 | 25m, 3 | |||||
| 39 |
★ Chocolates
Start: 7m left (down the slope) from Two And A Half Squirts, the trad line LHS of the bulge. Good moves on solid, but small trad gear, passing one BR near top, to chains. FA: Darrin Carter & Ross Ferguson, 2004 | 16 | 18m, 1 | |||||
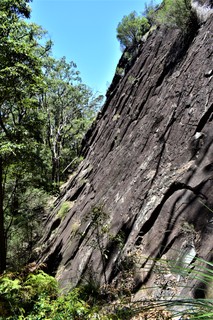 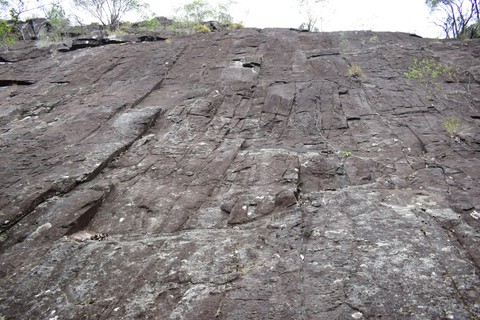 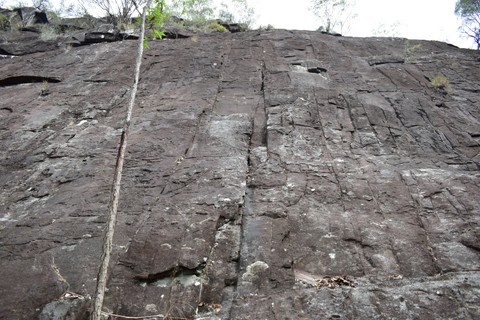 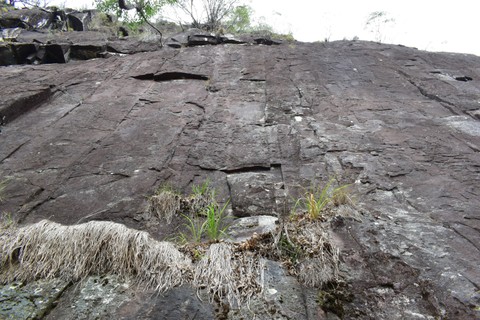 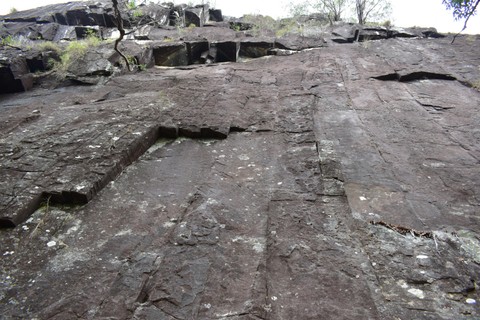 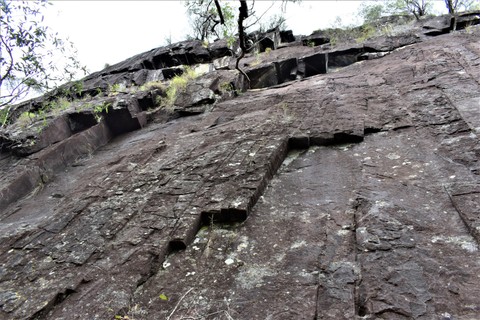  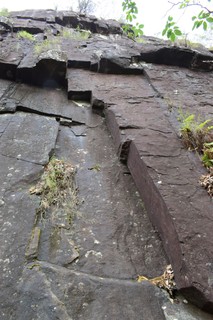 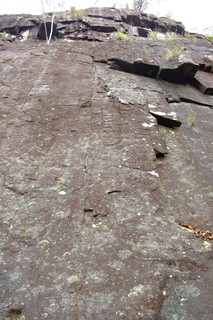 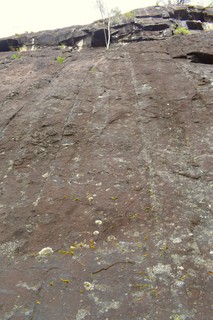 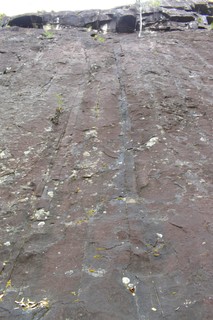 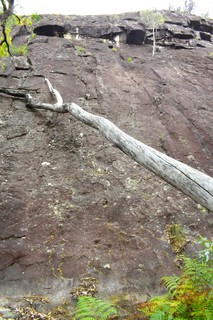 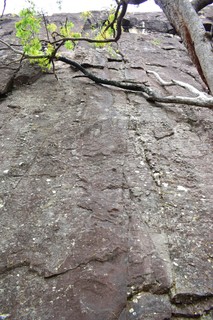 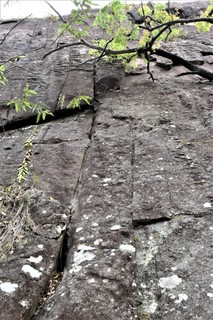  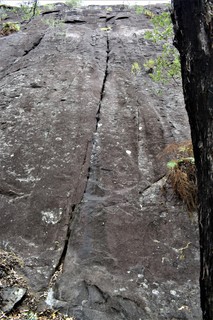 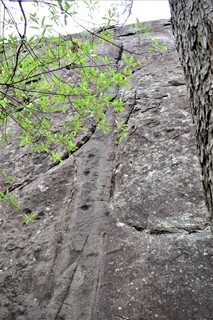  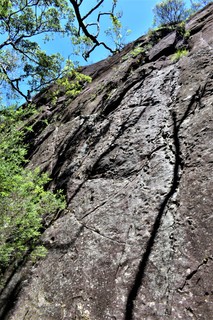 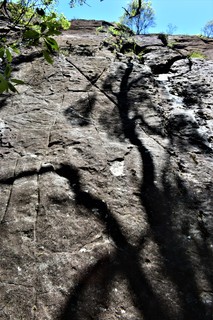 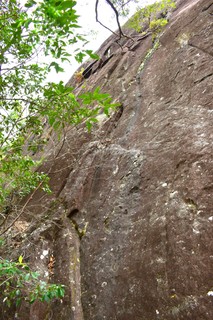  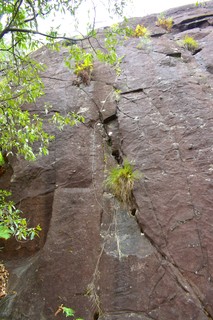 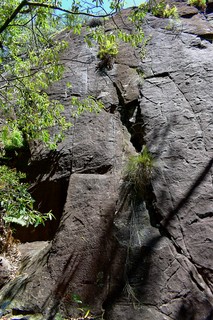 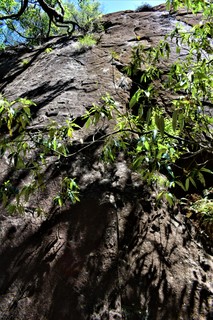 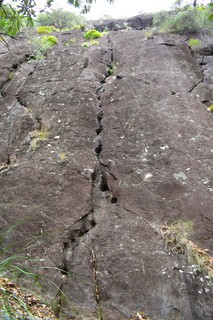 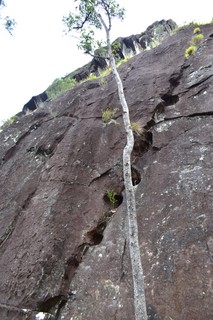 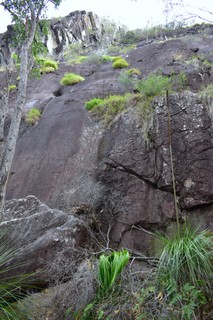 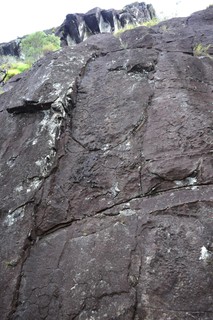 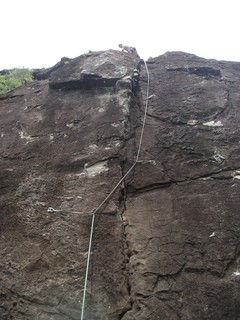 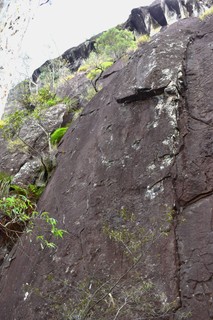 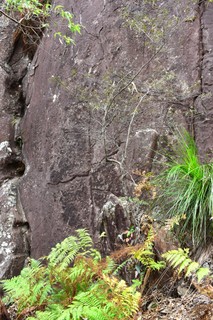 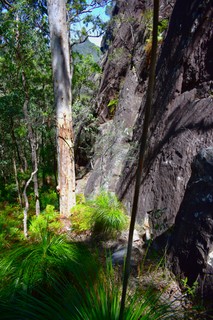 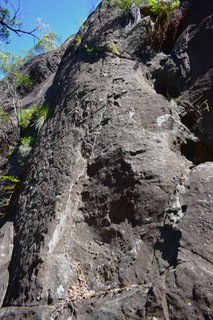 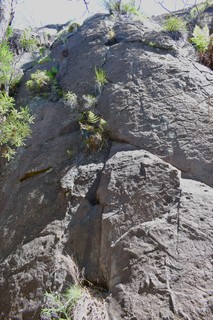 |
||||||||
1.14.1. Just Juice 4 routes in Area
- Summary:
-
All Trad climbing
Lat / Long: -26.894428, 152.887441
summary
Although there is a very scant smattering of bolts here, it is mostly trad, adventure climbing, with bold run-outs.
description
4 trad routes, with the occasional bolt runner (you will need bolt plates).
approach
Continue about 60m down the slope, left of Chocolates, down into a gully, up the other side, until you encounter some large blocks lying on the ground.
history
Developed by Darrin Carter and Gareth Llewellin in the 90s as an extension of the main cliff.
| Route | Grade | Style | Selected ascents | |||||
|---|---|---|---|---|---|---|---|---|
| 1 |
Waterboy
Start: Right of Just Juice, below the crack/slab. Tricky move up to a jug, then gear up to a stance & BR, past this, with good gear following, then take the easiest route to the top. FA: Darrin Carter & Brett Jewel, 1999 | 14 | 45m, 1 | |||||
| 2 |
★ Just Juice
Start: 60m left, down the hill from Chocolates, near some large blocks on the ground.
FA: Darrin Carter, Gareth Llewellin (Pitch 1), Sean Smith (Pitch 2 & 3), 1997 | 19 | 150m, 3, 3 | |||||
| 3 |
Time On Your Hands
Start: Left of Just Juice, in the depression with small knobs. Featured climbing up to a jug, then up to tree, continue on thin gear to first belay on Just Juice. Can be climbed in 2 pitches by belaying at the tree. FA: Darrin Carter & Gareth Llewellin, 1997 | 14 | 50m | |||||
| 4 |
Breakfast At Bobo's
Start: Left of TOYH.
FA: Darrin Carter (Pitch 1) & Project (Open?) - Pitch 2, 1999 | 24 | 45m, 2, 4 | |||||
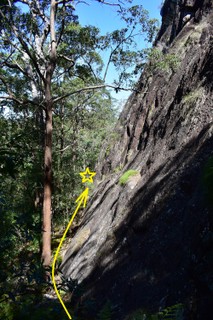 |
||||||||
1.15. Spikey Green Jelly Slope 39 routes in Field
- Summary:
-
All Bouldering
Lat / Long: -26.893661, 152.887340
Walk from the base of the summit track left along The Short Cool Ones track until The Uncut Diamond can be seen 20m to the left of the rock face,
From the carpark walk back about 100 metres until you find the East Beerwah track located across the road from the plantation. Follow the track passing a big fallen down tree and a rockfall sign to your left and keep following the distinct path until you reach the creek bed. At the creek bed turn right and follow the creek until you either see a big fallen down tree or the blue markers. From this point turn left and head up the hill. The crumbling crimps and choss face boulders will be up and to your left from here. From the crumbling crimps boulders follow the tracks directly up towards the base of the mountain to find the Uncut Diamond, and you'll pass most of the other boulders along the way.
description
A selection of boulders that detached from the mountain long ago. Please help me out with the grading of the problems I have no idea about this V scale.
Take bug spray.
Please be mindful of pad placement trying not to disturb any plants or wildlife. Also please limit chalk use and make sure to clean and brush problems at the end of your session.
There are more boulders to be added within the area, and there may be boulders further down the creek or around the mountain. If you are exploring please follow established tracks, and be careful of your impact.
approach
Both routes take about the same amount of time, however the second route is friendlier for people carrying pads and has less time spent walking up hill.
Please walk out the same way you came in. This is to minimise potential impact caused by several different goat tracks being created.
history
History is largely unknown. If you have any information please add it.
1.15.1. Alfalfa Boulder 12 routes in Boulder
- Summary:
-
Lat / Long: -26.893713, 152.889004
description
If you look at this boulder just right you may notice that it is excited to see you.
approach
Follow the East Beerwah track past the fallen down tree until it meets the creek bed. Turn right and follow the creek up for about 20 metres and this will be the first big boulder you come to.
 |
||||||||
| Route | Grade | Style | Selected ascents | |||||
|---|---|---|---|---|---|---|---|---|
| 1 |
★★ Ahead By A Hair Project
Sit start on vertical rail and face holds about 1 mtr right of the left side of the boulder. Dance your way up and mantle out. | |||||||
| 2 |
Shadow Government Project
Sit start for Shadow Puppets | 2m | ||||||
| 3 |
★★ Shadow Puppets
Stand start in the middle of the boulder on the left high slopey sidepull and low right hand undercling. Throw to the lip and top out on mega mantle. FA: Kwan Goddard Lee, 26 Nov 2020 | V4 | 2m | |||||
| 4 |
★ Mega Mantle
Pull on to the top edge above the start of shadow puppets. Mantle to victory. FA: Jake O'Sullivan, 21 Nov 2020 | V2 | ||||||
| 5 |
★★ It Scrubbed Up
Sit start matched on crimp on face. Head straight up only using the slopers, try not to stray too far into It's So Dirty, then mantle directly over the start holds. FA: Kwan Goddard Lee, 26 Nov 2020 | V4 | 3m | |||||
| 6 |
★★ It's So Dirty Low Sit
Sit start left of the groove with matched hands on the crimp on face. Throw to big holds and finish as per Its So Dirty. FA: Matt Schimke, 26 Nov 2020 | V3 | 3m | |||||
| 7 |
★ It's So Dirty
Sit start in groove with left hand on crimp on face and right hand on higher crimp in the groove (shorties may need to stack pads for right hand) Bust up through jugs and mantle out. For the full experience throw some dirt on the top holds before attempting the problem. FA: Oliver Rickford, 21 Nov 2020 | V1 | 2m | |||||
| 8 |
★★ Dirty Gronk
Start as for It's So Dirty Low Sit and traverse across the lip. Mantle left of Mega Mantle. Early mantle on Mega Mantle is a bit easier but sweet. FA: Alexander Jones, 29 Nov 2020 | V3/4 | 6m | |||||
 |
||||||||
| Route | Grade | Style | Selected ascents | |||||
| 9 |
★★ Hot Wheels
Sit-start under the small overhang compressing on either side. Slap your way up to top out. FA: Alexander Jones, 26 Nov 2020 | V4 | 3m | |||||
| 10 |
★ Off Balance Challenge
Stand start. Make your way up the left side of the arete. FA: Tamati Kennedy, 26 Nov 2020 | V0- | ||||||
| 11 |
★ Hands Off The Wheel
Up the middle of the slab. Try it as a nice leisurely no hands walk. FA: Alexander Jones, 26 Nov 2020 | V0 | 3m | |||||
| 12 |
★ Up On The Downstroke
Up the right side of the slab. Also the downclimb. | VB | ||||||
 Paul Bucher
1.15.2. Lilliputian Boulder 0 routes in Boulder
 |
1.15.3. Ring Finger Shadow Boulder 4 routes in Boulder
- Summary:
-
Lat / Long: -26.893431, 152.887980
approach
After passing Alfalfa follow the creekbed until you get to the big fallen down tree. Follow the path to your left up the hill before turning left at a eucalyptus tree and crossing the small creek with a tiny boulder to your right. Walk through the trees heading up and right before stepping over a log. Keep walking forward until you come to the Ring Finger Shadow boulder on your left and the The Yowie House Boulder on your right.
/4a/73/4a735c80650084e7953915422fe42a4d84a6eba3)   |
||||||||
| Route | Grade | Style | Selected ascents | |||||
|---|---|---|---|---|---|---|---|---|
| 1 |
★★ Spider Sax
Stand-start with left hand side pull and right hand crack. Fantastic moves and footwork to gain the lip for the mantle. Grab a spotter! FA: Alexander Jones, 12 Jan 2021 | V4 | 5m | |||||
| 2 |
Ring Finger Shadow / Crumbling Crimps
Stand start slab and head up topping out to the right. FFA: Brent Cobb, 1 Jul 2014 | VB | 4m | |||||
| 3 |
★ Glory Belongs to Ghosts
Stand start and head up the right arete. | V0 | ||||||
| 4 |
Textures You Say
Stand start bottom right hand corner and then move left. Some cool moves. Also the downclimb. | VB | 3m | |||||
1.15.4. The Yowie House Boulder 4 routes in Boulder
- Summary:
-
Lat / Long: -26.893287, 152.887946
approach
After passing Alfalfa follow the creekbed until you get to the big fallen down tree. Follow the path to your left up the hill before turning left at a eucalyptus tree and crossing the small creek with a tiny boulder to your right. Walk through the trees heading up and right before stepping over a log. Keep walking forward until you come to the Ring Finger Shadow boulder on your left and the The Yowie House Boulder on your right.
 /3c/b8/3cb8f6c7d8d37db17b600a2531ac13dd53f2a02e) |
||||||||
| Route | Grade | Style | Selected ascents | |||||
|---|---|---|---|---|---|---|---|---|
| 1 |
Titanium for Legs (Stand) / Choss Face (Stand)
Stand start in the middle of the wall then head straight up. FFA: Brent Cobb, 1 Jul 2014 | V1 | 3m | |||||
| 2 |
★★ Titanium for Legs (Sit)
Sit start with RH sidepull jug and left hand on small undercling. Slap your way up to join into choss face and finish up this. | |||||||
| 3 |
Lip Traverse (Project)
Sit start as for the Titanium for Legs (sit). Traverse along the lip then mantle. | |||||||
| 4 |
Sit start roof (Open Project)
Sit start under the roof. Climb your way out and mantle out using the arete and blank slab left of choss face. Multiple ways to start however lower will be harder. Should be a decently hard problem. | |||||||
1.15.5. Jurassic Jaws 2 routes in Boulder
- Summary:
-
Lat / Long: -26.893598, 152.886950
approach
From the Ring Finger Shadow boulder follow the small creek up and to your right. The Jurassic Jaws boulder should be fairly obvious. Easier to pass under the tree at the front of the boulder rather than dropping down the back side as there is a lot of loose dirt on the back side.
 |
||||||||
| Route | Grade | Style | Selected ascents | |||||
|---|---|---|---|---|---|---|---|---|
| 1 |
Herbaceous Cretaceous
Sit start on face. Start up. | |||||||
| 2 |
★★ Tyrannosaurus Boop
Sit start with left hand on crimp under boulder and right hand on crimp on boulder face. Work your way to the dinosaurs nose and mantle out. | |||||||
1.15.6. Coming Up for Air Boulder 1 route in Boulder
- Summary:
-
Lat / Long: -26.893619, 152.886997
/e7/5f/e75faadf03327fc07321a2d14cd02fd5d2c70684) |
||||||||
| Route | Grade | Style | Selected ascents | |||||
|---|---|---|---|---|---|---|---|---|
| 1 |
Coming Up for Air
Sit start under boulder with hands in jugs. Figure out the mantle and victory is yours. | |||||||
1.15.7. Bluebird Sam Boulder 2 routes in Boulder
- Summary:
-
Lat / Long: -26.893841, 152.886996
  |
||||||||
| Route | Grade | Style | Selected ascents | |||||
|---|---|---|---|---|---|---|---|---|
| 1 |
Bluebird Sam
Nice solid holds, using the tree makes it easier. FFA: Brent Cobb, 1 Jul 2014 | V1 | 3m | |||||
| 2 |
Katie Made Me a Cup of Tea
FA: Brent Cobb, 1 Jul 2014 | V0 | 4m | |||||
1.15.8. Jared Boulder 2 routes in Boulder
- Summary:
-
Lat / Long: -26.893902, 152.887017
description
Great beginner boulder.
approach
On the right just as you walk up to The Uncut Diamond Boulder.
 |
||||||||
| Route | Grade | Style | Selected ascents | |||||
|---|---|---|---|---|---|---|---|---|
| 1 |
★ Jarete
Straight up the left arete. | VB | ||||||
| 2 |
★★ Jared
Squat start on the right hand side of the boulder. Traverse left and finish as for Jarete. FA: Oliver Rickford, 9 Dec 2020 | V2 | ||||||
1.15.9. The Uncut Diamond 9 routes in Boulder
- Summary:
-
Lat / Long: -26.894088, 152.887020
  |
||||||||
| Route | Grade | Style | Selected ascents | |||||
|---|---|---|---|---|---|---|---|---|
| 1 |
Slippery Dip
Up the blank slab, will need some cleaning up. | |||||||
| 2 |
★★ Along The Arete Of The Brooding One
Nice layback arête to small stance, finish with dyno or not. FFA: Brent Cobb, 29 Jun 2014 | V0 | 6m | |||||
| 3 | ★ open project | 4m | ||||||
| 4 |
Gentiles Jewel Stand (Open Project)
Stand start with left hand on the arete and right hand on small sidepull crimp. Work your way at the same mantle as Night Crabber. | |||||||
| 5 |
★★★ Gentile's Jewel Sit (Open Project)
Sit start on rails. Work your way up the arete before moving back right through some sidepulls and crimps to Night Criers mantle. | |||||||
| 6 |
★★★ Night Crabber
On the slightly overhanging wall on the back of the diamond. Low start to the left of the tree with right hand on sloping arete and left hand sidepull on the face. Use various forms of wizardry to traverse up and left to the middle of the boulder and a commiting mantle. FA: Tamati Kennedy, 9 Dec 2020 | V5 | 6m | |||||
 |
||||||||
| Route | Grade | Style | Selected ascents | |||||
| 7 |
Jungle Gym
Traverse right along the slab starting at the tree along rails. Climb with care. Warning This route requires a bit of cleaning of loose holds and lichen. Please either stay off or be extremely careful if you're going to climb it before it's clean. | |||||||
| 8 |
Edge Of The World
Slap up the overhung arete till gaining the slab. Lots of pads, cautious spotters nessesary. Warning This climb needs to be cleaned of loose holds and lichen . Please stay off until it has been cleaned or be extremely careful whilst climbing. | |||||||
| 9 |
Bear Hug
Compression line up the slab. Warning This climb still needs to be cleaned of loose rock and lichen. Please stay off until it has been cleaned or be extremely careful while climbing it. | |||||||
1.15.10. Sitting Buddha Boulder 2 routes in Boulder
- Summary:
-
Lat / Long: -26.893493, 152.885988
approach
GPS location may need to be edited.
  |
||||||||
| Route | Grade | Style | Selected ascents | |||||
|---|---|---|---|---|---|---|---|---|
| 1 |
Lotus Position
Sit start compressing the bloc. Find feet then blast to jugs. Bit of a one move wonder. | |||||||
| 2 |
To Pimp a Buddhafly (project)
Sit start with right hand on crimp and left hand TBD. Go up? Top out straight above. | |||||||
1.15.11. Metropolitan Transport Boulder 1 route in Boulder
- Summary:
-
Lat / Long: -26.893905, 152.887995
/cb/b6/cbb6dda8418f7d89720e72efcf19df4bb18e3e0f) |
||||||||
| Route | Grade | Style | Selected ascents | |||||
|---|---|---|---|---|---|---|---|---|
| 1 |
Rail sit start (Project)
Sit start on sideways rails. Make your way to the topo. | |||||||
1.16. Other Ground Routes 6 routes in Unknown
- Summary:
-
All Rock climbing
| Route | Grade | Style | Selected ascents | |||
|---|---|---|---|---|---|---|
| 1 | ClimbX1 | 15 | 13m | |||
| 2 | ClimbX2 | 15 | 13m | |||
| 3 | ClimbX3 | 13 | 14m | |||
| 4 | ClimbX4 | 11 | 14m | |||
| 5 | ClimbX5 | 15 | 15m | |||
| 6 | ClimbX6 | 15 | 15m | |||
1.17. Foamy Castle Slope 10 routes in Field
- Summary:
-
All Bouldering
Lat / Long: -26.895178, 152.889041
approach
Keep following the East Beerwah track across the creek past the turn off to the Spikey Green Jelly Slope.
1.17.1. Foamy Castle 5 routes in Area
- Summary:
-
Lat / Long: -26.895983, 152.889044
  |
||||||||
| Route | Grade | Style | Selected ascents | |||||
|---|---|---|---|---|---|---|---|---|
| 1 |
★★ Open Project
Start on the overhanging pillar and cling your way to the top! | 3m | ||||||
| 2 |
★★ Open Project2
Attach yourself to the under side of this horizontal pillar and make you way out and up! | 4m | ||||||
| 3 |
Closed Project
Keep off please. | |||||||
| 4 |
Why is Your Penis Hard
flat hold to gain jug move feet up then stretch to finishing jug. | 4m | ||||||
| 5 |
★ Why Is Your Clitoris Hard
FA: Brent Cobb, 8 Aug 2014 | 4m | ||||||
1.17.2. Lionturtle Boulder 4 routes in Boulder
- Summary:
-
Lat / Long: -26.894303, 152.889006
description
This boulder is a 3.5-4m tall crimpy overhang. Strenuous sits that lead into powerful, long, and dead-point throws make up the bulk of this boulder. Not to mention that a bushy victory mantle lies in wait.
Please consider not putting any routes up on the slabby right hand side of this boulder as this may lead to the ferns underneath being killed.
approach
Follow the East Beerwah Track until you reach the first creek crossing after the Spikey Green Jelly Slope. About 5 metres after the river crossing there should be a small track that goes to your right up the hill. Follow this until it meets the creekbed and the Like Water Off A Turtles Back Boulder should be visible up the creek.
 |
||||||||
| Route | Grade | Style | Selected ascents | |||||
|---|---|---|---|---|---|---|---|---|
| 1 |
★ Open Project Lionturtle 1
Sit-start left of shield and straight up into the mantle. | 3m | ||||||
| 2 |
★★ Into The Bush
Sit-start with low L hand crimp rail and upper R hand crimp. Blast up and left to a jug and mantle straight into a bush. FA: Liam Sutcliffe, 6 Dec 2020 | V2 | 4m | |||||
| 3 |
★★ Flashlight Assist
Sit bunched on stacked crimps: good upper L crimp (R start hold of Into The Bush) and low R crimp. Huge move up and right to the best hold you can reach. This line doesn't veer left like Into The Bush. Contrived test of dyno strength! FA: Liam Sutcliffe, 6 Dec 2020 | V5 | 4m | |||||
| 4 |
★★ Open Project Lionturtle 2
Sit-start middle of the face and right of Flashlight Assist. Use spread crimps to get to an obvious side-pull. Big moves up and right to a victory jug and mantle. Will be a hard send but high quality problem! | 4m | ||||||
1.17.3. Creekside Boulder 1 route in Area
- Summary:
-
Lat / Long: -26.894318, 152.888002
description
Some potential for a crimpy face climb and a couple of v0-v1's
approach
From the Lionturtle Boulder keep following the creekbed up and slightly to the right and this boulder should be visible after about 100 metres.
| Route | Grade | Style | Selected ascents | |||||
|---|---|---|---|---|---|---|---|---|
| 1 |
Crimp Face (Open Project)
Sit start on crimps on the bottom right hand side of the block. Work your way up and left on crimps. | |||||||
/54/b4/54b438c4810baed87e84a2fda008af266d9e4b21)  |
||||||||