A Crag Guide gives an extensive view of all sub areas and climbs at a point in the index. It shows a snapshot of the index heirachy, up to 300 climbs (or areas) on a single web page. It shows selected comments climbers have made on a recently submitted ascent.
At a minor crag level this should be suitable for printing and taking with you on a climbing trip as an adjunct to your guidebook.
This guide was generated anonymously. Login to show your logged ascents against each route.
Warning
Rock climbing is extremely dangerous and can result in serious injury or death. Users acting on any information directly or indirectly available from this site do so at their own risk.
This guide is compiled from a community of users and is presented without verification that the information is accurate or complete and is subject to system errors. By using this guide you acknowledge that the material described in this document is extremely dangerous, and that the content may be misleading or wrong. In particular there may be misdescriptions of routes, incorrectly drawn topo lines, incorrect difficulty ratings or incorrect or missing protection ratings. This includes both errors from the content and system errors.
Nobody has checked this particlular guide so you cannot rely on it's accuracy like you would a store bought guide.
You should not depend on any information gleaned from this guide for your personal safety.
You must keep this warning with the guide. For more information refer to our:
Usage policy
Contributors
Thanks to the following people who have contributed to this crag guide:
Alex Mougenot
Joel Porgand
Tamati Kennedy
Honza Sabata
Michael Byrnes
Nick Em
The size of a person's name reflects their Crag Karma, which is their level of contribution. You can help contribute to your local crag by adding descriptions, photos, topos and more.
Table of contents
- 1. The Conch 1 in Area
- 2. Index by grade
1. The Conch 1 route in Area
- Summary:
-
All Bouldering
Lat / Long: -26.850381, 151.815006
description
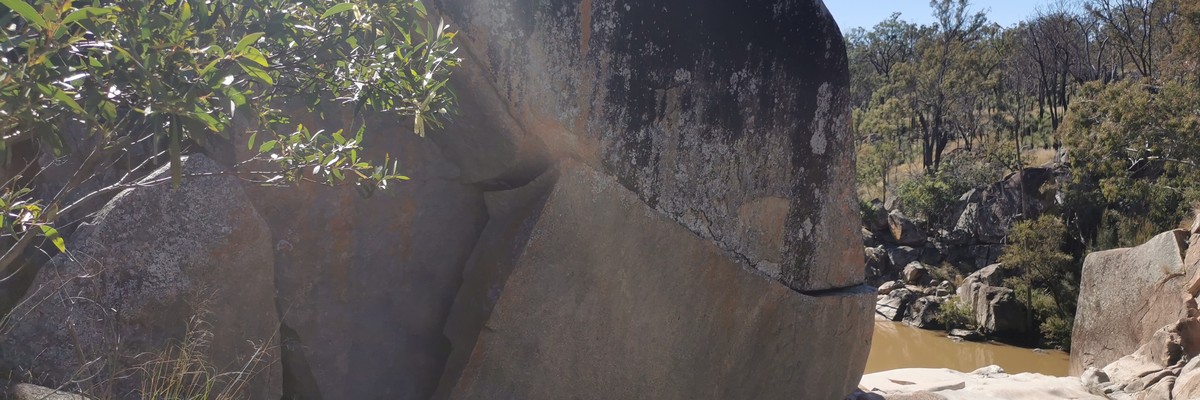
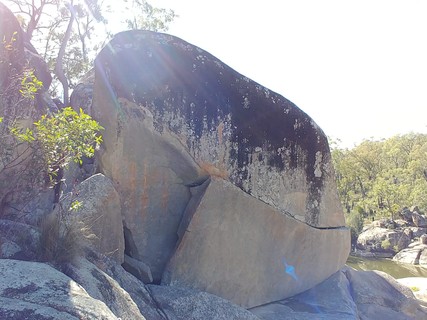
The Conch is situated 35m upstream of the falls edge and forms a vertical bank to the granite stream-bed. It is on the same side as Cherry Wing; this is the car park side. It has the likeness of a whopper boulder, and will likely produce several lines.
approach
To get to The Conch from the picnic area, walk up the trail to the right of Cherry Wing, continue across the top of the crag and then down again.
ethic
The style at Maidenwell to date has been traditional climbing. Bolt placements are belay anchors only, and these are stainless expansion bolts with fixed hangers. There is some potential for bolting the listed routes and new routes. I hope that sanity and logic prevail in endeavours of this kind. Bear in mind that overt bolting may impact on access here. Time will tell. Always give due regard to rock fall and work to reduce its incidence, as there may still be some loose rock on the listed climbs. The waterhole and picnic area have regular visitors on weekends, so be conscious of anyone in your climbing vicinity. Once the obvious loose rock is removed, the surface is very reliable.
 |
||||||||
| Route | Grade | Style | Selected ascents | |||||
|---|---|---|---|---|---|---|---|---|
| 1 |
★★ The Great Trout Hunt
A ripsnorter deltoid warmer. This beautiful piece of granite has been graffitied in painful blue paint reading “Fuck the Police”; some poor soul has been listening to far too much NWA. Begin at the right side of this long traverse and monkey arm your way 10m to the left, finishing in the corner. | V0- | ||||||
2. Index by grade
| Grade | Stars | Name | Style | Pop | |
|---|---|---|---|---|---|
| V0- | ★★ | The Great Trout Hunt |