Help

Boiling Pot

  • Grade context: AU
  • Photos: 29
  • Ascents: 337
  • Aka: Dazza's Bouldering Joint

Seasonality

J
F
M
A
M
J
J
A
S
O
N
D

Description

At the moment this guide is very much in development. Grades are guesstimates at best. Please feel free to add personal grades.

Some areas can stay dry during rain, but the whole area is prone to seepage after heavy rain.

Access issues

Remember that you are in a National park, don't litter, clean up any rubbish, don't disturb the wildlife and no bolting. Brush chalk/tick marks off holds when possible. It is essential that climbing in this area remains minimal impact and low key. The Westpac Helicopter and Surf Life Saving patrol this area, be friendly.

Approach

Drive through Noosa and park at the northern side of the National Park. Follow the Noosa Coastline Track until you get to tea tree bay. Head left down the beach until you reach the big sandstone wall.

Alternately, you can take the stairs down to the beach before the lookout. Follow the path on the rocks until you are under the lookout then downclimb to reach Area A.

Please don't cut down the gully just before tea tree bay as this area is being regenerated. This may cause destruction to growing plant life and will reflect poorly on the climbing community in general.

Ethic

National Park. A popular trail is directly above the crag so be respectful. With regards to this area, it's probable that kids throw rocks from the lookout so be careful.

History

History timeline chart

There has been a long history of bouldering here spanning 20+ years. Dazza did up an old guide which is where most of the current lines have been taken from albeit with some slight adjustments. Taking this into account please consult the community before claiming FA's especially if the climb came from Dazza's guide. If you have any further info please let us know.

Tags

Routes

Add route(s) Add topo Reorder Bulk edit Convert grades
Grade Route

When walking from Tea Tree Bay back towards the Boling Pot, this is the first sector you arrive at.

Start at small ceiling crack and work your way through jugs, a mega pinch and crimps for a mad dyno finish. This problem is a matched finish on the obvious flat ledge.

Start in the crack as for Spooge, Follow the seam and crimps to the right until you can gain mantle to ledge. Holds above the seam are out.

Set: Oliver Rickford & Paul Bucher, 19 Oct 2020

Start 1m right of Spooge. Up to salty undercling feature, finish matched on ledge.

FA: Daz

Start on R pocket and L sloping crimp. Bump through good edges to a dyno/dead-point for the high-mid left crimp and finish (matched) on the slopey orange triangle. This is Grace's first outdoor set x

To the right of Big Kahuna There is a length of hand crack worth about 3 moves. Sit start below this crack with a small pinch/crimpy nubbin for the right, large stand up move to gain the crack. After the crack match the tentative finishing hold above right.

FA: Nick Foulds, 25 Dec 2020

To the right of Area E, features a small cave and nice crimpy headwall.

Sit-start in ceiling crack to a R semi-gaston and crimpy undercling to progress to the small jug ledge. From here you will work through the face crimps to end on the high flat ledge (matched). This is an original Darren line; we added a sit-start for a wonderful and flowing rooflet section.

FA:

Sit start up the arete. Finish matched on obvious hold below the choss.

Sit start in the bottom crack make your way up and then trend left to finish matched on big slopey jug.

C1 in Dazza's guide but trending left instead of eight and down.

Sit start as for The First Cut but instead of going up, traverse left on pockets and crimps. Staying below the big break, Finish on big block left of End Result.

See old school topo

FA: Daz

Start in break under rooflet. Either crimp your way out or reach up to pocket on head wall. Head straight up to finish matched slopey jug under next rooflet. Might be harder for people with T-Rex arms.

C3 in Dazza's guide.

Sit start matched on slopey rail about 1 metre left of C3's start. Head out through small roof to crimps on headwall. Finish matched on jug.

FA: Dazza Noosa

Hand stack the crack and hang for 10 seconds (no feet). Will be easier for the crack connoisseurs. Originally graded V4 but probably better at a V3. It's a strange one, add a personal grade! Similar to Zilch in The Rain Cave at Brooyar.

Set: Paul Bucher, 2020

FA: Oliver Rickford, 6 Dec 2020

Left of End Result straight up through where the elimanite finishes.

Sit start 2m left of Fins In straight up to undercling then up to nice sidepull out left to nice jug and up to better jug. finish standing in the good ledge.

Sit start on good holds, move to and match sloper plate. Throw Rh to large vertical pinch. Finish matched on good hold above the pinch.

The original 5 in Dazzas guide eliminates the left crimp on the sloper plate with hands matched in the middle. Pure sloper power. Throw Rh to pinch then finish out on good hold right of the pinch.

Traverse both ways. Follow the crack seam under the rooflet. Graded 3 in the original guide. Current V grade is interperated.

A popular sector that offers shaded bouldering for people at all levels. Note that the rock does seep after heavy rain. Please brush and wash down holds after your session.

Traverse left on slopers.

Line B10 (0) - Both directions following main horizontal crack.

FA: Matt Schimke, 2009

Starman left to right version.

Start at main horizontal crack, extend to good hold. Traverse left for commiting throw to final hold. Grade 4 ** as per original guide.

Start on two small holds side by side. Up to next side by side holds. Horizontal crack is out. Up to next two crimps side by side then extend right. Match on good hold. Grade 5 * as per original guide.

Sit start on crimps. Directly up to crimps over bulge then bust out left before committing throw to same finish as Blockaholic.

B4 in Dazza's guide. Spotters recommended.

Problem is on protruding vertical seam. Sit-start on side-pulls and extend to horizontal crack. Work your way through the large gaston to achieve higher crack hold, ultimately gaining left crimp on the block for the final throw to the big ledge.

Original line (B7 * * *) ends at finish pocket of Benign and Brownies. ~3 more traverse moves -- felt way too dirty and chossy/unsafe. Won't alter the grade but still worth doing! Taken, transcribed and paraphrased from Dazza's Boiling Pot guide.

Sit start as for B9:Benign but traverse right along the horizontal seam until you can grab Blockaholic's LH Gaston as a RH side-pull. Finish straight up the protruding prow using the crimps on the left. This is essentially an eliminate which aims to cut out the big pocket on Blockaholic.

Oliver Rickford

Slightly contrived open project from the original guide. Start as per Benign but continue up to large side pulls, then to an almost vertical crimp above the rooflet, finish matched at victory pocket. Graded 3 with the use of a kneebar under the roof as an alternative problem.

Sit start 1.5 metres left of Blockaholic on protruding corner block below vertical seem. Work your way out left on slopey jugs to vertical wall then crank up on pockets and crimps. Finish on big right hand pocket about in line with Blockaholic's finishing hold.

B9 in Dazza's guide. Originally finished by traversing to the right.

Start on good ledge toward the start of Nam Rats and move to sloping pinch/crimp. Up to big crimp ledge and finish at the juggy pocket. Sit-start possible! Please be careful of the easiest beta -- it will hurt your ankle if you fall. Spotter required!

Easier version of Benign / B9

Sit start 3m left of Beta Blocka start under small rooflet on protruding good fin and crimps around it. Punch straight up to jug the traverse right along crack line. Line goes up diagonally right to ok left gaston crimp and then face crimps of Beta Blocka and straight to jug to finish.

Edmund

FA: Reagen

The small sector between Area B & A.

Sit start with both hands in jug. Layback the crack to the top and finish on jug just to the left of flake below break.

Starts on slopy matching handhold, work your way left on crimps until big move to finishing jug. Bottom ledge is out.

FA: Matt Schimke, 2009

Starts up Ong bak, then juggy traverse for 15 metres. Finishes on Nam Rats starting hold.

FA: Matt Schimke, 2009

Start on block to right of Red Tide straight to crimp at the edge of the roof then straigh up to break and traverse left to finish as per Red Tide.

Start at ceiling crack, toe cam out to mad ironstone mailslot crimp, and work to big sidepull/pinch. Big campus moves or tricky footwork to gain last two throws for ending shrub ledge. Bring a spotter for the throws!

FA: Michael Garrahy, 2012

Starting under the roof stretch yourself to the lip. Finish slightly left and up to bucket.

FFA: Antoine Moussette, 2001

Sit start on nice ledge bottom the blocks are out. Up and right through roof on crimps, hold up and left side pull is in then up right to good slot hold and higher left jug. Traverse right and finish up Le Toit De Ben. Feels harder than the other 2 lines but both me and James feel V5.

FA: James Hembury

FA: 4 Oct 2020

Sit start 2/3 metres to the left of Red Tide. Traverse using the holds in the roof to finish in large horizontal break 2 metres right of Red Tide.

Squat start above fallen dead tree out the first rooflet, traverse right on this finishing up on horizontal block right block is in.

FA: Reagen

15m right of Lock In The Heels. Start as per wing it left of big roof traversing right top to break and then out to edge of roof and up blankest face using small right crimp pocket and then up to the next break to finish. Right block is out removes the jugs and good crimps.

Sit start up the diagonal break, finish matched at the seam.

Sit start up the diagonal crack. Finish matched on good hold at the seam.

Sit start up the crack. Finish matched on good hold.

Sit start up the corner, traverse left before finishing matched on good hold.

Long traverse on good holds.

The small section of cliff with top outs at the far right end of the crag.

Used for quick access to the upper section of the Boiling Pot. Many a tourist have attempted to make a quick exit only to find one's self on the Walk Of Shame back to Tea Tree Bay.

Sit start matched on the sloping hold, straight up the overhung section to mantle.

Did you know?

Did you know that you can create an account to record, track and share your climbing ascents? Thousands of climbers are already doing this.

Selected Guidebooks more Hide

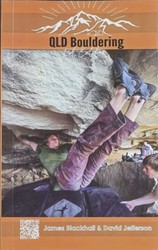
Author(s): Jimmy Blackhall & David Jefferson

Date: 2021

ISBN: 9377779499658

Hidden within the ordinary people of Queensland there exists a tight-knit community of scabby knuckles, grazed knees, massive forearms and iron-clad wills. This guidebooks seeks to shed light on this community and blocks of choice with all the information, skills and knowledge to open the door for you to explore all the bouldering that Queensland has to offer.

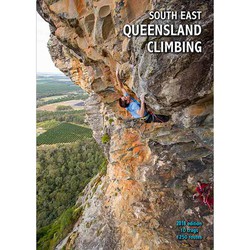
Author(s): Simon Carter

Date: 2018

ISBN: 9780958079068

A few years ago there was basically Frog Buttress and Coolum. Since then there has been more development than Barangaroo and South East Queensland should be on any climbers radar no matter what your style. Except ice climbing, definitely no ice climbing. But over 1250 routes with hard sport, multipitches and quality trad to make a great trip.

Accommodations nearby more Hide

Share this

Sun 23 Apr
Check out what is happening in Boiling Pot.

Get a detailed insight with a timeline showing

  • Ticks by climbers like you
  • Discussions of the community
  • Updates to the index by our users
  • and many more things.

Login to see the timeline!

Deutsch English Espaรฑol Franรงais Italiano ํ•œ๊ตญ์–ด Portuguรชs ไธญๆ–‡