A Crag Guide gives an extensive view of all sub areas and climbs at a point in the index. It shows a snapshot of the index heirachy, up to 300 climbs (or areas) on a single web page. It shows selected comments climbers have made on a recently submitted ascent.
At a minor crag level this should be suitable for printing and taking with you on a climbing trip as an adjunct to your guidebook.
This guide was generated anonymously. Login to show your logged ascents against each route.
Warning
Rock climbing is extremely dangerous and can result in serious injury or death. Users acting on any information directly or indirectly available from this site do so at their own risk.
This guide is compiled from a community of users and is presented without verification that the information is accurate or complete and is subject to system errors. By using this guide you acknowledge that the material described in this document is extremely dangerous, and that the content may be misleading or wrong. In particular there may be misdescriptions of routes, incorrectly drawn topo lines, incorrect difficulty ratings or incorrect or missing protection ratings. This includes both errors from the content and system errors.
Nobody has checked this particlular guide so you cannot rely on it's accuracy like you would a store bought guide.
You should not depend on any information gleaned from this guide for your personal safety.
You must keep this warning with the guide. For more information refer to our:
Usage policy
Contributors
Thanks to the following people who have contributed to this crag guide:
Chris
Kym.H
Michael B
Zhangter P
Jiri Stastny
Gideon Mettam
Aussie Edwards
Adam Straw
Brendan Heywood
Anthony Brandis
The size of a person's name reflects their Crag Karma, which is their level of contribution. You can help contribute to your local crag by adding descriptions, photos, topos and more.
Table of contents
- 1.
West Cape Howe
363 in Crag
- 1.1. Golden Gate Beach Bouldering 0 in Area
- 1.2. The Steps 38 in Cliff
- 1.3. Old Man Area 14 in Cliff
- 1.4. The Swallow 9 in Cliff
- 1.5. Ed's Ledge 10 in Cliff
-
1.6.
Black Wall 25 in Cliff
- 1.6.1. Left Side 7 in Area
- 1.6.2. The Pyramid 9 in Area
- 1.6.3. Right Side 9 in Area
-
1.7.
Southern Ocean Wall 69 in Cliff
- 1.7.1. Carousel Wall 18 in Cliff
- 1.7.2. Stooges Wall 7 in Area
- 1.7.3. Red Back Buttress 4 in Sector
- 1.7.4. First Birthday Groove 4 in Area
- 1.7.5. Supergroove 12 in Area
- 1.7.6. First Route Gully 24 in Area
-
1.8.
The Raft 78 in Cliff
- 1.8.1. The Mincer Area 8 in Area
- 1.8.2. Vulture Street Wall 16 in Area
- 1.8.3. Gay Blade Area 21 in Area
- 1.8.4. Pulsar Buttress 12 in Area
- 1.8.5. Lower Raft 13 in Area
- 1.8.6. The Spars 8 in Area
-
1.9.
Styx Gully 11 in Cliff
- 1.9.1. North Side 5 in Area
- 1.9.2. South Side 6 in Area
-
1.10.
Throne of the Gods 51 in Cliff
- 1.10.1. The Throne Room 22 in Area
- 1.10.2. Claw's Wall 5 in Area
- 1.10.3. Watson's Buttress 3 in Area
- 1.10.4. Convict's Corner 21 in Area
-
1.11.
The Book Ends 5 in Cliff
- 1.11.1. Left Book End 3 in Area
- 1.11.2. Recessed Wall 2 in Area
-
1.12.
Earl Grey Walls 12 in Cliff
- 1.12.1. Redemption Wall 1 in Sector
- 1.12.2. White Wall 5 in Area
- 1.12.3. The Zawn 6 in Area
-
1.13.
Torbay Head 4 in Cliff
- 1.13.1. Rainbow Slab 1 in Area
- 1.13.2. Sugglers Cove 1 in Area
- 1.13.3. Unknown Area 2 in Area
-
1.14.
Shelley Beach 17 in Cliff
- 1.14.1. Main Wall 4 in Area
- 1.14.2. Lauchie's Cove 2 in Area
- 1.14.3. Grunt Gully 2 in Area
- 1.14.4. The Andersons (Bouldering) 9 in Area
-
1.15.
Dingo Beach Boulders 20 in Area
- 1.15.1. Dingo Walls 6 in Area
- 1.15.2. Magic Pudding Boulders 1 in Area
- 1.15.3. The Underworld Boulders 13 in Area
- 2. Index by grade
1. West Cape Howe 363 routes in Crag
- Summary:
-
Mostly Trad climbing
Lat / Long: -35.109065, 117.621361
summary
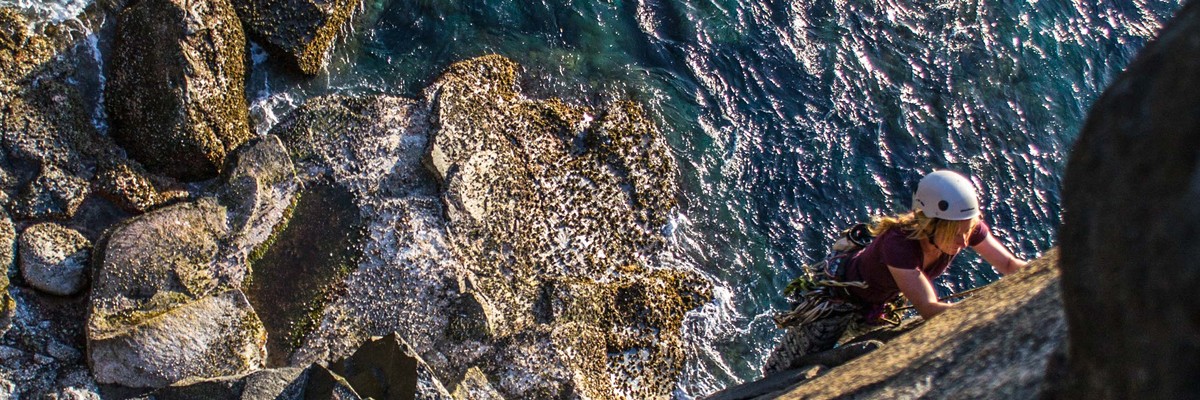
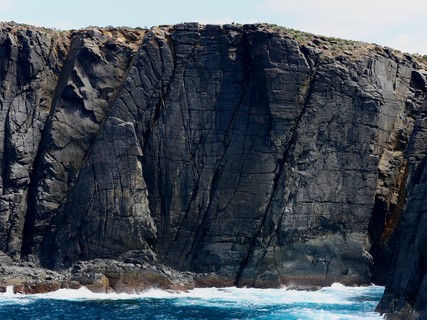
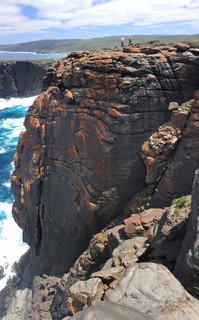
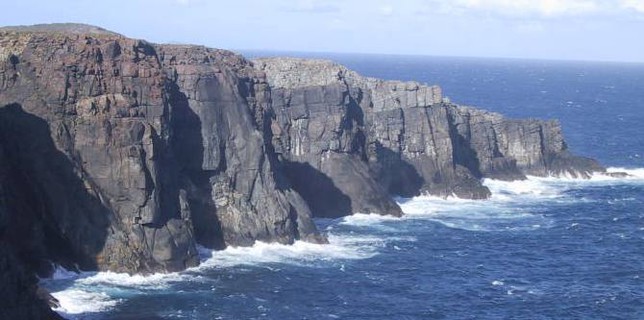
West Cape Howe has some of the greatest sea cliff climbing in Australia
description
Probably the most extensive area of climbing in Western Australia. There is a multitude of climbs on offer, with styles ranging from cracks, to aretes, to delicate faces and slabs. There is plenty of potential for new climbs too!
The area is dominated by the Southern Ocean, and its huge waves crashing against the steep walls. When seas are high (swell greater than 2m), many of the climbs will be unreachable. Weather conditions also change extremely quick, with wind and rain seemingly appear from no-where sometimes. Be careful! Help is hard to reach.
access issues
The 4WD track can vary greatly in condition. A shovel may be needed to fill in some of those holes!
approach
4WD access along a sandy track, or a 1.5 to 2 hour walk from Shelly Beach.
Most of the climbing is reached by abseiling down to a small belay spot above the crashing waves. Bring a 50-60m static for this purpose, and plenty of gear to build both belay and rap anchors. Leave rap line and carry prussiks to aid escape in case of emergencies.
where to stay
Either camp at West Cape Howe or at Shelly Beach
ethic
There is no established ethic. The usual WA ethics towards bolting apply, and all bolts should be placed with careful consideration, and definitely not used to replace natural pro.
1.1. Golden Gate Beach Bouldering 0 routes in Area
1.2. The Steps 38 routes in Cliff
- Summary:
-
Mostly Trad climbing
Lat / Long: -35.122492, 117.608891
description
The routes are very short, and do not offer the 'West Cape Howe' atmosphere. Nonetheless, on a strong southerly wind dominated day, The Steps is a great place to seek shelter. The area is popular with local fisherman.
approach
Can be reached by walking south of the Old Man Area for 10 minutes, or until you reach the Steps Rightside. Otherwise, park at the fishing carpark which branches off to the right if travelling from Shelley Beach.
descent notes
The Steps is quite close to the crashing waves, so may not be suitable when seas are high.
1.2.1. Leftside 19 routes in Area
- Summary:
-
Mostly Trad climbing
Lat / Long: -35.122051, 117.608920
| Route | Grade | Style | Selected ascents | |||
|---|---|---|---|---|---|---|
| 1 | Learning the Steps | 16 | 6m | |||
| 2 | Ballet | 14 | 6m | |||
| 3 | Two Step | 6 | 6m | |||
| 4 | Kingfisher | 10 | 9m | |||
| 5 | Tango | 12 | 10m | |||
| 6 | First Love | 14 | 10m | |||
| 7 | Ben Hurt | 14 M0 | 14m | |||
| 8 |
★ Wild Wild West
Fun. Crux to start, then pull through small roof to face. Set: S. Richardson & A. Rokich, 1992 | 23 | 14m, 2 | |||
| 9 | Bermuda Triangle | 12 | 14m | |||
| 10 | Spring Water | 18 | 15m | |||
| 11 | No Clause | 8 | 9m | |||
| 12 | ★ Clip Behind The Ear | 21 | 10m, 1 | |||
| 13 | East to West | 14 | 10m | |||
| 14 | Dizzy's Head Crack | 13 | 12m | |||
| 15 | Bengal Lancer | 8 | 9m | |||
| 16 | Sainchin | 8 | 8m | |||
| 17 | Gillette | 12 | 9m | |||
| 18 | Steel Eye Span | 12 | 8m | |||
| 19 | Watusi | 8 | 9m | |||
1.2.2. Rightside 19 routes in Area
- Summary:
-
All Trad climbing
Lat / Long: -35.122849, 117.608824
| Route | Grade | Style | Selected ascents | |||
|---|---|---|---|---|---|---|
| 1 | Groper | 10 | 8m | |||
| 2 | Kick Start | 12 | 8m | |||
| 3 | Lady Caroline | 14 | 10m | |||
| 4 | Three Step | 8 | 10m | |||
| 5 |
Fat Ankles
Climb the corner chimney between Three Step and Tombstone Rehearsal. FA: Adam Straw, Rob Kettels & Bruno Buzatto, 25 Oct 2014 | 13 | 8m | |||
| 6 |
★★ Tombstone Rehearsal
The obvious jamming/splitter crack in an othrwise black wall. Jam to horizontal break, then climb up to large ledge | 16 | 8m | |||
| 7 | Wire Guided | 16 | 6m | |||
| 8 |
★ Fist Frenzy
Climb the slightly overhanging hand/fist crack between Wire Guided and Fist of Fury. Finish as for Fist of Fury. FA: Adam Straw & Bruno Buzatto, 25 Oct 2014 | 15 | 6m | |||
| 9 | Fist of Fury | 10 | 10m | |||
| 10 | Stairway | 4 | 8m | |||
| 11 | Mistletoe | 11 | 7m | |||
| 12 | Puddles | 13 | 8m | |||
| 13 | Chris' Bar and Grill | 8 | 11m | |||
| 14 | Gan Kaku | 10 | 13m | |||
| 15 | Shinobi | 16 | 12m | |||
| 16 | Hacky Sack Crack | 12 | 12m | |||
| 17 | Chocky's Corner | 9 | 10m | |||
| 18 | Lay Down Sally | 10 | 14m | |||
| 19 | Death Wish | 14 | 14m | |||
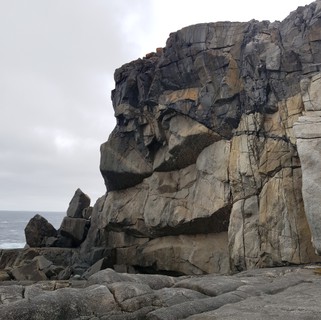
1.3. Old Man Area 14 routes in Cliff
- Summary:
-
All Trad climbing
Lat / Long: -35.126708, 117.607721
description
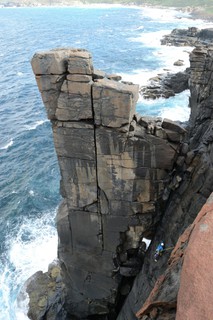
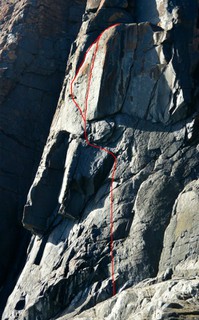
One of the main attractions to West Cape Howe. The 50m high semi-detached sea stack offers some of the best climbing in the state.
approach
From car park, follow abandoned 4WD track west. Turn right after 100m (approx) and follow faint tracks north. The Old Man is hard to spot until you are there.
descent notes
The routes start on a small chockstone platform 1/3 the way up the sea stack. Abseil down Easy Rider. The belay ledge seems to be pretty safe from large waves.
| Route | Grade | Style | Selected ascents | |||||
|---|---|---|---|---|---|---|---|---|
Overhanging NoseImmediately north of the sea stack is an overhanging nose with a large wave cut platform about 20m down. Rap down to platform. | ||||||||
| 2 |
Glass Staircase
FA: C. Slee & J. Nevin, 2002 | 19 | 26m | |||||
| 3 |
Blow Wave
FA: C. Slee, 2002 | 14 | 15m | |||||
 |
||||||||
| Route | Grade | Style | Selected ascents | |||||
The Old ManThe next climbs are found on the prominent sea stack. | ||||||||
| 5 |
★★★ Dancing The Deep Blue
Nice arête climbing on the Old Man. Start at belay point for The Climb, but traverse left along horizontal cracks to vertical crack that leads to ledge. Straddle arete past two FH to the top. Bolts are not ideal, but seem to hold. FA: S. Richardson, 1992 | 26 | 25m, 2 | |||||
| 6 |
★★★ The Climb
One of the best climbs for its grade in Australia! Climb the center hand/off-width crack that divides The Old Man pillar. Take big cams for top section.(can be done without big cams there are horizontal cracks that take smaller gear but bigger cams might make finding placements easier) FA: M. Smith, R. McArthur, V. Keane & H. Wopereis, 1978 | 18 | 23m | |||||
| 7 |
★★ Horizontal Refreshment
From the belay ledge at the base of the old man go up the inside corner and onto the face continuing to a short vertical crack at the top. Well protected with a few small wires and small to medium cams FA: Jonas Hollingworth & Trent Potts, 2014 | 21 | 18m | |||||
| 8 |
★★ Horizontal Refreshment Variant
Start as for Horizontal Refreshment but continue right at the top. FA: Sam Davies, 16 Aug 2014 | 21 | 18m | |||||
| 9 | Easy Rider | 6 | 23m | |||||
Mousetrap WallThe west facing cliff about 15m south of the Old Man. | ||||||||
| 11 | Better Mousetrap | 12 | 26m | |||||
Caitlin WallThe next segment of cliff south of The Mousetrap Wall. | ||||||||
| 13 | Thrunobulax | 15 | 20m | |||||
| 14 | Caitlin | 11 | 20m | |||||
Resurrection WallThe southernmost part of cliff line before it turns west and forms the prominent Prow feature. | ||||||||
| 16 | ★ Resurrection | 12 | 55m | |||||
| 17 | Ventriloquist | 11 | 40m | |||||
| 18 | Loosefer | 9 | 40m | |||||
| 19 | Veteran | 14 | 50m | |||||
1.4. The Swallow 9 routes in Cliff
- Summary:
-
All Trad climbing
Lat / Long: -35.127839, 117.607181
description
The cliff line opposite the rocky island. The Swallow is an obvious open book corner running down to the base of the cliff. There are a number of easier routes found here.
approach
Located on the headland, west from the car park.
descent notes
All climbs are reached by rapping from either side of the corner system.
| Route | Grade | Style | Selected ascents | |||
|---|---|---|---|---|---|---|
| 1 | S.N.A.F.U. | 10 | 35m | |||
| 2 | Gulls On The Avenue | 8 | 25m | |||
| 3 | No Bolts Please, We're British | 13 | 25m | |||
| 4 | Lord Hawthorn | 12 | 35m | |||
| 5 | Cop Out | 5 | 35m | |||
| 6 | Blue Light | 11 | 20m | |||
| 7 | ★★ Little Divil | 18 | 40m | |||
| 8 |
★ The Divil Direct
Hangers required. FA: P. Maher & J. Nevin, 2013 | 18 | 20m, 2, 3 | |||
| 9 |
Little Fecker
Abseil to the large ledge and start 5 metres to the right of the second pitch of Little Divil between the two shallow cracks. Direct line straight up the steepening face. Crux near the top. Belay on large ledge at top and scramble up the rocks left to finish. 6 bolts (need hangers) and natural gear. FA D.Reed and P.Maher Great little addition to this area. Note: due to the friable nature of the existing flakes and poor natural protection, it was decided to install the bolts to make this route more usable for future climbers. https://www.climberswa.asn.au/topic/new-route-at-west-cape-howe/ | 17 | 17m | |||
1.5. Ed's Ledge 10 routes in Cliff
- Summary:
-
All Trad climbing
Lat / Long: -35.128438, 117.607837
description
Ed's Ledge is found further to the south of The Swallow and has some interesting climbing. The base of the wall is sheltered by the island from the worst of the seas.
approach
Located on the headland, west from the car park, behind the rocky island.
descent notes
Need to abseil from top of climb.
| Route | Grade | Style | Selected ascents | |||
|---|---|---|---|---|---|---|
| 1 | ★★ Scorpion | 16 | 48m | |||
| 2 | ★ Editors Epic | 17 | 20m | |||
| 3 | Trembling | 16 | 40m | |||
| 4 | Bogey Man | 11 | 42m | |||
| 5 | Indian Snake Charmer | 20 | 47m | |||
| 6 | ★★ Wire Flake | 16 | 50m | |||
| 7 | Soft Touch | 16 | 50m | |||
| 8 | ★ Soft Contact | 16 | 50m | |||
| 9 | Country Roads | 16 | 50m | |||
| 10 | Missing Wires | 19 | 50m | |||
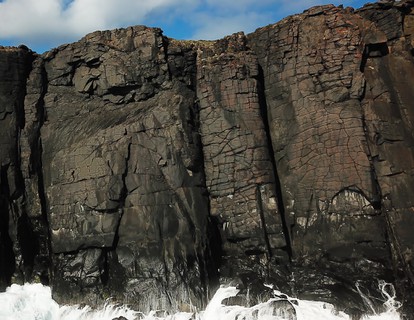
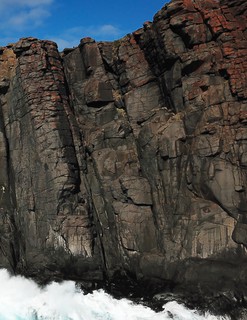
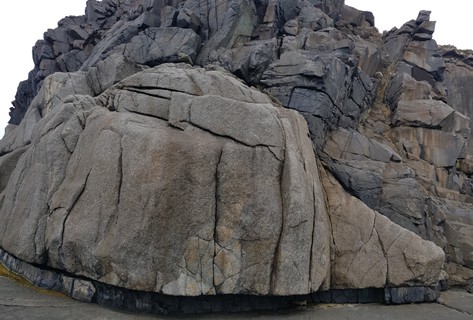
1.6. Black Wall 25 routes in Cliff
- Summary:
-
All Trad climbing
Lat / Long: -35.128383, 117.608672
description
360-degree panorama of the area in a link below: http://www.sphericalpano.com/panorama/climbing-the-cliffs-of-west-cape-howe/id/32.html
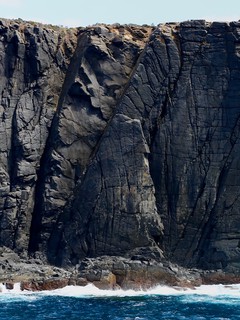
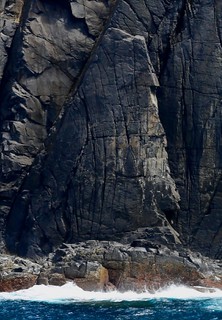
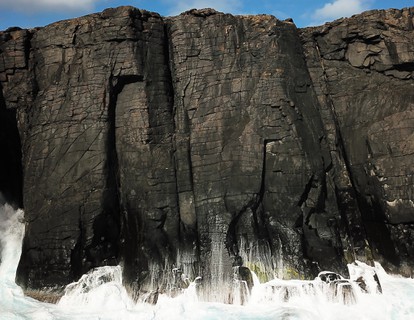
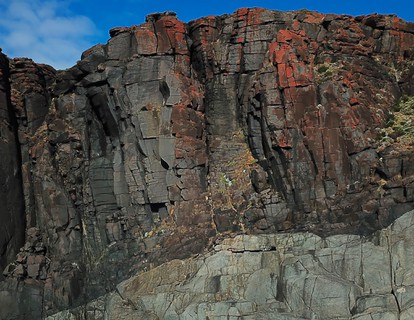
Very steep, exposed and intimidating! The Black Wall has some steep cracks and technical face climbing. Very atmospheric and a popular spot for climbers, and tourists. Beware of thrown rocks by unwary tourists.
approach
The south facing wall found be walking east from car park for a couple of minutes.
descent notes
Find your climb, and build a rap station above it.
1.6.1. Left Side 7 routes in Area
- Summary:
-
Lat / Long: -35.128433, 117.608418
| Route | Grade | Style | Selected ascents | |||
|---|---|---|---|---|---|---|
| 1 | One Thousand Moons | 18 | 50m | |||
| 2 | Prow | 15 | 40m | |||
| 3 |
★★ Hi Ho Silver
Steep but well protected cracks on right side of arete. Pitch 1 (20) 20m: Steep finger crack up to ledge. Pitch 2 (20) 20m: Crux pitch, up thin cracks. Finish on left margin of arete FFA: G. Brysland & A. Rokich, 1991 | 20 | 40m, 2 | |||
| 4 |
★ Missing Time
Climbing up middle of face and avoid use of arete. Natural gear plus 5 bolts. FFA: G. Brysland & A. Rokich, 1991 | 20 | 40m, 5 | |||
| 5 | Barry's Bouncing Butternuts | 18 | 43m | |||
| 6 | ★★ Harry Humpkin and the Exploding Pumpkin | 19 | 45m | |||
| 7 | ★ Gob Smackin | 15 | 50m | |||
1.6.2. The Pyramid 9 routes in Area
- Summary:
-
Lat / Long: -35.128471, 117.608736
  |
||||||||
| Route | Grade | Style | Selected ascents | |||||
|---|---|---|---|---|---|---|---|---|
| 1 |
★★ Andromeda
Usually done as two pitches, but can be done as a single with double ropes. Climb up obvious weakness too top of pyramid. Belay from here if doing in two pitches. Second pitch involves fantastic arete climbing to top. | 15 | 50m, 2 | |||||
| 2 |
Mistaken Identity
Possibly easier than 22: https://www.climberswa.asn.au/topic/west-cape-howe-3-new-routes/ | 22 | 50m | |||||
| 3 |
★★★ Flickering Indices
Up finger crack. Second pitch same as Andromeda | 22 | 50m, 2 | |||||
| 4 | ★★ Mandrake | 22 | 50m | |||||
| 5 |
★★★ Take The Plunge
Up right most crack on the base of the pyramid. Belay on top of pyramid. Second pitch same as Andromeda | 20 | 50m, 2 | |||||
| 6 | ★★ Point Taken | 22 | 50m | |||||
| 7 | Wantoks In The Jungle | 17 | 25m | |||||
| 8 |
Off My Cheops
Off My Cheops 30m 16 Located on the LHS of the pyramid. From the main ledge, traverse 1m left without getting inside the groovy chimney and continue up the major wide crack system. Finish Up on the arête. FA: 22/02/2014 David Tickler, Remi Vignals https://www.climberswa.asn.au/topic/west-cape-howe-3-new-routes/ | 16 | 30m | |||||
| 9 |
★ Tura Stone
Tura Stone 30m 19* Up the twin cracks to the rectangular stone at 7m, and continue up the cracks without using the left chimney and staying on the face to the top of the pyramid. FA: 22/02/2014 Remi Vignals, David Tickler | 19 | 30m | |||||
1.6.3. Right Side 9 routes in Area
- Summary:
-
Lat / Long: -35.128273, 117.608989
 |
||||||||
| Route | Grade | Style | Selected ascents | |||||
|---|---|---|---|---|---|---|---|---|
| 1 | Inside, Outside | 15 | 50m | |||||
| 2 |
★★ Friendless
For the full experience, rap all the way to bottom in corner with the pyramid ledge. Climb up cracks trending right then take left fork to belay ledge. Second pitch follows cracks up with an exposed finish, Pitch 1: 25m Pitch 2: 35m | 15 | 60m, 2 | |||||
| 3 |
★★ Friendless Variant
From start of 2nd pitch of Friendless, head up crack system between Friendless and Black and Beautiful. Relatively straightforward climbing with good protection. Beware of loose jugs on top that are potential belayer killers. | 16 | 35m, 2 | |||||
| 4 |
★★ Black and Beautiful
Classic Blackk Wall climbing up crack system to the right of Friendless Variant. At top, move up right ramp, or for harder finish (perhaps above the grade), climb the vertical crack with poor gear and flaky rock. | 15 | 45m | |||||
| 5 | Another Side of Midnight | 14 | 60m | |||||
| 6 | Quasar | 16 | 45m | |||||
| 7 |
★★★ The Dreaded Lurgy
I attempted this route a few years ago and found it pretty dirty and unappealing and bailed on the abseil rope. May be better with a good clean? I suggest if you try it keep the abseil rope in place incase | 23 | 50m | |||||
| 8 |
★ Palace of the Brine
FA: R. Weiter & J. Gregg, 2000 | 19 | 25m | |||||
| 9 | Tin Pan Alley | 10 | 45m | |||||
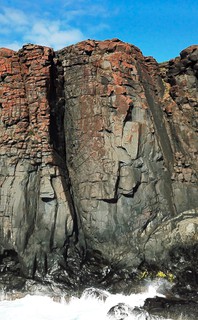
1.7. Southern Ocean Wall 69 routes in Cliff
- Summary:
-
Mostly Trad climbing
Lat / Long: -35.129187, 117.610070
description
The longest and highest part of the cliff line at West Cape Howe. The rock is beautiful too! Although it can be a little chossy near the top. Very exposed but full of classics.
approach
Walk about 50m south of the car park and look down. The cliff is west facing.
descent notes
Rap down from points above the climbs. Often, a short travers along the bottom of the cliff is required. Be aware of king waves, and always stay tied in.
 |
1.7.1. Carousel Wall 18 routes in Cliff
- Summary:
-
Mostly Trad climbing
| Route | Grade | Style | Selected ascents | |||||
|---|---|---|---|---|---|---|---|---|
| 1 |
Happy Clam
FA: J. Nevin & P. Maher, 2013 | 16 | 22m, 1 | |||||
| 2 |
★ Shellfish Bastard
FA: P. Maher & J. Nevin, 2013 | 13 | 22m | |||||
| 3 |
★★ Schatz
FA: J. Nevin, R. & R. Watson, 2012 | 11 | 27m | |||||
 |
||||||||
| Route | Grade | Style | Selected ascents | |||||
| 4 | ★ Welsh Git | 19 | 45m | |||||
| 5 | Fish 'n' Crack | 21 | 50m | |||||
| 6 | ★★ More Training | 20 | 50m | |||||
| 7 |
★★ My Spondy Donty Slipped
As for Training for Big Walls, but traverse the lip on micro cams. Solid test piece for FFA FA: John Dumas & Bianca Civello, 2014 | AIDC:C1 | 50m, 2 | |||||
| 8 | ★★★ Training for Big Walls | 19 | 50m | |||||
| 9 |
★★ Punkin and Hoonin
Abseil off bolts to the most northerly abseil gully (marked by large cairn) to a large ledge halfway down cliff line at the end of the gully. Climb up right of arete and go left over roof and up continue up arete to finish. | 17 | 35m | |||||
| 10 | Dairymilk Dive | 12 | 35m | |||||
| 11 |
★ Anthrax Ripple
FA: J. Nevin, D. Egeland & D.Algie, 1997 | 13 | 37m, 2 | |||||
 |
||||||||
| Route | Grade | Style | Selected ascents | |||||
| 12 | ★★ Shitsky | 17 | 35m | |||||
| 13 | ★ Shitsky Variant | 18 | 35m | |||||
| 14 | ★ Lost and Found | 17 | 25m | |||||
| 15 | ★★ Carousel | 15 | 50m | |||||
| 16 | ★★★ Chocolate Drop | 12 | 50m | |||||
| 17 | ★ Acid Drop | 17 | 50m | |||||
| 18 | ★ Long Drop | 20 | 50m | |||||
1.7.2. Stooges Wall 7 routes in Area
- Summary:
-
All Trad climbing
Lat / Long: -35.129015, 117.609867
| Route | Grade | Style | Selected ascents | |||||
|---|---|---|---|---|---|---|---|---|
| 1 |
★★ Trundle Fun
Abseil 50m down blunt arete to large belay ledge. Start up corner and move left past bolt an onto face and continue up staying left of arete. FFA: Alan Rokich & JC, 1994 | 19 | 50m, 1 | |||||
| 2 |
★★ Stooge
Abseil down arete for 40 m into niche. If wet, start from above niche on drier rock. Go up face staying as close to the arete as possible. FA: Alan Rokich & JC, 1994 | 20 | 40m | |||||
| 3 |
★ Crest of a Wave
FA: Doug Scott & Roland Tyson, 1988 | 18 | 50m | |||||
| 4 |
Larry
From base of abseil gully climb cracks on left up face to overlap before moving right. Layback the flake then head straight up. FA: Peter Nidd & JC, 1994 | 17 | 35m | |||||
| 5 |
★★ Curly
Rap of two bolts (require hangers) to a ledges. Climb up crack systems to top. FA: JC & Peter Nidd, 1994 | 15 | 35m | |||||
| 6 |
★ Mo
Start a few meters right of Curly and go up offwidth onto face FA: Peter Nidd & JC, 1994 | 15 | 30m | |||||
| 7 | ★★ More Training | 15 | 35m | |||||
|
Established circa 1994 by Alan Rokich, Peter Nidd and John Considine. | ||||||||
1.7.3. Red Back Buttress 4 routes in Sector
- Summary:
-
All Trad climbing
| Route | Grade | Style | Selected ascents | |||
|---|---|---|---|---|---|---|
| 1 |
★ Have a Go
FA: C. Slee & R. Weiter, 2013 | 20 | 15m, 2 | |||
| 2 |
★★ You Better Eat Your Wheaties
FA: R. Weiter & C. Slee, 2013 | 21 | 18m, 1 | |||
| 3 |
★ Black Widow
FA: R. Weiter & C. Slee, 2013 | 19 | 20m | |||
| 4 | ★ Red Back | 18 | 20m | |||
1.7.4. First Birthday Groove 4 routes in Area
- Summary:
-
All Trad climbing
 |
||||||||
| Route | Grade | Style | Selected ascents | |||||
|---|---|---|---|---|---|---|---|---|
| 1 | Lets Slip and Slide | 15 | 60m | |||||
| 2 | First Birthday Crack | 15 | 35m | |||||
| 3 | ★★ Sunshine Superman | 15 | 70m | |||||
| 4 |
★ Cosmic Debris
Good exposed climbing on a nice clean wall. Excellent rock, well protected and enjoyable at the grade. Abseil 50m from the top of the Sunshine Superman wall just north of The Supergroove at the 2 hex bolts on the boulder that caps the wall. Looking down from the top of the overhang you will see a large flake system. When you pass an eyebolt after 30m or so trend north slightly to the staircase ledges and belay on large cams. Pitch 1, 30m. Up the blocky crack system and past a series of horizontal breaks to a curving fingercrack and bolt (crux). Belay just after this on the ledge to the right. Pitch 2, 20m. Step left from the belay and head straight up the wall on thin protection to finish directly through the small roof. J. O Herlihy, K. Hartley, M. Rosser. Feb. 11 | 15 | 50m, 2 | |||||
1.7.5. Supergroove 12 routes in Area
- Summary:
-
All Trad climbing
Lat / Long: -35.129737, 117.610712
summary
DANGER a major rockfall occured on Blunt but Nosey in January 2022 and neighbouring routes may also have been destabilsed. Please keep away from this area until it has been assessed.
 |
||||||||
| Route | Grade | Style | Selected ascents | |||||
|---|---|---|---|---|---|---|---|---|
| 1 |
★ Let Their Boyfriends Sort It Out
(i) (18) Start as for A Shot At Redemption, move delicately up and over the arête (crux), then step left onto the face. Follow the aesthetic meandering crack up the face to belay ledge. (ii) (15) Continue up large blocks to finish. FA: Rob Kettels & Adam Straw, 25 Oct 2014 | 18 | 50m, 2 | |||||
| 2 |
★ Gorilla Grip
Start as for a shot at redemption, following pinch flakes to arête which is turned on the left. Follow wall left of arête (avoiding crack of let them sort it out) to ledge using horizontals for gear. To top as for 'a shot..' FA: Graeme thomson, rachel & rachel thomson | 19 | 50m | |||||
| 3 |
★★ A Shot at Redemption
Warning Rock: DANGER - MAJOR ROCKFALL RISK | 19 | 50m | |||||
| 4 | ★ Renaissance | 15 | 55m | |||||
| 5 |
★ Blunt But Nosey
Warning Rock: DANGER - MAJOR ROCK FALL RISK | 23 | 55m, 2, 2 | |||||
| 6 |
Exelsior
One of the first routes done at West Cape Howe, and perhaps a little sandbagged. Climb the offwidth/chimney width crack immediately left of Planar Craving. This route is often wet and very slimy. | 11 | 45m | |||||
| 7 |
★★★ Planar Craving
Warning Rock: DANGER - MAJOR ROCKFALL RISK Classic! Climb up steepening slab using small cracks and flakes for protection. This climb gets harder as you get higher. Finish at hanging DBB. FFA: D. Wagland, R. Muhlen-Schulte & S. Richardson, 1990 | 21 | 50m, 5 | |||||
| 8 |
★★ Mystery
Seven bolts and a few bits of gear. Similar to Planar Craving but climb on right side of slab. Excellent finish up the steep headwall. FFA: G. Brysland, 1992 | 21 | 50m, 7 | |||||
| 9 | Excalibur | 16 | 55m | |||||
| 10 |
★★★ Plumb Jamb
Follow left trending weaknesses ad cracks to obvious large horizontal crack and construct belay. Climb up vertical cracks to cave and skirt out rightwards. | 18 | 70m, 2 | |||||
| 11 |
★ Fig Jamb
Start as for plumb Jamb then go right and through roof rather than escaping left. continue up seam until about 2m lower than the plumb Jamb belay ledge. Place extended pro then traverse back and finish as for Plumb Jamb. FA: Trent Charleson & Tom Wiltshire | 18 | 35m | |||||
| 12 |
★★★ Didi Wa Didi
Hangers required for bolts. Pitch 1 (22) 45m: Start up crack to the right of Plumb Jamb. Move right and up steepening wall. Avoid large horizontal breaks on arete until you meet the arete. Pitch 2 (14) 25m: Up easy ground to top. Loose blocks FFA: R. Muhlen-Schulte & D. Wagland, 1990 | 22 | 70m, 2, 2 | |||||
1.7.6. First Route Gully 24 routes in Area
- Summary:
-
All Trad climbing
| Route | Grade | Style | Selected ascents | |||||
|---|---|---|---|---|---|---|---|---|
| 1 |
★★ Orion’s Belt
Abseil further down the gully trending over to the northern side passing the base of Easy Day For The Gentlemen to a square cut ledge to belay on medium to large cams. Pitch 1, Gr 13, 10m Step across to the wall and traverse left on the two large horizontal cracks to a double bolt belay in a fantastic position on the small triangular platform capped by a roof on the arête. Pitch 2, Gr 14, 30m Traverse right a couple of metres from the belay then straight up the middle of the wall past a bolt (hanger required) and into the fingercrack. Continue up and right to belay on a small ledge just left of the chimney. Pitch 3, Gr 12, 30m Either meander up the wall above (Gr12) or better, climb up and right from the belay a few metres then step across the chimney and climb the upper section of Easy Day. Finish at the eyebolts. J. O Herlihy K. Hartley Feb 12 | 14 | 70m | |||||
 |
||||||||
| Route | Grade | Style | Selected ascents | |||||
| 2 |
★ Orion
Abseil off bolts on top of Supergroove. 60m rope will get you down groove a fairway where it is possible to scramble down 10m to large ledge. Otherwise, do a double abseil. Fist pitch: Climb up vertical weaknesses on right side of arete to a small roof. Climb left of roof, then out left to double bolt belay (needs hangers) on a small triangular ledge. Second pitch: Keep right of arete. | 17 | 75m, 2 | |||||
| 3 |
★★ Orion Direct
As for Orion but start directly below blunt arete in front of headwall at the base of climb on platform. Take direct line straight up the wall and continue on as for Orion to 1st belay FA: Anthony Brandis | 18 | 75m, 2, 2 | |||||
| 4 | ★ Tripping Upstairs | 13 | 85m | |||||
| 5 |
★★ Star A.D.
Starts down near Jump for Joy and Tripping Upstairs. Can be reached from the chains on the ledge where BM starts with an extra 15m or so of static or alternatively use your lead rope. An excellent varied line. Climb the superb face on the clean west facing wall on edges and flakes past the horizontal cracks until a couple of metres below the roof. Traverse right and step over the void at the layback crack. Up this, then onto the arête and face on good holds to the top. Bridge the final slab and finish at the DBB. 6 bolts (hangers required) plus small cams and wires. K. Hartley. J. O Herlihy. Feb 12. | 19 | 35m | |||||
| 6 | Jump for Joy | 12 | 40m | |||||
| 7 | ★ Southern Ocean Swell | 12 | 50m | |||||
 |
||||||||
| Route | Grade | Style | Selected ascents | |||||
| 8 | ★★ An Easy Day For The Gentlemen | 12 | 40m | |||||
| 9 | Simon Sez | 11 | 30m | |||||
| 10 |
★ Havana
Conspicuous line of 6 U-bolts. FA: R. Tyson, 1998 | 19 | 40m, 6 | |||||
| 11 | Kathy | 14 | 24m | |||||
| 12 |
Tourettes Arête
Start as needles eye staying out of the crack then head up left arête all on natural gear to belay bolts on crown of thorns 40m gr14. | 14 | 40m | |||||
| 13 |
Carrots are for Casseroles
10m left of crown of thorns stand on large boulder then fire up arête 3 bolts and small to med gear to dbl bolt belay.enjoy | 15 | 18m | |||||
| 14 |
★ Crown Of Thorns
Takes the line up the west facing wall on the buttress to the left of Needles Aye. Start just left of the large flake and trend up and slightly left past three ring bolts. Through the overlap and up the middle of the slab passing some more bolts and various natural protection to finish at eyebolts. J. O Herlihy, K. Hartley. Feb. 11 | 17 | 25m | |||||
| 15 | Needles Aye | 5 | 45m | |||||
| 16 |
★★ Body Builder
Gnarly hand crack up the bulging west wall. Easy to spot. Watch out for killer swallows and bird shit. | 22 | 30m | |||||
| 17 |
★ Black Magic
Nice climbing and great rock on the north facing wall with the obvious diagonal crack, (below Body Builder). You can get to the start by abseiling from the top of WOB (north side of gully) then trending south to a directional bolt (american hanger) and down to the chains on the spacious ledge. Step across the crevasse onto the middle of the wall and a bolt. Head up and slightly left past another two bolts toward the diagonal crack, along this then straight through the overlap past two more bolts to finish at the DBB (Hangers required). Take small to medium cams. J. O Herlihy, K Hartley. Feb 12. | 17 | 15m | |||||
| 18 |
★★ Fishbone Arete
Located on the south facing wall of the huge block at the top of First Route Gully. Approach by abseil from the two bolts at the top (hangers required). Belay in the gully at the base of the short wide crack. Up this, then climb the superb clean slab and arête passing 3 bolts (hangers required) with small to medium cams in the horizontal breaks. https://www.climberswa.asn.au/topic/wch-new-routes/ K. Hartley, M. Rosser. Feb. 11 | 18 | 15m | |||||
| 19 |
★ The Truth
The right trending hand crack opposite Fishbone Arete finishing at a lower-off. K. Hartley. J. O Herlihy Feb 12. | 17 | 15m | |||||
| 20 |
★ "Up for Grabs" (open project)
18/19? Just right of The Truth is a great steep face climb that ends at the same lower-off. We top roped it the day we bolted it but never got back to tick it. It takes some small cams and has three bolts (hangers required) Go get it! | 15m | ||||||
| 21 |
★★★ King For A Day
Sustained climbing up the obvious steep north facing wall and arête of the huge block. Approach via a short abseil from the two hex bolts above the wide corner crack.. Pre-place the first draw and clip your lead rope to it on abseil.(Really needs to be rebolted!) Up the offwidth to the large horizontal break. Traverse right to the undercling, then up to a good edge near the second bolt. Continue traversing right (crux) then head up the face trending right to the arête and get a bit of a rest. Continue up the face and arête passing a couple more bolts to the victory jug. 6 bolts (hangers required, sorry!) K. Hartley, Feb 12. | 23 | 20m | |||||
| 22 |
Me And The Devil
Start at the base of the thin crack and arête left of KFAD on the short west facing wall. Up the crack that takes a small cam to a stance on the small boulder. Climb the arête passing two bolts (hangers required). K. Hartley. J. O Herlihy, Feb 12. | 19 | 12m | |||||
| 23 |
(Open Project)
Clip the high bolt just right of MATD and dyno from the crescent shaped crimp to the horizontal crack. Traverse left and finish up the arête. Good luck! | 12m | ||||||
| 24 |
★ The Whore Of Babylon
Access via abseil from the two ring bolts located just below the top of the gully on the north side Nice climbing starting next to the cairn halfway down the gully to the right of a bolt. Up the slab through horizontal cracks and flakes before moving towards the arête as it steepens near the top. 3 bolts (hangers required) and natural protection. Finish at the abseil anchor. J. O Herlihy, K. Hartley. Feb 12. | 14 | 30m | |||||
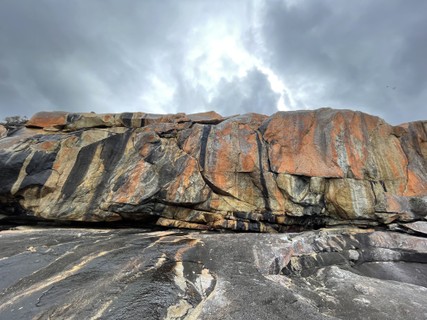
1.8. The Raft 78 routes in Cliff
- Summary:
-
All Trad climbing
Lat / Long: -35.131088, 117.610670
description
A little less intimidating than the other areas, The Raft offers great climbing that is usually accessible in high seas, and is usually protected from the wind!
approach
Walk south from car park along cliff line for aprrox 300m (8-10 mins). A large orange platform with a large rock cairn marks the descent area for Vulture Street. All the climbs can also be reached by walking further south of the Vulture Street Area to a point where a rock cairn marks a steep scramble to the base of the climbs.
1.8.1. The Mincer Area 8 routes in Area
- Summary:
-
Lat / Long: -35.130340, 117.610676
 |
||||||||
| Route | Grade | Style | Selected ascents | |||||
|---|---|---|---|---|---|---|---|---|
| 1 |
★ Better Than Chocolate
South Coast Rock description could be wrong. See update from first ascender: * Better Than Chocolate (75m, 21) – correction of route description from email by Scott Camps, May 2013: I clarify a route I climbed at West Cape Howe back in 1993 Better Than Chocolate which I then graded 19. It is incorrectly reported in Shane Richardson’s South Coast Rock guide to the left of its actual position. When it should have actually been described as the shallow finger crack corner immediately to the right of description in the guide, then ascends the middle of the beautiful chocolate wall left of The Mincer. In 2006 I repeated this route and believed it to be more like 21 but was appalled to find it had been mindlessly retro bolted? | 21 | 75m, 2 | |||||
| 2 | Jam Session | 12 | 85m | |||||
| 3 | Tossin' A Wobbler | 16 | 70m | |||||
| 4 | The Mincer | 9 | 67m | |||||
| 5 |
★★ The Last Goodbye
The Last Goodbye, Ronald Master, Ian Johnson, Gd 21, two pitches 55m, 13 glue in bolts (hangers needed) two DBB Approach: Walk to the mincer and at the top of the long face you will find two P bolts in the centre of the face between the Mincer and Striptease. Abseil from these down to a large ledge about 10m above the water with a double bolt belay. You will need a full rack of cams up to number 5 camelot including some micros plus a set of wires up to size 6 or 7 rocks. Pitch 1, 25m, gd 19, 8 bolts. Start from the ledge and launch up the wall following a series of in-cut edges and flakes. Head straight up the wall following the flakes and bolts up solid rock with some interesting and fairly sustained moves. Aim for the belay station slightly to right of the alcove. Pitch 2, 30m, gd 20, 5 bolts. Move up and slightly left into the beautiful hand/finger crack. Several good wires and cams can be place before clipping the bolt about 10m up. The crux is found at the top of the crack where a couple of long dynamic moves are needed to gain a good hold. Trend slightly left into the horizontal break and another good cam placement before clipping the next bolt. Move up the wall on slopping holds before clipping another bolt and some good cams. Move over easier ground clipping two more bolts as you go and a couple of cams. | 21 | 55m, 2 | |||||
| 6 | ★ Striptease | 16 | 65m | |||||
| 7 | ★ I Can't Like It | 22 | 60m | |||||
| 8 |
★★★ California Dream
Rap 60m or so from the two glue in staples just over the edge (you can scramble to them safely). You will rap 'into space' over the roofs. Make a semi-hanging belay at the start of the steeper climbing. L1 (18, 25m(?)): head up the steep hand and fist cracks on excellent rock, strait through the roofs (easier than it looks), with a step right at the crux. Belay when it eases off. L2 (14 35m(?)): an easy pitch on poorer rock. ?FA Rob Wall / Konstanze Stuebner, Dec '19. Its hard to believe noone has climbed this, as the first pitch is really three star - the jamming feels more like USA than WA !. Anyone out there know? FA: me? | 18 | 70m, 2 | |||||
1.8.2. Vulture Street Wall 16 routes in Area
- Summary:
-
Lat / Long: -35.130569, 117.610696
  |
||||||||
| Route | Grade | Style | Selected ascents | |||||
|---|---|---|---|---|---|---|---|---|
| 1 |
★★ Epitaph
Pitch 1, 30m 22. Go up trending left for 15m over some cruisey terrain to a short traverse before continuing up to the base of a thin crack. Up the thin crack onto the ‘Tombstone’ ledge. Small cams in the crack. Jonas Hollingworth – 01 Jun 14 Pitch 2. Finish as per final pitch on ‘Tombstone’. FA: Jonas Hollingworth, 1 Jun 2014 | 22 | 65m, 2 | |||||
| 2 |
★★ Thank God I'm an Atheist
Thank God I’m An Atheist 68m 18 Pitch 1, 33m 18. A variation avoiding the thin crack on ‘Epitaph’. From the thin crack continue left to another vertical crack leading to the ‘Tombstone’ ledge. Jonas Hollingworth – 01 Jun 14 Pitch 2. Same as pitch 2 of Tombstone. FA: Jonas Hollingworth, 1 Jun 2014 | 18 | 68m, 2 | |||||
| 3 |
★★★ Tombstone
Start from below Plumbline and travers left for 20 m and belay from below vertical crack. Second pitch is gold. Layback or fist jam your way up to nice hand jamming and finger locking. Belay from large ledge then go up chimney and keep going to top. First two pitches can be combined into one mega-pitch, but rope drag needs to be managed | 20 | 60m, 3 | |||||
| 4 | ★ I Wanna be a Cop Too | 21 | 60m | |||||
| 5 | Mustn't Go Down to the Sea Again | 16 | 55m | |||||
| 6 | ★★ Plumbline | 11 | 55m | |||||
| 7 | ★ Coast to Coast | 15 | 55m | |||||
| 8 | ★ Sleepwalking | 18 | 55m | |||||
| 9 | ★★★ Vulture Street | 17 | 50m, 1 | |||||
| 10 | ★★ Vampire Street | 20 | 50m | |||||
| 11 | Yawnup | 5 | 60m | |||||
| 12 | Seven Up | 11 | 60m | |||||
| 13 | Pig Face Gully | 5 | 50m | |||||
| 14 | The Price Is Right | 11 | 20m | |||||
| 15 |
★ Dark Arts
Steep line right of Vulture Street below the overhanging corner. Follow 4 BRs plus natural pro to DBB Some interesting discussions around bolting ethics: https://www.climberswa.asn.au/topic/new-climbs-west-cape-howe/ FA: J. Nevin, K. Hartley & J. O'Herlihy, 2011 | 15 | 25m, 4 | |||||
| 16 |
Dreadnought
Dreadnought, Grd 20, 40m, 5 bolts (need hangers) + micro to number three cams. Ronald Master, Mike Taylor, Dec 2012 Approach Abseil from the P bolts at the top of Dark Arts (adjacent to the gully forming the vulture street wall). The climb starts about 15m to the right of Vulture Street and about 10m above on a terrace in the gully (to the left of Dark Arts). The start is a shallow groove/crack that is between Vampire Street and the gully and heads straight up the wall to the blunt nose/arête on step fantastic rock. Description The climb starts in an awkward and strenuous shallow flared crack. Clip the bolt and layback/jam up passing a second bolt. Lunge for the horizontals and up to a good number 2 or 3 cam in some big horizontal breaks. Stay on the wall moving up past another 3 bolts over technical and sustained ground on shallow rounded horizontal breaks and some sharp crimps. The final move of the crux section is a lunge for a shallow v shaped alcove on the blunt arête. Pull into this placing a small cam and head up the steep juggy blunt arête/nose with plenty of cam placements. Belay on Dark Arts descent bolts and a large cam. https://www.climberswa.asn.au/topic/new-climb-at-west-cape-vulture-street-wall/ | 20 | 40m | |||||
1.8.3. Gay Blade Area 21 routes in Area
- Summary:
-
Lat / Long: -35.130784, 117.610682
 |
||||||||
| Route | Grade | Style | Selected ascents | |||||
|---|---|---|---|---|---|---|---|---|
| 1 | Rugosity | 12 | 50m | |||||
| 2 | Naughty But Nice | 17 | 50m | |||||
| 3 | Nice and Happy | 11 | 50m | |||||
| 4 | Happy Families | 7 | 60m | |||||
| 5 | Ribald | 10 | 60m | |||||
| 6 | Mustcumup | 8 | 50m | |||||
| 7 |
★★ Tights, Camera, Action
Excellent arete, face and crack climbing.
Set: M. Law & R. Tyson, 1988 | 25 | 50m, 2, 3 | |||||
| 8 | ★ Bloody Sunday | 20 | 50m | |||||
| 9 | ★★ Gay Dawn | 16 | 50m | |||||
| 10 | ★★ Nameless | 16 | 50m | |||||
| 11 |
★★ Gay Blade
All bolts were replaced a few years ago. Theres also 2 ring bolts at top of first pitch so you can low off also Set: M .Law & R. Tyson, 1988 | 27 | 50m, 2 | |||||
| 12 | ★ Endless Highway | 20 | 40m | |||||
| 13 | West Cape Cooler | 20 | 50m | |||||
| 14 |
★ Wish You Were Here
First ascent by Guy Duczynski and Paul Maroney 1892. There was a large chockstone in the headwall crack. It was dislodged on the 1st ascent | 16 | 60m | |||||
| 15 | Next Stop Antarctica | 22 | 25m | |||||
| 16 | ★★ Repetition | 13 | 50m | |||||
| 17 | Bill | 4 | 40m | |||||
| 18 | Ten Year Twitch | 10 | 40m | |||||
| 19 | Matador | 12 | 40m | |||||
| 20 |
★★ Vintage
Chimney/Groove/Head-Wall | 17 | 25m | |||||
| 21 | ★ Retrospection | 12 | 15m | |||||
1.8.4. Pulsar Buttress 12 routes in Area
- Summary:
-
Lat / Long: -35.131167, 117.610730
| Route | Grade | Style | Selected ascents | |||
|---|---|---|---|---|---|---|
| 1 | Melitab | 13 | 17m | |||
| 2 | Juggler | 18 | 25m | |||
| 3 | ★ One Of These Days | 18 | 26m | |||
| 4 | ★ Pomnambulist | 11 | 40m | |||
| 5 | ★★ Pulsar | 14 | 40m | |||
| 6 | Jellybean | 15 | 40m | |||
| 7 | ★ Tan Tay Lan | 17 | 20m | |||
| 8 | Fang | 8 | 45m | |||
| 9 | Belay With a Bullant | 10 | 40m | |||
| 10 | Line Squall | 8 | 20m | |||
| 11 | Rozamatoz | 10 | 20m | |||
| 12 | Blood Sucking Turds | 22 | 15m | |||
1.8.5. Lower Raft 13 routes in Area
- Summary:
-
Lat / Long: -35.131561, 117.610363
| Route | Grade | Style | Selected ascents | |||
|---|---|---|---|---|---|---|
| 1 | Mainstreet USA | 14 | 15m | |||
| 2 | Southern Highway | 8 | 15m | |||
| 3 | Bigfoot | 6 | 15m | |||
| 4 | Bar Reef | 8 | 40m | |||
| 5 | Lifeline | 12 | 40m | |||
| 6 | Needle and Thread | 7 | 40m | |||
| 7 | Drumstick | 11 | 40m | |||
| 8 | ★ Bloomers | 10 | 40m | |||
| 9 | Wave Surge | 11 | 50m | |||
| 10 | Matchstick Men | 9 | 50m | |||
| 11 | ★★ Calm Before the Storm | 10 | 45m | |||
| 12 | Fangstobaz | 11 | 45m | |||
| 13 | ★ 50 - 50 | 12 | 45m | |||
1.8.6. The Spars 8 routes in Area
- Summary:
-
Lat / Long: -35.131678, 117.610938
| Route | Grade | Style | Selected ascents | |||
|---|---|---|---|---|---|---|
| 1 | Toowindy | 5 | 7m | |||
| 2 | Ants | 12 | 30m | |||
| 3 | Gone With The Wind | 9 | 15m | |||
| 4 | Wibbledy Wobbledy | 9 | 20m | |||
| 5 | Rank | 4 | 15m | |||
| 6 | Cookie Monster | 10 | 30m | |||
| 7 | Vertino | 9 | 20m | |||
| 8 | Bucket Seat | 5 | 18m | |||
1.9. Styx Gully 11 routes in Cliff
- Summary:
-
All Trad climbing
Lat / Long: -35.132532, 117.611231
description
Only has a handful of climbing, but the the exposed faces and cracks make up for the lack of quantity.
approach
Follow disused 4WD track running south of car park to a small cleared area. After about 40m, walk down a hidden path on the right. Continue for about 5 minutes and scramble down steep gully.
The base of the climbs can be reached without abeseiling
1.9.1. North Side 5 routes in Area
- Summary:
-
| Route | Grade | Style | Selected ascents | |||
|---|---|---|---|---|---|---|
| 1 | ★★ Five Star | 20 | 65m | |||
| 2 | ★ State of Excitement | 17 | 60m | |||
| 3 | ★ Greenfinger | 15 | 65m | |||
| 4 | ★ Wild GSI | 20 | 20m | |||
| 5 |
Alien
FA: R. Weiter & J. Gregg, 1998 | 17 | 30m | |||
1.9.2. South Side 6 routes in Area
- Summary:
-
| Route | Grade | Style | Selected ascents | |||
|---|---|---|---|---|---|---|
| 1 | Rough and Crumble | 17 | 30m | |||
| 2 | Bombs Away | 11 | 40m | |||
| 3 | Identified Flying Stitch Plate | 13 | 50m | |||
| 4 |
On the cross
On the cross 50m 17 i. 20m: start at the blocky corner which leads to a right trending wide flake, the obvious line located in between Identified Flying Stitch Plate and Three’s a Crowd at the Styx Gully South Side. Good climbing but flaky crust makes the first 20m interesting until the large stepped ledge is reached. Big cams up to #5 recommended. Extend this pitch another 15m if rock is not sound enough… ii. 30m: Up the chossy corner to the top being careful not to break and drop anything down. FA: 26/01/2014 Remi Vignals, Delphine Chabanne https://www.climberswa.asn.au/topic/west-cape-howe-3-new-routes/ | 17 | 50m | |||
| 5 | Three's a Crowd | 10 | 45m | |||
| 6 | ★ Stargrazer | 19 | 63m | |||
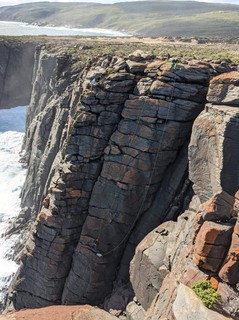
1.10. Throne of the Gods 51 routes in Cliff
- Summary:
-
Mostly Trad climbing
Lat / Long: -35.132825, 117.612731
description
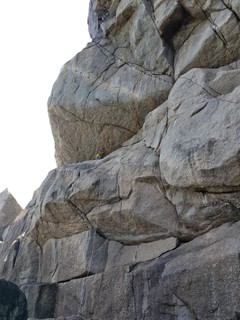
Home to technical slabs, overhung walls and cracks! There is a bit of everything on offer.
approach
Walk up disused 4wd track running south of car park to small cleared area. Continue for 80m and turn left down a small track towards the cliff line.
descent notes
Scramble down steep gully to the west of the Claw's Wall.
1.10.1. The Throne Room 22 routes in Area
- Summary:
-
Mostly Trad climbing
Lat / Long: -35.133046, 117.612373
  /fb/8a/fb8a1f833f1d9fba1fa5390df996c64a52429e37) |
||||||||
| Route | Grade | Style | Selected ascents | |||||
|---|---|---|---|---|---|---|---|---|
| 1 |
Project
Follow a corner crack up to ledge and roof crack. DBB at the top of the ramp. | 20m | ||||||
| 2 |
Unnamed
Aided to gain access to the ramp above. Elinor Fleming & Peter Zhang 23/12/2018 FA: 23 Dec 2018 | AID:A1 | 20m | |||||
| 3 |
★★ A Call To Arms
A beautiful line of underclings and laybacks. 2nd pitch of 3. Starts under the huge roof on the left side of The Throne Room. Recommend to move the belay about 10m to the right to a ledge below the start of the obvious line. Follow series of underclings until it ends, reach across to join the crack system on the left and continue up the steepening crack to the anchor. Double bolt belay. Can be reached by going up the first pitch or rappel down from the top to under the large roof. There's a DBB at the top of the ramp under the roof. Peter Zhang, 30/Nov/2019 FA: Zhangter P, 30 Nov 2019 | 23 | 20m | |||||
| 4 |
Zeus
This direct line goes up the main wall on the left side of the Throne Room. The crack goes directly up for 80m through several roof cracks. Done on trad gear aid, with only minor free climbing. It was done in 6 pitches due to drag from the all the roofs. A committing adventurous outing and will be a test piece free route at ~26/27? Bolted anchors were placed before and after the first major roof so people can bail and to make things user friendly as a variant in this roof is being worked that hopefully people will jump on as a separate single pitch route. Logan Barber, Scott Boladeras, Jan 2010. FA: 2010 | AID:A1 - 2 | 80m, 6 | |||||
| 5 | Corruption in High Places | 23 | 30m | |||||
| 6 | Bobby Dazzler | 21 | 30m | |||||
| 7 | Police Brutality | 14 | 55m | |||||
| 8 | ★ Legal Limits | 19 | 30m | |||||
| 9 | Truculent Truncheons | 18 | 20m | |||||
| 10 | ★★★ Corruption in Higher Places | 24 | 80m | |||||
| 11 | Wet Work | 19 | 40m | |||||
| 12 | Gallery Theft | 16 | 25m | |||||
| 13 | Tinkering Transience | 20 | 25m | |||||
| 14 | Tern | 8 | 35m | |||||
| 15 | Two Whales | 11 | 40m | |||||
| 16 | Sandgroper | 13 | 10m | |||||
| 17 | Exodus | 9 | 35m | |||||
| 18 | Handsome Ken | 12 | 10m | |||||
 |
||||||||
| Route | Grade | Style | Selected ascents | |||||
| 19 | Babie Doll | 11 | 10m | |||||
| 20 | ★★ Astroboy | 17 | 9m | |||||
| 21 | Pygmies on Parade | 10 | 8m | |||||
| 22 |
★ Hephaestus
A short hidden gem perfect for a warm up lead, top rope run or when the rest of the Throne Room cracks are wet. A few moves of face climbing to gain a fist crack. Punch it as it starts to get steep, following the crack up then slightly right to gain the upper hand size crack to top. Stellar climb, just wish it was longer! FA: Chris Miller | 18 | 10m | |||||
1.10.2. Claw's Wall 5 routes in Area
- Summary:
-
Trad climbing and Sport climbing
Lat / Long: -35.132468, 117.613010
| Route | Grade | Style | Selected ascents | |||||
|---|---|---|---|---|---|---|---|---|
| 1 |
★ Ice Cream for 4Play
Right trending diagonal handcrack to vertical finger crack before pulling over the lip to the slab. Located on the large left block as you scramble up from The Throne Room towards Elegantly Wasted. Belay from bottom ledge. FA: Brian Tan & Peter Zhang, 14 Feb 2015 | 19 | ||||||
| 2 |
★★★ Elegantly Wasted
Technical face climbing, small-med wires and 3 bolts, 2 ring bolts added at the top for lower off so you don't have to top out amongst loose blocks etc. FA: S. Richardson & S. Aegerter, 1997 | 25 | 20m, 3 | |||||
| 3 |
★★★ Twitch to Glory
If you like crimps and slabs you'll love this. Twitch up the wall past 7 bolts to a double ring bolt lower off. FA: M. Law & R. Tyson, 1988 | 27 | 25m, 7 | |||||
| 4 |
★ Gatling
60m rope needed for lower-offs. FA: R. Weiter & C. Slee, 2013 | 19 | 30m | |||||
| 5 |
★★ Pistolero
Follow cracks to lower-offs of Gatling. FA: R. Weiter & J. Gregg, 2002 | 18 | 30m | |||||
/21/a9/21a93f4d0a6d0e2b6bdb399276bb953aa79c32f6) 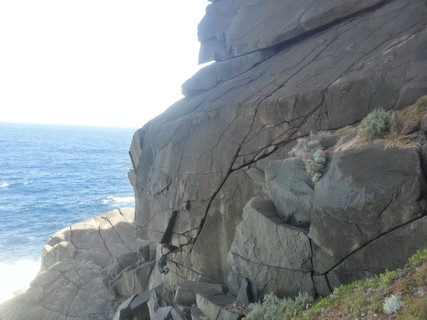 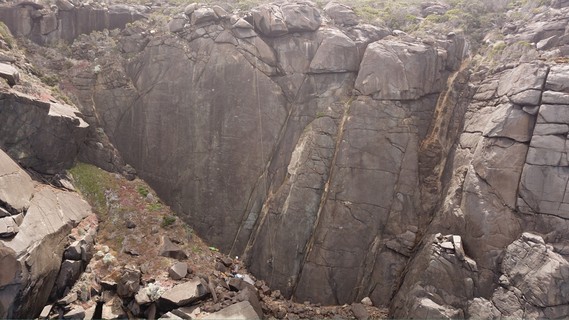 |
||||||||
1.10.3. Watson's Buttress 3 routes in Area
- Summary:
-
All Trad climbing
Lat / Long: -35.132371, 117.613457
| Route | Grade | Style | Selected ascents | |||
|---|---|---|---|---|---|---|
| 1 | Delicatessen | 11 | 30m | |||
| 2 | Jon Jon | 8 | 30m | |||
| 3 | Gannet | 10 | 40m | |||
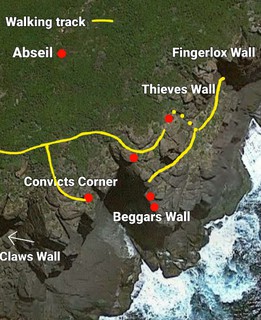
1.10.4. Convict's Corner 21 routes in Area
- Summary:
-
All Trad climbing
Lat / Long: -35.132478, 117.613697
description
A good collection of climbs that vary in styles and grades. One of the better areas at west cape howe with a large concentration of quality routes.
access issues
Don't try to access these walls from the base. It is generally wet down low, covered in barnacles and the bottom ledge is prone to waves.
approach
Follow the trail further east of claws wall following rock cairns and staying well back from the edge of the cliff. Dogleg slightly uphill and through the bush following more cairns eventually leading to a boulder capping the top of Beggars wall. There are two abseil stations. One is on the edge of a large boulder to the right (west), above yellow peril (requires bolt plates) and gives access to critical mass, lab rat and show pony, as well as convicts corner and yellow peril. The other is bolted with fixed hangers and is 20m further east. Take a short static (20m or so) to rap down to a large vegetated ledge system. Walk east to access thieves wall, fingerlox and sexy buttress or west to get to the south side of beggars wall. Two more bolted rap stations give access to the upper ledge and lower ledge routes on this wall and require bolt plates. Be careful approaching these.
  |
||||||||
| Route | Grade | Style | Selected ascents | |||||
|---|---|---|---|---|---|---|---|---|
| 1 |
★ The Golden Years
Abseil down the slab which is roughly halfway along the main south face of convicts corner. Check access topo to locate this rap station (requires bolt plates). Starts in an obvious alcove and climbs the face of the large flake before stepping right and continuing up the slab above. Gear and a few bolts (bolt plates required). FA: J. Herlihy & K. Hartley, 2020 | 14 | 20m, 3 | |||||
| 2 |
★★★ Welcome Reality
Excellent arete climbing in an exposed position. Abseil further down the slab than the previous route to a semi-hanging belay (bolt plates required). Climb the short corner then step right towards the arete. Climb the sustained thin crack and slab up the edge of the huge wall. As the climbing eases, step left and follow the bolts up the slab to the top. Take a standard rack with rp's, micro cams, and bolt plates. FA: R. Master & K. Seewraj, Dec 2020 | 20 | 30m, 4 | |||||
| 3 | ★★ Convict's Corner | 22 | 70m | |||||
| 4 | ★★ Yellow Peril | 14 | 70m | |||||
| 5 |
★★★ Critical Mass
Solid and sustained climbing up an intimidating wall. Two traverses, two roofs and multiple cruxes make it a memorable and exposed outing. Take a full rack up to no.3 camalot, some long draws and a few extra small cams around .3/.4. Abseil 30m down the huge corner system from the top of Beggars wall to belay at the two eybolts on the slab. Step up and onto the face from the belay and traverse left along the rail past three ringbolts to the flake. Up this to the first roof. Bouldery moves up and right to the ledge above then a rightwards traverse passing another bolt to good holds. Up the face trending left following the curving cracks. Jam, stretch and squeeze your way over the roof to finish at the ledge and DBB FA: K. Hartley & K. Seewraj, Dec 2020 | 22 | 30m, 4 | |||||
/4d/f2/4df2446c12d90df2afca98abfeee319ccec46363) |
||||||||
| Route | Grade | Style | Selected ascents | |||||
| 6 |
★★ Showpony
Abseil 50m down the south side of the huge flake (yellow peril) from the top of Beggars wall. There is a rap station on the edge of the boulder with the small cave (bolt plates required). The route starts about 15m or so up from the base of the cliff at a DBB. Step left onto the flake at the fixed hanger and climb the edge of the flake up the slab following the thin cracks. At the top of the flake step right and follow the fixed hangers through the steepening headwall with a couple of mid-sized cams along the way. Up through under-clings to the horizontal break then traverse left a couple of metres to a vertical crack. Follow the crack for a few metres then climb the slab past another bolt. Very small wires and micro cams required. Take plenty of draws. FA: K. Hartley & J. Herlihy, Nov 2020 | 17 | 45m, 6 | |||||
| 7 |
★★ Lab Rat
A great long pitch up the face to the right of the yellow peril flake. Starts at the same belay as showpony following br's up the steepening slab (bolt plates required). Take gear for the horizontal cracks and after it gets steep, trend-right to a trad belay on the ledge below the huge roof. FA: L. Grieve & J. Herlihy, 2017 | 18 | 40m, 8 | |||||
| 8 |
★★ The Next Big Thing
The following routes are reached by abseiling from the two hex bolts accessed from the large vegetated ledge system. The climb starts from the lower ledge on the main face at a natural belay. Climb up and leftwards along hand crack until at the thin crack/seam. Up past a ringbolt to the steepening headwall. Balance up through the horizontal cracks to a thin section and another bolt. Up the short flared groove to finish at a trad belay on the ledge below the large roof. FA: M. Rosser & K. Hartley | 18 | 25m, 2 | |||||
| 9 |
Pheasant Plucker
An older rambling line on the right of the easy angled slab. Abseil down to the first or second ledge depending on the swell. The lower is a slightly harder line. Trend left along the diagonal cracks on either line then up through a steeper section with horizontal breaks.Continue straight up or move right to a large crack. Two ropes are useful owing to rope drag. J.Nevin ca. 2001 | 11 - 13 | ||||||
| 10 |
★ Pheasant Plucker direct
Starts from the lower ledge. Step left and climb up past two ringbolts to a blank section. Run it out up to the vertical crack, then finish straight up the face. FA: J. Nevin, 2020 | 14 | 25m, 2 | |||||
| 11 |
★★ Beggars Banquet
Starts from the upper ledge at a double bolted belay (requires bolt plates). Climb up and left from the belay, through the roof then straight up the face above. Gear and a few bolts (require bolt plates). FA: J. Herlihy, 2015 | 15 | 20m, 4 | |||||
| 12 |
★ Stress Test
Climb the thin face past three bolts just right of the belay to a tricky move before the horizontal break. Finish up the hand crack and wall above. FA: R. Master, 2015 | 21 | 25m, 2 | |||||
| 13 |
★ Athena
Starts at the south side of the upper ledge. Traverse right past a bolt to gain the arete. Up this to finish up the scaly face. Great rock and position. Take gear and bolt plates. FA: J. Herlihy, 2015 | 14 | 25m, 2 | |||||
| 14 |
★★ Reality Bomb
Abseil to the horizontal crack/ledge at the base of the right trending seam 10m to the left of the Xanthe. This is the narrow wall on the south side of the main slab. You will need a full rack of micro to medium cams and bolt plates. Set up a belay using the bolt and the horizontal crack. Head straight up the sustained wall to the first bolt staying to the right of the seam. Continue on rounded holds towards the second bolt on exposed steep rock (crux). A third bolt is passed before a horizontal break and broken crack system is reached providing the first real relief, small cams can be used here (1-2). Head up the broken crack through a large under cling to the base of the concave wall with good edges topping out at the abseil bolts at the top of the wall. FA: R. Master, 2015 | 20 | 25m, 4 | |||||
| 15 |
★ Xanthe
At the right of the slab is a narrow South facing wall. The climb starts on a narrow ledge directly below the hand jam crack. Move past the bolt to the arete and the crack above. Gear and bolt plates required. FA: J. Nevin, 2014 | 14 | 25m | |||||
| 16 |
★ Thick as Thieves
The first route on Theives Wall. Access is via a short abseil from the fixed hangers at the top of the crag down to the large vegetated ledge system, then walk east for 30m or so. Climb the hand crack which starts off a tad wide, through a bulge then continue up and leftward along the curving crack to a lower-off. Steeper than it looks. FA: K. Hartley & A. Separovic, Dec 2020 | 18 | 15m | |||||
 /81/29/8129bed57a2b32bafc77a3afbab31c932bc24583) |
||||||||
| Route | Grade | Style | Selected ascents | |||||
| 17 |
★★★ Fingerlox or the Wooden Box
Classic line up the slab following the thin cracks. Clip the bolt after the horizontal break and trend right to the arete. Up the short slab to finish at a lower-off. Take small/medium gear and bolt plates. FA: J. Herlihy & L. Grieve, 2015 | 17 | 30m, 1 | |||||
| 18 |
★★★ Fingerlox direct finish
Same as the previous route but instead of stepping right to the arete, clip the bolt and climb straight up the thin slab to the top. FA: K. Seewraj & K. Hartley, 2019 | 20 | 30m, 1 | |||||
| 19 |
★★ Fear Effect
Abseil to the small ledge at the base of a hand crack 15m below a large ledge Pitch 1, 15m grade 15 Belay in the crack with large cams. Climb the hand crack for 15m up to a large ledge. Medium to large cams for the belay Pitch 2, 30m grade 20 Climb up the vertical wall up horizontal breaks (medium to large cams) towards the first bolt runner. Climb diagonally right towards the arête (crux). Climb the thin corner crack, smearing and bridging on small flakes and features protected by micro cams and wires. Climb past the bolt runner and up into a crack to the base of the final finishing slab to the lower-off above fingerlox. FA: R. Master, 2015 | 20 | 40m, 2, 3 | |||||
| 20 |
★★ Too Sexy
Set up an anchor at the base of Theives Wall and abseil down over the huge chockstone to the large ledge below. The route starts at the obvious curving crack at the base of the south facing wall. Climb the handcrack up and through a slight bulge. Traverse left at the roof to a natural belay on med/large cams and either walk off left or continue up Fear Effect (recommended). FA: A. Separovic & K. Hartley, Nov 2020 | 17 | 25m | |||||
| 21 |
★★★ Too Sexy/Fear Effect link-up
Quality the whole way. Climb Too Sexy and traverse left to belay on med/large gear in the corner below the second pitch of Fear Effect. Climb FE and finish at the lower-off above Fingerlox.. FA: K. Hartley & A. Separovic, 2020 | 20 | 55m, 2, 3 | |||||
1.11. The Book Ends 5 routes in Cliff
- Summary:
-
All Trad climbing
Lat / Long: -35.131156, 117.614677
1.11.1. Left Book End 3 routes in Area
- Summary:
-
| Route | Grade | Style | Selected ascents | |||
|---|---|---|---|---|---|---|
| 1 | ★ Speed Reader | 21 | 20m | |||
| 2 | ★★ Free Spirit | 21 | 20m | |||
| 3 | Bookworms Delight | 19 | 20m | |||
1.11.2. Recessed Wall 2 routes in Area
- Summary:
-
| Route | Grade | Style | Selected ascents | |||
|---|---|---|---|---|---|---|
| 1 | Adventure Novels | 15 | 25m | |||
| 2 | Shelf Accessories | 17 | 25m | |||
1.12. Earl Grey Walls 12 routes in Cliff
- Summary:
-
Mostly Trad climbing
Lat / Long: -35.131271, 117.620532
1.12.1. Redemption Wall 1 route in Sector
- Summary:
-
All Trad climbing
description
The long, dark and chossy looking wall that extends West from the White Wall and ends in a little rocky bay.
approach
Approach from the 'Bookends Area' end, not the 'White Wall' end.
 |
||||||||
| Route | Grade | Style | Selected ascents | |||||
|---|---|---|---|---|---|---|---|---|
| 1 |
Time of Redemption
From small rocky bay on Western end of cliff walk approx. 100 m along ledges to a big'V'. (1) Start at 'V' and climb slabby, triangle shaped wall cris-crossed by fissures to bushy ledge. Scramble up grassy 10 m section to base of headwall. (2) Up 15 m along another series of cracks, the last of which is a beautiful finger crack through an orange band of rock (crux). When horizontal break is reached traverse left for 5 m and set up hanging belay. (3) Further traverse to the left then up prominent and steep (but chuggy) ‘nose’. FA: Andreas Roilo, Ken Bennett & Michael Otepka, 1993 | 21 | 70m, 3 | |||||
1.12.2. White Wall 5 routes in Area
- Summary:
-
Trad climbing and Aid climbing
Lat / Long: -35.130142, 117.618943
| Route | Grade | Style | Selected ascents | |||
|---|---|---|---|---|---|---|
| 1 | Wastelands | 20 | 45m | |||
| 2 | Ashley and Martins | 23 M3 | 60m | |||
| 3 | ★★★ Badlands | 23 | 85m | |||
| 4 | Sysiphos | 22 M1 | 75m | |||
| 5 | Three Men In The Snow | 19 | 30m | |||
1.12.3. The Zawn 6 routes in Area
- Summary:
-
All Trad climbing
Lat / Long: -35.131638, 117.621155
summary
 |
||||||||
| Route | Grade | Style | Selected ascents | |||||
|---|---|---|---|---|---|---|---|---|
| 1 |
★★★ Grace and Gravity
Starts left of “Callisto” on ledge. Climb via 4 bolts weaving first left then right to horizontal break. up over bulge then short traverse left(crux). The final 10m along the obvious shallow left trending corner/crack. 8BR’s and natural pro. FA: Andreas Roilo, 2007 | 22 | 27m, 8 | |||||
| 2 |
★★ Callisto
Starts 5m left of “Io” on the belay ledge. Up and left to first B.R. then up past another 4 and into corner and gully above. 5 B.R.’s and natural pro. FA: Jim Nevin, 2007 | 17 | 27m, 5 | |||||
| 3 |
Io
Starts on right side of wall on a ledge 20m down. Up the slab then over the bulges using B.R.’s then a flaky corner left of overlap using natural pro. If the swell is low you can start lower down the wall. FA: Jim Nevin, 2006 | 16 | 25m, 3 | |||||
| 4 | ★ Zawn To Be Wild | 20 | 50m | |||||
| 5 | ★★ Zawn Off Shotgun | 24 | 50m | |||||
| 6 | Keep It Soft For Jason | 16 | 50m | |||||
1.13. Torbay Head 4 routes in Cliff
- Summary:
-
All Trad climbing
Lat / Long: -35.131833, 117.640366
1.13.1. Rainbow Slab 1 route in Area
- Summary:
-
Lat / Long: -35.133600, 117.637144
| Route | Grade | Style | Selected ascents | |||
|---|---|---|---|---|---|---|
| 1 | Gravity's Rainbow | 15 | 45m | |||
1.13.2. Sugglers Cove 1 route in Area
- Summary:
-
Lat / Long: -35.129040, 117.639520
| Route | Grade | Style | Selected ascents | |||
|---|---|---|---|---|---|---|
| 1 | Keel Haul | 14 | 35m | |||
1.13.3. Unknown Area 2 routes in Area
- Summary:
-
summary
description
Rob Kettels on CAWA Forum: "In an area .5km north-west of Torbay Head, in West Cape Howe National Park, I put up two trad lines and explored the obvious variations on a granite headwall. The headwall is located downhill from a 4WD parking area. The routes take the left-hand and right-hand sides to the layback/under-cling flake shaped like a upside down sickle, with a yellow granite intrusion on the southern side. "
| Route | Grade | Style | Selected ascents | |||
|---|---|---|---|---|---|---|
| 1 |
Thirty first of December
Thirty first of December (gr 18). Rob Kettels, Aparna Ramesh and Larissa Losch | 18 | ||||
| 2 |
The Cow's Udder
Right-side: with variations The cows udder (gr 19). Rob Kettels, Aparna Ramesh and Larissa Losch | 19 | ||||
1.14. Shelley Beach 17 routes in Cliff
- Summary:
-
Bouldering and Trad climbing
Lat / Long: -35.106404, 117.633545
1.14.1. Main Wall 4 routes in Area
- Summary:
-
All Trad climbing
| Route | Grade | Style | Selected ascents | |||
|---|---|---|---|---|---|---|
| 1 | Whiting for Sunshine | 15 | 8m | |||
| 2 | ★ Blood and Bone | 15 | 8m | |||
| 3 | ★ Southern Right | 23 | 13m | |||
| 4 | ★ Tendon Schnapper | 22 | 15m | |||
1.14.2. Lauchie's Cove 2 routes in Area
- Summary:
-
All Trad climbing
| Route | Grade | Style | Selected ascents | |||
|---|---|---|---|---|---|---|
| 1 | Climbing Out of Tuna | 17 | 6m | |||
| 2 | Hard of Herring | 14 | 5m | |||
1.14.3. Grunt Gully 2 routes in Area
- Summary:
-
All Trad climbing
| Route | Grade | Style | Selected ascents | |||
|---|---|---|---|---|---|---|
| 1 | A Climb With a Porpoise | 15 | 8m | |||
| 2 | Life Without Porpoise | 14 | 8m | |||
1.14.4. The Andersons (Bouldering) 9 routes in Area
- Summary:
-
All Bouldering
Lat / Long: -35.107082, 117.632670
summary
Sharp but awesome circuit courtesy of Andy Lampard. Probably more done and more to go - but the circuit listed covers the main attractions.
approach
Access via the Shelley Beach and a short scramble to the bouldering.
ethic
Climbing is a privilege not a right – where possible preserve the natural flora and minimize impact. Clean tick marks and caked chalk with a good scrubbing. No chipping or gluing.
| Route | Grade | Style | Selected ascents | |||||
|---|---|---|---|---|---|---|---|---|
| 1 |
★★★ The Falcon
Sit start with right hand pinch and low left hand crimp. Up with cool tension moves to the lip. https://youtu.be/cTYs3KIhTJc?t=19 FA: Andy Lampard, Jan 2018 | V4/5 | 3m | |||||
| 2 |
★★★ Hyperdrive
Sit start low in the damp cave with right hand in the slot formed by the crack and low left hand on the vertical pedestal. Up and out the cave avoiding the dab into a blast for the lip. Tensiony, pumpy and a bit dynamic... All time! https://youtu.be/cTYs3KIhTJc?t=97 FA: Andy Lampard, Jan 2018 | V8 | 5m | |||||
| 3 |
★★ The Kessel Run
Sit start as for 'The Falcon' and traverse right to finish as 'Hyperdrive'. https://www.youtube.com/watch?v=FrcKzl_Lm9g FA: Michael Taran, Sep 2019 | V7 | 4m | |||||
| 4 |
★★★ Lightspeed
Sit start for 'Hyperdrive' and link to 'The Falcon' with rad traversing moves. https://youtu.be/FrcKzl_Lm9g?t=66 FA: Michael Taran, Sep 2019 | V8 | 6m | |||||
| 5 |
Adrift
Sit start. | V0 | ||||||
| 6 |
Craters
Sit start. | V0 | ||||||
| 7 |
★ Asteroids
The corner crack. Sketchy. | V1 | ||||||
| 8 |
★★ A Bad Feeling
Up the jugs. Highball. FA: Andy Lampard, Jan 2018 | V0 | ||||||
| 9 |
★★ The Engines
Andys arete. Tricky to get in condition as it is right in the swell zone. FA: Andy Lampard, Jan 2018 | |||||||
   /4e/95/4e95495c826a4563b71daeee8f09306b022f2fc5) /c3/45/c345f3fa6faf49e479dc7ee46f1fb8b5315b0c58)     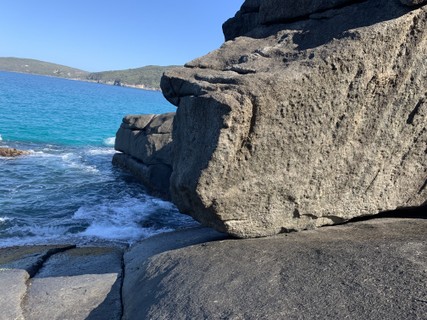 |
||||||||
1.15. Dingo Beach Boulders 20 routes in Area
- Summary:
-
All Bouldering
Lat / Long: -35.085032, 117.649220
1.15.1. Dingo Walls 6 routes in Area
- Summary:
-
Lat / Long: -35.085709, 117.645884
| Route | Grade | Style | Selected ascents | |||||
|---|---|---|---|---|---|---|---|---|
| 1 |
Skip This
Awkward sit. Harder than it looks...although maybe there's an easier way? FA: Michael Taran, 4 Sep 2022 | V2/3 | 2m | |||||
| 2 |
★ Yowie
Sit start with right hand sidepull knob thing and left hand shallow crystally pocket. One mover, fun. FA: Michael Taran, 4 Sep 2022 | V0 - 1 | 2m | |||||
| 3 |
★★★ The Drop Bear Project
Sit start. V0/1 to a high and committing crux! Rad | |||||||
| 4 |
★★ Untamed
Sit start in the mini-roof matched on the jug undercling. Up on good holds into some edges on the face. Cool https://youtu.be/FKB7JhW4Qts FA: Michael Taran, 4 Sep 2022 | V5 | 5m | |||||
| 5 |
★★ Dingoes Dance
Stand start and up the face. FA: Michael Taran, 11 Dec 2022 | V1/2 | ||||||
| 6 |
★ Dingo Wall Warm Up
Sit start and up the obvious features. FA: Michael Taran, 4 Sep 2022 | V1 | 5m | |||||
      /85/6d/856d93bcb5b0df26df07ba1d262a87f5b5d08e39)   |
||||||||
1.15.2. Magic Pudding Boulders 1 route in Area
- Summary:
-
Lat / Long: -35.085764, 117.646914
| Route | Grade | Style | Selected ascents | |||||
|---|---|---|---|---|---|---|---|---|
| 1 |
★★★ The Magic Pudding Proj
Stellar arete! | |||||||
  /48/59/4859d383eb4d9cf5fdede28581def3de95f09ef1) |
||||||||
1.15.3. The Underworld Boulders 13 routes in Area
- Summary:
-
Lat / Long: -35.083279, 117.651170
| Route | Grade | Style | Selected ascents | |||||
|---|---|---|---|---|---|---|---|---|
| 1 |
★ Footyless fiction
Sit start in slanted slot. Up and left using the crimps only (avoid the good holds out right). FA: Aussie Edwards | V3 | 2m | |||||
| 2 |
Cerberus
Sit start in the slanted slot. Up directly using all the holds FA: Unknown | V1 | 2m | |||||
| 3 |
★ Cerberus, Right
Sit start and up the left trending arete. Fun. FA: Unknown | V0 | 2m | |||||
| 4 |
★★ Malaria
Sit start matched on perfect under cliings in the roof. Up and through cool holds and features to escape left to avoid a desperately round highball top. FA: Aussie Edwards | V4 | 6m | |||||
| 5 |
★★ Blood Flood
Take the direct exit out of malaria. Bold FA: Michael Taran, Oct 2023 | V5 | 6m | |||||
| 6 |
★★★ Tissue of Lies
start with crimpy undercling then out the roof with powerful moves into a slopey top out. Awesome climbing FA: osc4ed | V6 | 4m | |||||
| 7 |
Edges then slopes
Sit start on the right with flat edges. Big move to slopers then trend left into a tricks mantle | |||||||
| 8 |
★★ Mirrors Edge
Start matched low as possible on the left side of the flake as Big move right and top out into the flake. Poor feet and sharp. FA: Aussie Edwards | V4 | ||||||
| 9 |
★★ Will you call me in the morning
Sit start with jug rail Move left to good triangle hold and up easily. Fun FA: laudy | V1 | 2m | |||||
| 10 |
★★ The smell of Tokyo in the morning
Sit start on jug. Up with perfect crimps avoiding the dab. FA: Aussie Edwards | V3 | 2m | |||||
| 11 |
★★★ Choccy almonds in the morning
Start big jug and straight up (located to the right of Tokyo in the morning) FA: Aussie Edwards | V0 | ||||||
| 12 |
Fields of asphodel
Sit start and up. Awkward. FA: Unknown | V1/2 | 2m | |||||
| 13 |
Compression things
Sketchy landing but seems all there | |||||||
  /71/63/716393ddc15fcf5c881b277ad0b1c43eaea641f3) /78/08/78081fc0c23a878a04187931053fe06563ce04c3) 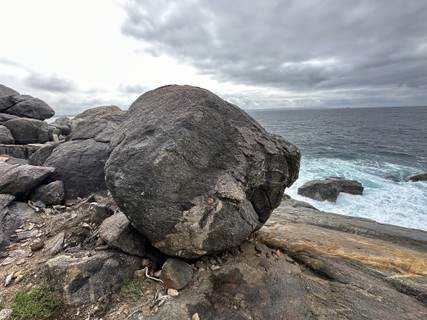 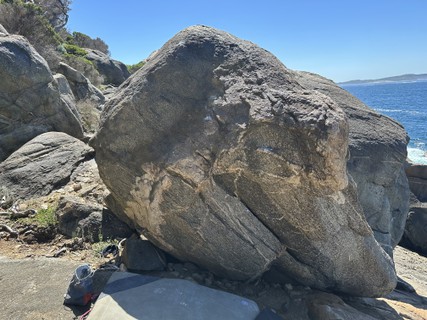 /e0/cd/e0cda4734dc3224475b2f98ea671ba955ad14ea4)   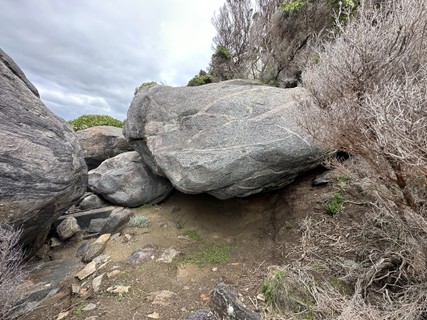      |
||||||||