Help

North Jawbone

Seasonality

J
F
M
A
M
J
J
A
S
O
N
D

Description

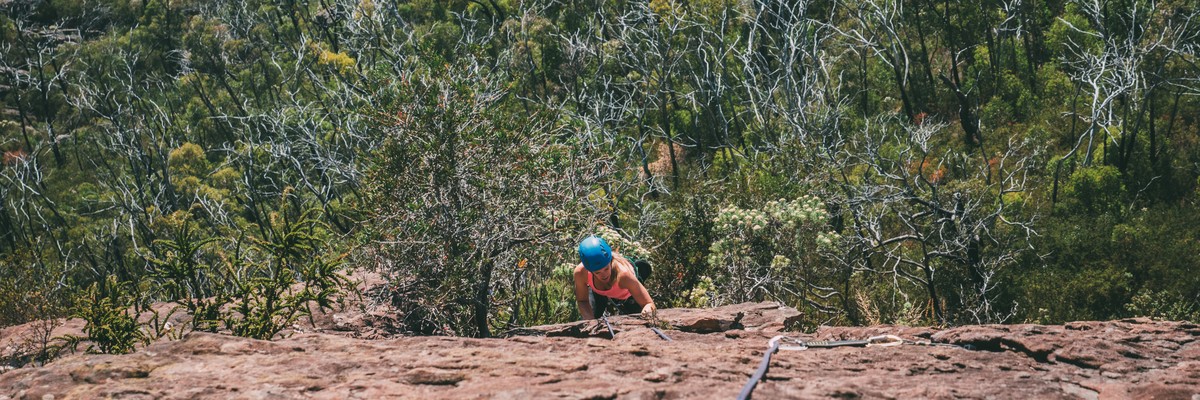
North Jawbone (singular!) overlooks the Cathedral Valley on the eastern side of the Cathedral Range. Despite its steep appearance North Jawbone is a reclining slab of about 60 degrees. The climbs are over 100m long on quality chocolate sandstone.

Approach

Access: From Melbourne take the Maroondah Highway to Buxton (100km). From Buxton continue along highway for 9km, and then turn right onto Cathedral Lane. Follow the road to the Cathedral State Park. Once inside the State Park, drive to the Cooks Mill camping site and continue on until you arrive at the North Jawbone car park.

From the car park take the well signed North Jawbone Hiking Track, down to the creek and on up the ridge on the other side of the valley. About half way up a bunch of slabby buttresses appear on the right (almost reaching the trail) A short distance further, there is a boulder marked by an orange triangle on the left.

Continue past this boulder to a second boulder marked by an orange triangle (https://www.thecrag.com/en/photo/7519436385). At the second boulder, immediately turn right off the hiking track and onto a small trail leading right. Follow the trail uphill marked by cairns through dense scrub, exiting at the base of the cliff. (If you cross a stream and hit switchback steps, you've gone too far)

Abseil Descent: The route follows the left edge of the right (Spiegal's Xanthene etc) buttress as marked. The rappels are approx 55 and 56m so the ground can be reached in two raps with 2x60m ropes (see notes below for options with shorter ropes).

First rap is two SS Petzl rings located a small scramble down from near the top of Travellers Slab.

Head down and slightly left to reach the ledges, go over these and down the face about 8m further to two more rings at a small but comfortable stance.

From here, the second rap heads slightly right down the face (near Route Two) to the bottom.

Options: If you have 1x60m and 1x50m ropes, you might be able to reach the midstation by equalising the ropes as best you can. Otherwise, stop on a small stance on the face and downclimb the easy but exposed face (or belay to be safer). Don't forget to tie stopper knots in the ends of your ropes. You can reach easy-angled slabs at the base with this rope combination and scramble down the last 2-3m of low-angle slabs.

If you only have 2x50m ropes you might still consider using the rap descent. Rap down to the ledges then belay or scramble down to the rings. For the second rap, head straight down the face over roofs (watch for sharp edges) to end up reaching a stance higher up in the gully, then bash down the last few metres.

Caveat: the short-rope options have not been tested. Abseiling can lead to injury or death, take suitable precautions.

Walk off: If you have packed light and lugged all your stuff up the cliff then walk off is quite simple. Scramble all the way up until you hit the tourist trail clearly marked by orange triangles. This heads off over the back of the cliff then down to the left. Trail passes through a grassy section, then head left towards the farmyard (signed) and down the hill. Allow just under an hour back to the car or 30/40 if you're fast.

Tags

Routes

Add route(s) Add topo Reorder Bulk edit Convert grades
Grade Route

On the Walking Track Slabs. A short bunch of slabs on the R before leaving the main walking track.

Follow the clean line through the overlap past 2 bolts.

FA: Stephen ford & Sonya Johnson, 2002

Bloody hard to find. 50m L of Jerry Pot are some short slabs. They are somewhat uphill from the base of Junglescope Buttress. Start at the L most of them, midway between the L arete and a dirty crack, where a reddish streak pierces the moss. Up the streak then go L on easy ground and up the arete.

FA: Keiran Loughran & Peter Watling, 1980

Mossy

  1. 45m Climb the slab a few metres up from Here Catch This.

  2. 25m Continue up the slab.

  3. 20m Take the less steep break through a series of overlaps.

FA: Jamie Searle & Pete Holmes, 2000

Varied climb, thin slab. Named after a near disaster on the 1st pitch. On the far L side of Junglescope Buttress is a series of overlaps and slabs formed by the sandstone strata. This takes the fattest slab, that gets narrower as it gets higher to a distinct protruding block.

  1. 50m (Crux) Reach the slab and climb it on its L side all the way to a small stance under the overlap and level with the protuding block.

  2. 20m R and over the block and up the crack above.Follow this L until it gets easy and you get to the large ledge.

  3. 20m Easy to the top.

FA: Glenn Tempest & Chris Hawthorne, 1985

Enjoyable, especially the top bits. Start near the L edge of the buttress below some bumpy intermittent flakes.

  1. 45m The flakes and straight up the the L end of the Junglescope belay ledge.

  2. 36m Up the corner on the L to a poor stance.

  3. 33m This crack above till it runs out, Traverse L to the arete and up to some flakes. Traverse back R to a tree.

  4. 26m The corner above.

FA: Bernie Lyons & second unknown, 1961

1 13 40m
2 12 40m
3 14 40m

This route is described in Rockclimbs Around Melbourne by Glenn Tempest.

A wonderful sustained adventure on perfect brown sandstone. There are various belay possibilities.

  1. 40m (13) As for Jerry-Pot.

  2. 40m (12) As for Jerry-Pot.

  3. 40m (14) Up the thin crack until it runs out. Not far above this is small slot that accepts a 0.5 cam. Step R, then back up L under the overlap and shallow L-facing corner. Up the clean-cut corner and cracks to join the last few metres of Junglescope.

The best route on the buttress. Based on a prominent flake down low and a R facing flake/corner running the middle top third of the buttress with some slabs in between.

  1. 48m Up and R to flake in the middle of the buttress. climb this and continue up slabs to the L end of a large ledge.

  2. 41m (Crux) Diagonally L for about 6m then up to overlapping flake and a bolt. From the small stance continue up until a step R between prickle bushes gains a small stance.

  3. 35m Up and L a bit to a good crack, then flake/corner to ledge on the L (Piton belay)

  4. 25m Clean corner and crack to the top.

FA: Peter Jackson & Steve Craddock, 1963

An excellent and often overlooked pitch.

2a. 48m Follow the thin crack starting from the L end of the ledge. The line eventually trends L to the base of the flake corner. This is where the last pitch of The Mice Were Furious starts

FA: Unknown

Good lead

  1. 48m Start up Junglescope

  2. 30m Up the R side of the buttress, belay above a scrubby ledge.

  3. 30m Up, keeping L of the gully. Traverse 15m towards the arete and pass over a small overhang.

  4. 30m Head upwards.

FA: Lee Stevenson & Geoff Shaw, 1959

  1. 45m Starts up Junglescope then takes in the better top half of Jerrypot

  2. 35m From the bolt at 20m continue diagonally L to a big flake. Follow the crack a few metres to a bush and ledge.

  3. 50m Climb diagonally L to a flake near the arete and continue past a rusty piton. Continue on or just R of the arete to a small stance 10m from the top.

  4. 10m Up easily.

FA: Larry tackle & friends

1 16 48m
2 14 50m
3 17 32m

This route is described in Rockclimbs Around Melbourne by Glenn Tempest.

Superb climbing all the way. Three excellent pitches. Start below the distinctive cricket ball impression on the wall 5m R of Junglescope.

  1. 48m (16) Climb straight up the technical slab past 2 FHs to the comfortable Junglescope ledge.

  2. 50m (14) Climb the R-curving arch (directly above the belay) for a few metres, then straight up the intermittent cracks and seams on the increasingly delicate slab. Belay across L at the base of the corner as for Junglescope.

  3. 32m (17) Climb the slabby grey wall tending up and R to under the middle of the steepening headwall. A few tricky moves over the overlap (FH), then up the final clean wall.

FA: Richard Smith & Jason Scott, 1987

  1. 45m (16) Start as for TMWF and follow it for about 20m. When it starts to veer left, veer right following a crack past some small bushes heading for the right end of the Junglescope ledge. Move left along the ledge to belay behind the large bush directly below the centre of the arch at a pocket which takes a large cam.

  2. 45m (Project)

  3. 50m (Project)

FA: Chris Baxter, Chris Dewirst & John Moore., 1966

  1. 36m, As for Mein Kampf.

  2. 15m, Diagonally up left to weakness in the middle of the overhang. Through the overhang to small stance just above. Peg belay.

  3. 20m, The line above.

  4. 35m, climb diagonally up right for 6m, then up left to a good ledge.

  5. 27m, veer right and up to the top.

FA: Greg Lovejoy & Bernie Lyons., 1961

"Poorly protected, and a waste of time." From 1988 Eastern District Guide and I doubt it has improved with time. Start at the RH edge of Central Buttress.

  1. 34m Up to the old bolt on Mein Kampf.

  2. 9m Up to a small stance and piton below the overhang.

  3. 34m Surmount the overhang then diagonally left into the crack. Up, then left into gully.

  4. 27m Grovel up.

  5. Continue grovelling.

FA: George Glover & Bernie Lyons, 1961

Described in the 1988 guide as an excellent outing.

  1. 34m (8) As for the first pitch of Central Buttress.

  2. 12m (9) As for Divect pitch 2.

  3. 35m Up

  4. 35m Veer rightwards then up on clean rock 4a) 30m (14) Or, climb the slab directly above as for Divect Direct Finish

FA: James Mclntosh & Glen Donohue., 2003

Easy way to access upper routes.

  1. 42m (5) Follow the crack to a small overhang (upper crack has foliage growing). Up a juggy wall and then head slightly R to a small belay stance.

  2. 35m (2-3) Up the juggy wall, passing rappel bolts, and on to belay at Gods Ledge.

Finish up The Knob, Travellers Slab, Gregs Direct or Traverse of the Gods*

FA: Robert Hewitt & Janet Southwell, 1959

FA: Rober Hewitt & Ken Fletcher, 1959

Links Gods Ledge with the 3rd pitch of Speigals Overhang. Recommend placing gear before stepping out, the 2 bolts (look new) are at the right end of the traverse.

FA: Bernie Lyons & George Glover, 1961

Start from Gods Ledge, 1m left of Travelers Slab. Climb the left edge to the top.

FA: Glenn Tempest, Eric Jones & Greg Pritchard, 1983

From God's Ledge follow the crack line up diagonally right then straight up the slab to the RHS of the abseil ledge passing a large bush on the right near the top. Not at all well protected. 13 for lack of pro?

Maybe original route. Follow Traveller's slab, through bush or just to its left then straight up the far RHS of the slab. No pro above the bush.

FA: Glen Tempest & Richard Smith., 1982

1 10 25m
2 8 29m
3 17 20m
4 17 20m

An epic adventure.

  1. 25m (10) Same as 'Speigal's Overhang'. If 'Speigal's Overhang' is busy, 'Route One' is another option.

  2. 29m (8) Up the crack in the middle until the overhang. Build semi-hanging belay right under it or left into the corner to a ledge. Very vegetated pitch.

  3. 20m (17) Up through overhang. Follow two BRs to the second overhang (crux, very stiff for 17). Belay on small stance 2m above and a bit to the left

  4. 20m (17) Delicate slab climbing. Traverse left then follow a thin crack to a BR, then straight up and a bit to the right to the 'Traverse of the Gods'. Move right to belay as for Speigal's Overhang. Then several options how to end this climb:

You can link 4th pitch of 'Xanthene' and 'Xanthene Direct' (total linked pitch length of about 65m).

FA: Doug Hatt & Rodney Coles, 1963

FA: Greg Lovejoy & Geoff Shaw, 1962

Starts where 'Xanthene' ends.

On the 'Traverse of the Gods', there's a bolt to the left of the route which can be clipped. Otherwise, straight up on slabs with pockets. Small cams in pockets. A lot easier on the 2nd half.

4th pitch of 'Xanthene' can be linked with this route (about 65 m altogether).

Takes the pleasant clean slab between Xanthene and Speigal's Overhang navigating through two overlaps.

Starts from a belay set ~40m up Speigal's Overhang (4m below the bushy stance just short of the first overlap on Speigal's).

Move up and L to climb through the first overlap, direct up the slab and pull through the second overlap. Continue up the slab above till nearing Traverse of the Gods. Here step back right to the belay at the start of the traverse.

Bolts were added by the FA shortly after the first ascent.

FA: @dalai & Gavin Fletcher, 1994

1 10 30m
2 9 40m
3 10 20m
4 6 30m
  1. 30m (10) Start up the slab, some of the protection is poor. Belay from a vertical crack with foliage and dead tree. Good stance behind the tree.

  2. 40m (9) Keep going up, climb a small overlap and head up to the large vertical crack. Belay from below the large overlap.

  3. 20m (10) From the belay pull up and over the overlap and follow the crack up. Belay options; either from a tree at the start of Traverse of the Gods or head up another 10m to a small ledge with trees.

  4. 30m (6) Follow the cracks and to the top.

FA: Doug Hatt & Rodney Coles, 1963

A link up of Speigal’s Overhang, Traverse of the Gods, and The Bold and The Cold.

Start with Speigal’s for 40m to just past a dead tree at the obvious belay with two parallel cracks. Then another 40m pitch to the tree and obvious belay where Speigal’s meets Traverse of The Gods. You can then either do the traverse and last pitch of The Bold and The Cold as separate pitches or link them together for one 40-50m pitch.

An alternative to the 2nd pitch of Whiteline Fever.

  1. 40m (17) As for Whiteline Fever.

  2. 50m (18) Move right and climb the slab and overlap between Speigal's Overhang and Whiteline Fever (5 BRs) to a chain near the top.

FA: Simon Mentz, 2006

Up right of the start of Speigal's Overhang at a recessed slab under a series of overhangs. Note that the 2nd pitch is a bit bold.

  1. 40 m (17) Climb the slab and exit thru the first overlap on the left then up the easy slab. Move left to belay as for the 2nd pitch of SO.

  2. 49m (18) Head back out right to the first crack in the overlap. Over this and up the slab above to the bottom right hand corner of the next overlap. Cams protect the moves up onto the final unprotected slab, finishing with a thin crack.

FA: Richard Smith & Glenn Tempest, 1986

FA: Roger Caffin & Sue Wilcox, 1966

Up the centre flake until its top, then delicately traverse left over the slab, pull up and left through the roof (crux), then continue left through more delicate slab moves to the next corner, and up easily from there. Descent involves scrambling UP the steep gulley behind the top of the climb to a trail that leads under Odd Wall (K. Y. Jelly area) and then North and down to the American Dream area. Alternatively, with double ropes it is possible to leave a sling over the pinnacle at the top and rappel the 40m to the ground.

FA: Tim Bearman & Silvia Lazarnick, 1977

Up the arete 1m right of Fruit Hustler, staying on the arête after you pass the tree, all the way up to where it meets the Fruit Hustler flake.

FA: Geoff Butcher, 1986

Up the arête 1m right of Fruit Hustler. From the tree, swing out left and follow the crack on the slab. Claimed to be a better option than the original finish to Babel Fish.

FA: Geoff Butcher, 1986

On the vertical section of rock left of Snakes Belly. Start bottom left below the break in the sedimentary layers. Head up and right underneath the roof until you reach the cleft. Pull through the roof (avoid vegetated ledge to your right) and then direct to the top. Looks a little chossy and contrived but the rock is solid and the climbing is engaging. Protection is great if you have a couple of micro cams to protect the first half.

FA: Sam Dowley

Starts in the corner left of Kiwi Express, then joins up with Low Act.

FA: Simon Todman & Owen Morris, 1989

Very minimal protection available.

Hello!

First time here?

theCrag.com is a free guide for rock climbing areas all over the world, collaboratively edited by keen rock climbers, boulderers and other nice folks.

You can log all your routes, connect and chat with other climbers and much more...

» go exploring, » learn more or » ask us a question

Selected Guidebooks more Hide

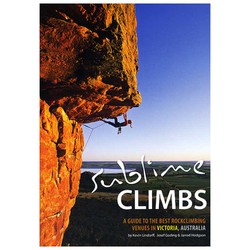
Author(s): Lindorff, Goding & Hodgson

Date: 2011

ISBN: 9780646529387

Get ready to fully experience the rock climbing scene in Victoria with Sublime Climbs, a comprehensive guidebook authored by Kevin Lindorff, Josef Goding, and Jarrod Hodgson. This full-color, 380-page book covers the best climbing locations in the region, including Mt Arapiles, Mt Buffalo, and the Grampians. It features descriptions of over 700 routes, topographic maps, and breathtaking images. Whether you're a seasoned pro or new to the sport, Sublime Climbs has everything you need to make the most of your climbing experience in Victoria and experience all of it's classic routes.

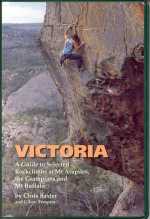
Author(s): Chris Baxter & Glenn Tempest

Date: 1994

ISBN: 0646167308

A Guide to selected rockclimbs at Mt Arapiles,the Grampians and Mt Buffalo

Accommodations nearby more Hide

Share this

Photos Browse all photos

Upload a photo of area

Mon 24 Apr
Check out what is happening in North Jawbone.

Get a detailed insight with a timeline showing

  • Ticks by climbers like you
  • Discussions of the community
  • Updates to the index by our users
  • and many more things.

Login to see the timeline!

Deutsch English Español Français Italiano 한국어 Português 中文