Topos are probably the most important type of information for climbers: Please add them whenever you can and make it easier for the community to find and identify their desired climbs.
You may add Area Topos and / or Route Topos to theCrag if you have the right permissions for an area. Simply click on the Request Permission button and wait for the confirmation email if you lack them.
theCrag uses photo topos for both, Area and Route Topos but of course you may also upload your hand-drawn cliff as an image and use it as a basis for drawing the topo with theCrag Topo Tool.
Choosing a good base imageBack to contents
Please avoid using drawings or photos as the base which include the routes pre-drawn into the image, including any text, labels, arrows etc. It is much better to use our drawing tools as they will not only be higher quality and more consistent across the site but will also be interactive and can be clicked, zoomed, highlighted, temporarily hidden etc.
For more details on how to take good photos for use as a base in topos please read Taking photos for topos
Route ToposBack to contents
Route Topos show the routes on a cliff or boulder. theCrag Topo Tool links the drawn lines on a topo with the actual route information.
Example of a Route Topo:
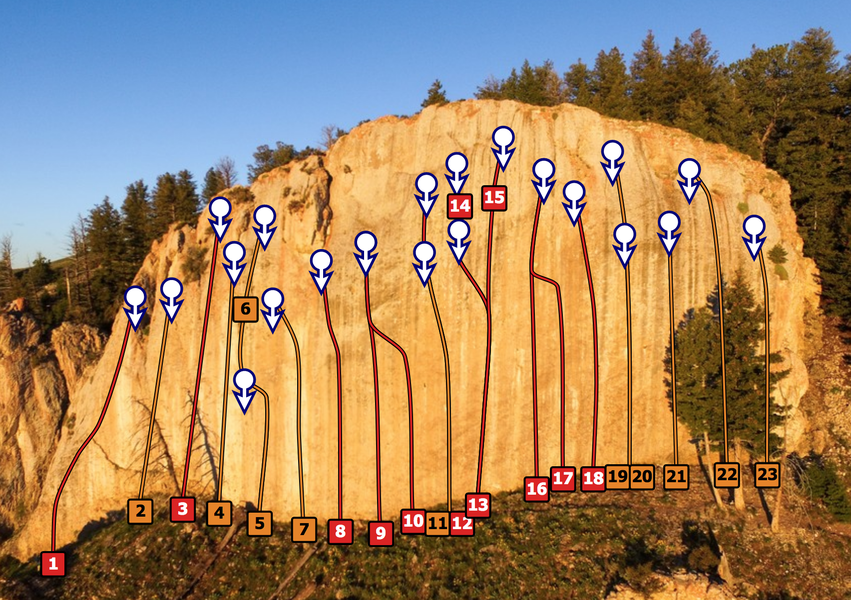
This allows for easy navigation and straightforward updates without the need to start from scratch in case new lines are added or anchor positions changed.
Watch this 3 minute video to see how to create a Route Topo from scratch or run through the high-level steps below.
Adding a Route Topo in a few simple steps:
- Login to theCrag
- Navigate to the area where you want to add a topo
- Verify, that you have the right permissions (Add Topo button is active)
- Upload an image as basis for the topo (see Taking photos for topos for suggestions)
- Select the routes you want to add by selecting the checkboxes (this can be modified later)
- Select a route from the list and click on the image to start drawing
- Right-click on any point for options and to add additional information
- Don't forget to use 'Deselect' and 'Zoom' to see more details
- Click Save Topo and go back to List View to see the final result
Area ToposBack to contents
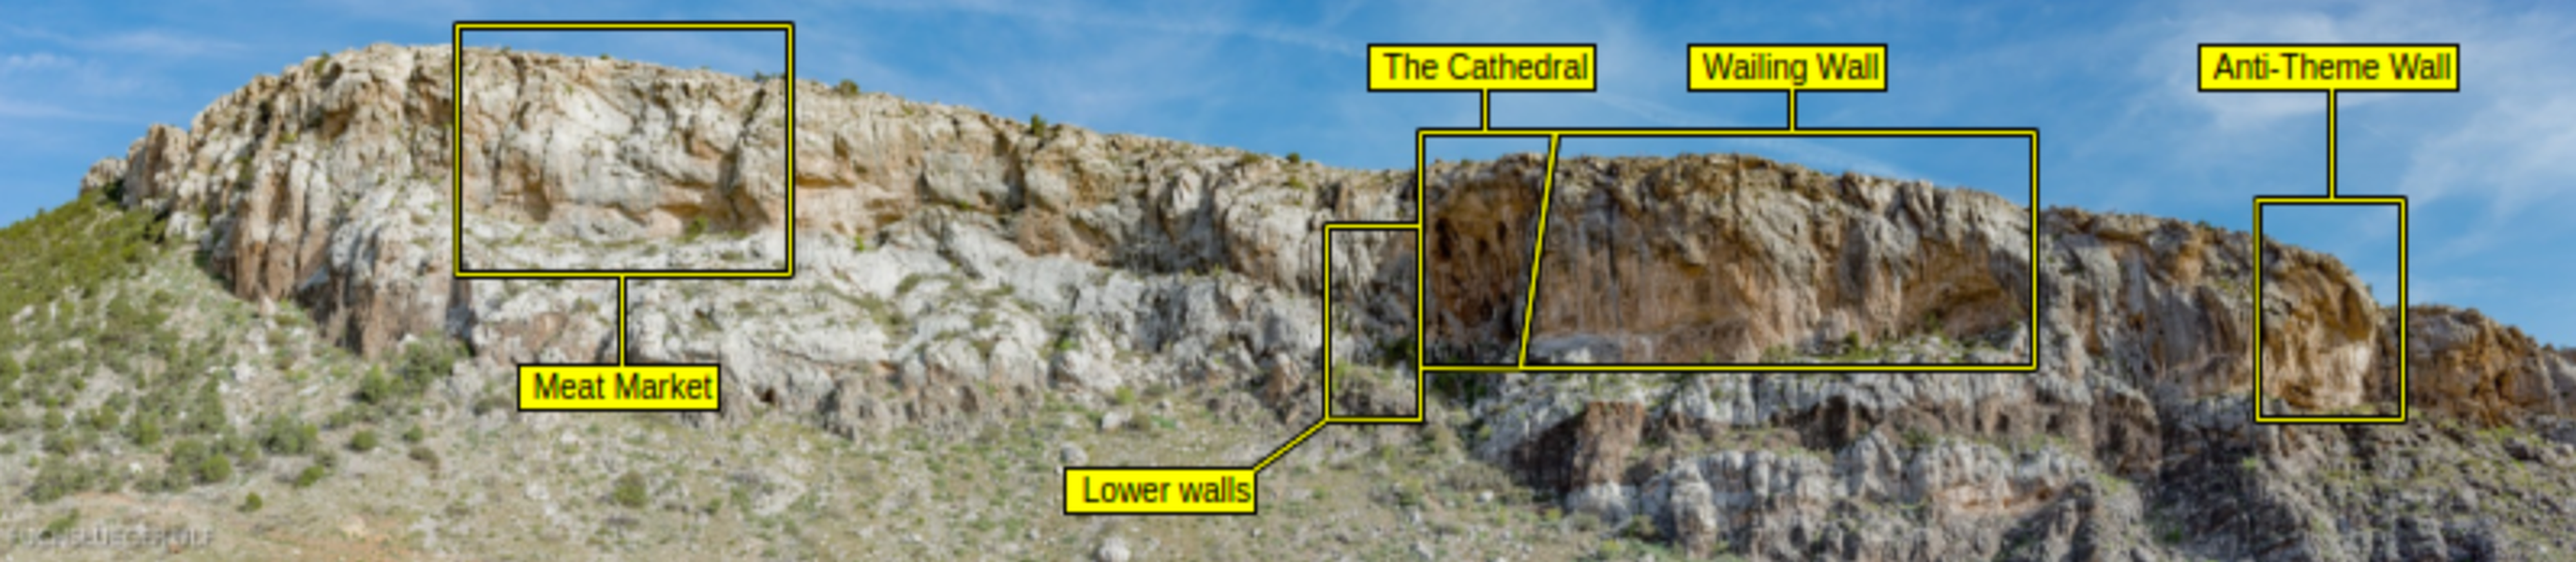
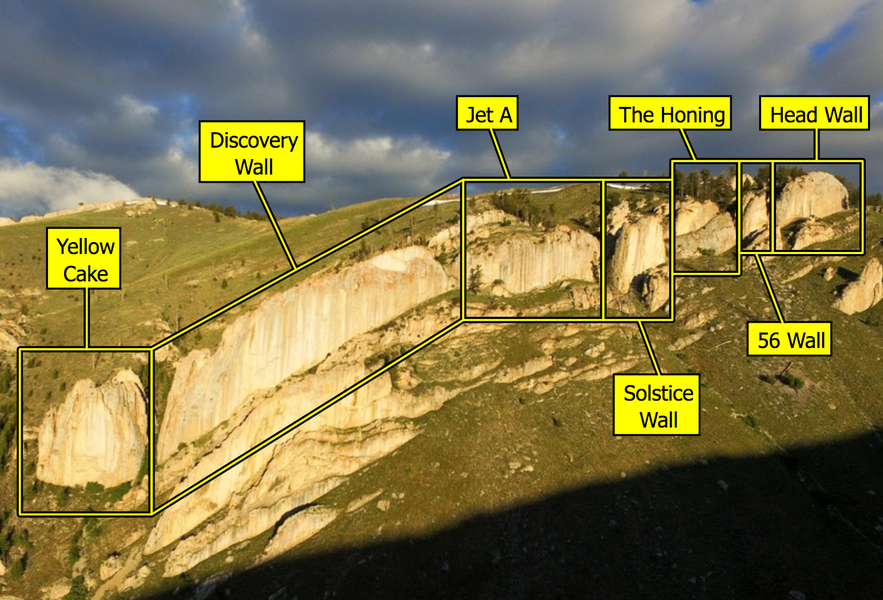
Area Topos are overview topos that show areas like sectors or cliffs on pictures or maps and thus make it easier for climbers to identify and find an area.
Example of an Area Topo:
theCrag allows drawing of Area Topos with theCrag Topo Tool. Watch this 3 minute video to see how to create an Area Topo from scratch.
Considerations for Area Topos:
You might want to consider one or the other tip from the list below to make really appealing Area Topos:
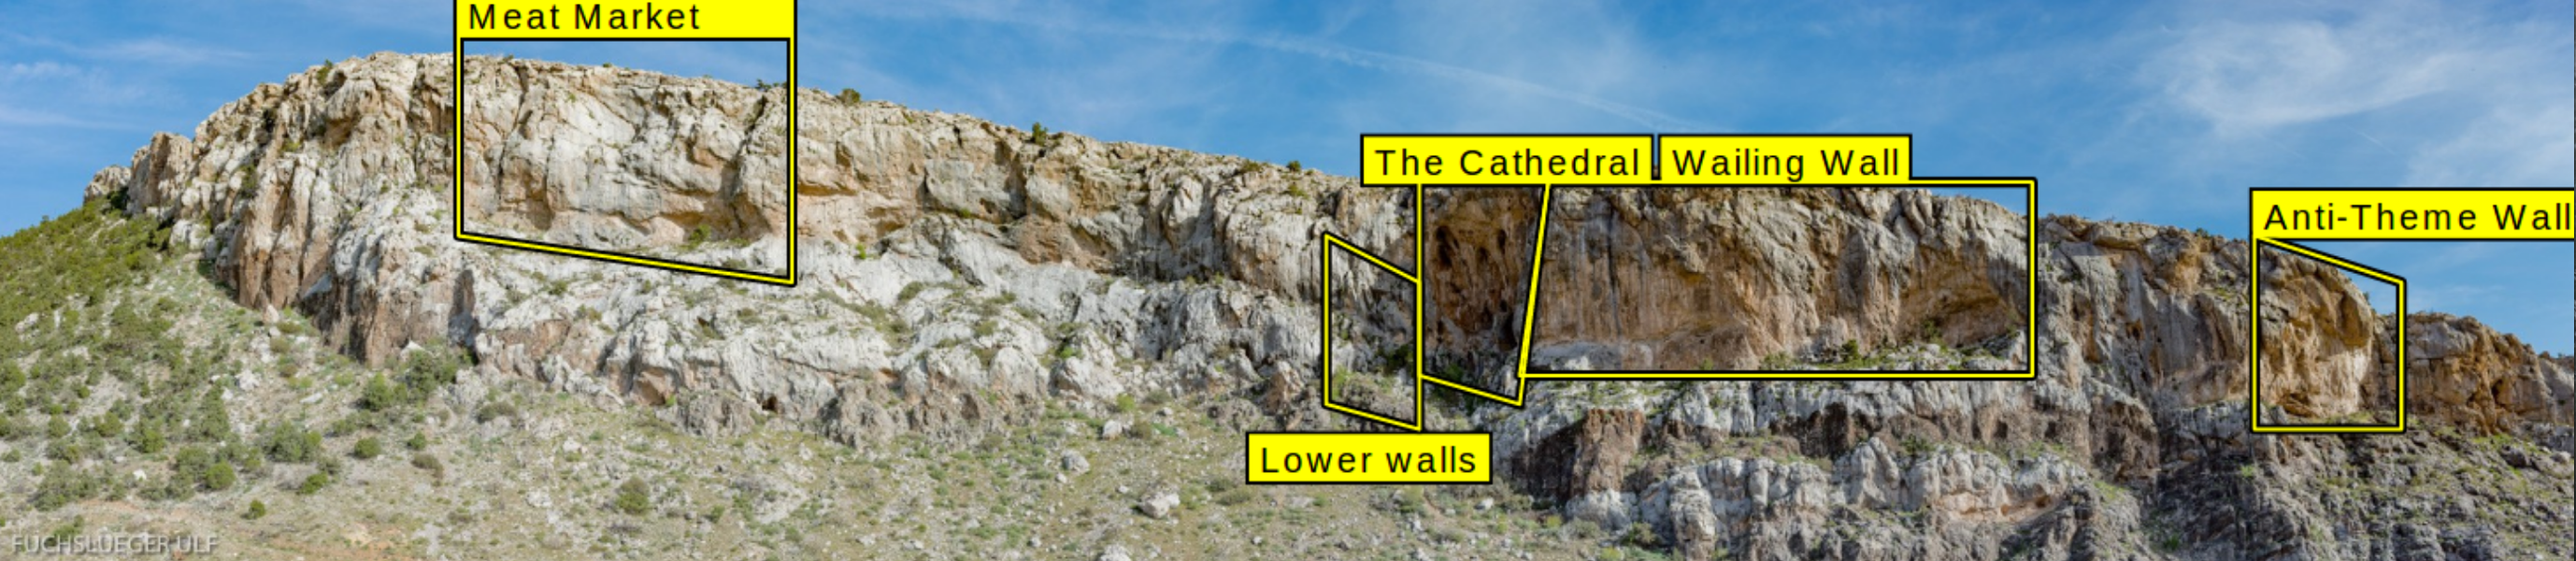
- Try to use rectangular areas unless it really warrants an irregular shape.
- Draw simple shapes with as few points as required to get a good outline of the cliff, but don't oversimplify.
- Where possible line the edges of adjacent areas.
- if there are irregular shapes which are adjacent, snap their shared edges perfectly together.
- If the area enclosed has a natural boundary such as the top of the cliff, or gully etc, make the shape overlap to include some sky, or the gully so the edge of the shape doesn't cover the natural edge of the feature; sometimes this means pulling the top boundary up into the sky so you can clearly see the skyline.
- If the labels are not adjacent to the area shape then draw a connecting line.
- Pull labels away from cliffs into regions of low interest such as the sky or foreground.
- Keep a consistent theme if needed, e.g. if label lines are on an angle, keep the angles consistent across all labels.
- Use the left/right/center and top/middle/bottom anchor setting to align the label exactly to the end of any lines.