A Crag Guide gives an extensive view of all sub areas and climbs at a point in the index. It shows a snapshot of the index heirachy, up to 300 climbs (or areas) on a single web page. It shows selected comments climbers have made on a recently submitted ascent.
At a minor crag level this should be suitable for printing and taking with you on a climbing trip as an adjunct to your guidebook.
This guide was generated anonymously. Login to show your logged ascents against each route.
Warning
Rock climbing is extremely dangerous and can result in serious injury or death. Users acting on any information directly or indirectly available from this site do so at their own risk.
This guide is compiled from a community of users and is presented without verification that the information is accurate or complete and is subject to system errors. By using this guide you acknowledge that the material described in this document is extremely dangerous, and that the content may be misleading or wrong. In particular there may be misdescriptions of routes, incorrectly drawn topo lines, incorrect difficulty ratings or incorrect or missing protection ratings. This includes both errors from the content and system errors.
Nobody has checked this particlular guide so you cannot rely on it's accuracy like you would a store bought guide.
You should not depend on any information gleaned from this guide for your personal safety.
You must keep this warning with the guide. For more information refer to our:
Usage policy
Contributors
Thanks to the following people who have contributed to this crag guide:
Ranger Dave
Brendon Flanagan
Brendan Heywood
Tim Clarkson
Niko Eltarenko
James B
Graham Dowden
Matt Short
Greg Ducky
Jake Griffiths
The size of a person's name reflects their Crag Karma, which is their level of contribution. You can help contribute to your local crag by adding descriptions, photos, topos and more.
Table of contents
- 1. Life Aquatic Wall 39 in Cliff
- 2. Index by grade
1. Life Aquatic Wall 39 routes in Cliff
- Summary:
-
Bouldering, Top roping and Sport climbing
Lat / Long: -33.850174, 151.203343
description
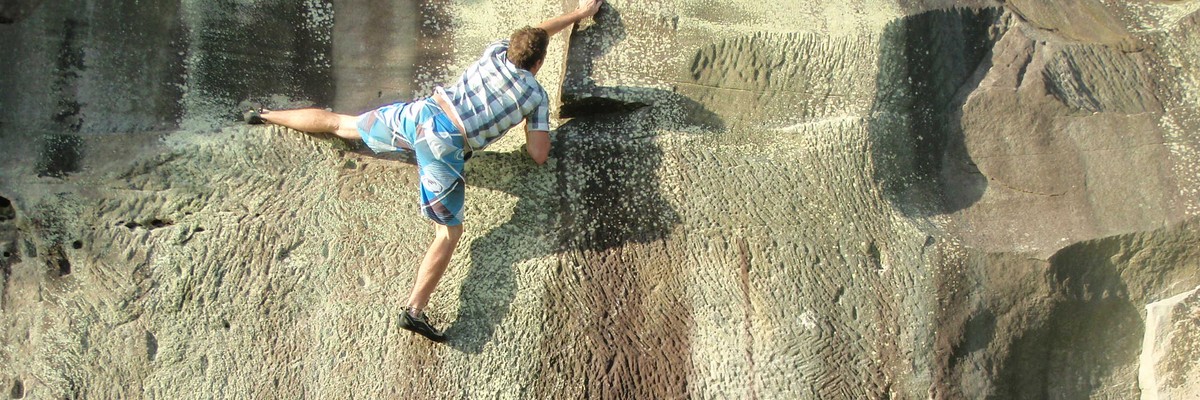
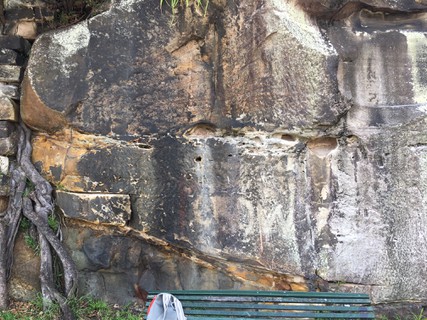
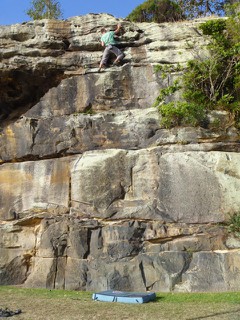
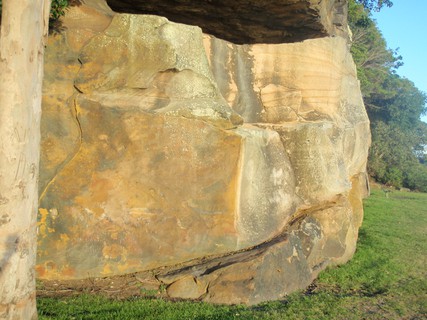
Life is all about the water! Or is it all about the land? Many have struggled with this dilemma and here you can too. Do you watch the hordes of city folk and their flotilla or does the rock and its intricacies consume you?
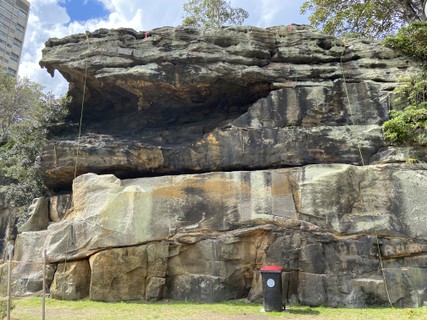
This wall is characterised by a massive cave to the left hand side and boasts some rewarding problems and challenging highballs.
Prepare to answer the questions of many elderly/tourists/sailor/dog walkers/fisher people of all types on all manner of topics (but mainly on what you are doing).
access issues
If you have benefited from climbing infrastructure in NSW, please consider making a donation towards maintenance costs. The Sydney Rockclimbing Club Rebolting Fund finances the replacement of old bolts on existing climbs and the maintenance of other hardware such as fixed ropes and anchors. The SRC purchases hardware, such as bolts and glue, and distributes them to volunteer rebolters across the state of New South Wales. For more information, including donation details, visit https://sydneyrockies.org.au/rebolting/
approach
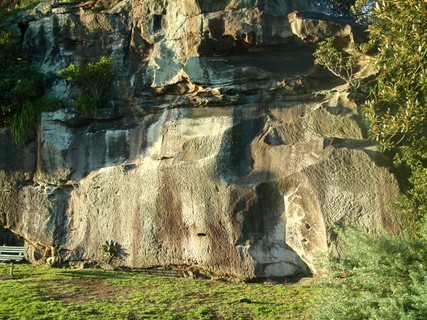
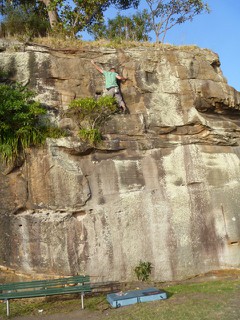
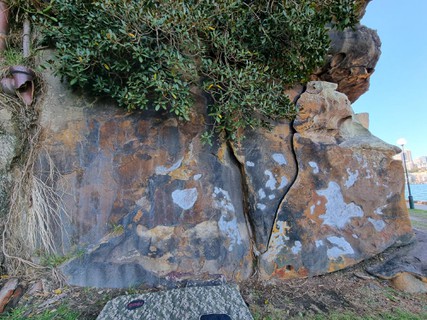
The first chunk of rock you come across as you round the corner of Blues Point. Climbs move from right to left and start at the boarder of the garden where the wall meets the grass and where the skies the limit!
descent notes
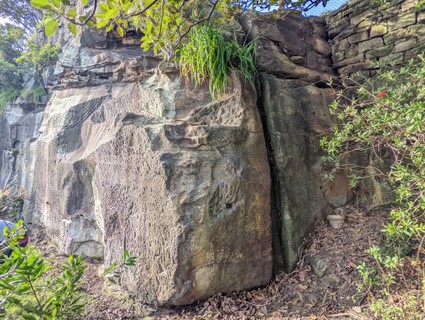
To set up the top rope problems either take the stairs past the toilet block to make your way up to the top of the crag or climb the sandstone block wall Half way between the two main walls
ethic
Respecting the enviroment and keeping crags clean will maintain a healthy and important relationship between the climbing community, local councils and National Parks. Carry out what you take in and enjoy what the North Shore has to offer.
If you come across an area that is being developed or you think could be under development, please show all due respect to the developers and do not climb the projects listed on thecrag.com.
history
Blues Point love and attention revivd by Brendon Flanagan and Ranger Dave Archer. Brendon and Dave's first united crag development. Rusted remains of old expansion bolts bear witness to past activities.
| Route | Grade | Style | Selected ascents | |||||
|---|---|---|---|---|---|---|---|---|
| 1 |
Traverse with a view
There is a lovely grassy section above Life Aquatic Wall. Starting about 2m right of the fence, there is a large step in the wall. Starting here, traverse right till you reach the end of the natural wall (around corner). Natural rock only! FA: | 3 | 8m | |||||
  |
||||||||
| Route | Grade | Style | Selected ascents | |||||
| 2 |
Crossing The Void
Start as for Slap Those Who Stare. Slap your way left and mantle up onto the ledge. Once here traverse to your right and around the back to where you'll find a vertical gutter cutting in the rock. DO NOT touch any part of the gutter while making your way across it, that'd just take away the fun and that's not what Blues Point is about. Finish by making your way down at the next corner. Can be sandy if there has been little traffic but a adventure non the less! FA: | V1 | 5m | |||||
| 3 |
★ Slap Those Who Stare
Carrots now in place for those who wish to top rope this problem set at grade 16. Thanks to my BIC Ranger Dave for permission to establish top rope anchors for this climb. Sharing the love. First wall you see as you round Blues Point. Slopey arête starting on the right side of the wall. Lose fame by standing on the rock at the start. Move left and up to top out. Disinclined to highball? Get down to the right before the crumbly looking roof for a V0. FA: | V1 | 5m | |||||
| 4 |
★ Red Cheeked
Carrots now in place for those who wish to top rope this problem set at grade 17. Thanks to my BIC Ranger Dave for permission to establish top rope anchors for this climb. Sharing the love Sit start in the scoop to make the most of the solid holds. Mantel up to finish same as Slap Those Who Stare. Dodge the highball and get down to the right for a V0. FA: | V1 | 5m | |||||
| 5 |
★ Smell the Roses
Good warmup for the V4 & a perfect problem on which to do your first rose. Start the same as ELAP. Keep low as you rose through to the left. Use the two big pockets and crimp to finish on the top ledge. And the bottom rock curb ledge; its out for feet buddy! FA: | V2 | 4m | |||||
| 6 |
★ Gold Amongst The Grains
Carrots now in place for those who wish to top rope this problem set at grade 17. Sit start same as ELAP. Move up to the top of the scoop and then left to the thin crimp. From there use the assortment of rounded side pulls to move up and top out slightly right, same as "STWS" and "RC" Some challenging moves through the middle. FA: | V3 | 6m | |||||
| 7 |
★★ ELAP
Super Classic Problem. Helps to do yoga before (especially the Extended Lateral Angle Posture) Sit start at Red Cheeked and move up to the top of the scoop before heading left to the little side pulling crimper. Finish with both hands on large ledge in Salute to the Sun Posture. Repeat. FA: | V4 | 3m | |||||
| 8 |
★ Date on the Bay / Höyrystyä
Some very tricky climbing. Start at the dyno hole and avoid the dyno ledge as well as the better holds out right. A little easier for the tall. Note: This should appear before Dump Divers Dyno (currently No.8) | V6/7 | 5m | |||||
  |
||||||||
| Route | Grade | Style | Selected ascents | |||||
| 9 |
Dump Divers Dyno
As the local disenfranchised types like using this dyno hole as a bin, it might need some cleaning. Boost straight up to jugging ledge. Be cautioned, the bin has teeth of the spidery kind. FA: | V2 | 3m | |||||
| 10 |
★ Dislocation Levitation
Direct start to "Dislocate Then Elevate". Levitate to pocket, then pull past sidepull to upper wall. | 7m | ||||||
| 11 |
★★ Ranger Dave Saves The Day
Carrots now in place for top roping. Safety line required to set up anchor. Perform a mantle between DDD and DS. Head left through the forest and hope that Ranger Dave is there to save the day if you can't commit to the crux. FA: | 17 | 11m | |||||
| 12 |
★ Dislocation Station
A real hip popper! Start behind old bench and move up the big pockets to the right. Follow longish sloping ledge, smearing and/or heal hooking like the best of them. Use gaping hole to finish with both hands on the jugging ledge of Dump Divers Dyno and ELAP. Super Reachy with solid power required on the last hold! A must try! FA: | V5 | 5m | |||||
| 13 |
★ Dislocation Irritation
The cherry on the cake of bad simon traverse Same as for "Dislocation Station" but once you have stuck the final ledge and your arms are screaming at you, continue to grind your way to the right following the solid ledges. Finish by reversing "STWS" in a controlled manner FA: | V6 | 7m | |||||
| 14 |
★★ Dislocate Then Elevate
Carrots now in place for top roping. Safety line required to set up anchor. Start same as Dislocation Station - Climb up pocket filled area behind the park bench and move right along obvious ledge, slapping and smearing. At large, deep letter box, ascend straight up following drill line near top of the cliff. Big high ball, with little choss once you blow the dust off the holds. One of those climbs worth doing once to really get the heart pumping! Originally a V4 highball problem set by Ranger Dave. A big thanks to my BIC for permission to bolt his problem. Sharing the love! FA: | 18 | 5m | |||||
| 15 |
★ Ziggy
Start just right of giant root system. Traverse right using pockets and shelf for hands and undercut ledge for feet. Finish at largest end pocket or continue on as for 'Dislocation Station', 'Dislocation Irritation' or 'Dislocate Then Elevate'. | V1 | 3m | |||||
  |
||||||||
| Route | Grade | Style | Selected ascents | |||||
| 16 |
★ I Can See The Clock But I Don't Know What The Time Is
Facing the rock beneath the high cave start at the far right, just left of the giant root system coming down to the ground. From here traverse around, pass the big scoop and over the buldge. You can either finish at the large drill hole or walk around to the Perfect Flake and finish on this. FA: | V2 | 12m | |||||
| 17 |
★ Find Your Fingers
A interesting traverse. Start as for P By The Sea. Traverse right using the undercling at waist height. Continue along until your fingers slip off the sloper undercling at the end. FA: | V1 | 3m | |||||
| 18 |
★ 'Thar She Blows!
Carrots now in place for top roping. Starting as for PBTS, head straight on up like a whales spout. Finish by topping out. FA: | 16 | 13m | |||||
| 19 |
In a Sea of Sunflowers - Variant 1
Up Thar She Blows followed by traversing the very top of the cliff. Use the carrots along the cliff top to set up directionals when establishing the top rope. FA: Maddie Stevie, 26 Sep 2021 | 16 | 7 | |||||
| 20 |
★★ In a Sea of Sunflowers - Variant 2
Up 'Tar She Blows' then traverse below the lip of the cliff. Use the carrots along the cliff top to set up directionals when establishing the top rope. FA: Brendon Flanagan, 30 Sep 2021 | 20 | 7 | |||||
| 21 |
In a Sea of Sunflowers - Variant 3
Closed project | 7 | ||||||
| 22 |
★ P By The Sea
Starting at the letter P (graffiti) head up and to the right via the small flake and drill hole tapping out on top. FA: | V0 | 3m | |||||
| 23 |
★ Hold On Salior
Start under the bulge between P By The Sea and Letterbox Crack. Only using the holds on that face mantle up and on to the skinny ledge at the top of the bulge. FA: | V2 | 4m | |||||
| 24 |
★ Short Arms and a Big Heart
Carrots now in place for top roping. Starting at Letterbox crack, climb straight up, link on to the edge of the cave and finish just above the corner of the cave (brownish water stained rock) Could be done as Boulder Problem if focused like a fox! FA: | 16 | 13m | |||||
| 25 |
★ Letterbox Crack
Follow the crack up using the vertical pockets. Finish by tapping out at the top of the line. FA: | V0 | 3m | |||||
  |
||||||||
| Route | Grade | Style | Selected ascents | |||||
| 26 |
★ Get Down Low And Go Go Go!
Start 1 metre left of Letterbox Crack at the inward corner cutting. Matching your hands on the slightly overhanging ledge traverse your way along until you've just past the start for Practice Your Mantle Part 2. FA: | V1 | 6m | |||||
| 27 |
★ Practice Your Mantle
Between LC and the second drill hole, mantle the small overhang. Very balancy. FA: | V2 | 2m | |||||
| 28 |
★★ Grasping For The Wind
Sit start using first vertical crack line just left of the scoop ( Practice Your Mantle ). Make your way up using the smooth arete to your left. Top out without moving to far left (where the easy holds are). FA: | V2 | 4m | |||||
| 29 |
★★ Rock The Boat
Sit start at second crack just left of the scoop. Dog leg up and left via big horizontal crack. Use angled cracks staying as close to Grasping For The Wind as possible, while not using its arete. Love the side pull and top out with final solid ledge hold. Keep your eyes open for possible dyno and sneaky toe jam! FA: | V2 | 4m | |||||
| 30 |
Flathead
Contrived! Start as for Rock the Boat, but once past low break, keep right hand on blunt arete to right. Use small side pull for left. Up and finish as for Rock the Boat. | 4 | 4m | |||||
| 31 |
★ One Move Wonder Dyno
A fun and very simple way to practice your confidence with the world of dynos. Keeping your feet low and smearing, match your hands on the solid ledge above, look, leap and lunge for the next ledge up. First Recorded Ascent: Brendon Flanagan FA: | V0 | 2m | |||||
| 32 |
★ A Maddie In Waiting
Start as for OMWD then up to the next ledge. FA: 8 Sep 2021 | V1 | 4m | |||||
  |
||||||||
| Route | Grade | Style | Selected ascents | |||||
| 33 |
★ Practice Your Mantle Part 2
Starting 1 meter to the left of the third drill hole, place your feet on the massive break and mantle. Heel hook high left and mantle again to the top. Excellent mantle practice for the beginner. FA: | V1 | 4m | |||||
| 34 |
Practice Your Mantle Part 3
Start 1 meter left of Practice Your Mantle Part 2. The perfect mantle for the beginner who's never done one before. FA: | V0- | 2m | |||||
| 35 |
★ Su's Day Off
Stand start with hands on the arete and smearing feet. Hands and feet only allowed on the arete going up (no cheating now!) | V1 | ||||||
| 36 |
★ Crimp And Save
A contrived climb with a powerful technical start. Start just right of Perfect Flake, with this easy crack out of bounds! Using smears and two side pulls head up to the bulge on the left above the out of bounds ledge line that's about head height. Keep moving up using controlled power (no Dynos) and mantle out. As to avoid temptation, there are only 5 useable holds for this V3. Less is Best! FA: | V3 | 3m | |||||
| 37 |
★★ Perfect Flake
The name of the climb says it all. Up the flake via some lay back and foot jamming action. FA: unknown | V0 | 3m | |||||
| 38 |
Tales of Choss and Chunder
Start just left of Perfect Flake, in front of the large root infested, chossy crack. Don't be alarmed - work the crack, without using the crimps on the walls ether side and move up to finish under resilient fig tree. Complete the full circle by traversing right and down climbing via 'PF'. Better than the choss would have you think! FA: | V2 | 4m | |||||
| 39 |
★★ Crimp and Collect
The positive matchstick edge crimps left of TOCAC crack. Avoid the crack until the holds truly run out, then sidepull the top 40cm block at the top of the crack to finish. Start wherever you can, options converge quickly. Sit-start also possible. Currently doable (Sep 2021) but the top metre a bit obscured by branches. FA: Tim Clarkson, 2013 | V4 | 4m | |||||