A Crag Guide gives an extensive view of all sub areas and climbs at a point in the index. It shows a snapshot of the index heirachy, up to 300 climbs (or areas) on a single web page. It shows selected comments climbers have made on a recently submitted ascent.
At a minor crag level this should be suitable for printing and taking with you on a climbing trip as an adjunct to your guidebook.
This guide was generated anonymously. Login to show your logged ascents against each route.
Warning
Rock climbing is extremely dangerous and can result in serious injury or death. Users acting on any information directly or indirectly available from this site do so at their own risk.
This guide is compiled from a community of users and is presented without verification that the information is accurate or complete and is subject to system errors. By using this guide you acknowledge that the material described in this document is extremely dangerous, and that the content may be misleading or wrong. In particular there may be misdescriptions of routes, incorrectly drawn topo lines, incorrect difficulty ratings or incorrect or missing protection ratings. This includes both errors from the content and system errors.
Nobody has checked this particlular guide so you cannot rely on it's accuracy like you would a store bought guide.
You should not depend on any information gleaned from this guide for your personal safety.
You must keep this warning with the guide. For more information refer to our:
Usage policy
Contributors
Thanks to the following people who have contributed to this crag guide:
Woody
Adrian Kladnig
Phillip Booth
Graham Dowden
Daniel Butler
Mike croker
Daniel da Silva
Hadley Wood
Eson
Pete
The size of a person's name reflects their Crag Karma, which is their level of contribution. You can help contribute to your local crag by adding descriptions, photos, topos and more.
Some content has been provided under license from: © Australian Climbing Association Queensland (Creative Commons, Attribution, Share-Alike 2.5 AU)
Table of contents
- 1.
Killara
88 in Area
- 1.1. The Big Pump / Mummy Dust Cave 32 in Crag
- 1.2. The Block 37 in Crag
- 1.3. The vape cave 7 in Boulder
- 1.4. Sterlo 12 in Area
- 2. Index by grade
1. Killara 88 routes in Area
- Summary:
-
Mostly Bouldering
Lat / Long: -33.768138, 151.141433
access issues
If you have benefited from climbing infrastructure in NSW, please consider making a donation towards maintenance costs. The Sydney Rockclimbing Club Rebolting Fund finances the replacement of old bolts on existing climbs and the maintenance of other hardware such as fixed ropes and anchors. The SRC purchases hardware, such as bolts and glue, and distributes them to volunteer rebolters across the state of New South Wales. For more information, including donation details, visit https://sydneyrockies.org.au/rebolting/
ethic
Respecting the enviroment and keeping crags clean will maintain a healthy and important relationship between the climbing community, local councils and National Parks. Carry out what you take in and enjoy what the North Shore has to offer.
If you come across an area that is being developed or you think could be under development, please show all due respect to the developers and do not climb the projects listed on thecrag.com.
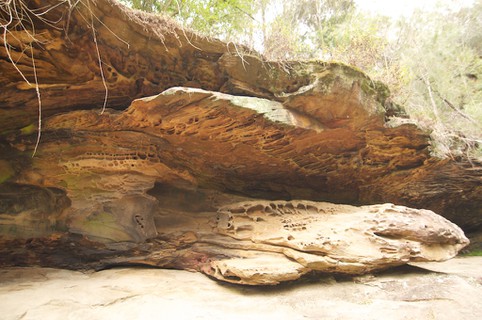
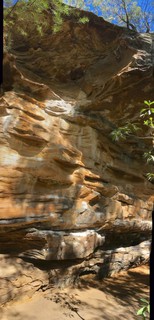
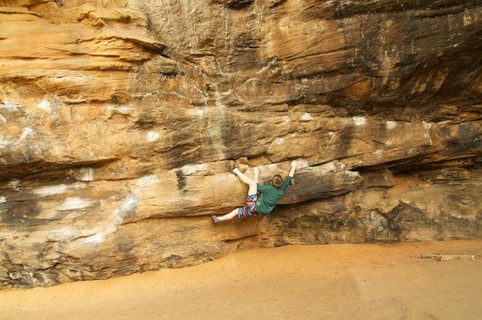
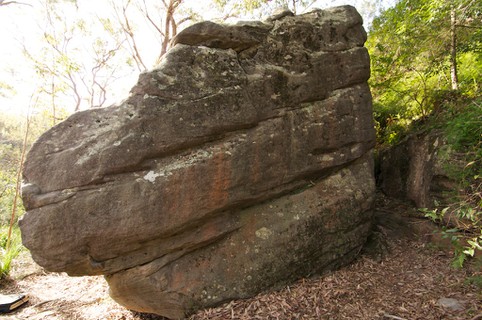
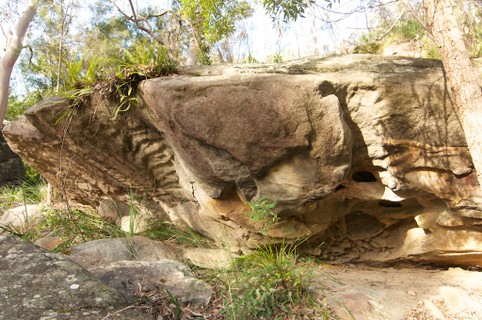
1.1. The Big Pump 32 routes in Crag
- Summary:
-
Mostly Bouldering
Lat / Long: -33.775108, 151.136951
summary
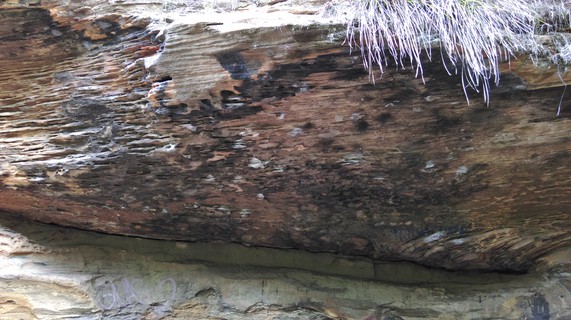
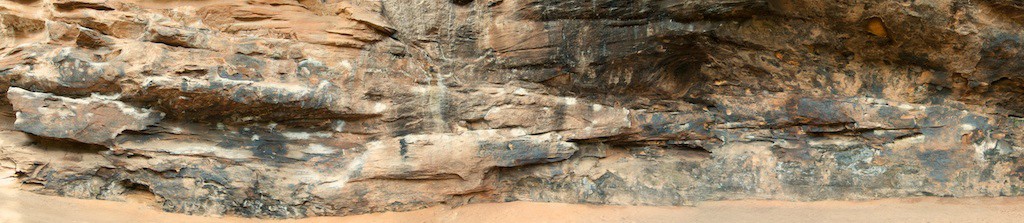
This area consists of overhangs and ceilings. Generally the main cave stays perfectly dry in the wet.
description
An overhanging cave with a fine red dust that sticks to everything. Has a high grunge factor. It used to be a favourite training ground in the 80's for developing endurance. The traverse from left to right - The Big Pump - is around 28.
Only a few of the main problems are shown and there are zillion variants.
Excellent in summer and also in wet weather. For some obscure reason the main cave doesn't tend to suffer from seepage after rain.
All sport routes are designed to be stick clipped to keep the bolts out of the boulder problems. A lot of the starts are problems in their own right, so definitely consider doing this.
access issues
In 2021 The Big Pump has been identified as a significant enclosed shelter which is a highly cultural, scientific, and archaeological site. The Aboriginal Heritage Information Management System (AHIMS) identifies the site as “De Burghs Bridge”.
approach
From the corner of Blaxland Rd and Terrace Rd Killara walk through Allen Park and follow the track down to the creek. Take care crossing the creek and immediately follow the shore line to your right. The first cave you get to is the Lower Cave with some ceiling problems to master.
From the Lower Cave you can see the main attraction if you look up and to your right. Walk and scramble up to it.
Be prepared for two things...red dust and The Big Pump.
Keep in mind, if you crossed the river to get to the crag and it's raining the water levels tend to rise quickly. An alternative approach/exit is to continue to follow the walking trail (which you turned off to get to the caves) up behind the climbing area until it passes under the large bridge. From here it is not too hard to walk back around to your car.
history
Steve Knight discovered this in the early 80's. Geoff Weigand used to train here with a weight belt which is how he probably destroyed his elbows.
  |
||||||||
| Route | Grade | Style | Selected ascents | |||||
|---|---|---|---|---|---|---|---|---|
The Lower CaveMAY BE BRITTLE AFTER RAIN! Please avoid climbing these routes after rain as there is only a thin exterior layer keeping the holds on. If you do come after rain focus on problems in The Main Cave - the rock quality is much better and it will be dry. | ||||||||
| 2 | ★★ Starter A | V0 | 2m | |||||
| 3 | ★★ Starter B | V0 | 2m | |||||
| 4 |
★★ Lower Cave A
Traverse upside down through the roof above the ledge. | V1 | 5m | |||||
| 5 |
★★ Lower Cave B
From the back of the cave follow the slots out through the roof. | V3 | 4m | |||||
| 6 |
★ Lower Cave D
Start on two flat jugs and move through crimps to finish up jugs. | V3 | 4m | |||||
| 7 |
★ Lower Cave C
Start on the hold above the ledge, and follow chalked holds to join up with Lower Cave B to the top. Set: Kevin Li, 22 May 2021 | V1 | 5m | |||||
| 8 |
★★★ Dragons Lair
Classic. Use only the holds in the beta vid for your hands, anything for feet. https://www.youtube.com/watch?v=xjnKqjrdq-w FA: Mike croker | V7 | ||||||
| 9 |
★★ Dragon's Den
Start on the jug/slot on the right, head up then traverse left to join the V3. | V6 | 4m | |||||
| 10 |
★★★ Hipster Bearded Dragon
Starts right at the slot/jugs, head up and left (above Dragon's Den) to join the V3. FA: Mike Forward, 11 Dec 2016 | V8 | ||||||
| 11 |
Pogona
Start as for 'Dragon's Den' then traverse left along the bottom lip holds joining into 'Lower Cave B'. The bottom ledge is off. FA: Unknown Set: Phillip Booth | V5/6 | ||||||
  |
||||||||
| Route | Grade | Style | Selected ascents | |||||
The Main Cave | ||||||||
| 13 |
★★ The Nudist Route
A pumpy number that climbs like one long boulder problem. Thought provoking moves up the face followed by generous holds through the roof. RBs the whole way. | 23 | 12m, 5 | |||||
| 14 |
★★ The Nudist Extension
Start up the nudist. When you get to the anchors throw for a big move right around the mossy face then follow the lip of the roof for another 5m on a sightseeing tour of bygone bolts (clip the fresh ones though). Finishes at chains, second or back-jump to clean. | 24 | 19m, 8 | |||||
| 15 |
★★ The Riders of Rohan
Start up from the sloping rail and move quickly to the chalked jug. A series of big moves through increasingly bad slopers brings you to the roof. Even bigger moves to more friendly holds on the lip and swing on through to the anchors of the Nudist Route. 2 FHs followed by 2RBs to the anchor. Grade in the realm of 25. Stick-clipping the first bolt strongly recommended. FA: Alex Bowes, 26 Dec 2020 | 24 | 12m, 5 | |||||
| 16 |
★★ King of the Pump
Link Riders of Rohan into the Nudist extension finish. Reasonably classic and good pumping fun. FA: Alex Bowes, 1 May 2023 | 25 | 19m, 8 | |||||
| 17 |
★★ 2
Start below the beginning of Mummy Dust and dyno your way up to a good jug near the first manky bolt. The arete and big break are off, as is matching hands. | V3 | 3m | |||||
| 18 |
★ Sobek
Long moves on jugs! Start on the big break a bit right of the arete / start of 'Mummy Dust' and dyno up to the next chalked jug. Continue up to same finishing hold for '2'. Good one to get the juices flowing. Grade aligned with other routes here, might be V2? FA: Unknown Set: Phillip Booth | V1 | 3m | |||||
| 19 |
★★ Jug 2
Sit start for Jug 1 and finish for Sobek | V1 | ||||||
| 20 |
★★ Jug 1
Sit start on undercling and finish out right on jug. | V1 | ||||||
| 21 |
★ Warm Up Traverse
Start as for Mummy Dust but go high to the start of The High Traverse. | V1 | 7m | |||||
| 22 |
★★★ Mummy Dust / The Big Pump
The classic training problem. Usually done left to right. If you don't rest in the little cave it is apparently equivalent to a 28. FA: Geoff Weigand | V5 | 20m | |||||
 |
||||||||
| Route | Grade | Style | Selected ascents | |||||
| 23 |
★★★ The High Traverse
A series of desperate iron crosses that links into Mummy Dust. | V7 | ||||||
| 24 |
★ 3
Up via the big undercling hole. | V0 | 3m | |||||
| 25 |
★★ The Layaway / 4
Layaway to layaway to jug. Balancy and committing. | V2 | 3m | |||||
| 26 |
★ The Layaway Sit
Sit start as for 'The Ramp' and head up to join original stand start. | V3 | ||||||
| 27 |
★★ The Ramp
A powerful and desperate crag classic. Start matched on the bottom sloper rail and power up the slopey ramp, past an edge, to the finish jug up high (on 'The High Traverse'). | V5 | 3m | |||||
| 28 |
★ 6
Yet another dyno. | V1 | 3m | |||||
| 29 |
Mummy's Old Carrots
Originally climbed back when the pyramids were being constructed. Now on some more friendly bolts. Start up the boulder problem 6, then do another boulder problem, followed by a dyno and another 2 boulder problems to get to the anchor. The grade is an absolute guess, and the real name and first ascensionist is a mystery. (does anyone know?) | 25 | 10m, 5 | |||||
| 30 |
★ Mummy's Traditional Traverse
Start up Mummy's Old Carrots, clip the anchor and climb past the fixed nut into the crack below the roof. Follow this all the way until it fizzles out past multiple blobs of old coach screw. Back jump (consider re-aiding if too tired) to clean. Whispers amongst the local trees suggest that back in the day this was in the realm of 28/29 but someone local and wise may have some more solid information on this (as well as the real name and FA). | 28 | 30m | |||||
| 31 |
★ 7
Traverse left and up out of the cave. Heel hooking is off. | V1 | 2m | |||||
| 32 |
★★ Hapi
Start on the low ridge edge just right of the start of the recess. Go up via big chalked scoop to the 'The High Traverse' avoiding the chalked holds on the right baby arete. Then continue left and finish matched on the final hold of '7'. Set: Phillip Booth FA: Unknown | V1 | 3m | |||||
| 33 |
★ Ra
Another easy warm-up for the cave. Start as for '8' on the right side of the cave then go up and traverse left on the high chalked holds (reversing 'The High Traverse'). Match on the final hold for '7' to finish. FA: Unknown Set: Phillip Booth, 2020 | V1 | 4m | |||||
| 34 |
★★ 8
Traverse right out of the cave. | V2 | 5m | |||||
 Phillip Booth
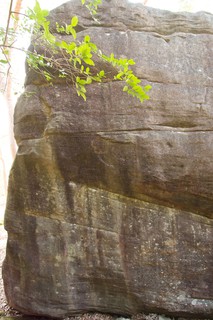
1.2. The Block 37 routes in Crag
- Summary:
-
All Bouldering
Lat / Long: -33.775280, 151.139851
summary
Boulder right on the Great North Walk
description
Bush boulder with some highballs and slopers.
access issues
The boulder is right on the Great North Walk which has significant pedestrian traffic on either side. Trackside climbs are on top of walkers.
approach
Park at the corner of Blaxland and Terrace Roads, West Killara. Enter through the gate on that corner, walk directly across the small, grassy clearing and on to the service trail. Keep walking past the "Lane Cove National Park" sign for about 150m until you see the small Great North Walk marker on the left (the track ahead goes to 'The Big Pump'). Turn left onto the GNW and proceed 300m, past a rising cliff, a complete overhang, and a waterfall. The boulder is right in the middle of the Great North Walk.
 |
||||||||
| Route | Grade | Style | Selected ascents | |||||
|---|---|---|---|---|---|---|---|---|
TracksideThese climbs are right on the Great North Walk as it runs beside the boulder. | ||||||||
| 2 | ★★ Awesome arete | V1 | 4m | |||||
| 3 |
★ Flake to flake
Yet another problem that's been vandalised. The starting flake is bit smaller than it used to be. Jump from the starting flake to the next flake and then straight up. | V2 | 4m | |||||
| 4 | Flake to flake (variant start) | V3 | ||||||
| 5 | ★ Big Artie | V3 | ||||||
| 6 | Big Artie (variant start) | V4 | ||||||
| 7 |
★★★ Backdoor Benny
One of the best 5s in Sydney. Start right hand in the pocketey side pull just left of the scoop and go straight up aiming for the nice uncut just left of the scoop up high. Nails. | V5 | 5m | |||||
| 8 | King Wally | V6 | ||||||
| 9 | Oh bondage up yours! | V7 | ||||||
| 10 | Date work | V6 | ||||||
| 11 | Worked date | V4 | ||||||
| 12 | ★★★ The end of history | V8 | ||||||
| 13 | ★★ The scoop | V0 | 4m | |||||
| 14 | Grand final fever | V6 | ||||||
| 15 | The brown | V6 | ||||||
  |
||||||||
| Route | Grade | Style | Selected ascents | |||||
| 16 | ★ I'm sure you'll be able to take my wheelchair on the aeroplane | V3 | ||||||
| 17 | ★★ The pinch | V2 | ||||||
| 18 | ★ Loose head | V2 | ||||||
| 19 | ★ The north east ridge | V2 | ||||||
BacksideThese climbs are on the rear of the boulder. There use to be a big edge on the State Of Origin problems but some vandal smashed it off, so you now need to pop for the smaller holds in the break. | ||||||||
| 21 | Warm Up 1 | V0 | ||||||
| 22 | ★ Warm Up 2 | V0 | 3m | |||||
| 23 |
Do Climbers Even Watch Footy?
Up crack | V1 | ||||||
  |
||||||||
| Route | Grade | Style | Selected ascents | |||||
| 24 |
Clothesline
From the arete traverse right finishing up Bog On Up. | V8 | ||||||
| 25 |
★ Head high
About half way between the arete and Bog On Up is a faint feature around head height with two slopes on either side. Grab the slopes and make a series of desperate slaps to the right finishing up Bog On Up. | V6 | ||||||
| 26 |
★ Bog on up
Mantle the good holds | V1 | ||||||
| 27 |
★★ State of origin 1
Start on the lowest holds and pop for the small edges then up over left. There used to be a big edge, but it has been smashed off so this is now probably harder than V3. | V3 | 3m | |||||
| 28 | ★★ State of origin 2 | V4 | ||||||
| 29 | ★★★ State of origin 3 (the decider) | V5 | ||||||
| 30 |
★★ Dying to know
Sit start and a long reach. The arete and the big edge half way up on its left are off. | V6 | 3m | |||||
 |
||||||||
| Route | Grade | Style | Selected ascents | |||||
| 31 | ★★ Ugly arete | V2 | 3m | |||||
| 32 | Steely Neilly | V5 | ||||||
| 33 |
★★ Teddybear's picnic
Right of arete, starting very low. 'Arete' is off. | V4 | 3m | |||||
| 34 | ★ Teddybear's picnic (eliminate) | V5 | 3m | |||||
| 35 |
Descent Route
Easiest way off the Block | V0 | ||||||
  |
||||||||
| Route | Grade | Style | Selected ascents | |||||
The Snake PitOverhang 10m right of The Block | ||||||||
| 37 |
★★★ Beyoncé’s Factory Workers
Start on obvious jug. Needs some repeats to confirm grade. Good start sequence. Set: Eson Zhao FA: Eson, 3 Sep 2021 | V6 | 2m | |||||
| 38 |
★★ Snake eyes
Since the jug has been smashed off by some vandal this may be undoable by mere mortals. | V3 | ||||||
| 39 |
★★ Snaked
Start in the back of the cave, up out over the jugs and wrestle with the tricky finishing mantle. | V4 | ||||||
| 40 | Trouser snake | V4 | ||||||
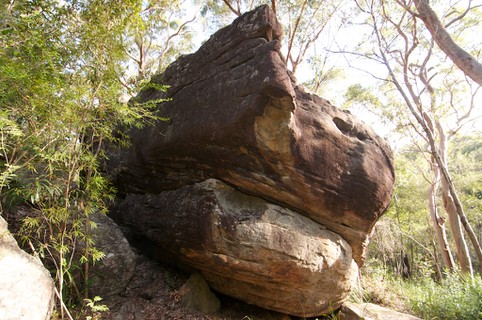
1.3. The vape cave 7 routes in Boulder
- Summary:
-
All Bouldering
Lat / Long: -33.776377, 151.140631
description
Nice cave with some hard problems
approach
100m further along the track than the block. You won’t miss it.
history
no known history
| Route | Grade | Style | Selected ascents | |||||
|---|---|---|---|---|---|---|---|---|
| 1 |
★★ Ectoplasm
From the logical start holds, climb the roof to the big hollow hole before topping out. All holds are in, even the big flake out left. | V3 | ||||||
| 2 |
★★ 35 mg
Start on the obvious, well chalked hold in the center of the wall. Traverse left using the SAME level of holds for your hands. All foot holds are in. finishing around the corner on the mega end jug. Classic. Done sit starting as for Super Birdman and topping out round the corner at V5/6. MD 2023. FA: Alex Bowes | V7 | 4m | |||||
| 3 | ★★★ Open project #? | |||||||
| 4 |
★ Enter Sandman
Sit start on farthest right undercling, rock onto face and finish via juggy mantle FA: Nathan Miles | V2 | 3m | |||||
| 5 |
Open Project #2
Low start to 35mg starting on jugs on back wall. | |||||||
| 6 |
★★★ Super birdman
Start under roof on jugs and bust out via the underlcing to finish up and left on the face. | V8 | ||||||
| 7 |
★★★ Midas touch
Direct finish of Super birdman. | V11 | ||||||
/6a/9d/6a9d8a39f517b8795d19c4744afe8665cf6429aa) /24/b6/24b6d25ee466e2acdd3f092f4d9bab07861471ce)  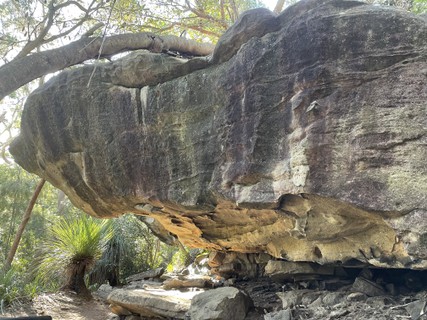 |
||||||||
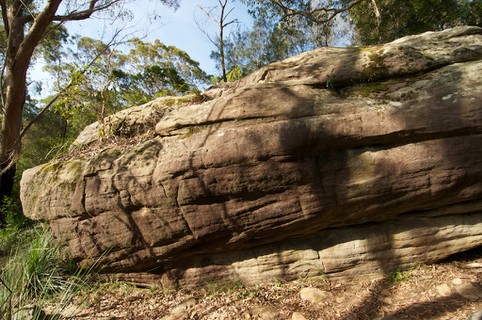
1.4. Sterlo 12 routes in Area
- Summary:
-
All Bouldering
Lat / Long: -33.775164, 151.139758
summary
Potential for awesome lines.
description
Boulder near river before the block.
approach
Down hill before the block near river.
/f5/eb/f5eb51f016d4019d7f363cec34792aa08023df0c) 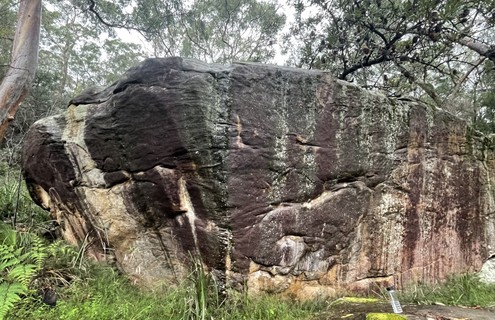 |
||||||||
| Route | Grade | Style | Selected ascents | |||||
|---|---|---|---|---|---|---|---|---|
| 1 |
G-Train
Start on the big flat hold and climb up the wall on nice edges | V1 | ||||||
| 2 |
★ Sugar Caine
Climb the blunt arete starting in the break. | V1 | ||||||
| 3 |
Half-Time Orange
Stand on the small rock to reach a side pull edge with your right hand. Jump to the chicken head then throw to the top. Short but sweet. | V4 | ||||||
| 4 |
★ Bannana Kick
Start left han don the side pull crimp and right hand on the horizontal crimp. Pull on (no jump starts), throw to the flat edge and finishing as for Friday Night Lights. | V7 | ||||||
| 5 |
★★★ Friday Night Lights
The best line on this boulder. A crimpy traverse leads to a big throw and tricky top out. Start at the obvious sit start on the left of the boulder and follow the obvious line right. Dyno to the top when you reach the flat edge and chickenhead. | V8 | ||||||
| 6 |
★★ Saturday Night Football
Climb Friday Night Lights to the flat edge then cross to the chicken head with your left hand to finish as for Half-Time Orange. | V7 | ||||||
| 7 |
★★ Sterlo On The Couch
Start on the two micro crimps, throw to the jug then make long lock-offs to a classic mantle top out. | V7 | ||||||
| 8 |
★ Above the Horizontal
Start on the big jug and make a big move left to a tiny edge. | V8 | ||||||
| 9 |
The Crimp Test Project
Sit start as for Friday Night Lights and climb straight up past some microscopic crimps. | |||||||
| 10 |
★ Grapple Tackle
Stand start and climb the faint arete using whatever holds you can find. | V9 | ||||||
| 11 | 1 | |||||||
| 12 | 2 | |||||||