A Crag Guide gives an extensive view of all sub areas and climbs at a point in the index. It shows a snapshot of the index heirachy, up to 300 climbs (or areas) on a single web page. It shows selected comments climbers have made on a recently submitted ascent.
At a minor crag level this should be suitable for printing and taking with you on a climbing trip as an adjunct to your guidebook.
This guide was generated anonymously. Login to show your logged ascents against each route.
Warning
Rock climbing is extremely dangerous and can result in serious injury or death. Users acting on any information directly or indirectly available from this site do so at their own risk.
This guide is compiled from a community of users and is presented without verification that the information is accurate or complete and is subject to system errors. By using this guide you acknowledge that the material described in this document is extremely dangerous, and that the content may be misleading or wrong. In particular there may be misdescriptions of routes, incorrectly drawn topo lines, incorrect difficulty ratings or incorrect or missing protection ratings. This includes both errors from the content and system errors.
Nobody has checked this particlular guide so you cannot rely on it's accuracy like you would a store bought guide.
You should not depend on any information gleaned from this guide for your personal safety.
You must keep this warning with the guide. For more information refer to our:
Usage policy
Contributors
Thanks to the following people who have contributed to this crag guide:
Chan
Kyle Dunsire
Phillip Booth
Lee McDougall
George B
Maurício Chino
Alex Vince
Sean
Chris
Hugo Hornshaw
The size of a person's name reflects their Crag Karma, which is their level of contribution. You can help contribute to your local crag by adding descriptions, photos, topos and more.
Some content has been provided under license from: © Australian Climbing Association Queensland (Creative Commons, Attribution, Share-Alike 2.5 AU)
Table of contents
- 1. The Corridor Boulders 27 in Boulder
- 2. Index by grade
1. The Corridor Boulders 27 routes in Boulder
- Summary:
-
All Bouldering
Lat / Long: -33.763412, 151.010087
description
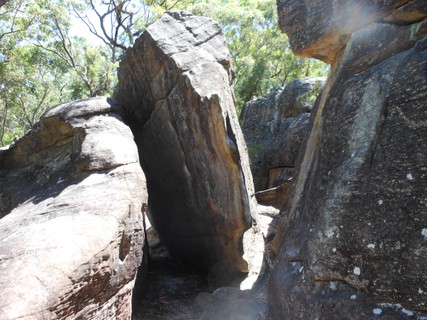
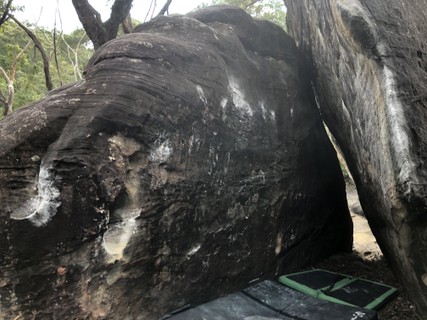
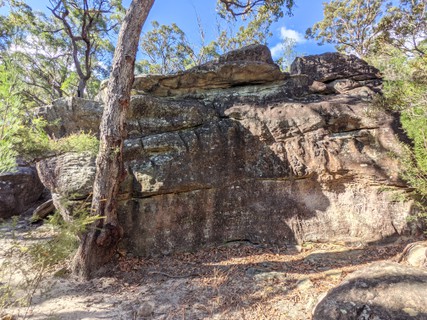
Three boulders with some fun climbing. Dries very quickly.
access issues
If you have benefited from climbing infrastructure in NSW, please consider making a donation towards maintenance costs. The Sydney Rockclimbing Club Rebolting Fund finances the replacement of old bolts on existing climbs and the maintenance of other hardware such as fixed ropes and anchors. The SRC purchases hardware, such as bolts and glue, and distributes them to volunteer rebolters across the state of New South Wales. For more information, including donation details, visit https://sydneyrockies.org.au/rebolting/
/b4/7f/b47ffcb49f70aadf4c24b572a0e8946eb1e29d62) 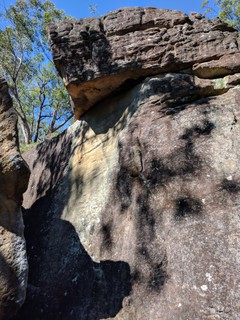 |
||||||||
| Route | Grade | Style | Selected ascents | |||||
|---|---|---|---|---|---|---|---|---|
| 1 |
★ Sherman Tank
Easily up the layaway arete. FA: Tim O'Neill | V1 | 3m | |||||
| 2 |
★ V3??
Find shallow mono above head height 1m R of "Sherman Tank". Up using this with R hand. Sherman Tank is off. | V3 | 3m | |||||
| 3 |
★ A?
Up the middle of the eastern rock, from the middle. Up through some slabby crimps | V0 | 3m | |||||
| 4 |
★ B?
Left of yellow streak and up overhung boulder | V2 | 3m | |||||
| 5 |
★ Bomb Shelter
Right of yellow streak and up overhung boulder FA: Rob Saunders | V1 | 3m | |||||
/dd/29/dd29ea398f6c94b119696bddd984531eec9e82dd) |
||||||||
| Route | Grade | Style | Selected ascents | |||||
| 6 |
★ You Go Slopia
Right slabby arete of western side. Usually pretty sandy. Bad fall FA: Rob Saunders | V2 R | 4m | |||||
| 7 |
★ You Go Squeeze
Up the crimps between You Go Slow and You Go Slopia without using any holds on the arete or the big edges out left. | V4 | 3m | |||||
| 8 |
★ You Go Slow
Mantle on the slopers and then balance to the top. FA: Tim O'Neill | V1 | 3m | |||||
| 9 |
★ C?
Left of You Go Slow, up the crimps | V2 | 3m | |||||
| 10 | ★ D? | V4 | 4m | |||||
| 11 |
★ Problem 8
Left of 'C?', up the streak of lichen. | V4 | 4m | |||||
  |
||||||||
| Route | Grade | Style | Selected ascents | |||||
| 12 |
★★ The Pincer Movement
Sit start, pinch, squeeze and wiggle your way up the knife edge arete. FA: Saxon Johns | V5 | 4m | |||||
| 13 |
★★ The Corridor
Desperate rounded sidepull climbing in the alley up the face. Left of The Pincer Movement, follow chalked cobwebbed crack. FA: Sharik Walker | V12 | ||||||
| 14 |
★ Missile Silo
One hard move on small crimps. FA: Tim O'Neill | V3 | 2m | |||||
| 15 | ★ Just L of Missile Silo | V4 | 2m | |||||
| 16 |
★ The Corridor of Uncertainty
Start from the obvious left hand sidepull and work your way rightward using the slopey crimps to finish up Missile Silo. Better avoid it when wet. | V6 | 4m | |||||
  |
||||||||
| Route | Grade | Style | Selected ascents | |||||
| 17 |
★ E?
Go up from above the low white scoop. Westernmost face of The Corridor Boulders. | V0 | 3m | |||||
| 18 |
★★ Baby Hops
Small dyno on slabby wall. Start from two good jugs on the right side of the wall and swing towards the left, up towards a good jug which you can match. Then climb towards circular jug at the topout on the top left. | V1 | 4m | |||||
| 19 |
★ F?
Directly to the right of the tree. Westernmost face of The Corridor Boulders. | V0 | 3m | |||||
| 20 |
★ G?
Sit start on the horizontal break, move up via some angled crimps and top out over bulge feature. | V3 | 3m | |||||
| 21 |
★★ Right Metal Sleeve
Full Metal Jacket Original but exit out right via a small left hand crimp and another right sidepull. Jug bulge is out for hands and feet. FA: Hugo Hornshaw, 4 Aug 2021 | V9 | 4m | |||||
 |
||||||||
| Route | Grade | Style | Selected ascents | |||||
| 22 |
★★ Full Metal Jacket
Start with hands on the lowest side-pulls (the right hand is below the lower horizontal seam right at the bottom of the vertical seam where it tapers off), head powerfully up the overhanging arete. The original problem 'Full Metal Jacket (Original)' uses all the sidepulls and generally requires a high heel hook. FA: Rob Saunders | V5 | 4m | |||||
| 23 |
★★★ Full Metal Jacket (Original)
Start with hands on the lowest side-pulls (the right hand is below the lower horizontal seam right at the bottom of the vertical seam where it tapers off) and don't skip any! See also: Full Metal Jacket, a V5 variant skipping the shallow right sidepull. | V8 | 3m | |||||
| 24 |
★★ Half Metal Jacket
Rounded bulge catching the sidepulls then lunge to the knob with your left. Start: Sit FA: Adam Griffiths | V5 | 3m | |||||
| 25 |
★★ Quarter Metal Jacket
Rounded bulge catching the sidepulls then lunge to the knob with your right. Start: Sit FA: Tim O'Neill | V5 | ||||||
| 26 |
★★ The Bilge
Start on flake then pocket and up to slot and mantle over. Start: Sit FA: Will Holbrook | V4 | 3m | |||||
| 27 |
★★ Bobby Bilge
Start on flake to the jug right side of the cavity, big push to the crimp up and to the right, top out like Full Metal Jacket Set: 6 Aug 2021 | V2 | 3m | |||||
 Mauricio Chino
2. Index by grade
| Grade | Stars | Name | Style | Pop | |
|---|---|---|---|---|---|
| V0 | ★ | A? | 3m | ||
| ★ | E? | 3m | |||
| ★ | F? | 3m | |||
| V1 | ★★ | Baby Hops | 4m | ||
| ★ | Bomb Shelter | 3m | |||
| ★ | Sherman Tank | 3m | |||
| ★ | You Go Slow | 3m | |||
| V2 | ★ | B? | 3m | ||
| ★★ | Bobby Bilge | 3m | |||
| ★ | C? | 3m | |||
| V2 R | ★ | You Go Slopia | 4m | ||
| V3 | ★ | G? | 3m | ||
| ★ | Missile Silo | 2m | |||
| ★ | V3?? | 3m | |||
| V4 | ★ | D? | 4m | ||
| ★ | Just L of Missile Silo | 2m | |||
| ★ | Problem 8 | 4m | |||
| ★★ | The Bilge | 3m | |||
| ★ | You Go Squeeze | 3m | |||
| V5 | ★★ | Full Metal Jacket | 4m | ||
| ★★ | Half Metal Jacket | 3m | |||
| ★★ | Quarter Metal Jacket | ||||
| ★★ | The Pincer Movement | 4m | |||
| V6 | ★ | The Corridor of Uncertainty | 4m | ||
| V8 | ★★★ | Full Metal Jacket (Original) | 3m | ||
| V9 | ★★ | Right Metal Sleeve | 4m | ||
| V12 | ★★ | The Corridor |