A Crag Guide gives an extensive view of all sub areas and climbs at a point in the index. It shows a snapshot of the index heirachy, up to 300 climbs (or areas) on a single web page. It shows selected comments climbers have made on a recently submitted ascent.
At a minor crag level this should be suitable for printing and taking with you on a climbing trip as an adjunct to your guidebook.
This guide was generated anonymously. Login to show your logged ascents against each route.
Warning
Rock climbing is extremely dangerous and can result in serious injury or death. Users acting on any information directly or indirectly available from this site do so at their own risk.
This guide is compiled from a community of users and is presented without verification that the information is accurate or complete and is subject to system errors. By using this guide you acknowledge that the material described in this document is extremely dangerous, and that the content may be misleading or wrong. In particular there may be misdescriptions of routes, incorrectly drawn topo lines, incorrect difficulty ratings or incorrect or missing protection ratings. This includes both errors from the content and system errors.
Nobody has checked this particlular guide so you cannot rely on it's accuracy like you would a store bought guide.
You should not depend on any information gleaned from this guide for your personal safety.
You must keep this warning with the guide. For more information refer to our:
Usage policy
Contributors
Thanks to the following people who have contributed to this crag guide:
Bevan Ashby
Dane Evans
Tim Williams
Stephen
Pete
James Lister
Nick White
Andrew Carr
Geoff Campbell
Michael Watson
The size of a person's name reflects their Crag Karma, which is their level of contribution. You can help contribute to your local crag by adding descriptions, photos, topos and more.
Table of contents
- 1.
Cohiba
139 in Crag
- 1.1. Teenage Angst Sector 22 in Sector
- 1.2. The Abstinence Sector 13 in Sector
- 1.3. The Arch 8 in Sector
- 1.4. Chicken boulder 1 in Boulder
- 1.5. Castro 12 in Boulder
- 1.6. Fundamental Sector 7 in Boulder
- 1.7. Animal Train Sector 21 in Sector
- 1.8. Valinor Boulder 2 in Area
- 1.9. Chicken Fingers Sector 19 in Sector
- 1.10. 100 Bananas Sector 12 in Sector
- 1.11. Más Elevado Sector 7 in Sector
- 1.12. Historic listings 14 in Unknown
- 2. Index by grade
1. Cohiba 139 routes in Crag
- Summary:
-
All Bouldering
Lat / Long: -35.370827, 148.907404
- Update June 2021
- A gate has been installed on the West side of the intersection near Cohiba East. If this gate is closed, you'll have to walk along the road to get to Cohiba.
description
Granite with a view. One of the most redeveloped areas with a number of great lines and potential for more.
access issues
This is part of the Lower Cotter water catchment area. There are a number of rehabilitation projects underway to manage run off and erosion.
approach
Follow Laurel Camp Road for three kilometres then turn right. Follow Pierces Creek Road for one kilometre then turn left. Park on the road near the blue trackside marker and walk 100 metres directly uphill towards the boulders.
ethic
Pierces Creek is primarily a bouldering area however a number of naturally protected lines have been established over the years. No bolting of routes is accepted. Instead, ascentionists use natural protection on the higher problems, or where that is not available, rely on mats, spotters, and gumption.
| Route | Grade | Style | Selected ascents | |||||
|---|---|---|---|---|---|---|---|---|
| 13 |
Baby's Day Out
FA: Jonny Will, Jul 2020 | {UIAA} V2 | 3m | |||||
|
I'm guessing these are over towards Animal Train? please confirm and place in correct sub area | ||||||||
1.1. Teenage Angst Sector 22 routes in Sector
- Summary:
-
Lat / Long: -35.368985, 148.909259
  |
||||||||
| Route | Grade | Style | Selected ascents | |||||
|---|---|---|---|---|---|---|---|---|
| 1 |
1.
Stand start then climb up and top out. FA: Bevan Ashby, 13 Jun 2016 | V1 | 3m | |||||
| 2 |
2.
Sit start then climb up and top out. FA: Bevan Ashby, 13 Jun 2016 | V0 | 3m | |||||
| 3 |
★★ Slapsadaisicle / Slapsickle / Slap and Press
Powerful start, then technical on slopers, easy finish. Around the side of the boulder from Bow You Bastards, start on good holds (past the gaston) and up. | V5 | 3m | |||||
| 4 |
★ Promote that Man
Sit start then climb up and top out. FA: Bevan Ashby, 13 Jun 2016 | V6 | 4m | |||||
| 5 |
★ Half a star
Sit start as for Slapsadaisacle, traverse low and right through good holds to finished matched on the good hold of St. Christopher (head height, a little bit before the vague arête). Going there and back again adds a grade. | V3 | 4m | |||||
   |
||||||||
| Route | Grade | Style | Selected ascents | |||||
| 6 |
★ Gastagon
Sit start as for Saint Christopher but go straight to the gaston rather than up. | V7 | 5m | |||||
| 7 |
★★ Saint Christopher
A powerful start then traverses left into slapsickle. It will leave you pumped. | V8 | 3m | |||||
| 8 |
Bow You Bastards
Sit start. Throw to a rail from some poor incuts praying for footers now that one of the epoxied holds has disappeared. Cruxes - getting from the sit to the good holds, and executing a gaston out left and continuing left and around, topping out on big holds as for the V5. An extension to Saint Christopher, almost 180 degrees around the circle from Slapsickle. FA: Chris Webb | V11 | 10m | |||||
| 9 |
★★ 3.
Mantel the vague scoop right next to the 'Bow You Bastards' (and many variants) boulder. | V5 | 3m | |||||
| 10 |
4.
Stand start then climb up and top out. | V0 | 2m | |||||
   |
||||||||
| Route | Grade | Style | Selected ascents | |||||
| 11 |
5.
Stand start then climb up and top out. FA: Bevan Ashby, 31 May 2016 | V0 | 2m | |||||
| 12 |
★ Horny Fat Chick
Sit start left side arete then climb up and top out. FA: Bevan Ashby, 3 Jun 2016 | V5 | 4m | |||||
| 13 |
★★ Mr Negative Stand
Stand start arete then climb up and top out. FA: Bevan Ashby, 11 Jun 2016 | V7 | 4m | |||||
| 14 |
★★★ Mr Negative
Sit start from base of arete then climb up and top out. FA: Bevan Ashby, 25 Jun 2016 | V9 | 4m | |||||
| 15 |
★★★ Teenage Angst
Sit start. Sit start then out left and up through small incuts and very large moves, off-balance with crap footing! Big moves on okay holds to start, and then the crimpers and slopers start up. Off-angle. FA: chris Warner | V9 | 5m | |||||
| 16 |
Teenage Angst LHV
Sit start left of the start of Teenage Angst on a small pebble then out to the incuts left. | V9 | 5m | |||||
  |
||||||||
| Route | Grade | Style | Selected ascents | |||||
| 17 |
★ Maduro
Stand start then climb up and top out. | V4 | 3m | |||||
| 18 |
★ False Economy
Stand start then climb up and top out. FA: Bevan Ashby, 27 May 2016 | V4 | 4m | |||||
| 19 |
6.
Stand start then climb up and top out. FA: Bevan Ashby, 27 May 2016 | V1 | 3m | |||||
| 20 |
★★★ Higher education
Start with a high right jam between the boulders. Struggle upwards. Question your choices. Two stars if you're into offwidths, minus eight if you're not. FA: Geoff Campbell, 17 Jun 2018 | V1 | 2m | |||||
| 21 |
★ Abort Abort Abort
Stand start then climb up and top out. FA: Bevan Ashby, 27 May 2016 | V6 | 5m | |||||
| 22 |
7.
Stand start right hand arete. Climb up and top out. FA: Bevan Ashby, 20 May 2016 | V2 | 3m | |||||
 Bevan Ashby
1.2. The Abstinence Sector 13 routes in Sector
- Summary:
-
Lat / Long: -35.369120, 148.909168
 |
||||||||
| Route | Grade | Style | Selected ascents | |||||
|---|---|---|---|---|---|---|---|---|
| 1 |
1.
Sit start from incut jug on back of boulder then climb up and top out. | V2 | 2m | |||||
| 2 |
★★ The Abstinence RHV
Sit start from rail, then climb up trending rightwards and top out. | V6 | 3m | |||||
| 3 |
★★ The Abstinence LHV
Sit start from rail, then climb up trending leftwards and top out. FA: Bevan Ashby, 22 Jun 2016 | V7 | 3m | |||||
| 4 |
★ Rat's Nest
Sit start beneath crack/corner then climb up and top out. FA: Bevan Ashby, 27 Jun 2016 | V5 | 4m | |||||
| 5 |
★★ Taking Care of Business
Sit start right hand incut crimp, climb up and top out. FA: Bevan Ashby, 22 Jun 2016 | V5 | 4m | |||||
| 6 |
Fulffy Rats
Start as for Fluffy Cheesecake, travers right on small crimps, finish as for Rats Nest. FA: Stephen | V8 | ||||||
   |
||||||||
| Route | Grade | Style | Selected ascents | |||||
| 7 |
★★ Fluffy Cheesecake
Sit start then climb up slab gaining flake and top out. FA: Bevan Ashby, 18 May 2016 | V6 | 5m | |||||
| 8 |
★ Fluffy Cheesecake Stand
Stand start then climb up slab gaining flake and top out. Left of Taking Care of Business. Start with Two Crimps. Theres a mini foot ledge with a small tree stump on the left of it. FA: Bevan Ashby, 15 May 2016 | V5 | 4m | |||||
| 9 |
★ Hairy Bitch
Stand start then climb up and top out. FA: Bevan Ashby, 15 Jul 2016 | V3 | 3m | |||||
| 10 |
★ Indulgence
Sit start below the bulge, on the boulder directly behind The Abstinence, then straight up. FA: Pete, 2017 | V3 | 3m | |||||
| 11 |
Indulgence RHV
Sit start as for Indulgence, and then up and around onto the right hand face to finish. FA: Pete, 2017 | V4 | 3m | |||||
| 12 |
Up and down
Stand start and up on the highest part of the wall, up and left of Indulgence. Down climb this or jump down to a mat to get off the boulder. FA: Pete, 2017 | V0 | 3m | |||||
 |
||||||||
| Route | Grade | Style | Selected ascents | |||||
| 13 |
★ Overindulge
Stand start on the opposite end of the boulder to Indulgence, climbing up the left hand arete and face. FA: Pete, 2017 | V2 | 3m | |||||
1.3. The Arch 8 routes in Sector
- Summary:
-
Lat / Long: -35.369262, 148.909294
   |
||||||||
| Route | Grade | Style | Selected ascents | |||||
|---|---|---|---|---|---|---|---|---|
| 1 |
★★ Jaf Jaf
Stand start from base of diagonal crack then climb up and top out. FA: Bevan Ashby, 18 Dec 2016 | V3 | 6m | |||||
| 2 |
1.
Stand start from base of slab then climb up and top out. | V0 | 4m | |||||
| 3 |
★ Esplendidos
Looks like this used to be a hard compression problem and perhaps would still go that way. Right of Number 12 | V9 | 6m | |||||
| 4 |
★ Number 12
The obvious corner. The easiest descent from the whole boulder is to down climb the top of this and jump to the rock or a mat | V1 | 6m | |||||
| 5 |
Whooping
A highball line that previously went up the face between Split Infinitive and 'Number 12', Looks to be doable, but may be a bit harder FA: chris Warner | V6 | 7m | |||||
   |
||||||||
| Route | Grade | Style | Selected ascents | |||||
| 6 |
★★★ Split infinitive
Highball crack with little room to land. The problem is pretty easy, but hitting the pads wouldn't be (Take it as Grade19/20 trad) FA: Chris Warner | V0 | 6m | |||||
| 7 |
★ Flakey
Up the easy wall on good holds, a couple of metres left of Slab Climbing Blues. FA: Pete, 2017 | VB | 2m | |||||
| 8 |
★ Slab Climbing Blues
Up the undercut slabby groove, on the boulder directly behind and up the hill from Number 12. FA: Pete, 2017 | V4 | 4m | |||||
1.4. Chicken boulder 1 route in Boulder
- Summary:
-
Lat / Long: -35.369241, 148.908112
approach
Just off the track behind Animal Train looking uphill and diagonally right
 |
||||||||
| Route | Grade | Style | Selected ascents | |||||
|---|---|---|---|---|---|---|---|---|
| 1 |
★ Chickin Pickin
About 80 metres away from Animal Train across a gully and past an overgrown road. Bit hard to find at the moment. Hard and overhung. Stand start on the lowest point (the small notch) then up from sidecling or a match traversing right. Very physical. FA: David Nott, 14 Apr 2017 | V6 | ||||||
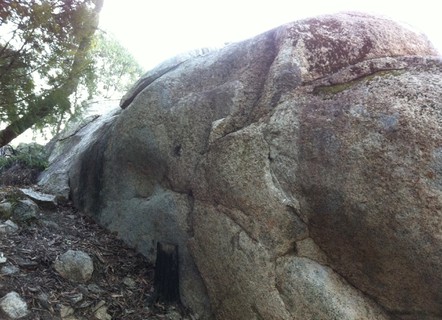
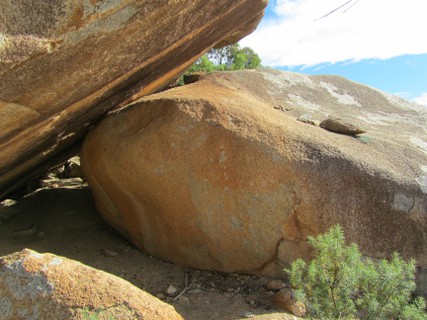
1.5. Castro 12 routes in Boulder
- Summary:
-
Lat / Long: -35.369213, 148.909650
description
A nicely featured boulder, a short walk left across the hill from the Teenage Angst area.
approach
About 50m along the small track that starts directly behind the start to Gastagon etc, passing a couple of other boulders on the way.
  |
||||||||
| Route | Grade | Style | Selected ascents | |||||
|---|---|---|---|---|---|---|---|---|
| 1 |
★ Lanceros
Sit start low on undercling/sidepull and directly up arete FA: Nick White, 2017 | V5 | 4m | |||||
| 2 |
★ Robustos
Low sit start on undercling/sidepull, then right to join the base of the good seam and across to finish up Magicos. FA: Pete, Apr 2017 | V4 | 3m | |||||
| 3 |
★ Revolucion
A link up of Robustos and Exquisitos. Follow the line of Robustos to the Magicos flake, then join the line of Exquisitos and follow that to the far right arête to finish. FA: Pete, 2017 | V6 | 4m | |||||
| 4 |
★★ Magicos
Sit start on the right side of the good flake, then up. FA: Pete, Apr 2017 | V0 | 3m | |||||
| 5 |
★★ Exquisitos
Start at good flake, traverse right across the horizontal break and then crimps to reach the far arete, then up. FA: Pete, 2017 | V6 | 4m | |||||
| 6 |
Siglo
Mantle from the good holds in the horizontal break. FA: Nick White, 2017 | V4 | 3m | |||||
| 7 |
★★ Coronas Supremos
Low sit start as for Coronas. Follow the start of Coronas left along the low flake, then head further left and traverse the horizontal break to finish up Magicos. FA: Pete, 2017 | V6 | 4m | |||||
| 8 |
★ Secretos
Stand start between Siglo and Coronas, then straight up on thin crimps and slopers in the high scoop. FA: Pete, 2017 | V5 | 3m | |||||
| 9 |
★★ Crimpos
Sit start below Secretos on the big shield block. Use tiny crimp and trickery to traverse left and top as for Siglo FA: Zoe R | V5 | 3m | |||||
/e8/9f/e89f3fa01f1f3bd02397f67522808c8fa49b8c3e)  /30/88/3088fa04ab6b1d3b35cf164e676f9fee01c8f0ce) |
||||||||
| Route | Grade | Style | Selected ascents | |||||
| 10 |
★ Coronas
Low sit start at the base of the flake. Left along the flake, then up via the scoop and arete. FA: Pete, Apr 2017 | V5 | 4m | |||||
|
Kid Kenobi is located about 20m downhill from the Castro boulder near the creek. | ||||||||
| 12 |
★★★ Kid Kenobi
Sit start from slot then climb up and top out. NOTE: seeps for at least a day after decent rain. FA: Bevan Ashby, 19 Oct 2020 | V9 | 4m | |||||
| 13 |
Spicelord's Slab
Coming from Teenage Angst sector to Castro, Boulder on the right. Stand start on tiny indentations in the rock, hands on the back side of the boulder, scramble to the top using any footholds you can find. FA: Eugene Tan, 17 Jun 2023 | V3 | 3m | |||||
1.6. Fundamental Sector 7 routes in Boulder
- Summary:
-
Lat / Long: -35.369395, 148.909106
description
The furthest boulder from the parking area, just below the old road.
  |
||||||||
| Route | Grade | Style | Selected ascents | |||||
|---|---|---|---|---|---|---|---|---|
| 1 |
Number 1
A traverse project starting either at the glued on holds or farther right as for the V4 and finishing as for 'Fundamental'. V11+ climbers please apply. Sit start of course. That's what boulderers do. | 8m | ||||||
| 2 |
★★ Perception
Up the arete/slab with reasonable holds to get you there. Powerful and technical start, that eases up after the first move. | V4 | 5m | |||||
| 3 |
Seditious
Stand start and mantle the vague scoop. FA: chris warner | V7 | 5m | |||||
| 4 |
★★★ Fundamental
Stand start matched on low rail then climb up and top out. | V10 | 3m | |||||
| 5 |
★ George of the Jungle
Start as for Nicole's then traverse right and top out on obvious ledge. (Watch out for that tree) FA: Michael Watson, 2 Aug 2020 | V2 | 2m | |||||
| 6 |
★★ Nicole's
A sit-start problem, up pressing into the scoop then large moves/frictioning to the top. Very bodymorphic, hard to grade. | V6 | 4m | |||||
| 7 |
Sea Jerky
Stand start then climb up and top out. FA: Bevan Ashby, 13 May 2016 | V2 | 4m | |||||
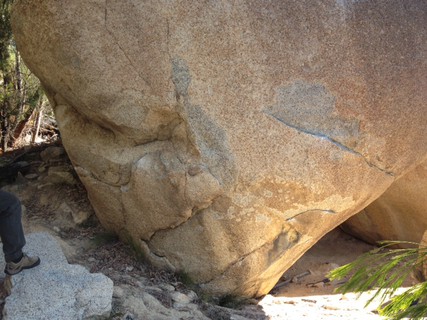
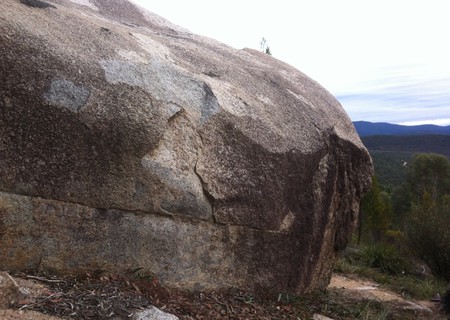
1.7. Animal Train Sector 21 routes in Sector
- Summary:
-
Lat / Long: -35.369026, 148.908858
  |
||||||||
| Route | Grade | Style | Selected ascents | |||||
|---|---|---|---|---|---|---|---|---|
| 1 |
★ Manatee Mantle
At the top of the smallish bloc, directly left (looking uphill) of the Animal Train bloc. Sit start with good holds, then straight up. FA: Pat, 2017 | V1 | 2m | |||||
| 2 |
★ Hamster Heels
Sit start and up. The good but detached low footer is out. FA: Nick White, 2017 | V2 | 3m | |||||
| 3 |
★ Ferrety Fingers
Stand start on two small crimps, then up to more crimps and an easier mantle. FA: Nick White, 2017 | V2 | 3m | |||||
| 4 |
★ Low Lemur
Sit start low with righthand on a side pull and left hand on either of the low edges. Pull on moving left and up. FA: Nick White, 2017 | V4 | 3m | |||||
| 5 |
★ Lefty Llama
Sit start at the arete. Up to side pull on the arete, then move left onto the slab and straight up. FA: Pat, 2017 | V5 | 3m | |||||
 /1c/eb/1ceba9bc1af2ab6da74affc71f40bbc62e823a01) /6f/6c/6f6ce325210044127b04ef9c6fca375f583cba17) |
||||||||
| Route | Grade | Style | Selected ascents | |||||
| 6 |
★★ The Likeable Llama
Sit start at the base of the boulder. Straight up the tapered arete/face, and then along the rib above. FA: Pete, 2017 | V6 | 4m | |||||
| 7 |
★★ Wily Whale
Right of The Likeable Llama arete/face, in the slot formed by the Animal Train bloc. Sit start low on the prominent side pull, then a big move to the lip, mantle, and up. FA: Nick White, 2017 | V4 | 3m | |||||
| 8 |
Limpet
On the left wall of the Animal Train bloc. Stand start with a decent crimp pinch, a metre or so left from Horsin' Around. Pull onto the only decent foothold, and up to a mantle. FA: Pete, 2017 | V4 | 3m | |||||
| 9 |
★ Horsin' Around
Stand start on the wall behind Wily Whale. Pull on with crimps, then up to mantle over the top. FA: Pete, 2017 | V4 | 3m | |||||
| 10 |
Crimp project/s
Up the wall to the right of Horsin' Around | 3m | ||||||
 /b1/76/b176fa3f3761fa5a7c8a2583f33c2bd8eefd8823) /d8/a0/d8a03a9e6f3dd3f8dd6303b13a45487e0bb67d33) /a2/fd/a2fd7c9095d3471b34d98907436de705831a4dba) |
||||||||
| Route | Grade | Style | Selected ascents | |||||
| 11 |
★★★ Animal Train
Warning Rock: The 'knee bar' flake at the start of AT is beginning to flex (not in a good way) Sit start the steep crack. A test piece for well 'ard crack climbers. You can try and layback/undercling this, but if you aren't Arnie or can't jam you're likely to fail. Eat your wheaties. King line of Cohiba. Follow the crack through the roof and up the slab to finish. Hopefully you have the perfect hand size. FA: george feig | V10 | 4m | |||||
| 12 |
★ Cagey Cheetah
Stand start, a couple of metres right from Animal Train. Up with crimps and the diagonal seam, to join the horizontal break and top. FA: Pete, 2017 | V4 | 4m | |||||
| 13 |
★ Winking Walrus
Stand start at the base of the arete (in front of the small block). Up the arete and wall to the left. [the lower part of the arete includes a loose-isn hanging block - you don't need to use it, but just beware] FA: Pete, 2017 | V3 | 4m | |||||
| 14 |
★★ Slinky Snake
Up the very nice easy corner FA: Pete, 2017 | V0 | 4m | |||||
| 15 |
Grumpy Bear
Stand start and up with ok crimps but poor feet, a few metres right of Slinky Snake and just before the end of the block. FA: Pete, 2017 | V5 | 3m | |||||
   |
||||||||
| Route | Grade | Style | Selected ascents | |||||
| 16 |
★★ The Weak Suffer What They Must
Stand start from RH side pull then climb up and top out. FA: Bevan Ashby, 7 Aug 2021 | V6 | 4m | |||||
| 17 |
★★★ JB is my Hero
Mantle the lip then climb up and top out. FA: Bevan Ashby, 22 Jun 2021 | V5 | 10m | |||||
| 18 |
★★ Too Much Monkey Business
Sit start beside the tree, with left hand on the lip and right hand on a side pull. Pull on and across to join Monkey Business, finishing up that line. Long and pumpy. FA: Nick White, 2017 | V5 | 3m | |||||
| 19 |
★★ Monkey Business
Stand start at the low end of the ridgeline flake. Traverse the lip leftwards to top out as for Chicken Run. FA: Pete, 2017 | V4 | 3m | |||||
| 20 |
Sneaky Fox
Stand start immediately left of the low wedged block. Up and over. FA: Pete, 2017 | VB | 2m | |||||
| 21 |
★ Chicken Run
Stand start with the good footer, immediately right of the low wedged block. Up and over the apex of the boulder. FA: Pete, 2017 | V0 | 2m | |||||
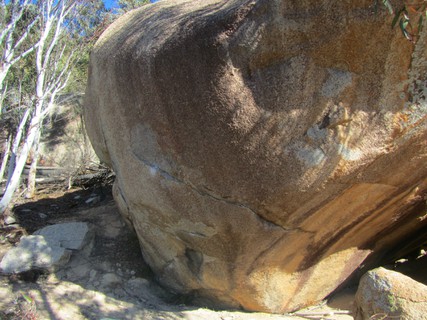
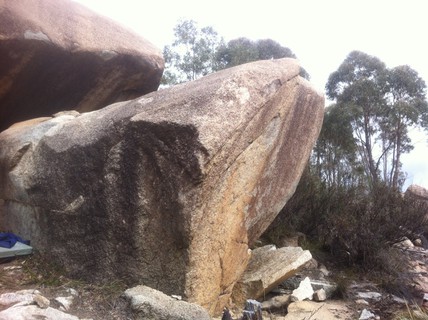
1.8. Valinor Boulder 2 routes in Area
- Summary:
-
Lat / Long: -35.369142, 148.908073
description
A small boulder with a few possible lines. Detached boulder under the overhang ain't in
approach
From Fundamental sector head west along the old road for 100m until you find the boulder on the left
/32/44/32443de1ae1a72c9cd979392def96ae6051e53d2) |
||||||||
| Route | Grade | Style | Selected ascents | |||||
|---|---|---|---|---|---|---|---|---|
| 1 |
★★★ Tulkas
Hang start on right hand jug, traverse left on crimps and slopers, mantle FA: Tim Williams, May 2022 | V8 | 3m | |||||
| 2 |
Tulkas Sit
Sit start on holds down and right of Tulkas' start jug, finish as for Tulkas | |||||||
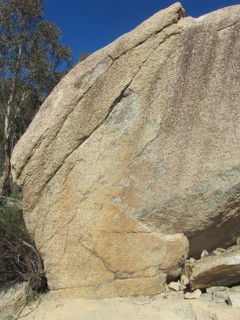
1.9. Chicken Fingers Sector 19 routes in Sector
- Summary:
-
Lat / Long: -35.368863, 148.908906
  |
||||||||
| Route | Grade | Style | Selected ascents | |||||
|---|---|---|---|---|---|---|---|---|
| 1 |
1.
Sit start then climb up and top out. FA: Bevan Ashby, 30 Jun 2016 | V5 | 3m | |||||
| 2 |
★ Nugget
Sit start beneath flake then climb up and top out. FA: Bevan Ashby, 2 Jul 2016 | V4 | 3m | |||||
| 3 |
Jiffy Park Variant
Stand start then climb up and top out. FA: Bevan Ashby, 9 Jul 2016 | V3 | 5m | |||||
| 4 |
★ Jiffy Park
Stand start then climb up and top out. FA: Bevan Ashby, 9 Jul 2016 | V2 | 5m | |||||
| 5 |
★ Apogee
Stand start then climb up and top out. FA: Bevan Ashby, 7 Jul 2016 | V3 | 6m | |||||
| 6 |
★ Blue Flu
Sit start then climb up and top out as for Chicken Fingers. FA: Bevan Ashby, 7 Jul 2016 | V5 | 6m | |||||
| 7 |
★ Chicken Fingers
Stand start then climb up and top out. FA: Bevan Ashby, 3 Jul 2016 | V6 | 5m | |||||
| 8 |
★ 2.
Sit start beneath flake then climb up and top out. FA: Bevan Ashby, 3 Jul 2016 | V0 | 3m | |||||
  |
||||||||
| Route | Grade | Style | Selected ascents | |||||
| 9 |
3.
Stand start then climb up and top out. FA: Bevan Ashby, 16 Jul 2016 | V3 | 3m | |||||
| 10 |
★ Capyboppy
Stand start then climb up and top out. FA: Bevan Ashby, 19 Jul 2016 | V3 | 3m | |||||
| 11 |
4.
Stand start from base of slab then climb up and top out. FA: Bevan Ashby, 10 Jul 2016 | VB | 4m | |||||
| 12 |
Sniffwell
Sit start then climb up and top out. FA: Bevan Ashby, 10 Jul 2016 | V3 | 4m | |||||
| 13 |
★ Cuddles
Sit start then climb up and top out. FA: Bevan Ashby, 10 Jul 2016 | V6 | 4m | |||||
/da/9d/da9d105de7b6c03d16bce21993fbb4add67bf45c)  |
||||||||
| Route | Grade | Style | Selected ascents | |||||
| 14 |
★ Twinkle Toes
On the boulder up and right (looking up), from the Cuddles boulder. Stand start at the arete/rib that forms the left side on the scoop. Straight up the rib and slab above on crimps, slopers and small crystals. FA: Pete, 2017 | V2 | 4m | |||||
| 15 |
★ Matt Was Also There
Use the right arete and slopers to gain the scoop, then up - easiest if you head right at half height. FA: Nick White, 2017 | V0 | 4m | |||||
| 16 |
★ Lozzatron 2000
Stand start just right of the arete and climb up and right. FA: Nick White, 2017 | V0 | 4m | |||||
| 17 |
★★ Corkett's Mantle
After the tricky move to the sloper lip, go straight up the slab. | V8 | ||||||
| 18 |
★★ Corkett's Delight
Sit start in the horizontal break. Traverse right using crimps and/or the sloping top to finish up Jaiho. Starting with both hands on the side pull flake probably adds a grade. FA: Nick White, 2017 | V6 | 3m | |||||
| 19 |
★ Jaiho
Sit start at the obvious sloping ledge, and go directly up and over (heading right into the obvious crack is a lot easier and not as nice). FA: Nick White, 2017 | V4 | 2m | |||||
1.10. 100 Bananas Sector 12 routes in Sector
- Summary:
-
Lat / Long: -35.368574, 148.908062
 |
||||||||
| Route | Grade | Style | Selected ascents | |||||
|---|---|---|---|---|---|---|---|---|
| 1 |
1.
Stand start from base of slab then climb up and top out. FA: Bevan Ashby, 30 Aug 2016 | V0 | 3m | |||||
| 2 |
★ Movement Meditation
Stand start from right side of arete then climb up and top out. FA: Bevan Ashby, 30 Aug 2016 | V1 | 4m | |||||
| 3 |
★★ 100 Bananas Stand
Stand start from left side of arete then climb up and top out. FA: Bevan Ashby, 1 Sep 2016 | V2 | 4m | |||||
| 4 |
★★ 100 Bananas
Sit start from left side of arete then climb up and top out. FA: Bevan Ashby, 1 Sep 2016 | V6 | 5m | |||||
| 5 |
★ Super Terrific Happy Hour
Stand start from left hand crimp then climb up and top out. FA: Bevan Ashby, 8 Sep 2016 | V5 | 5m | |||||
  |
||||||||
| Route | Grade | Style | Selected ascents | |||||
| 6 |
★ No Excuse RHV
Sit start from left hand crack then climb up and top out. FA: Bevan Ashby, 7 Sep 2016 | V4 | 5m | |||||
| 7 |
★ No Excuse LHV
Stand start from right hand crack then climb up and top out. FA: Bevan Ashby, 13 Sep 2016 | V4 | 5m | |||||
| 8 |
2.
Stand start from flake then climb up and top out. FA: Bevan Ashby, 8 Sep 2016 | V2 | 4m | |||||
| 9 |
★★ 3 Michie Street
Stand start from left hand pocket then climb up and top out through groove. FA: Bevan Ashby, 7 Sep 2016 | V4 | 5m | |||||
| 10 |
★★ 5 Michie Street
Sit start from base of crack then climb up trending leftwards and top out through groove. FA: Bevan Ashby, 8 Sep 2016 | V4 | 5m | |||||
| 11 |
★★ 7 Michie Street
Sit start from base of crack then climb up trending rightwards and top out. FA: Bevan Ashby, 16 Sep 2016 | V3 | 4m | |||||
| 12 |
★ Work Smirk
Sit start then climb up and top out. FA: Bevan Ashby, 13 Sep 2016 | V2 | 3m | |||||
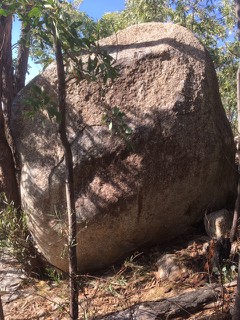
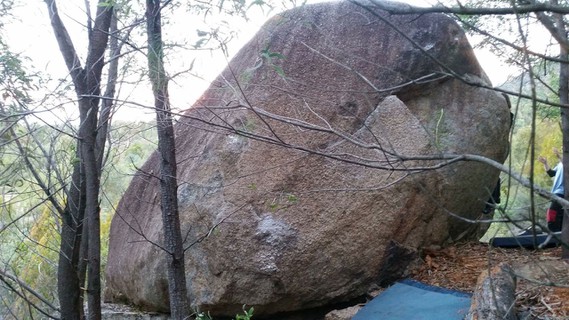
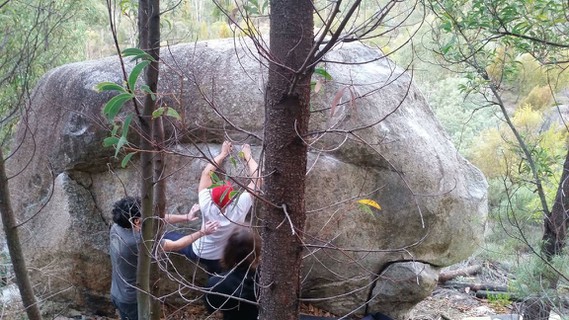
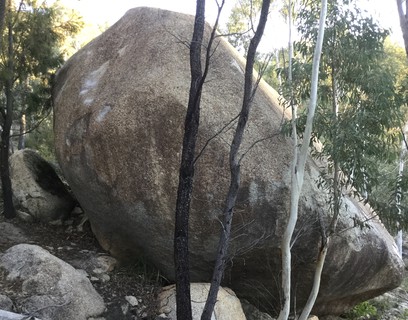
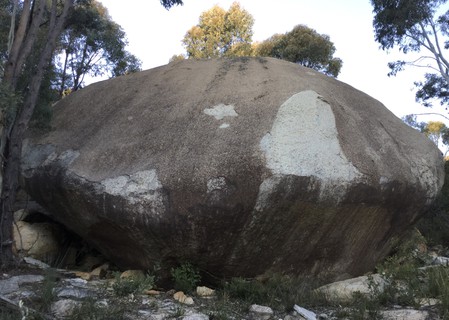
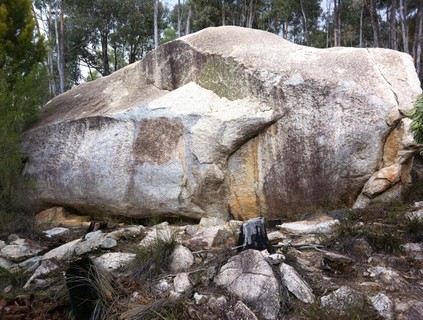
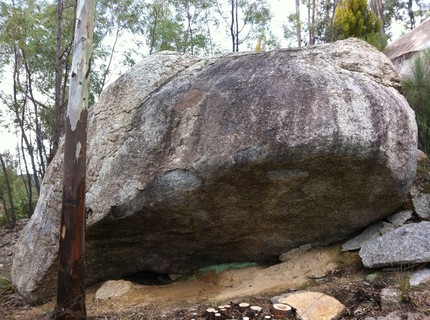
1.11. Más Elevado Sector 7 routes in Sector
- Summary:
-
Lat / Long: -35.369680, 148.908383
description
Uphill area of Cohiba containing the "Unknown" problems as well as a very big boulder.
approach
Head uphill from Animal Train Sector. Go towards the very big boulder, which should should be visible after crossing the old road.
    |
||||||||
| Route | Grade | Style | Selected ascents | |||||
|---|---|---|---|---|---|---|---|---|
Main boulder | ||||||||
| 2 |
★ Slabadabadoo
Highball slab route to the left of karate chop crack FA: Andrew Cadogan-Cowper, 11 Aug 2020 | V0 | 8m | |||||
| 3 |
★★ Karate chop crack
50m up the hill from Fundamental block. Stand start at the base of the semi-detached flake. Climb the flake using your preferred combination of laybacks and jams. Mantle the flake and climb the committing but easy slab above. FA: James Lister, Nov 2017 | V0 | 6m | |||||
| 4 |
★ Unknown 1
From a sit start, lowest holds possible, crux is the sloper slap, finding your footing and bumping up then top out as for Unknown 2. FA: David Nott | V6 | 3m | |||||
| 5 |
Unknown 2
Stand start as for Unknown one, right hand high left hand low. Top out. Basically a mantle problem. FA: David Nott | V1 | 3m | |||||
Questionable locationThe following problems without topos have been assumed to belong to this sector based on their original proximity on theCrag to the "Unknown" problems. | ||||||||
| 7 |
Unknown 3
From a stand, mantle up on good holds. | V0 | 3m | |||||
| 8 |
Jump
Right side up and over the bulge. FA: David Nott, 20 Jul 2014 | V3 | 4m | |||||
| 9 |
Slide and Jump
Start further left and traverse into the rail then finish as for Jump. FA: David Nott, 20 Jul 2014 | V5 | 4m | |||||
1.12. Historic listings 14 routes in Unknown
- Summary:
-
description
Some historic listings, from before the fires. Please move any incorrectly allocated problems (i.e. any that still exist in the old form) back to the relevant areas, ideally with a description to help find it. It may be useful to load the old reference topo here, if anyone has it?
| Route | Grade | Style | Selected ascents | |||
|---|---|---|---|---|---|---|
| 1 |
Number 7
Another problem looking blank and flanked by trees since the fires. #historic | V2 | 3m | |||
| 2 |
Number 8
Blank, and hugged by trees. #historic | V3 | 3m | |||
| 3 |
Number 9
Looks damaged but possibly you can walk up it. #historic | V0 | 3m | |||
| 4 |
Number 10
Looks destroyed, holds have flaked off leaving a blank egg. #historic | V3 | 3m | |||
| 5 | Number 23 | V3 | 3m | |||
| 6 |
Number 22
Sit start. #historic | V2 | 3m | |||
| 7 |
Number 25
Up the wall right of Animal Train. Destroyed. #historic | V2 | 5m | |||
| 8 |
Number 26
Up the wall far right of Animal Train. May still go? #historic | V4 | 5m | |||
| 9 |
Number 27
Sit start. #historic | V2 | 3m | |||
| 10 |
Number 28
Sit start. #historic | V3 | 3m | |||
| 11 | Number 29 | V1 | 3m | |||
| 12 |
Number 30
Sit start #historic | V2 | 3m | |||
| 13 |
Number 31
Up the groove. #historic | 3m | ||||
| 14 |
Number 6
It looks like a huge piece of the block has been exfoliated during the fires. What is left may not be a V3 problem, even with a sit start, and there's a tree in the way to boot. #historic | V3 | 3m | |||