A Crag Guide gives an extensive view of all sub areas and climbs at a point in the index. It shows a snapshot of the index heirachy, up to 300 climbs (or areas) on a single web page. It shows selected comments climbers have made on a recently submitted ascent.
At a minor crag level this should be suitable for printing and taking with you on a climbing trip as an adjunct to your guidebook.
This guide was generated anonymously. Login to show your logged ascents against each route.
Warning
Rock climbing is extremely dangerous and can result in serious injury or death. Users acting on any information directly or indirectly available from this site do so at their own risk.
This guide is compiled from a community of users and is presented without verification that the information is accurate or complete and is subject to system errors. By using this guide you acknowledge that the material described in this document is extremely dangerous, and that the content may be misleading or wrong. In particular there may be misdescriptions of routes, incorrectly drawn topo lines, incorrect difficulty ratings or incorrect or missing protection ratings. This includes both errors from the content and system errors.
Nobody has checked this particlular guide so you cannot rely on it's accuracy like you would a store bought guide.
You should not depend on any information gleaned from this guide for your personal safety.
You must keep this warning with the guide. For more information refer to our:
Usage policy
Contributors
Thanks to the following people who have contributed to this crag guide:
Lee McDougall
Brendan Heywood
Ben Vincent
Josh laidlaw
Pak
Simon
José Taulis
Eric Liu
Nick Murphy
Russ MacKenzie
The size of a person's name reflects their Crag Karma, which is their level of contribution. You can help contribute to your local crag by adding descriptions, photos, topos and more.
Table of contents
- 1. Main Wall 42 in Cliff
- 2. Index by grade
1. Main Wall 42 routes in Cliff
- Summary:
-
Sport climbing and Trad climbing
Lat / Long: -45.141860, 168.769919
description
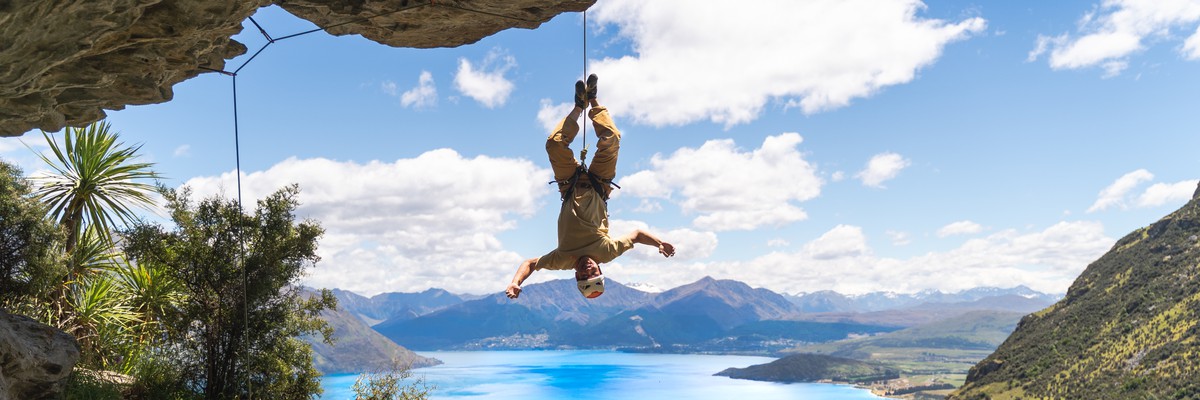
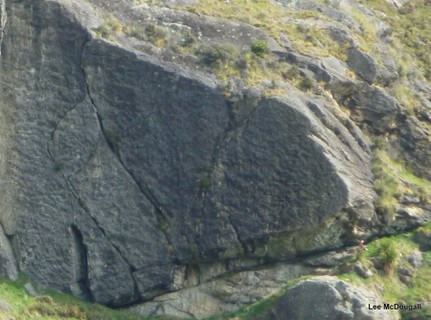
The classic crag for the area. If your only here for a day or two this is definitely the crag to check out. Very exposed at approximately 1000 meters and a some of the classics of the area. Don't leave without climbing 'The Mission' Bring a 60m rope and lots (12+) quickdraws
approach
From the top of the road, follow the walking track for approx 20 minutes. You will eventually come to a junction with a sign that says "track" pointing one way and a waterfall the other.

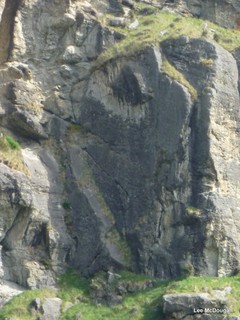
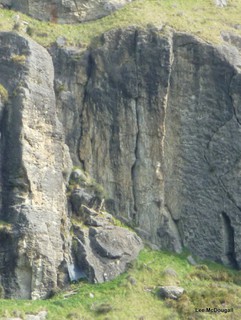
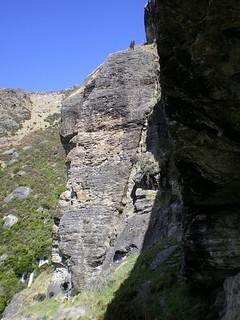
Main Wall - Approach4.JPG

Main Wall - Approach5.JPG

Main Wall - Approach6.JPG

Main Wall - Approach7.JPG

Main Wall - Approach8.JPG
| Route | Grade | Style | Selected ascents | |||||
|---|---|---|---|---|---|---|---|---|
| 1 |
★★ Chimneyphobia
Up the chimney. FA: Guillaume Charton, 2009 | 18 | 18m, 6 | |||||
 |
||||||||
| Route | Grade | Style | Selected ascents | |||||
| 2 |
★★ Leap Frog
Climb through the overhang, finishing on a slab. FA: Guillaume Charton, 2010 | 19 | 15m, 6 | |||||
| 3 |
★ Future is Knocking
Climb the corner. FA: Guillaume Charton, 2017 | 16 | 13m | |||||
| 4 |
★ Indecent Exposure
Climb up past two bolts on the right face of the corner. Step over onto the left slab and continue to a chain anchor. FA: Sally Ford, 2004 | 15 | 15m, 7 | |||||
| 5 |
★ The Quest
Start at the fixed belay anchors at the bottom. Straight up the slab past 5 bolts and lots of holds to a chain anchor. FA: Dave Bolger | 16 | 13m, 5 | |||||
| 6 |
★ Oh la la!
Climb left of a vague arête. Lower off same chain anchor as per TQ. FA: Guillaume Charton, 2013 | 16 | 15m, 5 | |||||
| 7 |
★ Mojo Zone
Climb the gentle slab. FA: Diego Moyano & Guillaume Charton, 2017 | 12 | 15m, 6 | |||||
| 8 |
★ Unearthed
Climb the large crack, then left to bolts. FA: Diego Moyano & Guillaume Charton, 2018 | 12 | 31m, 7 | |||||
| 9 |
★★ Awesome Possum
Climb the corner to the wide crack, tending left. FA: Diego Moyano & Guillaume Charton, 2017 | 16 | 31m, 7 | |||||
| 10 |
★★ Twelve
Climb to the 4th bolt of Almi, then tend left. FA: Sally Ford & Aaron Ford, 2010 | 17 | 31m, 12 | |||||
| 11 |
★★ Almi
Climb up a slab to a small overhang. FA: Swenja Stellfeld, 1997 | 18 | 31m, 13 | |||||
| 12 |
★ Alien Resurrection / No More Mr Nice Guy
Climb the crack. FA: Steve Carr, 1998 | 16 | 30m | |||||
| 13 |
Beyond The Pale
Start up “88 chocolate treats’ to 4th bolt .Move R to large ledge then up corner left of Bigger than big on good natural pro[wires small friends] .Move onto wall on R when corner blanks out at bushes move R to belay of Bigger than Big. Can also start as for Alien Resurrection FA: Simon, 1998 | 16 | 30m, 4 | |||||
| 14 |
★★ 88 Chocolate Treats
Two meters left of 'Bigger than Big', just next the the small tree. Straight up the face to a small rooflet. Continue through the bulge and left at the overhang with one bolt on it. Follow the large crack to the left and back onto the face for an easy finish at the chain anchor. FA: Swenja Stellford, 1997 | 19 | 31m, 11 | |||||
| 15 |
★ Bigger Than Chocolate
Climb up an easy face to a small rooflet. FA: Guillaume Charton, 2017 | 17 | 27m, 9 | |||||
| 16 |
★★ Bigger Than Big
Up through a lightly steep section with some great jugs past 2 bolts then a big move up over the bulge. Nice and easy slab climb to finish, though may be a tad run out for a beginner leader. Double ring lower off. FA: Ian Binnie, 1996 | 18 | 28m, 8 | |||||
  |
||||||||
| Route | Grade | Style | Selected ascents | |||||
| 17 |
★ La Belle Vie
Bouldery moves. FA: Guillaume Charton, 2005 | 23 | 10m, 3 | |||||
| 18 |
★ La Submission
Climb up a brown rock to a shared anchor with La Belle Vie FA: Guillaume Charton, 2007 | 20 | 12m, 3 | |||||
| 19 |
★★★ The Mission
Crag classic. Don't miss it. Start on the face facing west then follow the bolts up and left onto the arete, to the top. Great exposure! Chain anchor. FA: Mark Whetu & Russ McRae, 1996 | 16 | 28m, 9 | |||||
| 20 |
★★ Lucalucki
Well spaced bolts around cruxes. | 18 | 32m, 13 | |||||
| 21 |
★★ Don't Be Deceived
Face climbing with few bolts. FA: Mark Woodward, 1996 | 18 | 32m, 8 | |||||
| 22 |
No Bro, Bro
Climb up the ramp to the base, then up the crack system. FA: Gordy Watson | 18 | 20m, 2 | |||||
| 23 |
★★ Monsieur Muscle
Boulder up to the first bolt, then finish up a steep face. FA: Guillaume Charton & John Burrow, 2012 | 23 | 28m, 9 | |||||
| 24 |
★★ Smellie Crack
Climb up an offwidth to a crack, finishing up a small face. FA: Doug Smellie, 1999 | 20 | 25m, 10 | |||||
| 25 |
★ No Holds Barred
Start left up the first bolt, climbing up the arete. Veer towards Aratika at the 4th bolt, then back left. FA: Tony Burnell, 2007 | 22 | 27m, 8 | |||||
| 26 |
★★★ Aratika
Climb up the sustained arete. FA: Russ McRae, 1996 | 24 | 30m, 10 | |||||
| 27 |
Aramuru
Wide chimney right of Aratika. FA: Doug Smelie, 1999 | 16 | 30m, 4 | |||||
| 28 |
★ Up the Creek
Climb up the face, then left at the break to shared anchor with Aramuru. FA: Tony Burnell, 2007 | 18 | 30m, 9 | |||||
 |
||||||||
| Route | Grade | Style | Selected ascents | |||||
| 29 |
★★ About Time
Long slab. FA: Mark Whetu & Russ McRae, 1996 | 18 | 30m, 13 | |||||
| 30 |
Aroha
Clip the two bolts left of the offwidth, then up the crack joining with another crack on the right. FA: Doug Smellie, 1999 | 17 | 25m, 2 | |||||
| 31 |
★ Ford Crack
Overhanging offwidth to the crack joining with Aroha. FA: Aaron Ford & Sally Ford, 2007 | 18 | 30m | |||||
| 32 |
Between the Lines
Between two obvious cracks, tending left to shared anchor with About Time. FA: Tony Burnell, 2007 | 23 | 30m, 10 | |||||
| 33 |
★ Arapiko
Start on the left end of Proud Monkey Roof, climbing left to join Ford Crack. FA: Sally Ford & Aaron Ford, 2007 | 18 | 30m | |||||
Proud Monkey Roof | ||||||||
| 35 |
★ The Short Fat Version
FA: Bruce Dowick | 26 | 20m, 10 | |||||
| 36 |
★★★ Drunken Monkey
FA: Gordy Watson & Andy Mills | 24 | 20m, 9 | |||||
| 37 |
★★ Proud Monkey
FA: Ian Binnie, 1996 | 23 | 20m, 7 | |||||
| 38 |
★★ Red Curry Pot Climb
FA: Doug Smellie, 1999 | 24 | 12m, 4 | |||||
| 39 |
★★★ Dream Thing
Jugs galore through the roof. The pump is real pulling the lip. Hang on until you clip the anchors. All about the location with this one. Cut your feet & get the shot. FA: Ian Bull, 1999 | 21 | 15m, 8 | |||||
| 40 |
★ Drop Kick To The Head
FA: Doug Smellie, 1999 | 23 | 15m, 4 | |||||
| 41 |
★★ TNT
FA: Tony Burnell, 2007 | 25 | 15m, 7 | |||||
| 42 |
★ More Monkey Business
FA: Doug Smellie, 1999 | 21 | 20m, 7 | |||||
| 43 |
★ Raining Body Parts
FA: Ian Bull, 1999 | 21 | 20m, 7 | |||||