Photos
Help

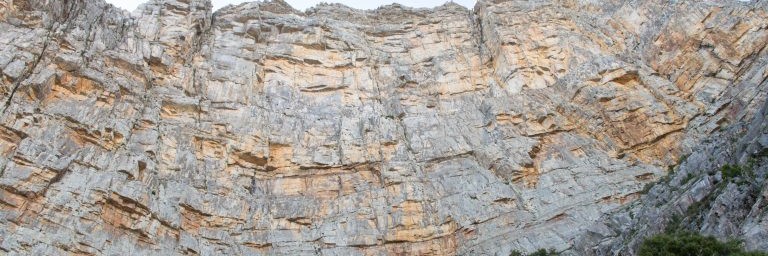
Yellowwood Amphitheatre

  • Grade context: SA
  • Photos: 1
  • Ascents: 3
15

Seasonality

J
F
M
A
M
J
J
A
S
O
N
D

Access issues inherited from Yellowwood

The Ravine, Amphitheatre and most of the climbable rock is on the farm Gevonden 733 and is privately owned by the Dave Richter family trust. There is tacit permission to climb at Yellowwood by the beneficiaries of the trust provided we do not engage in any eco-unfriendly practises.

Descent notes

Depending on the route and your ropes length, choose the fastest between these 3 possible options : walking back and using the Timerity Abseil, using Down Time Abseil, or walking further to the gulley between Smalblaar ridge and the chesspieces (3 raps).

Ethic inherited from Yellowwood

The prevailing ethic for Yellowwood is tread lightly.

"Tread lightly" means no bolting of belay stances unless all possible alternatives have been completely exhausted. No placing of bolts for running belays that are not absolutely essential. No use of pitons, unless necessary. No use of power drills is accepted!

Climbers are asked to respect the prevailing ethic which is intended to preserve the aesthetic appeal of Yellowwood as a world-class Trad climbing destination.

It is essential for first time visitors to do an ascent of one of the existing classic trad routes to appreciate the committing and adventurous nature of the climbing at Yellowwood. Older routes such as Armageddon Time (and the direct), Blood is Sweeter than Honey and Time Warp are all test pieces for their grade. And newer routes such as Prime Time (and the direct) and Fantastic Time as well as "routes in progress" of which there at least 3, are no less demanding at the grade. Most, if not all the trad routes on the main wall have at least one "R" (run-out) pitch but none are "X" rated. There is minimal fixed gear and very few fixed stance

A new route on Yellowwood, Fighting The Dark Side Of Gravity, has had all its bolts removed, except for two that are essential for the leader on Pitch 3. Two non-essential pitons have also been removed.

There has been much debate about Yellowwood and the most active Yellowwood climbers have talked extensively so as to settle the ethos of this high-value cliff.

In a recent meeting Adam Roff, Jeremy Samson and Hilton Davies distilled the following:

Yellowwood is a very special Trad climbing venue and there have been some mis-steps in route development at the crag. Newborn was bolted many years ago before locals had given much thought to bolting and ethics. It is a legacy that shall remain, but should not be seen as guidance for route development at Yellowwood. More recently four new routes have been established by visitors who have made extensive use of non-essential bolting. Whilst route development is encouraged, non-essential bolting is not; and these new routes are getting their non-essential bolts removed. They will remain as good adventurous routes.

2014: There have been no less than 10 new multi-pitch trad routes established at Yellowwood in the first 5 months of this year. Together they constitute no less than 60 pitches or, combined, more than 1500m of climbing. All the routes have been free-climbed with the vast majority of the pitches of being moderate grade and only 2 pitches of grade 22 and one of grade 24. The routes are all well protected and no fixed gear was necessary.

Tags

Routes

Add route(s) Add topo Reorder Bulk edit Convert grades
Grade Route
1 20 50m
2 22 55m
3 23 20m
4 24 48m
5 24 35m
6 17 30m
7 21 35m
8 19 40m

Approach.

Show Time starts left of centre of the main Yellowwood Amphitheatre about 7 metres left of the start of Newborn. The first few bolts of Newborn or visible from the base of the wall and the start of Show Time is marked by a small cairn of stones adjacent to a small flat clearing used as a bivvy spot.

  1. 50m 20 Climb easily up the gray slabs for about 30m just left of a vague recess and past an overhang. Head up right to the gray face and climb the shallow left facing corner and continue up to the overhang capping the red-orange rock. Move left to a ledge. (Find a good small cam placement in a pocket on the face above the ledge.

  2. 55m 22 S3 This pitch has two potential deck falls although the moves are not very hard. The first is stepping off the ledge to start “overhanging strenuous gnarly looking crack” and the second is starting up the left facing corner past the “thin flake plastered against the wall”. Move to left end of the ledge and step across the void to below a crack that can be vegetated. The crack does take good pro if cleaned. Continue up to and then past the large overhang on its left and climb the left facing dihedral to a large ledge on the right. Climb the overhanging strenuous gnarly looking crack for about 10m to a ledge system. Move left 2m and climb the left facing corner starting at a thin flake plastered against the wall on the left. Continue easily up the orange left facing corner to the grey overhang and pass it on the right. Semi-circle up and right to avoid the very steep crack in the white rock (climb it if you are bold and strong). Head easily up and left to a right facing corner system on yellow rock topped by a robust bush to a stance. With 50m ropes, stance 5m lower on a decent ledge, then scramble up the corner system to start of pitch 3.

  3. 20m 23 (Don’t be tempted to combine pitch 3 with any part of pitch 4 unless you have done it before. It will be very tiring and you may run out of gear, communication and end up in a crappy hanging stance anyway!) Strenuous climbing past an inverted 1” cam placement and a fixed nut brings you to a juggy rest. (The nut marks the way). Continue up to the overhang and the move right on the gnarly rock to pass the roof on the right. Continue up a few meters to a hanging stance under the overhang.

  4. 48m 24 If you are lucky and you manage to work out the best way to climb this pitch, then it is probably only grade 23. However the on-sight sans beta is probably closer to 26 if you get anything wrong. This pitch is a brutal beast and has yet to be done on-sight free as at 29 March 2015. It is extremely challenging for short people and has two very difficult cruxes. Climb the left facing corner to the overhang. Step right onto the arête and clip the fixed wire if you wish. Continue up past the small overhang to easier ground. Continue straight up for 4m or so and then move left about 3m. Do not climb the obvious white recesses but climb the grey rock bulge between them! directly above the bomber rock 1 placement (only grade 19) to a large rail under the overhang. You can place a large cam on the right to protect your second but the rail generally is at least size 4.5 Camelot. Rail all the way left easily to the grotty corner and climb it. Or keep moving left on a clean rail to circumvent it. Climb up to the (halfway) ledge and clip a bolt left there by some Spanish climbers and stance right there so you can see your second. If you did not find pro in the large rail for your second then move all the way back right to stance above that point so your second is protected with a more vertical rope. (Sounds complicated but will be evident when you are there.)

  5. 24 35m Lie back the gray flake on the left and continue up the brittle recess until the holds run out. (There is good pro but the holds seem very dodgy). Step out left on to the arête on good rock and continue to the small overhang. Compose yourself on good holds. Continue straight up if you are bold and strong or move left 3m and climb the crack into a shallow recess past a “nice-to-have” thread that is in situ. Continue up about 10m and rail right to a good ledge.

  6. 30m 16 It seems sensible to climb straight up but there is no pro and it is tricky indeed. So move right 3m and climb the easy recess for about 5m. Then climb diagonally back left above the stance to the obvious rail capped by an overhang. Rail easily all the way left to a good ledge at the base of the right facing corner.

  7. 35m 21 Climb the corner that is vegetated in places for 30m to where it steepens. Climb the steep overhanging crack till you can rail 3m right to a good ledge. (This pitch has really good climbing despite the chossy appearance.)

  8. 40m 19 Climb up to the overhang past the right side and then up easy blocky climbing to a rail system. Move right about 10m and avoid the first left facing yellow-orange recess. Continue to the next grey one and climb up it. Head easily diagonally up left to a grey overhanging crack and crank through this to top out.

Descent:

Have a good look of the lay of the land before you start the route. Take photos with you or have them loaded to a large screen smart phone.

Head east (towards Rawsonville) to the Timerity abseil 10-15 minutes. Keep going downwards past the largest gully (Yellowwood Crack and the Tea Time abseil) and then head north-east for the furthest and lowest gully. You will eventually see cairns leading you to the gully. Abseil 3 abseils down the Timerity rap route to the drip

Gear: 50m ropes are fine for this route but be careful on the third abseil if you use the Timerity Rap Route. 50m ropes do not get you all the way to the ground and you have to traverse left (north-east) on a ledge system and then scramble down

Doubles on cams to 1,5 inch is recommended. Single set nuts to size 10 or 12. . 4 QD’s 10 Slings or 8 Slings and one very long sling is useful. No RP’s required. No 4.5 Camelot is useful but not essential.

FFA: Charles Edelstein & Willem le Roux, 28 Mar 2015

1 17 45m
2 17 40m
3 20 25m
4 19 25m
5 17 30m
6 18 40m
7 10 25m
8 20 40m
9 22 40m
10 19 35m
11 16 40m

Start in the middle of the Amphitheatre, just right of a prominent big block. The route follows the break up to the first set of big roofs 120m above.

  1. (17) 45m Follow the fracture system to a small roof. Keep going to a block belay.

  2. (17) 40m Step left and follow the break, occasionally moving out right, to a belay ledge on the left.

  3. (20) 25m From the right of the ledge climb up past an open book and go right to a hanging stance below the roof.

  4. (19) 25m Traverse right to a break in the roof. Climb through & up the wall to stance on the right.

  5. (16) 30m Climb up & traverse left under the small roof. Keep going to a recessed corner with an arete on the left.

  6. (18) 40m Step up & out left onto the arete. Climb to the big halfway ledge.

  7. (11) 25m Scramble up and left into the recess. Stance on a blocky ledge on the left.

  8. (20) 40m Climb the face above, moving slightly left onto the arete. Keep going to a small stance on the right.

  9. (22) 40m Traverse left to a break in the roof. Climb the break until forced to move right & up (crux). Keep railing right to a break and up to a small stance.

  10. (19) 35m Climb the book above & move left into the recess below a large roof. Move up & rail left under the roof. Belay around the corner.

  11. (16) 40m Climb the recess above to a roof. Go left & up. Scramble off.

Descent EITHER walk right to the gulley between Smalblaar ridge and the chesspieces. This involves three short abseils.

OR use the DOWN TIME Rap Route

FA: Paul Schlotfeldt & Dave Shewell, 1988

1 18
2 19
3 25
4 24
5 26
6 27
7 22
8 28
9 24
10 22
11 27
12 25
13 15

GENERAL Newborn is the only sport route at Yellowwood. It was bolted by Sean Maasch in the late 1990's. Jeremy Samson added more bolts in 2007 and opened the route with Jimbo Smith in 2009. At the time of writing (November 2017) the route had seen four known ascents, none onsight. Climbing Newborn requires a big effort and good conditions. The route gets sun from about 11h30, although pitches capped by the big roofs above the halfway ledge are shady for longer. It can bake in summer once the sun hits. Rock quality is generally excellent. The route does not see much traffic, so expect the occasional hollow flake or precariously balanced boulder. Cracks get overgrown in winter. All stances have bolted belays. Most pitches finish on comfortable ledges. Bolts are spaced on easy ground, but close when the climbing gets harder. The first and last pitches can be combined to save time. No pitch is longer than 35m, most are much shorter.

GEAR A 60m sport rope and 18 draws are needed to climb and descend Newborn. Half ropes work well for parties of three. It allows for hauling a bag and makes it easier to get down (see below).

The route starts approximately 20m right of Show Time. Two large, white boulders mark the spot.

  1. [18]: Easy climbing over gentle ground. Watch out for loose rock.

  2. [19]: Short, easy pitch. Can be combined with the first.

  3. [25]: Thin crux section, then easy climbing to a ledge.

  4. [24]: Short pitch with sustained, technical climbing to a hanging belay.

  5. [26]: Traverse right from the stance to skirt the first roof. Blast past two overlaps and up a delicate corner to the stance. Packs a punch.

  6. [27]: Tricky face climbing leads to an open book and easier ground. The start is harder for shorties. HALFWAY LEDGE

  7. [22]: Awkward scramble over bad rock. Comfortable, shady stance.

  8. [28]: Superb pitch with a very long reach at the crux. Ends in an uncomfortable hanging belay.

  9. [24]: Sustained climbing past the big roof. Stunning, shady stance.

  10. [22]: Short, easy pitch that ends at a semi-hanging belay.

  11. [27]: Revenge of the shorties. Super technical.

  12. [25]: Climb up left to clip the poorly placed bolt above the overlap. Then come back down and pass the overlap by heading diagonally up and right (crux).

  13. [15]: Ascent the pleasant slab, then scramble up the bushy gully to anchors at the summit. Can be combined with pitch 12.

DESCENT Getting back to the ground require multiple abseils. There are three viable options:

  1. Newborn - Abseiling down the route is the only option when using a single rope. It is straight forward to rap from the halfway ledge, but gets complicated higher up.

  2. Down Time Abseil Requires 2 x 60m ropes. Six pitches. Better than rapping the route.

  3. Timerity Abseil - See description elsewhere on the Wiki. Requires 2 x 50m ropes. Three easy raps. Fastest way down, but requires walking.

FA: Jeremy Samson & Jimbo Smith, 2009

1 22 25m
2 25 35m
3 22 30m
4 21 50m
5 16 15m
6 21 22m
7 23 29m
8 21 45m
9 19 35m

Start

The best way to find the start is to have a good look at the photograph. It starts almost directly below the rectangular overhang in the middle of the Amphitheatre. Above at about 5m is a shallow left facing corner.

  1. 25m 22 Climb up the corner until it gets to a tenuous stemming move. Continue up to a ledge on blocks. Or move left across the slab on good holds to a crack system and continue to the rail. Move back right to the blocks and then from the right side continue up the overlap above. Diagonal up left and do a tricky move into the short right facing corner to a good belay.

  2. 35m 25 Climb up to the rectangular overhang and then swing out left onto a thin rail. Have some tiny cams ready. Crank up and then do a tenuous stemming move to get to the easier ground below the large left facing corner. Continue up the corner with some funky moves to a rail under the overhang and rail right onto the exposed arete. Climb straight up from the edge to a rail about 4m above. Move right a couple of meters and then head diagonally up right on a low angle slab. Belay on a good ledge on the left.

  3. 22 Climb directly up heading for the large left facing red corner. Place good gear where available as it becomes run out. Once in the corner go right on a gnarly gray rail. Move into the corner systems up to the right and climb up to a large ledge on the right.

  4. 21 Step up off the left edge of the ledge and continue up the crack system for 55m to the halfway ledge.

  5. 16 Walk left and climb up easy blocks to a ledge that is down and to the left of the obvious nose visible 20 m above. Alternative Pitch 5: 22 Climb the steep crack up to the left for 2 or 3 metres and then step right onto the red/orange face. Continue up to the shallow right facing corner and then exit left of the overhang on dodgy rock to continue a few meters to a rail. Rail right to a good stance,

  6. 21 Climb the crack system to a hanging stance about 22m higher just before the steep right dihedral. If there are 3 climbers, then one may as well stay at the stance at the beginning of the pitch while the other clears the gear which is needed for pitch 7. Do not stance at the slightly lower ledge as it is less comfortable.

  7. 23 Climb up to the rail and move right (small cams). Then move back left and pull onto the huge scary flake. Climb up this to the overhang and then step out left. Climb the overhanging crack system to where it eases. Move up left onto a ramp but climb straight through higher up by under-clinging the overhang. Do not escape up and left up the ramp which looks easier. It is dirty and horrible. Move up diagonally right to a rail and stance on the right on a sitting ledge. If you are short of gear, there is a thread point after the crux.

  8. Step right across the gap and climb the classic crack for 10m or so. Then diagonal out left and up the face (run out) to a large ledge system.

  9. 18/19 Find your way out up and right.

FA: Dave Vallet & Charles Edelstein, 2008

1 6c
2 5c
3 6c
4 7a+
5 7b
6 6c
7 6a
8 6a+
9 6a+

no RD available

1 15 40m
2 17 25m
3 18 18m
4 18 20m
5 19 15m
6 21 20m
7 18 35m
8 17 35m
9 16 15m
10 19 25m
11 20 30m
12 20 30m
13 22 30m
14 17 40m
15 19 35m

FA: Dave Cheesmond & A. Dick, 1977

1 24 20m
2 26 30m

Start: Directly above and to the left of the campsite one can see a thin, leftwards tending crack which leads to a grassy ledge below a steep corner. Time Warp Direct climbs this.

  1. 24: 20m Climb up easily to the base of the thin crack. Climb some technical moves up and left past pitons to a small break before another thin crack, then climb this thin crack straight up to stance at a grassy ledge.

  2. 26: 30m Climb straight up the steep corner for 10m until one reaches the left end of a roof. Reach up and clip a piton, then traverse right a few meters and blast straight through the roof to get established on the face above. Climb directly right and up for about 8m to stance at a small ledge.

Here one can either abseil 50m straight down to the campsite or climb an easy pitch straight up and left to join with Time Warp.

Descent EITHER walk right to the gulley between Smalblaar ridge and the chesspieces. This involves three short abseils.

OR use the DOWN TIME Rap Route

FA: Hilton Davies & Guy Paterson-Jones, 2012

The abseil descent is very user friendly and over time has been much improved and you would have to be rather unlucky to have an epic on it. The descent nevertheless is very airy and a wonderful high mountain experience if you have never done anything like it. 60m ropes are adequate provided they are not shorter. 70m ropes allows for combining the first two and last two abseils. The descent can be done with 55m ropes but is not ideal and you will have to leave some gear if you only have 50m ropes but it is not necessarily an epic.

The top anchor is quite easy to find unless it is dark but even then a cairn along the rim of Yellowwood marks the origin and there are no cairns of stones anywhere near. From the top of Smalblaar the cairn can be found by walking west quite steeply down to where it levels off. The cairn is located about 20m after passing the gulley where the one and only massive right facing corner is found on the Amphitheatre and where "Fantastic Time" tops out.

At the cairn peer over the edge and you will see a ledge system and the anchors. There are 2 sets of anchors connected with a blue rope at this time. Use the lower set as this will be safer, provide more rope length and make for easier retrieval of your rope.

Connect yourself safely to the lower anchor and then after feeding your rope correctly through the Singing Rock Red Blocks (courtesy of CityROCK) and also with the one rope also backed up through a chain link start your abseil preferably with a prussik and individual knots at the end of the rope. Do not tie the lower ends of the rope together as twisting may cause problems.

  1. Abseil (Rap) 40m. Rap straight down, past an overhang then free-hanging for a bit. When you touch rock again place a #0.75 cam in a vertical slot or at the next overlap and clip the rope in short. This will get you past the next bulge. The anchors are just beneath the bulge on a blank hanging stance.

  2. Abseil (Rap) 30m. Rap off two bolts with nice long chains on them. Straight down to a ledge. Completely free-hanging rap. You can just reach the ledge if you lean out. The next anchors are just to the left. You can combine Abseil 1 and 2 with 70m ropes and 60m ropes may also reach but clip in short at the chains with a biner if you do not stop here.

  3. Abseil (Rap) 50m. Rap off another Red Block straight down to the jumbo halfway ledge. Scramble down 3m to the lower ledge to find the next anchors where there are two sets. Use the one at the edge of the ledge on the right facing outwards (west edge of the ledge). This point has a Red Block, allows extra length of the rope and allows easier retrieval of the rope.

  4. Abseil (Rap) 58m This is a full length rappel. Tie individual knots on the ends of your ropes. If your ropes are less than 60m you will find a single bolt at a stance after 45m on the left just before you go over the last overhang. The rappel ends on a small ledge with three bolts and a Red Block

  5. Abseil (Rap) 58m Abseil till you are level with the top of the final ramp just below the very steep yellow rock band. Look about 5m left (west) to find a 2 bolt, chain and Mailon stance. Swing left to it. With 70m ropes you can get to a walk-off ledge about 6m above the ground. Walk off right (east) above the trees and then scramble down right-wards. When the last person to come down reaches the walk off ledge using 70m ropes he/she should pull down some rope to reach the ground. Otherwise the rope will be caught in the trees if you walk off and scramble right with it. Once on the ground pull the rope from there to the left of the trees.

  6. Abseil (Rap) 20m. A single threaded rope will get you down from here.

1 20 45m
2 21 35m
3 22 30m
4 21 45m
5 23 45m
6 25 35m
7 22 25m
8 21 30m

The route offers great quality climbing particularly from pitch 3. After making the halfway ledge, we found that other climbers had nabbed our intended continuation. After making a few abortive (and white-knuckle) attempts at a direct continuation, we eventually, in African Time, meandered towards other parts of the wall to resume our route on less-crowded rock.

The route starts approximately 40m left of Armageddon Time and about 10 meters right of a big flat boulder surrounded by Wild Peach trees. This is almost directly below the left hand edge of the large stepped roofs of Armageddon’s third pitch. The route follows close to a fairly obvious, vegetated, chossy looking, straight-line break that runs up the first half of the wall at about 10 degrees left of vertical. At the third pitch it rails right (through the large left-facing corner) and continues up a clean crack line that runs parallel and about 8 meters right of the main vegetated break.

  1. 45m, (20) This pitch starts up easy ground (loose flakes) in the very shallow recess, which forms the start of the break. Continue on small holds up the steepest part of the seam past an old peg. Higher up, pull steeply to a small bushy ledge. Follow the main vegetated vertical break above for about 10 meters, to where it steepens. Rail left at an orange patch of rock below a small roof and up, to stance on a good ledge in a recess (gear for the stance can be found several meters further up).

  2. 35m, (20) From the ledge climb a few meters up and right to a small ledge. Climb a steep, reachy finger crack for several meters until it is possible to step out right onto the arête. Climb the arête to a ledge at the bottom left of the large Armageddon roofs. From the ledge step left across the vegetated recess and then up it for about 10 meters to a hanging stance at the level of the first, thin rail that goes out right, across the overhanging, leftwards facing wall.

  3. 30m (22). Rail right for 5 meters to the skyline arête. The rail is thinnest at the start (crux) and widens later. Move up 5 meters to a ledge. Then climb up past a small roof (thin), and up to gain the clean, leftwards-trending crack up to a big, comfortable ledge.

  4. 45m (21). The route continues straight up the clean, leftwards tending crack line about 6 meters in from the left hand edge of the ledge. Climb this through layback moves, and two small roofs, to continue above leftwards around a small, blunt arête into less steep ground in a recess. Stem up the steep crack to gain a good rail 5 meters higher. Move up and slightly right to finish up a layback and thin face moves (the sting in the tail) to gain the halfway ledge. The route continues way over to the right (towards Smalblaar Ridge). Walk along the ledge past Armageddon and the exposed step-over. Approximately 15 meters beyond this is an obvious break, where a steep vertical, very grassed-up crack leads into a roof. Three meters right of this is a leftwards tending, thin finger crack which runs up to the right hand side of the roof.

  5. 45m, (23). Climb the finger crack. Follow the wider crack above, through another roof and straight up to a big ledge.

  6. 35m, (25). Continue straight up the line of the last pitch for about 5 meters. Trend left on small ledges and faces to reach the base of the obvious overhanging crack just left of the big corner. Climb the crack (crux) and go left to a ledge above.

  7. 25m, (22). Go left along the ledge for about 3 meters. Climb the vertical finger crack, through 2 small roofs. Traverse a few meters left across the face above to gain (thin) a crack that is followed easily up to a ledge below a roof.

  8. 30m, (21). Climb the overhanging chimney / crack through the roof from the ledge (hard), into thin cracks in a face above and then straight up to a ledge. Climb one of the water runnels on the next face up to the top.

Descent

EITHER walk right to the gulley between Smalblaar ridge and the chesspieces. This involves three short abseils.

OR use the DOWN TIME Rap Route

FA: Johann Lanz & Robert Zipplies, 2012

1 19 40m
2 19 20m
3 20 35m
4 21 17m
5 21 30m
6 16 20m
7 23 45m
8 19 40m
9 20 42m
10 19 45m

Start roughly 200m right of Time Warp (ie. 75m right of the clump of trees). Below & right of the prominent understepped overhangs is a slightly raised ledge. The climb starts up a shallow open book that leads up to the left-hand extreme of a narrow band of overhangs.

  1. [19] 40m Ascend the book, sneaking left around a roof. Move back right into the break & up to a ledge.

  2. [19] 20m Walk 12m left and climb a shallow recess to a sharp ledge. Traverse left to stance below the main corner .

  3. [20] 35m Climb the right-facing book to the base of the roofs. Traverse right and up (15m) until able to move up on pockets to a blank open book. Balance left into the easy break left through the roof to a large ledge. This pitch can be linked with the previous one.

  4. [21] 17m Turn the roof to climb the left-facing corner. Traverse right to a sloping stance beneath another corner.

  5. [21] 30m Step down & rail right across the void. Climb the flake system above to a ledge on the right. Climb the corner above to a higher ledge. This pitch can be linked with the previous one.

  6. [16] 20m Climb up to the big half-way ledge. [ The Route continues up the headwall to the right of the huge broken recess/corner. Walk 80m right to a small corner with a flake at it's base. 5m to the right, just before a higher ledge is a short layback corner.]

  7. [23] 45m Climb the crack & move left over onto the ramp (thin). Either stance on the ramp or continue diagonally left to a short, steep, left-facing corner. Climb this to a ledge. Its impressive to do this as one pitch. It was opened as two pitches.

  8. [19] 35m Step down and climb left & up to a short layback flake. At the top move left under the roof past a small blocky ledge to a stance 4m diagonally higher.

  9. [20] 45m Move up right & climb the break. Climb left through a small juggy overhang past a ledge to a roof. Rail right to a crack, and climb it to a ledge on the left.

  10. [19] 45m Ascend a crack to a ledge. Avoid a gully by tending right on good grey rock to a ledge. Pull through the bulge 3m left of a chossy crack. Follow a short crack to the summit.

The Thin Crack above the stance after pitch 2 is graded 24. FA: J. Colenso, K. Smith & S. Middlemiss 1988

Descent EITHER walk right to the gulley between Smalblaar ridge and the chesspieces. This involves three short abseils.

OR use the DOWN TIME Rap Route

FA: J. Fisher & Paul Schlotfeldt, 1987

1 17
2 20
3 23
4 16
5 19
6 22
7 22 A1
8 21

Start at the easy break right of Armageddon Time (ie: just left of the last clump of trees.) Scramble up 10m.

  1. (17) Continue up the break to a crack leading on to a large block & narrow ledge. Traverse 10m left.

  2. (20) Climb the middle of the clean grey face to stance on a block under a small roof where the rock colours orange.

  3. (23) Above, pull through into the left-hand recess. Go right onto the face & layback moves lead onto grey rock again. Step Back left at 20m.

  4. (16) Use the Armageddon Time pitch up to the Halfway ledge.

  5. (19) 10m left and climb the easy loose big gully to an ancient peg. Move out left onto good rock & a semi-hanging belay around the first corner.

  6. (22) Step left around the nose. Cross the gap to a sharp rail, which is followed easily to the ledge below a hidden recess.

  7. (22,A1) Climb the recess, out left and back on a grey flake. Layback the recess, using 3 RP's to reach a finger rail. Go left and up to a ledge.

  8. (21) From the left of the ledge, follow a low rail across to the old pendulum pitch on Time Warp. Finish easily up that route.

1 22 25m
2 19 25m
3 24 35m
4 26 30m
5 16 35m

Start Head to the extreme upper right part of the amphitheatre where there is a large clump of old Yellowwood trees. Second Coming starts here. Ten metres to the left is a solitary Yellowwood. Another five metres left a ledge begins and goes out horizontally left towards Armageddon Times while the land drops away. Five metres along this ledge is the start of the route marked by a small beacon and a piton one metre off the ledge.

  1. 25m 22: Head up a steep crack in a shallow break. At 10m reach a piton. Break through overlaps up to the right to reach easier vertical ground. Then climb easily up and left to a standing-room ledge with good natural gear. There are two bolts.

  2. 25m 19: Heads up right to a big obvious crack, up this crack then right and up to a big ledge more than a metre wide and very long. The stance has one bolt and one piton about 75cm apart. They are joined together by cord. There is a clip-gate biner on the bolt. There is good natural gear.

  3. 35m 24: Head up a steep white-grey face then into a very thin orange crack. Ten metres up a one-finger, single-digit tenuous crank with trick footwork gets a long reach beyond a pinched out section of crack to tips-only into the tiny opening of the crack. A piton is a little higher. Then climb up another metre to an overlap then rail out right for 3 or 4 metres on a clean and exposed face. It’s a little tricky getting up. The route then converges with Second Coming and shares the next 10 metres to the original end of the Second Coming 2nd pitch below a roof with a standing ledge. At the stance there are two bolts close together and joined by black rope. There is a locking biner with a brass screwgate on one bolt. There is good natural gear.

  4. 30m 26: This pitch shares the first 3 or 4 metres with Second Coming before that route traverses out right while Fighting continues straight up. The pitch starts with a pull through a small roof. Before committing to the crank you reach through and clip a piton. When hanging out you reach 30 cm higher and clip a bolt. (David Davies and Tony Dick had been much braver in 1988 when they led this ground-up without ironware!). It's then straight up on edges where hammers have been used to knock flaky stuff off and to create small edges. Three or four metres above the bolt there is another one. Jam the undercling crack and crank up to get onto easier ground. Head up and slightly right then leftwards with some tenuous but easy climbing on minimal protection. Here the route has converged with Second Coming. The stance is on easy ground with good natural protection.

  5. 35m 16: This is the same pitch as for Second Coming. It heads up and left on easy ground to the jumbo ledge. A belay bolt has been placed a metre off the ground on the immaculate steep white face of Armageddon Direct presumably as a belay. It is doubtful that the bolt will remain there for long. There is good natural protection.

Descent EITHER walk right to the gulley between Smalblaar ridge and the chesspieces. This involves three short abseils.

OR use the DOWN TIME Rap Route

FA: Martin Schendele & Daniel Gebel, 2009

1 18 30m
2 20 20m
3 21 45m
4 19 25m
5 19 30m
6 23 45m
7 23 23m
8 21 35m

Half Time, in its own right, is a great outing of 4 excellent pitches that gets you relatively quickly to the Half Way Ledge. It is the equivalent in length of doing a route on the Chess pieces but without the extra walking and there is an easy 2 rap escape using Down Time which should be easily spotted by walking left for about a rope length. Normal 60m ropes are just fine.

Start The route starts about 50m further right of Armageddon Time just past a boulder and Yellowwood tree that is against the base of the wall and where the trail along the base levels out. The start is marked by a cairn and ahead and to the right is a dense clump of Yelowwoods.

  1. (18) 30m Climb easily to a short left facing corner topped by an overhang on the left. Pull through into the crack and continue to the good ledge in a left facing recess.

  2. (20) 20m Stem up the yellow-red recess. The hollow sounding flakes on the right are quite stable but use with care. Move up right to below an overlap and pull through using the scary looking jammed block. Climb diagonally left up the ramp to stance on a tiny ledge close to the arête.

  3. (21) 45m Climb straight up 12 or so metres tending to stay on the left arête avoiding the dodgy rock on the right. Step round left at the highest overlap visible and do airy steep lay back moves on small holds to good holds and then exit to the right. Continue up 3m and exit right past the overhang to gain a ramp. Climb 20m up the ramp to stance on the highest ledge on a cantilevered block.

  4. (19)25m Climb the left facing corner and exit diagonally left just before the corner ends to gain the Halfway Ledge Walk left 40m or so past the start of Armageddon Direct and past the huge left facing corner system to stance below a right leaning thin crack system in gray rock.

  5. (19) 30m Climb up the recess using the thin crack and exit right after 7m where the holds run out. Continue round the corner right and up a crack to stance on large sloping blocks.

  6. (23) 45m. Step left off the ledge onto the exposed arête and climb the yellow overhanging fin on lay backs and crimps and stemming moves. Continue into the lichen covered rock and past the slightly grotty groove to exit to a good ledge. (This is a long and intense pitch and a big rack is useful.) One can escape easily from here by walking left about 30m along a ledge system to the Down Time abseil point. A belay is recommended as there is one exposed but easy move.

  7. (23) 23m Step right off the ledge and climb the crack above to attain the obvious overhanging jamb crack. Climb this to a small perch.

  8. (21) (22 for shorties) 35m Climb up the a obvious short right facing recess on lay backs on lichen covered rock. Climb the recess to easier ground and follow your nose straight to the top passing a classic traddy chimney but avoiding the easier grot on the right.

Descent: EITHER walk right to the gulley between Smalblaar ridge and the chesspieces. This involves three short abseils.

OR use the DOWN TIME Rap Route

FFA: Charles Edelstein & Neels Havenga, 2011

1 19 35m
2 20 20m
3 19 15m
4 22 40m
5 22 15m
6 19 35m
7 25 A1 30m
8 20 45m
9 19 30m
10 16 25m

Start: At the clump of trees against the wall at the top right. Begin by scrambling up on the left over easy broken grey rock.

There are two key features. One pitch below the halfway ledge is an enormous roof, perhaps the biggest on the amphitheatre, which the route turns on the right. Above the halfway ledge lie three vertical fins. The route uses the left one.

  1. 35m 19: Head up and right to an obvious vertical crack. Start up this crack then angle up leftwards to a whitish-yellow recess below a small roof. Get around the roof on the right then head straight up a crack to just a few metres below the big, long roof system. Stance on a small ledge a few metres off to the left, alternatively combine with the next pitch into one.

  2. 20m 20: Move back to the crack system then traverse right on a steep orange wall that has an obvious big rail and pockets on the face. At 7m the rail turns round a corner and ends. Out of sight of the belayer keep traversing at the same level but now on dark rock under a roof for a further 5m. On an open face continue traversing right for another 6m until reaching a crack system leading up. Head up to the big ledge. Walk along the ledge to the right. Pass the white sandy corner after 4 metres and continue another 4 metres to a break in the roof. Stance here.

  3. 15m 19: Crank through the roof and head straight up the clean crack to reach a ledge.

  4. 40m 22: On the ledge move left for a couple of metres then step over the void. Climb up the sustained and unrelenting crack including overcoming a couple of small roofs. Do a long pitch to reach a small ledge on the left about six metres below the Great Roof.

  5. 15m 22: To the right is a steep and intimidating reddish face. Head up and right on this overhanging face to reach a big undercling flake. Up this flake then the crack above it to reach the roof where it ends on the right. Turn the corner of the roof to get onto a small ledge.

  6. 35m 19: Straight up for a few metres then move out leftwards for a couple of metres to gain a little crack system that heads up the clean grey faces that are directly above the enormous roof. Beautiful face climbing takes you to the halfway ledge. Get on top of the large platform to stance. (The Armageddon crux pitch is immediately left)

  7. 30m 25, A1: On the platform move up and across to the right. Directly above is a big crack system with a massive protruding flake. This is the Armageddon Wimp-Out pitch. Judgment Day takes the overhanging orange wall to the right. Head up the unrelenting overhanging wall using the parallel vertical cracks that lead to the grey arête on the right after about 25 metres. Stance around the arête to the right.

  8. 45m 20: Nice easy climbing leads directly up for 20 metres to a ledge. Step off the ledge to the left and delicately get up to a rail and gear a few metres higher. Rail 5m right then up cracks and a detached block . Stance a couple of metres above a big chockstone.

  9. 30m 19: Climb the bottomless chimney slot with the chockstone wedged in it at the top. Step left and head up the crack system until forced to move left using edges to get across into the offwidth that becomes a perfect finger crack. Head up to the overlap then move a few metres to a comfortable ledge on the left. The ‘Changing Cracks’ pitch. The next pitch can be combined with this one.

  10. 25m 16: Climb up to a ledge and step right. Balance up the gearless face for a bit to get to a small horn. Up the magnificent ‘Handlebars’ Pitch to the summit!

Descent: EITHER walk right to the gulley between Smalblaar ridge and the chesspieces. This involves three short abseils.

OR use the DOWN TIME Rap Route

FA: Hilton Davies & Guy Paterson-Jones, 2012

This cliff is unlocated

If you know where this cliff is then please take a minute to locate it for the climbing community. contact us if you have any issues.

Accommodations nearby more Hide

Share this

Tue 18 Apr
Check out what is happening in Yellowwood Amphitheatre.

Get a detailed insight with a timeline showing

  • Ticks by climbers like you
  • Discussions of the community
  • Updates to the index by our users
  • and many more things.

Login to see the timeline!

Deutsch English Español Français Italiano 한국어 Português 中文