A Crag Guide gives an extensive view of all sub areas and climbs at a point in the index. It shows a snapshot of the index heirachy, up to 300 climbs (or areas) on a single web page. It shows selected comments climbers have made on a recently submitted ascent.
At a minor crag level this should be suitable for printing and taking with you on a climbing trip as an adjunct to your guidebook.
This guide was generated anonymously. Login to show your logged ascents against each route.
Warning
Rock climbing is extremely dangerous and can result in serious injury or death. Users acting on any information directly or indirectly available from this site do so at their own risk.
This guide is compiled from a community of users and is presented without verification that the information is accurate or complete and is subject to system errors. By using this guide you acknowledge that the material described in this document is extremely dangerous, and that the content may be misleading or wrong. In particular there may be misdescriptions of routes, incorrectly drawn topo lines, incorrect difficulty ratings or incorrect or missing protection ratings. This includes both errors from the content and system errors.
Nobody has checked this particlular guide so you cannot rely on it's accuracy like you would a store bought guide.
You should not depend on any information gleaned from this guide for your personal safety.
You must keep this warning with the guide. For more information refer to our:
Usage policy
Contributors
Thanks to the following people who have contributed to this crag guide:
Tommy Krauss
Brendan Heywood
Nick Clow
Heidixe
Nick Hanson
Chris L
o_g
Luen Warneke
griffith
Tim Williams
The size of a person's name reflects their Crag Karma, which is their level of contribution. You can help contribute to your local crag by adding descriptions, photos, topos and more.
Table of contents
- 1.
Bottom Dam
82 in Area
-
1.1.
Lloyd's Wall (Dry) 12 in Area
- 1.1.1. Vertical Wall 6 in Area
- 1.1.2. Middle Section 4 in Area
- 1.1.3. Far Right of the cliff line 2 in Area
- 1.2. The Egg Boulder 4 in Area
- 1.3. The Gorse Factory (Dry) 5 in Area
- 1.4. The Bakehouse (Dry) 5 in Area
- 1.5. The Yellow Cave (Dry) 7 in Area
- 1.6. Dam Wall Left 4 in Area
- 1.7. Funky Town Cave (Dry) 11 in Area
- 1.8. Funky Town Slab (Dry) 2 in Area
- 1.9. Funky Town Boulder (Dry) 7 in Area
- 1.10. Electric Wall 4 in Area
- 1.11. Dam Wall 5 in Area
- 1.12. The Electric Avenue 3 in Area
- 1.13. Fred's Point 0 in Area
-
1.14.
The Island 13 in Area
- 1.14.1. The Island - Dam Side 13 in Area
- 1.14.2. Mary's Wall 0 in Area
- 1.14.3. Anzac Wall 0 in Area
- 1.14.4. The Island - Town Side 0 in Area
-
1.1.
Lloyd's Wall (Dry) 12 in Area
- 2. Index by grade
1. Bottom Dam 82 routes in Area
- Summary:
-
All Bouldering
Lat / Long: -42.308738, 147.382073
The operation and use of drones by park visitors on reserved land including national parks is not permitted
Peregrine Falcons nest from July - December each year. It’s important that climbers don’t climb near active nests during this period. Known sites (non exhaustive) are: Sand River (Far East, The Panopticon), Bare Rock (R of the Boneyard, L of Bisso of Orange), Rocky Cape, Pubic Wall/Duck Reach, Hillwood, Gunners Quoin, Lowdina.
Please note that Tasmania has notoriously patchy phone reception for particular service providers. Telstra is the most reliable. An emergency Personal Locator Beacon or similar is recommended kit when climbing in remote locations.
For more information - follow the link below for some local tips + tricks on how to better reduce your impact during your next Tassie climbing holiday
")
access issues
Many locals continue to use community run website thesarvo.com for crag/route updates and noting any access issues. The associated app can be downloaded and used offline!
http://thesarvo.com/confluence/display/thesarvo/Tasmania
Gerry Narkowicz also produces hardcopy guides to numerous venues across the state via the 'Climb Tasmania' website
approach
To get to the southern areas, walk across the bottom dam, up the slab (can be a bit sketchy with pads, especially when wet - easier to the left)
Various crags are currently underwater due to high lake levels. Dry areas are labeled accordingly.
ethic
")
1.1. Lloyd's Wall (Dry) 12 routes in Area
- Summary:
-
Lat / Long: -42.305348, 147.380945
description
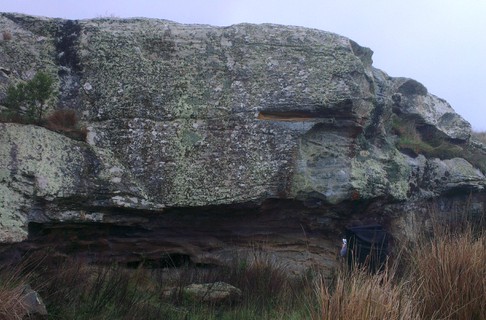
This vertical wall is on the north facing side of the point to the south of the Warm Up Blocks.
1.1.1. Vertical Wall 6 routes in Area
- Summary:
-
All Bouldering
Lat / Long: -42.305363, 147.380943
| Route | Grade | Style | Selected ascents | |||
|---|---|---|---|---|---|---|
| 1 |
Grendel (sds)
Start just left of the Lloyds engraving on the left hand side of the wall (the obvious left sweeping arc). Sit start at pinch (feet off slab), up via under clings to your left and sharp edges to your right. Top out using good holds at lip. | V4 | ||||
| 2 |
★ Brad Pitt
A big reach to holds in the little corner - the first ascent was by a very tall person reaching across to the top holds, this problem is considerably harder using the lower holds. The low hold has now broken and is bigger, and goes from here at about V8. | V8 | 3m | |||
| 3 |
Looyd's Pitt / 1. V6
Stand start but very reachy to first hold. A crucial foothold has snapped off, making this climb much harder. Grade is unconfirmed. | V6 | ||||
| 4 |
★★ Lloyd's Dyno (stand)
Dyno to top from good hold | V5 | 3m | |||
| 5 | 4. V? (sds) | ? | ||||
| 6 |
Campbell's Problem V6 (sds)
5m right of Lloyd's Dyno, sitstart up flake, then right and up thin slab | V6 | 4m | |||
1.1.2. Middle Section 4 routes in Area
- Summary:
-
All Bouldering
Lat / Long: -42.305413, 147.380785
description
The middle section of the wall forms a high cave.
| Route | Grade | Style | Selected ascents | |||
|---|---|---|---|---|---|---|
| 1 |
★ 1. Nettle Lover (sds)
Sitstart under roof and climb up onto slab via jugs | V1 | ||||
| 2 |
★ 2. Cardboard Thin (sds)
Sitstart and up into curving undercling | V2 | ||||
| 3 |
3. Itchy and Scratchy (sds)
Start on two small edges around corner, traverse leftwards along rail and into Cardboard Thin | V4 | ||||
| 4 |
4. Al's Highball (highball, sds)
Start at the start of the Nettle Lover traverse and climb up to the high ledge and the top. | V3 | ||||
1.1.3. Far Right of the cliff line 2 routes in Area
- Summary:
-
All Bouldering
Lat / Long: -42.305413, 147.380658
| Route | Grade | Style | Selected ascents | |||
|---|---|---|---|---|---|---|
| 1 | 1. Ren (hang) | V4 | ||||
| 2 | 2. Stimpy (hang) | V5 | ||||
1.2. The Egg Boulder 4 routes in Area
- Summary:
-
Lat / Long: -42.305536, 147.380928
| Route | Grade | Style | Selected ascents | |||
|---|---|---|---|---|---|---|
| 1 |
★★★ 1. Green (sds)
V3/4. Sit start on good edges, move up and onto slab via small holds to top. | V4 | ||||
| 2 |
2. V3 (sds)
As for 1.Green but move right via good holds to arete, then to top. | V3 | ||||
| 3 |
3. Frixion (stand)
Rock onto the blankish black slab and to top via mossy holds. Fun slab problem. | V2 | ||||
| 4 |
4. Saddam's Slab of Torture
Right hand arete and slab. | V4 | ||||
1.3. The Gorse Factory (Dry) 5 routes in Area
- Summary:
-
Lat / Long: -42.305713, 147.381744
| Route | Grade | Style | Selected ascents | |||
|---|---|---|---|---|---|---|
| 1 | 1. Wombat Fucker | V1 | ||||
| 2 | 2. V? (sds) | ? | ||||
| 3 | 3. The Gorse Whisperer (sds) | V5 | ||||
| 4 | ★ 4. V2 (hang) | V2 | ||||
| 5 | 5. Gorse Fucker (sds) | V3 | ||||
1.4. The Bakehouse (Dry) 5 routes in Area
- Summary:
-
Lat / Long: -42.305920, 147.381901
 |
||||||||
| Route | Grade | Style | Selected ascents | |||||
|---|---|---|---|---|---|---|---|---|
| 1 | 1. V? (sds) | ? | ||||||
| 2 | 2. V? (sds) | ? | ||||||
| 3 | 3. V? (stand) | ? | ||||||
| 4 | 4. Chocolate Eclair (highball) | V3 | ||||||
| 5 | 5. V? (sds) | ? | ||||||
1.5. The Yellow Cave (Dry) 7 routes in Area
- Summary:
-
Lat / Long: -42.306259, 147.381969
description
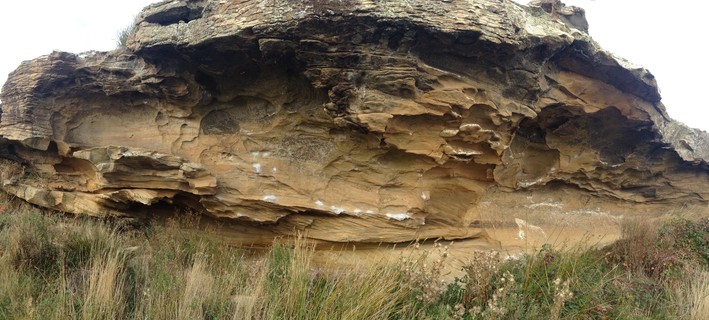
First cave about 20m left of the bottom dam. Dry in even fierce bad weather.
approach
Approach via the bottom dam, Yellow Cave is the first cave left, about 20m from the dam.
 |
||||||||
| Route | Grade | Style | Selected ascents | |||||
|---|---|---|---|---|---|---|---|---|
| 1 |
★ Un-named
SDS under roof left of Sanguine Direct. Out, around bulge to finish on the same jug hold as Sanguine Direct. | V2 | 4m | |||||
| 2 |
★★ Sanguine Direct
Direct SDS to Sanguine. Start under roof, moving through slopers on the face. The finish is the same as Sanguine | V3 | 4m | |||||
| 3 |
★★★ Sanguine
R to L traverse of sloper rail, finishing up to jug under roof. Great rock. | V4 | 6m | |||||
| 4 |
★ Roundhouse
Start as for Sanguine, but move up then left on slopes and pinches. Finish on jug. | V7 | 5m | |||||
| 5 |
★★ Strongbuoy / Roundhouse Direct
Start roughly in the middle of the Sanguine traverse, directly under the roof pocket on slopers, bust straight up and finish as for Roundhouse. FA: Tim Williams, Jan 2022 | V8 | 3m | |||||
| 6 |
★★ Roundhouse - Roof pocket variant
Variation: Out of confusion as to exactly where Roundhouse goes, most people tend to do the slightly easier 'Roof-Pocket' variation which uses the big roof pocket instead of the slopes and pinches. This variation goes at around V5 | V5 | 5m | |||||
| 7 |
★ V6
Hang start on low ledge with your heel up. Move right along the line for a couple of metres to finish on jug. The extension through the lip and top out would probably go. | V6 | 4m | |||||
1.6. Dam Wall Left 4 routes in Area
- Summary:
-
Lat / Long: -42.306499, 147.381909
| Route | Grade | Style | Selected ascents | |||
|---|---|---|---|---|---|---|
| 1 | 1. Arsehat (stand) | V0 | ||||
| 2 | 2. V? (stand) | ? | ||||
| 3 | 3. V? (stand) | ? | ||||
| 4 | 4. V? (stand) | ? | ||||
1.7. Funky Town Cave (Dry) 11 routes in Area
- Summary:
-
Lat / Long: -42.305337, 147.383023
description
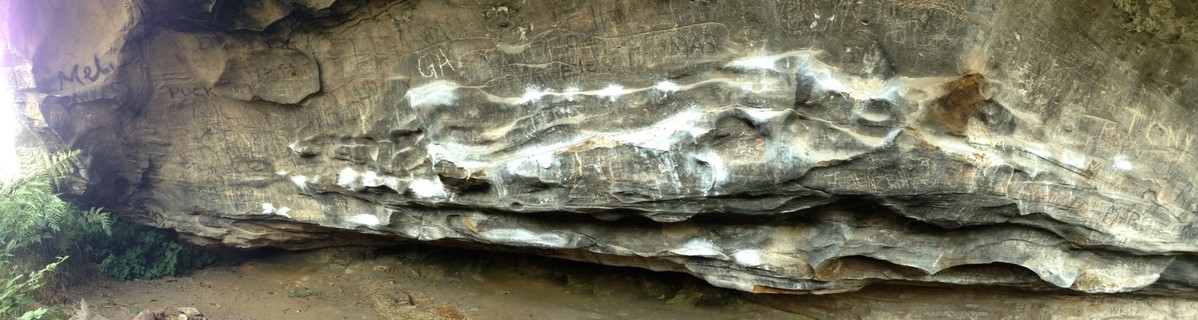
The Funky Town Cave is host to a handful of classic hard lines, feet are rare and holds are usually small and slopey.
approach
To get to Funky Town, walk across the bottom dam, up the slab and then head straight over headland heading a bit right. Follow the headland to find a cave on the opposite side to the Yellow Cave.
 |
||||||||
| Route | Grade | Style | Selected ascents | |||||
|---|---|---|---|---|---|---|---|---|
| 1 |
★★★ Angels on the Sidelines
The left arete of the cave, start low with right hand on undercling sloper and left hand on the broken hold. Left hand starting hold broke sometime in 2016. Still sits at V10. Follow the hanging arete and finish on the flat jug. A hard topout may be possible. FA: G. Maddox, 2013 | V10 | 3m | |||||
| 2 |
★★ Sexy Angels
The low start to 'angels on the sidelines'. Start on sloping crimps just below the 'sexy' graffiti. Adds a few hard tension moves. FA: Joe Schwarz, 16 Apr | V11 | ||||||
| 3 |
Fading Angels Project
Very hard. Sit start as for Fade to Black, up into the rib and hard left via big move to finish as for Angels on the Sidelines. Will add several grades to Fade to Black | 4m | ||||||
| 4 |
Fade to Black
Hang Start on the horrendous pinches, slap up to slopers and traverse right to jug as for Kung Fu Fighting. FA: Sam Edwards | V13 | 4m | |||||
| 5 |
★★ Kung Fu Fighting
Start on undercling and slope and slap up to slopes and traverse right to jug. FA: Sam Edwards | V10 | 3m | |||||
| 6 |
★★ Acid Reign
Was V7 until starting hold broke. Start on undercling and broken sloper. FA: Sam Edwards | V8 | 3m | |||||
| 7 |
★★ The Fountain
Start on the slopers right hand side of Acid Reign. Up to same finish FA: T. Krauss, 6 Jul 2014 | V8 | 3m | |||||
| 8 |
★★ V3
Traverse from the huge juggy sloper to the right as far as possible | V3 | 4m | |||||
| 9 |
★ High traverse
As for low traverse but hands only on the thinner line | V5 | 4m | |||||
| 10 |
★★ Groove Train
Start on slopes heel up. Probably easier if you're tall and harder if you're not. FA: Kim Robinson | V10 | 4m | |||||
| 11 |
★ Rhamnusia
Start on low crimpy rail 3m right of Groove Train, up to slopers then head left to finish at nose. | V11 | 7m | |||||
1.8. Funky Town Slab (Dry) 2 routes in Area
- Summary:
-
Lat / Long: -42.305521, 147.383064
description
The Funky Town Slab is the slabby headwall to the left of the Funky Town Cave.
Only one route on the wall has been recorded, though some other lines have been attempted there is still some potential for new hard lines.
approach
Access to the slab is the same as for Funky Town Cave.
| Route | Grade | Style | Selected ascents | |||
|---|---|---|---|---|---|---|
| 1 |
★ V7
The farthest left of the 3 water-grooves | V7 | ||||
| 2 |
★ The Raven
Stand start the double water groove just to the left of the cave arete. FA: H. Jackson, 2017 | V7 | 4m | |||
1.9. Funky Town Boulder (Dry) 7 routes in Area
- Summary:
-
Lat / Long: -42.305735, 147.383144
 |
||||||||
| Route | Grade | Style | Selected ascents | |||||
|---|---|---|---|---|---|---|---|---|
| 1 | V? | ? | ||||||
| 2 | V3 (stand) | V3 | ||||||
| 3 | 1. Stuck on You (hang) | V5 | ||||||
| 4 | ★★ 2. V3 (stand) | V3 | ||||||
| 5 | 3. V5 (stand) | V5 | ||||||
| 6 | 4. Unstuck (sds) | V5 | ||||||
| 7 | 5. Project | V10+ | ||||||
1.10. Electric Wall 4 routes in Area
- Summary:
-
Lat / Long: -42.307383, 147.385719
| Route | Grade | Style | Selected ascents | |||
|---|---|---|---|---|---|---|
| 1 | 1. V1 (sds) | V1 | ||||
| 2 | 2. Blind Mullet (sds) | V4 | ||||
| 3 | 3. Electric Lazyland (stand) | V5 | ||||
| 4 | 4. V? (stand) | ? | ||||
1.11. Dam Wall 5 routes in Area
- Summary:
-
Lat / Long: -42.306855, 147.382397
summary
Currently in 30-40cm of water.
| Route | Grade | Style | Selected ascents | |||||
|---|---|---|---|---|---|---|---|---|
| 1 |
★★★ Crack Head
About 50m right of the dam is a very steep hand crack usually full of cobwebs. Sit start on finger locks, up to jams, top out on ledge. | V5 | ||||||
| 2 |
Iron Maiden
About 25m to the right of Crack Head is a free standing boulder, a bit fractured and loose but has a couple of fun problems. Sit start on good holds, up to curving arete, use holds only on arete. Top out at apex of boulder. | V3 | ||||||
| 3 |
Fractional
Start as for previous problem, up middle of face using good edge and loose finger crack, dyno to apex. No holds on arete. | V3 | ||||||
 |
||||||||
| Route | Grade | Style | Selected ascents | |||||
| 4 |
★★★ My Happy Place
30m? right of the bottom dam is a bulgy arete feature just to the left of a little chimney crack. Sit start left of the crack, head left and around the arete, then up to slopers. FA: Sam Edwards, 2008 | V12 | ||||||
| 5 |
★★ Worthy of Attack
The shallow crack 6m right of Mr Happy Place. Sit start on sidepull at bottom of crack, climb up to ledge and then top out in any direction that appeals. FA: Callum Hyland | V11 | ||||||
1.12. The Electric Avenue 3 routes in Area
- Summary:
-
Lat / Long: -42.306165, 147.385013
description
These are the short walls on the next point across from Funky Town. The first section has potential for quite a few more short, moderate problems.
| Route | Grade | Style | Selected ascents | |||
|---|---|---|---|---|---|---|
| 1 |
V2
Start as for Electric Avenue but go left to the next set of jugs. | V2 | ||||
| 2 |
Electric Avenue
Start 1m left of arete at jug. Up jugs to top. | V2 | ||||
| 3 |
V0
Start at flat hold 1m right of arete. | V0 | ||||
1.13. Fred's Point 0 routes in Area
1.14. The Island 13 routes in Area
- Summary:
-
Lat / Long: -42.307424, 147.378747
1.14.1. The Island - Dam Side 13 routes in Area
- Summary:
-
All Bouldering
| Route | Grade | Style | Selected ascents | |||
|---|---|---|---|---|---|---|
| 1 |
★★ Buzzy Land
Start on undercling and go up and left, to finish as for El Nino FA: Kim Robinson | V8 | ||||
| 2 |
★★ El Jeffe
Start in between El Nino and BuzzyLand at an undercling. Up to the two crimps on BuzzyLand and then straight up. | V7 | ||||
| 3 |
Slap Slap
This is a small cave around and up to the left of the main cave. Start on the slopey lip , mantle to top. | V3 | ||||
| 4 |
Fear and Loathing
Start as for Slap Slap, but go right through choss. | V3 | ||||
| 5 |
★ Spirulina
Hang start on the large jug, climb up to the crack, jam through it and battle over the top. FA: Dave James | V1 | ||||
| 6 |
★ 1st V5
Start at back of cave and climb out on jugs and jump around lip to big slopey basin. Has been done with top out at V7 FA: Kim Robinson | V5 | ||||
| 7 |
★★ 2nd V5
Climb out from back of cave to big jug on lip and traverse the lip rightwards to finish up La Nina. FA: Kim Robinson | V5 | ||||
| 8 |
Oonga Boonga
Project - Start at back of cave directly in from the big jug, near the Oonga Boonga grafitti. Hard moves out the roof to the jug on the lip, and then even harder moves straight up to finish. The two halves have been done individually, both at about V9 | V9 | ||||
| 9 |
V3/4
Start as for La Nina and traverse the entire length of cave leftwards on the back wall to the start of Spirulina. FA: Kim Robinson | V4 | ||||
| 10 |
Doug's Linkup
Start as for La Nina, and do the first move out to the flake/undercling. The head left on jugs through the roof, to finish at no. 2. | V5 | ||||
| 11 |
★★★ La Nina
Start on jugs on the back wall 2m left of El Nino. Straight out to lip then finish right and up. FA: Jon Nermut | V4 | ||||
| 12 |
La Nina Direct
Direct finish to La Nina FA: Kim Robinson | V8 | ||||
| 13 |
★ El Nino
Start at the right hand end of the cave. Out to lip then up and slightly left. FA: Jon Nermut | V4 | ||||