A Crag Guide gives an extensive view of all sub areas and climbs at a point in the index. It shows a snapshot of the index heirachy, up to 300 climbs (or areas) on a single web page. It shows selected comments climbers have made on a recently submitted ascent.
At a minor crag level this should be suitable for printing and taking with you on a climbing trip as an adjunct to your guidebook.
This guide was generated anonymously. Login to show your logged ascents against each route.
Warning
Rock climbing is extremely dangerous and can result in serious injury or death. Users acting on any information directly or indirectly available from this site do so at their own risk.
This guide is compiled from a community of users and is presented without verification that the information is accurate or complete and is subject to system errors. By using this guide you acknowledge that the material described in this document is extremely dangerous, and that the content may be misleading or wrong. In particular there may be misdescriptions of routes, incorrectly drawn topo lines, incorrect difficulty ratings or incorrect or missing protection ratings. This includes both errors from the content and system errors.
Nobody has checked this particlular guide so you cannot rely on it's accuracy like you would a store bought guide.
You should not depend on any information gleaned from this guide for your personal safety.
You must keep this warning with the guide. For more information refer to our:
Usage policy
Contributors
Thanks to the following people who have contributed to this crag guide:
Nick Foulds
Alexander Jones
Alistair Earley
Brad Simpson
jayden desmond
Brendan Heywood
Finn
Lee Prescott
Andrew Lightfoot
Reagen
The size of a person's name reflects their Crag Karma, which is their level of contribution. You can help contribute to your local crag by adding descriptions, photos, topos and more.
Table of contents
- 1.
Terrors Creek
32 in Crag
- 1.1. Lower Tier 9 in Area
- 1.2. Hill Side 0 in Boulder
- 2. Index by grade
1. Terrors Creek 32 routes in Crag
- Summary:
-
All Bouldering
Lat / Long: -27.154044, 152.823818
description
Terror's Creek has a large and fairly confused history. It seems as though many of QLD's strong climbers of the past have been through this area over the years. A combination of broken holds and blurry memories however have rendered a lot of the past descriptions pretty inaccurate. This is an attempt to get this crag up to date for future crushers.
The rock consists of 'Greenstone', (metamorphosed basalt), and is very resistant to rain damage.
approach
There is parking for one to four (maybe 5small) cars behind the guard rail. Bear in mind however first in will be stuck until second in moves their vehicle and so on down the line of parked cars).
Parking is 5.5km from the Mt Mee Rd turn off from Dayboro. Turn in behind the "Terrors Creek - George Juffs Bridge" sign. Be careful pulling back onto Mt Mee Road as both corners are quite blind and vehicles are traveling at speed up and down this road.
From the parking, follow the vague track down to the boulders in the creek. Walk along the boulders for a couple of minutes until you reach a steepish section. Go down this, there will be a large boulder on your right. This is the back of the Main Boulder. Walk around the end of this boulder and you will see the Main Area.
If you scramble down the creek from the main boulder you will find the "easy" slabs of the lower tier.
 |
||||||||
| Route | Grade | Style | Selected ascents | |||||
|---|---|---|---|---|---|---|---|---|
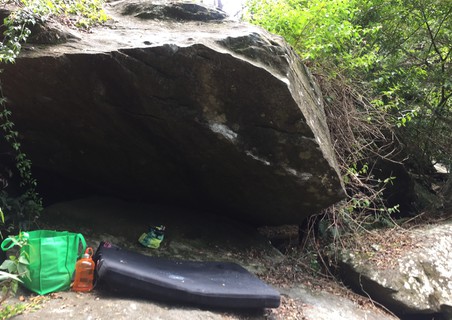
The Starship BoulderGet ready to pull hard on small crimps, and a couple conveniently placed mono's. | ||||||||
| 2 |
★ Silent Witness
Very overhanging wall. Start on side pull and rail. Throw for left hold, match, throw for another left hold, left heel hook after big move to top. Press like mad....you don't want to fall off. Nick W | V4 | 3m | |||||
| 3 |
★★ Kiss My Witness
This was previously ‘Kiss My Witness’ V6. Holds broke and alas was a project for some time before a “post break repeat” grade confirmation. Start with both hands on low incut rail. Follow obvious break straight up and finish as for ‘Silent Witness' FA: Sam Bowman, 22 Aug 2021 | V12 | ||||||
| 4 |
Witness the Brittleness (Possible Regrade Project)
Possibly lives up to the name. It would appear that holds have broken since Brad S and Nick W first documented this boulder. A powerful, aggressive crimp boulder that needs a repeat to reconfirm the grade. Would appear at least V11. Sit Start on good two finger side pull and crimp. Hard first moves left into small crimps, then finish as for ‘Kiss My Witness’. Brad S and Nick W (Pictures on StrandedClimbers.Blogspot.com.au) | V11 - 13 | ||||||
| 5 |
★★★ The Rack
Absolute cracker of a one move wonder. Start on incut edge in middle of wall. Do a big move to good edge, match, then finish up an easy mantle (as for 'Kiss the Witness'). Definitely harder for those challenged in the ways of the span. FA: Sam Bowman, 22 May 2020 | V10 | ||||||
| 6 |
★★ The V7
Stand start on left hand edge and right hand crimp. Big first move into right gaston, then follow good edges to first obvious top out. Mantle is tricky so be careful. Unsure on First Ascensionist, please get in touch with more info! FA: Unknown | V7 | ||||||
| 7 |
★★★ V7 link traverse
Start as for the v7 finishing up the mantle of the v4 trending below the lip on good holds moving back down before heading up to the mantle. FA: I'm sure some one has already done this | V7 | 6m | |||||
| 8 |
★★★ The Mono Proj
Guess this needs a new name. Low start on the first of the monos and the obvious incut edge, with a pretty crucial toehook. Climb straight through the roof for a few moves before finishing up The V7. One of QLD's new hardest boulders. FA: Sam Bowman, 22 May 2020 | V12/13 | ||||||
| 9 |
The Spice Rack Proj
Mega Rig climbing the steepest most sustained part of the overhanging wall, likely a project for future generations. | |||||||
  |
||||||||
| Route | Grade | Style | Selected ascents | |||||
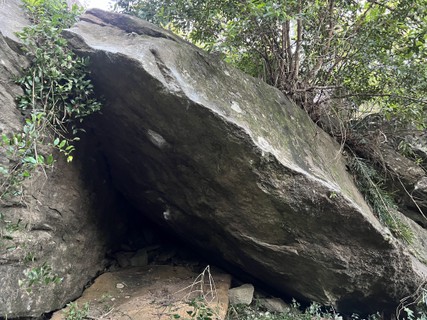
The Starship Boulder (front) | ||||||||
| 11 |
★★★ Flight of the Fat Man / Common Enemy of the Fat Man
Start left hand on the arete, right hand on lower crimp. Overhanging arete above the small pool near the entrance as you approach super overhanging wall. FA: Finn, 19 Mar 2022 | V11 | ||||||
| 12 | Project | |||||||
| 13 |
★ My Green Life
Start on the incut pinch and incut right-hand hold. | V5 | ||||||
| 14 | Left Project | |||||||
| 15 | ★★ Right Project | |||||||
    |
||||||||
| Route | Grade | Style | Selected ascents | |||||
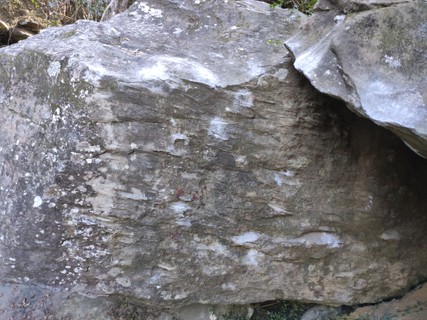
Stinkbug BoulderBeneath the main wall. | ||||||||
| 17 |
★ Stinkbugs from Hell
Underneath rock opposite the main wall. Start matching second lowest rail (Could go from lower rail but will probably break off) with double toe hook over lip. Pull onto jugs/lip and traverse left to mantle. FA: Lee Prescott, 18 Dec 2021 | V2 | ||||||
Below The Main Area | ||||||||
| 19 |
★★★ Coach Don’t Play
LH undercling RH arete, traverse right, top out for Unkown Gnome. FA: jayden desmond | V2 | 2m | |||||
| 20 |
Unkown Gnome
Start lower on the small footholds used in the V3, big move out to the shelf. FA: Unknown | V7 | ||||||
| 21 |
★★ Unknown
Smaller overhang below the witness boulder. Start low on crimps, blast up and left to a vicious mantle. FA: Andrew Lightfoot | V3 | 3m | |||||
| 22 |
★★ Lung Infiltration
Start on the left pocket side-pull and right side-pull just above ground level. Use a series of crimps and slopes to gain the mantle. The boulder on the right is out but using it goes a bit easier. FA: Tim Janetzki, 28 May 2023 | V5 | 2m | |||||
| 23 |
★★★ Khosy's Cosy Climb
Start matched on the small blocky hold, figure out how to do the large move to the middle crimp and mantle. Avoid wall on the left. FA: Finn McCallum, 17 Oct 2021 | V7/8 | 2m | |||||
| 24 |
★★★ Abuse of Flower Comes as No Suprise
Start matched on obvious low rail, follow arete, top out for Khosy’s Cosy Climb. FA: jayden desmond | V4 | 3m | |||||
| 25 |
★ Hot wet action
Sit start matched on the low blob, follow arete | V3 | 3m | |||||
/4c/1a/4c1aef09c0658a57ed61561ca87eb66b81899e7e) |
||||||||
| Route | Grade | Style | Selected ascents | |||||
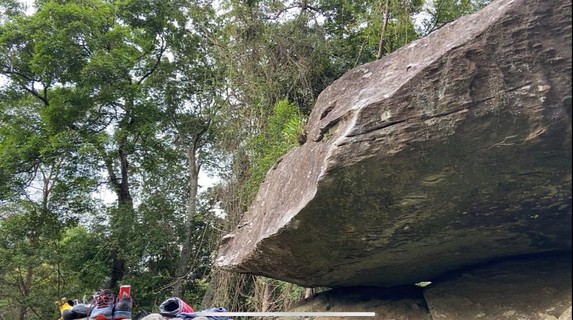
Gator BoulderFound to the right of Troglodyte boulder. | ||||||||
| 27 |
★★ Gator
Start matched on the low sloping jug. Line of least resistance takes you around its jaw where you grab his eyebrows and slap him in the face to mantle. Great beginner problem! Chockstones are out. FA: Alexander Jones, 28 May 2023 | V2 | 2m | |||||
| 28 |
Aid
Start matched on the sloping jug. Slap some gator cheeks and mantle directly. Chockstones are out. FA: Tim Janetzki, 28 May 2023 | V3 | 1m | |||||
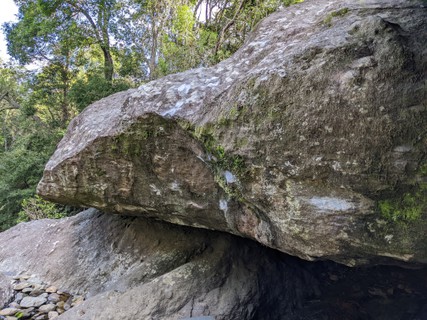
1.1. Lower Tier 9 routes in Area
- Summary:
-
Lat / Long: -27.153315, 152.823908
summary
The collection of slabby blocks (and some not) lower down the creek from the main boulder.
description
An area lower down the creek with more "accessible" grades to the average climber with some easy movement available to aid your warm-up. Probably not worth the visit for these boulders in their own right.
access issues
Be careful of coming here if there is any likelihood of heavy rain or after heavy rainfall. Much of this area is subject to being underwater.
approach
Reach lower tier by following down the blocks beneath main boulder.
/b8/95/b8953f20c724e12c16b48ec48e2f06da4b477fe4) /ab/7d/ab7d69e7559d470e3b1af7fa66ed40d9a977c767) /11/66/116652d0489de0fbc7b0a524a9b9cf0a8308bb16) |
||||||||
| Route | Grade | Style | Selected ascents | |||||
|---|---|---|---|---|---|---|---|---|
| 1 |
★ The Bucket slab
A slab with a fair few good buckets in it making for easy climbing on bombproof rock. Start at the bottom right of the block and trend up left to the top. FA: Nick Foulds, 29 May 2021 | V0 | 3m | |||||
| 2 |
★ Bucket slab arete
The right hand arete of Bucket Slab. Easy on solid rock. FA: Nick Foulds, 29 May 2021 | V0 | ||||||
| 3 |
Ladder Slab
The left side of the slab boulder below the Bucket slab boulder. Huge ladder rung type holds available for the bottom half of the boulder, maybe a slightly harder move at the top for the vertically challenged. Again excellent solid rock. FA: Nick Foulds, 29 May 2021 | V0 | ||||||
| 4 |
★ Diminishing Arete
The right hand side of the Ladder Slab boulder. Smaller holds diminish the higher you climb leaving thin hands on good feet near the top. Trust your slab technique on this one. Again excellent quality rock. FA: Nick Foulds, 29 May 2021 | V1 | ||||||
| 5 |
Two ways
Two ways to do two ways! either use a high heel and lay to the right (I would argue more fun this way) or use a toe and rock straight onto the face. FA: Nick Foulds, 29 May 2021 | V1 | 2m | |||||
/14/dc/14dc9c4805a1b1cd312284550630faa8838747b5) 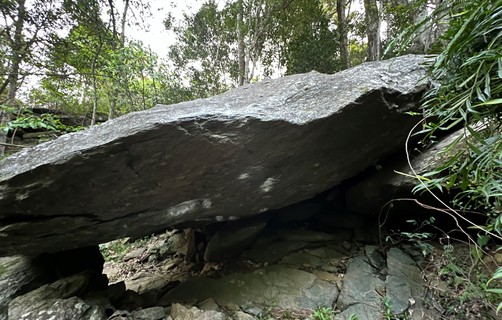  |
||||||||
| Route | Grade | Style | Selected ascents | |||||
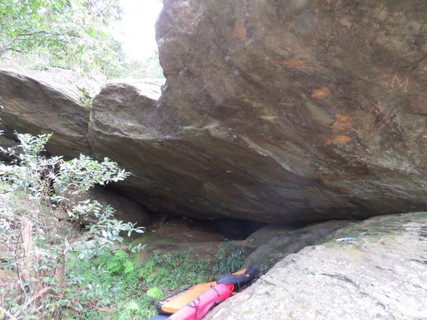
| 6 |
Troglodyte Roof
There are likely several routes under the troglodyte roof probably exiting from either side of this bloc. | |||||||
| 7 |
★ King Scrub
Sit-start on shelf, bust to the lip then mantle. Not too bad at all. FA: Alexander Jones, 21 May 2023 | V4 | 2m | |||||
| 8 |
Troglodyte Roof Right Project
Start on the largest shelf in the middle of the roof, head out towards the right side of the boulder. | |||||||
| 9 |
Troglodyte Roof Left Project
Start on the largest shelf in the middle of the roof, head out towards the left side of the boulder. | |||||||
1.2. Hill Side 0 routes in Boulder
description
This is on private land. Don't boulder here.
approach
There is none.