A Crag Guide gives an extensive view of all sub areas and climbs at a point in the index. It shows a snapshot of the index heirachy, up to 300 climbs (or areas) on a single web page. It shows selected comments climbers have made on a recently submitted ascent.
At a minor crag level this should be suitable for printing and taking with you on a climbing trip as an adjunct to your guidebook.
This guide was generated anonymously. Login to show your logged ascents against each route.
Warning
Rock climbing is extremely dangerous and can result in serious injury or death. Users acting on any information directly or indirectly available from this site do so at their own risk.
This guide is compiled from a community of users and is presented without verification that the information is accurate or complete and is subject to system errors. By using this guide you acknowledge that the material described in this document is extremely dangerous, and that the content may be misleading or wrong. In particular there may be misdescriptions of routes, incorrectly drawn topo lines, incorrect difficulty ratings or incorrect or missing protection ratings. This includes both errors from the content and system errors.
Nobody has checked this particlular guide so you cannot rely on it's accuracy like you would a store bought guide.
You should not depend on any information gleaned from this guide for your personal safety.
You must keep this warning with the guide. For more information refer to our:
Usage policy
Contributors
Thanks to the following people who have contributed to this crag guide:
Brendan Heywood
Luca Giovagnoli
Derek Holmes
Simon Dale
Analise VH
Chris Summit
Kai
AriefNagara
Trevor Ayala
Roi Matalon
The size of a person's name reflects their Crag Karma, which is their level of contribution. You can help contribute to your local crag by adding descriptions, photos, topos and more.
Table of contents
- 1.
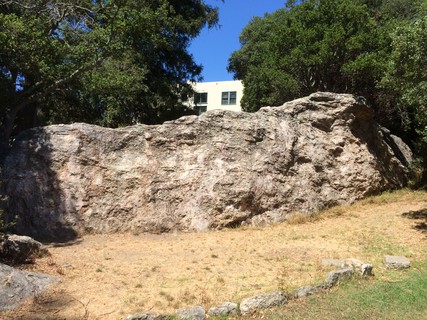
Indian & Mortar Rocks
64 in Area
- 1.1. Indian Rock 43 in Area
- 1.2. Mortar Rock 21 in Cliff
- 2. Index by grade
1. Indian & Mortar Rocks 64 routes in Area
- Summary:
-
Mostly Bouldering
Lat / Long: 37.892625, -122.272581
description
Two classic Bay Area outdoor bouldering areas, located right beside each other.
access issues
For any/all access issues at crags in this region, please contact the Bay Area Climbers Coalition.
approach
Park near the intersection of Indian Rock Ave and San Mateo Rd in Berkeley, then a leisurely 30 second stroll will have you on the rock.
history
This rock has been climbed on since the 1930s - there's still evidence of old bolts and piton scars visible here and there. From the 1960s onward this was one of the more important training spots in the West Coast, before gyms came along - pretty much anyone who's anybody from that period spent time honing their technique here.
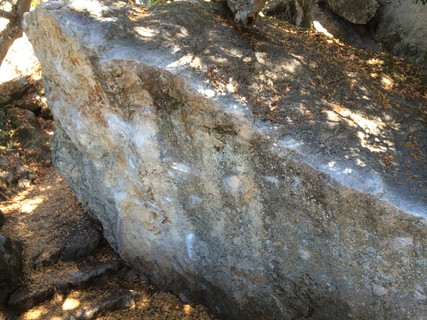
1.1. Indian Rock 43 routes in Area
- Summary:
-
Mostly Bouldering
Lat / Long: 37.892254, -122.272758
description
A historic crag in California climbing, and still the best bouldering in the East Bay.
  /2d/3e/2d3ea1214ba6cc0c97543624e8d783c55b5b2659) |
||||||||
| Route | Grade | Style | Selected ascents | |||||
|---|---|---|---|---|---|---|---|---|
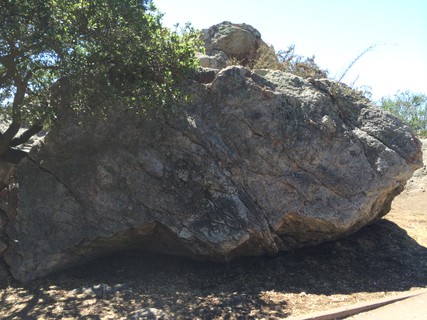
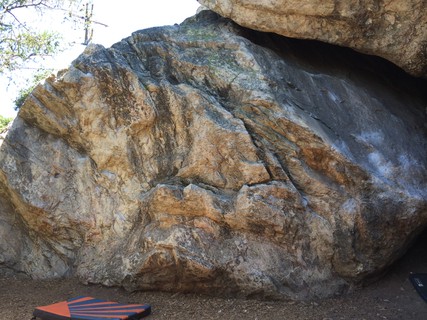
Sidewalk BoulderThe cute little boulder that greets you as you open your car door. | ||||||||
| 2 |
★ Beginner's Slab
Several options, all easy & pleasant. | VB | 10ft | |||||
| 3 |
★★ Ape Overhang
Low sit start on slippery rail then move right through jugs to tricky top out up arete. Sit start on higher jug is V2. | V3 | 10ft | |||||
| 4 |
★ Ape Traverse
Sit start right of arete, then low traverse left to the Beginner's Slab keeping your butt off the ground with difficulty. | V6 | 20ft | |||||
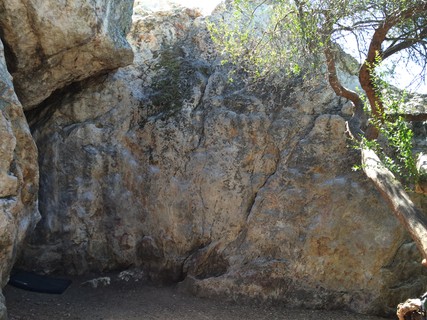
Front and Summit AreasA variety of problems are found on the boulders and walls on the street side and summit of Indian Rock. | ||||||||
| 6 |
★★ Warm Up Slab
The pleasant white slab on the left side of the front face of the main rock. Has at least 3 different independent lines, all about the same grade. | V0- | 15ft | |||||
| 7 |
★★ Left Arete
Sit start. Crack is off. | V2 | 8ft | |||||
| 8 | ★ The Crack | V0 | 8ft | |||||
| 9 |
★ Little Prow
Sit start. Crack is off. Take care of block behind. | V1 | 8ft | |||||
| 10 |
★ Summit Route
Bad Landing | V0 | 10ft | |||||
| 11 |
★ Unnamed Arete
Start as low as you can. | V2 | 10ft | |||||
| 12 |
★ Sloper Traverse
Start on Unnamed Arete and go left, well below the lip. | V6 | 15ft | |||||
/d2/c7/d2c713c2a1ad89e2b8cfbedddb91f02c6bfe5bfe) 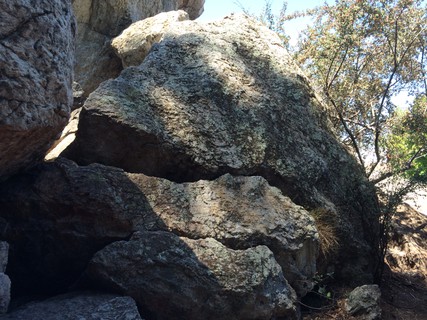 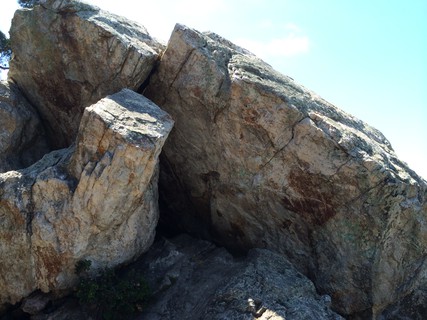 |
||||||||
| Route | Grade | Style | Selected ascents | |||||
| 13 |
Unnamed Traverse
Awkward traverse right above a bad landing. | V3 | 20ft | |||||
| 14 |
★★ Juggy Prow
Fun steep jugging. | V0 | 10ft | |||||
| 15 |
Beginner's Slab 2
Next boulder right of Juggy Prow. | VB- | 10ft | |||||
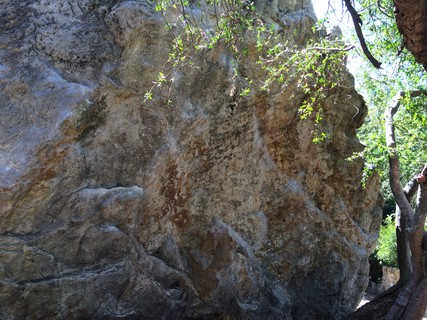
|
The following 5 routes are located on the huge chockstone looming above The Pit. The first 3 can be bouldered, but the 2 directly above The Pit are best top-roped. | ||||||||
| 17 |
★★ The Block Traverse
Traverse right, staying off the top. | V4 | 10ft | |||||
| 18 |
★★ Mechanic's Crack
Start in the cave then traverse right and top out, avoiding the block behind. Scary. | V3 | 15ft | |||||
| 19 |
★ Worm Drive / The Seam
Stand start is V1. Spotter strongly recommended so you don't fall down into The Pit. | V6 | 12ft | |||||
/82/51/8251ebea8fc2eba89de31283259f004aa80a0945) /9f/0a/9f0ab0e5ebe1efc657d2a39c19ad192a631d7c83) |
||||||||
| Route | Grade | Style | Selected ascents | |||||
| 20 |
★ I-12
Can also be started as for I-11. | 5.11a | 40ft | |||||
| 21 | ★ I-11 | 5.11a | 15ft | |||||
Stairway SlabsThe pleasant slab above the top set of stairs can be top-roped off a natural anchor. | ||||||||
| 23 | Slab Left | V0- | 13ft | |||||
| 24 | Slab Center | V0- | 20ft | |||||
| 25 | ★ Slab Right | V0 | 20ft | |||||
 |
||||||||
| Route | Grade | Style | Selected ascents | |||||
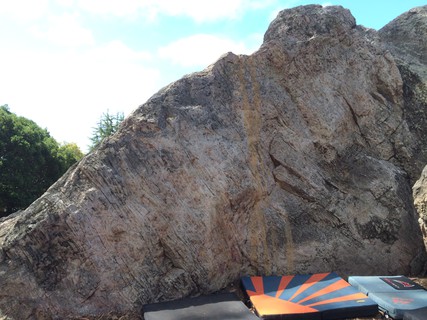
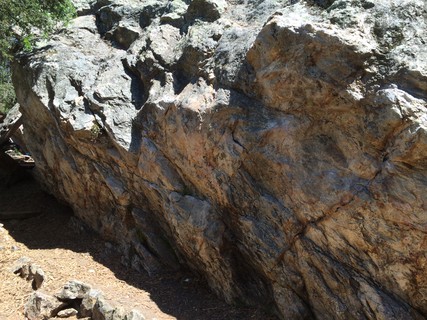
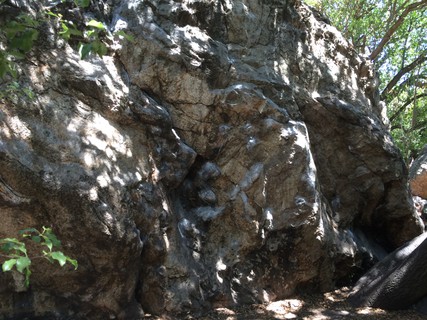
The PitThe centrepiece of Indian Rock. This area has numerous variants and eliminates that aren't mentioned here. Note: this area faces west and gets blasted with afternoon sun, so it's better in the morning or during cooler weather. | ||||||||
| 27 |
★★ Indian Rock Overhang
Mega classic. Two bolts on top for top-roping this and the next 3 routes. | V2 | 20ft | |||||
| 28 | ★★★ Center Overhang | V4 | 20ft | |||||
| 29 | ★★ Right Overhang | V1 | 23ft | |||||
| 30 | ★★ Easy Overhang | V0 | 25ft | |||||
| 31 | ★ The Edge | V4 | 30ft | |||||
| 32 |
★★ Embryonic Journey Sit Start
Start as for The Edge, then traverse right to join Embryonic Journey. | V4 | 45ft | |||||
| 33 |
★★ Embryonic Journey
Start at the chimney then traverse left and up across the slab to a final encounter in the "birth canal" | V0 | 40ft | |||||
 |
||||||||
| Route | Grade | Style | Selected ascents | |||||
| 34 |
★★ Watercourse
From the large heuco, can also traverse left on jugs and downclimb the start of Embryonic Journey. There are numerous classic variants on this panel of rock - ask a local for some pointers! | V2 | 26ft | |||||
| 35 |
★ Beginner's Crack
Tricky start, then easy. | V0 | 26ft | |||||
| 36 |
★★ Beginner's Face
Face between Beginner's Crack and Transportation Crack. | V1 | 26ft | |||||
| 37 |
★★ Transportation Crack
Handy descent for the Pegboard Wall. | VB- | 30ft | |||||
| 38 |
★ Edge Slab
Slab right of Transportation Crack. | V0+ | 30ft | |||||
 |
||||||||
| Route | Grade | Style | Selected ascents | |||||
Pegboard WallA steep wall offering a very large number of variants and eliminates. Ask a local for details. | ||||||||
| 40 | ★ Pegboard Arete | V0 | 16ft | |||||
| 41 | ★★ Pegboard | V1 | 15ft | |||||
| 42 |
★★ The Flake Traverse
Up the diagonal flake, then big move left into Pegboard. | V4 | 17ft | |||||
| 43 | ★★ The Bubble | V5 | 20ft | |||||
| 44 | ★ Far Right | V0 | 15ft | |||||
  |
||||||||
| Route | Grade | Style | Selected ascents | |||||
| 45 |
★★ Indian Rock Traverse
While it's possible to go right around Indian Rock, most people start at the very bottom of the path and finish at the top of the top set of stairs (after crossing the Stairway Slabs). | V5 | 200ft | |||||
Grinding Hole WallThe lovely short wall in the park across the road from Indian Rock. A great spot for kids and beginners. | ||||||||
| 47 |
★★ Traverse
Traverse the lovely little wall L to R, staying off the top. | V1 | 45ft | |||||
| 48 | ★ Left Side | V0 | 10ft | |||||
| 49 | ★ Center | V0 | 10ft | |||||
| 50 |
★ Right Side
Up over the little overlap at the right end. | V1 | 12ft | |||||
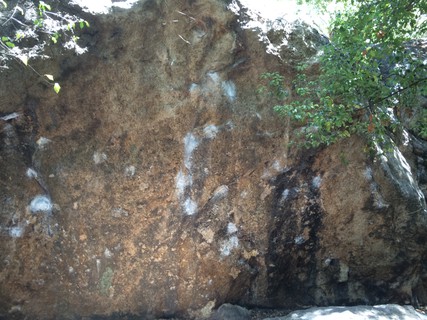
1.2. Mortar Rock 21 routes in Cliff
- Summary:
-
All Bouldering
Lat / Long: 37.893257, -122.272360
description
The most concentrated area of hard bouldering in the Bay Area.
 |
||||||||
| Route | Grade | Style | Selected ascents | |||||
|---|---|---|---|---|---|---|---|---|
Hand Traverse WallThe first wall you come to, directly above the path. | ||||||||
| 2 | ★★ Rimshot | V3 | 8ft | |||||
| 3 | ★ The Girls Problem | V4 | ||||||
| 4 | ★★ Left Arete | V1 | 8ft | |||||
| 5 | ★★ Hand Traverse | V1 | 30ft | |||||
| 6 |
Pipeline Traverse
Top is off. | V5 | 30ft | |||||
/0b/22/0b22075319d24ede8cc12dbbbb6e21d2fa558202) /05/d1/05d184525269b77f3f92653dd50d5e8c8ad6741e)  |
||||||||
| Route | Grade | Style | Selected ascents | |||||
Little Half DomeThe small face left of the path, just up from Hand Traverse Wall. | ||||||||
| 8 |
Little Half Dome Traverse
Start on either side and traverse the face | V0 | 20ft | |||||
| 9 |
★ Little Half Dome
Start low and go straight up the middle. Many variations. | V1 | 10ft | |||||
Mortar RockThe steep, dark, imposing main cliff band. | ||||||||
| 11 |
★★★ Nat's Traverse
Start far left, traverse low around the prow (jug rail is off) and finish up The Ramp. FA: Nat Smale, 1976 | V8 | 45ft | |||||
| 12 |
★ Brink of Disaster
Slaps up the prow. Watch the tree. | V5 | 15ft | |||||
| 13 |
★★ Mark's Traverse
Start on The Ramp and reverse Nat's Traverse. FA: Mark Nicholas, 1990 | V11 | 35ft | |||||
| 14 | ★★ The Ramp | V5 | 20ft | |||||
| 15 | ★★ New Wave | V10 | 20ft | |||||
 |
||||||||
| Route | Grade | Style | Selected ascents | |||||
| 16 |
★★ Don't Worry, Be Snappy
FA: Tom Richardson, 2000 | V11 | 20ft | |||||
| 17 |
★★★ Impossible Traverse
Connects Don't Worry, Be Snappy into the Impossible Wall. The obvious link from 'Nat's Traverse' (yet to be completed) will be a super-hard mega-classic. FA: Chris Sharma, 2006 | V13 | 30ft | |||||
| 18 |
★★★ Egypt Air
Highball left finish to Impossible Wall. | V9 | 25ft | |||||
| 19 |
★★★ Impossible Wall
From the stand start. Sit start ("Chinese Connection") is V11. | V9 | 20ft | |||||
| 20 |
★ The Odyssey
Stand start. Sit start is V12. | V10 | 20ft | |||||
 |
||||||||
| Route | Grade | Style | Selected ascents | |||||
| 21 |
★★ Bench Crack / Nat's Crack
Pad this well - the crux is near the top. | V1 | 20ft | |||||
| 22 | ★ Bench Wall | V2 | 20ft | |||||
| 23 |
★ Bench Wall Dihedral
Bad landing. | V1 | 20ft | |||||
| 24 | ★ Edges | V0 | 20ft | |||||