Aide

Banks Gully Amphitheater

  • Contexte de la cotation : AU
  • Photos : 25
  • Ascensions : 203
24

Saison

J
F
M
A.
M
J
J
A
S
O
N
D

Résumé

Quintessential Blue Mountains conundrum crag - amazing rock and routes with troublesome access.

Description

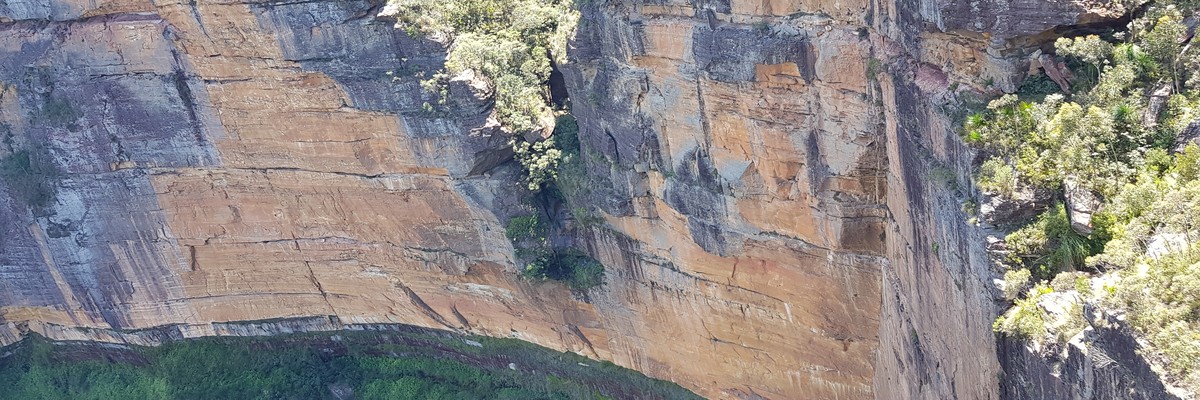
A vast amphitheater of jaw-dropping rock requiring rap-in, climb out tactics.

Limit. de l'accès hérité de Blue Mountains

The Blue Mountains are a World Heritage listed area. The Grose Valley, the cliffs around Katoomba and much of the Narrow Neck peninsula are part of the Blue Mountains National Park which is managed by the NPWS. The Western Escarpment - where most of the climbing is - is Crown Land managed by the BMCC. While the NPWS Plan of Management nominates several locations in the National Park where rock climbing is deemed appropriate, the majority of the climbing remains unacknowledged. To maintain access our best approach is to 'Respect Native Habitat, Tread Softly and Leave No Trace'. Do not cut flora and keep any tracks and infrastructure as minimal as possible.

Practically all crags are either in National Park or in council reserve: dog owners are reminded that dogs are not allowed in National Parks at any time and fines have been issued, while for crags on council reserve the BMCC leash law requires that dogs be on-leash.

For the latest access related information, or to report something of concern, visit the Australian Climbing Association NSW Blue Mountains page at https://acansw.org.au/blue-mountains/

Approche

Approach GPS Tracklog.

From Mt. Banks carpark follow the summit trail, which starts directly behind the large slab of rock. Walk up the initial hill to where the track levels off in a saddle of sorts. Just before the track starts steeply uphill after the saddle, contour around to the right, staying directly underneath the cliff line.

Continue under the cliff line until you can see a small ridge heading to a pagoda. From the top of this pagoda, you will be able to see the spur that heads towards an obvious orange cliff.

The trail skirts the right of this first pagoda and then to the left of the next pagoda. Then follow you nose down the spur, all the while staying your course towards the orange cliff.

When the spur flattens out, drop down a gully which will bring you close to the edge. To gain the Wild Wild West area, continue contouring right (west), or for the main Amphi, head left along narrow ledge. After negotiating a small rock step either continue down to the main amphitheatre or continue contouring back left into the gully to gain he Upper Alcove area.

25 - 30 min approach, 30 - 40 min exit.

Main Amphitheatre Crag Navigation:

From where you first arrive at the cliff, looking out, if you head to your left (across the top of the waterfall) and traverse along the clifftop to a cave, you will find the access for No Man's Land, The Agora Ledge and Monty's Modern Life areas. If, instead, you head to your right and through a narrow cave, the set of anchors before the sketchy corner step-across is the access for The Banks Beer Garden ledge.

See sub-area descriptions, and topo photos for more info.

Où dormir

At home.

Éthique hérité de Blue Mountains

Although sport climbing is well entrenched as the most popular form of Blueys climbing, mixed-climbing on gear and bolts has generally been the rule over the long term. Please try to use available natural gear where possible, and do not bolt cracks or potential trad climbs. If you do the bolts may be removed.

Because of the softness of Blue Mountains sandstone, bolting should only be done by those with a solid knowledge of glue-in equipping. A recent fatality serves as a reminder that this is not an area to experiment with bolting.

If you do need to top rope, please do it through your own gear as the wear on the anchors is both difficult and expensive to maintain.

At many Blue Mountains crags, the somewhat close spacing of routes and prolific horizontal featuring means that it is easy to envisage literally hundreds of trivial linkups. By all means climb these to your hearts content but, unless it is an exceptional case due to some significant objective merit, please generally refrain from writing up linkups. A proliferation of descriptions of trivial linkups would only clutter up the guide and add confusion and will generally not add value to your fellow climbers. (If you still can't resist, consider adding a brief note to the parent route description, rather than cluttering up the guide with a whole new route entry).

If you have benefited from climbing infrastructure in NSW, please consider making a donation towards maintenance costs. The Sydney Rockclimbing Club Rebolting Fund finances the replacement of old bolts on existing climbs and the maintenance of other hardware such as fixed ropes and anchors. The SRC purchases hardware, such as bolts and glue, and distributes them to volunteer rebolters across the state of New South Wales. For more information, including donation details, visit https://sydneyrockies.org.au/rebolting/

It would be appreciated if brushing of holds and minimisation/removal of tick marks becomes part of your climbing routine. Consider bringing a water squirt bottle and mop-up rag to better remove chalk. Only use soft (hair/nylon) bristled brushes, never steel brushes.

The removal of vegetation - both from the cliff bases and the climbs - is not seen as beneficial to aesthetics of the environment nor to our access to it.

Remember, to maintain access our best approach is to 'Respect Native Habitat, Tread Softly and Leave No Trace'. Do not cut flora and keep any tracks and infrastructure as minimal as possible or risk possible closures.

For the latest access related information, or to report something of concern, visit the Australian Climbing Association NSW Blue Mountains page at https://acansw.org.au/blue-mountains/

Historique

Graphique de l'historique des voies

First developed by Simon Opper, Andy Myers et al. around 2007, followed my a later wave of development by Emil Mandyczewski, Paul Thomson, and Neil Monteith starting in 2019.

Tags

Voies

Ajouter une(des) voie(s) Ajouter un topo Réorganiser Éditer en masse Cotations converties
Cotation Voie

A small grey south facing wall just above the main amphitheater.

Left of the two lines here. Quite good until the last dangerous runout to the anchors - where all the holds are now dirty.

Right of the two lines. A useful warm up for the main event in the amphitheatre, where flash pumps will ruin your effort for getting here. Climb up juggy wall on bolts steepening at the anchors. Spaced bolting and not well cleaned - take care..

Équip.: Simmo

FA: Simmo, 2007

This is the access for The Name Changers, Call Out Culture, and Strength is Weakness.

Cross to the east side of the Waterfall, through the cave with the sketchy step across (fixed rope) and around past the major arete (Lulu).

Follow narrow sketchy ledge around for 50m to slot (bolt & fixed rope) - crawl along this for 10m then pop out onto larger ledge with tree and double FHs (Strength is Weakness). Double Rings further along is the rap for Call Out Culture and The Name Changers.

1 23 45m
2 24 35m

Two inoffensive pitches of orange up the wall right of Call Out Culture. Approach via abseils down Call Out Culture (either fix a 100m static or two raps with doubled 70m ropes). Belay off ringbolt and FH on jumbled rocks on narrow ledge below ramping corner. At least 18 draws required for first pitch - the midway belay is semi-hanging.

  1. 45m (23) Easily up corner (a few loose blocks) then launch up the stellar orange face to the right. Slope after slope trending left leads to final flake to double bolt belay.

  2. 35m (24) Up pumpy flakes & breaks onto grey wall (it's not over yet!) - finish up jugs.

FA: 28 Juin 2020

1 16 15m
2 18 45m
3 19 35m

"It's such a cool line, but if you can see it, it's too wide." Mikl. A three pitch trad route up a major corner feature. Bring a rack with plenty of wide gear (doubles of Camalots from #0.3 to #5) plus single set of wires, a couple of micro cams and lots of long runners. Like everything around here the route is accessed by rapping in. Follow narrow sketchy ledge around from top of Lulu for 50m to slot (bolt & fixed rope) - crawl along this for 10m then pop out onto larger ledge with tree and double FHs. Walk 5m further along to double RBs. Rap 35m to small ledge and 2nd set of RBs. Rap 50m to ground (swing across to touch down below the start of the route).

  1. 15m (16) Grey loose corner 5m left of the base of the major orange corner. Belay on small ledge using loop of rope over large detached pillar (it's bomber).

  2. 45m (18) The mega line! Problem is you have to grovel with fear up the first few metres of alarming choss. Belay at bolts on small ledge on left (the halfway rap anchors). This pitch eats large cams and requires copious long runners. Don't skimp.

  3. 35m (19) Back into the jaws of death for several metres then traverse left to continuation of line punching through the steepness above. Be alert but not alarmed past the big chockstone (it wouldn't budge when we tried to manhandle it). Finish with airy thin crack (save the small cams).

FA: 5 Juin 2020

A mostly trad route up a series of corners (some cracked, some fused). Bring your A Grade stemming ability for the crux pitch. Rack - wires, singles of #0.3-0.5 camalots & doubles of #0.75-#4. Rock quality on this route is big grain and sometimes dirty - take care. All belays are bolted. Approach - rap anchors are located halfway along the crawl section with the fixed rope. Either fix a 70m rope, and rap down to top of pitch 1 and then double rope 30m to ground - or fix a 100m rap line. The route starts left (looking out) of where the rap ropes touches down.

  1. 30m (19) Short handcrack to grasstree, then step left into fused corner (bolt). Up corner (fiddly gear) to ledge. Finish up spooky but spectacular layback crack to novelty belay on "boot flake" ledge.

  2. 25m (23 to 25) Left off ledge (medium cams in breaks) to bolted face & techy fused corner. Save a #1 & 2 Camalot for the top. Full hanging belay on bolts. Leave the rest of the rack for the second to lug up. The grade of the crux on this pitch is proving quite divisive (hence the route name).

  3. 25m (21) 3 bolts up face to the right of corner (bird poo marks the way!) then swing right into blind trad protected corner that leads to tiny ledge belay.

  4. 30m (21) Stem up a few moves to cam break - then traverse right onto orange face and up to small roof crack. Over this (burly!) then up long dirty wide crack to top. Don't place all your big gear down low - you will want it high up!

FA: 19 Juil 2020

Agora (noun) - "A public open space used for assemblies and markets."

The main ledge used to access Incitatus, Yellowjacket, Dialectic - Best Forgotten Art, and Pebble Pundits.

Cross to the east side of the Waterfall, and through the cave with the sketchy step across (fixed rope). The first set of bolts you come to is for Lord of the Balrogs, the second is Incitatus, the 3rd is The Hornet.

Abseil 70m from the 2nd set of rap rings to get to the Incitatus Ledge, from which you can access the other routes (check route description).

Bolted top pitch. Rap in to DRB from DRB on ledge. Quality mix of climbing - face, arete and roof.

FFA: Simmo & andy myers, 2007

An excellent trad adventure with a long, quality crux pitch reminiscent of Samarkand (albeit easier). Originally climbed onsight, ground up, sans start bolt, and through a sea of choss. Significantly tamed now.

From the anchors above Incitatus, using either 2 ropes or a doubled 70m rope, rap twice down Incitatus (25m and 35m) to The Agora Ledge. Then abseil diagonally over to the top of Pebble Pundits P1 (25m). Using a #2 cam and the in situ bolt, rap a final 20m to the ground. You can also reach the ground in a single 100m abseil with enough rope and some abseil trickery.

Take full set of nuts, double cams from tiny to #4 Camalot, with a few extra smaller cams (0.3 - 0.5 Camalot).

  1. 20m (20) A scrubby and undercut start (pre-clip/stick-clip the bolt) leads to surprisingly difficult and varied crack-fu. Belay on ledge at bolt.

  2. 35m (21) The soaring corner/crack. Trad belay on ledge under roof - #3 & #4 cam required.

  3. 20m (20) Step left under roof and up beautiful water-washed crack, then around right where the crack fuses to Lulu belay bolts at ledge.

  4. 35m (22) Exit via Lulu (all bolts).

The rightmost route off the ledge, trending up a vague overhanging prow feature.

  1. 30m (27) Powerful steep face climbing with two demanding cruxes and a frustrating dynamic finale. Arctic conditions will help.

  2. 40m (25) A baffling slab leads to a bewilderingly easy roof-turn, followed by surprisingly hard face-climbing. Up slab, turn roof via righthand line of bolts, cross-over The Hornet and follow bolts trending left, and eventually back right to finish at The Hornet's anchors.

Équip.: Emil Mandyczewsky, 1 Jan 2019

FA: Paul Frothy Thomson, Emil Mandyczewsky, Heath Black & Josh Norris, 30 Août 2020

Rap in from the third DBB to the right. Go down climbers left of Lulu to DRB at base of flake line. Up spooky flake to big reach at first roof (crux). A 0.75 (green) camalot on a long sling under the roof can make you feel a little more zen about reaching around the roof to clip the bolt. After the roof trend towards the arete and cross over Dialectic - Best Forgotten Art. The line of least resistance on the upper section of wall and thus winds about the face.

FFA: Simmo & Andy Myers, 2007

A sustained and technical power-endurance crimpfest leading into The Hornet.

From the walk-in terrace rap from first set of anchors (as you approach) down IFP, fixing as you go or directly down from middle anchors. 75m rap to comfortable ledge.

Finish as for The Hornet or jug out.

Équip.: Emil Mandyczewsky, 1 Jan 2019

FFA: Emil Mandyczewsky, 24 Mars 2019

An aesthetic, improbable 3-pitch line of technical face climbing up the water-washed wall between The Hornet and Lord of the Balrogs.

Rap from the first bolts you come to (above Lord of the Balrogs) 35m to the first belay, and another 40m to the small ledge, clipping into a few bolts on the way down to avoid being stranded in space.

  1. 40m (27) 16 Bolts - Beautiful, dreamy face climbing. Up trending left (long sling on 2nd bolt) via technical slab, to sustained water-washed headwall. This pitch can be combined with the next at the same grade with a few long runners.

  2. 10m (23) 4 Bolts - Traverse hard right from the belay to 2nd bolt, then up through roofs to cosy belay ledge.

  3. 25m (25) 12 Bolts - Boulder off the belay, traverse hard right, then more directly up through long punchy crux to easier finale. The final moves to the anchor pack a sneaky punch.

A couple of routes between all the showstoppers.

Serves as the access for Lord of the Balrogs and Puppet of a Sinner.

Cross to the east side of the Waterfall, and through the cave with the sketchy step across (fixed rope). The first set of bolts you come to is for Lord of the Balrogs. Abseil 70m from these anchors to a stance in the corner.

Long trad corner crack, varied and interesting. From spacious ledge, up crack for 50m, trending left onto face in the last 5m.

First lead as one long pitch, however can be split into 2 at small ledge at 25m.

Takes gear from 0.3 to 4 camalot and wires.

To access, rap down Puppet of a Sinner from rings in cave, either with fixed 55m rope or 2 raps.

FFA: Emil Mandyczewsky & Will Vidler, 30 Nov. 2018

55m 2 pitch face on back wall. Rap in from double rings in cave.

FFA: Simmo & Andy Myers, 2007

Bring a beer, a hammock, and a kebab.

The main ledge used to access Charlie Don't Surf, The Monteith Memorial Traverse, The Thin Line of Reprieve, Life Without Meaning, Two Nobodies, and Proleptic Decrepitude and Despair.

Immediately below the "staging area cave" on the approach, turn right (looking out) and follow the clifftop through a narrow shale cave. Abseil 70m from the last set of bolts before the sketchy corner step-across (or 25m and 35m) to arrive at the belay for Charlie Don't Surf and The Monteith Memorial Traverse.

To gain the ledge, lead/dog/aid across the Monteith Memorial Traverse, or do an epic pendulum.

Abseil 70 from the last set of bolts on the ledge before the sketchy corner step across.

2 pitch sport route in a picturesque and exposed position that serves as the access rappels to 'The Thin Line' ledge. 1 x 28m and 1 x 38m rap.

  1. 38m Gr. 26 Off the belay traverse right and up flake. Winds through interesting terrain with a number of techy and crimpy cruxes.

  2. 28m Gr. 24 Surprisingly consistent climbing with a sting in the tail.

Équip.: Emil Mandyczewsky, Nov. 2018

FFA: Emil Mandyczewsky & Paul Frothy Thomson, 9 Déc 2018

The bolted traverse to gain the ledge below The Thin Line of Reprieve. Can be aided at about 18M1.

Accessed by abseiling 70m straight down the wall to a semi-hanging belay from the rap point above.

Start immediately left of the belay.

Can be climbed either direction, with the "left to right" variant being about 1 grade harder.

Stay off the vegetation!

Named in remembrance of the many, many, o so many girdle First Ascents I've done with Monty over the years.

FA: Paul Frothy Thomson & Emil Mandyczewsky, 11 Nov. 2018

FA: Heath Black & Paul Frothy Thomson, 5 Juil 2020

An impressive crack in an unlikely position. The first pitch is 38m of glorious and sustained corner crack, one of the finest single trad pitches of the grade in the mountains.

Initially led with a rest on the first pitch circa 2007 by Simon Opper and Andy Myers.

Access by 2 raps down Charlie Don't Surf followed by the Monteith Memorial Traverse. Alternatively, fix and rap an 80m rope and swing across on the traverse bolts to ledge.

  1. 38m Gr. 24 From spacious ledge, head up corner crack to belay on ledge.

  2. 30m Gr. 20 Continue up steepening corner crack. Once around first few roofs follow an obvious escape left onto slab. Continue up to ledge and DBB.

While this would be the line of the route, a more enjoyable and sustained outing would be to finish up the second pitch of Charlie Don't Surf. Or even better, climb it as a single ledge to ledge mega pitch and stick to the crack for the finish, 60m just makes it.

Recommended Rack:

1 x #1 C3 (red), 1 x #2 C3 (yellow), 3 x #0.3, 3 x #0.4, 2 x #0.5 to #3, 1 x #4, Small-Medium Wires

Optional: #6 Cam for the very start (an extra 0.5 is also suitable as an inferior placement), extra #0.3 and #0.4 cams (recommended), extra #2 and #3 cams.

FA: Simmo, andy myers & Robert Bryniarski, 2007

FFA: Paul Frothy Thomson & Emil Mandyczewsky, 3 Nov. 2018

A mega line linking improbable features up much steepness, and a contender for one of the best at the grade in the Blueys. Partially equipped by Emil, and finished years later by Paul.

Climb The Thin Line of Reprieve on gear (#6/Wires, 0.3, 2, & 3) to first rooflet and hard to clip bolt. Then bust out a rising traverse left with wild, gymnastic moves, before continuing more directly up steep prow to no hands rest. From the rest, dyno for all you're worth, then power through sustained steep climbing for 20m to the belay.

CLOSED PROJECT.

All thrilla, no filla. 1 new bolt and 5m of new climbing, all action, minimal faff, no camp-out rests.

The giant 45m link of P1 and P2 of Two Nobodies, offering epic pump in a gnarly location. Technically grade 28, but might as well be 29 if you factor in the faff! Proper rope shenanigans ahoy!

Climbing on two ropes is mandatory (!!!) even with a billion giant runners. The First Ascent used 3 x 60cm runners; 7 x 40cm runners, and 10 x Ordinary draws.

As for Two Nobodies P1, but at the last bolt of that pitch, instead of traversing left to gain the hanging belay (and without deviating off-route to the crap rock out right for a rest), continue straight up and into the epic P2 headwall, leading to one of the hardest moves of the route 42m up. Mantle onto big ledge, quit climbing, take up croquet.

For the full tick, avoid traversing off-route out left to the big break on P2 (at the white streak).

Finish as for Two Nobodies P3 to top out.

FrothyFirstAscent

Wild steepness, inspiring rock and gripping position. Pitched out due to the rather epic rope drag on both crux pitches, but P1 & P2 were originally climbed while belayed from the ledge. Bring long runners, seriously. No, seriously!

  1. 25m (27) 13 Bolts - Sustained start for 6 bolts to the horizontal. Campus right and up the flakes, then hard moves back left, culminating is some big moves to gain the anchor. Avoid deviating off-route to the crap rock out right for a rest before the final moves. Rope drag is a real problem; solution is lots of loooooong runners.

  2. 20m (26) 8 Bolts - Funky moves on small holds heading right to get established on the headwall. Big moves and lots of air up the steepness. Meander back right to a rather mean finish and scary mantle to belay. Did I mention long runners?

  3. 35m (21) 10 Bolts - Traverse 3m left from the belay (rather runout, be careful) then up to break. Truck back right for 4m before gaining corner. Up this, around prow, then up face to base of hanging overhung corner (crux). Negotiate this with some stemming skillz and conquer the scary mantle to the belay.

FrothyFirstAscent

Single 40m pitch overhanging ~12m, half on gear and half on bolts, starting from trad belay (BD #1 and #2) 6m left of the start of Two Nobodies.

Up flake feature past 5 bolts. Hard moves off #0.75/#1 cams, then 3 more bolts of punchy climbing to #1, #0.4 and #4 cams to major horizontal. 2 more bolts leads to the upper crux, rising traverse left across a weird hanging feature (avoid trending right into death choss). #2/#3 cams in break below the final roof, then punch out the roof and overhanging prow on amazing pocket jugs, protected by #0.3 and #0.5 cams, leading to final mantle and anchor.

Can escape the crag from here via P3 (22) of Two Nobodies.

Gear: BD #0.3 to #4, with doubles of #0.75, #1 and #2.

FA: Paul Frothy Thomson & Stephen Varney, 12 Sept 2021

The access for Tradfear and SuperDyke.

This wall is located on the other side of the major canyon that separates the two sides of the Amphitheatre. More chossy, but just as steep, and features pretty much all day shade.

After breaking off from the usual access (see Banks Amphi access notes) parallel the cliff back upstream for a few hundred metres until you can cross the creek. Then head back downstream along the cliff edge (vague trail) to the top of the amphitheatre.

There are currently 3 sets of belay/rap bolts. All routes require rapping to hanging belays and climbing back out again.

Nearest route to the waterfall. This was an abandoned partially bolted Simon Opper project from 2007ish that has been re-equipped and a lower pitch added.

  1. 25m () Corner crack (trad) for 15m then trend right onto face and long rising traverse to small ledge and semi-hanging belay.

  2. 37m () Steep, mostly juggy climbing up guts of big orange wall. All bolts.

Équip.: Simmo & Heath Black, 2019

Long sustained route up a dyke feature splitting the upper section of the wall. Bring 18 draws (long if possible) and a backup jumar for escape. Fix 40m rap rope to anchor consisting of a FH and vertical Ubolt. Rap down grungy black corner for 10m until you can reach first bolt under roof. Clip in to most of the bolts below this on the way down as it is a steep wall and you will loose connection with the rock very quickly. Hanging belay off two Ubolt with feet on tiny ledge. Climb the dyke feature for 25m to roof, then traverse left under this (airy!) and onto small vegetated ledge. Finish up short grey wall to ledge where you started.

FA: Heath Black & Paul Frothy Thomson, 24 Mars 2019

Mostly trad, mostly choss. Major crackline splitting the orange wall. Very overhung. Best to fix a 100m static and short fix down the route. The bottom belay is about 10m above the ground which is a ferns and mud. Rack should be triples of cams 0.3 - 0.5, doubles of cams 0.75 to 3, single of cams 4 & 5. The 5 can be left at pitch 4 belay as its only needed on the last pitch. Approach: It's best to fix ropes rather than attempting to use double ropes and pull them down after you. There are two ways to rap down depending on how much you want to pre-inspect what you plan to climb back up. If you just want to get down quickly and inspection free use the FH and ubolt anchor (same approach as for Superdyke). Rap straight down corner, down Superdyke and continue down below that route using trad and occasional bolt to stay connected to the wall. Option B rap which goes straight down the route - use the single lone Ubolt further left (back it up with the FH/ubolt to the right). This way down requires a lot of kick swinging, short fixing on each belay and leaving occasional bits of trad behind. It's mega steep!

  1. 15m (17) Overhung trench of choss. All trad. Hanging belay off bolts

  2. 35m (24) 3 bolts up face to where the "fun" begins. Boldly launch up overhung wall, following intermittent seam, and through two small roofs to small ledge belay. This pitch takes a lot of finger sized cams.

  3. 12m (22) Pretty ghastly steep. Exposed flakes of choss to lone bolt. Wiggle a #4 in the mud slot above this then launch into steep pumpy fisty crack. Belay on small ledge (DRB)

  4. 25m (22) Traverse right across wall on flakes then mantle up to small ledge. Finish up the top section of Superdyke (bolts).

Équip.: Heath Black

FA: Paul Frothy Thomson & Heath Black, 3 Oct. 2021

Bonjour !

Ici pour la première fois ?

theCrag.com est un guide gratuit pour les sites d'escalade partout dans le monde, édité en collaboration par des grimpeurs passionnés, des bloqueurs et d'autres gens sympathiques.

Vous pouvez enregistrer toutes vos ascensions, vous connecter et discuter avec d'autres grimpeurs et bien plus encore...

» partez à la découverte, » en savoir plus or » posez-nous une question

Selected Guidebooks plus Cacher

Auteur·e·s: Simon Carter

Date: 2019

ISBN: 9780958079082

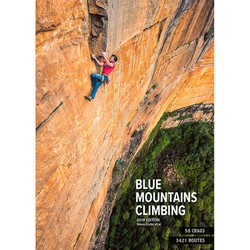
The latest comprehensive, latest and greatest Blue Mountains Climbing Guide is here and it has more routes than you can poke a clip stick at! 3421 to be exact. You are not going to get bored.

Auteur·e·s: Simon Carter

Date: 2019

ISBN: 9780958079075

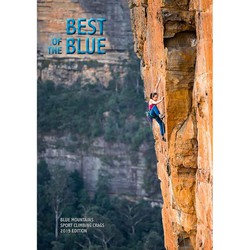
Simon Carter's "Best of the Blue" is the latest selected climbing guide book for the Blue Mountains and covers 1000 routes and 19 different climbing areas. For all the sport climbers out there, the travellers, or just anyone who doesn't want to lug around the big guide that's more than 3 times the size - cut out the riff-raff and get to the good stuff! This will pretty much cover everything you need!

Logements à proximité plus Cacher

Partager ceci

Dim 16 Avr
Regardez ce qu'il se passe à Banks Gully Amphitheater.

Get a detailed insight with a timeline showing

  • Ticks by climbers like you
  • Discussions of the community
  • Updates to the index by our users
  • and many more things.

Login to see the timeline!

Deutsch English Español Français Italiano 한국어 Português 中文