Aide

Desperation Wall

Saison

J
F
M
A.
M
J
J
A
S
O
N
D

Limit. de l'accès hérité de Glasshouse Mountains

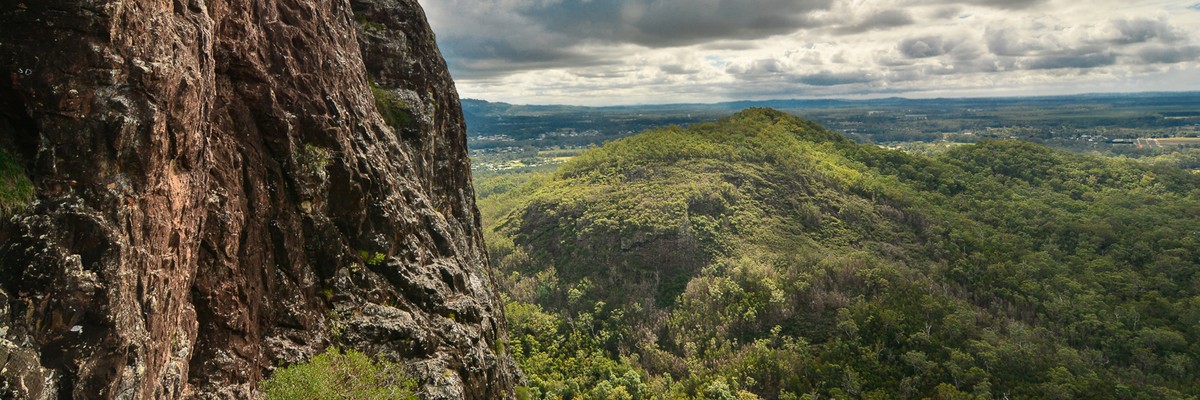
Most 'Glasshouse Mountains' climbing is within the Glass House Mountains National Park. Please respect the environment and other people's enjoyment of it. Access to climbing here is a privilege, not a right.

The 2019 Ngungun track expansion & fortification work is now complete, and the mountain is once again fully open.

Approche

Access as for 'Carborundum Wall' sector (east face track), then follow the rock apron down and right.

© (Trent)

Éthique hérité de Glasshouse Mountains

Modern climbers establishing new routes have taken great pains to ensure any new routes do not interfere with the historic routes established many decades ago.

Retro-bolting of existing routes is unacceptable!

New routes shall make use of traditional protection where available.

Certains contenus ont été fournis sous licence de : © Australian Climbing Association Queensland (Creative Commons, Attribution, Share-Alike 2.5 AU)

Voies

Ajouter une(des) voie(s) Ajouter un topo Réorganiser Éditer en masse Cotations converties
Cotation Voie

Start about 70m down right from the Caves Route at low angled wall. Up 15m of slab below a small buttress. Then up centre of buttress to finish at steelwood trees in a grassy area. The Caves Route is 10m left at this point.

FA: Dennis Stocks & Neill Lamb, 1966

Start about 10m right of Keloid at the foot of a scoop of easy angled slabs. This route is considerably undergraded and underprotected. Additionally, all former belays are now effectively absent. Proceed with caution, or better yet, not at all.

  1. 36m Up the slabs and diagonally left across the top side of a gully. Continue on leftward trend until steepness eases to worn slabs. Continue on up to the left for another 4m into a gully and dodgy (e.g. non-existent) tree belay.

  2. 18m Climb back down and traverse directly right along small ledges to piton below groove. Continue right and slightly down for 3m to twin pegs. Rusty and not recommended as a belay.

  3. 29m (crux) Left a bit, then straight up to base of groove. Up this with adequate pro to sloping rock and tree belay. From here, scramble up and left to connect with Caves Route.

FA: Neill Lamb & Dennis Stocks, 1967

  1. 40m Straight up to twin peg belay at the end of Wasp's second pitch

  2. 29m Same as Pitch 3 of Wasp

FA: J Mather, M Siwek & K Jesienowski, 1983

Start between Wasp and Desperation Wall. This route is under-protected, beware!

  1. 26m (crux) Up easy slab, onto wall and straight up, then trend slightly right over bulge, to peg, then straight up a right trending groove on the left side of the bulge, then slightly left of white streaks, hard move onto belay ledge.

  2. 38m Climb directly up from ledge to find a peg at 12m, continue straight up to overhanging wall, then a short traverse left to the base of the groove and finish as per Wasp.

FA: Paul Caffyn, Mike Meadows & Chris Meadows, 1967

Start 5m L of 'Desperation Wall'.

Very well protected climbing in good position for the grade. Grade 16 leaders love this route.

  1. 35m 12 FHs to rap station (DBB).

  2. 35m 11 FHs to rap station (Ring and chain). Use long draws to minimise drag coming under and around the rooflet

Two 60m ropes will get you back to the ledge at the start, scramble down from here. Alternatively, head up 3m from P2 anchors to bushy ledge and walk left to join up with the Caves Route.

FA: Darrin Carter & Kevin Coleman, 2004

Start at the base of an impressive blank wall right of Line of Credit. This route climbs mostly solid rock but is runout in places. Various alternate finishes have been done.

  1. 22m This pitch has very little protection. Straight up on nice rock for 8m, then traverse diagonally right with care on sloping holds to ledge and belay.

  2. 17m Traverse left for 5m then up scary, thin wall with little pro with a slight right trend and up to small ledge. Bolt belay as described in previous topos seems not to exist any more, best to traverse up and left to DBB on Line of Credit.

  3. 50m (crux) Straight up, then traverse right under yellow overhang, passing some rusted pitons en route. Continue up shallow corner where decent wires protect some tricky moves on poor rock. Skirt overhang on right to ledge and bush belay.

  4. 25m Continue up into Cave 1.

FA: Ron Cox, 1960

Start to the left of Ishoni. Looks unlikely from the ground but is much better than you think. Starts off the left end of the ledge with easy climbing on medium sized gear then FH's up steep headwall. Absolutely outstanding after the start.

FA: G Llewellin R Ferguson, 2007

To start, skip the crack but and go right to through the steep bulge past bolt. Merge left with Straight to the Pool Room and finish up headwall.

FA: G Llewellin R Ferguson, 2007

A proud line. Start by scrambling up onto vegetated terrace 25m right of Line of Credit, then walk off left end of terrace 3m to tree. Belay out of wide crack. Double ropes essential. Up left around bulge, then up to first of three black FH's. Up and left to ledge (big gear). Right off ledge to horizontal break in superb marble-like stone, then back left to FH. A long undercling move, then up to last FH. RP's take you up the ever steepening wall, then a good wire and a thankful rest on easy ground. Slab to chains. Well protected with careful placements.

FA: Lee Cujes, Aaron Jones & Neil Monteith, 1999

Start to the right of Ishoni. Cruisy but fun start then steep conclusion. Trad down low and two FH's higher up. Lower off.

FA: G.Llewellin B. Strachan, 2007

First climb Ideas Man (crux) but continue past IM anchors for another 5m to a DBB.

P2) 14 - 40m continue up following line of least resistance passing one FH to DBB.

P3) 16 - 30m continue up faint features with gear and two FH to DBB.

P4) 10m either straight up to DBB or escape right to Zeitgeist anchors.

Groove/crack to its end. Up wall trending right to S crack and double hanger anchor with quick links. Small to medium gear. Well protected along the route and before the cruxes.

FFA: Ross Ferguson Ben Carter, 2013

1 17
2 13
3 15

Start by scrambling 10m up to broad ledge 30m R of 'Line Of Credit'. A DBB at the base of a line of FHs is found here.

  1. 32m (17) Follow line of FHs up and diagonally R over steep headwall before trending back L to DBB on spacious ledge.

  2. 38m (13) Up through typical Tibro slab. Ignore 1st DBB you come to - it's there purely to facilitate retreat on a 60m rope.

  3. 35m (15) Continue up nice exposed slab to top. Again, ignore 1st DBB you come to.

From final DBB it's easy to scramble a few metres right into Cave 3:

then up over the scree shoulder & down, into the very large Cave 2 to join the 'Caves Route'. Scramble down through Cave 1 out right, to the DBB. Descent from here, via the 'Caves Route' consists of 3 raps = will get you down on a single 60m.

Descent back down Zeitgeist on a single 60m rope: 4 raps will get you to the bottom slab and then a scramble down to the ground: rap down to the first DBB, 5m above the 2nd belay, mid pitch 3.

From here, rap to the next DBB, mid pitch 2 - about 15m above the first belay station on the big ledge.

Then a 15m rap to the big ledge, and pitch one belay.

From here, a full 30m rap will get you to the top of the slab, with some careful down scrambling to the ground.

NOTE: IT'S STILL 4 RAPS USING A SINGLE 70M!

FA: David, Ruth Reeve & a host of helpers, 2010

Start the same as for Black Orpheus. This climb ascends the wall directly to the left of Black Orpheus. A fairly comprehensive rack with a selection of wires, including RP's, hexes and cams from small to #3 Friends should provide plenty of protection.

  1. 20m Climb straight up the first pitch of Black Orpheus to large ledge and natural belay.

  2. 13m Step left from belay onto short wall above then easier ground. Follow the left trending ramp for a few meters then step up to a natural belay on a small stance. An escape right is possible onto Black Orpheus.

  3. 30m Step left from the belay and climb obvious line above the loose blocks. Continue up the steep section (crux) staying right of a small tree to where the angle eases. Follow the easier ground to another natural belay a few meters left of and below obvious corner.

  4. 40m Traverse right from the belay and up into the corner left of the chimney of Black Orpheus, follow this to where it widens into a grassy gully, then step right onto the wall and climb easily to a tree.

  5. 10m Scramble up the slabs to another tree at the mouth of the big cave.

FA: Bill Strachan & Ross Ferguson, 2008

1 7 30m
2 10 25m
3 4 25m
4 10 32m
5 3 23m

A great, easy 135m multipitch route although pro can be pretty sparse on p2&3 and non-existant on p5. A good initiation to what to expect from Tibro multipitches. Can be done in three pitches with 60m rope.

Start: About 50m L of Candy Mountain at big corner/gully, behind a rock apron. Marked 'BO' (very faint).

  1. 30m (7) Very easily up gully on solid jugs and good pro to big ledge and trad belay.

  2. 25m (10) Up rocky corner/slab (right of ledge) Then left to mount short wall (crux), onto slab & up this gully (R) with a couple of bushes offering protection to big ledge & bush belay.

  3. 25m (4) Climb up edgy slab in an exposed position with minimal protection until it curves back left & you reach a tree-lined ledge above. Scramble up L to the top of the ledge. Originally, the belay made use of the "Zombie Tree", however it is preferable that modern ascents make use of gear in groove about 5m above to establish a belay and protect this historic but weary flora from further abuse. You can choose to run pitch 2&3 together, beware that you may be out of earshot of your belayer. This pitch requires a cool head: exposed pitch & minimal pro!

  4. 32m (10) Run-out start, then bridge up chimney (crux), which is better than it looks (very good gear), at top LH side of chimney, traverse L along the rising ledge and into corner, follow this up right over blocks to top of gully & crack & tree belay.

  5. 23m (3) Up very easy blocky slab (no gear) to big tree in Cave 3. (Some choose to run pitch 4&5 together, on a 60m+ rope, be aware you WILL be out of earshot.) Finish up the 'Caves Route', or descend via rap station at mouth of Cave 1. Alternatively, you can climb (on belay) over to the chains on Zeitgeist & abseil down this to get back to the start of the route.

FA: Sid Tanner & Andrew Spiers, 1969

An easy but badly protected outing. A great adventure for the discerning choss jockey. The FA was completed (just!) in two pitches (running 1-2 and 3-4 together). Note that this was not at all comfortably done on a 70m rope - if you're going to do this as two pitches I would only recommend doing so on an 80m rope.

  1. (4) 20m - First pitch as for Black Orpheus

  2. (14R) 50m - Instead of mounting the short wall as for Black Orpheus, head right just under the steep wall and trend right and slightly up over occasionally horrific rock (only real landmark is a grassy tree ledge you traverse about 5m above) with a healthy dose of airiness to ledge at start of white and black streaked slab and up this for 15m to tree belay on left.

  3. (10) 40m - Up right easily to tree (sling) then straight up over rotting rock to mount bulge, then trending up and right to big tree belay just below obvious chimney

  4. (4) 30m - Up and right into chimney and finish in cave 4 as per Prometheus

FA: Jake Forker & MisterS, 15 Mars 2020

Start 7m left of Orpheus. A fine route, avoids rubbish. Pro and rock good except a small patch on Pitch 2.

  1. 50m Up grey prow, over flat topped pillar. Trend slightly right to tree.

  2. 40m Following left-trending diagonal crack to tree at 25m. Before tree, up on good clean rock, then trend right to shallow block corner left of wide crack.

  3. 50m Up corner then directly up to belay in bowl below cave. Tremendous pitch!

  4. 10m Scramble up to cave.

FA: Rob Staszewski & Peter Beames, 1991

Start about 20m right of Black Orpheus. Fairly contrived.

  1. 25m Up an open rock gully to a tree belay.

  2. 29m (crux) Trend right over a horrendous flake, then diagonally up right, to tree belay.

  3. 27m Up slab trending right for gear, or straight up (very run-out), to a line of small steelwood trees. Left along dirt ledge to the face right of Black Orpheus chimney & tree belay. This ledge is the same as the end of BO pitch 3.

  4. 28m Up onto the wall right of the chimney. Traverse rightward around to rubbly gully. Up this gully (LHS is the better option), to a tree belay.

  5. 40m Finish as for the fourth pitch of Prometheus 1 up in Cave 4.

FA: R Brooks & G Baines, 1957

Climbs the white streaked slab 3m L of prominent corner, just L of Prometheus I. Crap pro, good rock.

Climb the prominent corner you pass on you way to the start of Prometheus I. Good gear and ok climbing but you end up climbing through an unpleasant bush to top out, hence the name. Continue up or scramble down Prometheus I. Named but FA not listed because it has probably been climbed heaps of times since the 1960s!

FA: Unknown

Start: Prometheus I.

There are a plethora of variants to Prometheus I, this one is an easy stroll up the mountain, to Cave 4. A tad thin on gear on p2.

  1. 53m 4 - Same as Prometheus pitch 1,but continue left, following the natural weakness & gully, to a small dirt ledge & bushes. Trad belay.

  2. 30m 4 - Continue left, following the line of weakness, then trend up & right, around the Steelwood trees, to a tree belay.

  3. 40m 4 - From the belay, head for the right side of Cave 4, into the fern gully, then up the left side of this into Cave 4. Belay from Cave 4.

A good way up to cave 4 and beyond, not as clean and classy as The Caves Route but a nice change of scenery.

Start about 50m right of Black Orpheus, in a gully that is accessed by scrambling up just before the track drops down and starts heading around the northern side of the mountain. This route has many variations - this description is only one of them.

  1. Scramble up the gully, left of Candy Mountain, then up right, into the prominent corner and follow the apron right towards Ross Miller Route until a ramp is met on the left. Scramble up this ramp to a corner belay below the first bolts of the Ross Miller Route.

  2. Climb the left leaning gully, to a prominent steelwood tree. Belay from here.

  3. Traverse right and diagonally up, following a line of small trees (slings) to a ledge, below a steep short gully. Belay from solid tree or gear.

  4. Move left and up (grade 2) or climb the gully directly to avoid rope drag, heading in the direction of cave 4, either stop at the ledge at the bottom of the ramp in front of cave 4 or continue up to the prominent tree on the ramp. Find a suitable tree to break the pitch.

  5. Continue up and towards the right side of cave 4 (facing cave) into the gully/chimney, with a cruxy move to top out into cave 4. This pitch can be done without rope. The most popular escape is the Cave 3 traverse (grade 2, now bolted, with anchor), on the left far side of the cave, to join Caves Route, or keep scrambling to the right and in the upper cave 4 to the start of Prometheus II (marked). Due to the weakness of the trees on this route, abseiling is not recommended.

FA: Ron Brooks & Neill Lamb, 1953

Le saviez-vous ?

Saviez-vous que vous pouvez créer un compte pour enregistrer, suivre et partager vos ascensions ? Des milliers de grimpeurs le font déjà.

Selected Guidebooks plus Cacher

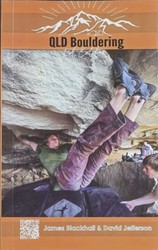
Auteur·e·s: Jimmy Blackhall & David Jefferson

Date: 2021

ISBN: 9377779499658

Hidden within the ordinary people of Queensland there exists a tight-knit community of scabby knuckles, grazed knees, massive forearms and iron-clad wills. This guidebooks seeks to shed light on this community and blocks of choice with all the information, skills and knowledge to open the door for you to explore all the bouldering that Queensland has to offer.

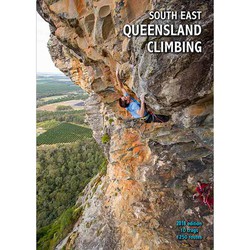
Auteur·e·s: Simon Carter

Date: 2018

ISBN: 9780958079068

A few years ago there was basically Frog Buttress and Coolum. Since then there has been more development than Barangaroo and South East Queensland should be on any climbers radar no matter what your style. Except ice climbing, definitely no ice climbing. But over 1250 routes with hard sport, multipitches and quality trad to make a great trip.

Logements à proximité plus Cacher

Partager ceci

Photos Rechercher parmi toutes les photos

Téléversez une photo de site

Mer 19 Avr
Regardez ce qu'il se passe à Desperation Wall.

Get a detailed insight with a timeline showing

  • Ticks by climbers like you
  • Discussions of the community
  • Updates to the index by our users
  • and many more things.

Login to see the timeline!

Deutsch English Español Français Italiano 한국어 Português 中文