도움

Pierces Pass West Side

12

계절특성

J
F
M
A
M
J
J
A
S
O
N
D

설명

Old school trad lines with a few good moderate sport multis thrown in for good measure.

접근 문제들 Blue Mountains으로부터 상속된

The Blue Mountains are a World Heritage listed area. The Grose Valley, the cliffs around Katoomba and much of the Narrow Neck peninsula are part of the Blue Mountains National Park which is managed by the NPWS. The Western Escarpment - where most of the climbing is - is Crown Land managed by the BMCC. While the NPWS Plan of Management nominates several locations in the National Park where rock climbing is deemed appropriate, the majority of the climbing remains unacknowledged. To maintain access our best approach is to 'Respect Native Habitat, Tread Softly and Leave No Trace'. Do not cut flora and keep any tracks and infrastructure as minimal as possible.

Practically all crags are either in National Park or in council reserve: dog owners are reminded that dogs are not allowed in National Parks at any time and fines have been issued, while for crags on council reserve the BMCC leash law requires that dogs be on-leash.

For the latest access related information, or to report something of concern, visit the Australian Climbing Association NSW Blue Mountains page at https://acansw.org.au/blue-mountains/

접근

Walk down the Pierces Pass main track for 15 minutes. 40 metres past Grasshopper, turn right on to the canyon/climbing path, which can be faint and difficult to spot after wet seasons, treefall, etc. Follow this down to the creek then diagonally left up the other hillside until you get to your desired piece of rock. This trail could do with some TLC, preferably by someone who understands the merits of contouring, there is a profusion of lost walkers' trails blasting straight up and down both sides of the creek valley. In particular, do NOT go more than 40m past Grasshopper (for 100+ metres "to a left hand turn that would take you beneath the Colours of Spring Wall") because this takes you unnecessarily deeper into the creek valley and through much denser scrub up the other side.

윤리문제 Blue Mountains으로부터 상속된

Although sport climbing is well entrenched as the most popular form of Blueys climbing, mixed-climbing on gear and bolts has generally been the rule over the long term. Please try to use available natural gear where possible, and do not bolt cracks or potential trad climbs. If you do the bolts may be removed.

Because of the softness of Blue Mountains sandstone, bolting should only be done by those with a solid knowledge of glue-in equipping. A recent fatality serves as a reminder that this is not an area to experiment with bolting.

If you do need to top rope, please do it through your own gear as the wear on the anchors is both difficult and expensive to maintain.

At many Blue Mountains crags, the somewhat close spacing of routes and prolific horizontal featuring means that it is easy to envisage literally hundreds of trivial linkups. By all means climb these to your hearts content but, unless it is an exceptional case due to some significant objective merit, please generally refrain from writing up linkups. A proliferation of descriptions of trivial linkups would only clutter up the guide and add confusion and will generally not add value to your fellow climbers. (If you still can't resist, consider adding a brief note to the parent route description, rather than cluttering up the guide with a whole new route entry).

If you have benefited from climbing infrastructure in NSW, please consider making a donation towards maintenance costs. The Sydney Rockclimbing Club Rebolting Fund finances the replacement of old bolts on existing climbs and the maintenance of other hardware such as fixed ropes and anchors. The SRC purchases hardware, such as bolts and glue, and distributes them to volunteer rebolters across the state of New South Wales. For more information, including donation details, visit https://sydneyrockies.org.au/rebolting/

It would be appreciated if brushing of holds and minimisation/removal of tick marks becomes part of your climbing routine. Consider bringing a water squirt bottle and mop-up rag to better remove chalk. Only use soft (hair/nylon) bristled brushes, never steel brushes.

The removal of vegetation - both from the cliff bases and the climbs - is not seen as beneficial to aesthetics of the environment nor to our access to it.

Remember, to maintain access our best approach is to 'Respect Native Habitat, Tread Softly and Leave No Trace'. Do not cut flora and keep any tracks and infrastructure as minimal as possible or risk possible closures.

For the latest access related information, or to report something of concern, visit the Australian Climbing Association NSW Blue Mountains page at https://acansw.org.au/blue-mountains/

태그들

루트들

루트 추가 그림안내지도 추가 재 주문 대용량 편집 변환된 등급
등급 루트

Upgraded in latest guide. Start at the crack 1m or so R of Samson Gets a #1 and follow this up to the arete. Go around the arete and past one bolt (has a biner on it as of 04/18) to desperate, disintegrating and gripping crux sequence that gets harder every time someone pulls on. If you manage to old school your way through this, continue up the slowly falling apart crack to the ledge. Rap off the block above Samson.

FA: M Wilson & C Hale, 1996

The middle of the three cracks. Fantastic looking crack that is visible from both the track and many of the climbs on the East Side. Easy corner to hand crack that then widens. Finger crack to finish. Rap off unpleasantly slung death block on top.

FA: M Wilson & C Hale, 1996

The crack a few metres left of Samson Gets a #1.

  1. 28m (19) Up crack to ledge. Belay on boulders (as for Kryptonite Crack and Samson Gets a #1).

  2. 32m (19) From anchor traverse 6m L to below bulging L-facing corner-crack. Traverse further 2m L to below pockets. Up to pockets then back R to crack (small wires). Pull through bulge (crux) then good climbing following crack to ledge. Find carrot belay on far R side of ledge. Rap 50m to ground (it's not a rap anchor though, only carrots, so you'll have to leave some gear behind to rap off this).

FA: M Wilson & C Hale, 1997

A gem of a climb in a magnificent setting and historically one of the first multi-pitch sport routes in the Bluies. A rare big wall that suits lazy starters - it dips into shade after 10am in summer. Many non-lazy climbers combine it with with Smegadeath for a full day out. The route is mostly juggy with a few smaller holds and not too hard for the grade. Although it was rebolted in 2021 the original older vibe still remains - it is more runout than many of the newer sport multis - a few cams can help if this is at your limit. Take about 12 quickdraws, 2x60m+ ropes, and above all, prusiks! No bolt-plates required.

  1. 40m (21) Trend left up face onto overhung juggy arete and finish up grey wall to tiny ledge and anchors. Stick-clipping the first bolt is highly recommended. Approx 10 bolts.

  2. 20m (21) Right trending wall on extraordinary featured rock. The orange slopes are delicious. Belay on tiny ledge under the daunting steepness.

  3. 33m (23) A remarkable pitch. Left through steepness onto subtle arete. Step right onto unique and unnerving thin flake (treat this with extreme caution) and up pumpy steep wall until the angle changes to less army and more footy. Belay is right at the top of the cliff at awkward small stance (semi-hanging belay).

Descend by rapping down pitch 3 using double ropes (clipping into a few bolts to stay connected to the steep wall). [Alternatively, you can lower off pitch 3 with a single 70m rope, with a few metres to spare (knot in end!), so everyone can lead it. The oddly positioned rap rings will massively twist your rope, so its best if the first leader lowers off draws, and the second leader abseils. This also means your 2nd rope only needs to be towed to the 2nd anchor, and its bottom end can stay on the ground]. Then one long 60m rap down pitches 2&1 to the ground. 50m ropes will not make it down in one go. It's possible to do it in three raps with a bit of a swing on pitch 2. Walking off is not recommended as it puts you all the way back on the highway at least two kilometres away from the carpark.

FA: Michael Law & S Moon, 1996

Groove 10m L of Bladderhozen. Start at shallow R facing corner. Take a #0.2 to #4 BD as well as the usual suspects.

  1. 35m (20) Corner then short flake to stance, up and R to overlap below tiny fern, vital small wire and and cam. Up L on pockets then back R and climb the wall to the right of the vegetated groove on pockets, breaks and ironstone edges to the overlap, and bolt. Pull on to wall and easier wall climbing veering left to belay at stance above small roof in groove, cams in pockets to belay.

  2. 25m (17) Up wall to large break and ring belay #4 handy this pitch

  3. 30m (23) Easily up corner to ledge, right wall of corner, 2 bolts. Move onto the left wall & shallow horizontal break, 0.5 BD Crux, slightly L, up the wall (2 bolts) to flake in corner, easier climbing up corner to ledge. #4 , #0.75 & 0.3 or 0.4 BD for belay.

  4. 15m (24) A great pitch. Stem corner to large horizontal below roof. L 1m into hand crack. Big holds on steep arête between crack and corner. Hard last 3m back to corner and up to ledge, DRBB. Single rack required for this pitch.

Rap 45m to rings (anchor 2) then rap 25m to anchor 1 of Bladderhozen, then rap to the ground.

If you have a x60m ropes you can reach the ground in two abseils.

FA: M Wilson, C Hale & B Harrington, 2000

4 well bolted sport pitches with shade after midday and minor weather protection in the upper pitches. All bolts and belays are glue-in rings - no bolt plates required. Try not to throw anything on the canyoners that wander along the base of the route at regular intervals. Starts 10m left of Bladderhozen, and 3m left of Church of the Seventh Samurai at far left end of small ledge at small tree and small balancing flake.

  1. 14m (16) Easy face left of balancing flake to ledge. Scramble up and left 5m to belay left of giant flake. 5 bolts.

  2. 32m (23) Easily up left side of giant flake for a few metres then straight up the orange wall. At 15m tread cautiously past shale band and through crux undercut. Once the difficulty eases trend right for a couple of bolts to miniature ledge belay. 12 bolts.

  3. 30m (21) Long orange wall left of major corner to big ledge. 11 bolts

  4. 37m (24) Tricky slab start then continue up orange wall that steepens gradually to a pumpathon finish onto ledge. 15 bolts. Rap back down the route. Double ropes required unless you have an 80m single or don't mind a rope stretch just reach the belay on a 70m.

Set: Heath Black, 20 2월 2016

FA: Heath Black, adam demmert & @cathdv, 28 2월 2016

1 20 45m
2 23 25m
3 25 25m
4 25 25m

Take at least 16 draws, a few slings, and prussiks for leader and second. Two 50m ropes suffice. All U-bolts. Pitches 2→4 are protected from rain.

  1. 45m (20) Starts about 50m down L of Iron Throne at freestanding pillar (look for U-bolts). While the easiest pitch, expect some adventure. Climb chimney between pillar and wall to ledge. Left and left again past ledges (take care) and up negotiating some shale to major corner system with great rock. Up this, eventually exiting L and up ramp to belay (bolts placed high, extend to belay on ramp).

  2. 25m (23) Slabbing up solid grey, then orange rock with delicate section up high, trending L to large belay ledge.

  3. 25m (25) Directly right off the belay, then blast up the sustained orange wall on perfect stone. Pull on fixed sling to avoid a sandy mantle and gain the belay in alcove. Third belay bolt available for positioning extra bodies or kit.

  4. 25m (25) Committing roof in an exposed position (hard to grade this pitch as it's really just a couple of steep moves through the roof then easier climbing). A couple of bolts lead to the roof (rig to minimise drag). Once through ceiling, easier climbing on large features and some sandy scoops to outrageous belay stance on the edge of the world. Leave the second rope fixed to the p3 belay to assist getting back in, or if your second isn't keen, it's possible to be lowered and clean this like a regular sport pitch. 15 clips.

FA: Lee Cujes, Jake Bresnehan & Kamil Sustiak, 15 1월 2022

From the Pierces Pass Lower Carpark, head down the Pierces Pass walking track, looking for the Yileen canyon exit track (on the right) when approximately below The Colours of Spring. Head down the Canyon Exit Track, across the creek, and back up the other side (passing below Wrath of Delilah, Samson Gets a #1 and Kryptonite Crack), and below the cliffline (past Bladderhozen, Church of the Seven Samurai and The Iron Throne) to the bottom of Yileen Canyon.

Bush bash through dense wall-of-tree in a westerly direction below the cliffline (staying high-ish) for 100m to another slot canyon (this is the abseil descent from the climbs beyond this point), and for another 100m to Mrs Mac's Crack (the first of the obvious, overgrown corner-cracks, in grey rock). 15m further along, down a slight scramble is the direct, vegetated grovel start to Tientel (look for several carrots directly above, this is Kiss and Tell (22), which shares the same start).

Better than Ben Hur is another 100m further along the base of the cliff (and up a vegetated, loose gully).

P1 12m (15) - Up dirty, vegetated, barely protected corner to groove/chimney. Up this until it ends, then left along vegetated/loose ledge to belay below the main corner.

P2 45m (20) - Up loose blocks and vegetation, to overgrown, dirty corner. Carefully up this to a nice-looking clean corner at 35m height. Layback up clean corner, then continue up to a stance on a small, vegetated ledge below loose corner above (average gear on this belay).

P3 45m (20) - Up past shale-band and through roof to vegetated corner. Okay climbing up corner past 2 bulges. Belay on rubble-strewn ledge (fixed hex), 10m below big shale roof.

P4 45m (21) - Up corner to disgusting shale ledge and shale roof. Carefully get a #5 cam (or #4 higher up) into the wide shale-crack in the roof. Through roof with much trepidation (being careful not to kill your belayer), then more enjoyable steep corner-crack climbing to huge shale/dirt ledge.

P5 35m (21) - Up tricky, vegetated stemming corner to stance below roof. Chimney through roof, and up dirty, mossy, vegetated corner above to shale-mantle next to a small cave (#2 & #3 cams out right to belay).

P6 25m (12) - Dangerously up completely overgrown and underprotected corner. Up wide crack. Up ironstone plates to belay well-back on small trees.

To escape, walk east down the steepening hill and into the overgrown canyon. CAREFULLY down the steep canyon (through a wall of shrubs/trees) aiming for a tree with multiple slings around it at the canyon drop-off. A full 60m abseil will JUST make it to the ground, or a 40m abseil (to carrots + carabiners on the RIGHT side of the canyon), and another 20m abseil to the ground.

Description as found in "Rockclimbs in the Grose Valley", edited by Warwick Williams:

Everyone raves about it.

This is a typical Grose climb that can really test your commitment and experience. A few young hard men thought that this would be a good starting place to show their mettle. Before reaching the crux, but after breaking a hold or two, they thought Nowra was a better bet.

Stepped, left leaning corner system capped by large roof finishing near Liversidge Hill and clearly visible from Hanging Rock.

Access: Follow the Pierces Pass track towards valley until it reaches cliffs. Leave track and head west crossing creek, then follow base of cliffs, crossing two more watercourses until major corner system is visible. Walking time from track to climb is about 45mins. Mt Wilson map ref 517818.

Start: Scramble up (ropes required) about 70m to base of corner following system of bushy ledges; corner begins at right end of top ledge. Take full rack up to very large SLCD.

  1. 40m (16) Corner to belay (SLCD's) above small overhang with large bush, 4m below first major roof.

  2. 25m (18/19) Corner to shale ledge (good runner) then traverse left 4m to break in roof. Jugs (?), then left and up corner past bush to HB (SLCD'S) below bush 2.5m below roof.

  3. 20m (crux) Corner to second roof with prominent horizontal handcrack. Move left under roof, then corner to belay (SLCD's) on good, small ledge.

  4. 40m (17) Corner to large roof, then left round arete to corner. Corner/slab to belay (SLCD's) 4m below final roof.

  5. 30m (14) Up right on juggy wall to arete , then into easy corner.

FA: Mark Baker & Lucas Trihey, 1995

FA: L Trihey & C Jackson, 2002

알고 계십니까?

귀하가 등반한 등정들의 기록, 추적 그리고 공유할 수 있는 계정을 만들 수 있다는 것을 알고 계십니까? 수천명의 등반가들이 이미 이런 일들을 하고 있습니다.

Selected Guidebooks more Hide

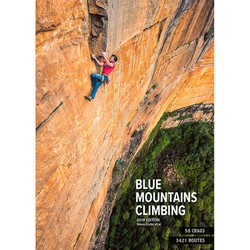
Author(s): Simon Carter

일자: 2019

ISBN: 9780958079082

The latest comprehensive, latest and greatest Blue Mountains Climbing Guide is here and it has more routes than you can poke a clip stick at! 3421 to be exact. You are not going to get bored.

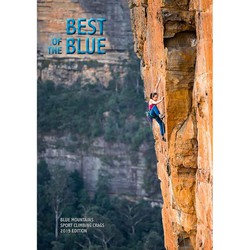
Author(s): Simon Carter

일자: 2019

ISBN: 9780958079075

Simon Carter's "Best of the Blue" is the latest selected climbing guide book for the Blue Mountains and covers 1000 routes and 19 different climbing areas. For all the sport climbers out there, the travellers, or just anyone who doesn't want to lug around the big guide that's more than 3 times the size - cut out the riff-raff and get to the good stuff! This will pretty much cover everything you need!

Accommodations nearby more Hide

Share this

사진들 모든 사진들 훑어보기

지역의 사진을 업로드하세요

수요일 19 4월
무슨일이 일으나고 있는지 Pierces Pass West Side 알아보세요.

Get a detailed insight with a timeline showing

  • Ticks by climbers like you
  • Discussions of the community
  • Updates to the index by our users
  • and many more things.

Login to see the timeline!

Deutsch English Español Français Italiano 한국어 Português 中文