帮助

South Face

季节分布

J
F
M
A
M
J
J
A
S
O
N
D

准入问题 取自Glasshouse Mountains

Most 'Glasshouse Mountains' climbing is within the Glass House Mountains National Park. Please respect the environment and other people's enjoyment of it. Access to climbing here is a privilege, not a right.

The 2019 Ngungun track expansion & fortification work is now complete, and the mountain is once again fully open.

前往

Several ways exist to approach the South Face and Wayne's World. The quickest and most convenient is by walking on the fire trail from the picnic area near tourist car park and keeping on fire trails to stay close to the mountain.

Once near the middle of the western side, the 4X4 track will cross a couple of watercourses. Here, a faint trail heading east and going over a big burned log, will reach a more defined track, once established and maintained by bushwalkers.

This is now an overgrown ring track. Turn right in the proximity of a large white gum and follow this trail southward, getting faint and scrubby, passing an area of tall black boys.

Soon the trail will turn in a ESE direction downhill towards the rock apron and Fern Wall. From here keep getting closer to the rock face until you reach Wayne's world in approx 40 minutes from car park.

The crags of the south face can easily be approached by walking by the apron.

This approach has the benefit of having a car at a convenient location, doesn't not require a 4X4 and is fairly flat along the way, unlike the old Wayne's World approach route.

下撤信息

The quickest way to descend from the top of the South Face, is to reach the tourist track. A defined but faint trail exist from the western shoulder above shell rock/the Underworld to the upper tourist track. Be careful to stay on this trail and avoid further erosion to this fragile and unique scrub.

行为准则 取自Glasshouse Mountains

Modern climbers establishing new routes have taken great pains to ensure any new routes do not interfere with the historic routes established many decades ago.

Retro-bolting of existing routes is unacceptable!

New routes shall make use of traditional protection where available.

线路

添加线路 添加路线图 调整排序 批量编辑 难度体系换算
Grade 线路

Variant finish of The Legend of the Barbed Wire Banshee linking to Shell Rock and finishing up West Beerwah final pitch to chains, for cleaner climbing. After completing pitch 7 of Banshee, climb the steep tree filled gully to the back door of Shell Rock with two sets of old chains. Continue up as per last pitch of West Beerwah to rap chains then scramble up through thick scrub to the top of the shoulder.

首攀: Jack Denny & Russell Denny, 7月 2016

This route climbs the south-west corner to the top of the shoulder, directly up through a cave and long chimney. The climb is long, the rock surprisingly good and the features vary from pitch to pitch to keep things very interesting although it has a fair bit of shrubs and scrub to negotiate. It has few isolated 16 moves and one hard cave exit move with some runouts. P1 - 7: C. Brazzelli, B. Cobb in April 2015. P8 - 11:D. Luton, R. Denny in April 2016/

APPROACH: The route starts few metres left of Burnt Cookies and The Nut, marked 'TN', at Wayne's World left end.

Locate the start 3m left of BC and start the bushy scramble ascending left and occasional zig zag to LLR until reaching clear rock at the end of the terrace/ledge and the beginning of the proper climb. This pitch is similar to the lower Caves Route of Tibro.

From a split corner/flake climb up to ledge staying left of a big white overhanging roof cap. Up easy slab sections to cave. Top belay in upper-right end of cave on good gear.

Climb out of the right side of the cave with an overhanging move on good holds and keep scrambling up and right slabby sections to find the base of a long chimney chocked with debris and vegetation, hidden behind a corner ledge on the RHS.

A long chimney that gets gradually narrow, runout and cruxy at the top. Ends into a small cave/groove. An overhanging move off the ground from the cave the cave will set you on a low angle dirt filled crack leading to chimney above. Avoid the chimney and head out right above cave across bulging face, good pro in small horizontal slot, trending right and up, increasingly runout to series of ledges, go to 2nd ledge up and a good belay tree at 27m.

Up from belay about 10m to ledge at base of bare rock face, go right a few meters, cam in horizontal crack, bring second up here, then traversing right, drop down into a chimney and keep going right and up across chimney about 15m to belay tree and tree lined shelf, might be ugly to retreat from here. Beyond the right end of the shelf, there's a sheer face dropping towards the South East, no route that way.

Pack rope and scramble up a steep bushy gully ending in a cul-de-sac of rockfaces. Rope up in awkward location, starting up arete on left then straight up over belay and up eventually to find ledge and small gum tree for belay.

Pack rope and bulldoze up narrowing gully with thick scrub and rock faces either side, gully tops out on ridge, cliff edge on the right drops down to a bushy terrace/ramp about 50m below. Keep going straight to the summit of the Western shoulder.

The variation of proceeding towards shell rock is a better variant and a cleaner finish of the route.

首攀: D. Luton, brent, Cris & Russell Denny, 26 4月 2015

This is a good route linking the base of Banshee long chimney with the lower Cyclop cave, in an airy diagonal traverse on the right. The first 20m are easy climbing with 4 good placements, passing a carrot bolt. The mid section (crux) is exposed, extremely thin and runout. Below the cave the route gets easier but long runouts are unavoidable. The Cyclop cave offers also a sheltered bivouac if needed.

首攀: Russell Denny

Start from a point a little to the right of a series of overhangs, slightly behind a prominent dead tree at the left hand end of the south wall. This climb is a direst route to the lower shoulder. From the start, an ascending traverse left is made to a large veranda. Climb the corner to the left of the ledge. An awkward overhang is surmounted and the nose of the buttress circumvented. A steep wall then leads to a broad sloping ledge, above this climb the wall to a timbered shelf. From this point, ascend a series of easy slabs in the direction of the now visible 'Garden of Eden' cave. Continue on a series of steep holdless slabs leading to the cave. Traverse from the cave on steep slabs to the left into a small groove which leads to a timbered ledge. Ascend a steep gully to Shell Rock (a prominent outcrop with a hold through the centre). A scramble over easier ground leads to the shoulder.

首攀: W. Peascod, N. Lamb & Donn Groom, 1960

This route is a great adventure climb starting in Waynes World and passing through the South Face via a large cave, to the West shoulder. The cave is probably the "Garden of Eden" described in the 1960’s route Pilgrims Progress. From there you follow the old route to the shoulder via Shell Rock. It’s a big day out so start early, take lots of water, head torches and charged phones. The route has a few vertical sections and a number of steep slabs with varied protection. Pitch 7 is particularly run out with poor protection- be aware.

This route was the result of many sessions by R. Denny, W. Kite and D. Luton through the middle of 2016. The first full ascent to the shoulder was made in November 2016- 12 hours car to car.

APPROACH: At the west end of Waynes World (S-26.89879,E+153.88150), walk further west up the slope as far as you can to reach a belay ledge at the obvious corner.

GEAR: A full set of cams, nuts, hex's and tricams plus plenty of slings. Take 2x60m ropes to allow a retreat.

1- 20m (10) Climb up the steps in the corner to a ledge then left to go around the arête. Scramble upwards along the bottom of the rock face to a tree belay.

2- 25m (13) Scramble about 10m up to next corner and belay on the large ledge. Use the vertical crack for protection and climb onto the arête to find further cracks. Second half is a bit run out to the trees on the next large ledge- keep left to avoid the large loose block.

3- 31m (12) Straight up the steep face to the left of the corner. Towards the top, step right into the corner to avoid some scrub and find the base of a bare slab. Aim for the trees at the top of the slab without much protection. A shrub well to the left can be used about halfway- long sling to minimise drag. Tree belay on small ledge.

4- 35m (10) Scramble up about 10m up and over the corner to a tree belay at the base of the next slab. Easy climbing with a few pockets for protection. Straight up then to the right of the scrub to find a tree belay in depression at the base of another slab.

5- 18m (10) Up the slab to find protection under the roof on the right hand side. Use a long sling then traverse up to the left along the base of the roof. Step onto the ledge at the base of a chimney. Belay off gear in the back of the cave.

6- 20m (13) Climb the chimney and step left to place a large hex in the narrow top section. Easy climbing up the slab trending right, but minimal protection till a corner is reached. Aim for the clump of trees on the right which has a wide ledge behind. Belay off gear and/or tree.

7- 30m (16, crux) Straight up to underside of the cave (probably the "Garden of Eden" described in Pilgrims Progress- 1960’s). Not a hard grade but it’s extremely run out with a lot of slippery lichen on a bare slab with very poor protection- use caution. Belay at the first reasonable shrub available. The cave is now a 15m scramble away. Halfway there, a ledge on the left has a large leaning block that provides a good rapping anchor- 40m to bottom of pitch. The next four pitches go the shoulder via Shell Rock following the top part of Pilgrims Progress.

8- 20m (16) From the ledge to the left of the cave, traverse left very exposed over a bare slab. It’s only this one move that’s hard- beware the hollow-sounding flake above you. Once some decent holds are found, it ease’s to more like 13 going up the small groove which leads to a timbered ledge. Tree belay or use the fixed hanger.

9- 20m (-) Scramble up the steep gully then up the right side of a chimney. Keep going till the rock face becomes steep and the vertical crack is visible.

10- 20m (-) This is also pitch 9 of Legend of the Barbed Wire Banshee. Straight up the steep face on the right of the tree filled gulley to reach the 2nd set of chains just below Shell Rock cave. Take some time to enjoy views out of the cave.

11- 20m (-) Follow the last pitch of West Beerwah. Trend right towards the top then up to find the chains. A bush-bash up and over easier ground leads to the shoulder. Follow the ridge around to find the walking track.

首攀: R. Denny, W. Kite & Dean Luton, 11月 2016

1 14/15 35m
2 14/15 35m
3 10 30m
4 10 30m
5 10 30m
6 12 30m
7 14 30m
8 15 30m
9 15 30m
10 14 25m

Lhotse Flake (grade 15) - 10 pitches to summit South West Shoulder of Beerwah starting at the bottom of No Honk at Waynes World. Good protection, trad route, solid rock, getting steeper towards top, set of cams, larger hexs, nuts, rap from anywhere on a single 60, knotted ends a must, rope stretch required rapping lower 35m pitches.

  1. 35m (14/15 ) Start at the initials NH, bottom of No Honk, some trad placements to join Extreme Close Up, half a dozen bolts (plates needed), rusty rap chains at 35m

  2. 35m (14/15) 2nd pitch of No Honk, mixed trad with 3 or 4 bolts (plates needed) to chains at 35m

  3. 30m (10) Up to terrace then left through small roof, easy going low angle straight up to DBB, dodgey shrubs for pro if required.

  4. 30m (10) Easy going straight up to DBB, more dodgey shrubs for pro if required.

  5. 30m (10) Out of the shrubbery on cleaner rock now, slightly left trending crackline, very grippy slab to DBB.

  6. 30m (12) Straight up past left facing corner with some vegetation to DBB alcove at the base of the obvious 30m high flake (right facing corner)

  7. 30m (14) Up into the right facing corner of the big flake, cams in the crackline all the way, smaller cams towards top, DBB beyond top of crackline

  8. 30m (15) Getting steeper now, up through alcove/chimney then ledges and slightly left past a lone hanger (handy if wet) then DBB above on face, small ledge stance.

  9. 30m (15) Cruxy move right off belay onto block 0.1 cam possible, up a bit to mid size bomber cams in crack, continue up obvious crack/runnel, then a satisfying hex placement (big one), up under headwall, a hanger on the face out left protects committing overhanging mantle move, then easy thru alcove and face to DBB, a few meters below solid little gum at the lip of the terrace, good ledge/lookout here right on the top of the main wall. Pack up the rope, scramble diagonally up left 50m heading for Shell Rock via chimney/gully to Shell Rock.

  10. 25m (14) Rope up on the final pitch above Shell Rock, cams, nuts, to chains on the hollow lava tube at 25m.

Pack up gear, follow the well worn track about 50m to the western shoulder along the ridge towards the knob, then over slabs to hook up with the tourist track.

首攀: Kerrie McMartin & Russell Denny, 25 4月 2017

The start of this climb is about 400m to the right of Pilgrim's Progress and is supposedly marked by a large grey gum tree with a heavy top and a badly burnt base. Who knows if it's still there? Two short pitches traverse to the left and a steep 20m wall is climbed directly to a veranda of shrubbery. The climbing continues until a series of small overhangs are reached. Traverse right and then continue up the weathered walls until a short traverse left leads to the south-west shoulder.

首攀: W. Peascod, N. Lamb & L. Upfold 1960s

This climb starts to the right of Wayne's World sector and meanders its way up the south wall topping out at the left shoulder of the summit. The FA's did not plan on going all the way but a lack of any real plan and sketchy lower offs meant this appeared as the only real option!

Start early, avoid rainy weather, carry head torches for all climbers, take phones and be willing to run it out.

There are probably far better equipped routes so this is not recommended unless you are up for an adventure

  1. Head to Wayne's World and start approximately 30m right of "Gas Works" in what looks like a fairly good corner. Make a belay in the small tree at the top of the sloping slab. (12)

  2. Head up trending right over a low jagged rocky ridge with minimal gear for another 45m to another small tree.

  3. Fairly good climbing up slabs to a dirty corner for belay. (55m 8)

  4. Climb through the rocks and shrubs until you get to the base of another wall (45m 4). Now walk right along the apron with a false sense of hope that you are somewhere near the summit for about 40m until you realise that things are getting steep and you should tie in again.

  5. About the point where you can't walk any further east, head up an almost vertical, exposed outcrop for about 14 metres (13) until you reach a very healthy looking young adult gum tree. It makes an excellent anchor for belaying the second climber, with a good view to the east across a vegetation-filled gully to a towering crag of volcanic columns.

  6. The best pitch. Climb upwards and to the left through large jagged rocks, into a deep, right facing crack for protection and use the large unusual features of the uncharacteristically cream coloured right face to reach yet another tree/shrub belay at the top of the short wall. (35 m - 16)

Pitches 7 - 10 are a good practice in slinging marginal gear comprising of hedges and shrubs. Memory of this is hazy due to one head torch used between 2 climbers, who were on occasions up to 50 metres apart! Having several footholds break off in total darkness, part-way up a grade 13 pitch, was the most vivid memory of this section of the climb! Especially as there wasn't a lot in the way of good placements.

首攀: Patrick & Adrian Woodcraft, 17 3月 2015

Start by climbing " It will be mine " or " We're not worthy " located at Wayne's world. These are both 2 pitch climbs with carrot bolts so take bolt plates. The new route continues up and slightly right. "It will be mine " is the better option. Mixed protection but definitely take a set of cams from 0.1 to #3 and nuts. Hexes and tri-cams also possible.

  1. 35m (16) It will be mine 1st pitch.

  2. 25m (13) It will be mine 2nd pitch.

  3. 30m (15) Up and right through the roof section via the large steps. Hangers protecting the step moves. Continue diagonally up through the middle of the slab section to DBB.

  4. 30m (14) Trend left up slight gulley to sling shrubs then up to left facing flake/roof. Follow the flake to DBB on left over easy ground. ( DBB common with the top of pitch 4 on Lohtse ).

  5. 30m (10) Up and trending diagonally right on clean slabs to DBB. ( Lohtse trends up left crack line from this shared DBB ). No placements needed on this pitch.

  6. 30m (14) Up slabs with limited protection but over easy terrain to a fixed hanger, from here go right for variant pitches or left for original climb up to chimney with a couple small shrubs approaching the left side of the obvious curved roof. Belay from the top of the chimney on two fixed hangers.

  7. 30m (16) Roof pitch goes right on hangers then through the roof at the Apex. Difficulty easing above the roof. Climb up and diagonally right to DBB.

  8. 30m (16) Up and right trending. Follow the hangers past the alcove on right to DBB directly above alcove.

  9. 25m (16) Straight up slab to hanger. Steeper directly up pockets to vegetated ledge. Tricky section of either directly up or slightly right and up on good holds to rap station on left. Clip rap station but continue up to large ledge to create an anchor with a single hanger and gear in corner.

  10. 25m (16) Tricky start off ledge to clip a bolt then up obvious line of protection on the arete using solid but sometimes hidden placements on your right. Resist the vegetated pockets on the left. Layback left to stand up on foot sized block to clip the hanger then Turtle-back move above. Up on thin footholds to sloping steps on left. Follow arete to DBB.

Escape left to gum tree and scrub. Caution needed leaving anchors. Follow faint track up and right 30m through scrub. Take care to stay on track, once at the rock apron continue right and up 30m along shoulder west of the knob. From here follow track right to join the tourist route. Alternatively a straight forward rap down the variant pitches to avoid the roof.

Variant pitches 6,7,8.

6 Variant. 30m (15) Up and trend right on gear to DBB on the slant under the right end of the roof line.

7 Variant. 30m (15) Up to clip hanger and then trend right with limited protection but over easy terrain to alcove and DBB.

8 Variant. 30m (16) Take a couple steps right and climb up to hanger. Follow the arete line as it gets steeper with various protection and 2 hangers to meet the original routes DBB above alcove.

首攀: 3 5月 2020

自由首攀: Russell Denny & Damien Shields, 3 5月 2020

A bog-standard South Face route which fills in a few gaps. It was climbed ground-up with a double rack, and although this might seem like overkill, individual pitches do have a strange tendency to require multiple cams of the same size.

There are three main cruxes - the 40m slab traverse forms the mental crux, the horrific bushwhacking exit forms the emotional crux, and climbing without snacks forms the culinary crux. One of the FA's ate two muesli bars enroute, therefore lowering his personal grade to M0, because food is aid.

While it is possible that some/much/all of this terrain has been climbed in the past, none of the existing route descriptions appear to match this route. Due to the extremely vague documentation of the old South Face routes, the FA's humbly submit this as a new line unless anyone provides compelling evidence to the contrary.

  1. 50m (14) Start about 30m left of The Martian and the same distance right of a blocky roof. Sit start on good holds, blowing your onsight if you dab. Up line of least resistance, very easy but no gear for the first 20m. Some good protection becomes available in the middle of the pitch but disappears once again as you move through the bulge. Trend right to tree belay about 10m left of the first DBB on The Martian.

  2. 50m (12) An easy but somewhat bold and serious pitch. Traverse horizontally for about 40m with only one piece of gear worth a damn. Once near the large corner, move up a rain runnel with big holds but little protection. Bomber gear belay in the corner crack. Note: Future ascensionists are welcome to push a direct start from below this corner, however it will be quite steep and somewhat out of character with the remainder of the route. Protection availability unknown.

  3. 50m (13) A nice pitch of grippy slab. Gear is bomber, though spaced. Trend slightly rightwards and up to belay off two medium shrubs.

  4. 50m (10) A hard hands free problem. Trend diagonally left to stay on mostly clean rock, keeping the line of vegetation close by on your right. Sling trees as needed and eventually find yourself at a comfortable grassy ledge with an adequate tree belay.

  5. 45m (13) A pleasant ramble on decent rock. Gear can be placed if you desire such things. Straight up into a weird little vegetated pod belay.

  6. 40m (15) At this point, the route intersects at times with Thunderball, though often takes a more natural line by following weaknesses. Move right from the belay and into a shallow groove, heading up to clip a bolt. Ignore the bolts out left, instead continuing straight up on cool pocket features to a bushy ledge beside the large black bulge. Belay here or at the bolted anchor on top of the bulge (semi-hanging). A lovely pitch and probably the standout of the route.

  7. 50m (16) Move up and clip the bolt if you like, make sure to extend as you're going to move right through some dark, strangely featured rock. Sling some chickenheads (quite small, more like quailheads really) and keep moving up. Clip the rap station but move on, passing a ledge and some tricky moves near dicky bolts. Follow the left-trending gully which forms the line of natural weakness, ending up wherever makes sense to you. Note: As an alternative for this final pitch, it would be possible to trend right into the runnel feature and top out the route via a series of vegetated gullies. These lead to a faint saddle on the summit ridgeline which would keep the route a more traditional affair and probably lower the grade.

Descent: Pack your rope, unsheath your machete (but not really, it's a National Park) and sally forth into the shrubbery. Head painfully upward to meet with Beerwah's western shoulder where a footpad will contour east toward the Tourist Track. Down this and head to the cafe for milkshakes.

自由首攀: Morag Stewart, Peatey & Ryan Siacci, 30 5月 2020

Just as you start pitch 3 of the Martian follow the traversing hangers that go left to vegetated ledge. You can continue up to the midway flake anchors but it's better for visibility to anchor off trees and bring your follower to the ledge.

The 2 pitches of the flake feature can be linked on a 60m rope.

From the top anchors climb diagonally right about 5m to continue on the Martian.

首攀: Russell Denny & Damien Shields, 10 8月 2019

1 15 48m
2 13 28m
3 14 30m
4 13 31m
5 11 30m
6 13 30m
7 13 30m
8 15 30m
9 15 30m
10 17 30m

The Martian Multipitch. 320m grade 17 50m or so east from right end of Wayne's World, a few metres past a very large burned tree stump at a low point adjacent to the rock apron, as the track gradient starts to rise but before the big left facing corner. This is a clean and safe route to the top of the western shoulder ideal for beginners but long enough to engage the experience climber for a relaxing day out, with terrific top out pitches, all with bolted belays. Rock is great all the way. A set of cams up to #4, nuts and hexes. 10 draws. Slings and extenders. FA: R. Denny and C. Brazzelli

  1. 48m (15) 5 m east from the burned tree base before the corner end of the wall. Up on easy ramp for 20m then trending left around a steep section. A steeper move around a block and up to a shady ledge.

  2. 28m (13) Walk left and up to another nearby ledge. Climb the rampy shallow corner trending slightly left to a tree beside a detached big block. Belay behind tree.

  3. 30m (14) Step right and up from belay and climb up to lip on featured slab. ( The 90 degree left traversing line is for The Martian Moon Flake Variant ). Trend slight left with some bold sections to belay on ledge behind gum trees.

  4. 31m (13) Thin moves up slab, sling small trees on the left and gear, above small terrace, great featured rock straight up.

  5. 30m (11) Climb straight up on grippy and featured low angle slab, follow small crack line with pro to belay. Good rock, typical Beerwah volcanic features. The next 2 pitches weave through the timbered middle slabs, take care to stay on route.

  6. 30m (13) From belay, up and trending right on low angle slabs (grade 4), sling trees and find the way above to ledge/alcove behind shrubs. Up the chimney to belay above.

  7. 30m (13) Up right facing corner from belay. Pitch is trending slightly left and stays on clean rock. Scramble to belay above.

  8. 30m (15) Up to bushy terrace and walk 10m left to base of chimney. Climb chimney with pro options (or arete on the left) to left of rooflet. Up past shrubbery contouring left, jam fingers behind a polished detached cruxy block. Straight up good pro, final approach to belay from below left, has hidden pro. Beware of some minor rope drag on this pitch, use long extenders. NOTE: if rapping this pitch, it is necessary to stay right (east) of the climbing line on the rib and keep the rope well away from the corner to avoid getting it stuck in the flakes and cracks.

  9. 30m (15) A slab pitch getting steeper, up left at first to meet the faint right trending crack system with small placements. Moss and lichen covering on this pitch, small holds, engaging, last section up past a small tree to a hanging belay. Terrific slab pitch.

  10. Olympus Mons (crux) 30m (17) Climb the vertical crack system trending right, a few cruxy and thought provoking sections, good rock, to top out belay. Mind the stacked blocks at the top. Final 6m use right ramp to escape the overhanging chimney or climb directly.

1x60m rope sufficient to climb the route.

From top belay, scramble up the wide gully between the west shoulder and the knob. The arch is visible on the RHS. Once on the saddle ridge, descend and traverse contours towards the north-east to meet the tourist track. Try to stay on existing foot pad to avoid erosion.

首攀: Russell Denny & Cris, 28 4月 2019

Approach: This route tops out the prominent knob on the Western shoulder of Beerwah below the summit. Can be accessed via a number of different hiking routes. First ascent was done as a tasty addition to The Martian. After Olympus mons (pitch 10 of the Martian) scramble approximately 50 m up the exit gulley towards the western shoulder, until you begin to pass the base of the knob and it's south west facing wall, 15m to the right of the exit track.

Description: Climb starts at the vertical crack, just left of center of the wall (avoiding the overhung lips to the right) Crack 15m before stepping right and up onto sustained slab with left-facing corner. Done with cams .3-2, nuts 1-13. Natural belay(trees and boulder) perched on the knob with awesome western outlook.

自由首攀: 10 9月 2023

自由首攀: Samuel Gough & Julian Miller, 10 9月 2023

A bit of a journey! This route features 210m of independent climbing, however access involves a lengthy vertical approach. Distance from base to summit of Beerwah is some 650m, including 7 pitches of The Martian and a rising scramble traverse through typical Glassies scrub. The wide range of experiences on this route inspired the name. One for the adventure climbers!

For pitches 1 through 7, climb The Martian. 240m of good rock with mixed protection, mid teen grades at most. Simul-climbers will move quickly here.

Half-way up the 7th pitch, just above the only hanger on the pitch, traverse right. Follow blue tape for an easy scramble a la Caves Route. Perhaps 200m right and 100m+ height gain, heading for the landmark double roof. Back on rope for pitches 8 to 11 up a generally left-facing corner to terrace 100m above. Full rack of cams 0.1 to #4, stacks of gear options, traffic needed to clean this section, rock quality improving with height.

Pitch 8 – 20m, Grade 18. Four fixed hangers lead to belay on spacious vegetated ledge. A thin, balancy crux with a weird mantle.

Pitch 9 – 40m, Grade 22-23 or A1. Getting steeper and harder now, follow the corner crack system with some bolts to guide the way. Well protected pitch to a semi-hanging belay below roof. Fairly sustained free climbing or a good aid pitch. Free grade is still anyone's guess until properly clean, but it's hard work.

Pitch 10 – 20m, Grade 20 A0. Easing off up corner under classic double roof with good cracks. 5m horizontal "Thank God" ledge leads left under roof to join bolt ladder up blank wall. This has not yet been freed, might go at 21 or so. Up to DBB and stance just left and above the roof with good visuals to seconder. Exposed. Option for the better climbers is to ignore the ledge and bolt ladder and to follow the corner crack all the way to meet the roof line. Trace the line where the roof blocks meets the wall - "Great Roof" style except backhand to the left. This option should be classic but looks hard, someone might get it.

Pitch 11 – 20m, Grade 18. Continue to top via vertical crack, take cams all the way. An awkward move in the middle, after which you will reach a vegetated terrace for a tree belay.

Pitch 12 – 30m. Coil ropes and scramble up with a slight leftward trend to an alcove where rock face starts again.

Pitch 13 – 25m, Grade 13. Unpack ropes again and climb up past four hangers trending left to DBB. Follow goat track with old tape up and right for 20m or so to base of headwall with a single ring anchor.

Pitch 14 – 30m, Grade 13. Up and right of ring through shrubbery with a few hangers to help route finding. DBB at the base of steep slab on final pitch.

Pitch 15 - 25m, Grade 18/19. Tricky slab, harder than it looks. Following shallow groove/runnel to ledge and left facing corner, thru head wall to DBB out of sight below summit, then top out on the Western end of the summit ridge.

Decend via tourist route. Still awaiting an FFA, get after it!

首攀: Russell Denny & Brett Caldwell, 12月 2019

自由首攀: Alex Mougenot & Kyle Addy, 27 11月 2022

This climb starts off on the big vegetated ledge after climbing the first pitch of DIVINE COMEDY. We found the rock quality to be better this way and it finishes up a unique water runnel. The best time to climb on the south side is from April until August as it has all day shade. Because of the all day shade allow for significant drying times after rain.

The name for this climb is after an experience we had upon our FA attempt. We were walking around to the south side and almost at waynes world when 2 hikers appeared from the bush. "Is this the way to the general " they asked. We all look at each other puzzled " Do you mean the tourist track " I ask. "yeah you know, the general way up " they reply. We joked about it the rest of the day and the name stuck.

PITCH 1 Grade 19, 15m. From the pitch 1 anchors of DIVINE COMEDY start traversing right around arete following fixed hangers. Good to use an extender on bolt just around arete to stop rope damage if falling.

PITCH 2 Grade 18, 30m. From DBB climb up through chimney to ledge then follow flake feature up to DBB.

PITCH 3 Grade 20 From DBB climb straight up keeping the fixed hangers on your left until you reach water runnel feature in which you climb through the middle.

From the top of Pitch 3 you can scramble up to a vegetated area and go off rope. From here you can either follow the goat track left and continue on with DIVINE COMEDY or keep going left to meet up with the tourist track.

自由首攀: Dave Westby, Matthew Kievel, Russell Denny & Damien Shields, 18 6月 2022

The start is located on the left of the ridge on the south face. The first four pitches are up a wall on good rock, then 200m of mank and bush to the middle cliffs. The next four pitches are up from a small pinnacle against the face, up and over a small overhang and into a crack. Up the crack until it rises to a huge overhang. Traverse right onto the right wall and across to another crack and up. The last four pitches are clean climbing on the steep ribs that lead to the top.

首攀: Les Wood & Donn Groom, 1966

Start two ridges west of the Central Rib, at the base of the large, clean wall on the south face. Up left to a sloping ledge. Traverse leftward under an overhang to a grassy ledge. Up a rather water-worn groove to the right of a corner. up rightward over slabs to a projecting rock, right of an overhang. Up the slabs below the overhand and then up the groove and into a cave. Out of the cave to a crack on the left of an overhang.

首攀: Les Wood, Donn Groom & Brian Driscoll, 1966

首攀: Cris, Russell Denny & Dani, 6 1月 2018

Start about 500m right of Mopoke Slabs. The climb commences just to the left of 'Barrier Wall'. Follows up a series of slabs until the veranda is reached. Traverse to the right for about 30m until a large prominent rib bounding the south and east faces is reached. A difficult chimney is surmounted which leads to the crest of the rib. 115m of climbing on the face of this immense rib leads to a belt of scrub below the summit pyramid. The final wall is well provided in knobbly excrescences and a direct route is followed over this wall to the summit.

首攀: J. Stephenson, G. Broadbent & N. Lamb, 1953

你知道吗?

你知道吗?创建账户后,你可以记录、跟踪并分享你的攀登!数千计的攀登者已经在这么做了。

Selected Guidebooks more 隐藏

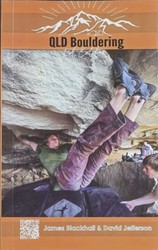
作者: Jimmy Blackhall & David Jefferson

日期: 2021

国际书号: 9377779499658

Hidden within the ordinary people of Queensland there exists a tight-knit community of scabby knuckles, grazed knees, massive forearms and iron-clad wills. This guidebooks seeks to shed light on this community and blocks of choice with all the information, skills and knowledge to open the door for you to explore all the bouldering that Queensland has to offer.
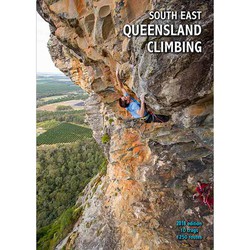
作者: Simon Carter

日期: 2018

国际书号: 9780958079068

A few years ago there was basically Frog Buttress and Coolum. Since then there has been more development than Barangaroo and South East Queensland should be on any climbers radar no matter what your style. Except ice climbing, definitely no ice climbing. But over 1250 routes with hard sport, multipitches and quality trad to make a great trip.

附近的住宿 more 隐藏

分享至

照片 浏览所有照片

上传区域的照片

星期天 21 5月
查看South Face的最新动态。

Get a detailed insight with a timeline showing

  • Ticks by climbers like you
  • Discussions of the community
  • Updates to the index by our users
  • and many more things.

Login to see the timeline!

Deutsch English Español Français Italiano 한국어 Português 中文