A Crag Guide gives an extensive view of all sub areas and climbs at a point in the index. It shows a snapshot of the index heirachy, up to 300 climbs (or areas) on a single web page. It shows selected comments climbers have made on a recently submitted ascent.
At a minor crag level this should be suitable for printing and taking with you on a climbing trip as an adjunct to your guidebook.
This guide was generated anonymously. Login to show your logged ascents against each route.
Warning
Rock climbing is extremely dangerous and can result in serious injury or death. Users acting on any information directly or indirectly available from this site do so at their own risk.
This guide is compiled from a community of users and is presented without verification that the information is accurate or complete and is subject to system errors. By using this guide you acknowledge that the material described in this document is extremely dangerous, and that the content may be misleading or wrong. In particular there may be misdescriptions of routes, incorrectly drawn topo lines, incorrect difficulty ratings or incorrect or missing protection ratings. This includes both errors from the content and system errors.
Nobody has checked this particlular guide so you cannot rely on it's accuracy like you would a store bought guide.
You should not depend on any information gleaned from this guide for your personal safety.
You must keep this warning with the guide. For more information refer to our:
Usage policy
Contributors
Thanks to the following people who have contributed to this crag guide:
Bevan Ashby
Ethan Parkes
James Lister
mellor
Rob Knight
Jake Parker
Nick White
Liam Davey
Brendon Jones
Tim Rock
The size of a person's name reflects their Crag Karma, which is their level of contribution. You can help contribute to your local crag by adding descriptions, photos, topos and more.
Some content has been provided under license from: © Canberra Climbers' Association (CC BY-SA)
Table of contents
- 1. The Asteroid 28 in Area
- 2. Index by grade
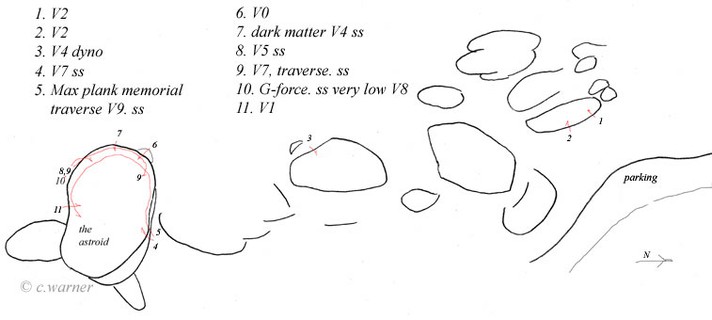
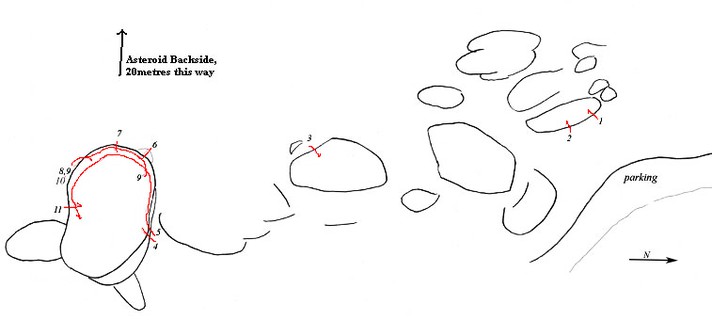
1. The Asteroid 28 routes in Area
- Summary:
-
All Bouldering
Lat / Long: -35.427486, 149.538166
description
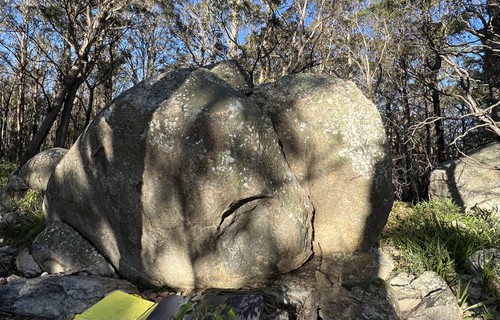
This bloc sits on the left hand side at the top of the steep hill with the blue gravel on it and is mainly the work of George Fieg, one of Canberra's strongest climbers for many a year.
access issues
These boulders lie in a national park. While there are no current access restrictions, please respect the nature of the park and aim to minimise your impact. Refer to the NPWS alerts page for the park for up-to-date access information.
| Route | Grade | Style | Selected ascents | |||||
|---|---|---|---|---|---|---|---|---|
| 1 |
★ One Step / #1
FA: George Fieg | V2 | ||||||
| 2 |
★ Time of Your Life / #2
FA: Sarah | V2 | ||||||
| 3 |
★ Lay Back
Sit Start | V1 | ||||||
| 4 |
★ Blaster Master
Stand Start | V3 | 3m | |||||
| 5 |
★ Easy Launch
Sit Start | V0 | ||||||
| 6 |
★★ Launch Away
sit start | V2 | ||||||
| 7 |
★★ Finger Flake Of Death
Sit Start | V1 | 3m | |||||
| 8 |
★ Dyno / #3
Dyno. FA: George Fieg | V4 | ||||||
| 9 |
★★ Madness in G Minor / #4
Sit start. FA: George Fieg | V7 | 5m | |||||
| 10 |
★★ Madness in its place
Link up from the start of MiGM into the finish of EiiP. Longer than the direct MiGM but avoids the tricky mantle. FA: James Lister, Mar 2024 | V7 | 5m | |||||
| 11 |
Everything in G Minor
Links the start of EiiP into the finish of MiGM. Contrived but nice moves. Another local interest only link up. FA: James Lister, Mar 2024 | V5 | 4m | |||||
| 12 |
★★ Everything in its place
Sit start with hands on flake jugs and feet on main block. Climb up and right to top out similar to space funk or stretch hang. FA: James Lister, Mar 2024 | V4 | 3m | |||||
| 13 |
★★★ Max Plank Memorial Traverse / #5
Sit start then traverse the boulder right to finish up where The Blue Nun finishes. FA: Sarah | V9 | ||||||
| 14 |
Stretch Hang / #6
FA: Sarah | V0 | 2m | |||||
| 15 |
★ Dark Matter / #7
Sit start deep on crimps with a leg bar. FA: George Fieg | V6 | 3m | |||||
| 16 |
★★ Pulling G’s / #8
Sit start then sloppy slaps up left then mantel. FA: George Fieg | V5 | 3m | |||||
| 17 |
★ Space Funk / #9
Traverse left from a sit start and finish up a bit left of where Stretch Hang finishes. FA: George Fieg | V5 | 3m | |||||
| 18 |
★★ G-Force / #10
Sit start very low. FA: George Fieg | V8 | 3m | |||||
| 19 |
★ The Blue Nun / #11
FA: Sarah | V1 | 3m | |||||
| 20 |
Probe
FA: Chris Warner | V0 | 3m | |||||
| 21 |
Bogie
FA: Chris Warner | V0 | 3m | |||||
| 22 |
★ Two Fat Ladies Direct
Sit start from low LH sidepull / RH mono-sidepull then climb up and top out. FA: Bevan Ashby, 17 Aug 2021 | V5 | 3m | |||||
| 23 |
★★ Two Fat Ladies
Sit start beneath "Soft Error", traverse left via underclings then top out via crimps. FA: Bevan Ashby, 19 Aug 2021 | V6 | 6m | |||||
| 24 |
★★ Soft Error
Sit start. FA: Chris Warner | V4 | 4m | |||||
| 25 |
Brick Moon
Sit start. FA: Chris Warner | V3 | ||||||
| 26 |
★ Gravity Assist
Sit start. FA: Chris Warner | V3 | ||||||
| 27 |
★ Heavy Ions
FA: Chris Warner | V1 | ||||||
| 28 |
★ Lucozade Man
Sit start matched on sloper, climb up via LH sidepull then top out via crimps. FA: Bevan Ashby, 23 Feb 2023 | V4 | 4m | |||||
   /8c/b9/8cb9ca3c1fda9000ab8fb14aac707c2531b94cde) /a1/5f/a15f4e7da7561ac2e78d543fcc763ce0dfc850da) 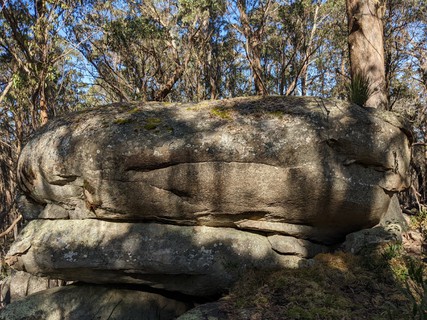 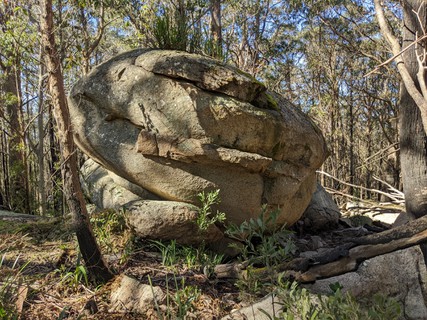 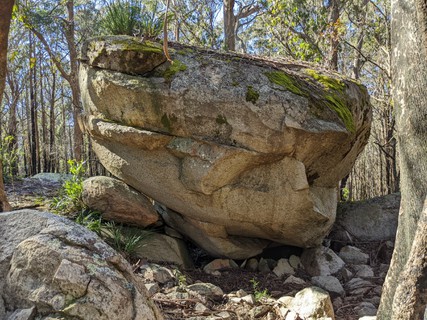 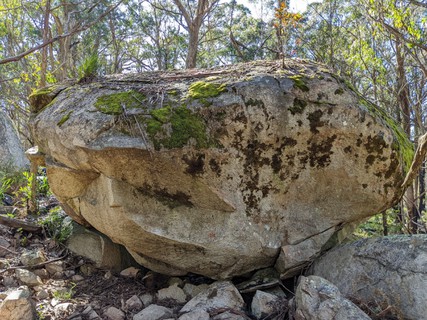 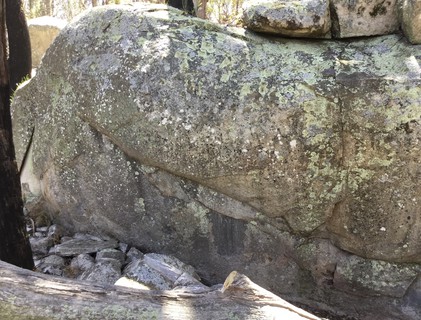 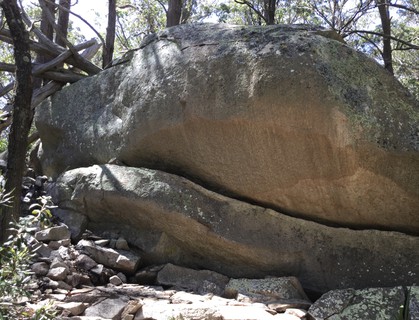 |
||||||||
 Bevan Ashby
2. Index by grade
| Grade | Stars | Name | Style | Pop | |
|---|---|---|---|---|---|
| V0 | Bogie | 3m | |||
| ★ | Easy Launch | ||||
| Probe | 3m | ||||
| Stretch Hang | 2m | ||||
| V1 | ★★ | Finger Flake Of Death | 3m | ||
| ★ | Heavy Ions | ||||
| ★ | Lay Back | ||||
| ★ | The Blue Nun | 3m | |||
| V2 | ★★ | Launch Away | |||
| ★ | One Step | ||||
| ★ | Time of Your Life | ||||
| V3 | ★ | Blaster Master | 3m | ||
| Brick Moon | |||||
| ★ | Gravity Assist | ||||
| V4 | ★ | Dyno | |||
| ★★ | Everything in its place | 3m | |||
| ★ | Lucozade Man | 4m | |||
| ★★ | Soft Error | 4m | |||
| V5 | Everything in G Minor | 4m | |||
| ★★ | Pulling G’s | 3m | |||
| ★ | Space Funk | 3m | |||
| ★ | Two Fat Ladies Direct | 3m | |||
| V6 | ★ | Dark Matter | 3m | ||
| ★★ | Two Fat Ladies | 6m | |||
| V7 | ★★ | Madness in G Minor | 5m | ||
| ★★ | Madness in its place | 5m | |||
| V8 | ★★ | G-Force | 3m | ||
| V9 | ★★★ | Max Plank Memorial Traverse |