A Crag Guide gives an extensive view of all sub areas and climbs at a point in the index. It shows a snapshot of the index heirachy, up to 300 climbs (or areas) on a single web page. It shows selected comments climbers have made on a recently submitted ascent.
At a minor crag level this should be suitable for printing and taking with you on a climbing trip as an adjunct to your guidebook.
This guide was generated anonymously. Login to show your logged ascents against each route.
Warning
Rock climbing is extremely dangerous and can result in serious injury or death. Users acting on any information directly or indirectly available from this site do so at their own risk.
This guide is compiled from a community of users and is presented without verification that the information is accurate or complete and is subject to system errors. By using this guide you acknowledge that the material described in this document is extremely dangerous, and that the content may be misleading or wrong. In particular there may be misdescriptions of routes, incorrectly drawn topo lines, incorrect difficulty ratings or incorrect or missing protection ratings. This includes both errors from the content and system errors.
Nobody has checked this particlular guide so you cannot rely on it's accuracy like you would a store bought guide.
You should not depend on any information gleaned from this guide for your personal safety.
You must keep this warning with the guide. For more information refer to our:
Usage policy
Contributors
Thanks to the following people who have contributed to this crag guide:
Dylan Edwards
Andy Beckworth
Adam Huddleston
Brendan Heywood
Cameron Roy
Paul Badenoch
Jason Morton
John Hudson
Matthew Broadbent
Thomas Boehm
The size of a person's name reflects their Crag Karma, which is their level of contribution. You can help contribute to your local crag by adding descriptions, photos, topos and more.
Some content has been provided under license from: © Cameron Roy (CC BY-SA 3.0 AU) © Australian Climbing Association Queensland (Creative Commons, Attribution, Share-Alike 2.5 AU)
Table of contents
- 1.
Norton Summit
223 in Crag
- 1.1. The Far Left Wing 4 in Crag
-
1.2.
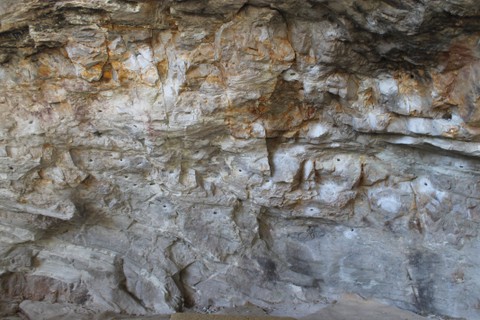
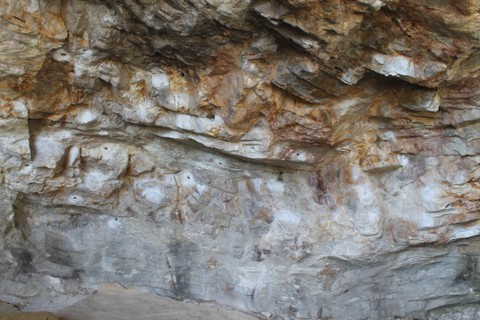
The Cave 84 in Crag
- 1.2.1. Cave Bouldering 13 in Sector
- 1.3. The Hole 61 in Crag
- 1.4. The Right Wing 6 in Crag
- 1.5. The Bachelor Pad / Lower Norton Summit 68 in Crag
- 2. Index by grade
1. Norton Summit 223 routes in Crag
- Summary:
-
Bouldering, Sport climbing and other styles
Lat / Long: -0.000818, 138.709413
Climbers must leave the cliff PRIOR to sundown.
Peregrine falcon nesting seasons adhered to. No climbing above the cave.
Ensure your car displays a CCSA (Climbing Club of South Australia) sticker at all times when parked.
Keep noise to a minimum. ACCESS IS SENSITIVE. ABIDE BY THE RULES. REFER TO ADELAIDE HILLS CLIMBING GUIDE FOR FURTHER INFORMATION OR CONTACT THE CCSA.
Access to the crag is prohibited on Total Fire Ban days
description
Refer to Access Issues for further information. One of the most important cliffs in South Australia due to proximity to the CBD , the dense amount of mid-range to harder routes (especially 24 to 32) , and of great historical significance to SA climbers. Access however is by negotiation (through the CCSA and landowners) , so strict rules apply. Refer to Access Issues.
access issues
ethic
Sport climbing, mostly higher grades (23-32).
1.1. The Far Left Wing 4 routes in Crag
- Summary:
-
All Trad climbing
Lat / Long: -34.922422, 138.712900
| Route | Grade | Style | Selected ascents | |||
|---|---|---|---|---|---|---|
| 1 | Nicks and Nooks | 15 | 25m | |||
| 2 | Slaps and Shrieks | 20 | 25m | |||
| 3 | Gropes and Gasps | 19 | 25m | |||
| 4 | Bulges and Bellyflops | 15 | 30m | |||
1.2. The Cave 84 routes in Crag
- Summary:
-
Sport climbing, Trad climbing and other styles
Lat / Long: -0.000022, 138.712924
description
Routes are described left to right.
access issues
Private land with climbing club of SA arrangements. No climbing before sunrise or after sunset. No climbing on total fire ban days for Mt Lofty ranges. CCSA sticker visible on climbers cars. No climbing above cave lip or outside designated areas.
| Route | Grade | Style | Selected ascents | |||||
|---|---|---|---|---|---|---|---|---|
| 1 | Graunch | 13 | ||||||
| 2 | Boulder Problem | 13 | ||||||
| 3 | The Hindley Hustle | 19 | 20m | |||||
| 4 | ★ Uptown Eugene | 21 | 20m | |||||
| 5 | Uptown Eugene RHV | 23 | 20m | |||||
| 6 |
★ Little Rundle Street
The line 2m left of 'Trundle down rundle' - 5 bolts FFA: Adam Gower, 2012 | 23 | 20m, 5 | |||||
| 7 |
The Mall's Falls
The unbolted line in between Little Rundle St and Trundle Down Rundle. Veer left and then thin cruxy moves to move right into Trundle just before Little Rundle St does. FA: Mike Garrett, 20 Dec 2020 | 24 | 20m | |||||
| 8 |
★★★ Trundle Down Rundle
Graded 24 until a large jug ripped off, courtesy of Mr Baker. Now a soft-touch 25 power-endurance fest. Takes the left most chalked weakness past a line of rings bolts and positive holds to a fingery crux at the last bolt. One of the best routes at the Summit. | 25 | 20m, 4 | |||||
| 9 |
★ Trundle RHF / Trawler
Trundle to third bolt, then right into Gawler Bypass. New bolts and anchor to replace manky cam and rusty bolts. | 24 | 7 | |||||
| 10 |
★★ City To Bay
Trundle down rundle to it's 3rd bolt, then break right to a fixed draw, follow the traverse right, another fixed draw, then through the roof into Space to rent. Finish at the ANZAC chains. FA: 2012 | 24 | 8 | |||||
| 11 | ★★ Gawler Bypass | 24 | ||||||
| 12 |
★★ Hyperspace Bypass
Space to Rent to under the roof then break left and finish up Gawler Bypass. Originally done on trad. | 24 | 20m | |||||
| 13 |
★★ Anzac Space
Anzac to the 4th bolt then left (across Pivoting Head/RERL traverse) into Space to Rent - finishing as for Anzac. Take a long draw for the 5th. | 24 | 15m, 8 | |||||
| 14 |
★★ Space to Rent
Approx 2m left of the start to 'Anzac'. Trad start to old bolts leads to the RERL traverse line (at the roof). Head directly through roof approx 5m left of Anzac line and finish as for Anzac. Now bolted. | 24 | 6 | |||||
| 15 |
Pivoting Head
Established by Carrigan in '81, now superceded by Grurper DS & Crossroads. Up Grurper LH (rarely done) to good rest before traversing out right into the finish of what is now Crossroads. | 24 | 17m, 7 | |||||
| 16 |
★★ Run Every Red Light
Anzac Highway to its 4th bolt, then break left along the horizontal to join Trundle Down Rundle at its final ring bolt (crux). FA: Steve Kelly, 2006 | 25 | 25m, 7 | |||||
| 17 |
★★ Space to Amble
Climb Space to Rent to jugs just past the 4th (rusty note 2 new bolts have been added to the start of space to rent) bolt then traverse right to the 4th bolt of Anzac Highway Amble. Finish up Anzac | 24 | 6 | |||||
| 18 |
★★★ Anzac Highway Amble
Up 4 bolts Lt of Grurper direct. Then traverse up and Lt past 2 more bolts to chains. DBB FA: Tony Barker, 2000 | 23 | 25m, 7 | |||||
| 19 |
★ Grurper LHV
Up between Anzac Highway Amble and Grurper DS to a groove. Escape up R to the Grurper ledge. Features guano, poor rock and marginal protection. FA: Colin Reece & Chris Shepherd, 1980 | 21 | 13m | |||||
| 20 |
★★ Grurper Amble
A link up that a lot of people do (surprised to see it was not here yet). Grurper to its anchor, then head left into AHA to make a long and nice pitch, where the traverse between routes is the only spicy addition. 23** in the CCSA mini guide to the summit. A tad harder than Grurper, but more similar in grade to that climb than to Anzac, so keeping 23 here as per the mini guide, but 22 would also be fair. | 23 | 25m, 7 | |||||
| 21 |
★ Grurper DS
Start: Left of 'Crossroads' Straight up to the exciting move onto the big ledge. 3 bolts to rap station. NB: The original Grurper starts near North Terrace Stroll and gains the big ledge from the R. | 22 | 10m, 3 | |||||
| 22 |
★ Grurper pitch 1
The left-trending trenchline, starting near the base of NTS. Most people place gear along the way. When it joins Crossroads, move up clipping two bolts then step L to the big ledge with the belay biners. NB: this is not Grurper DS which has 3 bolts and climbs directly to the ledge. FA: Roger Alldritt & John Nitschke, 1972 FFA: Colin Reece & Gary Scott, 1979 | 21 | 17m, 2 | |||||
| 23 |
★★ Crossroads
An excellent addition made up of a steep bouldery start, a pumpy big-hold mid-section, then morphing into a somewhat technical slabby finish. Finish at the chain of 'North Terrace Stroll'. FA: Peter Daish | 25 | 20m | |||||
| 24 |
★★ Crossroads Direct Finish / Crossroads RHV
Not particularly popular and somewhat contrived. Still worth it, particularly if you have route fitness (crux at the top). Follows Crossroads to the roof, then breaks right past underclings to gain the thin letterbox slot in the hanging headwall. Choose a sequence (dynamic or static option) then finish as for North Terrace Stroll. Extended draws for both headwall bolts are mandatory. FA: Craig Ingram, 2006 | 27 | 20m | |||||
| 25 |
★ Crossroads Direct LHV
Climb Crossroads to the roof (where it joins Pivoting Head) then traverse right above the lip of the roof to the draw above the North Terrace Stroll roof, and keep going right to the KPDM chains. Unsure on the grade - but felt harder than Tim and easier than Crossroads Direct. FA: Paul Kinnane, 4 Jan 2020 | 26 | 7 | |||||
| 26 |
★ Strolling
Once considered to be 'the 29 project' - that was until Mick waltzed up it during his Summit love affair - grading it 7b+ (26) - at a time when he was doing 28's in two or three tries. Takes The Stroll to the roof, then traverses left into large underclings to gain the Crossroads RHV crux, and finishes as for that. Previously unrecorded. Could be 28. FA: Mick Wells, 2013 | 27 | ||||||
| 27 |
★★ Ticket to Ride / (Linkup)
IP to the roof, then traverse left through Payneham, past North Terrace and head through the roof of Strolling/Crossroads direct FA: Thomas Boehm, 12 Sep 2020 | 29 | 20m | |||||
| 28 |
★★ Crossing the Stroll
Links the start of Crossroads into the finish of North Terrace Stroll. Classic. FA: Craig Ingram, 2006 | 25 | 20m | |||||
| 29 |
★★ Evolution of an Hourglass
Start up Crossroads, go into The Stroll at its rest point, then prior to main (top) roof - traverse right into KPDM. Finish as for this. FA: JayT, 2006 | 27 | 23m | |||||
| 30 |
★★ Evolution of a Wine Glass
Crossroads then diagonally right into KPDM then traverse the lip of the small roof to join Peregrine at its anchor. | 23 | ||||||
| 31 |
★ Evolution of a Beer Glass
KPDM with the Crossroads start. Crossroads for first 2/3 bolts, then traverse right into The Stroll gaining the big jugs up and left of the fixed 'biner, then finish up the remainder of KPDM. | 26 | 23m, 7 | |||||
| 32 |
★★★ North Terrace Stroll
Quite a hard onsight. Unlikely moves epitomise both crux's of this outstanding route, which breaks through the top main roof on its leftside (past the fixed 'biner). Start: Start below a very high 1st ring bolt, climb to this, then onwards to the fixed blue 'biner (1st crux). Take the left-trending line of jugs up and left then through the main roof and up. | 25 | 20m | |||||
| 33 |
★★ KPDM / Kensington Park Duck Massacre
Takes the right-hand major roof weakness. Start as for NTS and follow it to the blue 'biner. Keep on track heading left but then kick back right through the overlap to the lip jug. Make a hard slab move to reach the break, then blast straight through the main roof via the obvious line (fixed 'biner). Back jump from the last bolt to clean. FA: Malcolm Matheson, 2000 FA: Stuart Willams, 2000 | 27 | 20m | |||||
| 34 |
★★ Pain on Payneham
Climb KPDM to the top roof, then traverse with trepidation leftwards to the finish of 'North Terrace Stroll'. Could do with another bolt! FA: Stefan Schiller | 26 | 23m | |||||
| 35 |
★★ Pushin' Into Payneham
Links Itchy Fingered into Payneham FA: Justin Taylor, 2006 | 28 | 25m | |||||
| 36 |
★ Itchy Fingered FNG
To screwgate on Stroll then up and right to Peregrine belay FA: Matt Adams, 2000 | 26 | 10m | |||||
| 37 |
★★ Lost Property / KPDM Direct
KPDM Direct, slightly harder than KP, but easier than IP! Takes North Terrace Stroll to the fixed biner (2nd bolt) then fires directly up through the post-crux moves of Intellectual Property and rejoins KPDM at it's 3rd bolt. Consistent! FFA: Nick Miguel Ducker, 2018 | 27 | ||||||
| 38 |
★★★ Intellectual Property / (KPDM link up)
Links Itchy Fingered into KPDM - a longstanding problem finally solved. FA: Steve Pollard, 2000 | 28 | 20m | |||||
| 39 |
★ IP Extension
At the lip of IP, head right and run it out to the chains of Eddie, finishing up that routes extension. Surprisingly good, rope drag isnt too bad considering.. FA: Thomas Boehm, Jan 2020 | 28 | 25m | |||||
| 40 |
★★ Slanted and Enchanted
Start up 'Peregrine' RHV until through its crux. Clip the bolt of 'Brotherhood' and traverse left into Itchy Fingered. Continue and finish as for 'North Terrace Stroll'. FA: Craig Ingram | 26 | 25m | |||||
| 41 |
★★ Peregrine / Peregrine 1st pitch
Local warm up route. | 21 | 9m, 3 | |||||
| 42 |
★ Peregrine Pitch Two
Bear up R, then through a roof and up the wall to a DBB. The original Peregrine 17M5 had 5 pitches but climbing above the 2nd pitch is off limits. FA: Stuart Fishwick, Richard Horn & Doug McLean, 1970 FFA: Kim Carrigan, Jon Chester & Greg Moore, 1979 | 23 | 14m | |||||
| 43 |
★ Brotherhood of the Black Chicken
An eliminate! Takes a contrived lefthand version of 'Peregrine' past an additional fixed hanger. Finish at the loweroff of PRHV. | 23 | 7m | |||||
| 44 |
★ Peri Peri Chicken
As contrived as its name! Start up 'Peregrine RHV', and at the first bolt traverse left below the crux to the first bolt of 'Peregrine'. Finish up 'Brotherhood of the Black Chicken'. FA: Sundance Bilson-Thompson, 13 Dec | 23 | 9m, 4 | |||||
| 45 |
★ Peregrine RHV
The most fallen off crux move at the Summit. Takes the easy juggy start below the 1st ring bolt to a big move for a well-chalked crimp/slope - and a reach out left to a jug. Finish up on the slab. | 23 | 9m, 3 | |||||
| 46 |
★★ Coming at ya Pussy / Punching / Punching the Pussy
Climb 'Peregrine LHV' and then launch up the rest of Eddie. Can also be done via the RHV start at roughly the same grade. FA: Andy Beckworth | 24 | 15m, 4 | |||||
| 47 |
★★ Pussy Extension / Punching Extension
Pussy into Kill Like a Madam finish (pitch 2 of Peregrine finish) aka 2nd chain. Plenty of ascents, just previously unrecorded. Hard for the grade! | 24 | ||||||
| 48 |
★ Eddie-Peregrine
Been done ages ago but not recorded on this site. Up Eddie until it reaches out left within a move of Peregrine then finish up that route. | 23 | ||||||
| 49 |
★★ Eddie Misses the Point
A Summit classic. Optimal power-endurance climbing at the grade. Start as for 'Peregrine' RHV but launch directly up past the 1st bolt to a 2nd. Break back left via a crimpy move (crux) into 'Pussy' and finish at the chain. FA: Stuart Williams, 2000 | 25 | 15m, 4 | |||||
| 50 |
★★ Eddie Extension
Eddie Misses the Point into Kill Like a Madam finish (2nd pitch of Peregrine). Unrecorded previously but had plenty of ascents. | 25 | ||||||
| 51 |
★ Why So Serious?
Climb Eddie or Tim to the chain then against your better judgement, launch up and left through a runout extension to finish on the KPDM anchor. FA: Justin Taylor, 2015 | 26 | 16m, 5 | |||||
| 52 |
★★★ Kill like a Madam
Link 'TITG" into 2nd pitch of peregrine. FA: simon wilson | 26 | 23m | |||||
| 53 |
★★ Tim in the Gym
Has had more laps run on it than the 'Adelaide' Oval... Start as for Eddie, then trend rightwards to the big roof. Clip the lip bolt, dyno, and finish directly at the chain. A tad harder than Eddie. | 26 | 15m | |||||
| 54 |
★★ Hutt Street Homies
A worth while traverse which will test your shoulders and has enough independent moves to be worth while. Start as for Eddie and climb to it’s second bolt. Now climb directly right to the second bolt of Dudley via a big span move. Then move up and right via another span move through the second bolt of Don’t Rain on the Parade, climb Parade to its the mantle, then traverse right to the chains of Natives are Restless. (Or finish up Rain on the Parade for the full package - Eddie and Dudleys Excellent Adventure) FA: Phil Davis, 16 Aug 2020 | 26 | 7 | |||||
| 55 |
★★ Eddie and Dudley’s Excellent Adventure / The Excellent Adventure
The full package! Climb Hutt Street Homies to the Mantle of Don’t Rain on the Parade and finish as for that route (@ Kill Like a Madam / Peregrine p3 chains) FA: Phil Davis, 13 Aug 2020 | 26 | 10 | |||||
| 56 |
★★★ The Mini Adventure
The shorter, easier and original version of Eddie and Dudley’s Excellent Adventure. Start up Dudley in the Gym, then break right under the Tim dyno to pull the crux moves and join Rain on the Parade. Milk the rest after the traverse then finish as for Rain to the top (2nd) chains. FA: Mike Garrett, 2 Aug 2020 | 25 | 22m, 9 | |||||
| 57 |
★ Dudley in the Gym / Shell Shock
A tad easier than Tim! The direct start to Tim, climbing straight up to the roof from the right side of the Cave. | 25 | 15m | |||||
| 58 |
★ Don't Rain on The Parade
FA: Michael Hillan | 24 | 25m, 4 | |||||
| 59 |
★ The Natives are Restless P1
Start 2m R of the corner. Climb past 2 bolts to a horizontal, traverse R to 3rd and then a technical finish to DBB on the R. | 21 | 10m, 3 | |||||
| 60 | Black Dwarf / The Attack of the Headless Peregrine | 20/21 | ||||||
| 61 |
★ Red Dwarf
Shallow groove between Black Dwarf and Easy Peasy. Solo. Probably been TR'd before. FA: 2011 | 20 | 9m | |||||
| 62 |
Easy Peasy
Furthest right hand line of bolts on right side of Cave as you walk in. | 20 | 10m | |||||
| 63 | Pedestrian Rule | 24 | ||||||
| 64 | ★ AUMC Route | 15 | ||||||
| 65 | ★★ AUMC Route DF | 15 | ||||||
| 66 | ★★ Trout Fishing in America | 22 | ||||||
| 67 | ★ Endive | 23 | ||||||
| 68 |
★★★ Don't Panic
A varied and sensationally exposed single pitch climbing the entire height of the top cave.Start as for endive,but instead of heading to the corner (and belay ledge) stay in the crack, a couple of committing moves above gear lead to the traverse on endive's second pitch, follow this traverse to the line of bolts in the middle of the cave and follow the bolts to the small ledge a couple of metres above the last bolt. Best to lower from the top bolt to avoid trashing the area above the cave. FA: 2015 | 26 | 30m, 3 | |||||
| 69 |
Chad's project
The line of bolts up the middle of the cave, great line with a couple of very hard moves in the roof. | |||||||
| 70 |
TB or not TB
The bolted route at the right hand end of the top cave, don't let the start put you off a good route. | 24 | ||||||
| 71 |
Somebody Put Something in My Drink
FA: Mark Witham & Stuart Williams, 1988 | 14 | 12m | |||||
    |
||||||||
1.2.1. Cave Bouldering 13 routes in Sector
- Summary:
-
All Bouldering
description
Random list of some of the more popular problems in the Cave
| Route | Grade | Style | Selected ascents | |||
|---|---|---|---|---|---|---|
| 1 | ★ The Thing | V4 | ||||
| 2 | ★ The Weakest Link | V5 | ||||
| 3 | ★★★ Pinch Two Eliminate | V4 | ||||
| 4 | ★★★ Ronnie's Summit Dyno | V6 | ||||
| 5 | The Big Dyno | V4 | ||||
| 6 | ★★ Standard Cave Traverse (High) | V0 | ||||
| 7 | Crystal Undercling | V3 | ||||
| 8 | The Iron Cross | V3 | ||||
| 9 | ★★ Standard Cave Traverse (Low) | V2 | ||||
| 10 | Sharik's Problem | V9 | ||||
| 11 | Luke's Undercling | V5 | ||||
| 12 |
★ Peregrine LH Footless
Footless to the 2nd bolt | V3 | ||||
| 13 |
Peregrine Circuit
Peregrine RHV to after crux then downclimb Peregrine LHV and back to start. Slightly harder in reverse. | V3 | ||||
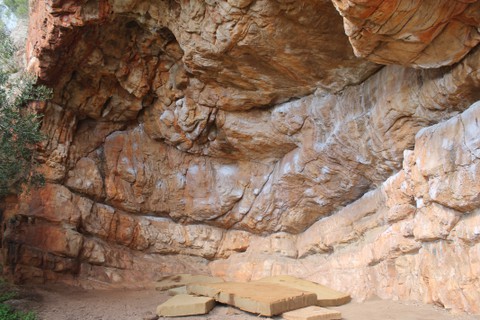
1.3. The Hole 61 routes in Crag
- Summary:
-
Bouldering, Sport climbing and Rock climbing
Lat / Long: -34.922164, 138.712030
description
Intro Adelaide’s premier (only) sport climbing venue The Summit is a site to behold. Carpeted, in situ couch and mats it is a place to sit back, relax and wait for someone else to put the draws in for you! But The Summit is not for the faint hearted, the climbing is powerful and steep. Christ even the slabs are steep! The routes are predominantly bolted with either stainless expansion or glue in rings and are in good condition (at the time of writing) with most routes finishing with lower offs.
approach
The Summit is located on The Old Norton Summit Road, in the next valley south of Morialta. To get there drive east out of the city and head up Magill Road. Continue straight onto The Old Norton Summit Road for 2.7km, the parking is on the right hand side. The easiest place to turn around is a small pull out 100m past the car park on the right. Once you have turned around, facing back towards town, park on the left hand side being considerate of others as there is limited space. Walk down the hill, west, and the track to the crag is on the left. Walk up the steep track taking the time to read the sign on the right. Refer to ACCESS CONSIDERATIONS for further important information regarding this topic. After the big steps the track levels off and branches, the left path to the Cave 1 min, and the right heads up the Hole, 12 secs.
ethic
Noise levels
This is a public area so please be considerate of others by keeping noise, music and swearing to a minimum. Think about taking a rubbish bag with you to help keep the place clean.
Imports/exports (rubbish/mats/tape)
Normal rules apply, take everything with you, this includes finger tape and cigarette butts. Help keep rubbish to a minimum by removing any badly damaged mats before they create an unsightly mess.
| Route | Grade | Style | Selected ascents | |||||
|---|---|---|---|---|---|---|---|---|
| 1 |
Come Out Fighting Start
Come Out Fighting past the small two-finger pocket to the pinch then to the hold just under the main roof. | V6 | ||||||
  |
||||||||
| Route | Grade | Style | Selected ascents | |||||
| 2 |
★★ Come Out Fighting
First line of bolts on your left as you enter the Hole. Stuart Williams with the vision and Sharik Walker with the send. Originally graded 29. V10 if you boulder it. FA: Sharik Walker, 1998 | 30 | 8m | |||||
| 3 |
★★ Stay in Hiding
Come Out Fighting extension. "Climb to the glued on ear hold then head right to the circus street chain, then all the way out to the end!" FA: Mick Wells, 2014 | 31 | ||||||
| 4 |
Catch & Match
Previously unrecorded but climbed years ago (like 100's of others). A 3-move problem. Start on a gaston crimp and small pocket, launch RH to the sloper, match, then straight to Boing's finish hold. | V5 | 2m | |||||
| 5 |
★ Match Maker
Start with 2 finger pockets, LH move to small ledge, then RH to 1finger pocket, match on slope ledge, jug to finish. | V3 | 2m | |||||
| 6 |
★ Boing is the Word
Sit-start with right hand in big shothole left of 'The Shining Path' and left hand in two finger pocket then make a 'La Rose' move out left (RH) to a 2/3-finger pocket then left hand to the big pinch. Up to 3/4-finger pocket (RH), then all the way to the top jug with your left. Match. 5 move classic eliminate. FA: Matt Adams | V5 | 3m | |||||
| 7 |
★★ Clutch-Boing Link
As per name. Clutch into Boing is the Word. FA: Andy Beckworth | V6 | 4m | |||||
 |
||||||||
| Route | Grade | Style | Selected ascents | |||||
| 8 |
★ Clutch
An attempt at a sloper problem in the Hole! Start matched on sloper above Boing pocket. Move left to sloper and match that. Move left again to sloper then cross under with right hand to sloper (crux) below glued jug. Match (or not) that and up easily to glued jug. FA: Andy Beckworth, 1997 | V5 | 2m | |||||
| 9 |
Swing Thing LH
Dyno Problem from the starting hold of TC, to jug to the R. | V4 | 2m | |||||
| 10 |
Swing Thing RH
Start on lower slopers just R of the jug, dyno to jug. | V4 | 2m | |||||
| 11 | Pinch Punch | V4 | 3m | |||||
| 12 |
★★ French Maid
Boulder route just left of The Shining Path through the roof finishing at SP chain. FA: Trent Searcy | V10 | ||||||
| 13 |
★★★ The Shining Path
Very short power route mainly on underclings ending at the padlocked chain. Given 30 by Matt it was downgraded by Stuart Williams on the 2nd ascent to 29. Now a V10 boulder problem. FA: Matt Adams, 1993 | V10 | 7m | |||||
| 14 |
★★ The Shining Burger
Links the Shining Path into the top of Filipino Furburger. Grade 30 route. FA: Trent Searcy, Feb 2017 | V11 | 9m | |||||
| 15 |
★ Shining Burger Out
Climb Shining Path take the rest then launch into Filipino all the way to the final chains. FA: mattwarner, 15 Jan 2022 | 31 | ||||||
| 16 |
Burger Fight
Filipino Path boulder then traverse leftwards to the chains on Come Out Fighting FA: trentsearcy, 2021 | 30 | ||||||
| 17 |
★ Filipino Path
Filipino to the 2nd good pocket, then left through sidepull to finish at the Shining Path padlocked chain. | V8 | 6m | |||||
| 18 |
★★ Filipino Furburger
Originally established by Matt Adams, short extension to the circus street chains later added by Sharik Walker. Takes the very overhanging pocket line just left of the marked Stugang start. FA: Matt Adams & sharik walker, 1994 | 29 | 9m | |||||
| 19 |
★★★ Filippino Out
or alternately "Filipino Furburger" into "Nirvanoxyne" FA: Trent Searcy 2012 FA: Trent Searcy, 2012 | 31 | 15m | |||||
| 20 |
★ Victims of Crime
A traverse starting at Stugang and then linking into Clutch-Boing Link. FA: Andy Beckworth, 1997 | V7 | ||||||
| 21 |
★★★ Stugang Willich
Marked with STUGANG! The original boulder/route in the hole and still the best. Hard move up to LH pinch/sidepull, then slightly right into undercling and onwards. Finish at the double shotholed break (original line did not use right hand undercling at the top). FA: Stuart Williams, 1993 | V7 | 6m | |||||
| 22 |
★★ Stugang Right Hand
Previously unrecorded but done decades ago. Scartrek start to the RH sidepull pocket, then LH into a sidepull undercling, cross RH to the good edge on Stugang, then into the undercling crux of that route. Finish as for Stugang. | V7 | 6m | |||||
| 23 |
★★ Stugang Ext Bloc
Stugang Extension past the hard gaston move, finishing on the Circus Street jug. | V8 | ||||||
| 24 |
★★★ Stugang Willich Extension
The obvious extension to Stugang, coming off the shotholes straight into a gaston crux, then linking into 'Dr Strike' to finish. Has been soloed, but not regularly! FA: Matt Adams, 1994 | 28 | 12m | |||||
| 25 |
★★ Stugang and the 7 Draws
Stugang Extension to Circus Street chain ie Snack Related Mishap into Nirvanoxyne. Start: As for Stugang. FA: Frederic Bonnet, 2006 | 31 | 16m | |||||
| 26 |
★★ Snack Related Mishap
Start as for Stugang and climb this through the extension crux, then finish as for 'Circus Street'. FA: Matt Adams, 1995 | 28 | 10m | |||||
| 27 |
Stugang Extension Extension / Super Extension
Stugang Extension into the finish of 'Wormhole'. FA: Frederic Bonnet, 2007 | 30/31 | 16m | |||||
| 28 |
★★ International Passport to Smoking Pleasure
Climb Stugang then up via undercling to Circus Street chains. FA: Matt Adams, 1995 | 28 | 10m | |||||
| 29 |
★ Osaki Dolphin
Sit start just below Stugang on undercling and boulder slightly right. Has been linked into Stugang or Scartrek and goes at V7. FA: Andy Beckworth, 1997 | V5 | ||||||
| 30 |
★★★ Mr Choss
International passport to the cave entrance. The most direct line in the Hole. FA: Frederic Bonnet, 2009 | 31 | 12m | |||||
| 31 |
★★ Scartrek the Next Laceration
Dynamic boulder problem starting at the base of Stugang but heading right to the sidepull pocket. Dyno out to the 3-finger pocket in the roof, then out to the hard-to-hit slot, finishing up and right on the big jug under the main roof (Diplomacy's rest). FA: Simon Wilson, 1995 | V7 | 7m | |||||
| 32 |
★★ Scartrek Diplomacy Linkup
Start up Scartrek, then finish up Diplomacy at the shotholes. | V8 | ||||||
| 33 |
★★ Nirvanoxyne
Starts as for 'Scartrek' but avoids the Scatrek finish and instead launches straight into the last half of 'Diplomacy'. Then does the Stugang 'Extension' crux moves, followed by the finish of 'Circus Street'. Continue all the way out to the entrance to the cave. FA: Fred Bonnet, 2005 | 31/32 | ||||||
| 34 |
Feral Muffins
Start as for 'Diplomacy' then go direct through roof on pockets through the worst rock in the Hole. Ends as a boulder problem on the Dr Strike jug (the hole), but was done on a rope by Matt to that routes finish (grade 31). FA: Matt Adams, 1995 | V10 | 7m | |||||
| 35 |
★★ CO2
Scartrek-Diplomacy link then Stugang Ext gaston crux into The Wormhole Search. FA: Fred Bonnet, 2009 | 33 | ||||||
| 36 |
★★★ Slime
Starts seated right of Osaki Dolphin, traverse under Scartrek over the slime to the Wormhole search via pocket, edges and underclings then end on Diplomacy jug! FA: Trent Searcy, 2023 | V11 | ||||||
| 37 |
★★ Scarf**kers Inc.
Sit-start on undercling/pocket between Stugang Willich and Diplomacy (currently has a chalked S below). Head left through right-hand hold to gain a good left-hand undercling. Move up through a right-hand crimp to gain the first pocket on Scartrek with left-hand and finish as for this route. If you cross under to Scartrek pocket and finish up Stugang take 9. Three stars FA Trent Searcy 2021. FA: Seth | V8 | ||||||
| 38 |
★★★ Scarfuckers into Stugang / Steep in the Deep
Start as for Starfuckers but at the sloper cross under to Scartrek pocket sidepull and then up Stugang RHV to finish. Classic flow. FA: trentsearcy | V9 | ||||||
| 39 |
★ Diplomacy into Scartrek
Start as for Diplomacy and head left into Scartrek to finish. FA: Sharik Walker, 2000 | V8 | ||||||
| 40 |
★★ Fred's Wormhole Problem
aka the start to The Wormhole Search. Just left of Diplomacy gain reasonable sidepull (RH in Diplomacy pocket) then gaston awkward pocket to press up and left into thinner 3-finger (often wet). Lunge for the jammed block in roof, then Diplomacy jugs. | V8 | ||||||
| 41 |
★ The Wormhole Search
Fred's finest linkup. Given 33 but settled at 32 after repeats? Start as for 36, then through Stugang Extension crux then climb the holds just right of circus street linking back to the end of the cave. FA: Frederic Bonnet | 32 | ||||||
| 42 |
Moustaki
Wormhole Search into Nirvanoxyne. FA: Frederic Bonnet, 2008 | 31/32 | ||||||
| 43 |
★★ Ultra Pleasure Vibe Bloc
Ultra Pleasure Vibe to the Circus Street jug. | V8 | ||||||
| 44 |
★★ Ultra Pleasure Vibe 2000
Climb the 'Scartrek' boulder problem. Just shy of the Stugang shotholes, move into a big undercling and then grab the Stugang 'Extension' gaston hold with your LH (as a sidepull). Perform the biggest drive-by in the world and gain the 'Circus Street' traverse line. Finish as for 'Stugang Extension' ie. take a rope! Probably 30. Start: As for 'Scartrek'. FA: Sharik Walker, 2000 | 29 | 17m | |||||
| 45 |
★★ Diplomacy-UPV Linkup
A variation on UPV. Instead of starting as for Scartrek, start as for Diplomacy. At the 'blob', gain big undercling and punch out to the sloper. Reach into the Stugang Ext gaston hold as a sidepull, then dyno for the Circus Str jug. Finish as for 'Stugang Extension'. FA: 2000 | 29 | 17m | |||||
| 46 |
★ Diplomacy-UPV Bloc
Diplomacy to the big undercling, then out right to the sloper, then right a move and finish on the Circus Street heel hook horizontal. | V7 | ||||||
| 47 |
★★ UPV Direct boulder
Start as for Scartrek into Diplomacy but head right into big undercling then out to sloper and Circus Street horizontal. FA: Thomas Boehm | V8 | ||||||
| 48 |
★★ Ultra Pleasure Vibe 2000 Direct
Start as for Scartrek or Diplomacy (29 or 28) and climb direct to the Circus Street horizontal via undercling, then up to the birds nest of Dr Strike, and finish as for that route. FA: tom boehm | 28 | ||||||
| 49 |
★★ Snaking Cowboy
The original line. Scartrek into Circus Street finish. FA: Matt Adams | 28 | ||||||
| 50 |
★★ Diplomacy Start aka. The Pocket Problem
Slightly lower start than the 'Diplomacy' route - starting on the twin 'eye' pockets - then climbing into 'Diplomacy' - finishing at the big jug under the roof. It's probably wise to jump off here! FA: Matt Adams | V5 | 7m | |||||
| 51 |
★★ Diplomacy
Standing start in the depths of the Hole under the line of pockets. Very steep pocket pulling up to the resting jug under the roof - then out left to finish at the Stugang shotholes (break). FA: Andy Beckworth, 1997 | V7 | ||||||
| 52 |
★★ Diplomatic Immunity
Links 'Diplomacy" into 'International Passport" FA: Sharik Walker, 1998 | 27 | 12m | |||||
| 53 |
★★ Dr Strike and the Hole Hog Hurricane vs the Funky Bullster
A power-endurance fest starting just right of 'Circus Street' and heading up via the 'shotgun' blast of finger pockets. Traverse left along jugs to the 'hole' - then up past shothole to match the final jug in the roof (after the last bolt). FA: Matt Adams | 25 | 10m | |||||
| 54 |
★★ Circus Doctor
FA: Matt Adams | 26 | ||||||
| 55 |
★ Circus Street
A well-named route starting up and right of 'Diplomacy' (on the higher platform) and traversing the lower lip of the Hole roof via a series of heel hooks and 180 degree twists. Finish at the shothole just after the dyno (crux). Hard for the grade. FA: adam gower, 1995 | 25 | 10m | |||||
| 56 |
★ Dr Strike into the Wormhole Search / Dr Strike extension
aka. 'Dr Strike' 'Extension'. 'Dr Strike' to the chain, then link into Nirvaoxyne finish. FA: Frederic Bonnet, 2000 | 30 | 12m | |||||
| 57 |
★★ Dr Strike's Circus / Fingering Your Date for Blood
Originally called 'Fingering Your Date For Blood'. Link up of 'Dr Strike' into 'Circus Street'. A 19-move power-enduro problem at the grade. Start: As for 'Dr Strike'. Climb to hole, then keep traversing left via a dropdown move onto the 'Circus Street' jug and onwards. FA: Matt Adams, 2000 | 25/26 | 10m | |||||
| 58 |
★★ Strike Circus Extension
Strike Circus to the chains at the cave entrance. | 29 | 15m | |||||
| 59 |
Mr X
Stugang Ext to the Circus Street jug, then reverse Strike-Circus into Gorgeous Guys and finish as for that route. FA: Frederic Bonnet, 2010 | 30 | ||||||
| 60 |
★★ Gorgeous Guys and Lipstick Lesbians
Takes the furthest righthand line up via good pockets to the roof - then strenuous moves left to the chain. FA: Luke Geelen, 2000 | 26 | 10m | |||||
| 61 | ★ Diplomacy Half (delete) | |||||||
1.4. The Right Wing 6 routes in Crag
- Summary:
-
All Trad climbing
Lat / Long: -34.922470, 138.712523
| Route | Grade | Style | Selected ascents | |||
|---|---|---|---|---|---|---|
| 1 | Asinine | 16 | 35m | |||
| 2 | Continental Drift | 19 | 40m | |||
| 3 | ★ Tectonic plates | 21 | 25m | |||
| 4 | Karstaways | 21 | 40m | |||
| 5 | Bloggs Direct | 17 | 31m | |||
| 6 | Subduction Zone | 19 | 33m | |||
1.5. The Bachelor Pad 68 routes in Crag
- Summary:
-
Mostly Bouldering
Lat / Long: -34.923248, 138.705346
- NOTE:
- The same regulations apply here as to the main area of Norton Summit (i.e. no climbing after sunset or on fire-ban days). Try to keep noise pollution to a minimum, stick to the walking trails and take your rubbish with you.
description
Intro
The biggest bouldering area in Adelaide.
approach
General Location
The Pad is located on The Old Norton Summit Road, about 1km down hill from The Summit (the climbing area not the actual summit!). To get there drive east out of the city and head up Magill Road. Continue straight onto Old Norton Summit Road for 2.5km. About 100m after passing house number 225 (lot number 59), there is a tiny pullout for parking on the left side of the road.
There is only space for a few cars to park, so be courteous of others. There are extra parking spaces further up the hill near the next house's driveway. The track up to The Pad is located on the other side of the road (south), opposite the Stobey pole about 50m downhill of the parking pullout. Cross the guardrail and you will see the track heading across the creek and up the hill. It take about 10 minutes of uphill slog to reach the cliff.
The location marked on the map has the point of the triangle at the beginning of the trail on the Old Norton Summit Road. The base of the triangle is at the cave itself.
ethic
Noise levels
This is private property so please be considerate by keeping noise, music and swearing to a minimum.
Imports/exports (rubbish/mats/tape)
Normal rules apply, take everything with you, this includes finger tape and cigarette butts.
Track maintenance
Track maintenance is the responsibility of any climber that chooses to frequent the Pad.
history
First discovered in 1995 by Stuart Williams and Simon Wilson whilst looking for routes they quickly sunk some bolts in what would become Bachelor Blend 23 and named the cave the Bachelor Pad. Word eventually filtered out and the Pad's bouldering potential started to be tapped in 1996 by an eager young crew. Many of the easier lines were climbed during this time but it took the visit from international rock stars Klem Loskot and Toni Lamprecht in 1999 to really put this place on the map. On a flying trip to Adelaide to recuperate from developing the bouldering in the Grampians over two days at the Pad they opened Madball sit V13, Hot Chocolate V10, Madball stand V9, Twist and Shout V9 and Benelli's Extension V8/9. Over the next few years local Sharik Walker filled in the blanks with ascents of the classic Butchers V10, Tao V11, Cocktoe V9, Kid Indestructible V9, Toe to Toe V7 and Non Intentional Lifeform V10.
On first acquaintance with this place you could be forgiven for thinking that the 50+ problems listed in this guide must be an error. Shorter than the length of Sissy Crag (NSW), not as high as Lindfield, The Fear Factory or Akuna Bay (NSW), and less inspiring than Trackside or Anderson’s (Vic) – it is nevertheless home to the hardest problems in South Australia.
Not only that, but it is also less than 20 minutes drive from the city, 3 minutes drive from a pub, and stays dry in the rain. What more could you want? Difficulty ranges from V0-V13, with just under half of the problems sub-V6, and all the rest being mainly in the V6-V10 bracket.
 |
||||||||
| Route | Grade | Style | Selected ascents | |||||
|---|---|---|---|---|---|---|---|---|
| 1 |
The One Legged Cougar
Far left hand side of cliff. Stand-start off chalked horizontal, then up left then back right following the line of least resistance to the positive holds under the roof. | V0 | 3m | |||||
| 2 |
Bachelor Blend
Start up "Fat Neck" to the first bolt, continue out through the roof. FA: Simon Wilson & Stuart Williams, 1995 | 23 | 14m, 3 | |||||
| 3 |
★ Fat Neck
Sit-start on big, flat, horizontal chalked jug. Place feet so they are off the ledge you are sitting on, then head up via a gaston pinch, a V-slot and some crimps to a jug directly above. | V1 | 3m | |||||
| 4 |
★ The Fish
Same start as Fat Neck. Head slightly left and up into underclings, then follow jugs (and the bolts), jumping off when you get scared. The high chalked jug is the generally accepted finishing hold. | V3 | 4m | |||||
| 5 |
★★ Fat Neck to the Bone
Same start as Fat Neck. Head R and up into underclings and side-pulls. Then continue R past the bolt via crux moves using a crimp rail to reach the finish jug of The Bone. | V4 | 3m | |||||
| 6 |
★★ Free Mahi Mahi Direct / the orginal line
Start up Fat neck then traverse righ to the sloper then right to the small undercling in the roof and up via the big LH sidepull and crimps. FA: | V6 | 3m | |||||
| 7 |
★★ Catch Mahi
Same start as Fat Neck, but directly right into large undercling, then to LH sloper and better RH sloper holds. Up and left through more underclings/sidepulls to good, round jug hold up under big roof. | V3 | 3m | |||||
| 8 |
★ Red Snapper
Foot eliminate. Start as for Catch Mahi, then rightwards across underclings and KMWISF start holds, into The Bone and finishing for this problem. Keep feet above the slightly off-horizontal seam at the base. | V5 | 3m | |||||
| 9 |
Kiss Me Where It Smells Funny
Dyno eliminate. Standing start using small LH nubbin crimp on hanging slab, and RH on adjacent sloper with thumb press. Jump for jug under roof! | V7 | 3m | |||||
| 10 |
★ The Bone
Sit start bellow and 1m R of the U-shaped jug, finish in the big jug under roof. | V2 | 3m | |||||
| 11 |
★ Faith
Crouching start under KMWISF going LH into undercling, RH into gaston press with thumb catch, then ‘faith move’ to LH nubbin crimp of KMWISF (employ a good spotter). R to big scoop jug, then dyno for big jug under roof. | V3 | 3m | |||||
| 12 |
The Bone, Double Dyno
Match both hands in the U-shaped jug of The Bone, then launch (double-handed) diagonally leftwards for the finish of Mahi Mahi. | V2 | 3m | |||||
/bc/c3/bcc316f0aabb6c382ccedcf7ed269add2a13b291) 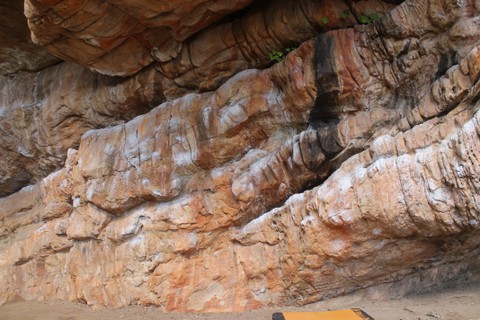 |
||||||||
| Route | Grade | Style | Selected ascents | |||||
| 13 |
★★ Royale
Start on the big sidepull, up diagonally left through serrated edges to the horizontal break, continue up past the letterbox fininshing out right on the hanging block. Pad it up well! | V2 | 4m | |||||
| 14 |
Derf
Sit-start on chalked block. Up and slightly left to jugs at the break. | V0 | 3m | |||||
| 15 |
★ Warmup / Warm Up the Horn
various warm up lines and traverses throughout the pad | V0- | 3m | |||||
| 16 |
★ Warm Up Double Dyno
double-hand dyno from the obvious jugs to the big rounded hold in the break. | V2 | 3m | |||||
| 17 |
★ Buttworth
Sit-start on jug rail. Up to roof on jugs. | V0 | 3m | |||||
| 18 |
Jacques the Potato
Sit-start with underclings as for Hot Chocolate. Paste your feet on and crank to the pointy jug with your left, match and then more easily up to jugs on traverse line. | V4 | 3m | |||||
  |
||||||||
| Route | Grade | Style | Selected ascents | |||||
| 19 |
★★ The Grind
Warning Fixed Gear: seized gear The line of side-pulls/laybacks through the middle roof. Originally given 28 by the FA (who didn't use kneepads but did utilise 2 kneebars and two shots, stating 'he got lucky'). Reason for the upgrade was due to it going unrepeated for 12 years despite strong efforts from people that had climbed somewhat harder things elsewhere. Then knee rubber was invented... FA: Steve Pollard, 2003 | 28 | 14m, 4 | |||||
| 20 |
★★ Aftertaste
Pull on at massive bucket halfway along traverse line (start of Chinese Nuggets). Motor right past a pinch, a pocket and some cruxier holds to reach the sharp jug at the right-hand end, then up to big sloper to finish. Can finish higher for some spicy fun and V4. FA: 1996 | V2 | 2m | |||||
| 21 |
★★ Chocolate Aftertaste (high traverse)
Traverse high break from large chalked horizontal jug to a point where you can drop down via a good pocket/jug to the starting hold of Chinese Nuggets (monster bucket midway across). Continue though to jug at the end of the traverse line, then up to match on big sloper. FA: Andy Beckworth | V4 | 2m | |||||
| 22 |
★ Chinese Nuggets
Standing start. From huge jug in middle of traverse line go up and left to jug pocket, then up. | V1 | 3m | |||||
| 23 |
★★ Chinese Nuggets RHV
Start as for CN but trend right after first two moves and end on high jug. | V1 | ||||||
| 24 |
★ Chinese Nuggets (Campus)
"Chinese Nuggets" without feet. | V4 | 3m | |||||
| 25 |
★★ Chocolate Aftertaste Low
Start as for Chocolate Aftertaste High but drop down to low level traverse from jugs using LH pocket/sidepull. Motor rightwards via a good open pocket and a ‘fin’ pinch, then into the original line at the 'drop down' pocket. Finish as for Chocolate Aftertaste High. FA: Luke Geelen | V6 | 2m | |||||
| 26 |
★★★ Full Chocolate Aftertaste
Hot Chocolate into Chocolate Aftertaste, finishing on a higher jug via an exciting sidepull move. | V10 | ||||||
| 27 |
★★ Hot Chocolate
An old local project nabbed by Klem! Sit start with left hand on the Jaques underclings. Make a move (crux) into the left sidepull above then right hand into good undercling, then into and finish as for Chocolate. AKA the sit start to Chocolate (known as the Pinch). Given 7c/V9 by Klem but upgraded by 2nd and 3rd ascentionists. FA: Klem Loskot FA: 1999 | V10 | 3m | |||||
| 28 |
★★ Hot Chocolate RHV
Was thought to be Non Intentional Lifeform by the FA and subsequent ascentionists. Starts immediately right of Hot Chocolate with left on the right hand hold and the right hand on a small undercling. Up into the undercling and sidepull of Hot Chocolate then as per that problem. Essentially an easier independant start. FA: Jordan Grant | V9 | 3m | |||||
| 29 |
★★ Milk Chocolate
(Weaker than Hot Chocolate). A higher sitstart than Hot Chocolate. A decent sequence in its own right. Sit start with LH on Hot Chocolate sidepull and RH on its good undercling ie two moves into Hot Chocolate. Paste your feet on and punch out to the good LH sidepull pocket and top out right as for Chocolate (aka the Pinch). The wads will probably think this is a V5. FA Klem Loskot (from the true sit). | V6 | 3m | |||||
| 30 |
★ Non-Intentional Life Form
Sit-start with right hand on small scallopy undercling (SGF low start hold) and an edgy pinch with the other. Punch up with your left to a hold on the lip then as per SGF from the undercling and then to the top. A very hard one mover. Crouch start goes about V5/6 and is worthy of your time. FA: Sharik Walker | V10 | 3m | |||||
| 31 |
★ Living or Exisiting
Alternative name for SGF. Not an independent problem. Description was as for NILF. FA: Luke Geelen | V8 | 3m | |||||
| 32 |
★ Secret Gay Fantasy
Starts under main roof on reasonable undercling (RH) and poorer undercling (LH). A very powerful 5-move problem. Pop LH to intermediate ‘breadloaf’ pinch, then big move out to the pocket on the lip (LH again) – catch the breadloaf as an intermediate (RH) – then up to jug in the Aftertaste traverse line and finish as for CHinese Nuggets. V8 as a crouchstart but take 9 points if you start seated on the lower holds. FA: Luke Geelen | V8 | 3m | |||||
| 33 |
★ Meantime
Start on underclings right of SGF. Slap left to lip and decent sidepull then through with right hand to the jug start of the Aftertaste traverse. Straight up via sidepull to the top tier. A nice little independent addition to the mid grade circuit. | V5 | ||||||
| 34 |
★★ Potato Aftertaste Low
Jacques the Potato into Chocolate Aftertaste Low. | V7 | 2m | |||||
| 35 |
★ Chocolate / the Pinch
One of the original problems from 96. Start with LH on the SGF lip hold and a polished gaston jug right of it. Bust a move (LH) to the tufa pinch on Aftertaste Low traverse then hit the jug line of the upper traverse. FA: Andy Beckworth FA: 1996 | V4 | 3m | |||||
| 36 |
★★ The Ballroom Slap
Stand start holding the pinch of Aftertaste Low Traverse and the finish jug of SGF. Dyno RH to a sloping jug in the top break. FA: Steve Kelly | V3 | 3m | |||||
 |
||||||||
| Route | Grade | Style | Selected ascents | |||||
| 37 |
★ One Five Nine / One Five
If you climb this with your feet on you get a great V1. Otherwise campus from the large bucket (LH) on the Aftertaste Traverse and slightly higher smaller jug (RH) to the high flat jug, then without matching go again RH to the top! 1-5-9 standard campus measurement. Hold large bucket LH and smaller slightly higher jug RH. Make a footless campus move to the high flat jug. | V1 | 3m | |||||
| 38 |
★★ Shout / Twist and Shout - Stand start
The stand start variant to Twist and Shout, starts on large underclings followed by 3 big moves, finishing on a sloper. Please be mindful of the holds you are standing on as they are the handholds for the sit start! | V4 | 2m | |||||
| 39 |
Project
Start for twist and shout, traverse under the roof to SGF and finish for that. Very technical and hard - approx V9 + V8/9 + V8 without relief (whatever that scores only the FA will know) | |||||||
| 40 |
Sharik's Problem
Start as for Twist and Shout but head left though the obvious chalked sloper edge and undercling to the start hold of Aftertaste then up and finish on the high jug. FA: Sharik Walker | V9 | ||||||
| 41 |
★★★ Twist & Shout
Sitstart – then out across the bad crimpers/slopers on the lip. RH crescent sidepull, then left into undercling right into undercling paste right foot on and go to the triangle pinch out left (in traverse line) – then straight up to the sloper (via intermediate pinch) – and match. FA: Klem Loskot, 1999 | V9 | 2m | |||||
| 42 |
★★ Benelli's Extension
Start as for 'Twist & Shout' but keep traversing right across slopers then up into the good undercling. Work your feet out, then head up and out (through blade jug) to the finish sloper of Twist and Shout. FA: Klem Loskot, 1999 | V8 | 2m | |||||
| 43 |
★ Benelli's Extension stand start
Start on sloper and RH sloper/crimp at the end of the Benelli’s traverse (just under the underclings). Left foot on lip, then up into the good underclings. Out to the sharp jug, then cross into the good finish hold of Chocolate and finish matched on the big sloper. For V5 start with feet on ledge. Please be mindful of your feet as you will be standing on the handholds of the sitstart and the holds are starting to get polished. | V4 | 2m | |||||
| 44 |
★★ Kid Indestructible
Climb Benelli's Extension but finish up the big underclings on the far right instead of the sloper. Originally given V10 but with new beta has settled at 9. FA: Sharik Walker | V9 | 2m | |||||
| 45 |
★★ The Sharik Dyno
Starts on the finish hold of Chocolate Aftertaste traverse (jug) – then huge dyno to obvious break. How many mats have you got? FA: Sharik Walker | V4 | 3m | |||||
 |
||||||||
| Route | Grade | Style | Selected ascents | |||||
| 46 |
★★ Indestructible / Kid Indestructible - Stand Start
The V6 stand start variant to Kid Indestructible. Start as for Benelli's stand start. | V6 | 2m | |||||
| 47 |
★★★ Madball
The Pad classic. Starts LH undercling and RH pocket (Crux) – then dyno to polished sloper – then out to jug and up. Numerous sequences all hard. Was given 7b+ by Toni but consensus is V9. FA: Toni Lamprecht, 1999 | V9 | 3m | |||||
| 48 |
★★★ Madball Sit-start
Sit start to Madball - FA Klem Loskot 1999. Originally graded 8a+/V12 but later upgraded to 8b/v13 by Klem. Lots of sequences now exist. | V13 | 3m | |||||
| 49 |
★★ Lucha Libre
Stand start from the end of Madball and follow the bolts to the chains. Good movement all the way. One of the hardest outdoor (as opposed to the Hole) routes in the State. FA: Matt Warner, 19 Jun 2021 | 31 | ||||||
| 50 |
★★★ Inflatable Bulge
Madball Stand to completion then traversing right through prominent bulge and into finish on Tao/Butchers finish jug. Originally graded 11. FA: Trevor Pearce | V10 | ||||||
| 51 |
The Sharik Project
The last remaining project at the Pad and the hardest. Will be Adelaide's hardest boulder problem when sent. Starts slightly right of Madball. Stand start with hands in good underclings in back of overhang. Move out through some of the worst slopers and a pinch known to man to eventually gain the good pocket on the lip then up and finish on good holds. Set: Sharik Walker | |||||||
 |
||||||||
| Route | Grade | Style | Selected ascents | |||||
| 52 |
★★ Cocktoe
Start left of Stalker with LH on good hold in roof and RH on low pinch. Out diagonally right via pinches and a heel, then through the ‘breadloaf’ pinch , finishing directly on the Stalker final finish hold. Was easier/better before the right hand pinch broke. FA: Sharik Walker | V9 | 3m | |||||
| 53 |
★★ Stalker
Starts back of cave with feet on rock platform. Through ‘bunny ears’ undercling, out to large sloper hold, then out to obvious ‘shark fin’ hold on lip and up. Finish on large sloper/jug out and left past niche. | V6 | 3m | |||||
| 54 |
★ Restraining Order (aka Stalker Extension)
4-move extension to Stalker - finishing on Tao. FA: Trev | V6 | 4m | |||||
| 55 |
★★★ Tao
Start as for Cocktoe, then break left out near the lip via a crimp and some compression. Originally graded V12. Slightly easier than Butchers according to the FA. FA: Sharik Walker | V10 | 4m | |||||
| 56 |
★★ Butchers
Linkup of Stalker into Tao, crossing into Cocktoe through the Stalker side- pull and pinch hold. ‘Slightly harder than Tao’ according to the first ascentionist. FA: Sharik Walker. Dropped some grades from V12 due to new beta. Named for the butchering of Shariks beta on other Pad climbs. FA: Sharik Walker, 2002 | V10 | 4m | |||||
| 57 |
★ Restraining Order Special Edition
the extension to Toe to Toe finishing as for Tao/Butchers. FA: Trev; seth | V6 | ||||||
| 58 |
★ Cockless
Cocktoe into Stalker then back into Cocktoe via the LH pocket (missing the breadloaf pinch). Strangely never recordered on this site. | V6 | ||||||
| 59 |
★★ Toe to Toe
Climb Stalker to left hand jug, match, then out to breadloaf pinch then finish as for Cocktoe. FA: Sharik Walker | V7 | 3m | |||||
 |
||||||||
| Route | Grade | Style | Selected ascents | |||||
| 60 |
Snowball
Starts at far right-hand end of cliff line on left side of scoop/shallow cave (questionable rock) finish up slopers on right. | V3 | 4m | |||||
| 61 |
The Butternuts
This and the following 5 climbs are included for historical purposes only! On the scrappy cliff 50m down R of the bouldering crag. This climb goes straight up the wall about 3m R of the alcove at the L end. FA: Mark Witham & Paul Badenoch | 13 | 11m | |||||
| 62 |
Road to Ruin
The rising diagonal trench beginning near The Butternuts. Some holds can't be trusted. FA: Paul Badenoch, 2014 | 16 | 12m | |||||
| 63 |
Victoria's Secret
Start 1.5m R of The Butternuts. Up into the short V-groove in the middle of the wall then move R and head for the tombstone up top. FA: Paul Badenoch & Vicki Kavanagh | 14 | 11m | |||||
| 64 |
No Push No Baby
Start 1.5m R of Victoria's Secret and head up the orange rock. Aim for the hanging slab at the top, passing the slender 'jug of death' at 5m. Take a #0.4 cam. The best climb here! FA: Paul Badenoch, Vicki Kavanagh & Mark Witham | 17 | 11m | |||||
| 65 |
Near Death Experience
Start 1m L of the vague nose and 1m R of NPNB. Up to the diagonal crack, move R for a large cam then up the brittle wall to a stance. Finish up the small corner on the R. Take a #0.75 cam. FA: Paul Badenoch & Clare Randall | 16 | 11m | |||||
| 66 |
My Degeneration
An exciting start just R of the vague nose to a small ledge. Continue up (#000 cam) and slightly L to finish as for NDE. FA: Paul Badenoch, Vicki Kavanagh & Mark Witham | 15 | 9m | |||||
| 67 |
★ Cock-Bulge / Cocktoe Extension Extension
Cocktoe extension to end jug of Tao, then reverse climb into Inflatable Bulge and finish on top of bulge via some chimney moves. FA: Thananthorn Suriyasenee, 23 Apr 2022 | FR:7b | ||||||
| 68 |
The other Sharik project
Project- linking Kid Indestructible sit to it's underlings then under the roof into Madball Stand. All the moves go, just needs someone strong enough to link them! | |||||||