Ayuda

Sanctuary

49

Estacionalidad

E
F
M
A
M
J
J
A
S
O
N
D

Resumen

Where the trail first meets the wall.

Descripción

Closer to the car park and a shorter approach than the cave, the Thunder Dome and surrounding walls have many great routes from easy to hard, on vertical and overhanging faces. The route lengths vary from 10-30m with great technical face climbing and steeper endurance routes.

Wear a helmet and be aware this crag hasn't had a heap of traffic. Keep to the one trail and pack out what you take in.

Where the trail first meets the walls you will come to the Two Towers area, all other routes are further up the hill trending right if you're looking at the cliff.

Restricciones

Please respect the local roads and residents, keep gates closed at all times. Do your best to car pool as much as possible to reduce traffic and impact to this area. Tread lightly and stick to the trail on the way to and from the crag.

Acceso

Drive: From Brisbane head out on the Centenary Highway, turn south at Ripley Rd. After about 10km this turns into Undulla Rd. After a further 7km turn right onto Mount Elliott Rd. On Mount Elliot Rd you eventually come to 2 sets of gates. Go through the gate and close them behind you. At the second set of gates, the right one is clearly someone's house, take the left gate. Drive to the end (bumpy dirt road) and park somewhere without blocking the final locked gate or the road.

Walk in: From the carpark, follow the forestry track around for about 15mins total walk time to The Sanctuary turn-off path;

Pass two sharp bends:

Continue on till you arrive to The Cave turn-off - a right hand bend in the fire trail with a faint path turn-off on the left (by one of the yellow SFT markers):

Walk another 100m or so, to arrive at a faint left turn-of by the twisted fallen tree, follow this to Sanctuary:

From here, it is about 200-300m to the first crag: The Two Towers. The path is well worn enough & easy to follow up the slope, right trending, up to the clearing, across this & up to the first wall.

Ética

If bolting new routes please avoid squeeze jobs, linkups or variant starts/finishes. There is enough rock for heaps of independent lines. Go for a walk! If your proposed line comes within 3m of an established route, please ask the person whose route it is so as not to devalue their original vision. Avoid damaging any vegetation in this area. The developers took great care in directing and constructing the track.

Vías

Añadir vía(s) Añadir croquis Reordenar Edición en bloque Convertir grados
Grado Vía

Where the trail first meets the walls, and takes an obvious turn right. You'll have Freeloader right in front of you, and looking left across the scree slope, you'll see the obvious tower.

Climbs the wide crack to the left of Catastrophist to ledge on trad. Edge your way gingerly around the bulge and clip a long runner on the first bolt of headwall. Do a hard move surmounting the bulge to establish on the arete. Stay on the arete clipping the bolts on the face to finish.

Climb the obvious tower 40m left across the talus field from the “Freeloader” arete. Straight up the middle of the face to an exposed finale on the free standing tower. Can gain the top of the tower for a great seat and view.

Climb the arete on the prominent pillar where the track meets the wall. Starts on the slab with a high first bolt on good holds. Freerider your way up the prow to the summit and take in the views. Good route to learn leading.

PAL: Toby Saunders, 20 Jun 2020

Shares first four bolts and trends right around arete and up the bouldery face to shared anchors on the prow. A longer draw on the 4th will reduce drag. A short draw on the 5th will direct a fall above in the right direction. Pre-placing draws after doing the arete climb would be best, but there goes your onsight...

Caution: As improbable as it looks, falling at 5th/6th can result in hitting the pillar behind you if you are not careful.

Short and punchy pressure crack system. Starts higher up and across the gully from Freeloader. Takes entirely small wires and cams with lots of thin face climbing. Add it to the list for your trad day at Sanctuary.

PA:

PAL: Rob Saunders & Ethan Naylor, 20 Dic 2020

Named after the Staghorn above the anchors. Climbs right side of arete. First bolt stick clip or reach off the slab. Tricky moves up the arete as you roll around the arete onto the face. Fancy face climbing to the chains. Well protected for the grade.

Equip: Rob Saunders, 20 Dic 2020

PA: Ethan Naylor, 27 Dic 2020

A surprisingly worth while TR. Lead Platycerium to establish an anchor. Belay above the slab. Start on low crimps. The hand jamb is 100% optional but you selling yourself short if you don't do it. Finish by touching the staghorn for good luck.

Approx another 50m uphill and to the right of the Two Towers area, and before you get to the Pandemic wall, you will see an excellent buttress on your left as continue up the trail.

Amazing climbing up the pumpy face to the technical prow above. Since the FA lots of new holds have been cleaned up.

PAL: Tom Reid

Bouldery headwall above Desert Treasure. Techy power problem on crimps and pockets. Finish at the top of the pillar above the treeline.

PAL: Tom Reid

Prominent black arete climb straight up the arete from the ground for a good time.

PAL: Alex Turnbull

Same start as for Lock Stock, at the jugs near the rooflet head right into the corner before launching back left to the ledge.

PAL: Alex Turnbull

Climb Lock Stock until it breaks right into Two Smoking barrels, continue up and right for 3 bolts and finish up the last bolt and anchor of Loose Hips. Quite technical but fun! Equipping the 3rd bolt was subcontracted out to Scott in a heavy downpour .

PAL: Dan Mackenzie, 26 Mar 2023

From standing belay either at the top of Lock Stock or just to the left, climb the easy slab up the corner then step onto the headwall and head up.

PAL: Alex Turnbull

Just an anchor currently needs a lot of choss trundled. Do not climb.

Just to the right of Badlands by 20m.

Starts 5m right of LS&2SB arete. Climbs straight up the overlapping rooflets and wall onto blunt arete. Technical climbing and some wild moves. Useful to have longer draws on bolts 1 & 5 for rope flow.

PA: Feb 2021

PAL: Rob Saunders, 11 Abr 2021

Start in front of the thick “Grass Tree”. Climb a series of features- up a faint, open-book-corner system. At the last bolt, traverse up and hard right to the anchors with SS Lower offs. Long draw on the 6th assists.

Equip: Eric Straw & Rob Saunders

PAL: Jimmy Blackhall, Dic 2022

An overhanging journey on the left end of the wall. Begin in the open orange corner. Stick clip high first bolt. Wrestle the fused block at half height to set up for pumpy moves to the final clip. Trend right to shared anchor with Blood Moon. Note: The fused block has been pinned and glued.

NOTE: stick clip the high first bolt to start. Bouldery start to get established on the wall, leads to awesome crack fondling goodness and a pumpy journey to high anchor.

Climb the bouldery start and seam trending right to establish on the main wall. Follow the winding seam till it disappears high on the wall in a sea of microholds. Continue up the steepening wall to the final puzzle and clip the anchors on the lip.

PA:

PA: Rob Saunders

PAL: Rob Saunders

Variant start to CTTL from in the small cave. Traverse the lip out left side and up to establish on the wall. Joins CTTL after the 3rd bolt.

Start in the little cave in front of the tree. Boulder up to stance below technical face, grapple and crank your way up before a punchy throw gets you to a welcome rest at ⅔ height. Spicy boulder to finish at the top of the wall.

PA: Tom Reid

PAL: Tom Reid

Vague prow right of tree. Hard start eases to nice face, punchy finish.

PA: Tom Reid

PAL: Tom Reid

Linkup. Variant finish for Darklight that climbs COVID-22's harder finish. The natural antithesis of CL.

Linkup. Adds a bunch of climbing to Yesterday's Hero by starting up Darklight for four bolts, then traversing right across the slab to join YH.

Linkup. Variant for Covid-22 that climbs Darklight’s easier finish via it's last bolt. Line of least resistance and a good warmup.

Climb the technical slab with pockets straight up the right side of prow through steepening ground. Can you make the anchors without a respirator?

Climb right side of first two bolts with C-22 then trends right through steep and bouldery ground to the higher anchor. Qualify for optional frequent flyer miles from last bolt to the anchors...

Access via 'History Never Repeats' this cliff is the obvious orange glory about 30m off the ground. Multi-pitch climbing. Two hanging belays seperate the routes here potentially allowing two parties to climb here. 60m rope required. Tie Knots!

Starts 3m right of Yesterdays Hero in the small enclave. Thin start up the slab to engaging ground above. Anchor on right of crack.

Diagonal crack running from Anchor of The Alchemist to the anchor of Good as Gold. Bring two racks of cams up to #3 and a set of wires and a mate. Great line with plenty of jambs and face holds to keep you occupied. First ascent put up onsight so needs some cleaning.

Access pitch that travels up the left side of wall and slab, trends right across the face to right mid wall anchor stance on the orange rock.

PA: Rob Saunders

PAL: Rob Saunders, Jun 2020

Climbs from seperate anchor on the left side of the upper wall. Exquisite moves up to and through the bulge lead to thought provoking balancy climbing on the upper wall. Amazing anchor position in the eyrie with a great view of Brisbane city to the North.

Climb the first line above the anchors on your left. Clipping bolt on the overlap and stepping left. Blast straight up the orange wall, technical moves on some of the best rock on the mount. Continues through the overlap and up to anchors right of the wombat hole. 60m to the ground from top anchors!

PAL:

Equip: Rob Saunders

PA: Rob Saunders, Jul 2020

Climb orange slab to second bolt in the overlap. Then up the glorious orange wall to anchors at a small ledge. Extension is work in progress up the arete to a higher anchor. Lower back to belayer. It is 55m to the ground.

Climb slab to 3rd bolt in at overlap. Then up through a boulder problem to a small ledge. Lower off

PA: Alex Turnbull

PAL: Alex Turnbull

Keep trending right on the trail coming to the obvious cave, starting at the first route 'Welcome To The Thunderdome'.

Advertencia Flora y Fauna: Bees in the cave right corner

The first climb immediately on your left as you sight the Thunderdome. Gentle start to some excellent technical climbing for the grade. Stick clip the 1st bolt and take care at the 4th. Go straight up around the 7th bolt for full value, ignoring the ledge rest far out left.

The central line on the clean face left of the cave with the basketball sized huecos. Fun and engaging climbing. Don’t forget to fondle the nostrils mid route.

PA: Matt Fingleton

PAL: Matt Fingleton

Link up. Climb 'Nostrildamus' past its anchor (Put an extended draw here), traversing over to your right joining 'Riders of the storm' at it's headwall. Finish as this.

PA: Such, Dan Kozianski & Geoffrey, 17 En 2021

Ramble up the vertical wall with some great warm up moves into the left side of the overhang up high, pull hard onto the face and enjoy the pump!

Advertencia Flora y Fauna: Birds nest in cave

Prominent line on the left end of the cave. Starting on the left face, climb into the upper cave and employ the dark arts in crack and off-width climbing, to levitate yourself into a position to clip the anchor at the lip. Stays dry in rain and back-jump to clean.

PA: Matt Fingleton

PAL: Matt Fingleton

Starts on prow in front of "Cursed Energy"

Bouldery start in the cave, head up and out the lip, then power up the pumpy steep face with awesome holds and moves.

PA: Tom Reid

PAL: Tom Reid

Linkup. Power up ‘Cursed Energy’ through the burly roof, moving right via a link up bolt into ‘Harold Boon’. Classic Flinders funk!

PA: Alex Turnbull

Start as for FS or CE. Climb FS to the 2nd last bolt (long draw here) and keep trucking right, across the colourful face. The anchor is under the lip of the Thunderdome; top out and check out the second cave above. “Good energy opens projects”!

Equip: Jimmy Blackhall, Mar 2023

PA: Jimmy Blackhall, Abr 2023

Head straight up the middle pillar to the roof. Traverse left out the steep, fun, weirdness (clip the second roof bolt from the pillar if possible) up the short face to the wide seam and the double chain lower offs above. Hope you packed your knee pads.

Climb FS or HB to the reset ledge (QuickDraw on the anchor bolt). Follow the left black bolt up the corner feature and traverse right into “Fred - Extension Proj”. Finish as this. “Not Knowing is Buddha”!

Equip: Jimmy Blackhall

PAL: Jimmy Blackhall, Mar 2023

Climb HB to the rest at the anchor (don’t clip it). Step right clipping the right bolt, and move up, tackling a short boulder problem. Closed Project

Short ceiling, thuggy line, in the right cave. Back jump to clean.

Equip: Jimmy Blackhall, Mar 2023

PAL: Jimmy Blackhall, 20 Abr 2023

Start as “Lean With It”- at the lip move left and across up, to finish as FS.

Funky cave with some steeeeep and funky rock with a nice head wall pillar above. Vertical/gently over hung face to the right separated from the cave by a crack/groove system.

No current safe access - please stay away.

Straight up and out the steep and powerful start on pockets to the lip, follow the right trending diagonal weakness to the RHS of the upper pillar and head up to the anchor. Seems hard!

PAL: Tom Reid

¡Hola!

¿Es tu primera visita al sitio?

theCrag.com es una guía gratis de zonas de escalada de todo el mundo, editada de manera colaborativa por escaladores, bloqueros y otros amables entusiastas.

Puedes registrar todas tus vías, ponerte en contacto y charlar con otros escaladores y mucho más...

» descubre más, » más información or » haz una pregunta

Selected Guidebooks more Ocultar

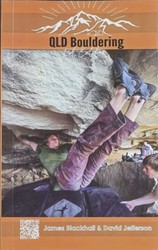
Autor(es): Jimmy Blackhall & David Jefferson

Fecha: 2021

número ISBN: 9377779499658

Hidden within the ordinary people of Queensland there exists a tight-knit community of scabby knuckles, grazed knees, massive forearms and iron-clad wills. This guidebooks seeks to shed light on this community and blocks of choice with all the information, skills and knowledge to open the door for you to explore all the bouldering that Queensland has to offer.

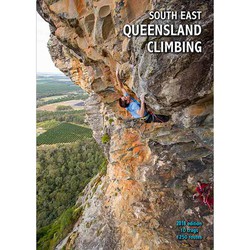
Autor(es): Simon Carter

Fecha: 2018

número ISBN: 9780958079068

A few years ago there was basically Frog Buttress and Coolum. Since then there has been more development than Barangaroo and South East Queensland should be on any climbers radar no matter what your style. Except ice climbing, definitely no ice climbing. But over 1250 routes with hard sport, multipitches and quality trad to make a great trip.

Alojamientos cercanos more Ocultar

Compartir contenido

Vie 5 Mayo
Echa un vistazo a lo que está ocurriendo en Sanctuary.

Get a detailed insight with a timeline showing

  • Ticks by climbers like you
  • Discussions of the community
  • Updates to the index by our users
  • and many more things.

Login to see the timeline!

Deutsch English Español Français Italiano 한국어 Português 中文