A Crag Guide gives an extensive view of all sub areas and climbs at a point in the index. It shows a snapshot of the index heirachy, up to 300 climbs (or areas) on a single web page. It shows selected comments climbers have made on a recently submitted ascent.
At a minor crag level this should be suitable for printing and taking with you on a climbing trip as an adjunct to your guidebook.
This guide was generated anonymously. Login to show your logged ascents against each route.
Warning
Rock climbing is extremely dangerous and can result in serious injury or death. Users acting on any information directly or indirectly available from this site do so at their own risk.
This guide is compiled from a community of users and is presented without verification that the information is accurate or complete and is subject to system errors. By using this guide you acknowledge that the material described in this document is extremely dangerous, and that the content may be misleading or wrong. In particular there may be misdescriptions of routes, incorrectly drawn topo lines, incorrect difficulty ratings or incorrect or missing protection ratings. This includes both errors from the content and system errors.
Nobody has checked this particlular guide so you cannot rely on it's accuracy like you would a store bought guide.
You should not depend on any information gleaned from this guide for your personal safety.
You must keep this warning with the guide. For more information refer to our:
Usage policy
Contributors
Thanks to the following people who have contributed to this crag guide:
Adrian Ridgley
Nick Murphy
Isabelle Wentworth
Mark Hoggard
Tim Hall
Jaime Mesias
Lucas Tatnell
Dane Evans
I Skip Crux Holds
Dylan Glavas
The size of a person's name reflects their Crag Karma, which is their level of contribution. You can help contribute to your local crag by adding descriptions, photos, topos and more.
Some content has been provided under license from: © Canberra Climbers' Association (CC BY-SA) © Australian Climbing Association Queensland (Creative Commons, Attribution, Share-Alike 2.5 AU)
Table of contents
- 1.
South Coast
396 in Field
- 1.1. North Durras Caves 1 in Crag
-
1.2.
Emily Miller Beach 8 in Crag
- 1.2.1. Emily's Cave 8 in Crag
- 1.3. Guerilla Bay 5 in Crag
-
1.4.
Bimbimbie 2 in Area
- 1.4.1. Phoenix 1 in Boulder
- 1.4.2. Simone de Beauvoir / SDB 1 in Boulder
- 1.5. Moruya South Head / The Ampitheatre 12 in Boulder
- 1.6. Whale Beach 7 in Boulder
-
1.7.
Bodalla 4 in Unknown
- 1.7.1. Pandora 4 in Boulder
-
1.8.
Tuross gorge / Tuross Falls 6 in Crag
- 1.8.1. Waterfall cliffs 4 in Area
- 1.8.2. The Summer Fun Walls 1 in Area
- 1.8.3. DWS area 1 in Crag
-
1.9.
Tuross Gorge Access Road 8 in Area
- 1.9.1. Pashing Dale Boulders / PDB 8 in Area
- 1.10. Gulaga East Face 1 in Area
-
1.11.
Tilba 1 in Area
- 1.11.1. Najanuga / Little Dromedary 0 in Crag
-
1.11.2.
Potential 2 / Central Tilba Peak 1 in Area
- 1.11.2.1. Gulaga West Face 1 in Crag
-
1.12.
Animal Docks 7 in Area
- 1.12.1. Camel Rock Area 1 in Sector
-
1.12.2.
Petting Pen / The Middleground 3 in Sector
- 1.12.2.1. Strike Cove 3 in Cliff
-
1.12.3.
Horse Head Rock Area 3 in Sector
- 1.12.3.1. Hoof Boulder 3 in Boulder
- 1.13. Birthday Bluffs 0 in Crag
- 1.14. Brogo Dam 1 in Area
- 1.15. Biamanga Pools / Biamanga Cultural Area 0 in Area
-
1.16.
Mimosa Rocks National Park 5 in Area
- 1.16.1. Bunga Head 2 in Unknown
-
1.16.2.
Bengunnu Point 3 in Unknown
- 1.16.2.1. Cave area 3 in Field
-
1.17.
Tathra 21 in Area
- 1.17.1. Whalewatchers Cave 8 in Cliff
- 1.17.2. Pig and Whistle Wall 3 in Boulder
-
1.17.3.
A Room with a View 5 in Boulder
- 1.17.3.1. Surf the Shingleback 2 in Area
-
1.17.4.
Kianinny crag 5 in Cliff
- 1.17.4.1. Mini Wall 1 in Area
- 1.17.4.2. Lower Wall 3 in Area
- 1.17.4.3. Upper Wall 0 in Area
- 1.17.4.4. Hidden Wall 1 in Area
- 1.18. Wallagoot Gap 4 in Crag
-
1.19.
Tura Head 56 in Crag
- 1.19.1. Rockpool Faces 9 in Cliff
- 1.19.2. Rockpool Boulders 27 in Cliff
- 1.19.3. Commy Cliff 8 in Cliff
- 1.19.4. The Boat Ramp 4 in Cliff
- 1.19.5. North Head Boulders 3 in Area
- 1.19.6. The Passage 5 in Area
-
1.20.
Beowa National Park / Ben Boyd National Park / Green Cape 148 in Crag
-
1.20.1.
Bittangabee (North side of bay) 104 in Crag
- 1.20.1.1. The Upper Tier 12 in Sector
- 1.20.2. City Rocks 18 in Crag
-
1.20.3.
Pulpit Rock 26 in Crag
- 1.20.3.1. North Side 22 in Sector
- 1.20.3.2. South Side (Upper) 4 in Sector
- 1.20.3.3. South Side (Lower) 0 in Sector
-
1.20.1.
Bittangabee (North side of bay) 104 in Crag
-
1.21.
Nadgee 3 in Area
-
1.21.1.
Wonboyn 3 in Crag
- 1.21.1.1. Greenglade / Naddies Bluff 3 in Crag
-
1.21.1.
Wonboyn 3 in Crag
- 1.22. Narooma Fitness Centre 0 in Gym
-
1.23.
Wog Supercrag 1 in Crag
- 1.23.1. Summer Rain buttress 1 in Cliff
- 1.24. Cookie Cliffs 6 in Cliff
-
1.25.
Bingie 89 in Area
-
1.25.1.
Mullimburra Point 1 in Crag
- 1.25.1.1. Razor Blocks 1 in Sector
- 1.25.1.2. Various potential 0 in Cliff
- 1.25.1.3. Pinnacles Beach 0 in Sector
-
1.25.2.
Grey Rocks 59 in Crag
- 1.25.2.1. Mum's Kitchen 16 in Cliff
- 1.25.2.2. Dad's BBQ 27 in Cliff
- 1.25.2.3. The Pantry 16 in Field
-
1.25.3.
Bingie Bingie 29 in Crag
- 1.25.3.1. Bingie Point 14 in Field
- 1.25.3.2. Dreaming Stairs 15 in Field
-
1.25.1.
Mullimburra Point 1 in Crag
- 2. Index by grade
1. South Coast 396 routes in Field
- Summary:
-
Bouldering, Trad climbing and other styles
Lat / Long: -36.416379, 149.988860
summary
Climbing a long way from anywhere.
description
A variety of climbing styles can be found throughout the south coast of NSW. With it's abundance of small towns and amazing beaches and a variety of other outdoor activities within the region it's a holiday paradise, but with plenty of routes and problems still yet to be discovered too!
Beowa National Park at the southern end of the NSW coast offers the main route (trad) climbing area, which is on quality sandstone. This NP also hosts the Light to Light multi-day walk.
A number of bouldering options are available, with these mainly located on rocky headlands along the coast where they are easily seen and accessed. Rock type and quality varies significantly from location to location and even within metres, so have a keen eye and nose if you are hunting for fresh boulders.
This area was ravaged by the 2019 Bushfires, so come with no supplies and spend up in the small towns where they really need it.
access issues
A lot of rock, a lot of private land, and a lot of bush.
approach
4 - 6 hours south of Sydney, or about 6 hours from Melbourne. Easily accessible from Canberra within a few hours.
where to stay
Any of the small towns offer Airbnb's, camping and other various accommodation types, most of them by the beach. Avoid staying at the crags as most are on private land or in a position to upset locals.
history
Crags were first found in the region and began development in the early 1990's with a slow but consistent rate of discovery by many different people throughout the years.
1.1. North Durras Caves 1 route in Crag
- Summary:
-
All Bouldering
Lat / Long: -35.634404, 150.313764
description
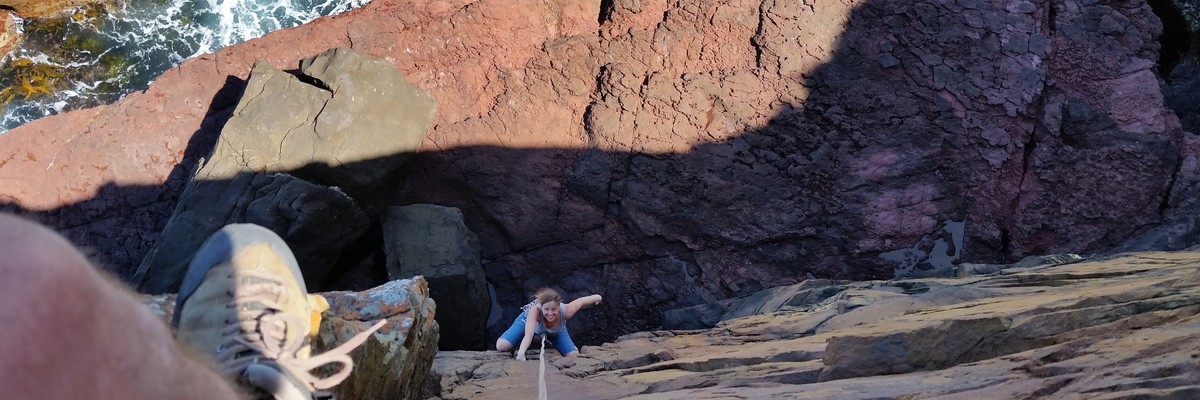
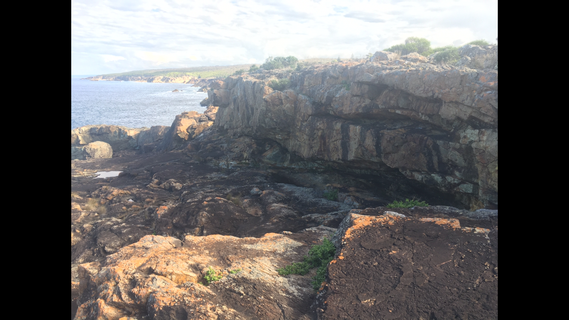
Sandstone cliffs around the caves on the Durras North beach. Be careful when climbing as the sandstone is really crumbly.
approach
Can be approached from the beach access or from along the beach. For beach access; When Driving along the Durras road, just after Depot beach turn off there is two car parks on the left hand side of the road. At the second car park there is a path that leads to a set of stairs, when you get to the bottom of the stairs, turn right and follow the edge of the beach until you get to the cave. For beach access; follow the beach towards Point Upright until you get to the cave.
history
Climbing started here in early 2019 by a family who didn't want to go to Nowra and drove to their local beach and found a slab of rock to climb.
 |
||||||||
| Route | Grade | Style | Selected ascents | |||||
|---|---|---|---|---|---|---|---|---|
| 1 |
★★ Creepy crawly Traverse / Breath
Traverse along a section of rock next to the cave. There are some fun heel hooks and toe jams to complete the climb. | V3 | 2m | |||||
1.2. Emily Miller Beach 8 routes in Crag
- Summary:
-
All Bouldering
Lat / Long: -35.673496, 150.301879
summary
Amazing beachside climbing
description
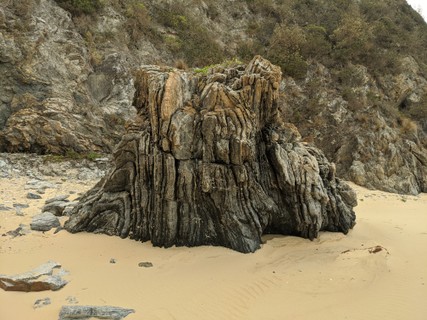
Pretty beachside climbing on a quiet beach with a selection of good problems with more that could be created by linking a few together
access issues
Located within National Park so due care needs to be taken in regards to this. No marking of climbs, be friendly to rangers, clean up any area you go to etc.
approach
Drive to Murramarang Beachfront Nature Resort and then go through the bush track on the right (you can drive or walk this bit.) You then follow the signs to Emily Miller Beach (don't get this confused with Emily Miller Point.) Once there go down to the beach and depending on the boulder it may be on the next beach.
where to stay
You can stay at Murramarang resort (camping or in a Villa) or you could stay anywhere in Batemans Bay or areas nearby.
ethic
Some of the rocks are thin and may snap off, be cautious when climbing to minimise this.
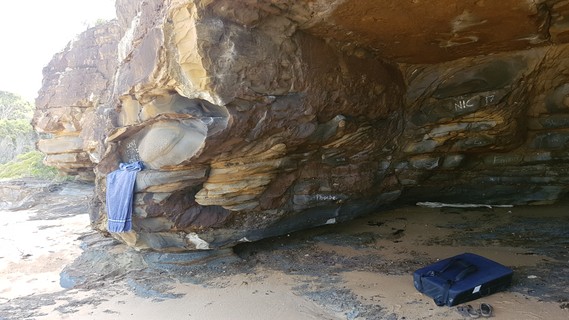
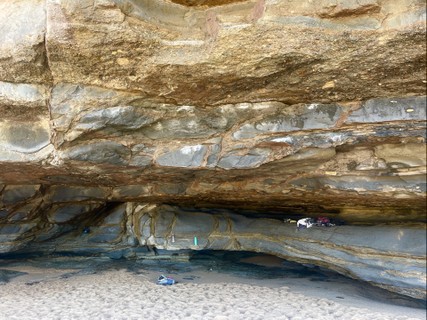
1.2.1. Emily's Cave 8 routes in Crag
- Summary:
-
Lat / Long: -35.674030, 150.301021
summary
Instagram worthy cave with a few problems in it overlooking the beach
description
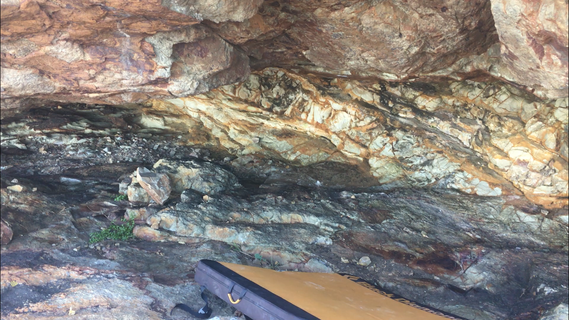
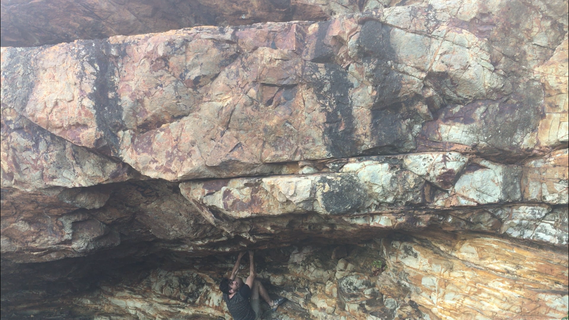
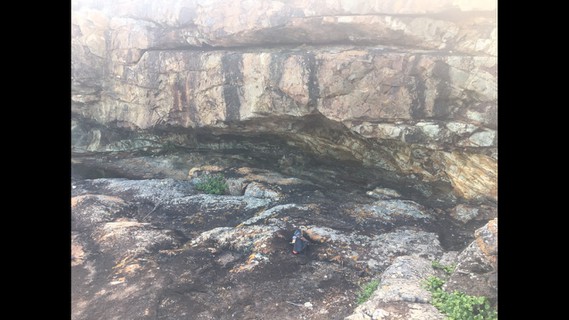
East facing cave holding several problems with potential for more only metres from the water on a quiet beach but nearby to resorts and national parks.
access issues
This area is located within Murramarang National Park so respect for this needs to be taken. Minimise chalk usage and ensure all rubbish you find is taken out. Climbing is generally only tolerated within most National Parks.
approach
Drive to Murramarang Beachfront Nature Resort and then go through the bush track on the right (you can drive or walk this bit.) You then follow the signs to Emily Miller Beach (don't get this confused with Emily Miller Point.) Turn right (from perspective of looking at the ocean) once on the beach. Walk over the rocks and the cave is right there on the next beach.
where to stay
You can stay at Murramarang resort (camping or in a Villa) or you could stay anywhere in Batemans Bay or areas nearby.
ethic
Some of the rocks are thin and may snap off, be cautious when climbing to minimise this.
| Route | Grade | Style | Selected ascents | |||||
|---|---|---|---|---|---|---|---|---|
| 1 |
★★ Star Wars Hat
Climb on the right side (from perspective of looking at the cave) Starts on the holds about 1.5m up and finished matched on the sloper on the roof. FA: Amelia Wingfield, 6 Jan 2017 | V2 | ||||||
   |
||||||||
| Route | Grade | Style | Selected ascents | |||||
| 2 |
★★ Better Beach Bouldering
Sit start under where Star Wars Hat starts. Follow Star Wars Hat but continue up past the sloper and to the higher rail. | V4 | ||||||
| 3 |
★★ How ya garn
Start on the nice jug about halfway on the left side of the cave. Traverse left on some crimps to the big sandy sloper. Finish on a pretty good crimp outside the cave. Deep jug at halfway has broken off. Adds a grade or two. FA: Jacob Johannessen, 24 Feb 2018 | V3 | 3m | |||||
| 4 |
★★ The Greater Glider
Right of Boys light up. Start down low left hand on left side of sloper with flat top, right hand slightly around the corner on worse sloper. Move out left and up to side pull rail, match, move left to good crimp and finish up on flat top jug. There was chalk on the holds before I got there so sorry if it was already sent. FA: steve willson | V3 | 2m | |||||
| 5 |
★ Boys Light Up
Start down low with hands on the sloper and move across the crimps to a pretty powerful move to the most obvious jug (careful if you don't get it right it bites!). climb finishes on edge top right. FA: Jacob Johannessen, 7 Apr 2018 | V3 | 3m | |||||
| 6 |
★ Its easy as 123, AM!
Past the cave (ocean to the left). The vertical hand crack. V1 if you can jam. Make your way up till you are standing above the crack. Either jump off or solo to the top on average rock. FA: steve willson | V1 | ||||||
 |
||||||||
| Route | Grade | Style | Selected ascents | |||||
| 7 |
Slices of Emily
Jump to start on the slicey juggy ledge about two thirds of the way along the cave lip(the lower, meaner of the two jugs). Move up then left along the crack, finishing matched in the slippery yellow section of the crack where it intersects with the vertical crack. Jump to start can be tricky depending on sand height, start further along right side cave if necessary. FA: Josh Zylstra & Benjamin Flippence, 25 Nov | V3 | 3m | |||||
| 8 |
★★ A Big Slice of Emily
Start matched on big pinchy jug at right hand side of cave (as with Better Beach Bouldering, but no sit start). Move up through BBB onto top rail then traverse across to start and finish Slices of Emily. FA: Josh Zylstra, 19 Apr | V4 | 9m | |||||
1.3. Guerilla Bay 5 routes in Crag
- Summary:
-
Bouldering, Rock climbing and Trad climbing
Lat / Long: -35.824960, 150.226986
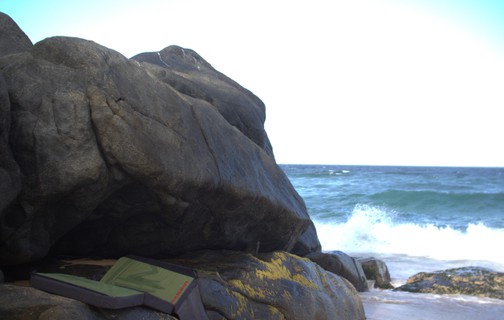
summary
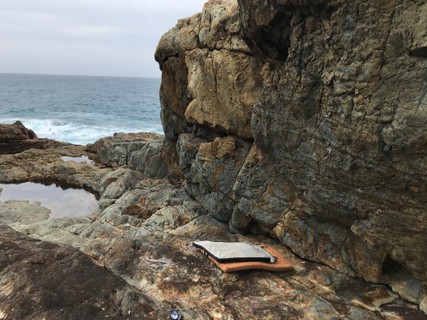
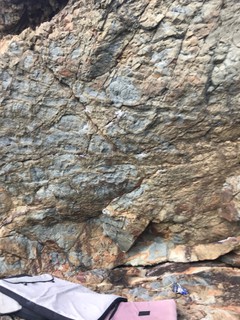
Small beachside bouldering on a unique little islet.
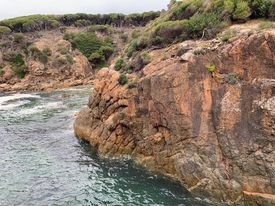
description
Large outcrop of rock just a short walk off the beach. Has a few boulder problems scattered across it and could be setup for top-roping with natural pro anchors.
A lot of the rock slopes pointing to the east at the top, so anything steeper is on the east face, but often means you'll end up getting wet if you fall which can be straight into the churning ocean.
access issues
Unable to find information on the outcrop itself, would not recommend placing any bolts (nor would it be necessary). Locals were around when first visited and didn't seem to care about people on the rocks.
approach
Turn off George Bass Road into Burri Point Rd following it down and taking the left onto Beach Parade Rd, you'll see an old wooden sign on the left hand side of the road pointing down a short road to the beach. Make sure not to park in front of the turn around point.
Instantly seen from the carpark, walk across the 20m spit connecting to the islet.
May not be accessible during high tide. Wade through thigh deep water to get to it on fairly flat ground and over some rocks.
where to stay
No camping here, but options not far away in caravan parks, airbnb etc
history
Nick Murphy decided to check it out in early 2020, though very likely others have looked here before
/42/6e/426ee247f4fb267cd3db0ce126a794f3ebb51fd2) /a5/1d/a51d871143ebce426e6286b82838ea6e8db0b441) 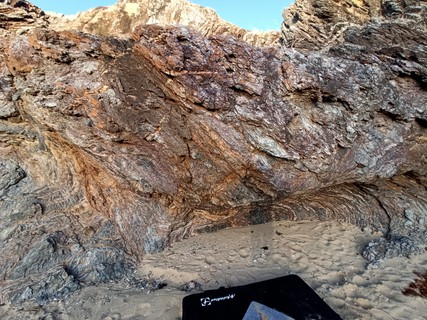 |
||||||||
| Route | Grade | Style | Selected ascents | |||||
|---|---|---|---|---|---|---|---|---|
| 1 |
★ Cracking Crocs
Up the crack in the corner, mantle then up to the top. Flakey rock, I don't think I'd trust gear placed in it but you could try. No obvious top rope potential. Climb with care. FA: Jarrah Turner | 14 | 10m | |||||
| 2 |
Pocket Sized Guerillas
Up on small pockets and face holds up onto the ledge. FFA: Nick Murphy, 30 Jan 2020 | V1 | 3m | |||||
| 3 |
★ Laying Off Guerillas
Climb up the second rib to the right up off the second ledge, laybacking to the top FFA: Nick Murphy, 30 Jan 2020 | V1 | 3m | |||||
| 4 |
Bloody Mary
Standing start on the left side of the bulge of rock, 2 jugs to start and pull up and onto the slab to finish with a top out. Be careful as some of the rock is a little sharp, some blood was left as a sacrifice by the first ascensionists. FA: Niggles & H.Tupper, 30 Jul 2022 | V2 | 3m | |||||
| 5 |
That's Cavey Baby
Sit start with feet under the roof/on the back wall of the little cave. Mantle onto the slab above the cave and top out on the slab. Watch out for sharp rock in some of the holds. FA: Niggles, 30 Jul 2022 | V3 | 3m | |||||
1.4. Bimbimbie 2 routes in Area
- Summary:
-
All Trad climbing
Lat / Long: -35.825620, 150.079190
summary
Bimbimbie is located in the Mogo State Forest.
description
Scattered, short granite boulders (3-8 metres high).
approach
Turn off Princess Highway at Milsons Road. Follow to junction of Bimbimbie and Cpt187/1 Road. 2 wheel drive okay to this point. Probably need a 4x4 beyond this point. GPS coordinates for Phoenix Crag/Princess Leah -35.8259558,150.0829297
ethic
Trad and bouldering only. No bolts.
history
Local Congo legends led the way on this one.
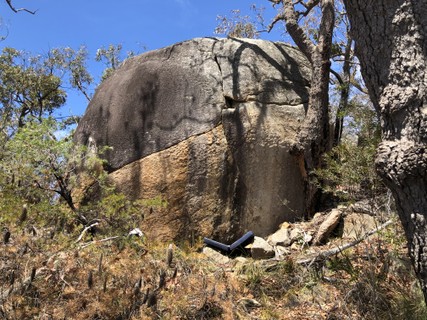
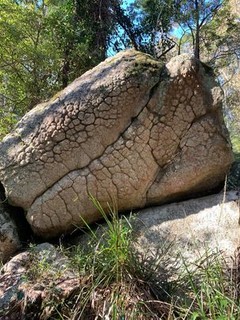
1.4.1. Phoenix 1 route in Boulder
- Summary:
-
Lat / Long: -35.825900, 150.082993
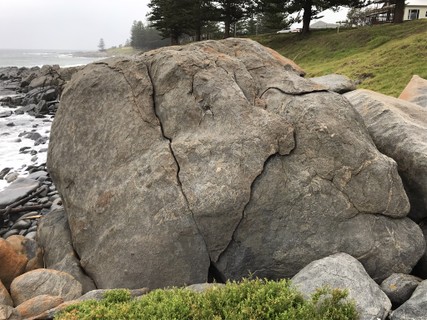
description
Large boulder, 8m horizontal and vertical crack feature facing north
 |
||||||||
| Route | Grade | Style | Selected ascents | |||||
|---|---|---|---|---|---|---|---|---|
| 1 |
★★ Princess Leia
Short diagonal leading to a vertical crack. A good highball problem for those who want the added excitement. A direct start into the vertical crack awaits a first ascent. FA: Mark Shorter & Mike Masters, 28 Jun 2020 | 21 | 8m | |||||
1.4.2. Simone de Beauvoir 1 route in Boulder
- Summary:
-
Lat / Long: -35.825046, 150.082884
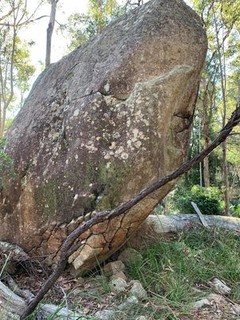
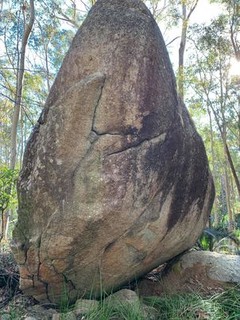
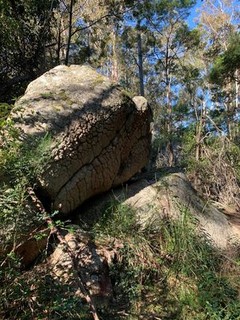
description
Cool eroded features, slightly sandy rock, approx 10 metres high
approach
3 min walk downhill from Phoenix boulder
/29/9f/299f62e382d0970ea8f6639c58474e577729b9f7) /97/2e/972e33b17d7b5d135c3bc03b142ae1325933c501) |
||||||||
| Route | Grade | Style | Selected ascents | |||||
|---|---|---|---|---|---|---|---|---|
| 1 |
★ ERA
East side of the boulder, weathered features to horizontal crack. Gear belay in crack at the top. Down climb off the back or rap using climbing partner on the ground as an anchor. FA: Mark Shorter, 2019 | 12 | 10m | |||||
1.5. Moruya South Head 12 routes in Boulder
- Summary:
-
All Bouldering
Lat / Long: -35.908657, 150.161416
description
A small bouldering spot on the South Headland.
Can be affected by high tides so be careful. Also be careful with pad placements as there's a ledge at the base of the majority of the climbs that can make falls difficult
approach
Head east at the roundabout in South Moruya on South Head Road. Follow all the way to the end and take a left onto Charles Moffitt Drive. Follow this around and turn left up the hill onto Coronation Drive and then go right onto Elizabeth St and go immediately right out towards the headland and park at the lookout point/cemetary.
Go left of the fence (you can look down onto the bouldering wall from the lookout) and follow the fishermans track down to the cliff line below. You'll see the area over to the right down a small scramble. 2 min walk in, be careful on the steep track down.
Not really accessible by public transport or walking from town.
history
Developed in January 2015 by Nick Murphy. Only several problems sent with potential for more
| Route | Grade | Style | Selected ascents | |||||
|---|---|---|---|---|---|---|---|---|
| 1 |
General Admission
The furthest most right boulder. Up the slightly overhanging prow arete from a sit start. FFA: Nick Murphy, 30 Dec 2014 FA: 30 Dec 2014 | V2 | 2m | |||||
| 2 |
Awkward Seat Shuffle
Up the obvious leftwards leaning crack FFA: Nick Murphy, 30 Dec 2014 | V1 | 2m | |||||
| 3 |
Cramped and smelly
Middle of the blank face to the left of the crack FFA: Nick Murphy, 30 Dec 2014 | V1 | 2m | |||||
| 4 |
The Social Ladder
About 2m left of the entrance space. Climb past the diagonal cracks on big jugs to top out. FFA: Nick Murphy, 30 Dec 2014 | V0+ | 3m | |||||
| 5 |
Night Of The Screaming Opera
1m left of previous climb. Start with hands in the high rails, up to the bad pinch and deadpoint for the top. FFA: Nick Murphy, 30 Dec 2014 | V1 | 3m | |||||
| 6 |
★ Avoiding The Crowds
Through the little overhang with underclings up balancy crimps to top out. FFA: Nick Murphy, 30 Dec 2014 | V1 | 3m | |||||
| 7 |
★★ Kings Lounge
Move up to the left of the next little undercling roof, up to pocket and into the kings lounge rail. FFA: Nick Murphy, 30 Dec 2014 | V2 | 4m | |||||
| 8 |
★ Deep Money Pockets
Stand start with hands in large pockets, move up to juggy rails and finish FFA: Nick Murphy, 30 Dec 2014 | V2 | 4m | |||||
| 9 |
★ Scooping Caviar
Crimps to shallow scoop at 3/4 height and then to rail at top to finish FFA: Nick Murphy, 30 Dec 2014 | V3 | 4m | |||||
| 10 |
Horn Rimmed Opera Glasses
Up to horn on the top of the wall FFA: Nick Murphy, 30 Dec 2014 | V2 | 3m | |||||
| 11 |
12
Rising traverse at the top end Set: Nick Murphy, 30 Dec 2014 FFA: Benjamin Korff, 10 Dec 2015 | V1 | 4m | |||||
| 12 |
Up in the Box Seat
On the boulder on the platform above the rest of the problems Sit start on undercling rail and use crimps to slap to top FFA: Nick Murphy, 30 Dec 2014 | V1 | 2m | |||||
        |
||||||||
1.6. Whale Beach 7 routes in Boulder
- Summary:
-
All Bouldering
Lat / Long: -36.051490, 150.141348
description
A very small crag right on the water in Tuross Heads.
approach
Park near 27 Tuross Blvd and walk down to the obvious high boulders just south of the main beach. 1 min walk in.
history
Developed in Dec 2014 by Nick Murphy. Could've had previous ascents simply because of it's prominence but nothing marked or recorded.
| Route | Grade | Style | Selected ascents | |||||
|---|---|---|---|---|---|---|---|---|
| 1 |
★ Whale Under Par
Start in little overhung cave closest to the water and pull up from sit start on pinches and throw to rail above. FFA: Nick Murphy, 28 Dec 2014 | V3 | 2m | |||||
| 2 |
1.5
Short climb, with most of the fun moves down low. Start with both hands on the lowest jug (see chalky hold in image) and feet pressed out right on the adjacent boulder. Then work your way along the feature, before working yourself on top of it. Then an easy climb out over the top. FFA: Nick Gilmore, 25 Dec 2017 | V1 | 2m | |||||
| 3 |
★ The Whale In The Room
3m left of the previous climb/back up the beach. Small rightwards leaning crack corner, follow up from sit start without using the large left hand ledge. FA: Nick Murphy, 28 Dec 2014 | V2 | 2m | |||||
| 4 |
★ Beached As A...
Same sit start as 'The Whale In The Room', except punch out left to ledge and mantle FFA: Nick Murphy, 28 Dec 2014 | V2 | 2m | |||||
| 5 |
★ Whale Of A Time
Left again of the previous climb. Easy moves up face and moving up between vertical cracks FA: Nick Murphy, 28 Dec 2014 | V1 | 2m | |||||
| 6 |
★ 5
Obvious high ball crack problem. Needs lots of pads, or top rope it. Open Project | V7 | 5m | |||||
| 7 |
★ Hidden Whale
Behind the high ball boulder. Stand start, with both hands on the lowest part of the crack, then work your way up the rightwards leaning crack. Then easy climbing onto the top. FA: Jonathon Colman, 14 Jan | V1 | 3m | |||||
      |
||||||||
1.7. Bodalla 4 routes in Unknown
- Summary:
-
All Bouldering
Lat / Long: -36.131257, 150.087707
description
A few boulders just off the highway, that may have some potential
1.7.1. Pandora 4 routes in Boulder
- Summary:
-
Lat / Long: -36.130157, 150.090244
description
Super cool bunch of rocks tucked away behind a quarry north of Dalmeny. Nothing established so far but some potential. Access is an issue. Seems to be situated on crown land but the access bridge is locked.
approach
Park on the east side of the Prince's Highway next to a concrete bridge that runs over Stony Creek. Make your way over the creek by any legal means (the gate to the bridge is locked). Once over the creek, walk straight along the path until you come to a big locked gate attached to a fence. Follow the fence left up the hill until you see some boulders off to your left. All the boulders are on the west-facing side of the creek gully.
    |
||||||||
| Route | Grade | Style | Selected ascents | |||||
|---|---|---|---|---|---|---|---|---|
| 1 |
★ Cames Jameron
Start on the far left side of the flake and move right and up to the top. FA: Tim Hall, 25 Oct 2022 | V2 | 3m | |||||
| 2 |
★ Cames Jameron Sit
Sit variant to Cames Jameron. Hasn't been done, hasn't been tried. Sit start on the good low crack-y holds on the left side. Big RH move to the start of Cames Jameron. Top out as normal. | |||||||
| 3 |
Potential 1
Good potential for a harder climb starting at the undercling to the right of Cames Jameron, moving directly up through some shallow holds. Set: Tim Hall | |||||||
| 4 |
Big and Cheesy
Sit start at beginning of middle diagonal line. Follow line up and out. Rock below is out. | 2m | ||||||
1.8. Tuross gorge 6 routes in Crag
- Summary:
-
Mostly Trad climbing
Lat / Long: -36.215561, 149.555400
description
See the Tuross Falls Climbing guide hosted by Canberra Climbing Association
access issues
Seems to be in the National park, rather than Wadbilliga State Forest, apparently the rangers are/have been friendly
1.8.1. Waterfall cliffs 4 routes in Area
- Summary:
-
All Trad climbing
Lat / Long: -36.224696, 149.536444
approach
Walk back down the patth from the platform until it crosses below and to the left of a slab. Look for an indistinct track headed towards the falls
| Route | Grade | Style | Selected ascents | |||||
|---|---|---|---|---|---|---|---|---|
| 1 |
★ Can't hear you
FA: Dave Cameron & Adam Steer | 20 | 75m, 3 | |||||
| 2 |
Brown Underpants Arete
P1: 18, 40m - Up thin crack a few meters right of the arête to a detached flake. Traverse right around flake and move back left above it. Head up to the base of the bottomless chimney around the corner to the belay ledge with some fixed gear P2: 15, 50m - head right and up from ledge for 10m, tarverse 30m along orange rock. Continue 10m to top. back clean to P1 and rap off fixed gear FA: adam steer & david cameron, 2003 | 17 | 90m, 2 | |||||
|
To access the following, rap in from the slings at the top of the falls (RHS looking up). If the river is low you can rock hop across to the start of Brown Underpants | ||||||||
| 4 |
★★★ Consumer Friendly
Right of the falls. Rap in and start when it gets too slippery. follow the ledges and corner crack to the top. FA: Rick Carey & Jamie Valdivia, 2005 | 16 | 45m | |||||
| 5 |
Black Adder
Set an anchor 10m right of the fixed abseil point. Rap in to a small ledge just above the water. Two 0.5 cams at waist height will prevent a swim. FA: Rick Carey & Dave Cameron, 2005 | 21/22 | 50m, 3 | |||||
1.8.2. The Summer Fun Walls 1 route in Area
- Summary:
-
All Trad climbing
Lat / Long: -36.225024, 149.532600
description
Map area is unconfirmed, requires someone to physically locate area and update the map ideally.
approach
From the top of the falls head upstream about 100m to an undercut 30m slab on the left hand side
| Route | Grade | Style | Selected ascents | |||
|---|---|---|---|---|---|---|
| 1 |
★★★ Hot Damm Hot
Start in the centre of the steep undercut slab. Crank through the bulge (21) or traverse in from left (20) and follow the crack line to the top of the slab. Rap off slings. FA: Dave Cameron & Adam Steer | 21 | 30m | |||
1.8.3. DWS area 1 route in Crag
- Summary:
-
All Deep water soloing
Lat / Long: -36.224816, 149.520204
summary
Potentially good DWS area, requires extensive development
description
Map area is unconfirmed, requires someone to physically locate area and update the map ideally.
Old topo photos show good potential for lines, but depth of water has not been confirmed/checked at all so be very cautious before climbing anything and check depth!
approach
200m upstream of the main falls there are some highball (10-15m) DWS lines
| Route | Grade | Style | Selected ascents | |||
|---|---|---|---|---|---|---|
| 1 | 1 | 10m | ||||
1.9. Tuross Gorge Access Road 8 routes in Area
- Summary:
-
All Bouldering
Lat / Long: -36.197233, 149.516737
summary
High quality granite boulders across various locations along the Tuross Gorge access road. Lots of development to go on and flakes to pull off. Be careful.
description
High quality granite boulders across various locations along the Tuross Gorge access road. Lots of development to go on and flakes to pull off. Be careful.
access issues
Nil
approach
Short walk-ins to various locations along the road.
ethic
No chipping of holds. Trad gear to be used on longer routes where possible.
1.9.1. Pashing Dale Boulders 8 routes in Area
- Summary:
-
Lat / Long: -36.173239, 149.495792
- Chipping of holds is not on - piss off
- Use trad gear on longer routes where possible
- Take all your rubbish away with you
summary
Some of the first boulders you come across along the road. Boulders vary in length and the rock quality is great.
description
Some of the first boulders you come across along the road. Boulders range from 3m+ in height. Development is in progress so be careful of pulling off flakes.
access issues
Nil
approach
Drive to (-36.173151, 149.495320). Boulders are visible from the road.
ethic
Look after the park:
/68/cd/68cd2e86629386f744e368da2ee149009b8e2b48) /d5/db/d5db9ca4892792358b8fc7c8992932c49655d270) /3b/4f/3b4f807f49ce2ea961213d88f55a117cd676768e) /27/3d/273d32c176d0a9de57a5c233b8a55c0e951dbae5) /45/01/45014e9cce199f8d38ab17d39c3c22bf93f1a09a) |
||||||||
| Route | Grade | Style | Selected ascents | |||||
|---|---|---|---|---|---|---|---|---|
| 1 |
First is Worst
Stand start, ascend the manky crack. Easy fun. FA: Dylan Glavas, 23 Aug 2021 | VB | 3m | |||||
| 2 |
★ Delicately
Stand start, delicately ascend, be careful of loose flakes. FA: Dylan Glavas, 23 Aug 2021 | V0 | 3m | |||||
| 3 |
★★ 2 Tabs of Acid
Visible only once... Stand start on the rightside under-cling and enjoy the ride. FA: Dylan Glavas, 23 Aug 2021 | V1 | ||||||
| 4 |
Mank Crack 2.1
A filler. Sit start. FA: Dylan Glavas, 23 Aug 2021 | VB | 3m | |||||
| 5 |
★★ Tufa 1 Fun
Close your eyes and imagine your on limestone. Sit start and pinch your way up the arete. FA: Dylan Glavas, 23 Aug 2021 | V1 | 4m | |||||
| 6 |
★★★ Type 2 Team
The chimney that was begging to be done. FA: Dylan Glavas, 23 Aug 2021 | V0 | 4m | |||||
/83/6b/836bba0c0540ed2fb0a84e1628e905b822d427cb) /40/c9/40c9298d53c6f7b5c025f3ff24383bb62888f403) |
||||||||
| Route | Grade | Style | Selected ascents | |||||
| 7 |
★ Ask Questions Later
Stand start and climb the right side of the flake, be careful. Top out to the left. FA: Dylan Glavas, 23 Aug 2021 | V1 | 4m | |||||
| 8 |
★★ Coma
Sit start with big hold. Move up and around the bulge to glory. FA: Dylan Glavas, 23 Aug 2021 | V3 | 4m | |||||
1.10. Gulaga East Face 1 route in Area
- Summary:
-
All Top roping
Lat / Long: -36.286697, 150.037372
summary
An area on the east side of Gulaga (Mt Dromedary).
description
High in the hillside are a number of prominent but well hidden cliffs, boulders and waterfalls that all look promising. An excellent granite cliff/ waterfall sits at the entrance to a cultish farm called 'Never Never'.
access issues
Gulaga and some of its rock formations are sacred to the indigenous community of the area. The rock tors at the top of Gulaga are NOT to be climbed. Permission should be sought for areas where one is unsure of its cultural status.
Although most of Gulaga lies in national park, a large amount of the forest is private property. Best to keep that in mind when searching for new crags.
approach
Follow google maps onto Mount Dromedary Trail. Drive up the trail across two (shallow and concreted) river crossings and up the side of the mountain until the road forks into three. The left option is towards a gated residence called 'Never Never', the right is also gated.
Park your car on the grassy patch on the left side, next to the big gate. Walk up the middle road (Mt Dromedary Trail) for approx 50 metres or less until the road bends to the left and you see a faint walking trail off to the right.
Follow this walking trail up and to the right and you will arrive at the top of the granite crag. There will be a small dam to your left and some water pipes.
Access to the bottom of the crag is via a 35m rappel from the water pipes.
where to stay
Tilba is a cute village and the pub is lovely.
ethic
This area not only is full of lovely finger cracks and off widths, but has one of the nicest top rope set ups you'll find, with a huge metal water pipe running directly above the cliff. As such, no bolting is allowed.
Additionally, due to the area's situation within an area of great cultural significance to the aboriginal community, damaging the rock in any way is not tolerated.
history
Mark Shorter and Mike Masters scouted and first climbed this area in 2020.
| Route | Grade | Style | Selected ascents | |||
|---|---|---|---|---|---|---|
| 1 |
Boxing Day Test Piece
Slab start into shallow finger crack on the left side of the crag. A good rest half way up on a small ledge. As the finger crack runs out traverse to the right and up into a number of small crimps on the face which constituted the crux before a slabby finish. FA: Mark Shorter, 2020 | 20 | 35m | |||
1.11. Tilba 1 route in Area
- Summary:
-
All Bouldering
Lat / Long: -36.317865, 150.072772
summary
Two yet to be climbed near roadside crags near Central Tilba
description
Visible from the Princes Highway on both the eastern and western side are two granite looking outcrops of rock with good height and a variety of aspects and profiles that could present a small wonderland of route potential to those who make the journey there.
access issues
Both locations require crossing private land so owners must be contacted to seek permission before entering.
approach
Potential 1; Najanuga (Little Dromedary Mountain). See track notes at link; hikingtheworld.blog/2016/01/16/little-dromedary-najanuga/
Potential 2; Access is still being confirmed as it will be necessary to pass through private land.
where to stay
Central Tilba has a variety of options, as well as nearby beach stays are available.
1.11.1. Najanuga 0 routes in Crag
access issues
hikingtheworld.blog/2016/01/16/little-dromedary-najanuga/
approach
hikingtheworld.blog/2016/01/16/little-dromedary-najanuga/
1.11.2. Potential 2 1 route in Area
- Summary:
-
Lat / Long: -36.309461, 150.068995
approach
So far looks like it needs to be accessed from either the East or the South, both crossing through farmland but with easy enough approaches as farm roads go a long way up the hill close to the crag. Discussions need to be had with landowners in determining access still.
1.11.2.1. Gulaga West Face 1 route in Crag
- Summary:
-
All Bouldering
summary
East-facing crag above Central Tilba. A number of boulders and perhaps some trad routes to be found.
approach
Walk counter-clockwise along the Bellbrook Loop Track. Access to this crag is most likely from the highest point along the track, should a third of the way along.
| Route | Grade | Style | Selected ascents | |||||
|---|---|---|---|---|---|---|---|---|
| 1 |
Gerry Harvey’s Tax Return
Prominent Boulder on the cliff side. Hard to find. | 3m | ||||||
/98/ed/98edb8969bb30fc1faf92b5954d8c41efee411bc) /a4/d7/a4d799eaf0b7fd95edeefce1864efaada557a8d8) /13/4e/134e7a837e6173a0380eecbd9292487970171910) /07/10/07102d857a591fc2dd22cce208bbd5aa412da44d) /6b/5c/6b5cb27aaf03b7b2dc9990641983be26729a4e2b) /93/c5/93c505e2b746b6e070395ce1e4ce4c964bb6956b) /14/39/14397c4da64385c0a28839977179d38c66f8532e) /8d/f0/8df0d21401b0f2cfe8cd934ecc7aeef7eee12a9b) /5c/70/5c70e88c0cf966cfaa59f0e5bd09e624141fc691) /4b/5e/4b5e10b1209d782f79b6c50c8219a7e20b58888d) /07/65/0765b37fe8b906b6ba392276aaa679be3f1d4eb9) /de/5a/de5acc346ebe2da62c774803a0135f89dde863c4) /85/a2/85a287e18ec099874f9d9ba2ea0ecd3338ce72f9) /18/38/1838967e2d7a27de6422f210f93cc36358ee1693) /64/e3/64e359eec27deb4c5652bac3c64ee229bf8687eb) /3d/53/3d53d0924f511a24269392e20c347c30d65ed3ba) /ab/01/ab011f4b6afe60fe5ca097fcff070ea3b1040772) /e1/d3/e1d3662260d9e1c1b3ceee4be93dcf8a23ada70d) /b6/ca/b6ca72de58ae994bba5f7bac00c75898e3d77a4c) /ea/30/ea30072449d4305e0b2db9d755970c42398bcdef) /68/ba/68ba807f752809b15d64698b32809a3d5390ef50) /4b/de/4bdeb8e6ec704f5b44f6954a97f156220fa99d29) /cf/a5/cfa502008b1820dda2eb82dd9f896a741bf0b3c7) /f9/f5/f9f581a3dae6185b6cbfb067a7a5ccdfe1e36b3e) /55/c7/55c74509d875a1be24c3fc6225fc214de68d52c3) /2d/64/2d64ff95ce186b3621cd48b829de78714003c12e) |
||||||||
1.12. Animal Docks 7 routes in Area
- Summary:
-
Mostly Bouldering
Lat / Long: -36.377081, 150.080623
summary
Seaside bouldering and a few routes near some iconic and well photographed rocks
description
Climbing right near the heavily photographed Horse Head Rock and Camel Rock. A few free standing boulders on the beach as well as some of the cliffs surrounding them offering a lot of potential on decent schist rock.
access issues
Not recommended to climb on either of the prominent tourist attractions here as that would likely just be bad press, as well they don't have the rock quality the others do and both are surrounded by water at most times.
approach
Park at the Camel Rock Beach Carpark, walk down onto the sand and head north and you'll immediately see Camel Rock and other boulders about.
Continue north past Camel Rock and you'll eventually come to Horse Head Rock which is about the limit of the climbing here. May require some scrambling to get to Horse Head depending on the tides. Anything further north is complete choss.
where to stay
3 Caravan parks very nearby, the nearest has a brewery attached, the Camel Rock Brewery and Restaurant
ethic
No Bolting (as this will attract unwanted attention) Don't chip or modify holds, brush off your chalk and tick marks, be polite to tourists, don't climb on Horse Head Rock or Camel Rock, take any rubbish of yours or you find out with you.
history
Nick Murphy was probably not the first to come by here and climb anything, though haven't been able to find anything elsewhere talking about this area.
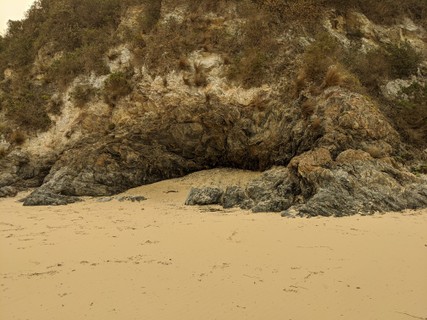
1.12.1. Camel Rock Area 1 route in Sector
- Summary:
-
All Trad climbing
Lat / Long: -36.378225, 150.080205
description
First area you come to from the carpark. Has a large highball boulder between Camel Rock itself and the cliff line, as well as a few others nearby.
| Route | Grade | Style | Selected ascents | |||||
|---|---|---|---|---|---|---|---|---|
| 1 |
★★ Camel Bro
Short slabby climb up the large faced boulder that runs parallel to the beach and just north of Camel Rock. Either a highball or could be led on gear, but was done ground up in approach shoes on first ascent, so not sure about placements. FFA: Nick Murphy, 31 Jan 2020 | 13 | 7m | |||||
/e7/cf/e7cf35252e5a60925c9867ab572cfc2dcd2fb2a9) /7a/dc/7adc579576c0d47dcd89d47acfc95c4e26f0658e) /fa/47/fa470bd00b7583d2f25e3e09636c6704428d6a5e) 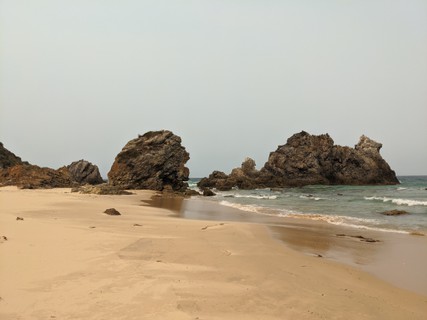 /fd/fa/fdfa482af8493b69c5c7f6bc7da0b75603c1d6e7) |
||||||||
1.12.2. Petting Pen 3 routes in Sector
- Summary:
-
All Bouldering
Lat / Long: -36.376507, 150.080424
description
The long section between Camel Rock and Horse Head Rock sectors.
 |
1.12.2.1. Strike Cove 3 routes in Cliff
- Summary:
-
Lat / Long: -36.376389, 150.080455
description
Small alcove paralleled by two slabby walls.
| Route | Grade | Style | Selected ascents | |||||
|---|---|---|---|---|---|---|---|---|
| 1 |
★ Pulling Shark Teeth
Sit start on the flake and head up through the big scoop up the easy face. Several pointy teeth shaped holds broke off on the first ascent giving it it's name. FFA: Nick Murphy, 31 Jan 2020 | V0 | 3m | |||||
| 2 |
★ Ride the Lightning
Just South of Horse Head Rock there's a small alcove of rock surrounded by two parallel short slabby faces. This is on the smaller more northern face and is highlighted by the obvious white streak that runs through the face. Sit start and pull up following the streak all the way up and right. FFA: Nick Murphy, 31 Jan 2020 | VB | 3m | |||||
| 3 |
★ Sent The Proj
Starts on the backside of 'Ride The Lightning' inside the alcove. Sit start pulling on the right hand side pulls and gaston into the flat edges and move for the top Set: Nick Murphy, 31 Jan 2020 FFA: Mitch Lindbeck, 30 Jun 2021 | V1 | 2m | |||||
/3c/e9/3ce93743f46be07e35cbbec4fbc1a05d5d119a09) /41/d4/41d4f662b20c548db0ac8f970a8464808fb04054)  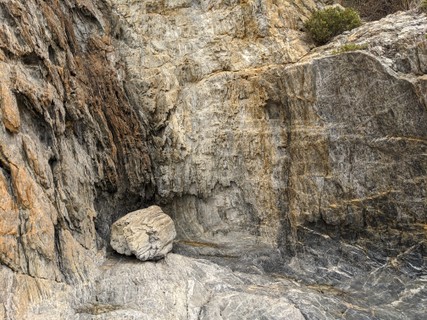 |
||||||||
1.12.3. Horse Head Rock Area 3 routes in Sector
- Summary:
-
All Bouldering
Lat / Long: -36.375364, 150.080830
description
Similar to Camel Rock area
1.12.3.1. Hoof Boulder 3 routes in Boulder
- Summary:
-
Lat / Long: -36.374804, 150.080621
description
Most northern free standing boulder on the beach just up from Horse Head Rock and about the limit for decent quality rock.
 |
||||||||
| Route | Grade | Style | Selected ascents | |||||
|---|---|---|---|---|---|---|---|---|
| 1 |
★ Horse Hoods
Up through the curved blades on the left hand beach side of the Hoof Boulder. Start sitting and pull up and head right in the direction of the curved blades FFA: Nick Murphy, 31 Jan 2020 | V0 | 2m | |||||
| 2 |
★ Surefooted Horse
Sit start and up through the vertical blades just to the right of 'Horse Hoods' FFA: Nick Murphy, 31 Jan 2020 | V1 | 2m | |||||
| 3 |
★ Going Horse
On the right side of the boulder that faces the ocean. Sit start off the sidepull flakes and head straight up. FFA: Nick Murphy, 31 Jan 2020 | V1 | 2m | |||||
1.13. Birthday Bluffs 0 routes in Crag
description
On the west side of Mumbulla mountain, visible from the highway are several prominent bluffs that look promising.
access issues
Located within Biamanga National Park
approach
Likely by driving to the end of Stevensons Lane is the best way to access the crags. May require crossing private property so seek permission first.
where to stay
Very near to the large town of Bega which has plenty of options
history
I've heard rumors that these were called Birthday Bluffs, and had been climbed at some point prior to the 80s, but have found no further information
1.14. Brogo Dam 1 route in Area
- Summary:
-
All Deep water soloing
Lat / Long: -36.488743, 149.723181
summary
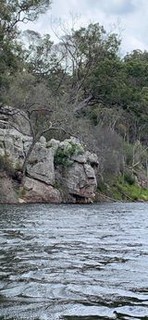
Along the shores of Brogo Dam are a number of potential DWS routes, including a known boulder called 'Indian Head'. Further above the dam are some potential short (~10-15m) sport routes.
description
Rhyolite cliffs and boulders
access issues
Access to the routes is most likely via canoe along the Brogo Dam. Access to some areas may be possible via 4wd tracks, particularly Brogo Firetrail. Canoes can be hired at Brogo Wilderness Canoes and launched from the boat ramp.
approach
Paddle about 1km along the left side of the Brogo Dam until you come to the second major inlet on the left (Nelson Creek). Boulder and cliffs to the left above the shoreline.
ethic
The area is located within National Park, and permission to bolt routes has not been sought as yet. Until discussions with NSW Parks takes place, bolting should not be undertaken. No chipping. Additionally, try to brush off chalk once you are done climbing, as this area is a popular sightseeing location.
history
Many people have thought about climbing this area, and it's highly likely that someone has done so in the past. Tim Hall attempted the first (unsuccessful) attempt of the DWS boulder on Boxing Day 2020.
 |
||||||||
| Route | Grade | Style | Selected ascents | |||||
|---|---|---|---|---|---|---|---|---|
| 1 |
Belly full of pudding
Straight up the middle of the boulder. Has been attempted once from a canoe start while hungover, with no chalk and no shoes. Probably no harder than V3. | 3m | ||||||
1.15. Biamanga Pools 0 routes in Area
description
access issues
Located within Biamanga National Park.
The Aboriginal custodians request that visitors, through respect, do not swim in the Mumbulla Falls area - a site that is sacred to the Yuin People.
1.16. Mimosa Rocks National Park 5 routes in Area
- Summary:
-
All Bouldering
Lat / Long: -36.582363, 150.041784
description
Coastal boulders and short cliffs. Rock quality is variable
1.16.1. Bunga Head 2 routes in Unknown
- Summary:
-
Lat / Long: -36.579907, 150.056678
description
Walk north along the cobbled beaches from the campground, after a few headlands you'll find a few rocks that are actually worth looking at
| Route | Grade | Style | Selected ascents | |||||
|---|---|---|---|---|---|---|---|---|
| 1 |
Candlestick
Up the south face of the Candlestick | V2/3 | 3m | |||||
| 2 |
★ Jack Be Quick
Up the candlestick the easy way | VB | 3m | |||||
  |
||||||||
1.16.2. Bengunnu Point 3 routes in Unknown
- Summary:
-
Lat / Long: -36.603819, 150.037281
description
Walk north from the picnic point campground. After the second beach the cliffs appear. Some rock is friable, and care should be taken
1.16.2.1. Cave area 3 routes in Field
- Summary:
-
All Bouldering
 |
||||||||
| Route | Grade | Style | Selected ascents | |||||
|---|---|---|---|---|---|---|---|---|
| 1 |
Hesitation
Up the weakness to the cave platform. Watch out for waves and spray, and the odd frail rock | V0 | 3m | |||||
| 2 |
Left project
Up the weakness above the cave to the left. The direct start a few meters left looks even easier | |||||||
| 3 |
Right project
up the crack at the right end of the cave, looks easy, but high enough to require pads | |||||||
1.17. Tathra 21 routes in Area
- Summary:
-
All Bouldering
Lat / Long: -36.731423, 149.988071
summary
A number of small boulders and cliffs on the rocks next to the ocean in Tathra.
description
Easy access climbing on solid rock.
approach
All parking is on Bega St in Tathra. Areas are 5-10 minutes walk.
1.17.1. Whalewatchers Cave 8 routes in Cliff
- Summary:
-
Lat / Long: -36.727317, 149.990066
description
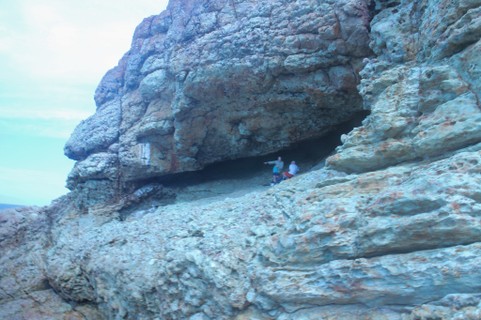
Large overhung cave right over the water with a great view.
approach
From the carpark in Tathra, at the end of bega st, walk down the tathra headland track for 100m to a faint track over the barrier on the right. Follow down onto the rocks and head around to a large obvious cave.
/db/70/db701cb76cceef0decfcfe04a7540b273fef1b20) 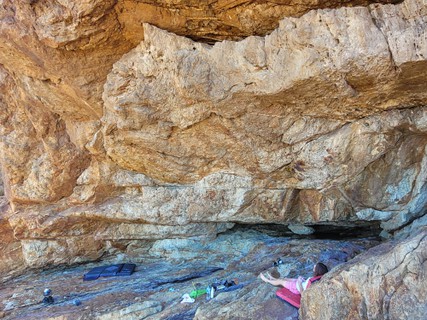 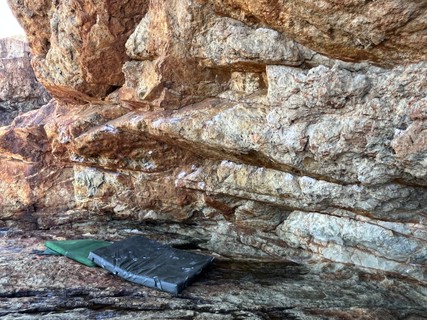 |
||||||||
| Route | Grade | Style | Selected ascents | |||||
|---|---|---|---|---|---|---|---|---|
| 1 |
★ I prefer the beach
Sit start left then up arete to lip. traverse right and then up to obvious finishing jug FA: Tim Williams, Dec 2020 | V4 | 5m | |||||
| 2 |
★★ The White Whale
Sit start on the jug towards the left of the cave. Traverse right and up through the roof with the big undercling and finish at the jug. FA: Lucas Tatnell, Dec 2020 | V6 | 5m | |||||
| 3 |
Call me Ishmael
Sit start below the end of White Whale, climb up. FA: Tim Williams, Dec 2020 | V3 | 3m | |||||
| 4 |
Breach
Sit start right of Call me Ishmael, big moves up to the lip and traverse left to jugs. FA: Tim Williams, Dec 2020 | V2 | 3m | |||||
| 5 |
Captain Ahab
Start at Thar She Blows and traverse left to the finish jug of The White Whale. FA: Lucas Tatnell, Dec 2020 | V2 | 5m | |||||
| 6 |
Thar she blows
Stand start in crack, follow up and right to jug. FA: Tim Williams, Dec 2020 | V1 | 3m | |||||
| 7 |
Pocket Junkie Maze
Sit start on pockets a metre under jug and through the pocket maze finishing at the top of thar she blows, FA: 13 Jan 2021 | V5 | 3m | |||||
| 8 |
★ Chowder
Start as for Breach, then left on the main horizontal crack at head height, through the start of White Whale, hard up and left finishing at the prow on the starting arete of IPTHB. Used to be V2 but it looks like a hold or two has broken off. FA: 31 Dec 2020 | V5 | ||||||
1.17.2. Pig and Whistle Wall 3 routes in Boulder
- Summary:
-
Lat / Long: -36.727510, 149.989508
description
Nice overhanging face on Tathra headland. Rock quality is mostly good but I need to come back and clean the top half of it on a rope because it is quite high (about 5 m?).
approach
Park at headland parking area. Find grassy field between houses and ocean in southside of headland. Walk across this and find start of 'wharf to wharf' walking track. Walk down steps into small gully where you will find a small track down towards the rock platform (go down this). Head down and around to the right to find this nice overhanging face.
history
I got confused about getting to whale watchers cave but found this. Rock was nice so it was climbed.
 |
||||||||
| Route | Grade | Style | Selected ascents | |||||
|---|---|---|---|---|---|---|---|---|
| 1 |
★ Whistling Pig
Sit start, left side of face, where jugs and awesome grooves are. Straight up and top out. | V0 | ||||||
| 2 |
★★ Captain Howdy
Sit start, middle of face, straight up tallest part of face to top out. Very tall, pad it out. | V4 | ||||||
| 3 |
★ Tubular Bells
Sit start on corner/arete thing (right side of face). Up on jugs to top out. | V1 | ||||||
1.17.3. A Room with a View 5 routes in Boulder
- Summary:
-
Lat / Long: -36.730511, 149.989903
description
Cave about 3m deep, and between 1/1.5m high.
approach
Drive into Tathra and follow the main road down past the IGA. Turn right onto beach street. Go straight (this means that you keep going straight and turn off beach street) ahead when you get to the right hand turn in the road. It looks a bit like someone’s driveway, because it sort of is. Park on the left where there is a little walking track. Go right and follow the walking track. Follow the track around and take the second exit off to the left. Walk down the rocks and turn right...it’s the deep cave about a meter and a half high...you can’t miss it.
history
I have never seen another boulderer here...ever
| Route | Grade | Style | Selected ascents | |||||
|---|---|---|---|---|---|---|---|---|
| 1 |
★★★ A Room with a View
Start inside the cave with hands on the grippy sloper on the back wall and feet on the back wall just below your hands. Climb across the roof, heading out right (from looking at the cave), until you reach the edge of the cave. From the edge, head up the face and over the top. Something to note, the starting hand hold and footers are the only part of the whole back wall that is in this climb. When getting near the edge of the cave it may be tempting to use the back wall that comes round, it’s not in. Set: Nick Thornton FA: Nick Thornton, 2014 | V6 | 3m | |||||
| 2 |
★ It’s hip to warm up
Start on hold just right if the crack and straight up. Set: Nick Thornton FA: Nick Thornton, 8 Nov 2018 | V0 | 3m | |||||
| 3 |
★ Cracked hips
Straight up the crack and topping out over the top to the left. Set: Nick Thornton FA: Nick Thornton, 8 Nov 2018 | V1 | 3m | |||||
     /fc/c3/fcc36a72a10cc484a972ade8b1e38cf9664ad646) |
||||||||
1.17.3.1. Surf the Shingleback 2 routes in Area
- Summary:
-
All Bouldering
Lat / Long: -36.730923, 149.989918
summary
Keep walking from "Room with a view" to get to this obvious overhung wall. The line up with middle is a cracker! Bring a few pads.
approach
As for room with a view, walk south. You'll see this fine wall, slightly steep, hard grey rock.
| Route | Grade | Style | Selected ascents | |||||
|---|---|---|---|---|---|---|---|---|
| 1 |
★ Plutonic pocket
Fairly high! See the two pockets up high in the vague corner? Climb to the top via these. Start on obvious low jugs. | V3 | 6m | |||||
  |
||||||||
| Route | Grade | Style | Selected ascents | |||||
| 2 |
★★★ Surf the Shingleback
Cool technical climbing up the face, fairly high for the last move so have a few pads! Sit start and make long moves up to the finishing ledge, then traverse easily left and down to descend. FA: George Broadfoot, 8 Oct 2020 | V6 | 5m | |||||
1.17.4. Kianinny crag 5 routes in Cliff
- Summary:
-
Lat / Long: -36.736744, 149.985410
description
A set of 2-5m high cliffs on the rocks above the water next to Chamberlain lookout. A huge amount of potential lines which will likely be developed over the coming months. As with any boulder, lines labelled "project" are open projects.
approach
Park at Chamberlain Lookout and walk down the rocks to the left approx 100m.
 |
1.17.4.1. Mini Wall 1 route in Area
- Summary:
-
All Bouldering
Lat / Long: -36.736842, 149.985158
description
The closest wall to the carpark, left of the lower wall.
 |
||||||||
| Route | Grade | Style | Selected ascents | |||||
|---|---|---|---|---|---|---|---|---|
| 1 |
★ Morpheus
Sit start in the vague corner. Climb up and slightly right to the jug and top out. FA: Lucas Tatnell, 31 Jan 2021 | V4 | 3m | |||||
1.17.4.2. Lower Wall 3 routes in Area
- Summary:
-
All Bouldering
Lat / Long: -36.736766, 149.985385
description
The large obvious wall on the lower tier.
 |
||||||||
| Route | Grade | Style | Selected ascents | |||||
|---|---|---|---|---|---|---|---|---|
| 1 |
★★ Project
Sit start on the jug under the roof. Climb up the arete and top out. Project, approx v6. | 3m | ||||||
| 2 |
★ Walruses
Sit start on the jug under the roof. Traverse onto the slab and climb up. FA: Lucas Tatnell, 31 Jan 2021 | V3 | 3m | |||||
| 3 |
Project 2
Sit start at the right of the slab and climb up the slab. Project, v6 or v7 approx | 3m | ||||||
1.17.4.3. Upper Wall 0 routes in Area
description
The smaller wall above lower wall.
 |
1.17.4.4. Hidden Wall 1 route in Area
- Summary:
-
All Bouldering
Lat / Long: -36.736650, 149.985522
description
A large wall on a slope, continuing on from upper wall.
 |
||||||||
| Route | Grade | Style | Selected ascents | |||||
|---|---|---|---|---|---|---|---|---|
| 1 |
Dorpheus
Sit start on the huge jug under the roof. Climb up through the sharp pocket and top out. FA: Lucas Tatnell, 31 Jan 2021 | V5 | 3m | |||||
1.18. Wallagoot Gap 4 routes in Crag
- Summary:
-
All Deep water soloing
Lat / Long: -36.787256, 149.962569
summary
A good little Deepwater Solo spot in a beautiful location.
description
An 8 metre tall DWS cliff over a small inlet. It probably is safest on the higher tides, but is definitely deep enough anyways.
approach
Drive to Wallagoot Gap car park, and then follow the well defined track 200 metres to Wallagoot Gap (well signposted).
All the climbing is on the right side (very obvious).
where to stay
Bournda National Park has a few good campsites.
ethic
Try not to chalk up the cliffs as it's a fairly popular tourist location.
history
The history of this crag stretches back to the Mesozoic era, when triceratops used to use it as a training crag during the hot summers.
  |
||||||||
| Route | Grade | Style | Selected ascents | |||||
|---|---|---|---|---|---|---|---|---|
| 1 |
★★ Horizontal Predominance
Mainly an access traverse for the cooler routes at the very end. Horizontal line out from the beach to the small platform at the end, staying low on the water line. Good holds most of the way, with some minor challenges, particularly if you do it barefoot. | 14 | 30m | |||||
| 2 |
Slab line
Unclimbed slab project at the far end of the cliff. Probably not a bad landing if you are clever about it, and a decent bit of climbing. | 5m | ||||||
| 3 |
★ Hard line
Line up the arete between the slab and the incut line. Crimpy and sustained. It has been confirmed (unexpectedly) that the water below is deep. | 4m | ||||||
| 4 |
★ Can Goannas Swim?
A proper DWS line over nice, deep water. FA: Tim Hall, 22 Mar 2023 | V3 | 6m | |||||
1.19. Tura Head 56 routes in Crag
- Summary:
-
Mostly Bouldering
Lat / Long: -36.854280, 149.947438
summary
Sea cliff climbing and bouldering on hard volcanic rock.
description
Easy to access crag with a variety of styles, bouldering, trad lines and sport routes, with plenty still to be developed.
access issues
Unknown currently, looks to be on public land as there's a walking track here with a lookout and natural rock pool at the end of the headland.
approach
Park in the carpark just off Headland Dr and then follow the walking track heading east from here. Follow the main track without taking any of the side tracks and you'll reach the end of the headland.
where to stay
history
Jaime Mesias had found pre-existing bolts from someone in 2019. Few routes added by Nick Murphy on an exploratory look in 2020.
1.19.1. Rockpool Faces 9 routes in Cliff
- Summary:
-
Bouldering and Trad climbing
Lat / Long: -36.855318, 149.949110
description
Short face overlooking the two rockpools at the end of the headland. Has a variety of face and overhung climbs.
approach
The first prominent cliff face you find as you walk out to the end of the headland. Overlooks the rockpool
| Route | Grade | Style | Selected ascents | |||||
|---|---|---|---|---|---|---|---|---|
| 1 |
Left line
Sit start 3m left of The Big Reach. Up 2m then left and up short water streak to top out. Left edge was used but an eliminate would make a good route too. FA: Mitch Lindbeck, 1 Jul 2021 | V1 | 4m | |||||
| 2 |
The Big Reach
Sit Start with hands on the Jugs, trying to reach the big fissures on the way | V1 | 6m | |||||
| 3 |
★★ Don't Look down
Sit start with both hands on the Jug, Pull up and move towards the crack and then head out. FA: Jaime Mesias, 10 Oct 2019 | V2 | 6m | |||||
| 4 |
★ Pockety Pop
On the left hand wall with the obvious pockets and breaks. Straight up through these and into the high pocket using the crack to the right. Some large cams might help on the horizontal breaks along with small wires for the cracks. Can also be done as highball boulder. FFA: Nick Murphy, 1 Feb 2020 | 17 | 6m | |||||
| 5 |
★★ Push that Toe
Stand Start Putting Both hands inside the crack and use your toe to push in the wee hold at the beggining of it. FA: Jaime Mesias, 5 Oct 2019 | V1 | 6m | |||||
| 6 |
★★ The Swing
Cross hand start from the Edge, Move along the side crack towards the main crack. FA: Jaime Mesias, 11 Oct 2019 | V1 | 6m | |||||
| 7 |
★ Don't swing
Start at the swing but continue straight up the arete to top out. FA: Mitch Lindbeck, 1 Jul 2021 | V0 | 5m | |||||
| 8 |
Pooling In The Cracks
The corner climb to the right of 'Pockety Pop'. Easy climbing and could be setup as a good top-rope option. FFA: Nick Murphy, 1 Feb 2020 | 14 | 5m | |||||
| 9 |
★ Gravity
Sit Start w' hands on the pockets, pull up towards the finger pocket FFA: Jaime Mesias, 14 Sep 2020 | V5 | 2m | |||||
      |
||||||||
1.19.2. Rockpool Boulders 27 routes in Cliff
- Summary:
-
All Bouldering
Lat / Long: -36.855388, 149.949470
description
Cliff line right beside the taller rock faces with a bunch of steeper boulder problems
| Route | Grade | Style | Selected ascents | |||||
|---|---|---|---|---|---|---|---|---|
| 1 |
★★ Seagull
Sit Start with both hands on the Jug, move underneath the roof towards the Flake FA: Jaime Mesias, 24 Apr 2020 | V2 | 3m | |||||
| 2 |
★ The Pop
Sit start, move into the flake, manage the dino | V3 | 4m | |||||
| 3 |
★★ Ring and Cling
Pull up from sit start on holds just above the large boulder under the roof, move up to the jug rail and into the undercling above and top out FFA: Nick Murphy, 1 Feb 2020 | V2 | 3m | |||||
| 4 |
Red Fiat
Sit start at the far back of the cave on a sidepull and undercling. Out through the crimps and straight over. FA: Tim Hall, 12 Mar 2023 | V5 | 3m | |||||
| 5 |
★★ Orange Juice
Sit Start on the undercling, Pull up into the crimp and follow the fisure FA: Jaime Mesias, 16 Sep 2020 | V3 | 3m | |||||
| 6 |
★★ Terminator
Sit Start with both hands on the undercling following the fisure and then reach over to the jug just above the overhang. FA: Jaime Mesias, 24 Apr 2020 | V2 | 3m | |||||
| 7 |
★ Sunbake
Start with both hands on the Edge and then move right. FA: Jaime Mesias, 20 Feb 2020 | V2 | 3m | |||||
| 8 |
★ Sunbake #2
Same start of "Sunbake" just with a little variation at the end, Top right. FA: Jaime Mesias, 20 Feb 2020 | V2 | 3m | |||||
| 9 |
★ Beach Walk
Stand start with both hands on the edge, follow the fisure | V4 | 6m | |||||
| 10 |
★ Strech Ya Legs
Sit start with Both hands on the Edge, legs stretched and pull up towards the big Edge FA: Jaime Mesias, 3 Apr 2020 | V0 | 2m | |||||
| 11 |
★★ The pull
Sit Start, Both Hands on the Sloper. Pull left into the Big Jug on the left and the Top out by the slopper on the right FA: Jaime Mesias, 3 Apr 2020 | V0 | 2m | |||||
| 12 |
★ Strechy 2
Sit start with both hands on the big white Quarzo, pull up into the undercling and then top out right by the sloper. (use the little holes for the feet, makes it fun) FA: Jaime Mesias, 3 Apr 2020 | V0 | 2m | |||||
| 13 |
Going for a walk
Sit Start, and follow the fisures up. FA: Jaime Mesias, 25 Mar 2020 | V0 | 3m | |||||
| 14 |
★ The View
Sit Start: Pull up towards the pockets and mantle out FA: Jaime Mesias, 25 Mar 2020 | V0 | 3m | |||||
| 15 |
Footy
Feet Only! FA: Jaime Mesias, 14 Aug 2020 | V1 | 2m | |||||
| 16 |
Cornflakes
Sit start with hands on the Flake and push up towards the pocket FA: Jaime Mesias, 27 Apr 2020 | V0 | 2m | |||||
| 17 |
★ Super Flake
Sit Start using the pinch, push up and follow the crag. FA: Jaime Mesias, 27 Apr 2020 | V1 | 2m | |||||
| 18 |
The wee Flake
Crossed hands on the Flake following up the left crag FA: Jaime Mesias, 27 Apr 2020 | V0 | 2m | |||||
| 19 |
★ El Queso
Sit Start with both hands on the Sloper push towards the wee Jug and up to the Undercling FA: Jaime Mesias, 27 Apr 2020 | V1 | 3m | |||||
| 20 |
The Tower
Sit Start on the Sloper, move along to reach the edge on the far right side. FA: Jaime Mesias, 27 Apr 2020 | V1 | 3m | |||||
| 21 |
★ The hug
Hug the Boulder from the bottom Pockets, reach the Jug on a long strech move. FA: Jaime Mesias, 27 Apr 2020 | V1 | 3m | |||||
| 22 |
★★ Elephant
Sit start on the big pockets, move into the pinch on the right side and up to the edge. FA: Jaime Mesias, 4 May 2020 | V3 | 3m | |||||
| 23 |
Bloody Elephant
Sit start with both hands on the Jugs, move left to the flake and follow the crag up FA: Jaime Mesias, 13 May 2020 | V2 | 3m | |||||
| 24 |
The Crimp
Sit Start grabbing the crimps on each side and pull up FA: Jaime Mesias, 27 Apr 2020 | V0 | 1m | |||||
| 25 |
★★ Spidy Spidy
Sit Start using the pinches underneath the boulder, Move along the crag FA: Jaime Mesias, 4 May 2020 | V2 | 3m | |||||
| 26 |
★★ Watson's Wormhole
Sit start with hands on either side of the deep undercling just to the left of Octopussy. Move right out wide to the finger pocket then straight up using side pulls on both sides to the top. FA: Timothy Brunette, 27 Dec 2022 | V3 | 3m | |||||
| 27 |
★ Octopussy
Sit start on the undercling in the cave, blast out to the small pocket and top out over the highest point, using the crack for left hand FA: James Smith | V5 | 3m | |||||
            /4a/db/4adbe44a6b706b06414098129b9e88bb70035480)    |
||||||||
1.19.3. Commy Cliff 8 routes in Cliff
- Summary:
-
All Bouldering
Lat / Long: -36.855675, 149.949388
description
Short bouldering wall with several juggy easier problems.
approach
Located just above 'The Boat Ramp' on an ochre red cliff. Look down to the right once you're at the end of the headland.
 /0e/d1/0ed1d91f5d1d3b2ab8bfb211a43dd2842cde5f4e) /17/31/173137a2196d5bd332ae44d1768241dca7089db6) /ab/c4/abc463e3790dc4f0094f45026eba29e3b521e144) /85/1f/851fd9e39274c77f6749569fd23625b3431c9f9a) |
||||||||
| Route | Grade | Style | Selected ascents | |||||
|---|---|---|---|---|---|---|---|---|
| 1 |
Pocket Cutter
Sit start to pull off the pockets in the horizontal break and the sidepulls and hit the big rail and then balance up to the top of the cliff and mantle out. FFA: Nick Murphy, 1 Feb 2020 | V1 | 2m | |||||
| 2 |
★ The Red Terror
Sit start and pull off the big pocket follow into the right trending crack on jugs and mantle out. FFA: Nick Murphy, 1 Feb 2020 | V1 | 2m | |||||
| 3 |
★ The Opposition
Start sitting off the jug at the bottom of the crack and gaston up the two sides. FFA: Nick Murphy, 1 Feb 2020 | V0 | 2m | |||||
| 4 |
The other undercling
Open project - sit start on the undercling to the left of the other big undercling. Up to top. Set: Mitch Lindbeck, 1 Jul 2021 | 2m | ||||||
| 5 |
On The Rise Project
Open Project Big move from big undercling pocket all the way to the top Set: Nick Murphy, 1 Feb 2020 | 2m | ||||||
/48/96/4896d280a52577a7fe9e51d3e11645d6a87ab598) |
||||||||
| Route | Grade | Style | Selected ascents | |||||
| 6 |
Laying the Foundations
Sit start, up the layback flake to the left of the crack. FA: Mitch Lindbeck, 1 Jul 2021 | V0 | 2m | |||||
| 7 |
Last Stand
Last crack on the right before you end up in the dirty rockpool. Grade is for a standing start, sit start yet to be done. Set: Nick Murphy, 1 Feb 2020 FA: Mitch Lindbeck, 1 Jul 2021 | V0 | 2m | |||||
| 8 |
Barefoot bandit
Stand start in the water a couple of metres right of the previous route at the next crack. Up to top. FA: Mitch Lindbeck, 1 Jul 2021 | V0 | ||||||
1.19.4. The Boat Ramp 4 routes in Cliff
- Summary:
-
All Bouldering
Lat / Long: -36.855954, 149.949513
description
Short 2m cliff on the south-eastern side of the headland with several problems. Definitely potential for some good moderate problems here.
Watch the surf as it can reach quite high on the ramp.
approach
Once you've reached the end of the headland turn right and head down towards the water, scramble down a few small cliffs until you can see the ramp that fades away into the water.
Routes listed left to right as you look at the wall
| Route | Grade | Style | Selected ascents | |||||
|---|---|---|---|---|---|---|---|---|
| 1 |
★ You Can't Park That Here!
Sit start and pull up the layback crack running beside the bulge and mantle out on the jugs FFA: Nick Murphy, 1 Feb 2020 | V0 | 2m | |||||
| 2 |
Big Boat, Big Fish
Sit start into the left leaning flake/crack and top out over the tiny overhang FFA: Nick Murphy, 1 Feb 2020 | V0 | 2m | |||||
| 3 |
★ Slotting It In Backwards
Start off the horizontal slot and move around the corner to the right on the sloping crimp rail and small feet to top out. FFA: Nick Murphy, 1 Feb 2020 | V1 | 2m | |||||
| 4 | 4 | 2m | ||||||
     /ba/11/ba116a19fe34b3962303a2a4e1f39219ce25ba25)   /83/ee/83ee301e691e3e44fd61b6935081ac8a9030207c) |
||||||||
1.19.5. North Head Boulders 3 routes in Area
- Summary:
-
All Bouldering
Lat / Long: -36.852463, 149.944985
description
A large, relatively flat rock shelf just to the north of the main Tura headland, featuring a couple of developed lines, and potential for more.
approach
Take the track that branches off to the left about a third of the way along the main headland walking track, leading out to a large rock platform to the north of the headland itself. Once out on the rocks head straight down towards the water to find the recorded problems directly below you, or right to find some as-yet unclimbed free standing boulders to the south.
 |
||||||||
| Route | Grade | Style | Selected ascents | |||||
|---|---|---|---|---|---|---|---|---|
| 1 |
The Cormorant
Sit start on the obvious undercling, up to the flat jug and traverse right on crimps to a slopey top out. Side note: anything to the right of the protruding rock on the far right is out; there's a crack running down alongside it that acts as a boundary of sorts. FA: James McMaster, 2 May 2022 | V4 | 2m | |||||
| 2 |
Seaspray
Start the same as The Cormorant, but instead of traversing right top out straight over the middle of the boulder. FA: James McMaster, 2 May 2022 | V2 | 2m | |||||
| 3 |
Tidal Traverse
Stand start matched on the sloper with small ledge directly below for feet. Traverse left through crimps and flat jug to a big shouldery move out left, before topping out over the highest point of the boulder. FA: James McMaster, 1 May 2023 | V2 | 2m | |||||
 James McMaster
1.19.6. The Passage 5 routes in Area
- Summary:
-
All Sport climbing
Lat / Long: -36.855908, 149.947660
summary
A bolted cliff face on the south-facing side of the headland.
description
Four bolted routes sitting at about 20m tall, with double rings at the top.
All the bolts have surface rust on them, but appear to be perfectly fine to climb on. I haven't checked the expansion bolts yet, just the glue-ins.
There is a fair amount of friable rock on the climbs still. It's best to keep that in mind when climbing or belaying.
approach
Travel along the walking track as though heading for the bouldering area. At a non-descript point, a faint trail/clearing will appear to your right. There are a few trails that lead off to the right before the correct one appears. You'll just have to have a crack at a few of them I suppose. The correct one is about 3/4 of the way along the trail, well after the rh lookout. Follow it towards what you think is a cliff but is just a steep scree hill. This will lead you in to the passage.
ethic
Bolting, obviously, is ok.
Excessive use of chalk is not. Try to keep this place as stunning and presentable as it is.
history
I have no idea who bolted this area, and if you do know, please update this section (climb names, FA details, grades, whatever) as you see fit. Edit: I read a on a page somewhere that it was a New Zealand climber that bolted the ring bolts
 |
||||||||
| Route | Grade | Style | Selected ascents | |||||
|---|---|---|---|---|---|---|---|---|
| 1 |
Route 1
Far left. Expansion bolted climb that follows the vertical seam directly up. Looks like a generous amount of holds. | 15m, 6 | ||||||
| 2 |
Tennis
Middle left. Good holds but with a slightly barren top section. The crux really is right before the chains. FA: Tim Hall, 25 Feb 2023 | 19 | 15m, 6 | |||||
| 3 |
Tennis Bail
A link-up of the easier part of Tennis to the Racket chains. Follow the line of least resistance away from the Tennis dihedral. | 18 | 8 | |||||
| 4 |
★ Racket
Right middle. Bit more saistained and thin | 21 | 15m, 7 | |||||
| 5 |
Route 4
Far right. Looks to be the hardest of the lot perhaps. | 15m, 6 | ||||||
1.20. Beowa National Park 148 routes in Crag
- Summary:
-
Mostly Trad climbing
Lat / Long: -37.234642, 150.013737
summary
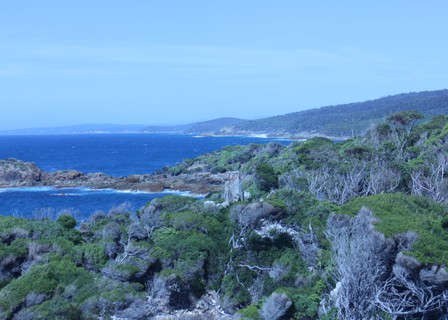
Beowa National Park (prior to 2022 it was called Ben Boyd National Park) is a seaside National Park south of Eden. It offers whale watching, fishing and beach camping - and of course climbing.
description
Rock is featured sandstone and often resembles English gritsone. The climbing is usually right on the ocean - but above the tide. Cliffs are usually between 10 and 20m high and trad or mixed protection. This is not a popular climbing area due to its remote location.
where to stay
Beach camping is available in the national park.
1.20.1. Bittangabee (North side of bay) 104 routes in Crag
- Summary:
-
Mostly Trad climbing
Lat / Long: -37.211321, 150.022993
summary
Short, convenient, and mostly easy trad climbing in an amazing location with spectacular campground, beaches, and forest. A good spot to set up topropes for beginners.
description
Bittangabee Sea Cliffs North is a compact climbing area located within the Ben Boyd National Park, 300 km southeast of Canberra near the NSW and Victorian state border.
The cliff is approximately 250 metres in length, 12-15 metres high, and accessed by a platform running along the base that is above high tide. The rock is a volcanoclastic sandstone with fantastic frictional properties. There are some friable bits, but most of it is surprisingly strong. The rock is heavily featured, quite steep with some small roofs and overhanging faces. Considerable jointing and interesting quartz intrusions provide lots of holds.
The cliffline is pretty much saturated with climbs, particularly at the southern end, with new routes likely to be contrived variants of existing ones. Bolts are not appropriate in this area, as the cliff is located within the Ben Boyd National Park. The area is a beautiful spot and should be preserved as such. Most routes can be protected with natural gear, but some are run-out or should be top-roped. This crag is an ideal area for beginners, with a multitude of easier climbs and opportunities for a first trad lead.
Climbs are described south to north (left to right while facing the cliff with your back to the ocean). Descend at either end of the cliff, but the descent from the right (northern) end is safer.
Take a standard rack, with extra small and medium cams (if you have them). Anchor points for top-rope belays can be a bit sparse. There are occasional features near the cliff edge, but many of the cracks tend to be about 5 metres back and require a second static rope (at least 10 m rigging rope recommended). Don't forget a carpet/towel for protecting anchor ropes on the often sharp cliff edge.
access issues
The "Light to light" walking trail of Ben Boyd National Park runs along the top of the cliff line. Park entry fees are $8 per vehicle per day. During heavy seas or king tides, access to the climbs is likely to be impossible.
approach
Get yourself to Eden, then head south in the direction of Orbost. Travel about 17 kilometres before turning left onto Edrom Road (tarmac), following signs to Bittangabee Bay. Turn right onto Green Cape Road after 6 km (dirt road). Turn Right at the first T Intersection (8 km) before turning left at 6 km on to the Bittangabee Bay Road (signposted to the campground). Total trip time is around 4½ hours from Canberra.
The crag is on the northern headland of Bittangabee Bay. The top of the cliff is the bare rock platform that is easily seen across the bay from the campground. Access the climbing area by walking about 1.5 km north from the campsite on the well maintained Bittangabee to Saltwater Creek walking trail (part of the "Light to light" path). After approximately 30 minutes walk, the track emerges onto a bare rock platform, which is the top of the cliff.
Access can be gained at either end of the cliff by an easy scramble down onto the rock ledge immediately above the ocean, although the righthand (northern) scramble is safer with small children.
where to stay
The Bittangabee Bay campground (30 sites, pit toilets, gas barbecues, and a freshwater creek) is beautiful. BYO water! Park entry fees are $8 per vehicle per day and camping fees are $12 per adult ($24 minimum). You will need to book ahead - expect the campground to be booked out during summer holidays. Eden is 45 minutes away and has pubs for that quenching ale.
ethic
It is important to remember this is a National Park and sensitive to human activities. Whilst little vegetation grows on the cliff itself, be sensitive to the local flora and fauna. Bolts are unnecessary and chalk should be used sparingly as the rock has exceptional frictional properties and barely needs any. Do not camp at the crag and carry out all of your waste.
history
Information here is partly based on the developments of John Wentworth and co, beginning in the 1980s. It is also partly based on a guide put together for the CCA by David Cameron and Rick Carey.
| Route | Grade | Style | Selected ascents | |||||
|---|---|---|---|---|---|---|---|---|
| 2 |
Kylies Psyche
(The 1st climb on south end of platform) Tackle roof on jugs, left of obvious corner. Then straight up the easiest line to left side of orange rock bay and top. (Step right to a variant finish, grade 18). FA: Rick Carey & Kylie Chomatek, 2001 | 17 | 8m | |||||
| 3 |
The Air of Inevitability
Start up corner, break through roof on the left, finish up crack. FA: John Wentworth, 1982 | 20 | 8m | |||||
| 4 |
★ Air of Expectancy
Climb corner and R face to roof. Plug the roof with cams on R allowing fear and trepidation to mount. Gather your gusto and with an air of expectancy, launch out to huge horizontal and up face to ledge with ever-decreasing jugs and thinning pro. Up to top. FA: Peter Lynch, 2012 | 19 | ||||||
| 5 |
★ Stairway to Higher Places
First crack at left hand end, just right of cavey section. Bouldery start leads to enjoyable climbing. FA: Peter Lynch, Paul Thompson & Brent Johnson, 2011 | 17 | 12m | |||||
| 6 |
★ Facing an Unpalatable Truth
Crack left of Flight 11. FA: Stuart McElroy & michael batchelor, 2006 | 18 | 11m | |||||
| 7 |
★ Flight 11
Straight up obvious slopey crack left of MOL (Difficult to protect on lead) follow crack line to block at top, over block to top. FA: Rick Carey & Kylie Chomatek, 2001 | 20 | 8m | |||||
| 8 |
★ The Universe and Everything
Unprotected low down without side runners. An eliminate line, squeezed in and avoiding everything in the cracks to left and right. Straight up bouldery moves past the small undercling. FA: 21 Apr 2022 | 20 | ||||||
| 9 |
★★ Meaning of Life
Up the most obvious crack line on the far right of wall. FA: Rick Carey & Kylie Chomatek, 2001 | 18 | 12m | |||||
| 10 |
★ Sunday Outing
Last crack before right corner. Bridge corner, pull onto wall, and follow crack to top. A deliciously pumpy excursion. FA: Peter Lynch & John Wentworth, 2012 | 16 | ||||||
| 11 |
Squeezed In
R of Sunday Outing, up chimney to ledge and follow seam to top. FA: John Wentworth, Josh Keogh, Juice & Peter Lynch, 2012 | 13 | ||||||
| 12 |
Descent gully
Up onto the block and up the flake. Frequently used as a down climb to access the platform. FA: John Wentworth, 1982 | 8 | 11m | |||||
| 13 |
★★ Underneath Work
Undercut start a few metres left of AQPFR. Crank hard and twist lock to small mantle edge. Desperate moves to crimpy edges on back wall. Arrange cams under rooflet flake, undercling and find the hidden flake up high. Cruise to the top. FA: Dave Cameron & Richard Morley, 2005 | 19 | 11m | |||||
| 14 |
★ A Quick Prick From Rick
Climb up the two large cracks on jugs, a single crack leads to the top. Good wires for pro. FA: Rick Carey & Kylie Chomatek, 2001 | 17 | 12m | |||||
| 15 |
★★ EBs Make it EZy
1 metre right of AQPFR. Up flake and straight up wall. FA: John Wentworth, 1982 | 13 | 12m | |||||
| 16 |
KitKat
Same start as EBs Make it EZ. Up flake and into corner. FA: John Wentworth, 1982 | 13 | 12m | |||||
| 17 |
★ Candyman
FA: Justin Ryan | 22 | 12m | |||||
| 18 |
★★ Third Time Looser
Up edge of the thin central flake. Use 1½ and 2 cams in quartz intrusion at roof for pro. Traverse left to the arête where a hidden thread allows a good rest. Layback up the arête, gear in slots. FA: Dave Cameron, 2005 | 18 | 12m | |||||
| 19 |
★★ Shits 6:30AM
Start as TTL. Crank through roof and up slopes to pocket. A jugular popping mantle leads to a good rest. Run it out to top. FA: Dave Cameron, 2005 | 23 | 11m | |||||
| 20 |
★ Coffin Lots
Start up diagonal flake, step right around corner, and up crack. (Variant start for Coffin Slot). FA: Paul Thompson, 2010 | 14 | ||||||
| 21 |
Coffin Slot
Start up wide slot, and continue up crack. FA: John Wentworth & Peter Lynch, 2010 | 14 | ||||||
| 22 |
Head Tripper
Sketchy lead. No protection for 6m. Delicate, balancy, and plays with your head. Requires a good spotter. Finish up through fun overlaps. FA: Peter Lynch & Alex Wootten, 2012 | 20 | ||||||
| 23 |
★★ Black Chasm
The excellent dark and shady corner that regularly sees climbers unfamiliar with the art of bridging grovelling in the crack. FA: John Wentworth, 1982 | 13 | 10m | |||||
| 24 |
★★ Up Up and Away
Variant of Boys Light Up. Up gymnastic start then straight up L arete only. FA: Stuart McElroy & Michael Batchelor, 2006 | 16 | 10m | |||||
| 25 |
★★★ Boys Light Up
Has it all, gymnastic start leads to a delicate face capped with an overhanging finish. All in a short action packed 9 m. FA: John Wentworth, 1982 | 17 | ||||||
| 26 |
Errol
Up the small undercut crack just around arete, approx 2m to the R of Boys Light Up. FA: John Wentworth, 1984 | 18 | 10m | |||||
| 27 |
★★ Yorkshire Girls Draw Blood
3 m right of NNA at obvious flakes. A tricky start then straight up flakes, great gear, great fun, very rough treatment for the uninitiated. FA: Dave Cameron & Richard Morley, 2005 | 17 | 12m | |||||
| 28 |
★ Other Flake Line
Squeezed in 1m R of YGDB. FA: Peter Lynch & John Wentworth, 2012 | 16 | ||||||
| 29 |
★★ Left Crack
The left of the two twin cracks. Delightful hand jams. FA: John Wentworth, 1982 | 16 | ||||||
| 30 |
★ Right Crack
The right of the twin cracks. FA: John Wentworth, 1982 | 15 | ||||||
| 31 |
I Can Jump Puddles
Face left of major corner LoF. FA: Peter Lynch & Brent Johnson, 2010 | 15 | ||||||
| 32 |
★ Leap of Faith
Major corner on R end of the wall. FA: John Wentworth & Vicky Wootten, 1986 | 11 | ||||||
| 33 |
Jealous Tart
Start easily up the diagonal crack behind the flake, onto ledge then up purple wall straight above (crux) protect with large cam. FA: Kylie Chomatek & Rick Carey, 2001 | 16 | ||||||
| 34 |
★ Beautiful Bridget
Up the line of shallow pods/pockets passing a two finger pocket en route – to the left of Johnny Shoot the Messenger Boy FA: Stuart McElroy & Michael Batchelor, 2006 | 16 | ||||||
| 35 |
Johnny Shoot the Messenger Boy
Step across the water onto the arête, head on up, cams in horizontals. Arrange gear under small roof and pull through to glory. Alternate starts possible. FA: David Cameron, Richard Morley & Mal MacDonnell, 2005 | 16 | ||||||
| 36 |
I Would Give Anything Just to Be Like Him
Start at crack line at water's edge, and finish up left facing corner on R. FA: John Wentworth & Peter Lynch, 2010 | 15 | ||||||
| 37 |
★ Water Light
L of WT. Delightful climbing requiring a tad of commitment. Aim for the dinner plate then finish up L facing corner and overlap. FA: Brent Johnson & John Wentworth | 17 | ||||||
| 38 |
★★★ Water Torture
Classic of the crag. The overhanging nature of this climb will leave a leader digging deep as you go for the top. Start on left and step onto wall over perpetual puddle, traverse right into line and follow face and flakes up to large horizontal. Move R to double threads and blast for the top. FA: Peter Lynch, 2010 | 18 | ||||||
| 39 |
★★ Water Board
The corner crack finishing straight up. Reach the start by funky traverse in from the right end of puddle. Lose a star if you traverse in from the left. FA: William Wentworth, John Wentworth & Peter Lynch, 2010 | 17 | ||||||
| 40 |
Left of Centre
First climb on Buddha Wall (small sloping wall fronted by perpetual puddle). Step onto wall at Buddha's face (clay stone pocket, whose features have now washed away). Trend left to top without using the major leftmost flake. FA: Peter Lynch & John Wentworth, 2013 | 9 | ||||||
| 41 |
★ The Middle Way
Let Buddha show you the way to enlightenment. From the face of Buddha, straight up. FA: John Wentworth & Peter Lynch, 2013 | 9 | ||||||
| 42 |
★ The Right Path
Half metre right of TMW. Tread the path with care, euphoria awaits you at the top. FA: John Wentworth & Peter Lynch, 2013 | 12 | ||||||
| 43 |
★ Shoulda, Coulda, Buddha
Start as TRP, immediately step 1m R and delicately slab your way to nirvana, keeping out of the R crack for full value. Shy on pro. FA: Peter Lynch & John Wentworth, 2013 | 15 | ||||||
| 44 |
Climb the Crack, Stupid
Climb the prominent crack to the top. Can be turned into an epic if you mix up your left and right. FA: John Wentworth, 2010 | 11 | ||||||
| 45 |
★ Enter the Zone
Absorbing climbing with lovely moves and a surprise finish. Straight up faint crack to ledge. FA: Peter Lynch, John Wentworth & Brent Johnson, 2011 | 17 | ||||||
| 46 |
★ Water Dragon
Committed approach, up faint crack then step right and follow weakness. FA: Peter Lynch & John Wentworth, 2010 | 17 | ||||||
| 47 |
★★ Smashing!
The wall a couple of metres left of Sedition FA: Stuart McElroy & Michael Batchelor, 2006 | 17 | ||||||
| 48 |
★★ Sedition / Serendipity
Step across the water onto the face and place gear as you see fit (Don’t comment on the government). Trend left (of the political landscape) over the bulging (capitalists pigs) and place cams in the sickle shaped crack. Undermine the status quo by using underhanded techniques in the crack, then head straight up the middle of the road on good crimpers. Easier than it looks, easier said than done. FA: John Wentworth, 1983 | 19 | ||||||
| 49 |
★★★ Yosemite Corner
2m R of Sedition. Delicately bridge through thought provoking corner up to steep top wall. FA: John Wentworth & Peter Lynch, 2009 | 17 | ||||||
| 50 |
Yosemite Crack
Flake line just R of YC. FA: Peter Lynch & John Wentworth, 2009 | 14 | ||||||
| 51 |
RP Special
Face and book corner just R of Yosemite Corner. (RPs Optional). FA: John Wentworth, 2009 | 12 | 6m | |||||
| 52 |
★★ Nose of El Capitan
Boulder moves up the steep arete, 2m R of Yosemite Corner. FA: Alexander Wootten, 2010 | 18 | 6m | |||||
| 53 |
All-dis and dat
First climb on Brave New Wall. Flake system at left side of wall. Good value for a short route. FA: Peter Lynch & Paul Thompson, 2011 | 17 | 6m | |||||
| 54 |
Epsilon Dreaming
Main central crack up to pocket and finish. FA: Alex Wootten, John Wentworth & Peter Lynch, 2010 | 18 | ||||||
| 55 |
Dystopocket
1m R of ED. R leaning flakes to trick top out, steeper than it looks. FA: John Wentworth, 2010 | 18 | 6m | |||||
| 56 |
Aiming High (Pete's Boulder Problem)
1m R of D, 1m L of SP. Technical, steep, a great climb. Can be done as a solo. Shy on gear, could place a good cam up high after the difficulties. Bring a crash mat! FA: Peter Lynch, 1 Nov 2015 | 21 | 6m | |||||
| 57 |
★ Surprise Package
Up undercut flake corner to ledge then continue to top through two roofs. FA: Peter Lynch & John Wentworth, 2009 | 15 | 12m | |||||
| 58 |
★ The Trickster
Face 1.5m R of SP. Pumpy face climbing to ledge, continue through double overhangs with a tricky finish. FA: Peter Lynch, John Wentworth & Brent Johnson, 2011 | 17 | 12m | |||||
| 59 |
Not Moonlight Buttress
Little L facing corner in centre of slab. Bouldery start then up delicate corner to thought provoking finish. Shy on pro. FA: John Wentworth, Brent Johnson & Peter Lynch, 2011 | 15 | 12m | |||||
| 60 |
Crimpy Corner
1/2 m R of NMB. Boulder start to jugs and finish up left facing scoop to ledge and then up top wall on R. Very little pro. FA: Peter Lynch, 2012 | 14 | 12m | |||||
| 61 |
Underclung
2m R of NMB up to L undercling and up. FA: Peter Lynch & John Wentworth, 2012 | 16 | ||||||
| 62 |
Underclinging to a Belief
Delicate start to underclings and up. FA: John Wentworth & Peter Lynch, 2012 | 17 | ||||||
| 63 |
Harmonious Discord
Face and using L arete, 1m L of P. FA: Peter Lynch, John Wentworth & Isabelle Wentworth, 15 Sep 2017 | 15 | ||||||
| 64 |
Postosterone
Shallow corner (boulder pictured has since been swept away) 1m L of HH. FA: Isabelle Wentworth, 15 Sep 2017 | 15 | ||||||
| 65 |
★ Hidey Holes
2m L of BN. Straight up past major pocket, finding excellent slots on the way. FA: John Wentworth & Peter Lynch, 2012 | 11 | ||||||
| 66 |
★★ Beez Neez
South around the corner from Beer Battered Rock is an obvious crack 2m from the arête. A short climb with tricky moves at 4m. Has a nice top out and good protection. FA: Alan Bainbridge & Mal MacDonnell, 2005 | 11 | 10m | |||||
| 67 |
★★ Arete of Regret
Up arete at start of PC. Fun arete with sensational no hands rest for those with long femurs. FA: Peter Lynch & John Wentworth, 2012 | 17 | ||||||
| 68 |
Pub Crawl
Start at the white splattered rock a few metres right of '6 beers before midnight' and traverse left for about 17m. Follow the lowest dyke for the first half, under-cling through the small overlap on the corner (crux), and stay on low holds well below the dyke for the second section, finishing at the incut corner. | V3 | ||||||
| 69 |
Retro Man
A few moves of interest just 1m R of AoR. Pulled out the old spoogie boreal aces for this one. FA: Peter Lynch & John Wentworth, 2012 | 15 | ||||||
| 70 |
★ Jug City
1m R of RM, another Bittangabee delight. Up the jugs. FA: John Wentworth & Peter Lynch, 2012 | 17 | ||||||
| 71 |
★ 6 Beers Before Midnight
Mals description to go here, problem is he had 6 Beers before Midnight and can’t remember anything. Jug Haul/Crimp/Slap Dynamically/Layback/Mantle/Smear/Scum up the easy/tricky/difficult start, follow the obvious/not so obvious line/seam/slab/crack/flake of jugs/crimps/slopers/heucos to the crux. Finish as start. FA: Mal MacDonnell & Alan Bainbridge, 2005 | 11 | ||||||
| 72 |
★★ Oi kids, come down from there!
Onto the boulder, step left onto the face and head up the left side. Step up left onto the ledge and finish up the obvious corner. FA: Mark Hoggard, 2 Aug 2021 | 8 | ||||||
| 73 |
Flake Climb
Flake at left end. Up steep flake, finishing up slab. FA: John Wentworth, 2009 | 17 | ||||||
| 74 |
Mark's Not Dead, He's Just Pining For The Fjords
Start 3m right of the arête, head to right up crack a few metres, trend left slinging lumpy jug. Head left to arête using 1 and 1½ cams for protection. Continue up arête. FA: Dave Cameron & Richard Morley, 2005 | 18 | ||||||
| 75 |
★★★ Orange Ruffy
Start as for MND. Head straight up from lumpy jug to hidden heuco. Move up and right along thin break then up small pockets to slopey mantle top out. Serious. FA: Dave Cameron & Richard Morley, 2005 | 22 | ||||||
| 76 |
Slimehead
Continues up and right along the diagonal features after Orange Ruffy heads straight up. FA: Kai Seth Robertson, 28 Sep 2019 | |||||||
| 77 |
★ P3
2m R of Orange Ruffy. Up to letterbox slot, then line of least resistance to top, finishing left of major capstone. FA: Peter Lynch & John Wentworth, 2016 | 20 | ||||||
| 78 |
★★★ First Coming
Unbeknownst to most people, God had a seaside holiday before heading off to create Mt Arapiles. This climb is a testament to his creative abilities. The gem of Bittangabee, steep, strenuous, and sensational. 1m R of P3. Up right-leaning diagonal, straight up to finish on splitter crack on capstones. FA: Peter Lynch, 2012 | 22 | ||||||
| 79 |
Old Baldy
Prominent blank arete just R of major crack. (no pro). FA: John Wentworth, 2012 | 17 | ||||||
| 80 |
Feeble Old Man
1m R of OB, up corner weakness to the top. No pro. FA: John Wentworth, 2012 | 13 | ||||||
| 81 |
★ Boy Flake
Start below the small, right-facing flake. Up this, pass flared horizontal (small cam), and up to ledge. Couple of runners in the back, then make the big step up and left (unprotected) and cruise to finish. FA: William Wentworth, 2010 | 15 | ||||||
| 82 |
Jump Start
Major crack. Jump puddle to start up crack/ramp, to ledge and then up through easiest route to finish. FA: Paul Thompson & Kobi Thompson, 2010 | 10 | ||||||
| 83 |
I Do Like to Be Beside the Seaside
Blank looking face just R of JS. Delicate moves to thought provoking finish. FA: John Wentworth & Peter Lynch, 2012 | 17 | ||||||
| 84 |
Thar She Blows
Start 1m R of BTSS at right-leaning flakes. Energetic face climbing up to big ledge. Set a belay and look for whales blowing (also great ledge for a bivvy if you want to stay the night). Pitch 2, straight up big pockets to top. The original belay boulder has been swept away, so belayer may require waders. FA: Peter Lynch & John Wentworth, 2012 | 19 | 12m, 2 | |||||
| 85 |
★★ Southern Rights
Absorbing face climbing on right leaning flakes, 1m R of TSB. FA: Peter Lynch & John Wentworth, 2012 | 18 | ||||||
| 86 |
★★★ Zymurgy
Very bouldery start – landing is good. Up to thin horizontal slot, place 0.5 cam after you reach the next holds. Thin moves follow on equally thin gear, bloody brilliant. FA: Dave Cameron, 2005 | 21 | ||||||
| 87 |
★★★ Snake Venom
Starting as for Zymurgy, climb the direct thinner line via slots and crimps to the right of the previous line and staying right of the prominent pale disc. Finish by topping out the boulder problem off the shelf and directly above. FA: 27 Sep 2023 | 23 | ||||||
| 88 |
★★★ Dead Crab's Lament
Up obvious thin cracks and pockets, 2m R of Zymurgy. Up tricky crack to large pocket and up. Originally graded 15. FA: John Wentworth, 2009 | 20 | ||||||
| 89 |
★★ Paragon
Face R of DCL. Tricky, committing start leads to easier climbing to the top. Stepping out right certainly lowers the grade. FA: Andrew Myers & Peter Lynch, 2009 | 19 | ||||||
| 90 |
★ Keeping the Balance
Deceptively tricky. 1m L of corner. Follow thin crack up until move right onto difficult ramp finish. FA: Peter Lynch, Brent Johnson & John Wentworth, 2010 | 18 | ||||||
| 91 |
Tarantula 2
The far-right corner — if only it was 3x as long! FA: John Wentworth, Brent Johnson & Peter Lynch, 2010 | 16 | ||||||
| 92 |
★ Adam's Problem
Variously described as "Adam's one" Jump or reach up to shallow pocket. Make your way up to the top from there. Traverse left or solo to the top of the cliff once on the ledge. FA: Adam | V3 | 3m | |||||
| 93 |
★ Ice Age Vision
Stand start on rail underneath small diagonal rooflet. Make your way up. FA: Peter Lynch, 1906 | V2 | 3m | |||||
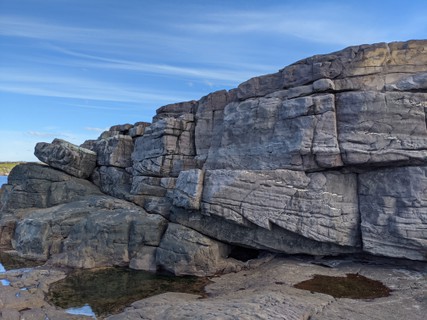 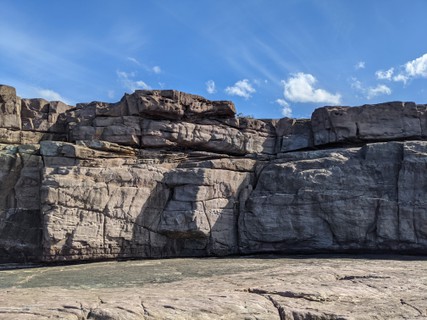 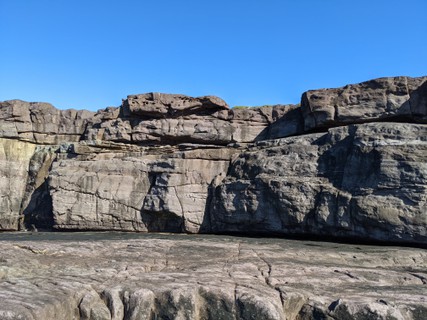 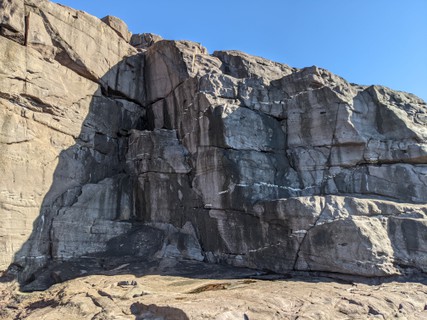 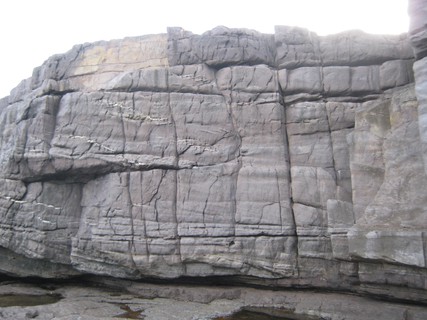 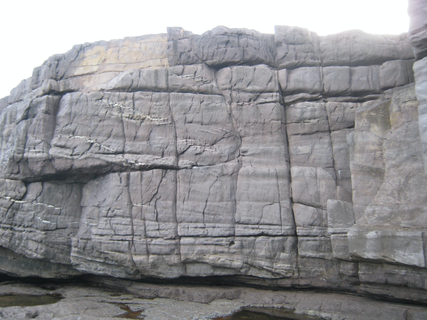 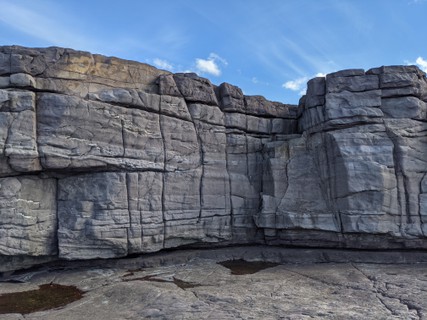 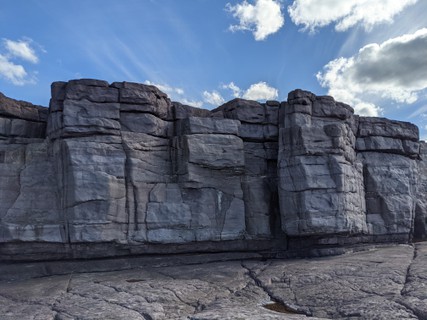 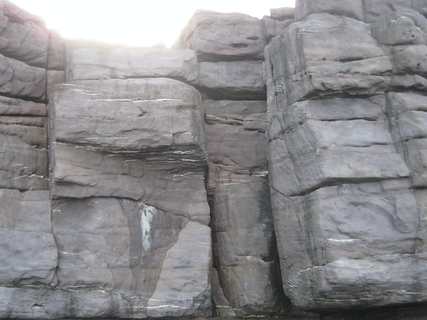 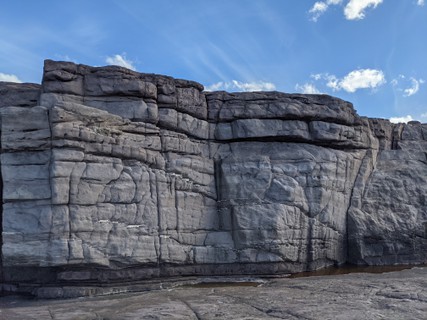  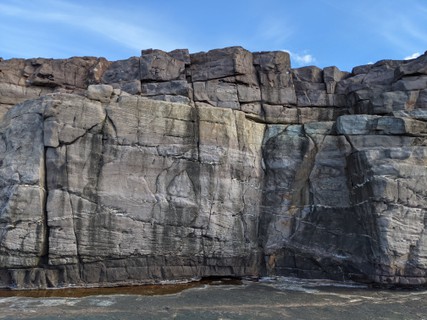 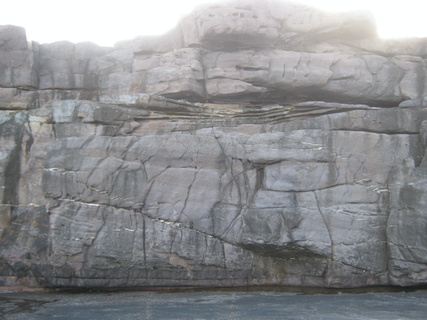 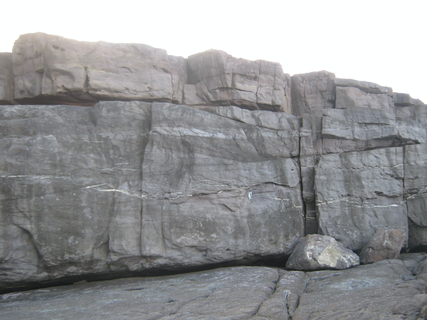 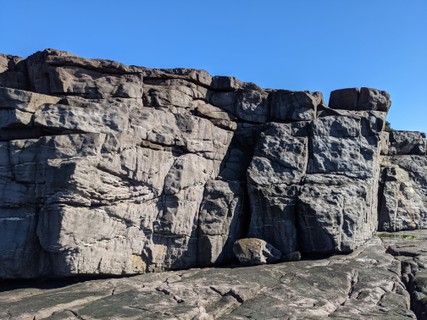 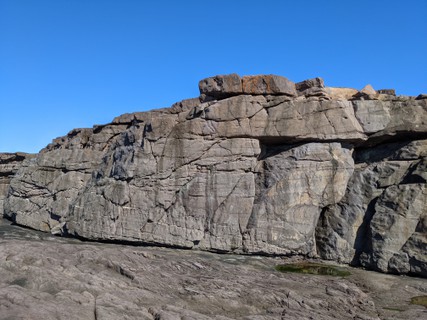 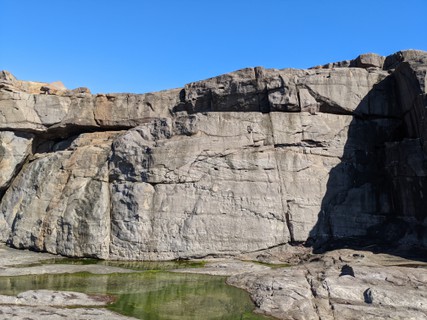 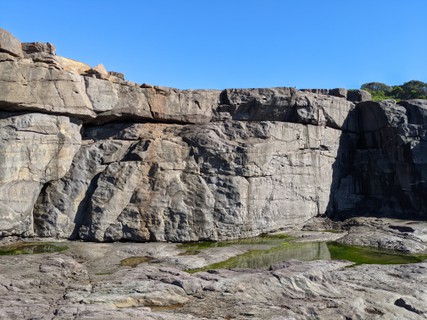 |
||||||||
1.20.1.1. The Upper Tier 12 routes in Sector
- Summary:
-
All Bouldering
Lat / Long: -37.211325, 150.022859
description
Bouldering area above Beez Neez with flat landings that stays dry when high seas make the lower cliff wet or dangerous to access. Care needed as this is a ledge above the main climbing area.
approach
As for the main climbing area, but instead of descending all the way down, locate a short chimney ramp about 10m north of Beez Neez where you can climb down to the ledge. You can also access the main climbing area by continuing down here.
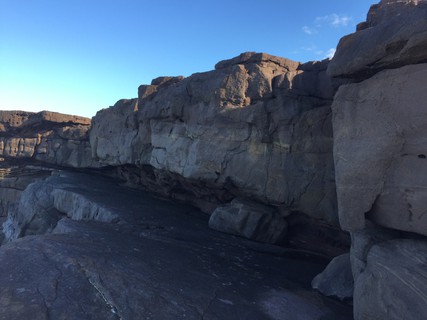 /51/62/51623138eed691204eb70c81aefa9df498e89a7d) /dd/41/dd411091254e46c93b2d1cfe00996d3be34af4bd) 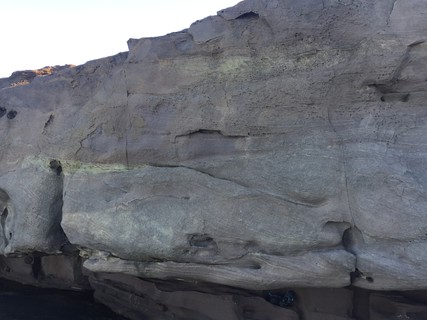 |
||||||||
| Route | Grade | Style | Selected ascents | |||||
|---|---|---|---|---|---|---|---|---|
| 1 |
Project 1
Open project. Sit start from jugs above the puddle, reaching for the slopers above. Hard not to touch the ground. Set: Mitch Lindbeck, 2 Jul 2021 | |||||||
| 2 |
Project 2
Open project. Sit start at the corner/arete 1m right of previous route. Set: Mitch Lindbeck, 2 Jul 2021 | |||||||
| 3 |
Crack line
Sit start at the corner crack 3m R of previous. Start with hand in the crack and pull for ledge. FA: Mitch Lindbeck, 2 Jul 2021 | V0 | ||||||
| 4 |
★ Hanging Crack
Sit start 2m R of corner at the crack. Start with hand in crack and pull up through huecos. Beware of fall potential off the ledge. FA: Mitch Lindbeck, 2 Jul 2021 | V1 | ||||||
| 5 |
★ Jug and up
Sit start 3m R of previous. Start with hands on jug and up passed the hueco. Beware of fall potential off the ledge. FA: Mitch Lindbeck, 2 Jul 2021 | V1 | ||||||
| 6 |
Project 3 - More jugs
Open project. Start just R of previous. Sit start at jug under big undercling. Set: Mitch Lindbeck, 2 Jul 2021 | |||||||
| 7 |
Project 4 - Yet more jugs
Open project. Sit start 1.5m R of previous. Hands on jugs and crack up. Set: Mitch Lindbeck, 2 Jul 2021 | |||||||
| 8 |
Project 5 - crack
Open project. Easy when standing start, I just couldn't get the sit start. Start at the crack at the left end of the ledge in the corner. Set: Mitch Lindbeck, 2 Jul 2021 | |||||||
/28/72/287227e156d13dddccd8615958dfef0cf397a5e5) /53/b6/53b63f401412d58998874dae83c4732bc756ef6a) |
||||||||
| Route | Grade | Style | Selected ascents | |||||
| 9 |
★ Diagonal crack
Sit start under the diagonal crack. Start is 2m R of the arete R of the corner with the ledge R of the previous route. FA: Mitch Lindbeck, 2 Jul 2021 | V0 | ||||||
| 10 |
Is it in?
Sit start 2m R of previous. Start at the jug and move up to the left. V0- if you use the block for feet. Doing it without using the block would be harder. FA: Mitch Lindbeck, 2 Jul 2021 | V0- | ||||||
| 11 |
Standalone
Standing start between the corner and chimney R of the previous route. FA: Mitch Lindbeck, 2 Jul 2021 | V0 | ||||||
| 12 |
Picking the nose
Sit start under the hanging arete R of the previous route. FA: Mitch Lindbeck, 2 Jul 2021 | V0 | ||||||
1.20.2. City Rocks 18 routes in Crag
- Summary:
-
All Trad climbing
Lat / Long: -37.254487, 150.014746
summary
Excellent compact sandstone sea cliffing a long way from civilization. All day shade.
description
This is a compact sandstone crag that is English gritstone like in appearance and climbing style. The climbs follow strong natural lines, using mostly trad gear. The look and feel to the cliff is a compact and darker version of Point Perp, but with generally better rock quality. Expect to see seals and dolphins playing off the rocks and fish swarming in the kelp. Crabs scuttle at your belayers feet whilst anemones cling to the rock pools along the base of the crag. There is great snorkelling straight off the rocks if the swell is low. There is evidence of huge waves, with hunks of wood wedged into cracks 10m off the ground. You will always have the place to yourself.
Every route is good and is worth doing. I refuse to give anything three stars, thus there are routes with no stars in this guide. Zero star routes are still recommend, but will usually not be as sustained as the higher starred routes. Generally the rock quality is superb, a fine grained sandstone which forms fluted cracks and pockets. Most routes have had one ascent, so make sure you check fragile looking holds before committing to deliberate run-outs. Because the cliff faces south it gets very little direct sun and needs a dry windy day to recover from heavy rain or big swells. We found that a wet cliff can dry out in a few hours if the wind is blowing just right. High humidity and a still day can also make the rock horribly greasy. This is not a sport climbing area. Every route in this guide requires trad gear, and most require a full rack, including micro cams. Climbers need to be proficient in placing fiddly gear to really enjoy this area. Offset wires are very useful for the flared cracks. Bolts have been used sparingly and only when no good trad gear is nearby. All bolts are stainless steel glueins. This is a seacliff with high levels of sea spray. Expansion bolts and cad plated crap are not to be used. Glue-in carrot bolts are located along the cliff top, usually well back from the edge. Most routes top-out for a belay off these bolts. This is to minimise the amount of bolts to maintain a low impact. Please respect this ethic and do not add lower-off bolts. Please always anchor or rap off a minimum of two of these bolts at all times. Some routes can be supplemented by trad anchors or tie off the bushes about 15m back from the edge with a long rope. There is still much unclimbed rock in the area. Most of it is choss. Please avoid establishing routes left of Storm Front Crack. The rock quality is much worse then the main wall, and it is much more visible to tourists and rangers. Lets keep this ‘choss sanctuary’ pristine.
access issues
It's a National Park. Keep a low profile.
approach
How do you get there? Locate Eden in far south coast of NSW. Get map to Ben Boyd National Park. Drive 550km aprox from Melbourne to City Rock day use car park. Follow marked tourist track to water. Look left – that’s the cliffs. The left side is sandy rubbish, the middle is where all the action is. Scramble up to top of cliff on left side. Follow tunnel through thick coastal vegetation and cut across to top of cliff as soon as possible. Walk along cliff edge (with care!) for a few hundred metres to locate large rock cairn on large open rock platform. Salty The Seal is directly below this rock cairn. Look for hidden belay BRs about 4m back from cliff edge. Storm Front Crack is located about 50m back westwards from the rock cairn (the way you just came from). All routes require fixing a rope and rapping in. Bring a spare rope and a rope protector for this purpose.
where to stay
Great camping in the National Park!
ethic
Mixed climbing. Bolts only where there is no trad.
history
Developed by Neil Monteith, Jono Schmidt and Adam Demmert over two trips in 2007.
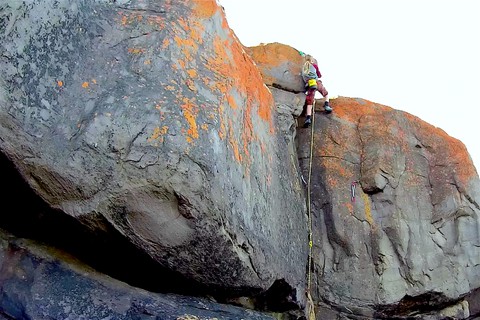 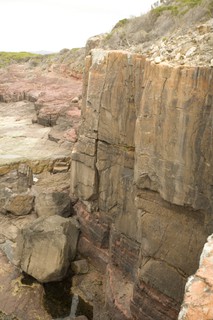 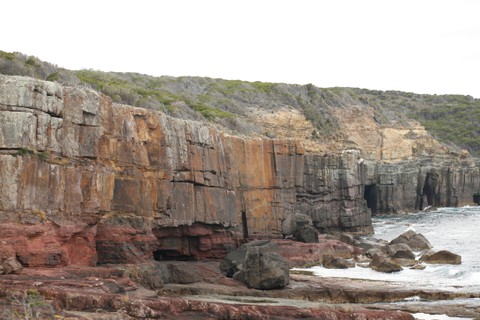 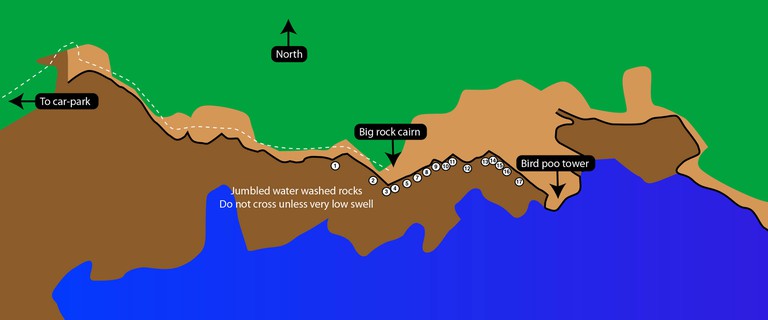  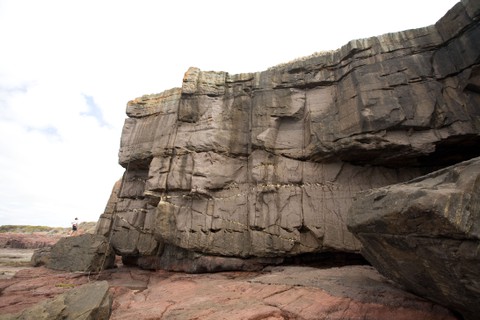 |
||||||||
| Route | Grade | Style | Selected ascents | |||||
|---|---|---|---|---|---|---|---|---|
| 1 |
Wish You Were Here
The first view of the ocean from the end of the path reveals a perched boulder directly ahead close to the edge and somewhat closer than all the recorded routes further east. Down behind this perched boulder is a clean wall above a non tidal platform bounded on it's left end by a square cut corner. Wish You Were Here takes the corner without bailing out onto the ledge at just over half height. FA: Kai Seth Robertson, 10 Jul 2017 | 16 | 7m | |||||
| 2 |
★★ Storm Front Crack
A strong trad line that looks much worse than it is. Locate rock wedged in tree about 2m back from edge. The crack is visible splitting the cliff edge. Rap from tree into small belay ledge 5m above swell. Stem up v-corner then over bulge. Easily up wide crack then launch up the sustained handcrack to top. FFA: Neil Monteith & Jono Schmidt, 2007 | 19 | 17m | |||||
| 3 |
★★★ Invasion Day
Best trad line on the cliff. Thin seam splitting the orange and grey rock 10m around the left of Salty The Seal. You can see this route from the fishing ledges back at the tourist track. Locate the double BR bolts at the top of the route near the cliff edge. Thin crack to start leads into small left facing cornerette. Great gear and great climbing. Double BR belay. FFA: Neil Monteith & Jono Schmidt, 2007 | 18 | 19m | |||||
| 4 |
★★ Arete (project)
Partially toproped (upper half only) FA: Neil Monteith, 2007 | 25 | 18m | |||||
| 5 |
★ Police Cruiser
Starts at major arête, Traverse diagonally up and right across giant crystals to break through right side of big roof. Com- mitting finish up slabby runnels. FFA: Neil Monteith & Adam Demmert, 2007 FA: Neil Monteith & Adam Demmert, 2007 | 19 | 20m | |||||
| 6 |
★★ Salty The Seal
Good line and great climbing. The easiest way up this section of wall. Start right of the overhung wall and traverse across left on amazing quartz dyke to reach small ledge. Straight up the thin crack above to large left facing corner conclusion. FFA: Jono Schmidt & Neil Monteith, 2007 | 17 | 21m | |||||
| 7 |
★★ Crystalline
Start as for Salty The Seal but go straight up to steepness (UB). Swing left and up to big undercling heuco and upwards. Big scoops and bizarre crux. Sustained. Bring some small/ medium cams and some slings for the threads above the last bolt. 4 u-bolts. FFA: Neil Monteith & Jono Schmidt, 2007 | 23 | 18m, 4 | |||||
| 8 |
★★ Barnacle Breath
Tenuous pocketed crux up blank looking corner. Almost a sport route. Start 3m right of Crystalline. Wander up the nice juggy start then enter the overhung blank corner. Quickly exit right and up pockets then step back into corner. 5 U-bolts. Fist crack size cams to finish. FFA: Neil Monteith & Jono Schmidt, 2007 | 24 | 18m, 5 | |||||
| 9 |
★★ Rolling Swells
A strong natural line straight up the guts of the main wall. 3m right of Barnacle Breath at undercut crack. Up crack to steep corner, stem this (RB) then up crack to juggy conclusion. Sin- gle U bolt lower-off. Don’t try and top out the grass up above. Bring a full rack. FFA: Neil Monteith & Jono Schmidt, 2007 | 21 | 18m, 1 | |||||
| 10 |
★★ Humidifier
Conditions were less than ideal on the first ascent. Starts 2m right of RS. Up delicate face to under left side of big roof, monkey out this on jugs then tough lip pull to mantle onto ledge. Stem up open corner to juggy conclusion. 4 u-bolts + medium trad. FFA: Neil Monteith & Adam Demmert, 2007 | 23 | 20m, 4 | |||||
| 11 |
Possible Project
Big roof. Looked at by Neil but no bolts (yet). | 18m | ||||||
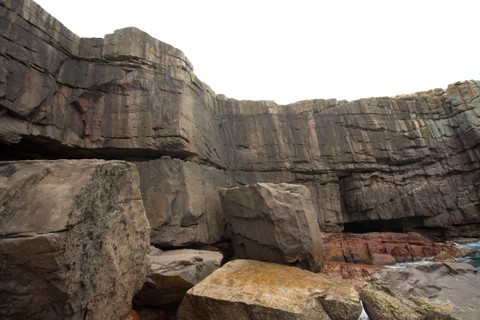 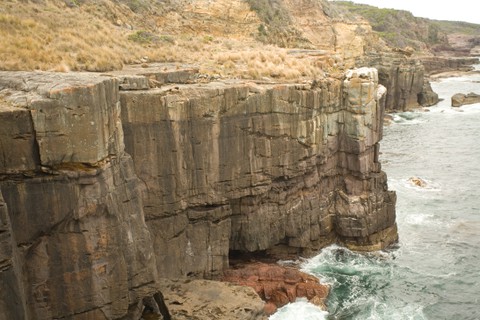 |
||||||||
| Route | Grade | Style | Selected ascents | |||||
| 12 |
★ Skiving Sea Monkeys
A big dark line, which tends to stay wet after heavy rain. Starts 2m right of major blank corner and 6m right of Humidifier. Up unlikely thin face seam (u-bolt) and onto ledge. Swing left over undercut and up left into lift shaft (UB). Stem up this shaft to top. Harder if you are short. Full rack required to #4 SLCD. FFA: Adam Demmert & Neil Monteith, 2007 | 21 | 20m, 2 | |||||
| 13 |
★ Performing Dolphins
A bunch of Japanese tourists filmed the equipping of this route. The exposed rounded prow with bouldery gritstone start. Located 6m right of SSM. Edge up start (2 u-bolts) onto ledge. Up face above (UB) to committing finish move. Medi- um cams/wires required. FFA: Neil Monteith & Adam Demmert, 2007 | 20 | 19m, 3 | |||||
| 14 |
★★ Shark Bait
RP special. Daunting line with just enough (small) gear. Starts 6m right of PD, and 2m left of major blank corner. Climb up short wall to ledge. Stem up short closed corner, step right and up to big break (#5 cam). Edge up face above (RPs and tiny cams) to finally reach a good ledge and gear. Easily to top. FFA: Adam Demmert & Neil Monteith, 2007 | 20 | 18m | |||||
| 15 |
★ Third Time Lucky
Committing trad climbing split by three ledges. Starts 3m right of major corner at small right facing corner. Spaced small gear and a long reach move at about 7m. Finish up leftwards into small right facing corner flake. Take standard rack plus micro cams (Black Aliens). FFA: Neil Monteith & Adam Demmert, 2007 | 19 | 17m, 91 | |||||
| 16 |
★★ Layback And Swim To England
Sustained flakes and one of the best routes here. Continuous rain showers thwarted attempts. Starts 3m right of TTL below open book corner. Stem up this (UB) to horizontal break. Lay- back up wonderful flakes to top. FFA: Adam Demmert & Neil Monteith, 2007 | 18 | 15m, 1 | |||||
| 17 |
★ Sailing The Seas Of Green
Sustained pod crack climbing with a bit of choss to finish. Starts 2m right of LASTE. Bouldery start to get to first UB. 3 u-bolts. Bring a standard rack to supplement bolts. FFA: Adam Demmert & Neil Monteith, 2007 | 22 | 15m, 3 | |||||
| 18 |
★★ Wedgewood
Major trad excursion through some unlikely territory. A piece of driftwood is wedged in the horizontal halfway up this route! Starts 4m right of chimney slot, at undercut wall. Boulder through roof and then work your way up to easiest break in roof at third height. Swing left and up heucos to top. Bring cams up to #5. FFA: Neil Monteith & Adam Demmert, 2007 | 18 | 16m | |||||
1.20.3. Pulpit Rock 26 routes in Crag
- Summary:
-
Trad climbing, Rock climbing and other styles
Lat / Long: -37.240218, 150.034984
summary
An 8-12 m tall, ~100 m wide sea cliff of Grampians-like sandstone in Ben Boyd National Park. Mostly moderate trad lines, with some sport and top-rope-only.
description
560 km east of Melbourne and 320 km southeast of Canberra, Pulpit Rock is located in Ben Boyd National Park (NSW) on the seaward side of Green Cape. It is one of many 5-25 m tall sea cliffs on the peninsula that are accessible by unsealed roads and scenic trails. Most of these crags are near-vertical with clean well-defined lines, flaring cracks and bizarre weathering patterns typical of coastal exposure.
Considerable potential exists here for short technical routes. The area lends itself to natural protection, with most routes requiring small wires and small to medium cams. Except for a couple of routes on the south side, bolted anchors are not in place at Pulpit Rock, so you will need to set your own belays using the trees and cracks at the top. Most are well back from the edge requiring extensions using ropes or long slings.
Pulpit Rock faces east and is well protected from westerly winds. Onshore winds, however, from the Tasman Sea are cold and best escaped by heading over to City Rock (approximately 4 km away).
access issues
Access to Ben Boyd NP is $8 per vehicle per day. Drive to Pulpit Rock car park. The last couple of kilometres of dirt track has some major potholes and drainage ditches - doesn't require 4WD, but decent clearance.
approach
From Melbourne, take the Princes Highway towards southeastern NSW, passing through Orbost in the direction of Eden. Approx 35 km north of Genoa (Vic.) and 17 km south of Eden (NSW), turn right into Edrom Road (sealed, signposted), which provides access both to a Pulp Mill on Twofold Bay and to Green Cape in Ben Boyd National Park. Basic provisions and fuel can be obtained at Kiah, another 5 km further north along the Princess Highway.
From the north, get yourself to Eden, then head south in the direction of Orbost. Travel about 17 km before turning left onto Edrom Road.
After 6 km on Edrom Road, turn right onto Green Cape Road (unsealed). Turn right at the first T Intersection (8 km) before continuing right at 5 km towards the Green Cape Lighthouse, turning left at 18 km to Pulpit Rock. The final 1.5 km of the track is quite rough and washed out in places, leading to a car park among Ti trees. From here, walk east ~50 m and down the steps to the main face on the north side.
history
Pulpit Rock appears to have first been climbed in the early 1990s by Gary Rankin and others. Some of the rusty hangers and carrots probably date from that time. Rick Carey, Mike Law-Smith, Zac Zaharias and others lead all the top-roped climbs described in the pre-2004 edition of the Green Cape Sea Cliffs guide around 2004, as well as adding many more. Neil Monteith appears to be responsible for some of the newer sport routes in 2007. Overall, the history is a little muddled, some of the routes appear to have multiple names, and I couldn't find any pre-existing topos. Have done my best to piece it together with some shots from August 2021.
1.20.3.1. North Side 22 routes in Sector
- Summary:
-
Trad climbing, Rock climbing and other styles
Lat / Long: -37.239901, 150.034942
description
The main wall is 8-12 metres tall and faces north. As approached from below, it begins on the right with a pocketed, clean, sandstone wall with limited pro and dirty exits. The central section is best, with steep walls, shallow corners, and sinuous left-leaning cracks with overhanging roofs. Around to the left are large blocky faces alternating with mostly vertical, 90-degree corners. Because the back corners are sheltered, people often use them for relief of body-functions. Unless the platform is clean from storm waves, approach this area from upwind with caution.
approach
Descend the steps from the parking lookout and head down and right across the platform.
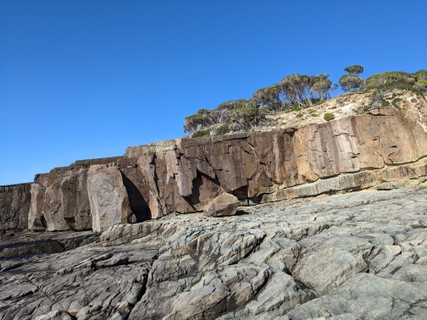 /61/91/6191cadfacdfed3a6054d68e36248152067a8827) |
||||||||
| Route | Grade | Style | Selected ascents | |||||
|---|---|---|---|---|---|---|---|---|
| 1 |
★★★ Traverse of the Fun Police
Step across the corner to the final platform. Traverse out left around the corner and along the gutter wall above the raging sea. Gear is mostly plentiful, with runouts in a couple of spots. A memorable climb best avoided in high seas! FA: Matt Rogerson, Rick Carey & Zac Zaharias, 2004 | 11 | 20m | |||||
| 2 |
★★ Fish Fingers
Central crack in the wall across the gap, overlooking the deep ocean gutter. FA: Mike Law Smith & Rick Carey, 2004 | 17 | ||||||
| 3 |
Fish-N-Shits
Bridge and stretch your way up the corner, then head left under the block. | 13 | 10m | |||||
| 4 |
Fish-N-Shits Alternate Start
No existing route description. Location unknown. | 16 | 10m | |||||
| 5 |
Ticks and Maggots
Original description: The left-hand crack of the first recessed corner. Up (ode to Bittangabee). MH: Could be same as Fish-N-Shits? Grade is too low for anything really. FA: Gary Rankin, 1991 | 9 | 10m | |||||
/87/e4/87e4be77028069ec0785d4ac19d25fcdb4d94a15) 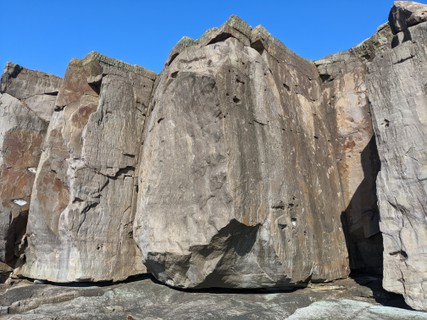 /93/ba/93bad89e65624a9e763081802fdf84c91ba3cfde) |
||||||||
| Route | Grade | Style | Selected ascents | |||||
| 6 |
Left Wall Down Under
Arête immediately to the left of Cenotaph Corner Down Under. FA: Rick Carey & Mike Law Smith, 2004 | 20 | 10m | |||||
| 7 |
★★ Cenotaph Corner Down Under
Obvious big corner with two parallel cracks up most of the central portion. FA: Rick Carey & Mike Law Smith, 2004 | 17 | 9m | |||||
| 8 |
★★ Fill My Pockets
Start as for Cenotaph Corner Down Under, swing out right on large jug, clip the first bolt with the hanger then straight up using the pockets someone just put there for this climb, passing two carrots to the top. FA: Rick Carey & Mark Tonkin, 2006 | 21 | 10m, 3 | |||||
| 9 |
★ White Horses
Straight up the face, starting 3 meters left of Fisherman's Dunny. Begin easily on jugs past a carrot making balancey moves to gain small pockets. Trend right towards the horizontal break, then up to good holds at 2nd carrot. Finish straight up using small wires or cams for protection. FA: Rick Carey & Nathan Roberts, 2006 | 20 | 10m, 2 | |||||
| 10 |
Shark Bait
Start as for Fisherman's Dunny, step left on break, then straight up the face past two carrots on thin holds to natural break, straight up to finish. FA: Rick Carey Rope solo, 2006 | 21 | 10m, 2 | |||||
/05/16/0516893728c786687f3d5404eb15f0302df07648) 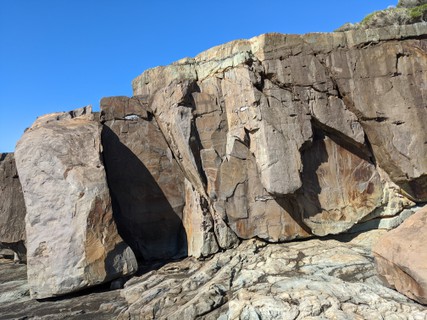 |
||||||||
| Route | Grade | Style | Selected ascents | |||||
| 11 |
★★ Fisherman's Dunny
Around the back of the Guns, Germs and Steel block is a recessed bay with a very thin corner crack at the back left. Interesting technical moves past 3 badly rusted FHs, then easily up to rusty anchor brackets. FA: Rick Carey & Saul Hilton, 2005 | 22 | 10m, 3 | |||||
| 12 |
Hydraulic Flush
The inside corner on the right-hand side of the recess, climbing the chimney behind the Guns, Germs and Steel block. Old description: 7m left of Ticks and Maggots. MH: Left? FA: Gary Rankin, Joel Rankin, Cathy Fraser & John Murphy, 1992 | 7 | 10m | |||||
| 13 |
★★ Dan Would Be Proud
Short, sharp, bouldery arête on the Guns, Germs and Steel block at the mouth of the dark chasm. Has two bolts and a single bolt lower-off that looks a little rusty as of 2021... Original description: Around left from Bindun in a small dark chasm. FA: Neil Monteith, 2007 | 22 | 8m, 2 | |||||
| 14 |
Guns, Germs and Steel
On the large freestanding block that has broken off the main cliff line. Leftward layback up the sharp arête to flake, smearing to the top. No gear. FA: Matt Rogerson & Rick Carey, 2000 | 17 | 8m | |||||
| 15 |
The Pull Pit / Short History of the World
Towards the left end of the face is a large, left-leaning, freestanding block. Starting to the left of Fisherman's Grief, jam the flaring crack, chimney to the top, and then scramble to the terrace. The original grade was apparently 9, updated to 12 at some point. Did it in 2021 and it is more like a 15... Perhaps the block has moved a bit? FA: Gary Rankin, 1991 FA: Matt Rogerson & Rick Carey, 2004 | 12 | 8m | |||||
| 16 |
Fisherman’s Grief
Leftward sloping finger crack at back-right of the embayment. FA: Mike Law Smith & Rick Carey, 2004 | 20 | 8m | |||||
| 17 |
New Balance
Directly up, balancey, with nuts to protect the initial moves. Up to the hand crack, straight up to the ledge, then the top. FA: Rick Carey & Mike Law Smith, 2004 | 21 | 9m | |||||
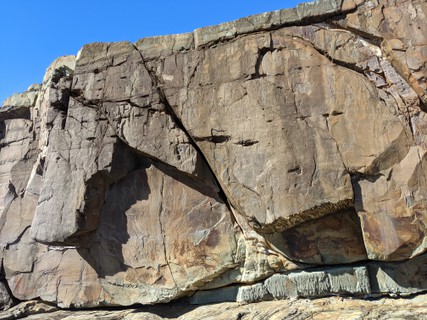 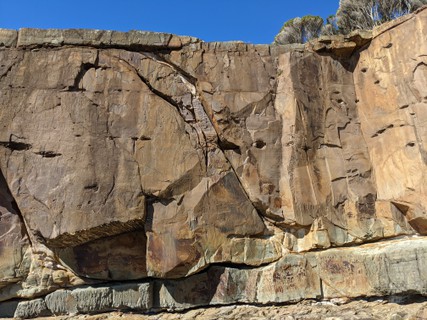 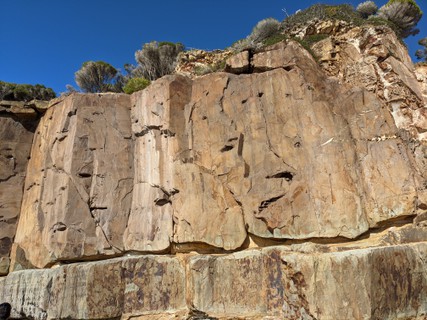 |
||||||||
| Route | Grade | Style | Selected ascents | |||||
| 18 |
Sea Eagles
Obvious left-leaning, diagonal crack to the left of Fisherman's Basket. Take big cams. FA: Matt Rogerson & Zac Zaharias, 2004 | 20 | 10m | |||||
| 19 |
Fisherman’s Basket / Wayback Layback
Right of the low sloping roofs, in the middle of the main face, is a sinuous, left-leaning crack which begins on a step at the base of the cliff. Jams needed. Watch out for pythons basking on the horizontal below the top! FA: Mike Law Smith & Rick Carey, 2004 | 20 | 10m | |||||
| 20 |
Bindun
Start at Fisherman's Basket but swing right onto the blocky face and up the corner to the top. Protection looks marginal... Top-rope only! FA: Gary Rankin, 1991 | 15 | 10m | |||||
| 21 |
Sandy Hunt
Open book corner capped by a small roof crux. Beware of the loose looking block on left. FA: Rick Carey, Matt Rogerson & Zac Zaharias, 2004 | 21 R | 10m | |||||
| 22 |
Joel's Bonito Caper
No existing route description. Location unknown. | 16 | 10m | |||||
1.20.3.2. South Side (Upper) 4 routes in Sector
- Summary:
-
Trad climbing and Bouldering
Lat / Long: -37.240263, 150.035059
description
8-10 metres tall and usually damper than the main wall with plenty of lichen.
approach
Push through the trees from the car park, down the loose slope (beware knocking off any rocks) and out onto the platform that forms the top of the main wall. Head around to the right to the top of South Side (Upper). As of 2021, there are two sets of double bolts for rapping, or travel sideways along the top until you can descend around the end and down through a mini boulder field.
| Route | Grade | Style | Selected ascents | |||||
|---|---|---|---|---|---|---|---|---|
| 1 |
★ Wanted In Seven Countries
FA: Neil | 17 | 8m | |||||
| 2 | ★ Pet Porpoise Pool | 16 | 9m | |||||
| 3 | Euro Tan | 16 | 7m | |||||
| 4 | ★ Porpoise Prow | V0 | ||||||
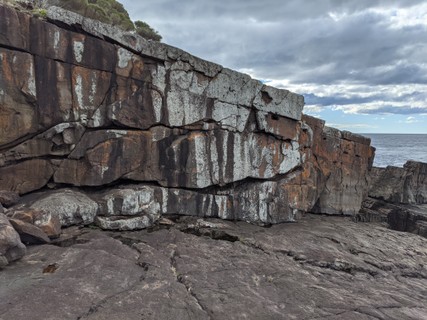 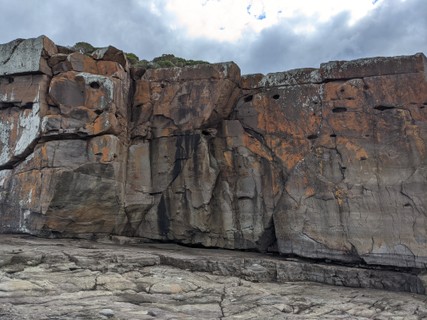 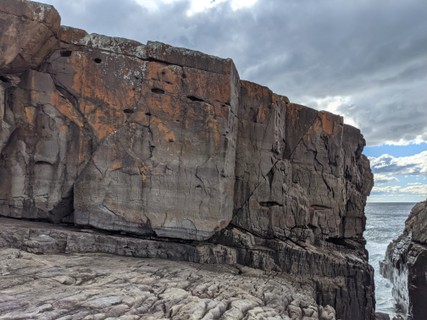 |
||||||||
1.20.3.3. South Side (Lower) 0 routes in Sector
description
Another 8 metre tall wall located below the South Side (Upper).
approach
Haven't worked it out yet... Can't see any rap rings, but at least one line is bolted below.
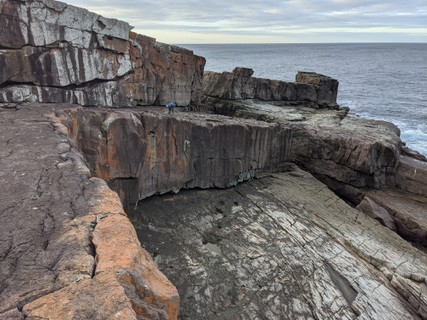 |
1.21. Nadgee 3 routes in Area
- Summary:
-
All Trad climbing
Lat / Long: -37.333428, 149.926410
description
Nadgee Forest is south of Ben Boyd.
Sea cliff climbing on trad generally.
1.21.1. Wonboyn 3 routes in Crag
- Summary:
-
Lat / Long: -37.276280, 149.971828
1.21.1.1. Greenglade 3 routes in Crag
- Summary:
-
All Trad climbing
Lat / Long: -37.283246, 149.943148
description
Small beachside sea cliff
approach
5 min walk from carpark. Head to the beach then the cliff.
| Route | Grade | Style | Selected ascents | |||
|---|---|---|---|---|---|---|
| 1 |
Nads Edge
FA: Macciza a.k.a. Macca & Nadège | 16 | 20m | |||
| 2 |
Gee Nad
FA: Macciza a.k.a. Macca & Nadège | 15 | 20m | |||
| 3 |
No Nads
First route done on cliff. Due to an overly anxious leader and lack of initial game plan, seconder could not follow as rope was pulled up. Oops, my bad ... | 14 | 20m | |||
1.22. Narooma Fitness Centre 0 routes in Gym
description
8 Hopkins Place, Narooma, New South Wales
1.23. Wog Supercrag 1 route in Crag
- Summary:
-
All Trad climbing
Lat / Long: -37.053165, 149.508890
summary
The little brother of the famous crag, home to thrutchy vegetated climbs of sub average height
description
A set of granite tors offering some potential decent crack routes
approach
You can see the crag to the east from Wog way. there is an old fire trail that you can park at the base of. the fire trail takes you most of the way to the crag then just follow the spur up till you reach the granite tors.
1.23.1. Summer Rain buttress 1 route in Cliff
- Summary:
-
Lat / Long: -37.052816, 149.509135
description
Slaby butress with cracks runnning up it.
approach
continue along the base of the cliffs
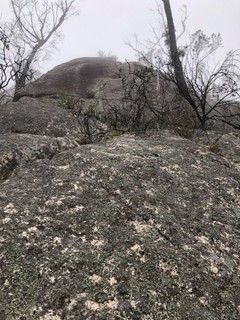 |
||||||||
| Route | Grade | Style | Selected ascents | |||||
|---|---|---|---|---|---|---|---|---|
| 1 |
★ Summer Rain
Start at the large tree in the gully and go up the vegetated cracks to crack running up the centure of the butress. it has a first pitch that is contrived and not worth doing FA: Rat, 27 Jan 2021 | 10 | 20m | |||||
1.24. Cookie Cliffs 6 routes in Cliff
- Summary:
-
Mostly Top roping
Lat / Long: -36.843469, 149.804854
description
Neat set of conglomerate cliffs very close to Wolumla. A good spot for some low-grade trad climbing and top-roping on short routes. The cliff is quite crumbly but will clean up well.
approach
Head south on Scott St in Wolumla, turn right on to Momsen St and follow the road up the hill (becomes Mine Lane) until you reach two gates next to a water tank. Park and follow the fire trail behind the righthand gate up the hill. About 25 metres after the 'Yurramie State Conservation Area' sign, turn left uphill for 50 metres until you reach the crag.
history
Tales of people climbing here in the past, but recent development comes thanks to the pioneering crag echolocation of Marley Faulkner, the climbing wizardry of Cellestine Janiola, and the equipment of Tim Hall
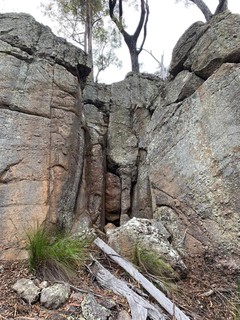  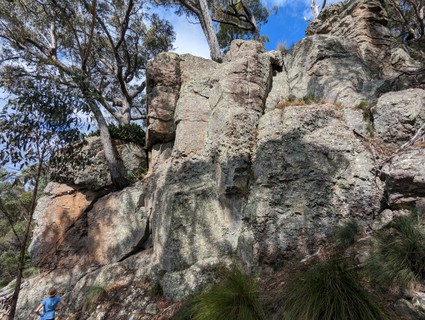 |
||||||||
| Route | Grade | Style | Selected ascents | |||||
|---|---|---|---|---|---|---|---|---|
| 1 |
The Crumb
Easy stemming or climbing up obvious middle crack FA: Marley Faulkner, 29 Dec 2022 | 13 | 8m | |||||
| 2 |
Return of the Crumb
Easy laybacking up crack on solid rock. FA: Cellestine Janiola, 29 Dec 2022 | 14 | 8m | |||||
| 3 |
Return of the Crumb Right
Start as for 'Return of the Crumb' but continue out diagonally right away from the crack on good smaller face holds. FA: Tim Hall, 29 Dec 2022 | 14 | ||||||
| 4 |
Holding Cell
Bouldery start up towards the big crack before heading left up the face for a slightly crimpy top. FA: Cellestine Janiola, 28 Dec 2022 | 12 | 10m | |||||
| 5 |
★ Turtle Magic
Start as for 'Holding Cell' but continue straight up the obvious overhanging splitter crack for some fun (if short) overhanging jams and laybacks. FA: Tim Hall, 29 Dec 2022 | 18 | 10m | |||||
| 6 |
Changing Corners
Obvious platform and open-book corner towards the right end of the crag. Stem on small gear, with small runout at finish. Helmets currently essential. FA: Mark Hoggard, 12 Feb 2023 | 15 | 9m | |||||
1.25. Bingie 89 routes in Area
- Summary:
-
All Bouldering
Lat / Long: -36.005852, 150.160176
1.25.1. Mullimburra Point 1 route in Crag
- Summary:
-
Lat / Long: -35.993747, 150.161774
description
Collection of small cliffs surrounding Mullimburra Point just south of Moruya.
access issues
Unknown currently
approach
Follow Bingie Point Road off the highway and turn left onto Mullimburra Point Road and follow along to the very end carpark.
To access northern beach area there's a small track that leads down to the beach about 100m back from the carpark.
To access southern beach with the pinnacles walk back about 50m from carpark and look for obvious track heading down to the beach on the left.
where to stay
No Camping on the beaches or at the carpark.
ethic
Brush off your chalk and tick marks Don't place bolts Pick-up your rubbish or any that you find. No chipping or modifying holds
history
Scouted by Nick Murphy January 2020
1.25.1.1. Razor Blocks 1 route in Sector
- Summary:
-
All Bouldering
Lat / Long: -35.992257, 150.160247
description
Single short wall facing north about 10 minutes walk/scramble from the carpark.
descent notes
Walk back 100m from most eastern carpark to northern carpark near toilets and follow obvious track down to beach.
Head north and scramble over the rock shelves until you find the small north facing wall with the 2 big flakes on it.
history
First route completed Jan 2020 called 'Lay Off Me Would Ya!' by Nick Murphy. Potentially for maybe 2 or 3 more
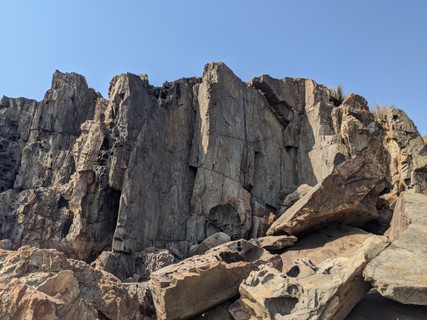 |
||||||||
| Route | Grade | Style | Selected ascents | |||||
|---|---|---|---|---|---|---|---|---|
| 1 |
Lay Off Me Would Ya!
Straight up the center of the wall. Sit start into the larger flake and top out on questionable holds, watch the landing. FFA: Nick Murphy, 31 Jan 2020 | VB | 2m | |||||
1.25.1.2. Various potential 0 routes in Cliff
description
A few cliffs on the eastern end of the point that hold a bit of potential. Need calm seas to be able to access most though as you need to hop across gaps or swim.
Some of the Zawns may hold potential as well, would need to be rapped into and climbed out, or just done as top-rope top-belays
approach
Walk directly east of the carpark finding the track and following the tracks staying on top of the ridgeline until you get to the very end and looking down a large flat ramp that leads to several spots
history
Scouted by Nick Murphy January 2020
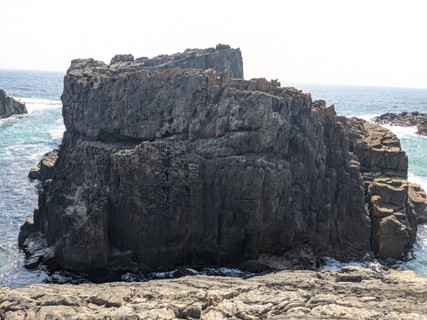 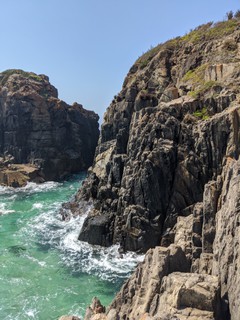 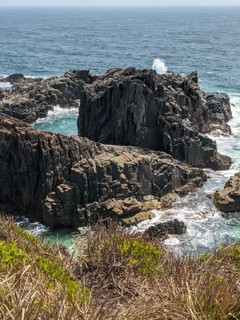 |
1.25.1.3. Pinnacles Beach 0 routes in Sector
description
Small south facing beach with potential on the western side for a few boulder problems and several very easy problems on the two pinnacles in the middle of the beach that dominate the view
approach
Walk back 50m from the eastern carpark and find the obvious track heading down the hill to the beach.
1.25.2. Grey Rocks 59 routes in Crag
- Summary:
-
Lat / Long: -36.003010, 150.158431
summary
Fun, short, easy problems with soft sand for falls. No mats needed.
description
Grey Rocks is an easy access, secluded crag where you can mix bouldering with swimming, surfing, fishing, bushwalking, mountain biking or simply sightseeing. It's a stunning place to be, with bouldering merely the icing on the cake. Most problems have sand landings, so mats are optional. The majority of the problems are in the easy to very easy range, making it a great playground for families or those that want an introduction to bouldering.
access issues
None known of.
approach
From Moruya, head south on the Princes Highway for approximately 7 km to the locality of Bergalia. Soon after the Bergalia turnoff, after the overtaking lane appears, turn left onto Bingie Road (signposted Bingie and Congo).
Drive along Bingie Road for approximately 4 km to the tee intersection. Turn left onto Mullimburra Point Road (signposted Mullimburra Point, Eurobodalla NP). Drive for about 1 km. Soon after the 60 km/h sign, there is a sharp left. The turnoff to Grey Rocks is on the right, just after this left turn (signposted Eurpbodalla National Park, Grey Rocks). Follow the dirt road (Grey Rocks Road) for around 200 m to the carpark. The short walking trail to Grey Rocks is straight ahead.
The picturesque Bingie Dreaming Track (13.5 km one way from Tuross Head to Congo or vice versa) crosses the path between the Grey Rocks carpark and Grey Rocks. Climbing at Grey Rocks can be an interlude when walking or cycling the trail.
where to stay
No camping is permitted on the beaches or at the Grey Rocks carpark.
The nearest wild camping area is at Brou Lake (NP), around 20 minutes south. No fires are allowed and booking is required. There is also a forestry rest area (Bodalla Park Rest Area) just south of the turnoff to Brou Lake where camping is permitted. The excellent Narooma MTB trails are nearby.
More suburban camping is available at Congo (10 minutes), Dalmeny and Narooma (around 30 minutes south on the highway). Please don't camp anywhere in the Bingie area of the Eurobodalla NP.
ethic
Leave no trace (no bolting, carry out rubbish, don't brush off the lichen, wash off chalk marks, etc).
history
Unsure whether they've been climbed before. No evidence found.
1.25.2.1. Mum's Kitchen 16 routes in Cliff
- Summary:
-
All Bouldering
Lat / Long: -36.004386, 150.157235
description
Fun, short, easy problems with soft sand for falls. No mats needed. Room for more (mostly harder) problems to be added. Not familiar with bouldering grades, so adjust as necessary.
approach
Park in the carpark at the end of Grey Rocks Rd. Walk along path and down timber stairs to southern side of rocks. When you reach the sand you'll see the boulders just over 100m down the beach.
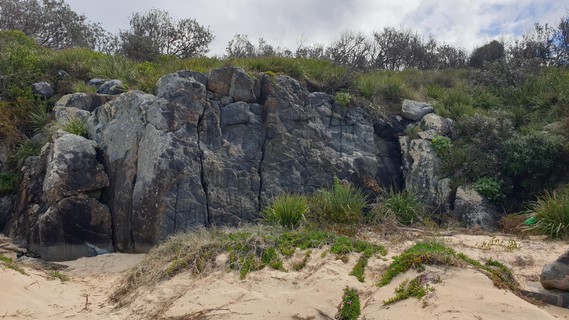 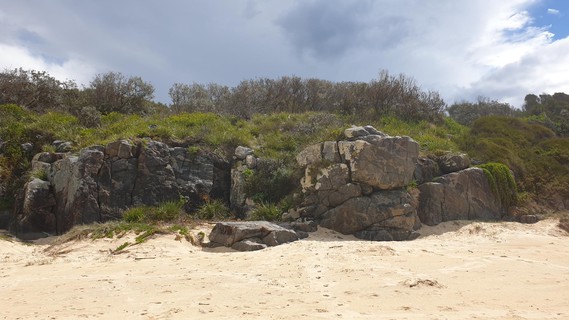 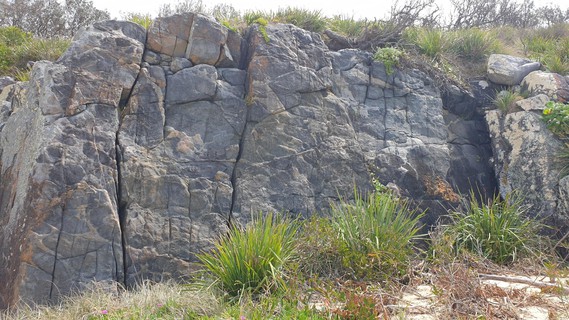 |
||||||||
| Route | Grade | Style | Selected ascents | |||||
|---|---|---|---|---|---|---|---|---|
Main WallThis is the high-ball, slabby face set back from the Anzac Boulder. It is protected from the nor-east winds and most problems have sand landings. The top-outs are generally good but take care at the vegetated right end. Try to limit damage to vegetation at the top. Descend left down Cream Corner. | ||||||||
| 2 |
Cream Corner
The internal corner at the left end of the left boulder. The best descent route for the Main Wall. FFA: Ria, 2 Oct 2021 | VB | 3m | |||||
| 3 |
★ Lamington Layback
The crack in the middle of the south facing wall. Dubious top-out chockstones. Take care. FFA: Dave, 2 Oct 2021 | V0- | 4m | |||||
| 4 |
★ Dad's Pancakes
Up the arete. FFA: Dave, 2 Oct 2021 | V0- | 5m | |||||
| 5 |
★ Peanut Biscuits
Left most crack on main face. FFA: Dave, 2 Oct 2021 | VB+ | 5m | |||||
| 6 |
★ 2 and a 1/4
Up slab between two cracks on main face. FFA: Ria, 2 Oct 2021 | VB | 5m | |||||
| 7 |
★ Apricot Slice
Crack in the middle of the main face. FFA: Ria, 2 Oct 2021 | VB | 5m | |||||
| 8 |
★ Licking The Beater
Up the stepped slab right of the central crack. FFA: Dave, 2 Oct 2021 | VB | 5m | |||||
| 9 |
★ Don't Skip Your Vegies
Slightly vegetated left leaning crack right of Licking The Beater. FA: Adrian Ridgley, 6 Jan | VB | 5m | |||||
| 10 |
Just One More
Off-width corner at right-hand end of main face. FFA: Ria, 2 Oct 2021 | VB | 4m | |||||
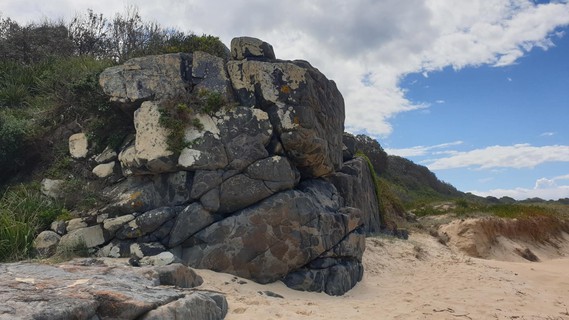 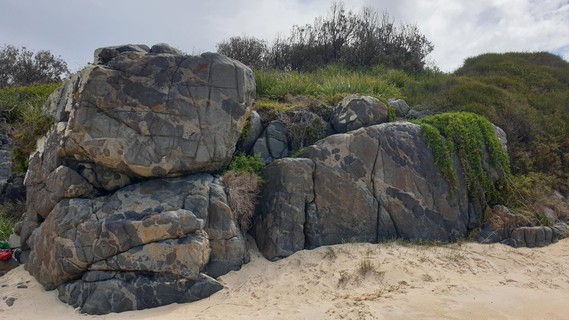 |
||||||||
| Route | Grade | Style | Selected ascents | |||||
Anzac BoulderThis is the prominant, double tiered boulder. Descend right down the gully between Anzac Boulder and Devonshire Face. | ||||||||
| 12 |
★ Oat Slice
Traverse right starting next to bush, just left of Vitamin Puffs. Follow head height horizontal crack / ledge with hands. Bridge gap (descenmt route) to Devonshire Face. Continue right until reaching bush, then top out. FFA: Dave, 2 Oct 2021 | VB+ | 7m | |||||
| 13 |
Vitamin Puffs
Use face and left side of crack on south facing wall. FFA: Ria, 2 Oct 2021 | VB- | 3m | |||||
| 14 |
Uncooked Chocolate Cake
Use face and right side of crack on south facing wall. FFA: Ria, 2 Oct 2021 | VB+ | 3m | |||||
| 15 |
★★ Anzac Arete
Sit start just right of arete proper, under-cling in mini cave then up arete. FFA: Dave, 2 Oct 2021 | V0- | 4m | |||||
Devonshire FaceThis is the short, steep face to the right of the Anzac Boulder. Descend left. | ||||||||
| 17 |
Dry Scone
The left arete of Devonshire Face, left of the deep crack (Elderberry Jam). This is to the right of the obvious descent gully. FA: Adrian Ridgley, 27 Mar | VB- | 3m | |||||
| 18 |
Elderberry Jam
There are three cracks in the Devonshire Face, right of Dry Scone. This is the widest crack to the left. You may need to tape up for this one. Pretend you're in The Valley and use vertical hand jams only (the rest is off limits) to gain the mighty summit. A harder variant (project) for the massochists would be to throw a fist into the bum start. FA: Adrian Ridgley, 30 Jan | VB+ | 3m | |||||
| 19 |
★★ Double Cream
Good value. The double, crossed cracks right of Elderberry Jam. Sit start. No dynos. FA: Adrian Ridgley, 27 Mar | V1 | 3m | |||||
1.25.2.2. Dad's BBQ 27 routes in Cliff
- Summary:
-
All Bouldering
Lat / Long: -36.003294, 150.158399
description
Dad's BBQ is a south facing, shady, easy access crag for those that want to dabble in bouldereing at easy grades, safe heights and with a sand landing. Swimming is available before or after (or during at high tide). No mat is required but a beach towel may be handy to minimise the brushing of sand off your sticky rubber. Plenty for the kiddies, especially on the Sausage Sizzle Slabs (eastern section).
Toppo lines are generally shown at hand level. The difficulty of sit starts may vary with sand level. Moist rock will make all routes substantially more difficult.
approach
From the Grey Rocks carpark, follow the trail to the wooden, beach access stairs on the right (south). Descend the stairs, turn left and walk for ten seconds.
history
Developed by Adrian Ridgley in January 2024. Most likely to have been climbed on before.
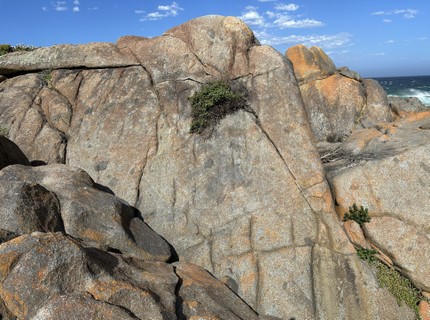 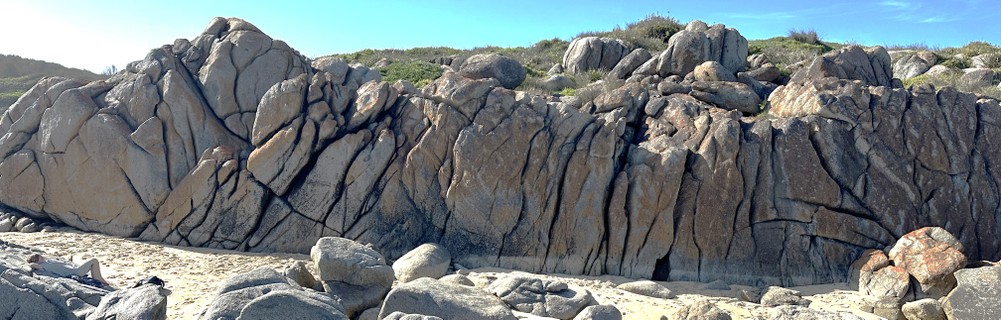 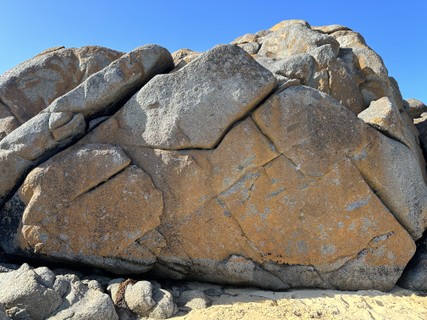 |
||||||||
| Route | Grade | Style | Selected ascents | |||||
|---|---|---|---|---|---|---|---|---|
Beer SlabThis is a west facing slab at a higher level than the beach. It has three weaknesses, the right of which is vegetated. | ||||||||
| 2 |
★ Beer In Hand
This is the middle of the three obvious weaknesses (the one left of the vegetation). Hands free. Topo at feet level. FA: Adrian Ridgley, 21 Jan | VB | 4m | |||||
| 3 |
★ Hold My Beer
On the same slab as Beer In Hand. Start up the diagonal, vegetated crack at the right side of the slab. Pad up just left of the arete. Hands permitted. FA: Adrian Ridgley, 21 Jan | VB | 6m | |||||
Salt Bae BoulderBack at beach level there is a large, south facing boulder with vibrant orange lichen. This is the Salt Bae Boulder. It is characterised by beautiful rock and a near vertical face. The bottom of it can remain moist after high tide and seas making the problems with techical feet (like Two Minutes Turkish) significantly more difficult. | ||||||||
| 5 |
★ Salt Bae
Start on the left side of the Salt Bae Boulder at the right-leaning crack. Traverse rightward with hands in the horizonal break. Finish up right leaning diagonal. V0 if you eliminate the obvious foot ledge in the middle. FA: Adrian Ridgley, 12 Jan | V0- | 4m | |||||
| 6 |
★★ Two Minutes Turkish
The pick of the crag. Quite the tip shredding puzzle. It links all the best bits of the Salt Bae boulder. Start as for Salt Bae, but traverse the face, from left to right, avoiding the high horizontal and right leaning break (the rest of Salt Bae) using whatever remains on the face. Finish in the welcome groove right of the boulder, or muscle up Golden Tomahawk for extra cred. FA: Adrian Ridgley, 30 Jan | V1 | 4m | |||||
| 7 |
Meat Sushi
What's the point? Start in the semi-detatched flake between the starts of Salt Bae and Off The Bone. Climb the flake to the diagonal and beyond. Top out in the middle of the upper boulder just to make it slightly interesting. FA: Adrian Ridgley, 30 Jan | VB+ | 3m | |||||
| 8 |
Off The Bone
Start in the middle of the Salt Bae boulder, with your feet on the obvious little ledge and hands on the thin side pull. Straight up, joining Salt Bae at the angled slot. The sit start (project) would make it harder and better. FA: Adrian Ridgley, 27 Jan | V0- | 3m | |||||
| 9 |
★★ Golden Tomahawk
Sit start on the right side of the Salt Bae boulder. Hands in left-leaning, rounded crack, right foot on right leaning slab. Work hands up left to knob. Pop right hand to top, match and top out. A harder variant (project) would be to start with both feet on the face or in the left leaning diagonal. FA: Adrian Ridgley, 21 Jan | V0 | 3m | |||||
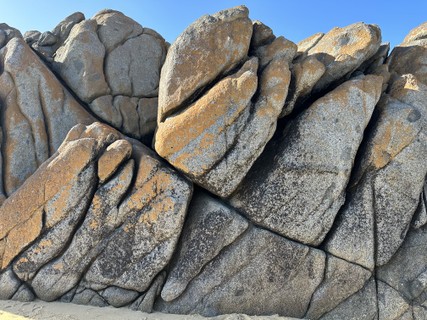 |
||||||||
| Route | Grade | Style | Selected ascents | |||||
Low n Slow AreaTo the right of the Salt Bae Boulder is an angled descent gully. To the right of that there is a slabby face characterised by criss-crossing off widths. The problems are simpler than the Salt Bae Boulder, but can also suffer from damp rock at the base after high tide. | ||||||||
| 11 |
★ Low n Slow
Start at right leaning diagonal just to the right of the Salt Bae boulder. Traverse right, feet low, through a proper hand jam and body tensioning barn-door moments. Finish up the second right leaning off-width. Tricky if moist. FA: Adrian Ridgley, 12 Jan | V0- | 4m | |||||
| 12 |
Hot n Fast
Sit start just right of Low n Slow with hands in isolated flake. Up rightward until feet gain the right leaning ramp. Follow ramp to glory. FA: Adrian Ridgley, 27 Jan | VB | 4m | |||||
| 13 |
Q n Up
Sit start at the right leaning diagonal right of Hot n Fast. Strong first move, then cruise up the widest break to top. FA: Adrian Ridgley, 11 Feb | VB+ | 3m | |||||
| 14 |
★ Swap n Go
Right to left rising traverse with feet in the obvious left-leaning ramp to easy top-out. FA: Adrian Ridgley, 12 Jan | VB+ | 3m | |||||
Sausage Sizzle SlabsRight of the Low n Slow Area you will find the Sausage Sizzle Slabs. This is an easy and safe area for the kiddies, entry level boulderers or bare footed swimmers that want to fondle some rock. The coarse texture means that this areas is less impacted by moist rock. Most problems have sand landings, but there are a few protruding ankle breakers (depending on sand level). Some supervision may be warrented. Most problems have easy, safe top-outs (with a few exceptions noted). Descend carefully in the deep slot between Sauce Not Ketchup and Burnt Sausage, or more easily at the eastern (right) end. | ||||||||
| 16 |
★ Bun Smoke
Long, rightward traverse across the Sausage Sizzle Slabs, from the finish of Low n Slow to the slabby corner after Do The Right Thing. Difficulty increases progressively. Perfect. FA: Adrian Ridgley, 12 Jan | VB | 20m | |||||
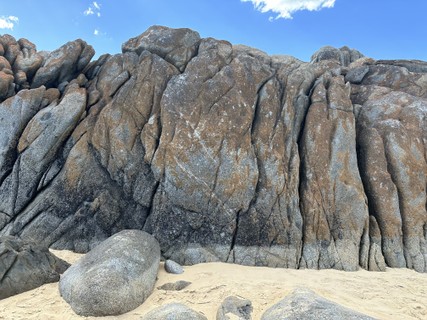 |
||||||||
| Route | Grade | Style | Selected ascents | |||||
| 17 |
★ Bread n Butter
The first vertical weakness right of the finish of Low n Slow. Start on rounded boulder. Good holds all the way. FA: Adrian Ridgley, 21 Jan | VB- | 3m | |||||
| 18 |
★ Salad Free Zone
The face between Bread n Butter and American Mustard. Both cracks are off limits. Tenuous to start. FA: Adrian Ridgley, 27 Jan | V0- | 3m | |||||
| 19 |
American Mustard
The shallow weakness a metre right of Bread n Butter. FA: Adrian Ridgley, 21 Jan | VB | 3m | |||||
| 20 |
★ Sauce Not Ketchup
The deeper weakness just to the right of American Mustard. FA: Adrian Ridgley, 21 Jan | VB- | 3m | |||||
| 21 |
Next Day Breakfast
The face between Sauce Not Ketchup and the descent gully. FA: Xavier Ridgley, 28 Apr | VB | 3m | |||||
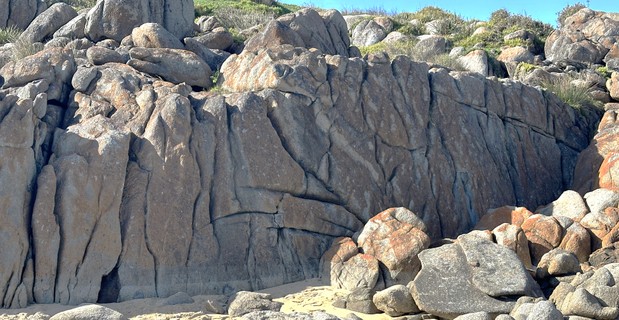  |
||||||||
| Route | Grade | Style | Selected ascents | |||||
| 22 |
Burnt Sausage
Kiddies confidence-builder. Right of Sauce Not Ketchup there is a deep, low-angled rift with a short pillar in the middle. This is one of many descent routes. To the right of that there is an offwidth with an obvious black leakage at the base. This is Burnt Sausage, short and overcooked but the kids won't mind. FA: Adrian Ridgley, 12 Jan | VB- | 2m | |||||
| 23 |
Better At Bunnings
Right of Burnt Sausage there are three shallow weaknesses. This is the left of the three. FA: Adrian Ridgley, 21 Jan | VB | 3m | |||||
| 24 |
No Onion
The right of the three vertical weaknesses. FA: Adrian Ridgley, 21 Jan | VB | 3m | |||||
| 25 |
Baby Q
Almost too easy to be a problem, but the kiddies (and oldies) will love it. The obvious left leaning diagonal right of No Onion. FA: Adrian Ridgley FA: 12 Jan | VB- | 3m | |||||
| 26 |
Join The Q
Start as for Baby Q but stright up the vertical weakness rather than the diagonal. FA: Adrian Ridgley, 11 Feb | VB- | 3m | |||||
| 27 |
★ White Bread Only
The vertical weakness right of Join The Q. FA: Adrian Ridgley, 21 Jan | VB- | 3m | |||||
| 28 |
Hide The Jalapeno
You may want to try this one yourself before pointing the offspring at it. A bit more tenuous than most on the Sausage Sizzle Slabs. The second weakness right of the left leaning diagonal (Baby Q), with blobs of yellow lichen. FA: Adrian Ridgley, 21 Jan | VB+ | 3m | |||||
| 29 |
★ Dripping Butter
Desperate ... for one move ... if you're 5'8". Between Hide The Jalapeno and Stained Serviette (the two lines with yellow lichen) there is a blank section of slab. Smear up this without using the boulders in the sand or the vertical weaknesses on either side. FA: Adrian Ridgley, 11 Feb | V1 | 3m | |||||
| 30 |
Stained Serviette
The broken weaknes 2m right of Hide The Jalapeno. FA: Adrian Ridgley, 21 Jan | VB- | 3m | |||||
| 31 |
Do The Right Thing
Just tidying up. The final vertical weakness on the right end of the Sausage Sizzle Slabs. Can be broken into two pitches. FA: Adrian Ridgley, 30 Jan | VB- | 2m | |||||
1.25.2.3. The Pantry 16 routes in Field
- Summary:
-
All Bouldering
Lat / Long: -36.002452, 150.158921
description
The Pantry includes most of the rest of the picturesque Grey Rocks headland. There is a huge amount of rock in this area, but it lacks both the stature and steapness required for fulfilling bouldering. There is still some potential amid the rounded grey rock and vivid orange lichen. Much of that potential is awaiting those with more bouldering resources than the original developers (like mats, strength, youth and courage).
Toppos typically show the problems at hand level.
approach
From the Grey Rocks carpark, take the trail straight ahead. Avoid the beach access on either side and walk towards the Grey Rocks headland. You will come upon a small, grassy clearing. Here, on your left, you will find the Picnic boulder surrounded by a flat grassy landing. Get your directions from here.
history
Explored and partially documented by Adrian Ridgley in February 2024.
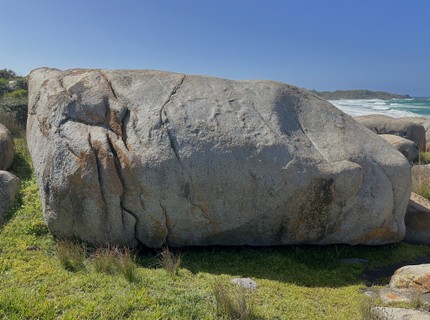 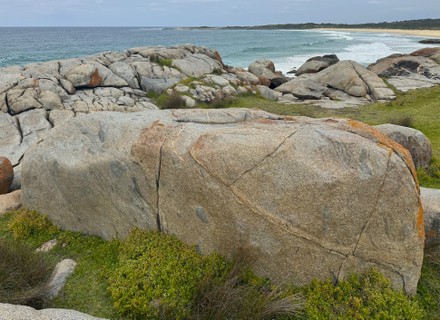 |
||||||||
| Route | Grade | Style | Selected ascents | |||||
|---|---|---|---|---|---|---|---|---|
Picnic BoulderFollowing the approach trail (as described for The Pantry) you will come upon a small, grassy clearing. Here, on your left, you will find Picnic boulder surrounded by a flat grassy landing. The Picnic Boulder has some short, simple problems and the potential for more for those that like palm-slapping, sloping granite with minimal feet and maximum muscle. | ||||||||
| 2 |
Gracias
On the left of the south face of Picnic Boulder. Sit start then easily up the prominant series of slots. FA: Adrian Ridgley, 11 Feb | VB | 2m | |||||
| 3 |
★★ Small Goods
Strangely satisfying. Sit start as for Gracias, but move right, swapping to the thinner crack. Rock over the low right foot and palm-slap up the blankness to the right of the crack. FA: Adrian Ridgley, 19 Feb | V0+ | 3m | |||||
| 4 |
★ Gingham Style
Only one move, but at least it's a fun one. Sit start (or hang straight armed if you are short) off the big jug on the right of the south face of the Picnic Boulder. Right foot up and crank over it onto slab. FA: Adrian Ridgley, 19 Feb | V0- | 2m | |||||
| 5 |
Paper Plate
Limp and pointless. At the left arete of the back (north) side of the Picnic Boulder there is a small attached flake. Crimp it and up. FA: Adrian Ridgley, 19 Feb | VB- | 2m | |||||
| 6 |
Paper Cup
Right of Paper Plate there are two side-pulls at head height. This is the left (easier) of the two. FA: Adrian Ridgley, 19 Feb | VB- | 2m | |||||
| 7 |
Paper Straw
The best of the three, but that's not saying much. Just right of Paper Cup there is another side pull. Use this and left foot on large blob. Swap feet and up. FA: Adrian Ridgley, 19 Feb | VB- | 2m | |||||
| 8 |
Spilt Chardy
Start at the right arete. Rising leftward traverse with feet following the angled sloper until you feel like mantling. FA: 11 Feb FA: Adrian Ridgley, 11 Feb | VB+ | 2m | |||||
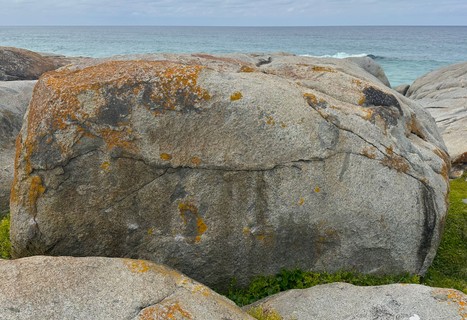   |
||||||||
| Route | Grade | Style | Selected ascents | |||||
| 9 |
★ More Like A Banquet
Sit start as for Gracias but traverse left across the west face. Finish up the easy, crimpy arete or, if you are still hungry, link into Spilt Chardy. FA: Adrian Ridgley, 19 Feb | VB+ | 5m | |||||
Galley BoulderGalley Boulder is the tallest of the boulders in The Pantry. To find Galley Boulder, rock hop about 30m south-west from Picnic Boulder until you see it's shaded, brooding form. Galley Boulder has a 4m southern face with numerous obvious high-ball projects above a moist, uneven landing. This can cop a pounding from the seas unless conditions and tide are favourable. | ||||||||
| 11 |
★ Mess Plates
On the left (west) face of Galley Boulder there is a prominant flake system. From a standing start, haul on the lowest jugs then layback the flakes. FA: Adrian Ridgley, 20 Feb | VB | 4m | |||||
Marble Cake BoulderTo find the Marble Cake Boulder, rock hop north from Picnic Boulder to beach level. Marble Cake Boulder is the largest boulder at beach level with a smattering of orange lichen and streaks of white quartz. The prominant, easy line is Marble Cake. | ||||||||
| 13 |
Vanilla Frosting
Vanilla Frosting is left of Marble Cake, following the quartz. A crimpy, standing start relents to simple moves on beautiful rock. FA: 11 Feb FA: Adrian Ridgley, 11 Feb | VB | 3m | |||||
| 14 |
Marble Cake
The set of left leaning diagonals. Sit start with left hand on crimp below horizontal quartz and right hand in side pull. A hard first move relents to a pleasant stroll. FA: Adrian Ridgley, 11 Feb | V0- | 3m | |||||
| 15 |
Orange Whip
Sit start as for Marble Cake but with both hands in the side pull. Thrutch up right to orange flake and stroll up it to top. FA: Adrian Ridgley, 29 Feb | V0 | 3m | |||||
| 16 |
Spatulation
The slab right of Marble Cake. Eliminate as much as you wish and it will still be simple. FA: Adrian Ridgley, 11 Feb | VB- | 3m | |||||
| 17 |
Sticky Fingers
The feature right of Spatulation. Hands free. Toppo is drawn at feet level. FA: Adrian Ridgley, 29 Feb | VB | 2m | |||||
 |
||||||||
| Route | Grade | Style | Selected ascents | |||||
Skillet BoulderTo find Skillet Boulder, continue north from Marble Cake Boulder, along the beach to near the end of the boulder field. The problems are on the north face. | ||||||||
| 19 |
Crepey
Crepey is just an excuse to do the last move of Skillet. Stand start on the very left of the boulder using the boulder in the sand for feet. Crimp and slap right to the finishing jug of Skillet. Top out as for Skillet. FA: Adrian Ridgley, 29 Feb | V0 | 2m | |||||
| 20 |
★★ Skillet
Just like a real boulder problem … only shorter. Sit start with both hands on the far right jug and left foot in the overhung corner. Grunt left to the next hold then power up left to the jug on the prow. Hook left, rock over and top out. FA: Adrian Ridgley, 29 Feb | V1 | 2m | |||||
1.25.3. Bingie Bingie 29 routes in Crag
- Summary:
-
Lat / Long: -36.015028, 150.159800
description
Bingie Bingie is an easy access crag where you can mix bouldering with swimming, surfing, fishing, bushwalking, mountain biking or simply sightseeing. It has significant cultural heritage which should be respected. It's a stunning place to be, with bouldering merely the icing on the cake. There is even a ship-wreck!
access issues
None known of.
approach
From Moruya, head south on the Princes Highway for approximately 7 km to the locality of Bergalia. Soon after the Bergalia turnoff, after the overtaking lane appears, turn left onto Bingie Road (signposted Bingie and Congo).
Drive along Bingie Road for approximately 4 km to the tee intersection. Turn right onto Bingie Road (signposted Bingie Point, Eurobodalla NP). Take care from this point onward as there are typically kangaroos everywhere.
Drive for about 500m, just before the gravel starts and turn left into Bingie Road. After about 700m the road turns to gravel. Keep heading straight, past the Eurobodalla NP sign and the Bingie Dreaming Track sign to the carpark at the very end. You will see a Bingi Bingi visitor's information area that contains lots of information on the wildlife and cultural information of the area.
Take the track straight ahead (east) to the Bingie Point boulder field. Take the right hand (south) track to the Dreaming Stairs boulder field.
The picturesque Bingie Dreaming Track (13.5 km one way from Tuross Head to Congo or vice versa) crosses the road 100m before the parking area. It can also be accessed from the parking area by following the Dreaming Stairs access. Climbing at Bingie Bingie can be an interlude when walking or cycling the trail.
where to stay
No camping is permitted on the beaches or at the Bingie Bingie carpark.
The nearest wild camping area is at Brou Lake (NP), around 20 minutes south. No fires are allowed and booking is required. There is also a forestry rest area (Bodalla Park Rest Area) just south of the turnoff to Brou Lake where camping is permitted. The excellent Narooma MTB trails are nearby.
More suburban camping is available at Congo (10 minutes), Dalmeny and Narooma (around 30 minutes south on the highway). Please don't camp anywhere in the Bingie area of the Eurobodalla NP.
ethic
Leave no trace (no bolting, carry out rubbish, don't brush off the lichen, wash off chalk marks, etc).
history
Unsure whether they've been climbed before. No evidence found.
1.25.3.1. Bingie Point 14 routes in Field
- Summary:
-
All Bouldering
Lat / Long: -36.012588, 150.162019
summary
In development
approach
Fmom the Bingie Bingie carpark take the eastern trail, left of the Bingi Bingi information sign.
 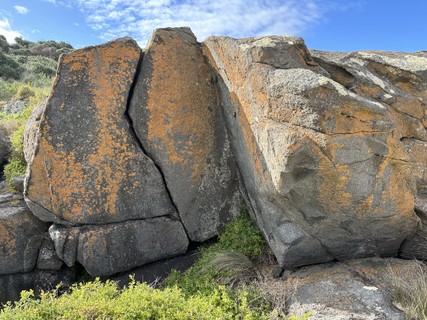 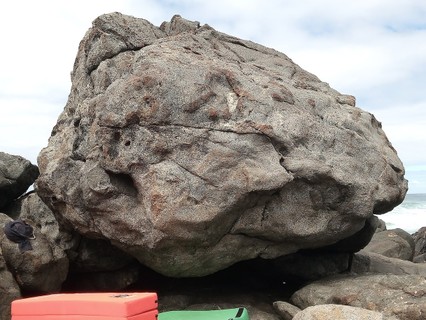 |
||||||||
| Route | Grade | Style | Selected ascents | |||||
|---|---|---|---|---|---|---|---|---|
Hermione BoulderSouthside of point, down on the beach. | ||||||||
| 2 |
★ Mermaid and the Chocolate Maker
Start on horizontal break. Multiple ways to go, choose your adventure. | V0 | ||||||
Mimosa BoulderFrom the Hermione Boulder, walk about 50m south-west down the beach to near the end of the boulder field. The Mimosa Boulder faces south with orange lichen and a flat rock landing. | ||||||||
| 4 |
★ Keft Cleft
The obvious splitter hand crack. Sit start. FA: Adrian Ridgley, 20 Apr | VB | 3m | |||||
| 5 |
Befogged Bridge
Bridge the corner using Keft Cleft for your left foot. FA: Adrian Ridgley, 20 Apr | VB | 3m | |||||
Batavia BoulderSouth side of point, just around corner from Hermione Boulder. | ||||||||
| 7 |
★★ Life In Beige Direct
Low sit start on RHS slimper jugs (right two). Straight up. | V4 | ||||||
| 8 |
★★★ Life In Beige
Low sit start on RHS slimper jugs (left two). Bust leftwards to pinch then up face. | V6 | ||||||
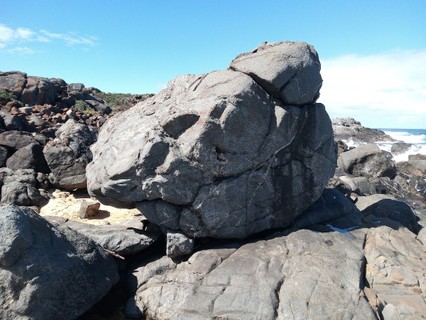 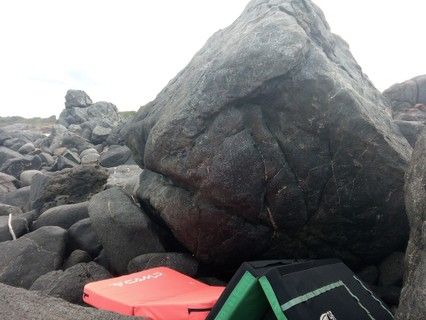 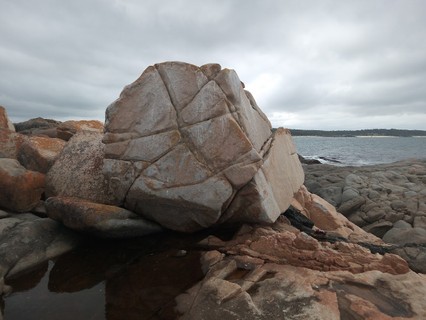 |
||||||||
| Route | Grade | Style | Selected ascents | |||||
| 9 |
★ Wet Dream
On seaside of boulder (south face). Sit start on slimpers. | V0 | ||||||
| 10 |
★ Gloom In The Corner
South-east corner. Sit start on slopers. Wrestle the bulge and mantle. Note that only the main boulder is in (don't dab the friendly looking small boulder). | V5 | ||||||
Lady Franklin BoulderOn south side of the point, further along from Batavia Boulder. | ||||||||
| 12 |
★ All Gloom No Doom
Small overhanging face. Low sit start with right hand on good side pull and left hand pressing down on the ledge bit. Exit left or right. | V0 | ||||||
Bounty BoulderRight at the end of the point. | ||||||||
| 14 |
★ Rum Rebellion
Sit start. Up the butts on the arete (western side) off small boulder. | V1 | ||||||
| 15 |
★ Self Sabotage
Sit start in side pull undercling thing (eastern side). Follow crack line up face (left side, south facing). | V1 | ||||||
| 16 |
★★ Breadfruit
Sit start in side pull / undercling (eastern side). Head straight up blunt arete (stay on left side of it). | V2 | ||||||
 |
||||||||
| Route | Grade | Style | Selected ascents | |||||
| 17 |
★ Sharks Happen
Sit start on jugs in left corner of eastern face. meander up face wherever you please. | VB | ||||||
| 18 |
★ Perpetual Dum Dum Machine
Start by establishing with both hands on slopey rail jug. Note that you must establish before climbing, if you use your momentum from pulling on to do the move, then you didn’t do the boulder. | V3 | ||||||
| 19 |
★★ The Mystic Twig
Start lying down and pull onto jugs. Up to lip. Traverse left along lip to arete, flop your body around the arete. Easy mantle. Can also mantle the lip at the start for an easier boulder, but the secrets of the twig will remain unknown. | V3 | ||||||
1.25.3.2. Dreaming Stairs 15 routes in Field
- Summary:
-
All Bouldering
Lat / Long: -36.017013, 150.157713
summary
Under development.
approach
From the Bingie Bingie parking area, take the right (south) track (keeping the Bingi Bingi infrmation sign on your left). Take the right fork after 50m (the left goes back to Bingie Point). After 200m you will reach a grassy clearing. Aim for the seat you see in the distance. The Bingie Dreaming Track joins the clearing on the right about 300m from the carpark. Just after the seat (about 500m from the carpark) follow the track sign left down the stairs to the beach. Snore Wall is to the right at the bottom of the stairs. Take your bearings from here.
history
Developed by Adrian Ridgley starting April 2024. May have been climbed on before.
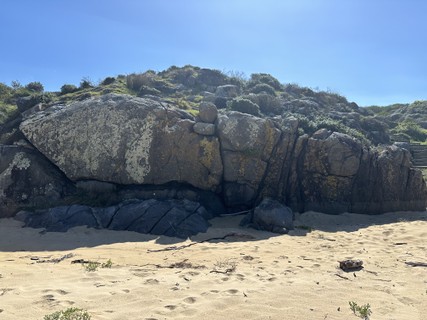 |
||||||||
| Route | Grade | Style | Selected ascents | |||||
|---|---|---|---|---|---|---|---|---|
Snore WallThis is the slabby to vertical south facing wall at the bottom of the Dreaming Track stairs. The rock quality isn't as good as most of the Bingie Bingie area so take care. There is further potential on the lichenous wall left of Don't Worry See Pappy, but this would require brushing, which may not be compatable with the cultural heritage of the area. Problems are described right to left. Toppos are generally at hand level. Descend the arete on the right to protect the vegetation. | ||||||||
| 2 |
One Sheep
To the right hand end of Snore Wall there is a set of three weaknesses. This is the left of the three with a fragile flake at the top. Hard sit start then easily up. FA: Adrian Ridgley, 12 Apr | VB | 2m | |||||
| 3 |
Two Sheep
Half a metre left of One Sheep. Start with your hands in the horizontal. Straight up face avoiding the hollow flake at top. FA: Adrian Ridgley, 12 Apr | VB+ | 2m | |||||
| 4 |
★ Three Sheep
This is the twin shallow cracks just right of the boulder in the sand. Up the cracks to awesome jug handle top-out. Sit start is VB+. FA: Adrian Ridgley, 12 Apr | VB | 2m | |||||
| 5 |
Snore
The deeper crack left of Three Sheep, above the boulder in sand. Sit start off boulder using the undercling knob. FA: Adrian Ridgley, 12 Apr | VB | 2m | |||||
| 6 |
★ Fingering The Nose Flute
The bottomless crack between the boulders in the sand. Sit start. FA: Adrian Ridgley, 12 Apr | VB+ | 3m | |||||
| 7 |
CPAP Smear
The face with crossed weaknesses 1m left of Fingering The Nose Flute. A powerful undercling sit start relents to an easier face. FA: Adrian Ridgley, 12 Apr | V0- | 3m | |||||
| 8 |
★ Don't Worry See Pappy
The right leaning weakness on the lichenous face left of CPAP Smear. Undercling sit start with hands following the weakness. FA: Adrian Ridgley, 12 Apr | V0 | 3m | |||||
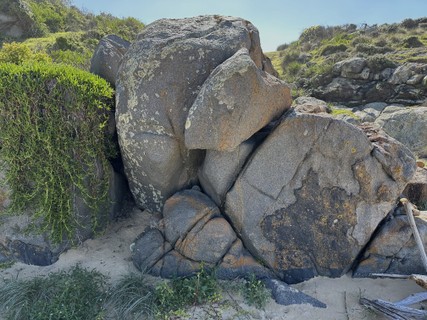 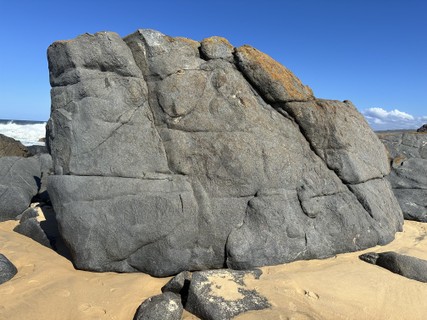 |
||||||||
| Route | Grade | Style | Selected ascents | |||||
Chock RockSouth-west of Snore Wall there is a group of boulders with a massive chockstone sitting on top. This is Chock Rock. Problems are on the south side. | ||||||||
| 10 |
★ White Horses
Start right hand side of chockstone. Sit start to hand jam. Reach over the bulging chockstone and walk feet up right ramp. FA: Adrian Ridgley, 12 Apr | V0 | 2m | |||||
| 11 |
★ Wild Turkeys
Different. Sit start left of the chockstone, up left face via a crimp ledge. Sit rest on chockstone, face outward and reverse mantle to top. FA: Adrian Ridgley, 12 Apr | VB+ | 2m | |||||
Dr Dream BoulderTo find Dr Dream Boulder, turn left at the base of the Dreaming Stairs and walk north around the coastline towards Bingie Point. Walk for about 200m, past the point with the cool, pink rock intrusion, to near the end of the boulder field. Alternatively, from the Bingie Bingie carpark, follow the Dreaming Stairs access description to the grassy area. Before the seat you will see a gully to the left (east). Follow any track to the beach after the gully. Dr Dream Boulder is the tallest boulder at beach level. Problems listed right to left. | ||||||||
| 13 |
★ The One Chance Dance
The face just right of Day By Day. Hands (and elbows) free. Toppo drawn at foot level. FA: Adrian Ridgley, 20 Apr | V0 | 2m | |||||
| 14 |
★ Day By Day
Start on the right of the north face. Undercling layback the aesthetic, left leaning line. FA: Adrian Ridgley, 12 Apr | VB- | 3m | |||||
| 15 |
★ Ballbearing Blues
The middle of North face between Day By Day and Night By Night. Sit start on finger jugs then pleasant smearing. FA: Adrian Ridgley, 12 Apr | VB+ | 3m | |||||
| 16 |
★ Night By Night
The splitter finger crack on the left side of the north face. Sit start at lower flake. FA: Adrian Ridgley, 12 Mar | VB+ | 3m | |||||
 |
||||||||
| Route | Grade | Style | Selected ascents | |||||
| 17 |
★ It Begins With A Blessing
The left arete of the north face. Start with both hands on lowest ledge. Mantle to establish on wall before moving either hand to the second ledge then top-out. The sit start (project) would be a whole lot harder and better. FA: Adrian Ridgley, 12 Apr | V0 | 3m | |||||
| 18 |
It Ends With A Curse
Open Project. The perfect splitter finger crack through rooflet on the east side of Dr Dream Boulder. | 3m | ||||||