
A Crag Guide gives an extensive view of all sub areas and climbs at a point in the index. It shows a snapshot of the index heirachy, up to 300 climbs (or areas) on a single web page. It shows selected comments climbers have made on a recently submitted ascent.
At a minor crag level this should be suitable for printing and taking with you on a climbing trip as an adjunct to your guidebook.
This guide was generated anonymously. Login to show your logged ascents against each route.
Warning
Rock climbing is extremely dangerous and can result in serious injury or death. Users acting on any information directly or indirectly available from this site do so at their own risk.
This guide is compiled from a community of users and is presented without verification that the information is accurate or complete and is subject to system errors. By using this guide you acknowledge that the material described in this document is extremely dangerous, and that the content may be misleading or wrong. In particular there may be misdescriptions of routes, incorrectly drawn topo lines, incorrect difficulty ratings or incorrect or missing protection ratings. This includes both errors from the content and system errors.
Nobody has checked this particlular guide so you cannot rely on it's accuracy like you would a store bought guide.
You should not depend on any information gleaned from this guide for your personal safety.
You must keep this warning with the guide. For more information refer to our:
Usage policy
Contributors
Thanks to the following people who have contributed to this crag guide:
Matt Brooks
Damien Brook
Mick Sander
Luen Warneke
Brendan Heywood
Bec Cowell
Nick Murphy
Stephen Gordon
Roo Davis
Campbell Gome
The size of a person's name reflects their Crag Karma, which is their level of contribution. You can help contribute to your local crag by adding descriptions, photos, topos and more.
Table of contents
- 1.
The Rock
78 in Crag
- 1.1. The Towers 54 in Cliff
- 1.2. Central Buttress 10 in Cliff
- 1.3. The Main Face 11 in Cliff
- 1.4. Upper Terrace 3 in Cliff
- 2. Index by grade
1. The Rock 78 routes in Crag
- Summary:
-
Mostly Trad climbing
Lat / Long: -35.283397, 147.074419
description
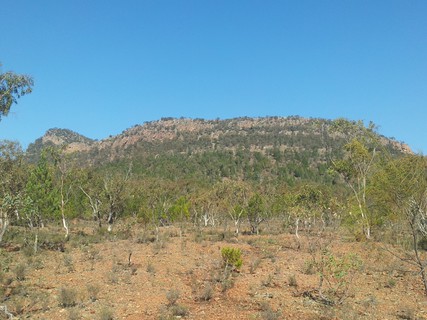
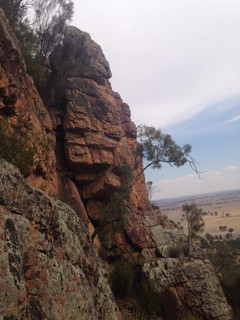
Know as Kengal to the local Wiradjuri people, The Rock towers 250 metres over the surrounding countryside, and is thought to have been a site for initiation ceremonies. The reserve is an island of natural habitat for native animals, including the turquoise parrot and glossy black cockatoo.
The Rock Nature Reserve is in the southern Riverina of New South Wales, and lies on the boundary of two major physiographic regions: the Riverine Plain and the western slopes of the Eastern Highlands.
On a clear day, you can see Mount Kosciuszko and the Victorian Alps from the top of the three kilometre Yerong nature track.
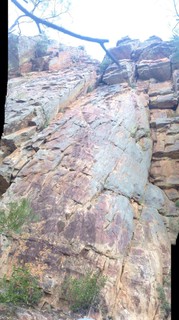
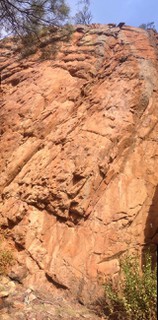
The Rock is comprised of a hard quartzite like stone laid down in a diagonal like strata. This leads to some beautiful and technical corner, crack and face climbing with lots of diagonally facing holds. Traditional gear is the go to on many of the routes with many good technical placements being found.
access issues
This reserve is 6 km west of The Rock village on Lockhart Road, 35 km east of Lockhart and 40 km south-west of Wagga Wagga off the Olympic Highway.
From 1st July to 31 December The Rock is closed to all 'Rock Sports', due to breeding Peregrine Falcons. A sign is put in place when the birds are nesting in this area. For more information check the NPWS website: https://www.nationalparks.nsw.gov.au/things-to-do/adventure-sports-experiences/the-towers
Climbing is only permitted at The Towers and is prohibited in other areas of the reserve at this time.
approach
Approach time to The Towers is 20 Minutes, Central Buttress is 25 Minutes, and The Main Face is 35 Minutes
where to stay
There is no camping within The Rock Nature Reserve, visitors can stay the night at The Rock Village, or find other accommodation options in neighbouring towns including Wagga Wagga
ethic
Taken from the NPWS signage located at The Towers:
Rockclimbing and abseiling within The Rock Nature Reserve may only be carried out with the consent of the director-General of the National Parks and Wildlife Service. Consent is given upon compliance with the Code of Conduct and completion of the Register book located at the base of The Towers.
Code of Coduct *Rock activities are only permitted on the NE rock face known as The Towers
*Parties are to be no larger than 4 people for rock climbing and 8 for abseiling.
*No new climbs are to be established outside of the designated rock activities area.
*Do not mark the location of climbs.
*Do not attach permanent anchor points to rocks, USE REMOVABLE GEAR only.
*Do not chip or glue route, brush or "garden" the rock face and avoid excessive use of chalk.
*Where possible descend via the cliff face to minimise erosion.
*Tread Lightly, keep to rocks, hard ground and established tracks.
*All flora and fauna are protected in The Rock Nature Reserve and must not be picked, harmed or disturbed in any way. Take especial care not to harm the Threatened plant Woolly Ragwort (Senecio gariandii).
 |
1.1. The Towers 54 routes in Cliff
- Summary:
-
Mostly Trad climbing
Lat / Long: -35.267794, 147.072933
description
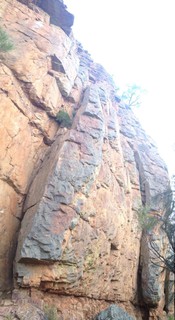
The Towers is the North facing cliff line that is visible from the car park and contains the majority of the routes at The Rock.
Bolting new climbs is prohibited under the Code of Conduct that allows climbing to take place at The Rock.
approach
Take the track that leads directly up the hill from the top L corner of the carpark. This track is not marked. This leads you up a fairly easy trail to the base of the cliff line and should take about twenty minutes.
descent notes
Climbers should, where possible, descend using the very adequate rappelling points, the position of which are marked by a small cairn at the top of the climbs (Top of Mrs Fairy, Angie, Virgins Crack). Note that a 50m rope will only just touch the ground from these points if it is slung half way. A 60m rope would be more appropriate. If a 50m rope is used you will have to rappel to a ledge that is about 2m above the ground, then downclimb. A knot in the end of the rope is highly recommended.
 |
||||||||
| Route | Grade | Style | Selected ascents | |||||
|---|---|---|---|---|---|---|---|---|
| 1 |
★ Controversy
L of TL is a prominent arete with a steep R face. Follow the R side of this arete. FA: Mar 2015 | 24 | 15m, 6 | |||||
| 2 |
★★★ Disorientation
Superb steep and technical climbing, packs in a lot for 20m. Line heading up R from C. Climb C till the 4th RB then head R and up the steep wall, keep L of the slab corner. FA: MB, 2015 Set: Aug 2015 | 25 | 20m, 8 | |||||
| 3 |
★ The Ladder
An easy beginners' climb on small clifline L of where old track ascends cliff. Start at the ladder like recess. FA: Jeff Boyton & Andrew Hedley, 1974 | 6 | 15m | |||||
| 4 |
Daisy
Wall several metres L of descent gully. FA: Jeff Boyton & Andrew Hedley, 1974 | 8 | 30m | |||||
| 5 | Descent Gully | 4 | 35m | |||||
| 6 |
MMMM
Wall R of descent gully. FA: Jeff Boyton & Andrew Hedley, 1974 | 8 | 30m | |||||
/41/fd/41fd212e577a61a2171ce961a783a43d86f68d10) |
||||||||
| Route | Grade | Style | Selected ascents | |||||
| 7 |
★ BRCN
The nearest I can figure is that this climbs the crack on the face to the Left of Kidstuff, assuming that Kidstuff takes the line in the chimney/gully. FA: Goose & Rhiannon Taylor, 25 Jun 2018 | 7 | 18m | |||||
| 8 |
Kidstuff
Layback crack 8m R of DG Line L of bush, then directly to roof. FA: Glen Holloway, 1993 | 5 | 20m | |||||
| 9 |
★ Traverse #1
Start is marked (T1). Directly up crack, veer slightly left about halfway up onto slab, exit via gully on the left. Nice easy warm up piece. FA: Andrew Hedley, 1973 | 10 | 30m | |||||
| 10 |
Leeper Traverse
Start is marked (T1). Directly up crack, veer slightly left about halfway up onto slab, exit via gully on the left. Nice easy warm up piece. FA: Andrew Hedley, 1973 | 11 | 35m | |||||
| 11 |
★★ The Nose
Start marked (TN). Nose to roof. Step R and ascend wall. FA: Jeff Boyton, Andrew Hedley (15 & M1, 1973 FFA: Greg Smith & Jeff Boyton, 1976 | 18 | 35m | |||||
   |
||||||||
| Route | Grade | Style | Selected ascents | |||||
| 12 |
Bill's Climb
Start marked (BC). One of the first climbs completed at The Rock. Chimney formed by large block. Veer slightly R up wall, then gully. Two alternative finishes are on wall L of exit gully. Line closest to gully is grade 10; line further L is grade 8. FA: Bill Davis & Scout group, 1972 FA: Andrew Hedly & Jeff Boyton., 1974 | 10 | 35m | |||||
| 13 |
★ Traverse #2
Start marked (T2). Corner, then pleasantly up wall. Veer slightly R to roof. Traverse R under roof to easiest line on R side of overhang. Slight bulge, then directly up. FA: Jeff Boyton & Andrew Hedley, 1973 | 13 | 40m | |||||
| 14 |
★ Honourable Harry
Start marked (HH). Crack, then finish by way of BC's gully. FA: Jeff Boyton & Andrew Hedley, 1973 | 12 | 35m | |||||
| 15 |
★★ Harry the Fairy
Some delicate footwork whilst on side pulls gets you to an easier finish. Start as for HH, boulder up R to RB then straight up the wall to lower off on ledge. | 18 | 20m, 4 | |||||
| 16 |
★ Mrs Fairy
Start marked (MF). Crack up to small overhang, step left onto slab, up to wide ledge then exit via chimney (BC's gully). Ledge can be used for top belay if done in two pitches. FA: Jeff Boyton & Andrew Hedley, 1973 | 12 | 35m | |||||
| 17 |
★★ Temptation
A good climb if one resists the temptation to escape to easier climbing on L. Start just L of Terminator. R side of face. First crux face is protected by 3 BRs. Rest of route is adequately protected by gear. From horizontal, move R to join Terminator (best finish) or step L through bushes and up face to a large ledge. Continue up gully or climb unprotected roof (20/21) on R side of gully. FA: Robert Cowan & Andrew McAuley, 1989 | 20 | 40m, 3 | |||||
  |
||||||||
| Route | Grade | Style | Selected ascents | |||||
| 18 |
★ Terminator
One of The Rock's classic test-pieces. Start Marked. Start 1m L of Scratched Knees on top of rock. Up L side of recess through spectacular roof line. Turn lower roof on L using prominent hold on L wall to gain halfway ledge of Traverse #2. (Belay possible under main roof but don't bother) Turn second roof using underclings, then large jam-crack to reach jugs on lip. Wall above. (Both roofs easier than they look) FA: Jeff Boyton & Edward Fairleigh 1970's. | 20 | 40m | |||||
| 19 |
★★ Scratched Knees
Start marked (SK). Starts 1m R of Terminator (just L of large nose). R side of recess and overhang to roof. Don't pike on R, but head straight up through roof and finish up L line. FA: Jeff Boyton & Andrew Hedley, 1973 | 15 | 35m | |||||
| 20 |
★ Wall Flower
Excellent climbing in unusual place. Start as for SK, moving R to join bottoming crack. Do not hang around crack like a wallflower - continue up arête. This leads to easier climbing and lovely stroll to top. Protection a bit dubious, but small RPs in strange places will protect crux. FA: Robert Cowan & Greg Claire, 1989 | 19 | 35m | |||||
| 21 |
★★ Wilted
Start 2m R of Wallflower on the face under the roof. Up this face to the roof. Step L into WF for a few moves then traverse back just above the roof to the arête. Follow this to the top where WF joins it. FA: 18 Oct 2015 | 19 | 15m, 4 | |||||
| 22 |
★★ Staircase
The Rock's first classic test piece at this grade. Start 2m left of prominent corner. Prominent upside-down staircase (two BRs) to ledge. FA: Robert Cowan & Andrew Driscoll, 1989 | 21 | 35m, 2 | |||||
 |
||||||||
| Route | Grade | Style | Selected ascents | |||||
| 23 |
★★ Incensed
Start as for Angie. Up this for 5m to a traverse line. Traverse L to join SC for about 4m then traverse L again to the arete and follow this to the SC anchor. FA: 31 May 2015 | 23 | 15m, 3 | |||||
| 24 |
★★ Angie
Excellent climbing at this grade. Prominent corner marked 'A'. Corner to roof. Pass the roof on the left. Continue past some large, loose blocks, then up to the top of the cliff. FA: Jeff Boyton & Andrew Hedley, 1973 | 15 | 35m | |||||
| 25 |
★★★ Outside Edge
Follow Angie to roof, then follow R line through roof. Straight up loose, R-facing corner to lower offs below loose wall at top. FA: Wayne Maher, Glen Donohue, Iain Sedgman & Andrew Webb, 1984 | 19 | 40m | |||||
| 26 |
★★ Where Iron Crosses Grow
Steep with a difficult move to reach the lip. Start as for OE or LWF and climb either of these for the first 5m before stepping onto the arête. Follow this to the first roof, step R under this, up a move then a hard move out L to the lip. Finish up the face to the lower off on OE below the death choss at top. Set: Matt Brooks, 8 May 2017 FA: MB, Jan 2018 | 26 | 25m, 5 | |||||
| 27 |
★★ Lest We Forget
Beautiful line done in two pitches to reduce rope drag.
FA: Iain Sedgman & Glen Donohue (alt), 1984 | 17 | 40m | |||||
  |
||||||||
| Route | Grade | Style | Selected ascents | |||||
| 28 |
Secret Agent Man
First line R of LWF. Thin crack, moving R to horizontal. Traverse L along horizontal to meet LWF. FA: Robert Cowan & Andrew Driscoll., 1989 | 22 | 20m | |||||
| 29 |
★★ Chaos
Climb SAM to horizontal, then move R to overlap. Move R past a FH up thin flake and face past 2FHs to small roof. Over roof and up face until just R of large roof. Finish up closed flake past 2FHs to lower off R of LWF. (#5 stopper and 2 small cams is useful after roof). Direct finish added in May 2017, makes for more direct and fun route. FA: Robert Cowan, Greg Caire & Andrew Driscoll, 1989 | 23 | 20m, 4 | |||||
| 30 |
★★ Iron Crossed Chaos
A link of Chaos Roof and Where Iron Crosses Grow. Start as for Chaos Roof. Up past the first few bolts to the roof and instead of pulling the roof move, step L and up into the roof of WICG. FA: MB, Jan 2018 | 27 | 25m, 6 | |||||
| 31 |
★★ Chaos Roof
Climb CHAOS past the 3 FHs and small roof then traverse L climbing the lip of the LWF roof and face before reaching the lower off on OE. FA: Robert Cowan, Peter Cunningham & Andrew McAuley, 1989 | 23 | 25m, 3 | |||||
| 32 |
★ Jammer's Delight
Start marked. Easy corner past pillar and up L side of wall. FA: Jeff Boyton & Andrew Hedley., 1973 | 9 | 40m | |||||
| 33 |
Jammer's Delight Variant Finish
Start as for JD but at about 15m follow easy crack on L wall. FA: Glen Donohue & Andrew Webb, 1984 | 8 | 40m | |||||
| 34 |
The Brink of Misery
Start 2m R. of JD at L. side of face. Hard face moves with scant protection lead by way of loose rock to shallow corner. Follow this up to top of pillar. Face above. FA: Iain Sedgman, 1984 | 18 | 40m | |||||
  |
||||||||
| Route | Grade | Style | Selected ascents | |||||
| 35 |
★ Comfortably Numb
Thin line 3m R of BM leading to shallow corner. Start behind large black and climb onto face. Difficult moves to horizontal. Pull past this to easier climbing. Protection difficult to place. FA: Robert Cowan, Peter Cunningham & Andrew, 1989 | 22 | 40m | |||||
| 36 |
★ Virgin's Crack
Marked corner 9m R of JD. Awkward start leads to quality. 20m slab corner. Easily to top. FA: Jeff Boyton & Andrew Hedley, 1973 | 14 | 40m | |||||
| 37 |
★★ Mohammed
Follow for VC for 1m, then move R onto arête. (If you reach L into corner grade is reduced to about 15). Crux is getting past overlap. FA: Andrew McAuley 80's. | 18 | 40m | |||||
| 38 |
★★ The Infidel
Nice face climbing, a little contrived as it steps L into Mohammed. Start 2m R of VC. Pull up R onto face for a few moves then Boulder L to join M. Up M for a few moves before traversing R a few metres before climbing diagonally R over the overlap and face to the anchors of BS. FA: MB, 2015 | 22 | 15m, 5 | |||||
| 39 |
★★ Battle Scars
Start 3m L of CD. Make some hard moves diagonally R to a jug then up a short crack to a horizontal. Step L 2m then straight up over the Arapiles style bulge to the finish. FA: MB, Feb 2015 | 24 | 20m | |||||
   |
||||||||
| Route | Grade | Style | Selected ascents | |||||
| 40 |
Chromium Dog
R of VC and round corner is 1m high ledge below steep face. Line from middle of ledge, moving R. At horizontal, swing L and up into loose corner. FA: Robert Cowan & Andrew McAuley., 1989 | 22 | 40m | |||||
| 41 |
★★ Space Junk
Excellent climbing on good rock. Small corner just R of CD for a few moves. Where CD traverses L, climb thin, R-leaning crack. Follow this thin line (crux) to horizontal. Finish up corner. If crux is too hard, climb up L and traverse R along horizontal to finish the line (23). FA: Robert Cowan & Andrew McAuley, 1989 | 24 | 40m | |||||
| 42 |
★★★ Cosmic Trash
Superb rock and nice face climbing. Starts 2m R of SJ follow the thin R leaning line up the wall staying approx 2m R of SJ the whole way. FA: MB, 3 Nov 2015 | 26 | 25m, 8 | |||||
| 43 |
Instant Religion
Steep face 4m R. of VC. Take line at R. side, about 3m L. of Andrew and detached block. Veer L. with line into short corner (crux). FA: Iain Sedgman, Peter Cunningham, Glen Donohue, D Harris & Tony Velling, 1985 | 18 | 40m | |||||
| 44 |
★★ The Unknown
Fantastic face and arete climbing with a sneaky step R at 2/3s height that makes it all go. Climb the arete immediately L of A to the second break after the slopy ledge. Step R into A at the roof climb this for a 1m and then step back L around the corner to the next BR. Climb the last bit of arete and face in a spectacular position to the top. Lower off below the choss at the top. FA: MB, 2015 | 23 | 22m, 7 | |||||
  |
||||||||
| Route | Grade | Style | Selected ascents | |||||
| 45 |
★★ Andrew
20m R. of VC is corner which starts behind L end of large, detached block. Up between block and wall to join corner. FA: Jeff Boyton & Harry Boyton, 1974 | 18 | 40m | |||||
| 46 |
Out of Africa
Follow Andrew to ledge (level with top of block). Crack out of R side of Andrew. Thin moves to good stance. Finish up corner. FA: Andrew McAuley & Robert Cowan, 1989 | 19 | 40m | |||||
| 47 |
★ The Hot Zone
Bouldery crux down low. Face route up wall in behind detached pillar crossing OOA finishing at the anchors ledge on the ledge of Andrew. FA: MB, 2015 | 23 | 18m, 5 | |||||
| 48 |
Rambunctious Flamboyance
2m R of Andrew is a bottomless, shallow corner behind a detached block. 'Delicate' is the flavour of this test piece. FA: Andrew McAuley & Robert Cowan, 1989 | 19 | 40m | |||||
| 49 |
★★★ Grand Larceny
Just L of The Brisbane Line at end of detached block is 4m face leading to horizontal. Ease up face L of arête on micro holds to horizontal. L-leaning line to ledge, then face above. FA: Peter Cunningham, Robert Cowan, Spring 1987. Direct Start added by Robert Cowan & Andrew McAuley, 1989 | 21 | 40m | |||||
| 50 |
The Brisbane Line
Starts at R end of detached block. Overhanging corner, then step up next (tricky) corner above. Major corner-line above to little ledge with small tree, then last part of corner. FA: Iain Sedgman, Glen Donohue & Wayne Maher, 1984 | 20 | 40m | |||||
| 51 |
FM (Full Manual)
Thin, discontinuous crack 1m R of BL to horizontal ramp of April Fools. R corner. A bit of manual manipulation will see you through this section. Continue up broken face. FA: Robert Cowan & Greg Claire, 1989 | 21 | 40m | |||||
| 52 |
April Fools
Starts 5m R of BL on ramp. Follow L-sloping ramp to small ledge. Traverse round nose to main crack-line. FA: Jeff Boyton, Andrew Hedley (14 & M1), 1973 FFA: Greg Smith & Jeff Boyton, 1976 | 17 | 45m | |||||
| 53 |
Benders Lane
20m Start at belay 13m R of AF (up scrubby gully). Tend L, then cracks and ledges to main ledge. | 11 | 32m | |||||
 |
||||||||
| Route | Grade | Style | Selected ascents | |||||
| 54 |
★ L Plates
At the bottom R end of The Towers wall before it turns chossy is a 20m high buttress about 50m R of Benders Lane. Start directly in front of buttress and up 5m past a finger crack to a large ledge. Continue 10m up corner and step left onto smaller ledge. Up last 5m past large broken crack and block. Ascending -from the top 50m further to the R a cairn marks an easy ramp scramble back down. FA: Darren Miles, 2001 | 5 | 20m | |||||
1.2. Central Buttress 10 routes in Cliff
- Summary:
-
All Trad climbing
Lat / Long: -35.271477, 147.075253
description
Climbing is currently prohibited at the Central Buttress by NPWS.
approach
Access to Central Buttress is easiest by way of the Yerong Nature Trail from the car park. Follow the track towards the summit, as the track becomes steeper it switches back a few times until the track passes under The Main Face. Before passing under The Main Face traverse right to the foot of the Central Buttress. This may require some easy bush bashing as the track is not obvious from the Yerong Nature Trail. Access to the Central Walls is either by traversing left from the base of The Towers cliff line, or by traversing right along the cliff line from the Central Buttress. Climbs are described from left to right; from the Central Buttress towards The Towers along the Central Walls.
| Route | Grade | Style | Selected ascents | |||||
|---|---|---|---|---|---|---|---|---|
| 1 |
Central Buttress Left-hand Crack
Start at L. side of (marked) buttress. L. crack system. FA: Jeff Boyton & Andrew Hedley, 1973 | 12 | 35m | |||||
| 2 |
Central Buttress Right-hand Crack
Start at R. side of (marked) buttress. R. crack system. FA: Jeff Boyton & Andrew Hedley, 1973 | 12 | 35m | |||||
| 3 |
Zed Crack
Start marked. Zigzag up start, then wall. FA: Jeff Boyton, Harry Boyton & Greg Smith, 1976 | 14 | 35m | |||||
/15/eb/15ebcb97b15d7079065667b5d013b415fc98ad8a) /2f/78/2f78f10126ebcb1f10da85c0399634374289f4c4)  /17/1d/171d1ced476771861415651eeb1eff63d041371a) /36/90/3690a7e069f547704ae81e8fd1d1d31306e8a04e) |
||||||||
| Route | Grade | Style | Selected ascents | |||||
| 4 |
Exit Gully
Start marked. Easy gully to top of cliff. FA: Jeff Boyton & Harry Boyton, 1973 | 7 | 30m | |||||
| 5 |
★★ Mr Toad
Start Marked. Up large crack to alcove on L. Follow obvious crack to crux. Reachy move into alcove rest. Step R and up to belay on L. FA: Damien Brook, Mick Sander & Ange Boyd, 2013 | 15 | 25m | |||||
| 6 |
Friction Boots
Start marked. Start on high-angled, mossy slab about 60m from Exit Gully. Directly up slab. FA: Jeff Boyton & Andrew Hedley, 1974 | 17 | 25m | |||||
| 7 |
Easy Crack
Easy crack just R. of Friction Boots slab. FA: Jeff Boyton & Andrew Hedley, 1973 | 8 | 25m | |||||
| 8 |
★ Slippery Serpent
Start marked. Up crack past bushes, follow layback right past small roof then on to top FA: Mick Sander, Ange Boyd & Damien Brook, 2013 | 10 | 30m | |||||
| 9 |
Jeff's Chimney
On the right side of the Central Walls are two large chimneys readily seen from the road when driving to the Rock Nature Reserve from The Rock township. Big L. chimney FA: Jeff Boyton & Andrew Hedley, 1973 | 14 | 35m | |||||
| 10 |
Greg's Chimney
On the right side of the Central Walls are two large chimneys readily seen from the road when driving to the Rock Nature Reserve from The Rock township. Big R. chimney FA: Jeff Boyton & Greg Smith., 1975 | 14 | 35m | |||||
1.3. The Main Face 11 routes in Cliff
- Summary:
-
Mostly Trad climbing
Lat / Long: -35.274819, 147.074213
description
Climbing is currently prohibited at The Main Face by NPWS.
approach
Access to The Main Face is via the Yerong Nature Trail from the car park. Climbs are listed left to right. At the left end of this cliff are five short corners; they are, Running Crack, Solo Crack, January Crack, Carcinogenic Cloud and Greg's Climb. A great climbing area for a hot afternoon. All climbs used to be marked, but markings have begun to wear and can be very difficult to find.
Upper Terrace; On the terrace above the Main Face are two tiers. Go to the top tier for Walking Across the Rooftops, Tinsel Town, and Yerong Trail Directissimo.
| Route | Grade | Style | Selected ascents | |||
|---|---|---|---|---|---|---|
| 1 |
Running Crack
First corner-crack on L. side of cliff. FA: Jeff Boyton & Greg Smith, 1976 | 8 | 10m | |||
| 2 |
Maherie
'There are routes and there are routes - but this is not one of them. It will surely land on the packs in years to come'. Loose. Start about 2m R. of RC. Move up L. and scale loose rock to perch yourself on person-sized, loose flake. Continue up even looser line above. FA: Wayne Maher, Glen Donohue, Iain Sedgman & Andrew Webb, 1984 | 13 | 10m | |||
| 3 |
Solo Crack
Corner R. of Running Crack. FA: Jeff Boyton & Greg Smith, 1976 | 10 | 15m | |||
| 4 |
January Crack
Corner R. of Solo Crack. FA: Jeff Boyton & Greg Smith, 1976 | 10 | 20m | |||
| 5 |
Mossy, Too
Start in crack system just R. of arête between January Crack and Carcinogenic Cloud. Crack until arête can be gained. FA: Derek Rempe & Robert Cowan, 1996 | 14 | 30m | |||
| 6 |
Carcinogenic Cloud
Corner R. of January Crack. FA: Jeff Boyton & Greg Smith, 1976 | 10 | 30m | |||
| 7 |
Greg's Climb
Start marked. Corner R. of Carcinogenic Cloud. Crack and wall above. FA: Jeff Boyton & Greg Smith, 1976 | 16 | 40m | |||
| 8 |
Falcon's Lair
3m R. of Greg's Climb is ledge 3m off ground. Boulder to ledge and climb corner to roof. Step R. to gain beautiful finger crack. Wall. FA: Robert Cowan & Derek Rempe, 1996 | 19 | 40m | |||
| 9 |
The Rock Face Route
A classic climb and the first done at The Rock. Start marked.
Exposure is grade 15 on its own. FA: Jeff Boyton & Shane Burkett, 1971 | 15 | 120m, 3 | |||
| 10 |
The Rock Face Direct
The Rock's original 'big wall' climb. Start marked.
FA: Jeff Boyton & Andrew Hedley, 1974 | 15 M3 | 65m, 3 | |||
| 11 |
Mossy
Start marked. Line of least resistance up mossy slab on R. side of face. FA: Jeff Boyton & Andrew Hedley, 1974 | 13 | 40m | |||
1.4. Upper Terrace 3 routes in Cliff
- Summary:
-
All Trad climbing
Lat / Long: -35.274762, 147.073319
description
Climbing is currently prohibited at the Upper Terrace by NPWS.
approach
Continue up the Yerong Nature Trail towards the summit, on the terrace above The Main Face are two tiers, go to the top tier.
| Route | Grade | Style | Selected ascents | |||
|---|---|---|---|---|---|---|
| 1 |
Walk Across the Rooftops
Ramble up R. side of cave, then traverse L. to base of crack. Climb crack. FA: Robert Cowan & Andrew McAuley, 1989 | 20 | 30m | |||
| 2 |
Tinsel Town
Blank corner 2m right of WAR. Move R. at ledge and up corners (crux). FA: Robert Cowan & Andrew McAuley, 1989 | 19 | 30m | |||
| 3 |
Yerong Trail Direttissimo
On the terrace above the Main Face are some interesting lines. About 100m from the L. are two good-looking lines. L. one is steep, closed corner starting halfway up cliff; R. one is saner version with a steep, blocky crack line at half height.
FA: Wayne Maher & Iain Sedgman, 1984 | 13 | 30m, 2 | |||