A Crag Guide gives an extensive view of all sub areas and climbs at a point in the index. It shows a snapshot of the index heirachy, up to 300 climbs (or areas) on a single web page. It shows selected comments climbers have made on a recently submitted ascent.
At a minor crag level this should be suitable for printing and taking with you on a climbing trip as an adjunct to your guidebook.
This guide was generated anonymously. Login to show your logged ascents against each route.
Warning
Rock climbing is extremely dangerous and can result in serious injury or death. Users acting on any information directly or indirectly available from this site do so at their own risk.
This guide is compiled from a community of users and is presented without verification that the information is accurate or complete and is subject to system errors. By using this guide you acknowledge that the material described in this document is extremely dangerous, and that the content may be misleading or wrong. In particular there may be misdescriptions of routes, incorrectly drawn topo lines, incorrect difficulty ratings or incorrect or missing protection ratings. This includes both errors from the content and system errors.
Nobody has checked this particlular guide so you cannot rely on it's accuracy like you would a store bought guide.
You should not depend on any information gleaned from this guide for your personal safety.
You must keep this warning with the guide. For more information refer to our:
Usage policy
Contributors
Thanks to the following people who have contributed to this crag guide:
Brendan Heywood
Bec Cowell
Ben Vincent
Bruce Taylor
Benji Dutaillis
Simon Porter
Bryn Norris
Laura Price
Andrew Woolley
Ash Powell
The size of a person's name reflects their Crag Karma, which is their level of contribution. You can help contribute to your local crag by adding descriptions, photos, topos and more.
Some content has been provided under license from: © University of New England Outdoor Club (Creative Commons - Attribution Non-Commercial Share Alike)
Table of contents
- 1. Pseudoephedrine Boulders 14 in Boulder
- 2. Index by grade
1. Pseudoephedrine Boulders 14 routes in Boulder
- Summary:
-
All Bouldering
Lat / Long: -30.600562, 151.801714
description
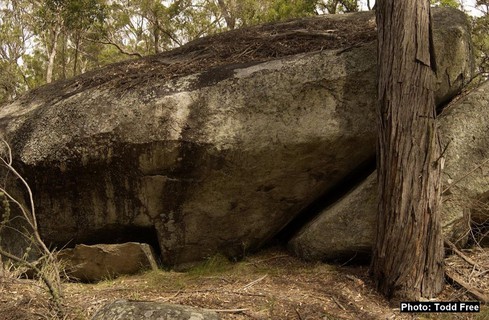
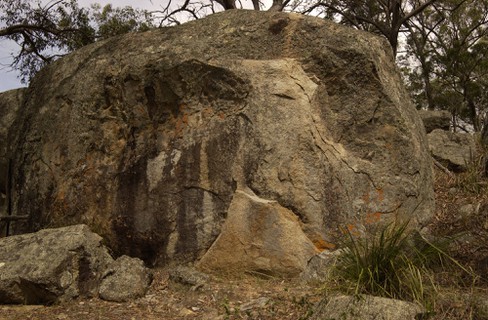
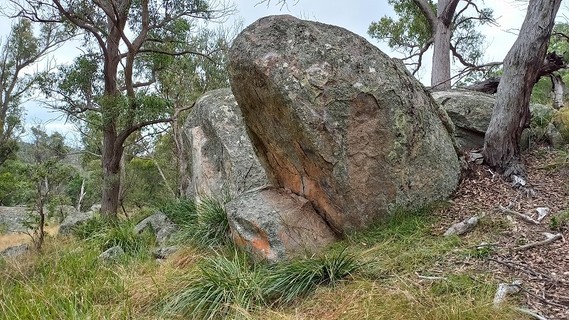
As you walk along the track heading east, pseudo is the long cluster of rock on the right, after Little Ayes rock
access issues
Gara gorge is part of Oxley Wild Rivers National Park and access is open:
http://www.nationalparks.nsw.gov.au/visit-a-park/parks/Oxley-Wild-Rivers-National-Park
ethic
Basically, the climbers of Armidale are a pretty laid back, free thinking group and as long as you don’t go out of your way to put people’s noses out of joint you’ll be amazed at how helpful they can be. The quickest way to piss people off is by ripping off projects. There are a few devoted locals making an effort and putting up quality new climbs. A lot of time, hard work and even money goes into their endeavours (cracks can be projects too) and there is too much unclimbed rock around to justify destroying someone else’s motivation. Any routes marked as such or not in the guide should be left alone. The simple courtesy of asking first may save you from being stripped naked and being staked out for the crows to pick your eyes out. If putting up new routes is your thing then please feel free. The only request is that you avoid placing hangers or conspicuous bolts around the Gara Boulders as we are already viewed as an environmental menace by the NPWS - bolting in National Parks is actually illegal.
  |
||||||||
| Route | Grade | Style | Selected ascents | |||||
|---|---|---|---|---|---|---|---|---|
| 1 |
★★ Teddy Bear's Picnic
Sit start on good edges, long reach to lip, then mantel. Easier variation is to use large detached block for the feet at start. | V3 | 2m | |||||
| 2 |
★ Phenylephrine
As for Pseudo proper, but go left and do a mantle on slopers. | V3 | 5m | |||||
| 3 |
★★ Pseudoephedrine
Follow flake up to thin slab mantle. | V3 | 5m | |||||
| 4 |
★★ Ketamine
A harder sit start to 'Pseudoephedrine', semi dyno off a marginal pinch to sloper then link up. FA: Brendan Heywood, 24 Apr | V5 | 5m | |||||
| 5 |
★★ Body Darma
Standing start on tiny crimps and head up to small left facing corner, then top. | V8 | 4m | |||||
| 6 |
★★ The Matt Wrigley Problem of 2004
Stand start. Hard mantle around a bulge. FA: Matt Wrigley, 2004 | V9/10 | 3m | |||||
   |
||||||||
| Route | Grade | Style | Selected ascents | |||||
| 7 |
★ Echidna flake / M3
Sit start on bottom right of obvious flake. Up flake then head left and up into corner. Use pocket in corner then up. | V2 | 4m | |||||
| 8 |
★ Echidna flake right variant
Sit start on bottom right of obvious flake. Up flake then up avoiding the corner and use the slight arete to the right of corner. | V3 | 3m | |||||
| 9 |
★★ M5
Variety of thin crimps | V0 | 2m | |||||
| 10 |
★ M6
Variety of thin crimps | V0 | 2m | |||||
| 11 |
★★ M6.5
Start in crimps, use pocket like feature and crimps to mantel. | V1 | 3m | |||||
| 12 |
★ M7
Sit start on feature, then up rail to huge edge to mantel on crimp. | V4 | 3m | |||||
| 13 |
M7.5
Sit start up blunt arete. | V0 | 3m | |||||
 |
||||||||
| Route | Grade | Style | Selected ascents | |||||
| 14 |
★★ Arete
The steep arete from a sit. Follow the line of good crimps and sidepulls to a big move to the lip. The foot block to the left is out. | V5 | 3m | |||||
2. Index by grade
| Grade | Stars | Name | Style | Pop | |
|---|---|---|---|---|---|
| V0 | ★★ | M5 | 2m | ||
| ★ | M6 | 2m | |||
| M7.5 | 3m | ||||
| V1 | ★★ | M6.5 | 3m | ||
| V2 | ★ | Echidna flake | 4m | ||
| V3 | ★ | Echidna flake right variant | 3m | ||
| ★ | Phenylephrine | 5m | |||
| ★★ | Pseudoephedrine | 5m | |||
| ★★ | Teddy Bear's Picnic | 2m | |||
| V4 | ★ | M7 | 3m | ||
| V5 | ★★ | Arete | 3m | ||
| ★★ | Ketamine | 5m | |||
| V8 | ★★ | Body Darma | 4m | ||
| V9/10 | ★★ | The Matt Wrigley Problem of 2004 | 3m |