A Crag Guide gives an extensive view of all sub areas and climbs at a point in the index. It shows a snapshot of the index heirachy, up to 300 climbs (or areas) on a single web page. It shows selected comments climbers have made on a recently submitted ascent.
At a minor crag level this should be suitable for printing and taking with you on a climbing trip as an adjunct to your guidebook.
This guide was generated anonymously. Login to show your logged ascents against each route.
Warning
Rock climbing is extremely dangerous and can result in serious injury or death. Users acting on any information directly or indirectly available from this site do so at their own risk.
This guide is compiled from a community of users and is presented without verification that the information is accurate or complete and is subject to system errors. By using this guide you acknowledge that the material described in this document is extremely dangerous, and that the content may be misleading or wrong. In particular there may be misdescriptions of routes, incorrectly drawn topo lines, incorrect difficulty ratings or incorrect or missing protection ratings. This includes both errors from the content and system errors.
Nobody has checked this particlular guide so you cannot rely on it's accuracy like you would a store bought guide.
You should not depend on any information gleaned from this guide for your personal safety.
You must keep this warning with the guide. For more information refer to our:
Usage policy
Contributors
Thanks to the following people who have contributed to this crag guide:
Matt Schimke
Matt Pelekanos
Mark Gamble
Thomas Gissing
Andrew Kraut
Matthew Kievel
Dave Westby
Bruce Schneider
Chris Baker
Jake Forker
The size of a person's name reflects their Crag Karma, which is their level of contribution. You can help contribute to your local crag by adding descriptions, photos, topos and more.
Some content has been provided under license from: © Australian Climbing Association Queensland (Creative Commons, Attribution, Share-Alike 2.5 AU)
Table of contents
- 1. Cook's County 24 in Crag
- 2. Index by grade
1. Cook's County 24 routes in Crag
- Summary:
-
Mostly Trad climbing
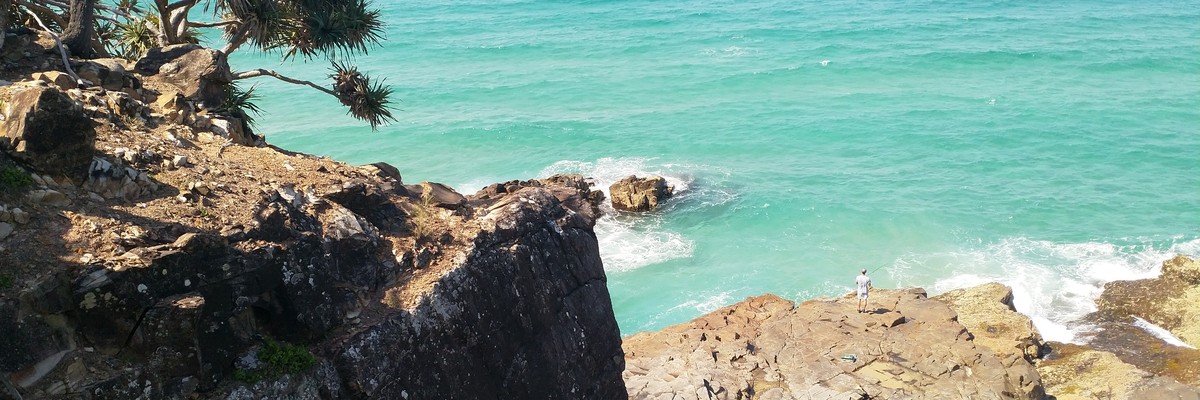
Lat / Long: -26.395489, 153.116935
description
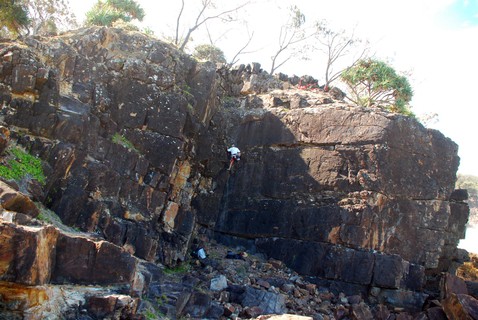
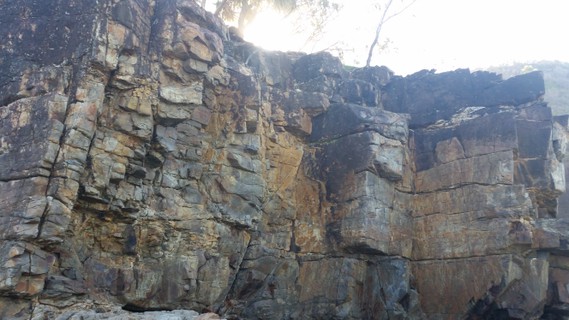
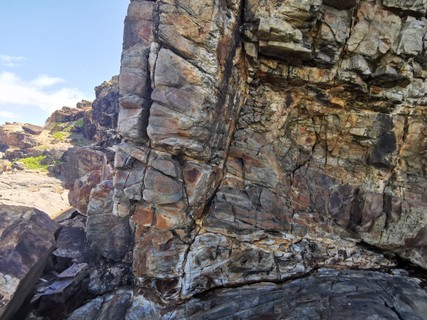
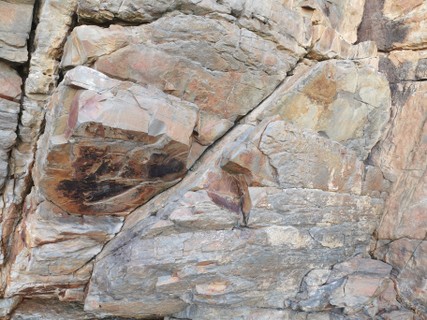
A small sandstone crag, with an easy access and a nice position. This place makes a great summer crag as there is almost always a breeze and is in the shade in the afternoon. Note that the routes on the right side of the cliff can not be accessed at high tide due to water flooding the area. All of the climbs require the belayer to find a suitable tree and bring up a second. Helmets are recomended for climber and belayer, as there is quite a bit of loose rock on the topouts.
approach
The cliff is located at the north end of Sunshine beach. Go through the back streets and along to the end of Seaview Terrace and park here. Head north along the beach to the headland. Either walk along the rocks to access or head up the obvious walking track up the hill and take the the track leading down to the cliff.
Routes are listed left to right.
ethic
Remember that you are in a National park, don't litter, clean up any rubbish, don't disturb the wildlife and no bolting. It is essential that climbing in this area remains low key.
history
History: There used to be a route called Hungover Fisherman (19) that was on a pillar, but in a storm the pillar fell over so the climb no longer exists. Also with the pillar no longer there, the route 'No Horizontal Moves' is no longer contrived.
/2e/00/2e00714a36aaf6421f17b63e7b639115c596ff0b) |
||||||||
| Route | Grade | Style | Selected ascents | |||||
|---|---|---|---|---|---|---|---|---|
| 1 |
Austro-Canadian relations
Up the corner just left of TCC. Gear is sub-optimal, but at least it's easy. May have been climbed before listed fa FFA: Matt Pelekanos & Christine Lethbridge | 6 R | 10m | |||||
| 2 |
The Crazy Canadian
Climb up to the grassy ledge at half height, then blast up the black slab with the crack running up it. FA: Oliver Rickford & Terry Forbes, 2010 | 11 | 12m | |||||
| 3 |
★ Ruby Tuesday
Starting just to the right of TCC, this climbs the blocky and steep arete. Climb up to ledge on right, then tackle the hard step accross move. From here to top. FA: Matt Schimke | 18 | 12m | |||||
| 4 |
★ Toast Hawaii
Up the slightly overhanging corner, plug in gear and then go up on jugs to a rest stance, then right and up to nice top out. Watch for loose blocks. May have been climbed before 2019. FFA: Matt Pelekanos & Christine Lethbridge | 18 | 12m | |||||
| 5 |
★★ Dwarf Shortage
Start 2 metres to the left of Grommet on the slighly overhung face, with an attractive crack at the top. Climb the steep jugs until you pull onto a ledge. Put some bomber gear in then blast up the crack. FA: Matt Schimke | 18 | 12m | |||||
 |
||||||||
| Route | Grade | Style | Selected ascents | |||||
| 6 |
★ Grommet
Chossy climb/scramble up the corner. Some good gear if you want. FA: Denise Crook & Mark Plenderleith, 1988 | 4 | 12m | |||||
| 7 |
★ Moon Tan
Climb the face 2 metres to the left of LH, the top has some exciting moves. Starting below the left leaning crack offers the best protection. FA: Michael Byrom & Alistair Byrom, 1988 | 13 | 12m | |||||
| 8 |
★ Lady Hawk
A good beginner lead with enough gear to keep the innocent happy. Start just to the right of arete, and follow weakness slightly left, before trending back right at the top. FA: Michael Byrom & Alistair Byrom, 1988 | 12 | 12m | |||||
| 9 |
★★ No Horizontal Moves
Climb up the slab using the horizontal slots. With the pillar gone it is no longer contrived as you cannot bridge on it. Might not have much gear as it was originally done on Toprope. FA: Michael Byrom & Alistair Byrom | 16 | 10m | |||||
| 10 |
★★ Ashtrays Of Emotion
Climb the thin wispy crack 1m to the left of the arete to a ledge. Place some RP's in left trending crack and continue to top. FA: Mark Plenderleith & Denise Crook, 1988 | 16 | 12m | |||||
  |
||||||||
| Route | Grade | Style | Selected ascents | |||||
| 11 |
★ Leave The Cripple At Home
Start on the flat rock at the bottom of the arete, pull on the jugs. Get to ledge and blast up on sidepulls and gastons. Quite serious, as there is no gear in the top half. Originally a TR climb. FA: Alistair Byrom & Michael Byrom | 21 R | 12m | |||||
| 12 |
Al's Garage
A short problem to get you warmed up. Start: Start under Mike and the Mechanic on two jugs. A few fun moves and your done. Finish by matching on the high jug, your feet should only be a foot above the ground. FA: Oliver Rickford, 2010 | V0 | 3m | |||||
| 13 |
★ Mike And The Mechanic
Start just to the right of arete in steep bulgy crack. Climbs this untill trending slightly right into the Mambo Man crack corner at the top. FA: Mike Cook & Frank Egyed, 1988 | 21 | 12m | |||||
| 14 |
★ Mambo Man
Climb the left trending jug haul just to the right of MATM, then straight up into a small corner. Look for the small hanging flake at half height. Not much gear in the first half. FA: Ian Harrison & Mark Plenderleith, 1988 | 21 | 12m | |||||
| 15 |
Fagends Of The Aristocracy
Takes the obvious right facing corner above the start of Mambo Man . A bit contrived but if you manage to resist stepping right onto Twisted Sister it has an exciting conclusion. FA: Ian Harrison & Mark Plenderleith, 1988 | 20 | 12m | |||||
| 16 |
★★ Twisted Sister
Climb the slightly overhung crack corner, 1 meter to the left of BTTB. FA: Mark Plenderleith, Ian Harrison & Denise Crook, 1988 | 16 | 12m | |||||
 |
||||||||
| Route | Grade | Style | Selected ascents | |||||
| 17 |
★ Washed away
Campus Problem. Start at BTTB on crimp, then campus right along the ledge. FA: Oliver Rickford, 2010 | V0 | 4m | |||||
| 18 |
★★ Bad To The Bone
Starts 2 meters to the left of Pipeline at crackline. Follow this to top. FA: Mark Plenderleith & Denise Crook, 1988 | 16 | 11m | |||||
| 19 |
★★ Pipeline
Start 1 meter to the left of Cardiac Arete. Follow crackline on brilliant rock to cruxy bulge, then topout to tree belay to the left. FA: Frank Egyed & Mike Cook, 1988 | 16 | 12m | |||||
| 20 |
Cardiac Arête
Climb obvious arete just to the right of Pipeline. FA: Frank Egyed & Mike Cook, 1988 | 19 | 12m | |||||
| 21 |
★★ Fortune Favours The Fuckwit
Contrived, straight up the grey wall on the right side of Cardiac Arete to a large break, up right onto ledge. From here to top. FA: Mark Plenderleith, Michael Freemantle & Ian Harrison, 1988 | 20 | 12m | |||||
| 22 |
★★ Break Dance
The beautiful crack corner just to the right of FFTF. Some loose rock on the top out. | 16 | 12m | |||||
| 23 |
Redgarten Wall
Straight up the red wall to the right of BD. | 18 | 12m | |||||
| 24 |
Seaside project
As close as you can get to the water. Thin. | 10m | ||||||
2. Index by grade
| Grade | Stars | Name | Style | Pop | |
|---|---|---|---|---|---|
| 4 | ★ | Grommet | 12m | ||
| 6 R | Austro-Canadian relations | 10m | |||
| 11 | The Crazy Canadian | 12m | |||
| 12 | ★ | Lady Hawk | 12m | ||
| 13 | ★ | Moon Tan | 12m | ||
| V0 | Al's Garage | 3m | |||
| ★ | Washed away | 4m | |||
| 16 | ★★ | Ashtrays Of Emotion | 12m | ||
| ★★ | Bad To The Bone | 11m | |||
| ★★ | Break Dance | 12m | |||
| ★★ | No Horizontal Moves | 10m | |||
| ★★ | Pipeline | 12m | |||
| ★★ | Twisted Sister | 12m | |||
| 18 | ★★ | Dwarf Shortage | 12m | ||
| Redgarten Wall | 12m | ||||
| ★ | Ruby Tuesday | 12m | |||
| ★ | Toast Hawaii | 12m | |||
| 19 | Cardiac Arête | 12m | |||
| 20 | Fagends Of The Aristocracy | 12m | |||
| ★★ | Fortune Favours The Fuckwit | 12m | |||
| 21 | ★ | Mambo Man | 12m | ||
| ★ | Mike And The Mechanic | 12m | |||
| 21 R | ★ | Leave The Cripple At Home | 12m | ||
| ? | Seaside project | 10m |