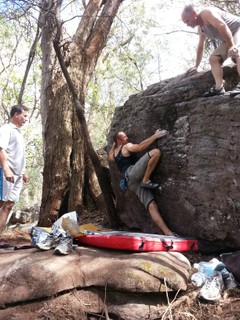
A Crag Guide gives an extensive view of all sub areas and climbs at a point in the index. It shows a snapshot of the index heirachy, up to 300 climbs (or areas) on a single web page. It shows selected comments climbers have made on a recently submitted ascent.
At a minor crag level this should be suitable for printing and taking with you on a climbing trip as an adjunct to your guidebook.
This guide was generated anonymously. Login to show your logged ascents against each route.
Warning
Rock climbing is extremely dangerous and can result in serious injury or death. Users acting on any information directly or indirectly available from this site do so at their own risk.
This guide is compiled from a community of users and is presented without verification that the information is accurate or complete and is subject to system errors. By using this guide you acknowledge that the material described in this document is extremely dangerous, and that the content may be misleading or wrong. In particular there may be misdescriptions of routes, incorrectly drawn topo lines, incorrect difficulty ratings or incorrect or missing protection ratings. This includes both errors from the content and system errors.
Nobody has checked this particlular guide so you cannot rely on it's accuracy like you would a store bought guide.
You should not depend on any information gleaned from this guide for your personal safety.
You must keep this warning with the guide. For more information refer to our:
Usage policy
Contributors
Thanks to the following people who have contributed to this crag guide:
Brendan Heywood
Nick Foulds
Jack Kilsby
Brad Simpson
Matt Pelekanos
Ryan Nicholls
Alex Mougenot
Troy McAndrew
Peatey
terry tynan
The size of a person's name reflects their Crag Karma, which is their level of contribution. You can help contribute to your local crag by adding descriptions, photos, topos and more.
Some content has been provided under license from: © Australian Climbing Association Queensland (Creative Commons, Attribution, Share-Alike 2.5 AU)
Table of contents
- 1.
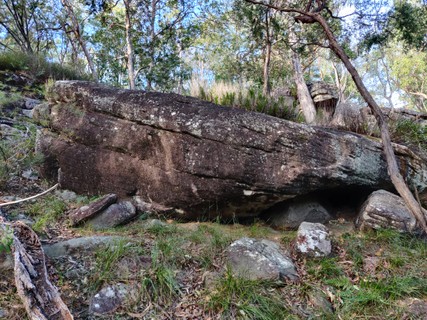
Springwood Conservation Park / E-Park
89 in Crag
-
1.1.
The Prow Area 59 in Sector
- 1.1.1. Bong boulder 6 in Boulder
-
1.2.
Coil Preservation Reserve 30 in Area
- 1.2.1. OCD Boulder 7 in Boulder
- 1.2.2. Freddies Day Out Boulders 9 in Boulder
- 1.2.3. Down To Nothing Boulders 8 in Boulder
- 1.2.4. Bandit Boulder 2 in Area
- 1.2.5. Sandpaper Boulder 4 in Area
-
1.1.
The Prow Area 59 in Sector
- 2. Index by grade
1. Springwood Conservation Park 89 routes in Crag
- Summary:
-
All Bouldering
Lat / Long: -27.624402, 153.142509
summary
Not as sharp as Tooheys, but same rock type (I think, but I'm no geologist!) 3-4m high. Plenty of routes to be developed still and some boulders not yet on record still in the park to be sussed out.
description
Only two areas have been documented here but there is lots of rock that when cleaned, provided some great problems at lower grades.
access issues
None, This park is an old reclaimed quarry site and has been excellently re-claimed by Logan council
approach
well maintained paths throughout the park that provide no more than a minute bush walking off the path to access the boulders.
where to stay
N/A
ethic
Be aware this is a multi-purpose community recreation area like Toohey Forest. Be respectful of other park users and try to minimise chalk left behind on boulders after session (TAKE A BRUSH). Ideally use a boars hair or similar brush on this rock, nylon or steel brushes will accelerate erosion here.
history
This park used to be a quarry and has been re-claimed by the Logan city council and made into a beautiful green space amongst the residential areas of this region. As far as I am aware, bouldering here is a fairly new addition to the park so lets keep it respectful and prevent any community backlash they could occur to prevent climbing in this residential park.
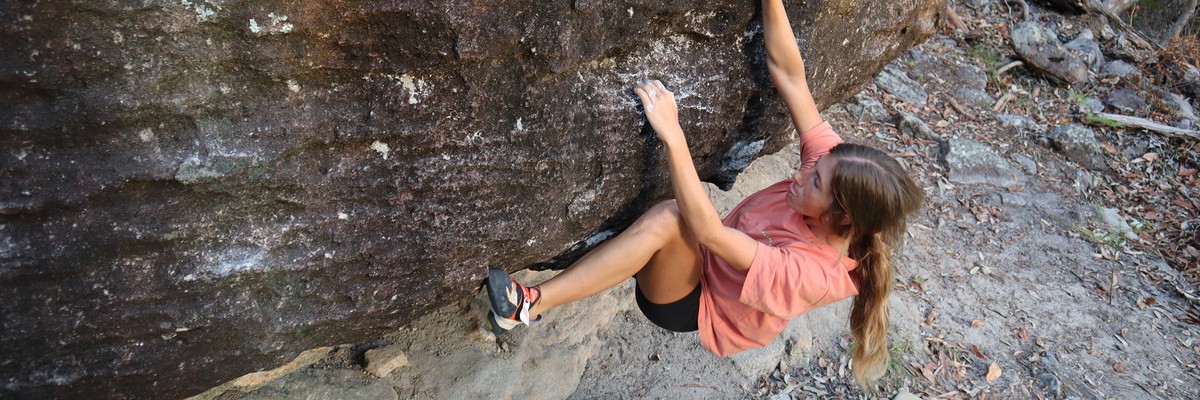
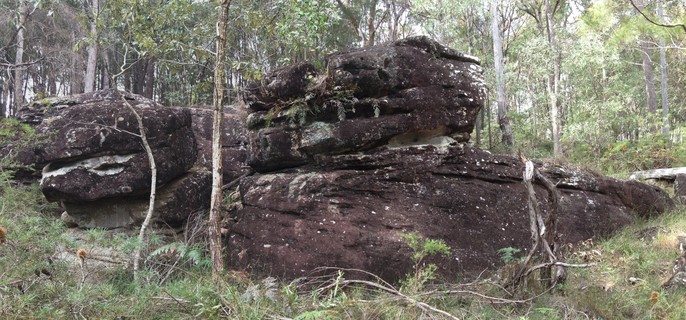
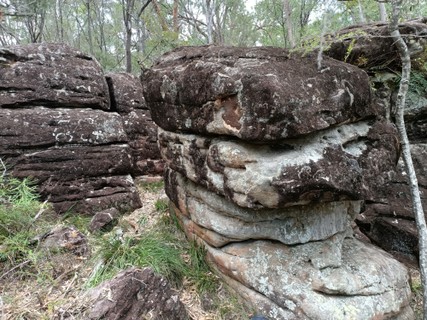
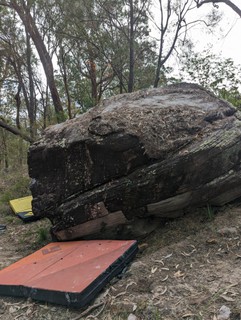
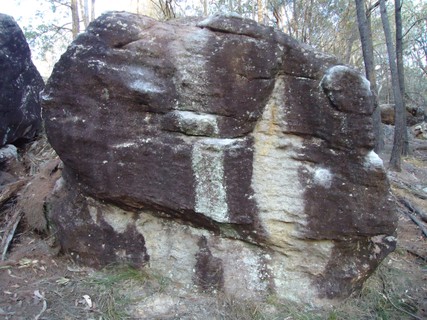
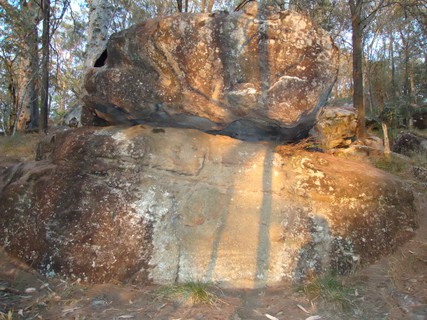
1.1. The Prow Area 59 routes in Sector
- Summary:
-
Lat / Long: -27.623255, 153.141777
description
The main area featuring the prominent 'Prow'.
approach
From the carpark: https://maps.app.goo.gl/nxGTjj95pAovR2Fu6
Head up the stairs following the track until it flattens where you'll see a park/BBQ area.(Alternatively park here across from 16 Platau Dr)
Continue along the concrete for approx 150m, a track right into the bush leads to the prow boulder.
| Route | Grade | Style | Selected ascents | |||||
|---|---|---|---|---|---|---|---|---|
| 1 |
★ West Face Traverse / Traverse to corner & exit up
Start on the left hand corner. Traverse right along the boulder's length to the Corner problem to finish up Corner. Using all holds and lip as required. | V1 | 5m | |||||
| 2 |
★ West Face Traverse - Eliminate
Traverse from the Left hand side to the right hand side to finish up the problem called corner. Keep hands on the face and off the top lip. | V1 | 5m | |||||
| 3 |
★ Ezee Peezy
Sit start | V0- | 2m | |||||
| 4 |
★ Lemon Squeezey
Sit start | V0- | 2m | |||||
| 5 |
★ Worth The Squeeze / Orange Streak
The Orange streak- SS with tricky mantle top out | V1 | 2m | |||||
| 6 |
★ Schadenfreude Culture
Between orange and white streaks | V0 | 2m | |||||
| 7 |
★ The Dole Bludger Streak
Climb the White Streak- avoiding the small bush at the top. FA: Unknown | V0 | 3m | |||||
| 8 |
★ White Streak Right
Next wide strip of lichen to R of 'White streak'. Sit start with obvious good foot left and jugs. | V1 | 3m | |||||
| 9 |
★★ Flee the Fire
Start as for “The Roof Is On Fire” but cross up and left to the top of “White Streak Right” to finish as this. FA: Nick Foulds, 15 Aug 2021 | V2 | 2m | |||||
| 10 |
★★ The Roof Is On Fire
First move is R hand up and right. Feet low under the bulge. | V2 | 3m | |||||
| 11 |
★ Robinhood Theory / Left of Tree
Sit start | V0 | 3m | |||||
| 12 |
★ From the Rich to the Poor
Starting on small but positive crimps just left of the tree, head right and up past the tree at your back and hugging tight to the face, nice crimp pulling and some fun body balance. FA: Nick Foulds, 15 Aug 2021 | V2 | 3m | |||||
| 13 |
★★ Tree Traverse
SS on the large jug left of the dead tree then traverse the rooflet left and up into 'Left of Tree.' | V1 | 3m | |||||
| 14 |
★ Corner
Standing start with a high foot straight up the corner, obvious jugs all the way. Sit start variant for a V1 finish. | V0 | 2m | |||||
| 15 |
★★ Baby Bonus
Start this crag classic, on the left side of the big tree- matched on the predominate jug. Traverse the big bulge to a powerful, morpho slap. Finish up and left. FA: Dan gordon, 2012 | V5/6 | 3m | |||||
| 16 |
★★★ Baby Bonus VF
From the crux jug of Baby Bonus, instead of campusing up and out left, traverse right for 2 metres through slopey jugs and crimps for an extremely demanding finish! | V7 | 4m | |||||
| 17 |
★★★ Teenage Wasteland
“Baby Bonus Long”- for the novelty of one side of the “Prowl wall” to the other. Start far left, on the furthest lowest jugs around “Ezee Peezy”. Start racing across the whole wall into “Baby Bonus VF” and finish as it’s VF version, traversing the slopey lip to finish further right. FFA: Jimmy Blackhall, 2020 | V7/8 | 12m | |||||
| 18 |
★ It Figures
Start as per Baby Bonus, but after catching the throw, go leftward: up and under the prow, with a committing mantle right over the most prominent point of the prow. FA: Leon Drummond | V5 | 3m | |||||
| 19 |
★ Chin Up
Hands high on jug and pull through to top | V1 | 2m | |||||
| 20 |
★ _
Start as for chin up, but follow the line of It Figures: under, then over the prow with a committing mantle. The only crux is not dabbing the tree on your way up. FA: Leon Drummond | V2 | 3m | |||||
| 21 |
★ Campus Up
Start as for CU but campus up and right to lip of 'Straight up' then use feet. | V1 | 3m | |||||
| 22 |
★ Straight Up
Standing start. | V2 | 3m | |||||
| 23 |
One Move Wonder
Start 1m right of 12. Hands start high and slap R for the lip | V0 | 3m | |||||
| 24 |
★★ The Bong Hole
Sit start inside the small cave under the Beginners Luck slab on perfect crimp rail. Finish at the top of the slab. FA: Troy McAndrew, 2 Feb 2020 | V4 | 3m | |||||
| 25 |
★ Beginners Luck
Some fun slab surfing. Not the best landing so bring a spotter. FA: Troy McAndrew, 2 Feb 2020 | VB | 4m | |||||
| 26 |
★★ Wish
Sit start with left hand in the big pocket, R hand just below in the smaller dimple. Move diagonally right and up through moderate crimps and tricky feet to top out after catching the large jug. The lip is out until you reach the mantle jug. Nice sequence on good holds. FA: Nick Foulds, 23 May 2020 | V4 | 3m | |||||
| 27 |
Dream
Same start as Wish but don't gain the jug, continue right through the thin crimps on the face to the end of the bloc and finish up top right corner. Project Set: Nick Foulds, 15 Aug 2021 | V6 | 4m | |||||
| 28 |
★ Smug
The arete on “Wish” bloc. Stand start with low undercling and LH juggy pocket. Straight up with the arete and face. | V0 | 2m | |||||
| 29 |
★ Slab
Easy warm up. Do it with no hands at V2. | V0- | 2m | |||||
| 30 |
★★ Low Blow Sit
SS at start of Low Blow Traverse and head straight up. | V0+ | 2m | |||||
| 31 |
Low Blow Traverse
Squat start on nice holds on the left side and stay low, traversing left to right. FA: Grant Martin, 2005 | V4 | ||||||
| 32 |
★ Low Prow
Sit start, straight up. | V3 | 2m | |||||
| 33 |
★ Low Bro
Sit start with left hand on the juggy arete and right hand in the LOW pocket. | V2 | 3m | |||||
| 34 |
Integral
Don’t step into corner | V0 | 3m | |||||
| 35 | Cutting Corners | V0 | 4m | |||||
| 36 |
Boulder escape
Chimney out from under the boulders | V0 | 4m | |||||
| 37 |
★ You're Only Cheating Yourself
Standing start. Don't step into corner | V1 | 4m | |||||
| 38 |
★★ You're Only Cheating Yourself- Sit Start
Same as "You're Only Cheating Yourself" but from a sit start FA: Harley Dawes, 20 Jan 2021 | V1 | 3m | |||||
| 39 |
Traverse High
Project?? Traverse left to right along. | |||||||
| 40 |
★★ The Honest Traverse
Start as for Cutting Corner and traverse to the right staying lowish, as to finish pocketed headwall. | V2 | ||||||
| 41 | ★ Karma Lords | V1 | ||||||
| 42 |
★ Gluteus Maximus
Start from the undercling and pocket in the cave and do some technical moves into daily high. FA: Kwan Goddard Lee, Aug 2020 | V4 | 4m | |||||
| 43 | ★ Daily High | V0 | 4m | |||||
| 44 | no | |||||||
| 45 | Cave exit | |||||||
| 46 |
★ How High
Sit start with hands on bottom face jugs, follow obvious solid jugs all the way up. | V2 | 4m | |||||
| 47 |
★ The Showstopper
Sit start matching the small crimp rail in the roof. 2 strenuous moves to gain the roof lip. A tricky turn of the lip helps you reach the break from where once established the final moves are straightforward for the brave! FA: Nick Foulds, 30 May 2020 | V4 | 5m | |||||
| 48 |
★★ Baked Traverse
Sit start in right corner of the cave on a small underclings, out to the large chalked holds. Progress along low on the boulder left, then link into High ball 2. FA: Todd Herriott, 2012 | V2 | ||||||
| 49 |
★ A Little Flutter
Sit start off big ledge. Good moves to slightly tricky mantle | V1 | 4m | |||||
| 50 |
★ Not much to work with
Sit start and go up the white streak under the cave, then use the crack in the cave to make your way up. Tricky top out. | V1 | 5m | |||||
| 51 |
Traverse
Starts 4m down hill of 'Low Prow'. From break in wall start with hands on jug & traverse right. | V1 | ||||||
| 52 |
Easy Dyno
SS. Hands on jug, feet up off grey low rock on wall. L hand R to hold | V0 | ||||||
| 53 |
Easy Dyno variant
SS. Same start as 'Easy Dyno' but move R hand up first. | V2 | ||||||
   /4b/45/4b458a9b2079530e539de125084a1d7b3afcfca6) 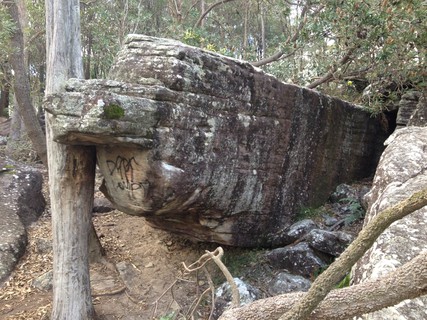 /5b/9e/5b9e98d3f1d9fa23a809c63bd65b6e5724679ad5) 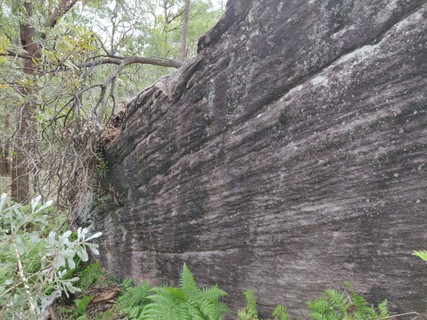 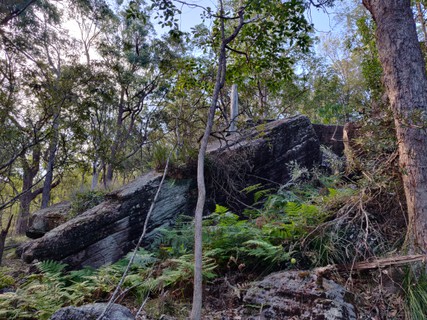 /92/0d/920dcdb8920a8eacfdbb859a9ff4853faeea010b) 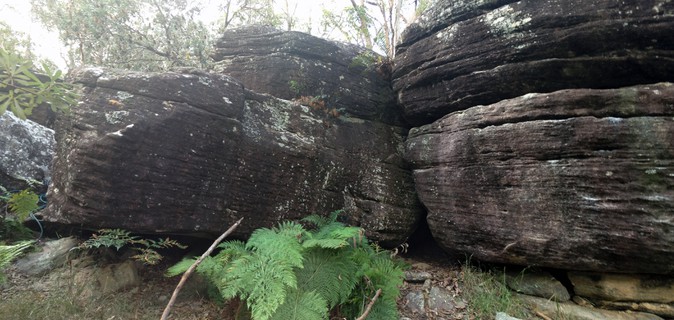 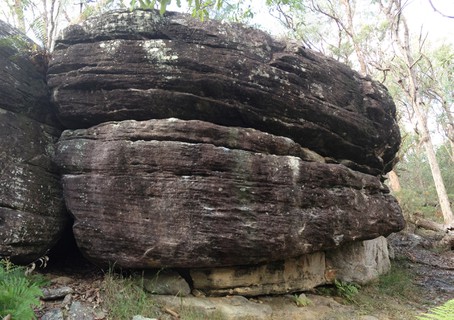 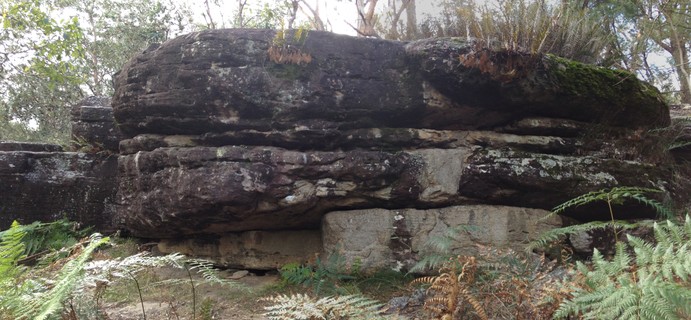 |
||||||||
 Jimmy Blackhall
1.1.1. Bong boulder 6 routes in Boulder
- Summary:
-
All Bouldering
Lat / Long: -27.622738, 153.141417
description
The smaller area of boulders just west along the ridge line of the prow area - 30s/1 minute through the brush.
approach
drop off the uppermost track running the northern edge of the park in a southerly direction when you first spot larger sized bits of rock from the path when heading in from the west.
  |
||||||||
| Route | Grade | Style | Selected ascents | |||||
|---|---|---|---|---|---|---|---|---|
| 1 |
Bong arete
Stand start the arete. Brush the slopers and be prepared to beached whale the mantle. | V2 | 2m | |||||
| 2 |
Easy highball
Up the L face past the scoops. | V0 | 5m | |||||
| 3 | Walk in the e-park | V0- | 5m | |||||
| 4 |
Bong Dyno
Start on the Jug and double Dyno up to the corner, then up the arete. | V1 | ||||||
| 5 |
Bong arete 2
Match start on the undercling then straight up the arete. | |||||||
 |
||||||||
| Route | Grade | Style | Selected ascents | |||||
| 6 |
Warm up route
SS and go straight up on jugs | V0 | 3m | |||||
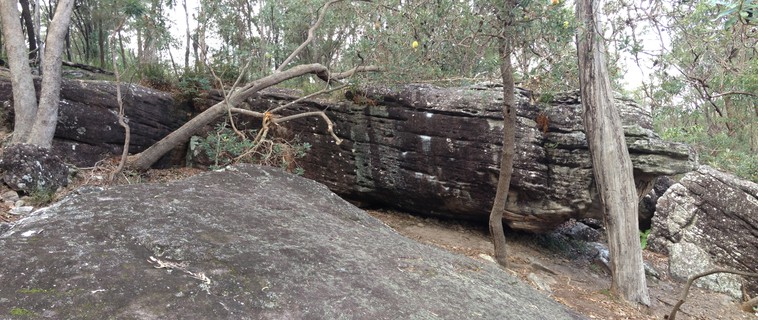
1.2. Coil Preservation Reserve 30 routes in Area
- Summary:
-
Lat / Long: -27.621767, 153.140048
description
Springwood's brother.
approach
Turn right and drop down hill after coming into park. Don't offend locals, it backs onto their property. If coming in from the western side of the park, take the first left hand turn and follow it up the hill once you reach the top follow the path left.
ethic
Boulders back onto locals property. be respectful of noise, litter and visible remnants post climbing (including chalk marks on the rock).
history
Recently literally 'unearthed' and cleaned to reveal some interesting problems
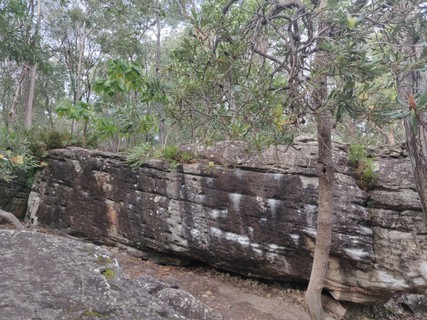
1.2.1. OCD Boulder 7 routes in Boulder
- Summary:
-
All Bouldering
description
A fun bloc with multiple good problems. Will most likely need brushing/cleaning as lots of forest debris falls on this rock.
approach
Instead of turning left and going to the original E Park area, go right, drop down the hill. OCD is in the middle of the hill.
history
Originally took 2 hours of cleaning to unearth this boulder.
     |
||||||||
| Route | Grade | Style | Selected ascents | |||||
|---|---|---|---|---|---|---|---|---|
| 1 |
★ Ferg's Problem
Climb the arete on good holds. FA: Fergus Simpson | V0 | 3m | |||||
| 2 |
★ SS to Ferg's Problem
SS on very sharp side pull(not the big jugs) FA: Nick Walker | V2 | 3m | |||||
| 3 |
★ Geordie Cult
SS with right heel hook on rail. Left foot flags. Slap with left hand for crimp then go again for sharp edge. Rock over for high side pull. Feet up. Slap for top. Mantle off. FA: Brad Simpson | V3 | 3m | |||||
| 4 |
★ Ripe for Eliminates
Traverse from Fergs problem across boulder on small holds. FA: Brad Simpson | V2 | 2m | |||||
| 5 |
★ Saturday Night Finger
Sit start on high LH crimp and RH side pull to small crimps or straight to jug slopper on the right. The key side pull for the old start no longer exists. This high RH makes it less awkward. FA: Nick Walker | V3 | 3m | |||||
| 6 |
★ Now That I'm Clean Again
One of the many warm ups on the boulder | V0 | 3m | |||||
| 7 |
★★ Don’t Leave Your Valuables Unattended
Start seated with lowest part of the crack LH and incut RH pocket. Figure a way to utilise the small positive crimp on the bulge, in negotiating a long move out right into SNF - finish as that. This line stays low and eliminates the LH and RH Sloper jugs found at the 3/4 height. FA: Jimmy Blackhall, 15 May 2020 | V4 | 3m | |||||
1.2.2. Freddies Day Out Boulders 9 routes in Boulder
- Summary:
-
All Bouldering
description
Just along from the OCD boulders are Freddies day out boulders.
approach
If looking at OCD boulder, these are uphill and left. Please note these boulders border some ones land.
  |
||||||||
| Route | Grade | Style | Selected ascents | |||||
|---|---|---|---|---|---|---|---|---|
| 1 |
★ Bolton Boy Made Good
Sit start under the roof on crimps. FA: Nick walker | V1 | 3m | |||||
| 2 |
★ Funk Soul Brother
From under the boulder move across and out. FA: Nick Walker | V2 | 3m | |||||
| 3 |
★ Full Tilt
SS with high holds to a slopey topout. FA: Kwan Goddard-Lee, 2014 | V1 | 3m | |||||
| 4 |
★ Flow
Sitstart at the start of Full Tilt, then up on nice pockets and traverse out left around the arete to slopey topout up Bolton Boy Made Good. FA: Alex Mougenot, 2014 | V2 | 3m | |||||
| 5 |
A Toast To Jake The Snake
The left arete of the right boulder. FA: Jake Walker | VB | 3m | |||||
| 6 |
★ No More Smelly Fat Pants
SS to one small crimp. Sharp FA: Nick walker | V1 | 3m | |||||
 |
||||||||
| Route | Grade | Style | Selected ascents | |||||
| 7 |
★★ Fat Freddy's Drop Direct
Sit start on rock, straight up and over. FA: Matt Pelekanos, 26 Apr 2020 | V0 | 3m | |||||
| 8 |
★ Fat Freddy's Drop
Far left of the bloc, SS on jug and move up and left to top out. FA: Matt Pelekanos, 26 Apr 2020 | V1 | 3m | |||||
| 9 |
★ Weekend at Freddie's
Up the arete on the right of the bloc FA: Matt Pelekanos, 15 Nov 2019 | V0 | 3m | |||||
1.2.3. Down To Nothing Boulders 8 routes in Boulder
- Summary:
-
All Bouldering
description
This boulder is getting pretty close to the houses, but it's still part of the reserve. Keep noise to a minimum!
approach
From FDO Boulder walk 30 metres towards the houses and downhill a little bit.
   |
||||||||
| Route | Grade | Style | Selected ascents | |||||
|---|---|---|---|---|---|---|---|---|
| 1 |
★★ Momentum
Around on the right side of Monument, SS with RH hand sloper on Rside of shelf, L foot high, R foot on flake, mantle up and left and navigate the exit keeping to the the right hand side of the arete. FA: Jack Kilsby | V1 | 3m | |||||
| 2 |
★★ Monument
Sit Start at the arete on a good sidepull crimp and slopey pinch. Straight up. | V3 | 2m | |||||
| 3 |
★ Gone For Summer
Sit Start on the medium edges. Then pull those slopers or power your way to the lip. | V3 | 2m | |||||
| 4 |
Undefeated
Sit Start on juggy pinch and pocket. Up and around the arete for the mantle. | V1 | 2m | |||||
| 5 |
★ Set Sail
Sit start under the flake. Straight up following the flake. | V0 | 3m | |||||
| 6 |
★ Pipeline
Sit start with left on a good crimp and right on a small crimp. The block protruding out underneath the boulder is in. | V1 | 3m | |||||
 |
||||||||
| Route | Grade | Style | Selected ascents | |||||
|
The next boulder is 20 metres down the hill from here. | ||||||||
| 8 |
★★ When My World Turns Cold
Sit Start on the bottom section of the boulder on a juggy pinch and spike. Then out to the wicked sandstone horns and up! | V0 | 3m | |||||
| 9 |
★ Season After Season
Sit start on two crimps to the left of WMWTC, up left to slopey rail and over the top. FA: Jack Kilsby | V0+ | 2m | |||||
1.2.4. Bandit Boulder 2 routes in Area
- Summary:
-
All Bouldering
summary
Right of FDO boulder. Has potential but needs a good clean
 |
||||||||
| Route | Grade | Style | Selected ascents | |||||
|---|---|---|---|---|---|---|---|---|
| 1 |
★ One Armed Bandit
Start low, pop up to knob FA: Matt Pelekanos, 15 Dec 2019 | V1 | 2m | |||||
| 2 |
★★ Sand Bandit
Low start with LH on sidepull and RH in pocket. FA: Jack Kilsby | V1 | 2m | |||||
1.2.5. Sandpaper Boulder 4 routes in Area
- Summary:
-
All Bouldering
summary
Slabby boulder just below FDO
| Route | Grade | Style | Selected ascents | |||
|---|---|---|---|---|---|---|
| 1 |
Left side
FA: Matt Pelekanos, 19 Dec 2019 | V0 | 3m | |||
| 2 |
Left face
FA: Matt Pelekanos, 19 Dec 2019 | V0 | 3m | |||
| 3 |
Right face
FA: Matt Pelekanos, 19 Dec 2019 | V0 | 3m | |||
| 4 |
Right side
FA: Matt Pelekanos, 19 Dec 2019 | V0 | 3m | |||