A Crag Guide gives an extensive view of all sub areas and climbs at a point in the index. It shows a snapshot of the index heirachy, up to 300 climbs (or areas) on a single web page. It shows selected comments climbers have made on a recently submitted ascent.
At a minor crag level this should be suitable for printing and taking with you on a climbing trip as an adjunct to your guidebook.
This guide was generated anonymously. Login to show your logged ascents against each route.
Warning
Rock climbing is extremely dangerous and can result in serious injury or death. Users acting on any information directly or indirectly available from this site do so at their own risk.
This guide is compiled from a community of users and is presented without verification that the information is accurate or complete and is subject to system errors. By using this guide you acknowledge that the material described in this document is extremely dangerous, and that the content may be misleading or wrong. In particular there may be misdescriptions of routes, incorrectly drawn topo lines, incorrect difficulty ratings or incorrect or missing protection ratings. This includes both errors from the content and system errors.
Nobody has checked this particlular guide so you cannot rely on it's accuracy like you would a store bought guide.
You should not depend on any information gleaned from this guide for your personal safety.
You must keep this warning with the guide. For more information refer to our:
Usage policy
Contributors
Thanks to the following people who have contributed to this crag guide:
Kyle Dunsire
Adrian Kladnig
Sebastian Sakowicz
Brendan Heywood
David Barrie
Jason Lammers
boulderakov
Luke
Brett H
Diego DeDiana
The size of a person's name reflects their Crag Karma, which is their level of contribution. You can help contribute to your local crag by adding descriptions, photos, topos and more.
Some content has been provided under license from: © Australian Climbing Association Queensland (Creative Commons, Attribution, Share-Alike 2.5 AU)
Table of contents
- 1. The Villas Cliffs 17 in Area
- 2. Index by grade
1. The Villas Cliffs 17 routes in Area
- Summary:
-
All Bouldering
access issues
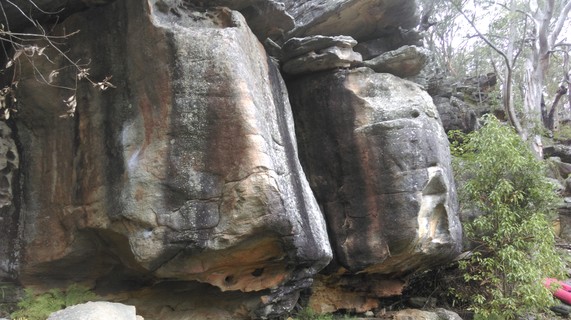
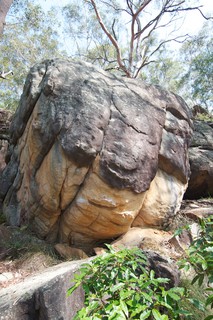
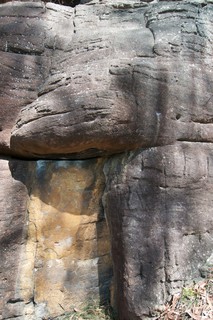
For over 50 years climbers in the Sutherland Shire have enjoyed free access to many fantastic crags and caves. But as of 2014 there have been access problems emerging at several climbing and bouldering areas due to aboriginal art sites and shell middens in caves. Sutherland Shire Council and the Dept of Enviroment and Heritage have announced closures and sign-posted some of these aboriginal sites, with further closures and signs to be added during summer/autumn 2016/2017. Areas of particular problem are ground level overhangs with flat bases, the type of terrain popular at hard bouldering areas. Whilst the details are sorted out keep a low profile, clean up ALL rubbish (inc removing mattresses in bouldering caves) and avoid climbing at closed areas. In particular treat non-climbers you see at crags with the utmost respect as they could be rangers, archeologists, traditional owners or anyone else with a dim view of climbers and the ability to shut us out. Climbing in Royal National Park has been officially banned for many years - probably due mostly to the Wattamolla 'don't jump off rocks' cliff-diving-into-water ban. For more information about aboriginal sites and rockclimbing please read this link from Sutherland Council: https://drive.google.com/file/d/0B0KxtU2nUQB9cjhHUWE4cE5HWnM/view?usp=sharing
 |
||||||||
| Route | Grade | Style | Selected ascents | |||||
|---|---|---|---|---|---|---|---|---|
| 1 |
Hairy Joe's Banana Shack
1st problem in the little cave next to the pipes. 'Excellent' and hard. FA: Paul Westwood, 2000 | V11 | ||||||
| 2 |
Squeaky Dog
Tough start, then enjoyable up the slab past the big pocket. 'Escape' right. | V3 | ||||||
| 3 |
★★ Unhinged
A committing barndoory classic | V5 | ||||||
| 4 |
★★★ Derailed
Bad landing, powerful and classic! | V8 R | 5m | |||||
| 5 |
★ Ren
Pleasant. | V3 | ||||||
| 6 |
Stimpy
Bad landing, committing and cute. | V3 R | ||||||
 |
||||||||
| Route | Grade | Style | Selected ascents | |||||
| 7 |
★★★ Help
Good | V6 | ||||||
| 8 |
★★ Mummy I'm Scared
Same start as Help, but move right of the arete and up. | V4 | ||||||
| 9 |
★ Rock On
Up the wall in front of the small tree | V3 | 4m | |||||
| 10 |
★★ Help into Rock On
Link sit start of 'Help into Rock On' | V7 | ||||||
| 11 |
★ Fumy Webs
Up the seam | V1 | ||||||
  |
||||||||
| Route | Grade | Style | Selected ascents | |||||
| 12 |
★★ Boobs
Best easy problem at crag. | V1 | 3m | |||||
| 13 |
★ Pox
Up the shitty arete, bad landing and bad rock. | V3 R | ||||||
| 14 |
★★★ Human Pinball
A nice short powerful, overhanging arete. Bad landing | V5 R | ||||||
| 15 |
★★ Letter Box
Up the wall via a committing lock. | V3 | ||||||
| 16 |
★ Playground
Start in break below rooflet, up and over, red rover. | V2 | 4m | |||||
| 17 |
★ Like A Finger Up Your Bum
If you're into that type of thing! | V2 | 4m | |||||
 Matti Puckridge
2. Index by grade
| Grade | Stars | Name | Style | Pop | |
|---|---|---|---|---|---|
| V1 | ★★ | Boobs | 3m | ||
| ★ | Fumy Webs | ||||
| V2 | ★ | Like A Finger Up Your Bum | 4m | ||
| ★ | Playground | 4m | |||
| V3 | ★★ | Letter Box | |||
| ★ | Ren | ||||
| ★ | Rock On | 4m | |||
| Squeaky Dog | |||||
| V3 R | ★ | Pox | |||
| Stimpy | |||||
| V4 | ★★ | Mummy I'm Scared | |||
| V5 | ★★ | Unhinged | |||
| V5 R | ★★★ | Human Pinball | |||
| V6 | ★★★ | Help | |||
| V7 | ★★ | Help into Rock On | |||
| V8 R | ★★★ | Derailed | 5m | ||
| V11 | Hairy Joe's Banana Shack |