A Crag Guide gives an extensive view of all sub areas and climbs at a point in the index. It shows a snapshot of the index heirachy, up to 300 climbs (or areas) on a single web page. It shows selected comments climbers have made on a recently submitted ascent.
At a minor crag level this should be suitable for printing and taking with you on a climbing trip as an adjunct to your guidebook.
This guide was generated anonymously. Login to show your logged ascents against each route.
Warning
Rock climbing is extremely dangerous and can result in serious injury or death. Users acting on any information directly or indirectly available from this site do so at their own risk.
This guide is compiled from a community of users and is presented without verification that the information is accurate or complete and is subject to system errors. By using this guide you acknowledge that the material described in this document is extremely dangerous, and that the content may be misleading or wrong. In particular there may be misdescriptions of routes, incorrectly drawn topo lines, incorrect difficulty ratings or incorrect or missing protection ratings. This includes both errors from the content and system errors.
Nobody has checked this particlular guide so you cannot rely on it's accuracy like you would a store bought guide.
You should not depend on any information gleaned from this guide for your personal safety.
You must keep this warning with the guide. For more information refer to our:
Usage policy
Contributors
Thanks to the following people who have contributed to this crag guide:
alonsoATCO
Al Bear
Michael Lehmann
Kai
David Gibbs
Pablo Barrios Ponce
Peter Nellist
Euan Moir
Campbell Gome
Phil Price
The size of a person's name reflects their Crag Karma, which is their level of contribution. You can help contribute to your local crag by adding descriptions, photos, topos and more.
Table of contents
- 1.
North East Outcrops & Angus
804 in Crag
-
1.1.
Moray Firth Coast 279 in Area
-
1.1.1.
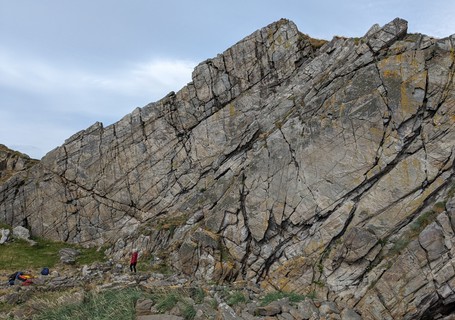
Cummingston Cliffs 141 in Cliff
- 1.1.1.1. Orange Wall Area 15 in Cliff
- 1.1.1.2. Gutbuster Bay Area 13 in Cliff
- 1.1.1.3. Prophet Walls 31 in Cliff
- 1.1.1.4. Tapered Wall 8 in Cliff
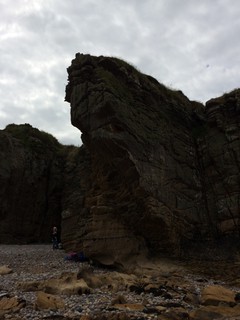
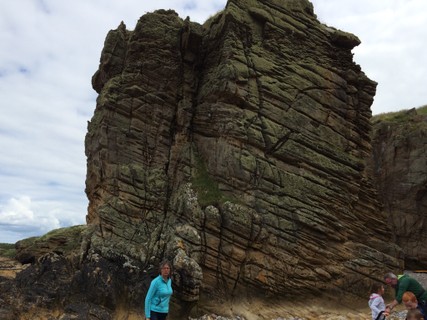
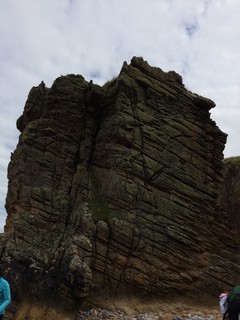
- 1.1.1.5. The Stack 18 in Cliff
- 1.1.1.6. Doubt Wall 10 in Cliff
- 1.1.1.7. Cornflake Walls 16 in Cliff
- 1.1.1.8. Arch Wall 18 in Cliff
- 1.1.1.9. Sunshine Wall 8 in Cliff
- 1.1.1.10. Sentinel Stack 4 in Cliff
-
1.1.2.
Logie Head 81 in Crag
- 1.1.2.1. Embankment 1 & 2 25 in Cliff
- 1.1.2.2. The Tidal Zone 13 in Cliff
- 1.1.2.3. Gully Wall 10 in Cliff
- 1.1.2.4. Star Zone 13 in Cliff
- 1.1.2.5. West Face 10 in Cliff
- 1.1.2.6. Path Wall 4 in Cliff
- 1.1.2.7. The Pinnacle 6 in Cliff
-
1.1.3.
Mull Cleave 9 in Cliff
- 1.1.3.1. West face 4 in Sector
- 1.1.3.2. The Landward Walls 5 in Sector
-
1.1.4.
Covesea 48 in Cliff
- 1.1.4.1. Primrose Bay 1 in Cliff
- 1.1.4.2. Honeycomb Wall 9 in Cliff
- 1.1.4.3. Boulders Bay 21 in Cliff
- 1.1.4.4. Stack Bay 14 in Cliff
- 1.1.4.5. Stone Steps Area 1 in Cliff
- 1.1.4.6. Beach Wall 2 in Cliff
-
1.1.5.
Rosehearty Crag 0 in Cliff
- 1.1.5.1. Quarryhead - Car Park Island 0 in Sector
- 1.1.5.2. Quarryhead - Car Park Crag 0 in Sector
- 1.1.5.3. Quarryhead - Moon Wall 0 in Sector
- 1.1.5.4. Murcurry - North Wall 0 in Sector
- 1.1.5.5. Murcurry - South Wall 0 in Sector
- 1.1.5.6. Murcurry - Dead Sheep Zawn 0 in Sector
- 1.1.5.7. The Sea-Cliffs - East Buttress 0 in Sector
- 1.1.5.8. The Sea-Cliffs - Middle Crag 0 in Sector
- 1.1.5.9. The Sea-Cliffs - West Wall 0 in Sector
- 1.1.5.10. The Sea-Cliffs - West Inside Buttress 0 in Sector
- 1.1.5.11. The Sea-Cliffs - Backside Wall 0 in Sector
- 1.1.6. Mohr Head 0 in Cliff
-
1.1.1.
Cummingston Cliffs 141 in Cliff
-
1.2.
Coast North of Aberdeen 27 in Area
- 1.2.1. Meackie Point 9 in Crag
- 1.2.2. Fulmar Wall 9 in Crag
- 1.2.3. Meikle Partans 9 in Cliff
-
1.3.
Coast South of Aberdeen 173 in Area
- 1.3.1. The Fin 20 in Crag
- 1.3.2. Earnsheugh 20 in Crag
- 1.3.3. Floors Craig 8 in Area
-
1.3.4.
Boltsheugh 20 in Crag
- 1.3.4.1. Boltsheugh Upper 12 in Sector
- 1.3.4.2. Boltsheugh Lower 8 in Sector
- 1.3.5. Brown Crag 10 in Crag
- 1.3.6. Brown Band Crag 8 in Crag
- 1.3.7. Yellow Crag 19 in Crag
-
1.3.8.
Craig Stirling 22 in Crag
- 1.3.8.1. West Buttress 10 in Area
- 1.3.8.2. East Buttress 11 in Area
-
1.3.9.
Clashrodney 34 in Crag
- 1.3.9.1. The Causeway Climbs 11 in Sector
- 1.3.9.2. The Pink Slab 6 in Sector
- 1.3.9.3. Central Buttress 9 in Sector
- 1.3.9.4. The Waterfall Climbs 4 in Sector
- 1.3.9.5. Cairnrobin Point 4 in Sector
- 1.3.10. South Cove 12 in Crag
-
1.4.
Angus 325 in Area
- 1.4.1. Kirrie Hill 75 in Crag
- 1.4.2. Balmashanner Quarry 22 in Crag
-
1.4.3.
Legaston Quarry 74 in Crag
- 1.4.3.1. Ring Buttress / Sunshine Wall 14 in Sector
- 1.4.3.2. Main Wall 25 in Sector
- 1.4.3.3. Rotten Wall 11 in Sector
- 1.4.3.4. Forbidden Buttress 7 in Sector
- 1.4.3.5. Babylon Buttress (Wet Wall) 10 in Sector
- 1.4.3.6. Rose Wall 7 in Sector
- 1.4.4. Ley Quarry 33 in Crag
- 1.4.5. Elephant Rock 28 in Crag
-
1.4.6.
Rob's Reed 54 in Crag
- 1.4.6.1. Dirty Harrys Cave 10 in Sector
- 1.4.6.2. Caravan 8 in Sector
- 1.4.6.3. Size isn't Everything 7 in Sector
- 1.4.6.4. Main Wall Left 10 in Sector
- 1.4.6.5. Main Wall Right 16 in Sector
- 1.4.6.6. The Pen 3 in Sector
-
1.4.7.
Arbroath 39 in Crag
- 1.4.7.1. The Rut 5 in Cliff
- 1.4.7.2. The Platform 0 in Cliff
- 1.4.7.3. The Tower 0 in Cliff
- 1.4.7.4. Non Tidal Wave 0 in Cliff
- 1.4.7.5. The Promontory 0 in Cliff
- 1.4.7.6. Sector Cartoon 12 in Cliff
- 1.4.7.7. Sector Parental Guidance 0 in Cliff
- 1.4.7.8. The Steppes 0 in Cliff
- 1.4.7.9. Sector Mini 6 in Cliff
- 1.4.7.10. Conning Tower Inlet 1 in Cliff
- 1.4.7.11. The Haven 9 in Cliff
- 1.4.7.12. Battery Inlet 0 in Cliff
- 1.4.7.13. Doom Hole 1 in Cliff
- 1.4.7.14. Grannie´s Garret 2 in Cliff
- 1.4.7.15. The Deil´s Heid 3 in Cliff
-
1.1.
Moray Firth Coast 279 in Area
- 2. Index by grade
1. North East Outcrops & Angus 804 routes in Crag
- Summary:
-
Trad climbing, Sport climbing and other styles
Lat / Long: 57.191373, -2.417172
summary
All of the East coast of Scotland goodness.
description
From north of Angus to Peterhead and the north coast towards Inverness.
1.1. Moray Firth Coast 279 routes in Area
- Summary:
-
Mostly Trad climbing
Lat / Long: 57.683570, -2.785302
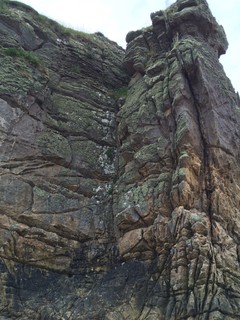
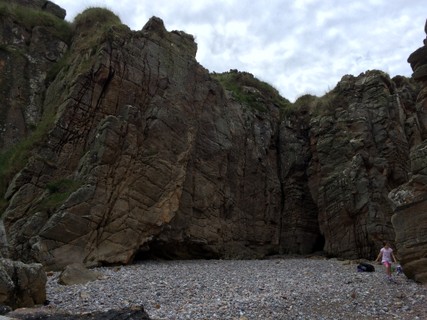
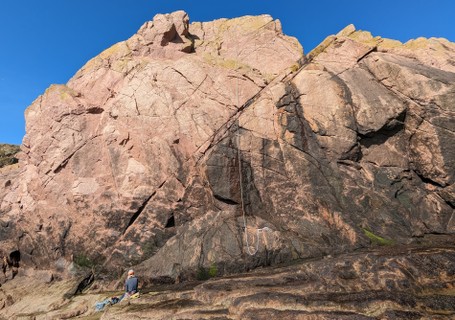
1.1.1. Cummingston Cliffs 141 routes in Cliff
- Summary:
-
Mostly Trad climbing
Lat / Long: 57.703949, -3.460951
description
North facing sea cliff on good sandstone. Toilets available at the car park. Very short walk in (less than 2 mins).
approach
Park at the Cummingston playground, off the road to the left if travelling from Burghead towards Hopeman. Walk (or take the children's slide) down to the paved path, and proceed either straight down to the beach then left, or left along the path for approximately 100 metres until the embankment on your right opens out and you are able to descend to the base of the cliffs. NB - the whole area is tidal.
descent notes
Stakes at the top of popular climbs to ab off of. Rigging protection to belay up a second can be challenging.
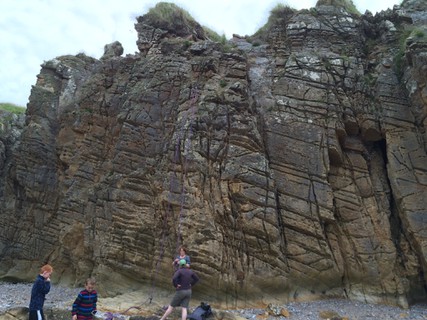
1.1.1.1. Orange Wall Area 15 routes in Cliff
- Summary:
-
All Trad climbing
Lat / Long: 57.704097, -3.457360
description
Eastern section of the cliff, directly below the car park. To the immediate left as you walk onto the beach area.
approach
From the car park, descend the slide (or walk down next to it) then proceed across the path (tarmac, runs from left to right as you stand at the bottom of the slide) and down towards the beach area. Orange Wall is on your left, with a large old metal pipe running vertically down it.
descent notes
Descend by the obvious walking path.
| Route | Grade | Style | Selected ascents | |||
|---|---|---|---|---|---|---|
| 1 |
Orange Peel
Right of the arete. Climb straight up, without using features on the arete. Last hold's a big reach. | E1 5b | 7m | |||
| 2 |
Route One
Start slightly right of Orange Peel. Follow the rightward trending flakes. | VS 4c | 7m | |||
| 3 |
Ginger Snap
Up the finger crack to the right of Route One, finishing by traveling left to Route One's finish. | HVS 4c | 7m | |||
| 4 |
Drainpipe Wall
A smooth section of the wall to the right of Ginger Snap, almost directly underneath a small shelf situated just below the top of the cliff (where the climb ends). | E2 6b | 7m | |||
| 5 |
Thumper
Another thin crack line, about ten paces right of Ginger Snap. | E3 6a | 8m | |||
| 6 |
Tangerine Scream
The overhung section of wall to the right of Thumper. Sparse holds and minimal protection. | E5 6a | 8m | |||
| 7 |
Hickory Dickory Dock
The next crack line along to the right. To the left of the next set of decent holds. | E4 6a | ||||
| 8 |
★ Flakey Wall
The clear line of flakes bearing to the right. | E1 5a | 8m | |||
| 9 |
Route Two
Right of Flakey Wall. Start at the bottom left of the overhang, and progress gradually to the right to finish as Skelp. | E2 5b | 8m | |||
| 10 |
Skelp
The direct line straight up the overhanging face to the wall above. Finishes at the same place as Route Two | E2 5c | 8m | |||
| 11 |
King Swing
The undercut crack line to the right of Skelp. Once you reach the bulge look to the right to make progress, then continue up the crack to the top. | E2 5c | 8m | |||
| 12 |
Beserker
Often sandy - bring a soft brush. Start as per King Swing, then traverse right along the bulge until you reach a vertical seam. Work your way up this, until you achieve the chimney to the finish. | E4 6b | 10m | |||
| 13 |
Power Struggle
Route will need cleaning prior to ascent - it seems to collect filth at an accelerate pace through some kind of dark magic. Right of the cave there is an overhanging wall with a slab at it's base. Climb up it. | E5 6a | 10m | |||
| 14 |
Solo Wall
The arete above the beach approximately 15 paces right of Power Struggle. | VD | 10m | |||
| 15 |
Black Roof
The roofed in corner to the immediate right of Solo Wall's dumpy arete. Aim for an incut niche in the corner where the wall transitions into the roof, then move left out onto the slabby wall to proceed to the finish. | VS 5a | 10m | |||
1.1.1.2. Gutbuster Bay Area 13 routes in Cliff
- Summary:
-
All Trad climbing
Lat / Long: 57.703879, -3.458263
description
UPDATE 6/7/2017 - the descent path has disappeared in gorse thickets, and the top out of Middle Muddle Direct is now a slope of gorse bushes, making for an excruciating top out. Just to the west (right as you look at Orange Wall), there is a tidal bay linked to Orange Wall by a cave. The climbing to the right and left of the cave is average to outright naff (past Sea Witch to the right, there are a number of climbs not listed here. The rock is substandard and very brittle). The back of the Cave is very entertaining!
approach
Through a large cave situated at the western end of Orange Wall Area.
descent notes
Via the obvious cliff top path through gorse. Wear trousers. UPDATE 6/7/2017 - the cliff top path has been fully overgrown by gorse and brambles, and the anchors are in need of replacement to facilitate safe belaying and rappelling.
| Route | Grade | Style | Selected ascents | |||||
|---|---|---|---|---|---|---|---|---|
| 1 |
Beastie's Wall
At the left side of the left wall as you look at it is a line of hollow flakes. Climb up them to the top, veering left to avoid a grassy section by taking a vertical crack. | HS 4a | 10m | |||||
| 2 |
The Beast
Follow the thin crack next to a flake, straight up through the roof to the finish. Very brittle rock. | E2 5b | 10m | |||||
| 3 |
Middle Muddle Groove
Climb the easy flakes, traversing right to a depression in the rock. Once reached, progress up the obvious groove to the top. | D | 10m | |||||
| 4 |
Middle Muddle Direct
Start a few paces right of the flakes of MM Groove, at a crack that runs through the bulge above onto a ledge. Follow the obvious crack to the top. | VS 5a | 10m | |||||
| 5 |
Jugular Wall
The steep wall to the right of MM Direct. About half way up there's a large jug to look forward to, before working through the last few ledges and up the final section of steep wall. | HS 4b | 10m | |||||
| 6 |
Mud, Sweat and Tears
Straight up the chimney at the back to a finish past a roof. | HS | 10m | |||||
   |
||||||||
| Route | Grade | Style | Selected ascents | |||||
| 7 |
★★ Hernia Corner
The bulging crack and corner on the left hand side of the back wall. Word on the street is the tricky start is often aided, dropping the grade to 5a. | E2 6a | 15m | |||||
| 8 |
★★ Anal Stretch
The route starts a couple of feet to the right of Hernia Corner. Tough reachy moves throughout the wall and roof make for an exciting climb. Take pro of an equivalent size to a WC hex 5 and a Rock 5 for the roof section, which finishes with a long reach right to a spike. Finish up the arete bearing right. | E6 6b | 15m | |||||
| 9 |
★ Legbuster
Runout in the upper section - ground-fall potential. To the right of a buttress is a pair of cracks. Climb the left one until reaching the bay, whereupon you trend leftwards up a thin and fingery wall to the finish. | E2 5c | 20m | |||||
| 10 |
★★ Gutbuster
Pumpy moves up the right-hand crack of the pair to the bay. Trend out rightwards to a mantle-shelf finish. Gobbles up cams like sweets in the lower sections. | E2 5c | 20m | |||||
| 11 |
★★ Kneewrecker Chimney
The chimney to the right of the pair of vertical cracks that make up the previous two routes. Watch out for the tight chockstone (crux) on your way up. | VS 4c | 20m | |||||
 |
||||||||
| Route | Grade | Style | Selected ascents | |||||
| 12 |
Sea Witch
Often needs a good clean prior to climbing. Left of an overhanging crack on the right-hand side of the cave, up a 'flake-nose' and through the brittle wall above. Very poor pro throughout on less than average quality rock. | E3 5b | 12m | |||||
| 13 |
Sandy Volestrangler
The overhung crack to the right of Sea Witch | E3 6b | 12m | |||||
1.1.1.3. Prophet Walls 31 routes in Cliff
- Summary:
-
Mostly Trad climbing
Lat / Long: 57.703596, -3.459986
description
Non tidal - reached at any time from the beach.
approach
Walk down the tarmac path (signed towards Burghead) for approximately 100 metres, until you reach an opening in the embankment on your right. Descend here and travel right (East) towards the large rock face.
descent notes
Along the obvious cliff top path.
| Route | Grade | Style | Selected ascents | |||||
|---|---|---|---|---|---|---|---|---|
| 1 |
★ The Gripper
The corner at the left of the overhung bay to the ledge above, finishing through the tricky roof. | HVS 5b | 20m | |||||
| 2 |
★★ Surf Nazis Must Die
Right of The Gripper. Climb the overhung wall straight up to the small overhang, then power through to the left before working right towards the top. Bring pro to the equivalent of a Friend 0 and a Friend 3. | E5 6b | 15m | |||||
| 3 |
★★ Aesthetic Ape
Climb the bulging corner to the right of Surf Nazis, following it roughly up to a break via a pocket. Pull through onto a block, then finish up to the right. | E4 6a | 20m | |||||
| 4 |
★ Bat Attack
Lethal ground-fall potential. Climb the edge of the incut recess right of Aesthetic Ape and left of the features of Orange Ape. Use a wobbly horizontal spike to reach a thin crack which leads to the finish. | E5 6a | 15m | |||||
| 5 |
★ Orange Ape
Follow the undercut corner at the back left of the bay. | E2 5c | 20m | |||||
| 6 |
★★ Statutory Ape
Follow the right edge of the large flake feature approximately 5 paces left of Bat's Wall.Make the ledge above, then reach up to a pinch at the right end of a feature. Levitate to a series of slopers, then follow to the finish above. | E6 6c | 15m | |||||
| 7 |
★★★ Bat's Wall
Crack line at the back right of the wall. Start direct, or up the shelf as an easier option. | E4 6a | 15m | |||||
| 8 |
★★★ Monkey Mafia
Often damp. Right of Bat's Wall, work your way up the gradually leftward migrating crack line from the depths of the cave. Once you achieve the sloping rest, follow the vertical crack to the roof, the work left on upsettingly poor undercut holds to the groove and the finish. | E4 6a | 15m | |||||
| 9 |
★ Noddy Machine
The overhung shallow groove line to a ledge with a large flake, traveling up left and through the roof section on jugs to a rightward arete and the finish. | E2 5b | 15m | |||||
| 10 |
Jaded Arete
The arete to the right of Noddy Machine. Climb it. | E2 5c | 15m | |||||
| 11 |
Triangular Groove
The vaguely ovoid shaped groove with a mini roof at the top, just right of Noddy Machine. The left side of the groove is the arete for Jaded Arete. Finish right as per Border Crossing. | HVS 5a | 20m | |||||
| 12 |
Border Crossing
The shallow groove to the right of Triangular Groove. Follow the groove to the flake on the right wall, then head directly up to the finish via a vertical crack. | HS 4b | 20m | |||||
| 13 |
Borderline
The big dihedral right of the groove. Bring a brush. | VS 4c | 15m | |||||
| 14 |
★ Palmist
Just to the right of Borderline. Climb directly to a jug, employ yoga/contortion/dislocation to stand up in said jug, then straight up the vertical crack to a small ledge and the top. | E4 6b | 15m | |||||
| 15 |
★★ The Prophet
The right hand side of the arete to the right of Palmist. Confusingly, start on a tiny step on the lower left side of the arete. Once you reach the left facing corner take a deep breath, then tackle the roof to easier going and the finish. | E2 5c | 15m | |||||
| 16 |
★ Africa
To the right of The Prophet. Climb the front face of the bulge towards the feature above that supposedly looks like a map of Africa. Place gear out left before brazenly climbing the sparsely protected face. | E4 6a | 15m | |||||
| 17 |
★ I-Ching
Climb the next arete to the right pretty much any which way you can. Get inventive with your pro, or it can get alarmingly run out. | E3 5c | 20m | |||||
| 18 |
★★ Left
The left-most corner of the big buttress. | VS 5a | 20m | |||||
| 19 |
★★ Centre
Up Left to a flake, then out right and head directly up the centre. | VS 4b | 20m | |||||
| 20 |
★★ Right
As the name implies, the right corner of the big buttress. | HVS 5a | 15m | |||||
| 21 |
Yorkshire Grip
The arete between Centre and Right. Eliminate - keep your eyes front and centre. | E2 6a | 15m | |||||
| 22 |
★ Spare Rib
Directly up the rib to the right of Right. No pro before the crux at half height. | HVS 4b | 15m | |||||
| 23 |
Yoohah
To the right of Right's corner, the first groove. | VS 5a | 10m | |||||
| 24 |
Bing-Bong
The second groove to the right of Right's corner, passing the obvious and awkward bulge to an equally awkward top out on slick grass. | S | 8m | |||||
| 25 |
Gnib-Gnob
At the back of a little bay to the right of Bing-Bong, in the corner where the wall shifts direction. Climb the corner. | HS | 8m | |||||
| 26 |
Pigmy Shrew
The clear vertical crack line, right of the corner of Gnib-Gnob. | E1 5c | 6m | |||||
| 27 |
Bank Vole
The next decent looking crack, a few feet to the right of Pigmy Shrew. | VS 5a | 6m | |||||
| 28 |
The Weem
The corner and slot away to the right of Bank Vole. | VD | 10m | |||||
| 29 |
The Wobble
Right of The Weem, you will find a shallow groove that faces left. Go up it. | VD | 10m | |||||
| 30 |
Thud
Like The Wobble, but to it's right and marginally more difficult. | HVS 5b | 10m | |||||
 |
||||||||
| Route | Grade | Style | Selected ascents | |||||
| 31 |
★★★ Bay Watch
An 80m traverse taking in all of the sights, starting from near The Gripper and finishing on the grass near Thud. If in doubt, look for chalk off-piste from the main routes. Taxing in duration if not in difficulty. Little red swim suit optional. | 6B | ||||||
1.1.1.4. Tapered Wall 8 routes in Cliff
- Summary:
-
All Trad climbing
Lat / Long: 57.703598, -3.461682
description
Non tidal - Loose rock apart from the bottom bay area containing The Nest (E2 6a).
approach
From the slide, follow the tarmac track towards Burghead for 100m, then descend a grassy slope in a break in the embankment on the right hand side of the path. Prophet Wall is to your right, and Tapered Wall is to your left as you look out to sea.
descent notes
Well trodden path back to the grassy break in the embankment, occasionally heavy with gorse. Wear trousers.
| Route | Grade | Style | Selected ascents | |||
|---|---|---|---|---|---|---|
| 1 |
Slimline Chimney
Up at the top left end of the wall, there is a short chimney/corner. Climb it. | S 4b | 6m | |||
| 2 |
Fracture Face
Look for the wall down the hill a short distance from Slimline covered in short crack features. Loose, friable rock abounds. Treat like a solo with the encumbrance of rope, a harness and necessary provisions. | VS 4b | 12m | |||
| 3 |
Tall Order
The arete at the end of the wall. Climb it direct. | HVS 5b | 12m | |||
| 4 |
Tom's Wall
Start at the arete of Tall Order, then migrate right up a chimney full of loose rock. | S | 12m | |||
| 5 |
Graffiti Wall
Direct up the centre/right graffiti covered slab to the right of Tom's Wall. | VD | 10m | |||
| 6 |
Pretty Flamingo
Head right until you come across a little bay made up of a corner and roof (The Nest). Climb the arete to the left of the corner, on it's right side. | E1 5c | 6m | |||
| 7 |
★ Ultra Radical
Climb the middle of the wall left of The Nest. Absolutely nails. Start at the thin crack and work your way upward using an undercut and sheer grit. Bring a brush to clean the upper sections. | E5 6c | 10m | |||
| 8 |
★ The Nest
The roofed corner. The crux is reaching the climb's namesake. | E2 6a | 10m | |||
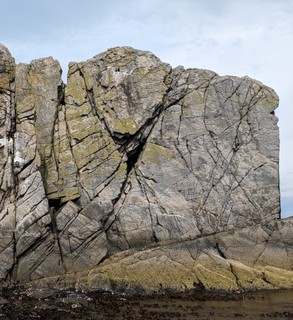
1.1.1.5. The Stack 18 routes in Cliff
- Summary:
-
Mostly Trad climbing
Lat / Long: 57.703850, -3.462110
description
Partially tidal. The largest of the stacks, visible slightly to the left as you descent from the path between Prophet and Tapered Wall. Exciting climbing in a beautiful location.
approach
As for Tapered Wall. The obvious large sea stack directly in front of Doubt Wall.
descent notes
By abseil, or via Back Passage (Moderate) at low tide.
   |
||||||||
| Route | Grade | Style | Selected ascents | |||||
|---|---|---|---|---|---|---|---|---|
| 1 |
★ Captain Birdseye
The left hand corner facing the land. Climb up the face, over the bulge then finish up an obvious groove. | E2 5b | 12m | |||||
| 2 |
Fingers Wall
Begin right of Captain Birdseye, aiming initially for a small square ledge. Traverse right to a set of slightly angled cracks, then work up them to top out. | E3 5b | 12m | |||||
| 3 |
★ Flying Buttress, Left Side
Begin at the right hand side of the slightly sloping shelf. Follow the corner to a ledge, then transfer to the face and finish directly. | VD | 10m | |||||
| 4 |
Flying Buttress, Right Side
Looking at Flying Buttress, use the same crack but follow the right hand side. Finish up the face as FB Left. No pro for the first three quarters of the route except very large cams in the crack. Easier to just solo it than try to place gear, although the right hand side wall's rock is crumbly | D | 12m | |||||
| 5 |
★ Flying Groove
Past Flying Buttress to the right is a large clear groove. Climb it. | VS 4c | 12m | |||||
    |
||||||||
| Route | Grade | Style | Selected ascents | |||||
| 6 |
★★ The Prow
Around the East side of the The Stack lies a bulging prow. Climb up then left over the lip, finishing directly up the face. Bring a range of large cams for the upper section where frequent but shallow placements abound. | E5 6a | 12m | |||||
| 7 |
Cutty Sark
To the right of The Prow, between it and a recessed corner. Starts just to the left of the corner, and gradually trends to the left onto the protruding prow. From there finish directly. Tenuous top-out. | S | 12m | |||||
| 8 |
East Side Story
Climb the wall to the left of Back Passage, trending right underneath the ledge covered in grass (and occasionally seagulls) to an easy finish. | VD | 12m | |||||
| 9 |
Back Passage
The recessed corner full of deep cracks. An easy climb for all the family, and doubles as a descent route from the top of The Stack. | M | 12m | |||||
| 10 |
Dirty Old Man
To the right of Back Passage, using the often vegetated cracks. Easy finish. | VD | 12m | |||||
| 11 |
★ Sunset Song
Climb the curved groove to the right of Dirty Old Man, finishing over a bulge. | HS 4b | 12m | |||||
| 12 |
Footloose
Start at the far right of the North facing wall. Once you get to about half height move over to the left and gain a ledge, then finish to the left over an exciting bulge. | VS 4c | 12m | |||||
| 13 |
Blocky
Start right of Footloose, following a natural line to the right end of a ledge to finish up the corner. | VD | 12m | |||||
| 14 |
★ Butcher's Broom
Follows clean cracks up the left side edge of the West facing wall to a bulging finish. | VS 4b | 12m | |||||
| 15 |
Shadow Flake
To the right of Butcher's broom. Climb directly to the small flake, then make a long move before finishing right. | HVS 5a | 10m | |||||
| 16 |
Coach Bolt Crack
The obvious left crack, to the right of Shadow Flake. | VS 4c | 10m | |||||
| 17 |
Huggy Bear
The right hand crack of the two, occasionally reaching for the arete when the going gets sparse. | VS 4c | 12m | |||||
| 18 |
★ Girdle traverse
Clockwise around the block. High tide adds spice, and occasionally soggy ankles. | 5b | ||||||
1.1.1.6. Doubt Wall 10 routes in Cliff
- Summary:
-
All Trad climbing
Lat / Long: 57.703693, -3.462128
description
Non tidal - Left of Tapered Wall. The steep wall opposite the largest stack. Finishes at the opening to the tunnel.
approach
As for Tapered Wall.
descent notes
As for Tapered Wall.
 |
||||||||
| Route | Grade | Style | Selected ascents | |||||
|---|---|---|---|---|---|---|---|---|
| 1 | ★ Doubtless Wall | S | 10m | |||||
| 2 | The Artful Dodger | HVS 5a | 12m | |||||
| 3 | ★★ Diedre of Doubt | HVS 5a | 12m | |||||
| 4 | ★★ Diedre of Double Doubt | E2 5b | 12m | |||||
| 5 | ★★ Doubting Thomas | E2 5b | 12m | |||||
| 6 | Staircase Crack | S | 12m | |||||
| 7 | Green Crack | VS 4c | 12m | |||||
 |
||||||||
| Route | Grade | Style | Selected ascents | |||||
| 8 | Lumside Crack | S | 12m | |||||
| 9 | The Lum | VD | 12m | |||||
| 10 | Cascade | VS 5a | 12m | |||||
1.1.1.7. Cornflake Walls 16 routes in Cliff
- Summary:
-
Mostly Trad climbing
Lat / Long: 57.703783, -3.462434
description
Tidal. Right of the arete that becomes blocked off at high tide, there are a range of featured walls with myriad grooves and pock marks, terminating in a rounded undercut section to the left of the next visible cave entrance.
approach
West of Doubt Wall, follow the natural curve of the cliff.
descent notes
Clear path along the cliff edge back towards the tarmac path.
  |
||||||||
| Route | Grade | Style | Selected ascents | |||||
|---|---|---|---|---|---|---|---|---|
| 1 | Snotty Nose | D | 12m | |||||
| 2 | Pegless Wall | HVS 4c | 12m | |||||
| 3 | ★ Old Peg Groove | VS 4c | 12m | |||||
| 4 | ★★ Cornflake Wall | M | 12m | |||||
| 5 | Shredded Wheat | VD | 12m | |||||
| 6 | ★ Rice Crispie Wall | D | 12m | |||||
| 7 | The Groove | D | 12m | |||||
| 8 | ★ Bombproof | S | 12m | |||||
| 9 | Blockproof | S | 12m | |||||
| 10 | ★ Blockbuster | VD | 12m | |||||
| 11 | ★ Doddle Diedre | S | 12m | |||||
| 12 | ★★ Stegosaurus | VS 4c | 12m | |||||
| 13 | ★ Gibbon | HVS 5c | 12m | |||||
| 14 | ★★ Trapeze | VS 5b | 12m | |||||
| 15 | Gorilla | E1 5c | 12m | |||||
| 16 | ★★ Central Face Low Level Traverse | 5C | ||||||
1.1.1.8. Arch Wall 18 routes in Cliff
- Summary:
-
Mostly Trad climbing
Lat / Long: 57.703781, -3.462763
description
After Cornflake Wall's undercut ending, continue west past the cave entrance. Between this cave entrance and the next are located two faces - once faces out to sea, the other is a collapsed cave.
approach
Continue west along the cliff base towards Burghead from Cornflake Walls.
descent notes
As for Cornflake Walls.
| Route | Grade | Style | Selected ascents | |||
|---|---|---|---|---|---|---|
| 1 | Bottomless Chimney | E3 6b | 12m | |||
| 2 | ★ Pipefish Wall | E3 6a | 12m | |||
| 3 |
★ Double Stretch
Highball boulder following a line of harder rock. | 6A | 6m | |||
| 4 | ★ Headbanger | 5C | 6m | |||
| 5 | Jerker | 6B | 6m | |||
| 6 | ★ Slab and Tickle | VD | 12m | |||
| 7 | Giraffe Corner | E3 6a | 12m | |||
| 8 | ★★ Arch Wall | E5 6b | 12m | |||
| 9 | Sandstone Wall | HVS 5a | 12m | |||
| 10 | ★ Appletiser | HVS 5a | 12m | |||
| 11 | ★ Le Crunch | E4 5c | 12m | |||
| 12 | Fourth Dimension | E2 5c | 10m | |||
| 13 | Jewels Underground | E3 6a | 10m | |||
| 14 | Brain Warp | E2 5c | 10m | |||
| 15 |
Puppet On A String
Dry tooling route. | A3 | 22m | |||
| 16 | ★ Bullworker | HVS 5a | 10m | |||
| 17 | Archibold | E4 6a | 10m | |||
| 18 | Expander's Crack | VS 4c | 10m | |||
1.1.1.9. Sunshine Wall 8 routes in Cliff
- Summary:
-
All Trad climbing
Lat / Long: 57.703638, -3.463135
description
Non tidal. This section of the cliff ends in a west facing wall that gradually tapers above a grassy embankment.
approach
Continue west from Sunshine Wall.
descent notes
As for Sunshine Wall.
| Route | Grade | Style | Selected ascents | |||
|---|---|---|---|---|---|---|
| 1 | Easy Arete | E | 10m | |||
| 2 | ★ Sunshine Roof | HS | 10m | |||
| 3 | Gorse Route | S | 10m | |||
| 4 | Sunshine Groove | S | 8m | |||
| 5 | Sunshine | HVS 5b | 8m | |||
| 6 | Sunshine Crack | VS 4c | 6m | |||
| 7 | Sunshine Extra | HS 4b | 6m | |||
| 8 | Sunshine Recess | S | 4m | |||
1.1.1.10. Sentinel Stack 4 routes in Cliff
- Summary:
-
Trad climbing and Bouldering
Lat / Long: 57.703840, -3.464592
description
The second of three stacks to the West of The Stack, identifiable by a tunnel running through it's centre.
approach
Pass Sunshine Wall from above on the path or below on the beach whilst headed west towards Burghead - the Maltings can be seen (and often scented) from here, then proceed across the small beach (towards the sea) to the protruding stack which is the Sentinel.
descent notes
Abseil, or proceed down Ramp Route (Severe).
| Route | Grade | Style | Selected ascents | |||
|---|---|---|---|---|---|---|
| 1 |
★ The Pedestal
Start on a lump of rock at the end of the tunnel and follow the overhang punctured by big positive holds. | 4C | ||||
| 2 |
Jutting Flake Crack
The obvious line up the corner of the stack closest to Sunshine Wall (SE?). | HS 4b | 8m | |||
| 3 |
Vein Attraction
Around the corner from Jutting Flake Crack, following a vein of good quality rock all the way up. | S | 8m | |||
| 4 |
★ Ramp Route
Facing The Sentinel from the East, climb the ramp at the right hand side until you reach a flake. From then on climb direct to the top on good handholds. | S | 8m | |||
1.1.2. Logie Head 81 routes in Crag
- Summary:
-
Mostly Trad climbing
Lat / Long: 57.700368, -2.792708
description
Peninsula just east of Cullen. East facing and very fast drying. Has a lovely carpet of grass at the base of the non-tidal sectors.
approach
Park by the Cullen caravan park ( 57.693679, -2.814896), walk east past Nelson's Seat and down to the coast. Follow the coastal path under the cliff to reach the dyke in the distance.
1.1.2.1. Embankment 1 & 2 25 routes in Cliff
- Summary:
-
All Trad climbing
Lat / Long: 57.700064, -2.792989
description
The first two sectors on the eastward side of the peninsula.
approach
Down the concrete then stone steps
Non-tidal.
descent notes
Easy walk down the back or via the rake.
 |
||||||||
| Route | Grade | Style | Selected ascents | |||||
|---|---|---|---|---|---|---|---|---|
| 1 | Mousehole | S 4b | 5m | |||||
| 2 | Sea Mouse | HS 4b | 6m | |||||
| 3 | ★★ Bladder Wrack | S 4b | 10m | |||||
| 4 | ★★ Sea Urchin | HS 4b | 10m | |||||
| 5 | ★ Sea Link | VD | 10m | |||||
| 6 |
Eliminate Wall
Climbs the wall between Sea Urchin and Poacher | E1 5c | 10m | |||||
| 7 | ★★ Poacher | VS 4b | 10m | |||||
| 8 | Spread the Donkey | VS 4c | 10m | |||||
| 9 | ★★★ Cullenary Delight | VS 5a | 10m | |||||
| 10 | Easy Over | E1 5b | 10m | |||||
| 11 | ★★ Sunny Side Up | HVS 5a | 10m | |||||
| 12 | ★ Sunny Side Direct | E1 5c | 10m | |||||
| 13 |
Dennis
Follow the obvious diagonal fault from right to left, keeping feet in the fault-line all the way, finishing past Mousehole. | VS 4c | ||||||
| 14 |
The Last Drop
Eliminate between 'Sunnyside Direct' and 'Fisherman's Tail'. | E1 5b | 10m | |||||
| 15 | Fisherman's Tail | HS | 10m | |||||
| 16 | ★ Sandy Crack | E1 5b | 8m | |||||
| 17 | ★★ No Hands Crack | E1 5b | 8m | |||||
| 18 | ★ Doc's Crack | HVS 5b | 6m | |||||
| 19 | ★★ The Central Belt | E1 5b | 30m | |||||
| 20 | Narrow Chimney | VD | 8m | |||||
| 21 | That Is The Question | HVS 5a | 8m | |||||
| 22 | On the Beach | HVS 5a | 10m | |||||
| 23 | ★ Dave's Dilemma | E1 5b | 10m | |||||
| 24 | ★★★ Holy Ground | E2 5c | 12m | |||||
| 25 | Cow's Crack | HVS 4c | 12m | |||||
1.1.2.2. The Tidal Zone 13 routes in Cliff
- Summary:
-
All Trad climbing
Lat / Long: 57.700278, -2.792618
description
Past Embankment 2 to the right, where the sea is.
  |
||||||||
| Route | Grade | Style | Selected ascents | |||||
|---|---|---|---|---|---|---|---|---|
| 1 | Friend | S 4b | 5m | |||||
| 2 | Foe | E1 5b | 6m | |||||
| 3 | Arch Enemy | HVS 5a | 8m | |||||
| 4 | The Clan | D | 12m | |||||
| 5 | ★ Cullen Chimney | S | 12m | |||||
| 6 | Bouillabaisse | HVS 5a | 12m | |||||
| 7 | ★★ Cullen Crack | VS 4b | 12m | |||||
| 8 | Snap Happy | E1 5a | 15m | |||||
| 9 | The Skunk | VD | 12m | |||||
| 10 | ★ Fat Chick | HVS 5a | 15m | |||||
| 11 | Capekyle | HVS 5a | 15m | |||||
| 12 | The Skink | S | 12m | |||||
| 13 | Findlater Rib | VD | 12m | |||||
1.1.2.3. Gully Wall 10 routes in Cliff
- Summary:
-
Mostly Trad climbing
Lat / Long: 57.700511, -2.792293
description
The gully at the seaward end of the Head.
approach
Walk along the top of the Head until you see the obvious gully in front of you near the end.
| Route | Grade | Style | Selected ascents | |||
|---|---|---|---|---|---|---|
| 1 | ★ Sea Snake | E2 5b | 10m | |||
| 2 | The Shrimp | VD | 5m | |||
| 3 | The Angry Anchovy | VS 4c | 8m | |||
| 4 | Callous Crayfish | VS 5a | 8m | |||
| 5 | Daisy Link | 5C | 5m | |||
| 6 | ★ Daisy Cutter | HVS 5b | 10m | |||
| 7 | ★★ Sea Pink | VS 4c | 10m | |||
| 8 | ★★★ Sea Anenome | E1 5b | 10m | |||
| 9 | Greenpeace | S | 10m | |||
| 10 | Greenvoe | S | 12m | |||
1.1.2.4. Star Zone 13 routes in Cliff
- Summary:
-
All Trad climbing
Lat / Long: 57.700726, -2.792007
description
Past the gully of Gully Wall to it's left from above. Very very fast to dry and some of the most solid rock at the Head.
approach
At high tide as for Gully Wall, at low tide just walk around the Head until you get to a rock platform below the climbs (submerged at high tide).
 |
||||||||
| Route | Grade | Style | Selected ascents | |||||
|---|---|---|---|---|---|---|---|---|
| 1 | Star Struck | HVS 5b | 12m | |||||
| 2 | ★ Anti-Matter | HS | 12m | |||||
| 3 | ★ The White Dwarf | VS 4c | 12m | |||||
| 4 | Brittle Star | HS | 12m | |||||
| 5 | ★ Black Hole | D | 15m | |||||
| 6 | ★ Moray Eel | VS 4c | 10m | |||||
| 7 | ★★★ Rising Star | HVS 5b | 10m | |||||
| 8 | Western Star | E2 5c | 10m | |||||
| 9 | ★★★ Fallen Star | VS 4c | 10m | |||||
| 10 | ★★ Fading Star | HVS 5a | 10m | |||||
| 11 | ★ Dark Star | E1 5b | 10m | |||||
| 12 | ★ Southern Cross | E2 5b | 12m | |||||
| 13 | ★ Northern logic | HVS 5a | 10m | |||||
1.1.2.5. West Face 10 routes in Cliff
- Summary:
-
All Trad climbing
Lat / Long: 57.700594, -2.792378
description
The westward face of the Head.
approach
As for Star Zone or approach along the beach from the west at low tide.
| Route | Grade | Style | Selected ascents | |||
|---|---|---|---|---|---|---|
| 1 | ★ Seal's Crack | E3 6a | 10m | |||
| 2 | ★★ The Cull | E1 5b | 8m | |||
| 3 | ★ Lone Star | HS | 8m | |||
| 4 | Little Green Man | D | 6m | |||
| 5 | ★ Polaris | VD | 15m | |||
| 6 | Buckies | VD | 5m | |||
| 7 | Cockles | VD | 6m | |||
| 8 | ★ Mussels | VS 4b | 8m | |||
| 9 | Black Pearl | S | 5m | |||
| 10 | Limpet Flakes | HS 5a | 8m | |||
1.1.2.6. Path Wall 4 routes in Cliff
- Summary:
-
Trad climbing and Bouldering
Lat / Long: 57.699715, -2.793327
description
On the mainland, the rock overlooking the concrete steps of the approach path.
| Route | Grade | Style | Selected ascents | |||
|---|---|---|---|---|---|---|
| 1 | Pathetique | S | 3m | |||
| 2 | ★ Pathology | HS 5b | 8m | |||
| 3 | Apathy | E1 5c | 8m | |||
| 4 | The Garden path | HS | 10m | |||
1.1.2.7. The Pinnacle 6 routes in Cliff
- Summary:
-
All Trad climbing
Lat / Long: 57.700137, -2.793964
description
The large pinnacle of rock just to the west of Logie Head, separated from it by about ten meters of water.
approach
Just turn left off of the path from Cullen about 15 meters before you would reach the Head, and walk to the pinnacle of rock in front of you.
| Route | Grade | Style | Selected ascents | |||
|---|---|---|---|---|---|---|
| 1 | ★ Remembrance Sunday | E2 5b | 15m | |||
| 2 | ★ Fianchetto | E1 5b | 15m | |||
| 3 | Endgame | E1 5b | 15m | |||
| 4 | ★★ Material Advantage | HVS 5a | 15m | |||
| 5 | ★ Hanging Pawn | HVS 5a | 15m | |||
| 6 | Mating Net | E1 5b | 15m | |||
1.1.3. Mull Cleave 9 routes in Cliff
- Summary:
-
All Trad climbing
Lat / Long: 57.672946, -2.428947
description
A big stack of rock poking out into the sea.
approach
From Mill of Melrose walk north then west around the fields towards the sea. The rock is visible from the cliff edge. Bring rap gear.
1.1.3.1. West face 4 routes in Sector
- Summary:
-
Lat / Long: 57.673604, -2.429271
| Route | Grade | Style | Selected ascents | |||
|---|---|---|---|---|---|---|
| 1 | Hammerhead | E1 5a | 25m | |||
| 2 | ★ Shark's Back | E1 5b | 25m | |||
| 3 | ★ Loan Shark | E1 5b | 25m | |||
| 4 | ★★ Cleavage | VS 4b | 25m | |||
1.1.3.2. The Landward Walls 5 routes in Sector
- Summary:
-
Lat / Long: 57.672504, -2.428787
| Route | Grade | Style | Selected ascents | |||
|---|---|---|---|---|---|---|
| 1 | ★ The Snout | VS 4c | 10m | |||
| 2 | The Clasper | S | 8m | |||
| 3 | Jam Crack | S | 8m | |||
| 4 | Shagreen | VS 4c | 10m | |||
| 5 | Spiracle | S | 10m | |||
1.1.4. Covesea 48 routes in Cliff
- Summary:
-
All Trad climbing
Lat / Long: 57.717933, -3.391606
description
North facing sea cliffs on variable sandstone
approach
Approaching from Lossiemouth on the B9040, pull in at the tarmac entrance to a gated path on the right, approximately 200 metres after some houses on the same side. The turn off is at the beginning of a small forest, and has footpath signs but at the time of writing no road signage.
  /eb/bd/ebbd7eaeb7113c65b977ce95bef1b122d65abe9e) |
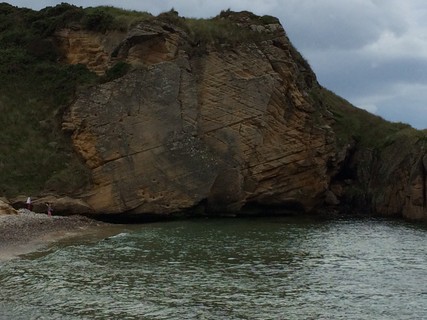
1.1.4.1. Primrose Bay 1 route in Cliff
- Summary:
-
Lat / Long: 57.713391, -3.413577
description
A very picturesque little bay, accessible on foot from Hopeman by heading eastwards down the path along the beach approximately 600m. Gets busy at the weekends with picnickers.
approach
Along the beach east from Hopeman, or the path parallel to the beach. Passes the golf course when you're close.
descent notes
The routes on the western side have (occasionally well hidden) stakes at the top.
| Route | Grade | Style | Selected ascents | |||
|---|---|---|---|---|---|---|
| 1 |
★★ Hacuna Mattata
Rap down to the hanging belay by way of the stakes at the top, clipping an in situ thread and an old peg. The belay is fairly obvious, just above where the sandstone turns soft and cuts in to the face to leave an overhang. | E3 5c | 30m | |||
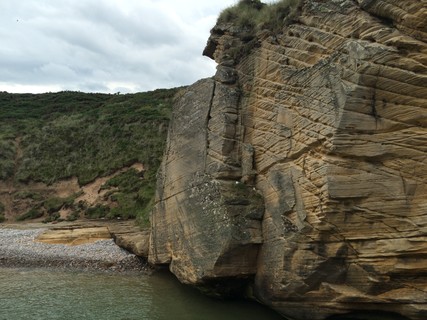
1.1.4.2. Honeycomb Wall 9 routes in Cliff
- Summary:
-
Lat / Long: 57.713110, -3.411528
description
The furthest west wall, to the left of the coast guard hut as you approach along the track. West facing, not really affected by the tides - as such, often needs a shuftie around with a brush before climbing as it gets very sandy.
| Route | Grade | Style | Selected ascents | |||
|---|---|---|---|---|---|---|
| 1 | Per Guano ad Astra | HVS 5a | 10m | |||
| 2 | The Sandman | E4 6a | 10m | |||
| 3 | Invisible Sun | E3 5c | 10m | |||
| 4 | The Sandbagger | E2 5b | 10m | |||
| 5 | Cat's Claws | E2 5c | 10m | |||
| 6 | Drone Warfare | E2 5a | 10m | |||
| 7 | Shear Fear | E3 5c | 12m | |||
| 8 | Primal Scream | E5 6a | 12m | |||
| 9 | Primitive Thoughts About Modern Girls | E2 5b | 15m | |||
1.1.4.3. Boulders Bay 21 routes in Cliff
- Summary:
-
Lat / Long: 57.713613, -3.410413
description
Not tidal, N and NW facing. Generally solid stone throughout.
approach
Down the path from the lookout station, then head east towards Lossiemouth for roughly 50 metres until you find a squarish boulder with a downward facing chimney on the left. Descend the chimney (fixed ropes), then head towards Lossiemouth again for the main bulk of the routes. The first two routes are to the west.
| Route | Grade | Style | Selected ascents | |||
|---|---|---|---|---|---|---|
| 1 |
Off The Leash
The left hand corner | VS 4b | 15m | |||
| 2 |
Juggernaut
The right corner | HVS 5a | 15m | |||
| 3 |
★ Past Imperfect
At the far left of the heavily featured wall is a right facing corner. Climb it beginning right of the pile of boulders | HVS 5a | 12m | |||
| 4 |
★ Family Affair
The jug-strewn line starting below the incut arête. At the thread move left, then progress back right to finish | E2 5b | 12m | |||
| 5 |
★ Sleepy Hollow
The poorly protected back wall, beginning centrally, then progressing left up the hanging corner section to finish | E1 5a | 12m | |||
| 6 |
★ Private Dancer
Follow the thin crack into the hanging corner | E3 5c | 12m | |||
| 7 |
★ Sandanista
The crack to the left of PD | E2 5c | 12m | |||
| 8 |
★★ The Domino Eeffect
The crack to the left of Sandanista | E3 5c | 12m | |||
| 9 |
Squadrone Muerte
From a boulder, step onto the face and climb directly up the poorly protected face. The belay stakes are a fair distance away (30 paces-ish) from the edge of the cliff, so bring plenty of rope | E3 5c | 15m | |||
| 10 |
★★ Banana Republic
Ascend the roof approx 8 paces right of Facist Octopus | E1 5b | 15m | |||
| 11 |
★★ Fascist Octopus
The large roofed corner right at the back of the next bay you come to after BR. Use the left corner to progress up to the roof (peg in situ), then move over left and reach up to tenuous holds and eventually a decent sized ledge. Finish up the corner. | E5 6b | 15m | |||
| 12 |
★ Bottle Dungeon
After FO you will find a cave. Climb it's right arête | E4 6a | 15m | |||
| 13 |
★★ Dancing in the Dark
Progress up the left side of the inside of the cave via an arête, then aim left to a visible crack line to the top. | E2 5c | 15m | |||
| 14 |
★★ Urban Gorilla
Begin at the left arête of the cave, and then climb the roof left of DitD, aiming for the flat ledge on top of the obvious block. Finish as DitD. | E3 6a | 15m | |||
| 15 |
★★ Roof Crack
The clear crack line through the roof to the left of UG. | E6 6c | 15m | |||
| 16 |
Girsie Crack
The loose, grassy and generally unpleasant cracks to the left of RC. | VS 4c | 12m | |||
| 17 |
★★ Annie Hall
Before you reach the arête of Orphan Annie there is a crack on your right. Climb it and marvel as it scoffs your gear. | HVS 5a | 12m | |||
| 18 |
Orphan Annie
The obvious arête immediately after AH. Place gear in the crack of AH, or ride the highway to the danger zone with minimal pro (E3). Climb the right side of the arête. | E2 5b | 12m | |||
| 19 |
Stress Relief
Start left of the arête of OA, then move boldly towards the in situ peg. The occasional hand and foot on the arête is in keeping with the line. | E2 5c | 12m | |||
| 20 |
★ Thatcher's Crack
The crack left of SR offers steady and well protected climbing. | VS 4b | 12m | |||
| 21 |
★ Per Rectum
Roughly ten paces left of OA, past the crack of TC. Begins in a bay and travels up through a chimney formed by a jammed boulder, before finishing up the arête to the right. | VS 4c | 12m | |||
1.1.4.4. Stack Bay 14 routes in Cliff
- Summary:
-
description
The bay fills up at high tide.
| Route | Grade | Style | Selected ascents | |||
|---|---|---|---|---|---|---|
| 1 | ★ Protection Racket | E1 5b | 12m | |||
| 2 | ★ Celebrate the Bullet | HVS 5a | 12m | |||
| 3 | ★★ Synthetic Pathway | E1 5a | 15m | |||
| 4 | Creepie Crawlie | HVS 5b | 12m | |||
| 5 | Slyme Crime | E4 6a | 10m | |||
| 6 | Paul Tax | 10m | ||||
| 7 | Back and Foot Disease | HVS 5a | 10m | |||
| 8 | The Vertical Smile | VS 4c | 10m | |||
| 9 | ★ The Gowp | E1 5a | 15m | |||
| 10 | ★ The Growl | E2 5b | 12m | |||
| 11 | Battle of the Bulge | HVS 5a | 10m | |||
| 12 | Legover Wall | E1 5c | 10m | |||
| 13 | Horny Beast | E1 5c | 10m | |||
| 14 | ★ Crack-a-Gow-Gow | VS 4c | 10m | |||
1.1.4.5. Stone Steps Area 1 route in Cliff
- Summary:
-
description
North facing.
approach
A small bay, accessible by steps from above at all tides.
| Route | Grade | Style | Selected ascents | |||
|---|---|---|---|---|---|---|
| 1 |
★ Gowing Nowhere
Keep your eyes peeled for the obvious chimney/crack/thrutchy horror. Once located, ascend it. | VS 4c | 12m | |||
1.1.4.6. Beach Wall 2 routes in Cliff
- Summary:
-
description
East facing vertical wall. The bay contains Gow's Castle on the Eastern side as a point of reference.
approach
The Eastern-most area of Covesea, accessible from above or along the beach at low tide.
| Route | Grade | Style | Selected ascents | |||
|---|---|---|---|---|---|---|
| 1 |
The Beachboys
Ascend the east facing vertical wall, staying clear of the right arête until the final finishing moves. | HVS 5a | 10m | |||
| 2 |
Reach or Beach
Begin directly below a rusting in situ peg, climbing directly to it then traversing right to a right-facing corner. Compose yourself then finish straight up the corner. | E1 5b | 10m | |||
1.1.5. Rosehearty Crag 0 routes in Cliff
1.1.5.1. Quarryhead - Car Park Island 0 routes in Sector
1.1.5.2. Quarryhead - Car Park Crag 0 routes in Sector
1.1.5.3. Quarryhead - Moon Wall 0 routes in Sector
1.1.5.4. Murcurry - North Wall 0 routes in Sector
1.1.5.5. Murcurry - South Wall 0 routes in Sector
1.1.5.6. Murcurry - Dead Sheep Zawn 0 routes in Sector
1.1.5.7. The Sea-Cliffs - East Buttress 0 routes in Sector
1.1.5.8. The Sea-Cliffs - Middle Crag 0 routes in Sector
1.1.5.9. The Sea-Cliffs - West Wall 0 routes in Sector
1.1.5.10. The Sea-Cliffs - West Inside Buttress 0 routes in Sector
1.1.5.11. The Sea-Cliffs - Backside Wall 0 routes in Sector
1.1.6. Mohr Head 0 routes in Cliff
description
Mohr Head is a cliff on the west of Gardenstown Beach Bay. A place with historical interest since it holds a Commonwealth graveyard. The climbable areas are big granitic-metamorphic boulders that landslide from the top of the cliff due to extreme weather and conditions for thousands of years. It's an undeveloped remote area with the potential to develop some lines.
Boulders can be found at the top of the cliff and in the shore. The ones on the shore(still in development) can only be accessed with low tide and it can be a dangerous place without tide knowledge. The ones at the top of the cliff can always be accessed using a steep path but they are greatly exposed and you need to be aware of falling zones to avoid rolling down the cliff, certain movements are considered not falling zones, and the place is not recommended for kids.
The rock is mostly solid, only in some small areas(cliff side of the Top Boulders)the rock is loose and caution is needed.
The sense of cliff exposure paired with the great views of the bay and the ocean makes the whole bouldering experience magig during dawn or sunset.
approach
The boulders at the shore can be accessed with low tide through Gardenstown beach. The boulders at the top of the cliff can be accessed through a steep path that starts after St. Johns Church Kirkyard
1.2. Coast North of Aberdeen 27 routes in Area
- Summary:
-
All Trad climbing
Lat / Long: 57.432113, -1.942352
summary
Sea cliffs offering a wide range of conditions, rock formations, lengths and styles.
description
Mostly trad venues tidal and non-tidal options, and some decent sport spots.
1.2.1. Meackie Point 9 routes in Crag
- Summary:
-
Lat / Long: 57.456002, -1.789759
 |
||||||||
| Route | Grade | Style | Selected ascents | |||||
|---|---|---|---|---|---|---|---|---|
| 1 | ★ The Collector | E1 5b | 15m | |||||
| 2 |
Flurry
Bold start. | E1 5b | 15m | |||||
| 3 | ★★ Impending Doom | E2 5b | 20m | |||||
| 4 | ★★ Scurry | HVS 5a | ||||||
| 5 | ★ The Water Margin | E1 5b | 12m | |||||
| 6 |
★★ Trial of Tears
Often wet at the top. | E3 6a | 15m | |||||
| 7 | ★★★ The Killing Moon | E1 5b | 15m | |||||
| 8 | ★ Legend | E2 5c | 15m | |||||
| 9 | The Changeling | E4 6a | 15m | |||||
1.2.2. Fulmar Wall 9 routes in Crag
- Summary:
-
Lat / Long: 57.421838, -1.825823
| Route | Grade | Style | Selected ascents | |||
|---|---|---|---|---|---|---|
| 1 | The Knacker's Yard | E2 5c | ||||
| 2 | Knacker's Crack | E1 5b | ||||
| 3 | Bird's Nest Route | S | 20m | |||
| 4 | Bird's Nest Route - Direct Finish | HS 4b | 20m | |||
| 5 | Bones Corner | VS 4c | ||||
| 6 | Intrusion | VS 4b | ||||
| 7 | Albatross | S | ||||
| 8 | ★★★ The Weight | HS | 20m | |||
| 9 | ★★ Billy the Kid | HVS 5b | ||||
1.2.3. Meikle Partans 9 routes in Cliff
- Summary:
-
Lat / Long: 57.422658, -1.824513
description
Lovely sea cliff on solid granite. No tidal issues, and easy walk down.
Climbs described right-to-left.
| Route | Grade | Style | Selected ascents | |||
|---|---|---|---|---|---|---|
| 1 | ★★ Constellation | S | 15m | |||
| 2 | ★ Shallow Diedre | VS 4b | 10m | |||
| 3 |
★ Jug Wall
Climb the short crack then juggy wall above. | D | 10m | |||
| 4 | ★★ Strawclutchers Wall | E1 5b | 10m | |||
| 5 | ★ The Band of Hope | HVS 5a | 10m | |||
| 6 | ★ The Bridge | VS 4b | 10m | |||
| 7 | ★★ The Bridge - Talisman | E1 5c | 15m | |||
| 8 | ★★★ The Bridge - Right Hand Variation | HVS 5a | 15m | |||
| 9 | Epistrophe | VS 4b | ||||
1.3. Coast South of Aberdeen 173 routes in Area
- Summary:
-
Trad climbing, Sport climbing and Rock climbing
Lat / Long: 57.064334, -2.113133
1.3.1. The Fin 20 routes in Crag
- Summary:
-
All Sport climbing
Lat / Long: 57.071493, -2.093619
summary
Bay just north of Orchestra cave and Boglesheugh, varies from super steep roof routes on the left to somewhat less steep wall routes on the right. It offers well equipped sport routes with good positive, athletic climbing. Although there are some easier routes they are generally of poor quality and require a knowledagble belayer due to the close proximity of the ground. As such the crag can not be recommended for the inexperinced.
access issues
Don't walk through the private shooting range from the north.
approach
Approach notes
The routes are on the north wall of the deep inlet immediately north of the Orchestra cave. Park as Orchestra cave, please park with respect to the locals on the street, do not park vans on the grass verge. Findon is a very small village and we do not wish to upset the locals by filling up the village with badly parked cars. Think about sharing lifts if possible or you could meet in Portlethan Asda and take one car from there.
Approach as for the cave but once in the field cross it slightly north to follow the field edge overlooking the deep inlet to the sorth. Now descend the steep grass at the back of the inlet (worn path) to where an insitu knotted rope can be descended hand over hand down a steep slab. Precarious when wet and be sure to check condition of rope before doing so. Then walk round to the base of the routes.
history
Recently developed hard sport and bouldering crag.
| Route | Grade | Style | Selected ascents | |||||
|---|---|---|---|---|---|---|---|---|
| 1 | ★★ Free Willy | {FR} 8a | 20m | |||||
 |
||||||||
| Route | Grade | Style | Selected ascents | |||||
| 2 | ★★ Moby Dick | {FR} 8a | 30m, 2 | |||||
| 3 | ★★★ Moby Killer | {FR} 8a+ | 25m, 2 | |||||
| 4 | ★★★ Anaconda | {FR} 8b+ | 25m | |||||
| 5 | Red Bellied | {FR} 6b | 10m | |||||
| 6 | ★ Mako | {FR} 7c | 20m | |||||
| 7 | ★★ Killer Wail | {FR} 8a | 25m | |||||
| 8 | Megolodon 1st lower off | {FR} 6b | 10m | |||||
| 9 | ★★★ Megolodon | {FR} 8a+ | 25m, 2 | |||||
| 10 | ★★ Yoshi | {FR} 7a | 25m | |||||
| 11 | ★ Yoshi Extension | {FR} 7b+ | 30m | |||||
| 12 | ★★★ Killer Instinct | {FR} 8b | 25m | |||||
| 13 | ★ Sting-Yoshi | {FR} 6c+ | 25m | |||||
| 14 | ★★ Stingray | {FR} 7b | 15m | |||||
| 15 | ★★ Dorado | {FR} 7b+ | 15m | |||||
| 16 | Dorado Cop-Out | {FR} 7b | 15m | |||||
| 17 | ★★ Dorado-Ray | {FR} 7b+ | 15m | |||||
| 18 | ★ Mahi Mahi | {FR} 7c | 16m | |||||
| 19 | ★★ Barracuda | {FR} 7a+ | 15m | |||||
| 20 | Barramundi | {FR} 6c | 15m | |||||
1.3.2. Earnsheugh 20 routes in Crag
- Summary:
-
Mostly Trad climbing
Lat / Long: 57.073491, -2.096420
summary
Intimidating multipitch sea cliff climbing on good rock, sheltered from sea spooge, wind and rain. Does seep in cracks and from the top, aretes and exposed faces are often covered in Lichen.
description
Earnsheugh offers some of the most gob-smacking seacliff climbing in Scotland, with loads of exposure on routes that are usually 2 or 3 pitches in length. The crag takes little time to dry after rain but can suffer from the dreaded coastal dampness. It's sheltered location can be both a hindrance as well as a godsend. Low humidity and winds from a West to Northerly direction generally give the best conditions. Some of the holds can feel a bit dirty but this only adds to the adventure. One of the best crags on the coast.
"Must do" routes: Thugosaurus (E5 5b,6a,6a), Prehistoric Monster (E5 5b,6a,5b), Death Cap (E1 5a,5a), Necromancer (E5 5c,6a,5b), Pterodactyl (E2 5a,5b,4c), Bat's Belfry (E2 5c,5c,5b).
access issues
On a clay pidgeon range, watch out for shooters. cliffs sometimes get littered with clay fragments.
approach
Non-tidal, and may be one of the few climbable crags on the coast in high seas.
The base of the crag can be reached by scrambling, but it is more common to abseil from the stakes at the top.
ethic
Trad.
| Route | Grade | Style | Selected ascents | |||
|---|---|---|---|---|---|---|
| 1 | Batty Bat | HVS 5a | 80m, 3 | |||
| 2 | ★ Hissing Sid | HVS 5a | 75m, 3 | |||
| 3 | ★★ Earnsheugh Ridge | E1 5a | 75m, 2 | |||
| 4 | ★ The Lost World | HVS 5a | 40m, 2 | |||
| 5 | Mysterious Journey | E1 5b | 65m, 3 | |||
| 6 | ★ Tyrannosaurus Wrecks | E4 6a | 30m, 2 | |||
| 7 | ★ Ichthyosaurus | E5 6a | 30m, 2 | |||
| 8 | ★★ Death Rattle Roofs | E4 6a | 55m, 3 | |||
| 9 | ★ Cthulu | E5 6a | 65m, 3 | |||
| 10 | ★ Grim Spectre | E6 6b | 50m, 3 | |||
| 11 | ★★★ Thugosaurus | E6 6a | 50m, 2 | |||
| 12 | ★★ Thugosaurus Direct | E5 6a | 50m, 3 | |||
| 13 | ★★★ Prehistoric Monster | E5 6a | 60m, 3 | |||
| 14 | ★ Grimly Fiendish | E4 6a | 35m, 2 | |||
| 15 | ★★★ Death Cap | E1 5a | 35m, 2 | |||
| 16 | ★★★ Necromancer | E5 6a | 40m, 3 | |||
| 17 | ★★ Weird Sister | E3 5c | 40m, 3 | |||
| 18 | ★★★ Pterodactyl | E2 5b | 45m, 3 | |||
| 19 | ★★★ Bats Belfry | E2 5c | 35m, 3 | |||
| 20 | ★ Blinkered Bat | E3 5c | 25m | |||
1.3.3. Floors Craig 8 routes in Area
- Summary:
-
All Trad climbing
Lat / Long: 57.037014, -2.131066
description
Floors Craig has plenty to offer the VS climber, as well as those operating at E2-E4. The Pugulist and Manassa Mauler are two of the coast classics.
Non-tidal venue, but care should be taken in big swells, so check the wind.
A major rockfall has destroyed the routes from Kinhaken to Blockbuster. February 2024.
access issues
If you want to park in the yard of the nearest farm, you have to knock on the door and ask the farmer. They'll tell you whether they're working in the yard that day and, if not, where you can park.
approach
North parking at the farm (57.040971, -2.135423). Please ask the farmer if it's OK to park at his turning pad. From here walk south until you reach a metal gate. Go down the field on the left walking SE, go past a big cove and find the crag ahead by the smaller inlet.
South parking as for Craig Stirling (57.039035, -2.145046). From here continue on the Backburn track south east all the way around until you are walking north east and you reach a metal gate. Go down the field on the right walking SE, go past a big cove and find the crag ahead by the smaller inlet.
The crag can be found at coords (57.036960, -2.130830).
Walking descent can be made either by the north or south. Abseil is more convenient when doing many routes. At low tides, all aspects can be reached from the bottom. At high tides or big swells, each area may need to be reached by independently by scrambling or abseil.
  |
||||||||
| Route | Grade | Style | Selected ascents | |||||
|---|---|---|---|---|---|---|---|---|
| 1 | ★ Cruel Sea | E1 5b | 10m | |||||
| 2 | ★★ Raging Bull | E3 5b | 10m | |||||
| 3 | ★ The Boxer | E2 5c | 10m | |||||
| 4 | ★ Sprunt's Route | E2 5c | 10m | |||||
| 5 | ★ Coup de Grace | E2 5c | 10m | |||||
| 6 | ★★ Sair Fecht | E3 6a | 12m | |||||
| 7 | ★ Cold Turkey | VS 4c | 9m | |||||
| 8 | ★ Left Right and Centre | E1 5b | 9m | |||||
1.3.4. Boltsheugh 20 routes in Crag
- Summary:
-
All Sport climbing
Lat / Long: 57.029662, -2.142793
description
The original Aberdeen sport climbing crag has since had some trad routes added on walls to the north and south of the bolts.
The sports climbs tend to be short and vicious. The trad climbs tend to be on adventurous rock.
access issues
No issues.
approach
Mostly non-tidal, though the routes at the south end of the headland are affected
1.3.4.1. Boltsheugh Upper 12 routes in Sector
- Summary:
-
Lat / Long: 57.029903, -2.142783
description
First sector yo encounter as you approach it. Short overhanging routes of all grades and a few boulder problems. Routes described left to right
| Route | Grade | Style | Selected ascents | |||
|---|---|---|---|---|---|---|
| 1 | Meany | {FR} 5c | 6m | |||
| 2 | Eany | {FR} 5c | 6m | |||
| 3 | Mo | {FR} 6a | 6m | |||
| 4 | ★ The Dark Side | {FR} 6c+ | 7m | |||
| 5 | Automatic | {FR} 6c+ | 8m | |||
| 6 | The Dregs | {FR} 6a | 8m | |||
| 7 |
Unnamed
Route not in the gudebook. To the left of the obvious crack and left of Little Creatures. | {FR} 5b | 9m | |||
| 8 |
Traverse of the Cods
This route starts at Little Creatures, then traverses right on the obvious break, then finishes up on Aches in Provence. | {FR} 7a | 12m | |||
| 9 | Little Creatures | {FR} 6c | 6m | |||
| 10 | Crossroads | {FR} 6a+ | 6m | |||
| 11 | ★ Aches in Provence | {FR} 6c | 6m | |||
| 12 | ★ Deadheads | {FR} 7b | 6m | |||
1.3.4.2. Boltsheugh Lower 8 routes in Sector
- Summary:
-
Lat / Long: 57.029424, -2.143234
description
Walk down from the emd of the Upper sector, and find a cave and a platform with a wall with much longer routes than on the Upper sector. Even tho it may look tidal, you can normally climb here all day without problem.
| Route | Grade | Style | Selected ascents | |||
|---|---|---|---|---|---|---|
| 1 | ★★ Morrison's Missed Adventure | {FR} 7a | 18m | |||
| 2 | ★★ Rankin's Rain Games | {FR} 6b | 18m | |||
| 3 | ★ The League of Whingers | {FR} 6b+ | 18m | |||
| 4 |
★ Hardy
The line of bolts right of League of Whingers. | {FR} 6a+ | 18m | |||
| 5 |
★ Laurel
Same start as Hardy, but quickly take the line of bolts to the right, and finish on the same LO. | {FR} 6a | 18m | |||
| 6 |
★ Cheeky Madam
The Line on the left side of the cave. Soft for the grade, but worthwhile nonetheless. | {FR} 6b+ | 15m | |||
| 7 |
★ Trouble Monkey
The line on the right side of the cave. It must be climbed to the left of the bolts across the roof for the tricky 7a+ moves. If climbed to the right of the roof (much eaasier ground) then it's only a 6b+ variation. | {FR} 7a+ | 15m | |||
| 8 |
★ Trouble Monkey Variation
A popular route that takes the right side of the bolts of the 7a+, making it a much easier climb and cutting the roof short, escaping it promptly. | {FR} 6b+ | 15m | |||
1.3.5. Brown Crag 10 routes in Crag
- Summary:
-
All Trad climbing
Lat / Long: 57.022738, -2.149695
description
A steep wall above a non-tidal platform. Good, well-protected climbing.
Some routes are prone to seeping.
approach
If parking at the Bettridge Centre in Newtonhill, walk south behind the centre and go past the playing fields. After the playing fields, you'll encounter a farmer's field closed by a fence. Go over the fence and walk on the edge of the field (respect the crops) near the coast, until you've walked for about 400m and you find a large post and a few large boulders (57.023148, -2.149499), which mark where you cross the fence and head south-west down the slope to the top of the crag. Some big boulders provide suitable abseil anchors or drop into the small corner that is above Rock Lobster and good nuts and cams work well. 20m will get you down.
| Route | Grade | Style | Selected ascents | |||||
|---|---|---|---|---|---|---|---|---|
| 1 | Black Mass | E1 5c | 10m | |||||
| 2 | Pinch of Salt | E5 6a | 15m | |||||
  |
||||||||
| Route | Grade | Style | Selected ascents | |||||
| 3 | ★★ Rock Lobster | E3 5c | 15m | |||||
| 4 | ★ Incontinence Crack | E1 5a | 15m | |||||
| 5 | Nappy Rash | E2 5b | 15m | |||||
| 6 | Z Bend | VS 4b | 15m | |||||
| 7 | Clean Round the Bend | HVS 5a | 15m | |||||
| 8 | ★ Dosmestos | E1 5b | 20m | |||||
| 9 | ★ Weakling Wall | E2 5b | 20m | |||||
| 10 | ★ Davidson´s Delight | E1 5a | 20m | |||||
1.3.6. Brown Band Crag 8 routes in Crag
- Summary:
-
All Trad climbing
Lat / Long: 57.022582, -2.149932
description
Immediately south of Brown Crag, this is shorter, steeper, quicker to dry and sunnier. Grooves and roofs from Diff to E5. Something for everyone.
approach
Approach as for the top of Brown Crag then continue south to the cliff top. A prominent small block is above the crag. Ab in.
If parking at the Bettridge Centre in Newtonhil, walk south behind the centre and go past the playing fields. After the playing fields, you'll encounter a farmer's field closed by a fence. Go over the fence and walk on the edge of the field (respect the crops) near the coast, until you've walked for about 400m and you find a large post and a few large boulders (57.023148, -2.149499), which mark where you cross the fence and head south-west down the slope to the top of Brown Crag. Cross the small burn (water stream) southwards to position yourself on top of Brown Band Crag, which is well recognised by the prominent square block used as an abseil point (20m).
 |
||||||||
| Route | Grade | Style | Selected ascents | |||||
|---|---|---|---|---|---|---|---|---|
| 1 | Coalition | E3 6a | 12m | |||||
| 2 | ★★ The Fire Inside | E2 5b | 12m | |||||
| 3 | Torn | D | 12m | |||||
| 4 | ★ Haar Hole | E1 5b | 12m | |||||
| 5 | Haar Attack | E4 6a | 12m | |||||
| 6 | Lost | E2 5c | 12m | |||||
| 7 | Found | E1 5b | 13m | |||||
| 8 | Forgotten | HVS 5b | 13m | |||||
1.3.7. Yellow Crag 19 routes in Crag
- Summary:
-
Sport climbing and Trad climbing
Lat / Long: 57.021811, -2.152039
summary
A hybrid crag with some sport and trad. Helmets recommended. The main wall will be partially affected in very high tides or big swells. Climbing all year round.
description
The crag faces south/south-east and can be a delightful sun trap, with climbing possible even through the middle of winter. A stick lip is handy to clip the first bolt on many of the routes though a bit of careful spotting plus equipping and clipping the bottom bolt of other routes after doing one means you can easily manage without.
access issues
No issues. Watch out for strong swells during high tide.
approach
From the Bettridge Centre car park (57.030423, -2.148508) follow the path to the south alongside the railway over the style and beyond the railway bridge and continue past the obvious (telephone) mast.
At the next field fence (gate often open), turn left (south-east) and walk to the edge of the field then turn right and follow the fence south-west until you reach the point in the fence where it makes a sharp turn to the left (towards the sea), cross the wire fence by the large cylindrical post (57.021867, -2.153115). You'll soon see the crag and a path going down hill which passes below the first buttress on the left.
history
Bolted in winter 2021/22.
  |
||||||||
| Route | Grade | Style | Selected ascents | |||||
|---|---|---|---|---|---|---|---|---|
Access WallSouth-east facing | ||||||||
| 2 | ★ Soft rock Cafe | {FR} 6a+ | 10m | |||||
| 3 | ★ Working Lunch | {FR} 6c | 10m | |||||
| 4 | ★★ Belay Boy | {FR} 6c | 11m | |||||
| 5 | Wamy Uppy | {FR} 5b | 10m | |||||
Sunshine SlabsSouth facing | ||||||||
| 7 | Surco del sol | {FR} 6a | 22m, 11 | |||||
| 8 | Placa del sol | {FR} 5b | 25m, 12 | |||||
| 9 | ★★ Sunshine Slab | {FR} 5b | 26m, 11 | |||||
| 10 | Weather Beaten | {FR} 5c | 27m, 12 | |||||
 |
||||||||
| Route | Grade | Style | Selected ascents | |||||
Main FaceSouth-east facing. Semi-tidal. | ||||||||
| 12 | ★ Cinder Rose | {FR} 4b | 18m, 8 | |||||
| 13 | ★★★ Gorse Blossom | {FR} 5c | 18m, 9 | |||||
| 14 | ★★★ Monochrome | {FR} 6c+ | 18m, 8 | |||||
| 15 | ★★ Incandescent | {FR} 6b+ | 18m, 9 | |||||
| 16 | ★★ Technicolor | {FR} 6c | 18m, 10 | |||||
| 17 | Foam Party (sport) | {FR} 6c | 18m | |||||
| 18 | ★ Foam Party (trad) | E4 5c | 18m | |||||
| 19 | ★★★ Fun Lovin' Criminals | {FR} 6b+ | 16m, 10 | |||||
| 20 |
★ The Secret Policeman's Other Ball
The left hand crack-line starting left of the shallow cave/alcove. | E2 5b | 12m | |||||
| 21 |
The Fuzz
Line between 'The Secret Policeman's Other Ball' and 'C.I.D. Wall', starting right of the cave/alcove. | E2 5b | 12m | |||||
| 22 |
C.I.D. Wall
The righthand crack-line just left of the edge. Rock a little friable towards the top. | E2 5b | 12m | |||||
1.3.8. Craig Stirling 22 routes in Crag
- Summary:
-
Mostly Trad climbing
Lat / Long: 57.033985, -2.134442
summary
Classic Sea cliff climbing on stunning rock, one of the best sea cliffs in Aberdeen
description
Coastal sea cliff climbing in a sensational position along a headland, rock is subject to sea spray and tends to be grimy unless a strong northerly breeze is blowing. topouts are often lichenous, worthwhile bringing a brush and cleaning on the rap in.
access issues
Watch for nesting season for sea birds, routes should not be climbed during this period.
approach
approach 20mins walk from nearest side road.
ethic
All traditional climbing, no bolting. Routes on aretes and overhangs are often deepwater soloed at High tide on the west buttress. The east buttress is well protected by deepwater, most routes can be soloed at an time.
| Route | Grade | Style | Selected ascents | |||
|---|---|---|---|---|---|---|
| 2 |
★★ Ordinary Route
FA: I. Clough & J. Cleare | {AU} FR:5a UK:HVS | 25m | |||
1.3.8.1. West Buttress 10 routes in Area
- Summary:
-
All Trad climbing
Lat / Long: 57.034061, -2.134733
| Route | Grade | Style | Selected ascents | |||
|---|---|---|---|---|---|---|
| 1 | Free Fall | VS 4c | 20m | |||
| 2 | ★ Yipeekaiae | E3 5c | 20m | |||
| 3 | ★ Searcher | E2 5b | 20m | |||
| 4 | ★ Yassassin | E6 6b | 20m | |||
| 5 | ★ Yassassin - Yahoochie Link | E6 6b | 20m | |||
| 6 | ★★★ Yahoochie | E6 6a | 20m | |||
| 7 | ★★ Yertezoot | E5 6b | 20m | |||
| 8 | ★★ Running Wild - Yertezoot Link | E6 6b | 20m | |||
| 9 | ★★★ Running Wild | E5 6b | 20m | |||
| 10 | Electric Chair | E2 5b | 20m | |||
1.3.8.2. East Buttress 11 routes in Area
- Summary:
-
All Trad climbing
Lat / Long: 57.033909, -2.134089
| Route | Grade | Style | Selected ascents | |||
|---|---|---|---|---|---|---|
| 1 | ★★★ Grand Diedre | HVS 5a | 20m | |||
| 2 |
★★★ The Reach Around
Far right from Depth Charge direct, climb roof on RH side to 'reach around' sloper, mantle on good crimps to RH face of arete(5c). Climb depth charge Arete to the top(5a). FFA: Michael Lehmann, 1 Jan 2020 | E3 5c | 20m | |||
| 3 | ★ Petite Deidre | VD | 20m | |||
| 4 | ★ Jeux Sans Frontiers | E3 5c | 20m | |||
| 5 | ★ Eastern Girdle | HS | 20m | |||
| 6 | ★ Upper Eastern Girdle | VS 4c | 20m | |||
| 7 | ★★★ Depth Charge | E1 5a | 20m | |||
| 8 | ★★★ Depth Charge Direct Start | E3 5c | 20m | |||
| 9 | ★★ Sea Cat | E3 5b | 20m | |||
| 10 | ★★ Clockwork Rat | E3 5c | 20m | |||
| 11 | ★★ Clockwork Cat | E3 5c | 20m | |||
1.3.9. Clashrodney 34 routes in Crag
- Summary:
-
All Trad climbing
Lat / Long: 57.082316, -2.088042
summary
Pleasant sunny walls and near to Aberdeen
description
Good varity of single pitch routes. "Must do" routes: Birthday Treat E1 5a, Sunlover's Traverse E1 5b, Stiletto HS, Gorgon VS 5a, Blind Faith E3 5c.
access issues
No issues.
approach
Cross the railway then follow a fence coastward in a vague grassy hollow with a gorse-strewn left bank. Cross the fence and follow a small path slightly leftwards across the heather to cross a burn (which ends in a waterfall beside some of the climbs). Keep going north-east until you overlook a small inlet, the Lagoon. There is an iron spike on bare rocks in a vague hollow. Descend the short wall below with the aid of another iron spike.
1.3.9.1. The Causeway Climbs 11 routes in Sector
- Summary:
-
Lat / Long: 57.083145, -2.087836
| Route | Grade | Style | Selected ascents | |||||
|---|---|---|---|---|---|---|---|---|
| 1 | Pipeyard Blues | S | 15m | |||||
| 2 | Creased Slab | M | 10m | |||||
| 3 | Grimble | E2 5b | 10m | |||||
| 4 | Grimace | E1 5b | 10m | |||||
| 5 | The Slant | M | 20m | |||||
 |
||||||||
| Route | Grade | Style | Selected ascents | |||||
| 6 | ★★ Blind Faith | E3 5c | 20m | |||||
| 7 | ★★★ Birthday Treat | E1 5b | 20m | |||||
| 8 | Have One On Me | HVS 5a | 20m | |||||
| 9 | Jug Fest | E1 5a | 20m | |||||
| 10 | ★ Mac's Route | S | 20m | |||||
| 11 | Corbett's Crack | S | 15m | |||||
1.3.9.2. The Pink Slab 6 routes in Sector
- Summary:
-
Lat / Long: 57.083014, -2.088020
description
A justifiably popular slab. Routes described left to right.
approach
Gained by descending the iron spikes.
 |
||||||||
| Route | Grade | Style | Selected ascents | |||||
|---|---|---|---|---|---|---|---|---|
| 1 |
★★ The Hairline
The left-hand crack gives a classic route. | S | 10m | |||||
| 2 |
Chester
The discontinuous fault between The Hairline and Stiletto, starting up a short right-facing corner. | VS 4c | 15m | |||||
| 3 |
★★ Stiletto
The twin cracks are tricky to start. Thereafter they give delightful and delicate climbing on small holds. | HS | 15m | |||||
| 4 |
★★ Gorgon
The crack-line 2m right of Stiletto. Start on a small ledge at its right side. Pull up right over th bulge on quartz jugs then step left and follow the crack to the top. | VS 5a | 15m | |||||
| 5 |
★ Medusa
The recessed corner around to the right requires low tide for access although it is possible to traverse in at VS 4c. Climb the corner and continuation crack. | S | 20m | |||||
| 6 |
★ Serpent
Traverse as for Medusa. Climb the corner immediately right to a roof. Turn using the left edge to gain the slab and finish more easily up the crack on the right. | VS 5a | 20m | |||||
1.3.9.3. Central Buttress 9 routes in Sector
- Summary:
-
Lat / Long: 57.082844, -2.088316
| Route | Grade | Style | Selected ascents | |||
|---|---|---|---|---|---|---|
| 1 |
Robb's Revenge
The left rib of the obvious chimney. | VD | 10m | |||
| 2 |
★ Chisel Chimney
The chimney with an overhanging block. | VD | 10m | |||
| 3 |
Sphincter Cannon
Start 3m left of Stone Roses. Make steep bouldery moves up and left to reach the obvious spike (crux. unprotected). Pull out left and finish easily. | E3 5c | 10m | |||
| 4 |
★ Stone Roses
Climb the smooth corner, exiting right to gain a standing position on the obvious spike (crux). Move up to an overhang, traverse left to a recess and finish easily. | E2 5b | 10m | |||
| 5 |
★ Capitol Wall
The left-slanting line right of Stone Roses, finishing up a bulging niche. A direct start is possible at VS 5a. Start at the base of the arete right of Stone Roses. | VS 4b | 10m | |||
| 6 | Capitol Wall - Direct Start | VS 5a | 10m | |||
| 7 | Senate | VS 4b | 10m | |||
| 8 |
Quick Corner
The right-hand corner. | S | 10m | |||
| 9 |
Whizzer
The well defined rib to the right of Quick Coner. | VD | 10m | |||
1.3.9.4. The Waterfall Climbs 4 routes in Sector
- Summary:
-
Lat / Long: 57.082477, -2.088247
description
Routes are described from right to left. These lie on the short walls south of the iron spike descent, bounded on the south by the waterfall, the final gesture of the little burn mentioned in the approach notes.
| Route | Grade | Style | Selected ascents | |||
|---|---|---|---|---|---|---|
| 1 |
★ Yellow Peril
This is the best line hereabouts, taking the obvious hanging corner on the first steep wall. Pull up onto the right edge of the lower scoop and go up to the rib to a bulge. Swing up left over the bulge to gain the groove leading to the top. | E1 5b | 10m | |||
| 2 |
Oaf
There are overhangs left of The Prisoner E4, and a slab left of a niche. Pull directly up onto the slab via a thin crack. Go up the slab and a short corner to the top. | VS 4c | 10m | |||
| 3 |
Gristwood's Gutties
The obvious roofed corner round left from Oaf. | S | 6m | |||
| 4 |
The Nose
The obvious nose between the previous line and the waterfall. | VS 4c | 5m | |||
1.3.9.5. Cairnrobin Point 4 routes in Sector
- Summary:
-
Lat / Long: 57.081677, -2.088988
description
Non-tidal. South-East facing. These routes lie 50 meters south of the waterfall, at a small headland. Although short, there are some enjoyable routes, often on good quality rock.
approach
An approach can also be made directly from the walk in to Clashrodney by descending the well defined grassy ridge seen on the approach (before reaching the burn). At the bottom of the ridge turn left and scramble down easy rocks just north of the first route. Climbs are described from north to south.
/51/cf/51cfc9b955ade358627ba35eebddca19fbc79e7a) |
||||||||
| Route | Grade | Style | Selected ascents | |||||
|---|---|---|---|---|---|---|---|---|
| 1 |
★ Schoolboy Aloholic
This lies on the first steep slab, split at half-height by a thin horizontal crack. Follow the right edge of the slab on small holds to a jug and pull onto a block. Move right to finish up the tricky thin crack. | VS 4c | 10m | |||||
| 2 |
Streetwise
Climb the smooth arete left of Schoolboy Alcoholic and continue over a bulge to fnish right of Glasgewian Snotter (avoiding any use of the final crack of that route). | E2 5c | 10m | |||||
| 3 |
★ Glaswegian Snotter
Start up the left-slanting shelf and climb up to reach the excellent finger crack in the top wall. There is an interesting direct start at 5a. | HS | 10m | |||||
| 4 | ★ Johnny's Dangler | E1 5b | 12m | |||||
1.3.10. South Cove 12 routes in Crag
- Summary:
-
All Trad climbing
Lat / Long: 57.094409, -2.077432
summary
A kilometre section of spectacular cliffs situated next to granite quarrys, the rock is an interesting mix of metamorphosed schist/gneiss and red granite. The area consists of mostly single to 2 pitch routes up to 40-50m tall. Climbs typically require a rap in and climb out approach.
approach
10mins from the carpark, recommend using the local guidebook for parking and access advice.
ethic
Trad.
1.3.10.1. Red Hole 8 routes in Cliff
- Summary:
-
description
A large sea cave at the centre of the crag.
descent notes
Solo down the sketchy north buttress or rap in.
| Route | Grade | Style | Selected ascents | |||
|---|---|---|---|---|---|---|
| 1 | ★★★ Red Planet | E4 6a | 50m, 2 | |||
| 2 | ★★★ Space Rats | E5 6a | 40m, 2 | |||
| 3 | ★★★ Procrastination | E5 6b | 40m, 2 | |||
| 4 | ★★★ Procyon | E5 6b | 40m, 2 | |||
| 5 | ★★★ Lost in Space | E6 6b | ||||
| 6 | ★★★ Cracks in Reality | E5 6a | ||||
| 7 | ★★ Black Sheep | E5 6b | 40m, 2 | |||
| 8 | ★★★ Super Cracks in Reality | E1 6b | 40m, 2 | |||
1.3.10.2. Main Face 4 routes in Cliff
- Summary:
-
description
Large section of cliffs south of Red Hole, populated by seagulls during nesting season.
approach
Rap in.
| Route | Grade | Style | Selected ascents | |||
|---|---|---|---|---|---|---|
| 1 | ★ Beyond The Fringe | E5 6b | 13m | |||
| 2 | ★★★ Lunatic Fringe | E7 6c | 25m | |||
| 3 | ★★ Teetering on The Brink of Madness | E5 6b | 20m | |||
| 4 | ★ Threshold of Sanity | E6 6c | 20m | |||
1.4. Angus 325 routes in Area
- Summary:
-
Mostly Sport climbing
Lat / Long: 56.596075, -2.855165
summary
Mostly quarried sport venues.
description
One of the highest concentration of easy-access and "easy" sport climbing venues of Scotland. Grades normally range from 5 to 7a, with a few venues offering 7b or 8a.
1.4.1. Kirrie Hill 75 routes in Crag
- Summary:
-
All Sport climbing
Lat / Long: 56.679074, -2.993641
summary
South facing Sheltered crag with easy access. Sandstone.
description
Extensive venue with low grades from 4 to 6c primarily. There are a bunch of 7a and one 7b. The style is bouldery and juggy. It is advised not to climb right after a period of wet weather, as the sandstone is unstable until dry and pieces of rock are more likely to come loose.
access issues
No issues.
approach
Once parked at the Neverland Captain Hook's pirate ship play area, or at the Camera Obscura parking area, follow the path east and turn right along the wall of the cementery. Then turn left to walk under the trees to reach the crag.
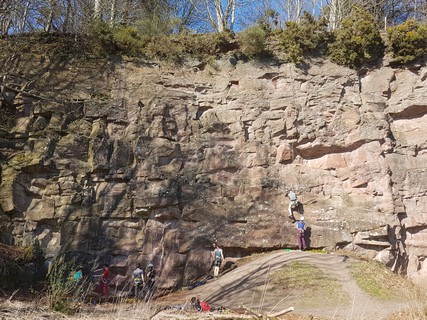 |
||||||||
| Route | Grade | Style | Selected ascents | |||||
|---|---|---|---|---|---|---|---|---|
Western Wall | ||||||||
| 2 | ★ Unenforced Layoff | {FR} 5a | 12m | |||||
| 3 | Mushroom Heads | {FR} 5a | 12m | |||||
| 4 | Another Green World | {FR} 6a | 12m | |||||
| 5 | Spirits Drifting | {FR} 6a+ | 12m | |||||
| 6 | Becalmed | {FR} 4c | 12m, 7 | |||||
| 7 | ★★ Sombre Reptiles | {FR} 5c | 11m, 7 | |||||
| 8 | ★★ On the Up | {FR} 5c | 10m | |||||
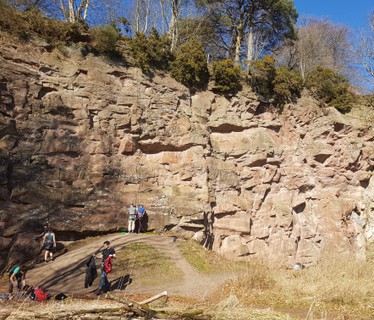 |
||||||||
| Route | Grade | Style | Selected ascents | |||||
| 9 | Mound over Matter | {FR} 5c | 9m | |||||
| 10 | ★★ Grassy Knoll | {FR} 6a | 10m | |||||
| 11 | Hard Labour | {FR} 6a | 10m | |||||
| 12 | Dogmatic | {FR} 6a+ | 10m | |||||
| 13 |
Caned and Unable
An eliminate route of the 2 to the sides. | {FR} 6c | 14m | |||||
| 14 | Paws for Thought | {FR} 6b | 14m | |||||
| 15 | Thorny Issue | {FR} 6b+ | 14m | |||||
| 16 | ★ All Chalk, No Traction | {FR} 6c | 14m | |||||
| 17 | Boarding Party | {FR} 6b | 14m | |||||
| 18 | Dubh be Dubh | {FR} 6a+ | 14m | |||||
| 19 | The Kirrie (beach) Ball | {FR} 6b+ | 14m | |||||
| 20 | ★★ Let there be Rock | {FR} 6a+ | 14m | |||||
| 21 | ★★ Bon the Edge | {FR} 6b+ | 13m | |||||
| 22 | Whole lotta Kirrie | {FR} 6b+ | 13m | |||||
| 23 | ★ Black int' Back | {FR} 7a | 12m | |||||
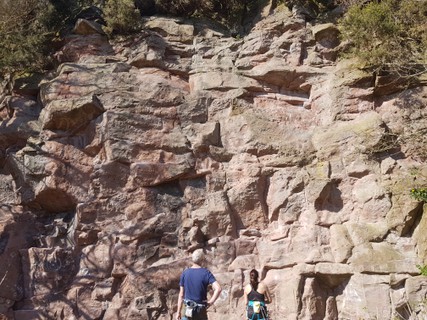 |
||||||||
| Route | Grade | Style | Selected ascents | |||||
Central Wall | ||||||||
| 25 | Pharmacist's Apprentice | {FR} 6b | 8m, 3 | |||||
| 26 | ★ Crystal Myth | {FR} 6b | 8m, 5 | |||||
| 27 | ★ Chasing Dragons | {FR} 6c | 8m, 4 | |||||
| 28 | Tim'rous Beastie | {FR} 6a | 8m, 3 | |||||
| 29 | Sonsie Face | {FR} 6a | 8m, 5 | |||||
| 30 | Glaikit Folly | {FR} 5a | 8m | |||||
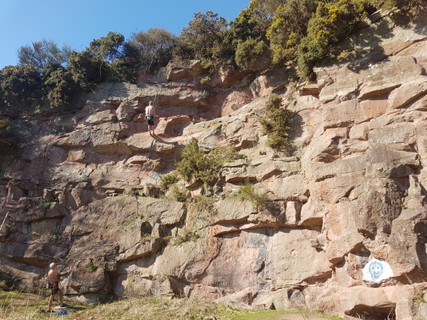 |
||||||||
| Route | Grade | Style | Selected ascents | |||||
| 31 | Screwless | {FR} 3a | 8m | |||||
| 32 | ★ Kirrie on Regardless | {FR} 3c | 10m | |||||
| 33 | Spent | {FR} 6a | 10m | |||||
| 34 | Badly Overdrawn Boy | {FR} 6a+ | 10m | |||||
| 35 | Joining the Debt Set | {FR} 6b | 10m | |||||
| 36 | On the Never Never Land | {FR} 6a+ | 10m | |||||
| 37 |
★★ La Plage
The obvious corner | {FR} 4a | 8m | |||||
| 38 | Hill Billies | {FR} 3c | 9m | |||||
| 39 | The Hill has Eyes | {FR} 5a | 10m | |||||
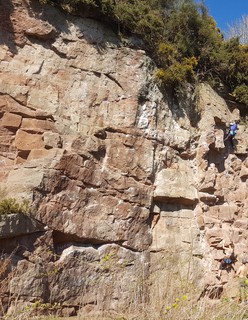 |
||||||||
| Route | Grade | Style | Selected ascents | |||||
| 40 | ★ What Every Woman Wants | {FR} 7a | 11m | |||||
| 41 | ★★ Where there's Muck there's Brass | {FR} 6c+ | 10m | |||||
| 42 | ★ Slim Pickins | {FR} 7b | 10m | |||||
| 43 |
★★ Dig Deep
WARNING!! 2020 Several large holds have fallen off at the start of the route, altering the original start. Now slightly harder to set off, but grade remains the same. FA: 2007 | {FR} 6c+ | 10m | |||||
| 44 |
★ Buffer Overflow
Climbs the first bolt of Dig Deep, the second and third bolts of Slim Pickins, then moves left to the comfortable ledge of Where there's Muck there's Brass, and finally climbs the final wall and bulge of What Every Woman Wants. Soft 7a+. Not a natural line. | 7a+ | 14m, 6 | |||||
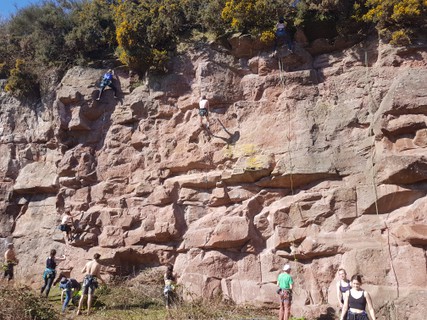 |
||||||||
| Route | Grade | Style | Selected ascents | |||||
| 45 | ★★ Ginger's Jewels | {FR} 6b+ | 10m | |||||
| 46 | ★ Beat the Bulge | {FR} 6b+ | 10m | |||||
| 47 | Weighty Issue | {FR} 6b | 10m | |||||
| 48 | Gut Feeling | {FR} 6b+ | 10m | |||||
| 49 | Touch Too Much | {FR} 7a | 11m | |||||
| 50 | Xmas Xcess | {FR} 6a+ | 11m | |||||
| 51 | ★ Serious Beef | {FR} 6c+ | 10m | |||||
| 52 | Fat of the Land | {FR} 6b | 10m | |||||
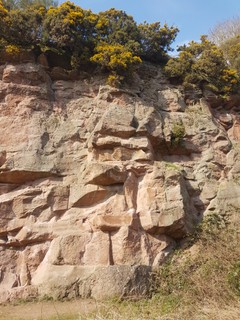 /77/e6/77e6974b7ee6db4bb6138b2995f1959b7dd409c8) |
||||||||
| Route | Grade | Style | Selected ascents | |||||
| 53 | Fat Boy Slims | {FR} 4c | 10m | |||||
| 54 | ★ Monkey See, Monkey Do | {FR} 6b+ | 10m | |||||
| 55 |
The Zoo
Deceiving start. | {FR} 6a+ | 10m | |||||
Eastern Wall | ||||||||
| 57 |
Walking the Plank
Warning Fixed Gear: Anchor | {FR} 6a+ | 12m | |||||
| 58 | Crocodile Corner | {FR} 5c | 12m | |||||
| 59 | By Hook or by Crook | {FR} 5a | 12m | |||||
| 60 | Wings Would Help | {FR} 6a+ | 12m | |||||
| 61 | ★★ Smee Day | {FR} 5+ | 14m | |||||
| 62 | ★ Fly Boy | {FR} 6b | 12m | |||||
| 63 | ★ Wrong Turn | {FR} 5c | 12m | |||||
| 64 | True Path | {FR} 6a | 12m | |||||
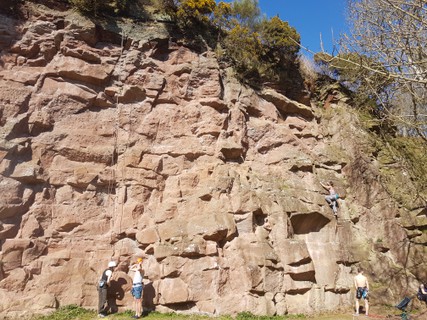 |
||||||||
| Route | Grade | Style | Selected ascents | |||||
| 65 | Seeing the Light | {FR} 6a+ | 12m | |||||
| 66 | ★★★ Peddle Power | {FR} 6a+ | 12m | |||||
| 67 | ★★★ Done and Dusted | {FR} 6b | 12m | |||||
| 68 | Curtain Call | {FR} 6a+ | 12m | |||||
| 69 | ★★★ When Annabelle met Tinkerbell | {FR} 6a | 12m | |||||
| 70 | El Captain | {FR} 5c | 12m | |||||
| 71 |
El Boa
Start at the bottom of the left-trending fault line. Climb up through the crack to the top, using bolts from routes either side, finishing on lower-offs of When Annabelle met Tinkerbell. Rock is soft in crackline, may be loose. | {FR} 6a | 13m | |||||
| 72 | Kirrie Sutra | {FR} 5a | 12m | |||||
| 73 | ★ Awe! | {FR} 6a | 11m | |||||
| 74 | Stiff Little Fingers | {FR} 6b | 11m | |||||
| 75 | Markerhorn | {FR} 4c | 11m | |||||
| 76 | Gran Jurassic | {FR} 5a | 10m | |||||
| 77 | Ruthosaurus | {FR} 3c | 8m | |||||
| 78 | Stegosaurus | {FR} 4a | 8m | |||||
1.4.2. Balmashanner Quarry 22 routes in Crag
- Summary:
-
All Sport climbing
Lat / Long: 56.626232, -2.890761
summary
Hard sport climbing area near Forfar. Slow to dry after winter seepage.
description
Slow to dry after winter seepage. Most climbs well protected, short (15m) and enjoyable, although somewhat intense.
approach
Park on the road sign posted as Glecoe Cottage. Try not to block any access on approach track. Follow the road to a right turn that becomes a footpath. After a few meters, cross over the barbwire fence on the left and walk doen the crag which would be clearly in view.
| Route | Grade | Style | Selected ascents | |||
|---|---|---|---|---|---|---|
| 1 | Syes Don't Matter | {FR} 6b | ||||
| 2 | Sye of Relief | {FR} 6b+ | ||||
| 3 | Firestarter | {FR} 6a+ | 12m | |||
| 4 | Delivery Man | {FR} 7a+ | ||||
| 5 | Start the Fire | {FR} 6b+ | 12m | |||
| 6 | Digital Sclerosis | {FR} 7b+ | ||||
| 7 | Digital Sclerosis there and back | {FR} 7c+ | ||||
| 8 | Made to Suffer | {FR} 7b+ | ||||
| 9 | ★★★ Savage Amusement | {FR} 7b | ||||
| 10 | ★★ Putting Shame in your Game | {FR} 7c | ||||
| 11 |
★ Manifestations
The thin wall which leads directly into the massive flake of Rat Attack. | {FR} 7b | ||||
| 12 |
Rat Attack
Starts right of Manifestation and finishes on the same line. | {FR} 6c+ | ||||
| 13 | ★ Tales of Creation | {FR} 8a | ||||
| 14 | ★ Hell Bent for Lycra | {FR} 6c+ | 13m | |||
| 15 | ★ Le Von Vacance | {FR} 7a | ||||
| 16 | ★ Half the Battle | {FR} 7a | 14m | |||
| 17 |
★ The Comfort Machine
Follow the first 3 bolts of Half the Battle, then traverse right for 2 more bolts to another anchor. | {FR} 6c+ | 14m | |||
| 18 | Off the Couch | {FR} 6c | ||||
| 19 | ★★ Gravity's Rainbow | {FR} 8a | ||||
| 20 | ★★★ The Niche | {FR} 8a+ | ||||
| 21 | Merchant of Menace | {FR} 6b | ||||
| 22 | Balmashanner Buttress | {FR} 4c | ||||
1.4.3. Legaston Quarry 74 routes in Crag
- Summary:
-
Sport climbing and Trad climbing
Lat / Long: 56.627800, -2.670730
summary
The original home of Scottish sport climbing. Most routes in the F6a - F6c range, and are mostly 10 - 15m long.
description
The climbing tends to be fingery and reachy, progress being dependent on horizontal breaks in the sandstone, along with the odd pocket. "Must do" routes: Driller Killer (F6c), Flight of the Mad Magician (F6b), No Remorse (F6c+), Spandex Ballet (F7a+), Playing with Fire (F6c).
access issues
No issues. Respect the neighbours.
approach
Lies just off the A933 Brechin to Arbroath road, just south of Friockheim. Limited parking beside the quarry. No dogs allowed. New access law means dogs cannot be excluded unless a local byelaw is in place. They must of course be kept under control.
note feb 2019 - there doesn’t seem to be any parking particularly near the quarry right now - we parked along the b961 beyond the entrance to Middleton estate in the woods and walked back down, 10 mins.
1.4.3.1. Ring Buttress / Sunshine Wall 14 routes in Sector
- Summary:
-
Trad climbing and Sport climbing
Lat / Long: 56.627809, -2.670417
| Route | Grade | Style | Selected ascents | |||
|---|---|---|---|---|---|---|
| 1 |
Choss
Just left of Ego Trip. | D | 7m | |||
| 2 |
Grot
The name says it all | D | 7m | |||
| 3 | Ego Trip | D | 7m | |||
| 4 |
Flightpath
In the opinion of one ascentionist, "if this is the route on the slab just left of the severe it is never vs 4c. For starters it has E1 5a notched in to the wall which I would have thought with the lacking gear it was at least that." Personally, I thought VS 4c was fair. | VS 4c | 8m | |||
| 5 |
Crowbar Crack
No surprise how this got its name! The obvious wide crack on the left hand buttress. | S | 8m | |||
| 6 | The Killing Fields | {FR} 6a | 10m | |||
| 7 | Armygeddon | {FR} 5+ | 10m | |||
| 8 |
★ Driller Killer
Sadly some of the holds are chipped... | {FR} 6c | 10m | |||
| 9 |
Trial by Dimension
Eliminate route, very reach dependant. Don't use any holds from "Driller Killer", and only the left most square edge of "Flight of the Mad Magician". | {FR} 7a | 10m | |||
| 10 |
★ Flight of the Mad Magician
Fantastic wee route with cunning and strength (or a long reach) required. | {FR} 6b | 10m | |||
| 11 | Seonds Out | {FR} 5c | 10m | |||
| 12 | Seconds Out (trad) | E1 5b | 10m | |||
| 13 | Plod | M | 9m | |||
| 14 | Contraflow | VS 4b | 9m | |||
1.4.3.2. Main Wall 25 routes in Sector
- Summary:
-
Sport climbing and Trad climbing
Lat / Long: 56.627576, -2.670482
| Route | Grade | Style | Selected ascents | |||
|---|---|---|---|---|---|---|
| 1 | Ratbag | {FR} 6a | 12m | |||
| 2 | ★ Hunt the Ratbag | {FR} 6b | 12m | |||
| 3 | ★ Death is the Hunter | {FR} 6b+ | 12m | |||
| 4 | ★★ Sweet Revenge | {FR} 6a | 15m | |||
| 5 | ★★ Sweet Revenge (trad) | E1 5b | 15m | |||
| 6 | Junk Man Blues | {FR} 6a+ | 12m | |||
| 7 | Between the Lines | {FR} 5+ | 12m | |||
| 8 | Bomber | {FR} 6a+ | 12m | |||
| 9 | Happy Days | S | ||||
| 10 | Brian the snail | {FR} 6a | 12m | |||
| 11 | Brian the snal Direct | {FR} 7b | 12m | |||
| 12 | The Rocking Stone | {FR} 4+ | 12m | |||
| 13 | The Rocking Stone (trad) | S | 12m | |||
| 14 | The Head | S | 12m | |||
| 15 | March of Dimes | {FR} 6a | 12m | |||
| 16 | Shoot to Kill | {FR} 5c | 12m | |||
| 17 | Overkill | {FR} 6b | 12m | |||
| 18 | Desperate Measures | {FR} 6b | 13m | |||
| 19 |
Staircase A
Climb the obvious corner and ledge system leading up and right. Grassy and rarely climbed. | D | 20m | |||
| 20 | Fire at Will | {FR} 4c | 13m | |||
| 21 |
Staircase B
The Direct Start of Staircase A. Climb for 3 meters to reach the original route below its second corner. | D | 3m | |||
| 22 | Walking the Straight Line | {FR} 4c | 13m | |||
| 23 | Ain't no Rolling Stone | {FR} 4c | 13m | |||
| 24 | The Rack | {FR} 4c | 14m | |||
| 25 | Lemon Squeezy | {FR} 4c | 14m | |||
1.4.3.3. Rotten Wall 11 routes in Sector
- Summary:
-
All Sport climbing
Lat / Long: 56.627460, -2.670945
description
Faces North
| Route | Grade | Style | Selected ascents | |||
|---|---|---|---|---|---|---|
| 1 | The Golden Shot | {FR} 6b+ | 13m | |||
| 2 | Charred and Damned Desire | {FR} 7b+ | 13m | |||
| 3 | The Hunting Swan | {FR} 6b+ | 31m | |||
| 4 | First to Fall | {FR} 6b+ | 13m | |||
| 5 | ★ Hell's Bells | {FR} 6c | 15m | |||
| 6 | Fire Down Below | {FR} 6a+ | 15m | |||
| 7 | Demolition Man | {FR} 5c | 14m | |||
| 8 | The Big J | {FR} 6b | 13m | |||
| 9 | Rocket's Secret Machine | {FR} 7a | 13m | |||
| 10 | Everything Must Go | {FR} 6a | 13m | |||
| 11 | Edge of Darkness | {FR} 6a | 16m | |||
1.4.3.4. Forbidden Buttress 7 routes in Sector
- Summary:
-
Trad climbing and Sport climbing
Lat / Long: 56.627428, -2.671223
| Route | Grade | Style | Selected ascents | |||
|---|---|---|---|---|---|---|
| 1 | Purple Haze | VS 4b | 13m | |||
| 2 | Night-time Sorrows | VS 4c | 13m | |||
| 3 | Virgin Crack | VD | 13m | |||
| 4 | Kiss of Death | VS 4b | 15m | |||
| 5 | ★ Direct Access | {FR} 6c | 15m | |||
| 6 | ★★ No Remorse | {FR} 6c+ | 15m | |||
| 7 | ★★★ Spandex Ballet | {FR} 7a+ | 15m | |||
1.4.3.5. Babylon Buttress (Wet Wall) 10 routes in Sector
- Summary:
-
Mostly Sport climbing
Lat / Long: 56.627463, -2.671370
| Route | Grade | Style | Selected ascents | |||
|---|---|---|---|---|---|---|
| 1 |
★ Sign of the Scorpion
Corner climb between Babylon Buttress and Forbidden Wall. Often wet. | E1 5b | 18m | |||
| 2 | She Conceives Destruction | {FR} 7a | 14m | |||
| 3 | Aerodynamic | {FR} 7b | 14m | |||
| 4 | Lymphomaniac | {FR} 6a | 13m | |||
| 5 | Roxanne | {FR} 4 | 18m | |||
| 6 | Diss! | {FR} 6b | 13m | |||
| 7 | Nymphocyte | {FR} 6b | 13m | |||
| 8 | ★ Playing with Fire | {FR} 6c | 13m | |||
| 9 | ★ Less Morts Dansant | {FR} 7a | 13m | |||
| 10 | Necrosis | {FR} 6a | 13m | |||
1.4.3.6. Rose Wall 7 routes in Sector
- Summary:
-
Trad climbing and Sport climbing
Lat / Long: 56.627545, -2.671419
| Route | Grade | Style | Selected ascents | |||
|---|---|---|---|---|---|---|
| 1 | Rootworks | S | 14m | |||
| 2 | Exodus | {FR} 5b | 12m | |||
| 3 | The Weasel | {FR} 6a+ | 12m | |||
| 4 | Remain in Light | {FR} 6b+ | 12m | |||
| 5 | Caprica | VS 4b | 14m | |||
| 6 | Winky | VS 4c | 14m | |||
| 7 | Gary's Route | S | 10m | |||
1.4.4. Ley Quarry 33 routes in Crag
- Summary:
-
Mostly Sport climbing
Lat / Long: 56.525649, -3.208965
summary
Very sheltered and sunny aspect with climbing on mainly vertical quarried walls. Some reasonable bouldering on short walls at entrance, though a little sandy.
description
Most routes start from the ledge above the pond. Takes no seepage so year-round climbing is possible. Mostly artificial routes, face climbing on pockets and thin crimps.
approach
| Route | Grade | Style | Selected ascents | |||||
|---|---|---|---|---|---|---|---|---|
Upper Area | ||||||||
| 2 |
★★ Tree Beard
On the boulder wall at the very left, traverse from: The obvious low jug at the far left following the line of crimps below the roof jugs, traverse through crimps on long powerful lock-off's to reach a slopey undercling with the right hand. Make a difficult move to a poor crimp, then back up into a line of crimps to join the jugs above the slopey ledge traverse. No roof jugs or big ledge for feet allowed. Eliminate, but surprisingly good, powerful climbing. Sneaky heel-hook beta makes all the difference. FA: Kris Devlin, 2012 | V8 | 10m | |||||
| 3 | Tree beard (with footledge) | V5 | ||||||
| 4 | Boulder wall traverse (L to R) | V4 | ||||||
| 5 | Sloper lip traverse | V3 | ||||||
/93/45/93454c161bd8a0ac3c278d236ff7295af0960e37) /41/2e/412ea75cd5ea4b7bfc4631fb5f66e74ef976217f) |
||||||||
| Route | Grade | Style | Selected ascents | |||||
| 6 | Rotweiler | {FR} 4a | 6m | |||||
| 7 | Scarred for life | {FR} 6a | 7m | |||||
| 8 | ★ Magic Pockets | {FR} 6b | 7m | |||||
| 9 | Pit bull | {FR} 4a | 7m | |||||
| 10 | Cat scratch fever | {FR} 4a | 7m | |||||
| 11 | Aprils Arete | {FR} 3c | 10m | |||||
 |
||||||||
| Route | Grade | Style | Selected ascents | |||||
Pond Area | ||||||||
| 13 | Easy Ley | {FR} 6a+ | 10m | |||||
| 14 | Nectar | {FR} 6a+ | 10m | |||||
| 15 | Dropping like flies | {FR} 6b | 20m | |||||
| 16 | ★★★ Nirvana | {FR} 7a+ | 11m | |||||
| 17 | ★★ Five magics | {FR} 6b+ | 11m | |||||
| 18 | Footfall | {FR} 6a | 10m | |||||
| 19 | Not the risk business | {FR} 6c | 11m | |||||
| 20 | Drowning by numbers | {FR} 7a | 12m | |||||
| 21 | Dark moon rising | {FR} 6b | 12m | |||||
| 22 | Twilight zone | {FR} 7a | 10m | |||||
| 23 | Fishing for compliments | {FR} 6b | 10m | |||||
| 24 | Caught in the act | {FR} 6b | 10m | |||||
| 25 | ★ Traditional imperfections | {FR} 6a | 10m | |||||
| 26 | Making the grade | {FR} 7b | 8m | |||||
| 27 | ★ Pool of despair | {FR} 7a+ | 9m | |||||
| 28 | Layed to rest | {FR} 7a | 9m | |||||
| 29 | ★★ Barrels for laughs | {FR} 7a | 9m | |||||
| 30 | ★★ Haul or nothing | {FR} 7b+ | 9m | |||||
| 31 | ★ Holy water | {FR} 7b | 12m | |||||
| 32 | ★ Life’s a beach | {FR} 6b | 14m | |||||
| 33 | ★ Fat Man Starts to Fall | {FR} 6b | 11m | |||||
| 34 | ★ The Magic Thumb | {FR} 7b | 10m | |||||
| 35 | Carlos Fire | {FR} 6b+ | ||||||
1.4.5. Elephant Rock 28 routes in Crag
- Summary:
-
All Sport climbing
Lat / Long: 56.675753, -2.466076
summary
Seacliff of mixed igneous rock that from certain angles actually does look like an elephant!
description
Routes mainly 15-22m in length and generally high quality. Mainly best for mid 6's up to 7b. High-quality gear [ie bolts] and all routes have lower offs. Gets sun till lunchtime. Mainly tidal but some routes available at any tide. As with any north east sea cliff, especially ones with caves, the routes can be greasy in humid weather though the more open routes and those above the tidal zone are often climbable.
access issues
no issues.
approach
Park on the minor road leading to Usan just beyond a white gate. Follow the track down under the rail bridge to the small clifftop graveyard. Take the steep and slippy (after rain) path down the south side of the Rock and then go through the first cave to access the east face.
At high tides when the through cave is awash then it is possible to access the crag by walking north from the graveyard along the field edge. At the north end of the bay a path leads down the grassy slope to the pebble beach. Don't be tempted down the gully which flanks the rock to the immediate north, it is wet and very unpleasant.
This approach also gives the best view of the "elephant" !
| Route | Grade | Style | Selected ascents | |||
|---|---|---|---|---|---|---|
| 1 | Can't see the F Elephant Anywhere | {FR} 7a | 14m | |||
| 2 | ★★ Pas de Charge | {FR} 6b | 16m | |||
| 3 | ★ Seeing is Not Believing | {FR} 6c | 16m | |||
| 4 | ★★★ Tale of the Tape | {FR} 6a+ | 15m | |||
| 5 | Big Lug | {FR} 6b+ | 16m | |||
| 6 | ★ Doigt Attack | {FR} 7b | 16m | |||
| 7 | ★★ Viagra Falls | {FR} 6c+ | 18m | |||
| 8 | ★ The X-philes | {FR} 6c | 20m | |||
| 9 | ★★★ Hanger | {FR} 7a | 18m | |||
| 10 | ★★ Bodysnatcher | {FR} 7b+ | 22m | |||
| 11 | ★★ Alien Breed | {FR} 7b+ | 22m | |||
| 12 | ★ Shapeshifter | {FR} 7a | 14m | |||
| 13 | The Ex-Pert Route | {FR} 6c | 20m | |||
| 14 | Pret's Buttock | {FR} 7a | 20m | |||
| 15 | ★★ Smells like Team Spirit | {FR} 7b | 22m | |||
| 16 | Hannibal | {FR} 7b | 22m | |||
| 17 | ★★ It's aroute Jim! | {FR} 7b | 8m | |||
| 18 | ★★ Butt Ugly Martians | {FR} 7b | 11m | |||
| 19 | ★★ Big Girls Blouse | {FR} 7a+ | 14m | |||
| 20 | Mahoots Mon | {FR} 6c+ | 13m | |||
| 21 | ★★ Beware of the Wellyfish | {FR} 6b | 13m | |||
| 22 | Don't Blame Me! | {FR} 6a+ | 20m | |||
| 23 | It's not my Fault! | {FR} 6a | 20m | |||
| 24 | ★ Right Wing Extremist | {FR} 6c | 14m | |||
| 25 | Pig on the Rig | {FR} 6c+ | 14m | |||
| 26 | ★ The Beggars are Coming to Town | {FR} 6b | 14m | |||
| 27 | Hornblower | {FR} 6c | 14m | |||
| 28 | Whistleblower | {FR} 6b | 14m | |||
1.4.6. Rob's Reed 54 routes in Crag
- Summary:
-
All Sport climbing
Lat / Long: 56.659972, -2.834082
summary
Sandstone/conglomerate crag in a sunny south facing position.
description
The majority of the routes are quick to dry and up to 15m high. There's Vertical face climbing at the right end and roofs at the left culminating in the spectacular Dirty Harrys Cave.
Dirty Harry's cave can provide a number of complex link ups. Golden Fleece and the current “King” of Robs “Let the right one in” have been recorded as good examples of what can be done here.
There is a lot of uncertainty over the rock on "The Pen” area at the moment.
Please climb there with caution.
access issues
The crag is off limits from September 1st to 31st October each year as the farmer keeps deer there and they are very aggressive during the rutting season. PLEASE do not break this ban as access is delicate, go somewhere else instead.
approach
Parking is limited (56.659433, -2.828811) and there is space for 3-4 cars only. DO NOT park in the tarmacked "turning circle" before the dirt track, as this is needed for long farm vehicles to negotiate the turning.
Anyone ignoring this please don't be surprised if you return to your car and find damage to your vehicle.
1.4.6.1. Dirty Harrys Cave 10 routes in Sector
- Summary:
-
Lat / Long: 56.659959, -2.835427
/8a/72/8a7264ab3cc3b8a8dc137a8705370144ce96b4b9) /3a/4e/3a4e9c3ec3a991b11b1c79e30ff2b4343d45f19f) |
||||||||
| Route | Grade | Style | Selected ascents | |||||
|---|---|---|---|---|---|---|---|---|
| 1 | Little Po Beep | {FR} 6b | 8m | |||||
| 2 | The Sheep of Things to come... | {FR} 6b+ | 11m | |||||
| 3 | ★★ Skulldudggery | {FR} 6c | 12m | |||||
| 4 | ★★ Car Pit Baggers | {FR} 7a+ | 12m | |||||
| 5 | ★★ Climb and Punishment | {FR} 7b | 13m | |||||
| 6 |
★ Dead Pull
One of the last routes on the crag to dry. A little harder than Climb and Punishment but a lot easier than Reinforcer. Original line used the “crocodiles snout" for feet only but now it has cleaned up it is possible to miss out the big roof reach perhaps making the route slightly easier. Still best climbed as original. | {FR} 7b+ | 14m | |||||
| 7 | ★★ The Reinforcer | {FR} 7c | 13m | |||||
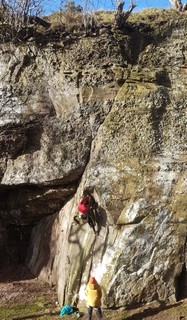 |
||||||||
| Route | Grade | Style | Selected ascents | |||||
| 8 | ★ The Enforcer | {FR} 7b | 13m | |||||
| 9 | Dirty Harry | {FR} 6b | 12m | |||||
| 10 | Make my day | {FR} 6a | 10m | |||||
1.4.6.2. Caravan 8 routes in Sector
- Summary:
-
Lat / Long: 56.659946, -2.834985
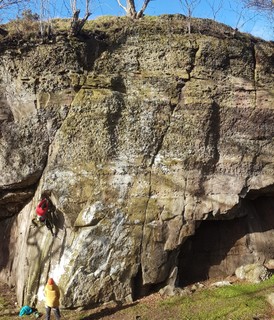 |
||||||||
| Route | Grade | Style | Selected ascents | |||||
|---|---|---|---|---|---|---|---|---|
| 1 | Good Boy Jo Jo | {FR} 6b+ | 10m | |||||
| 2 | ★ Towed in the Hole | {FR} 7a | 10m | |||||
| 3 | ★ Head of the Queue | {FR} 6c | 10m | |||||
| 4 | ★ Snails Pace | {FR} 6c | 12m | |||||
| 5 | End of the Road | {FR} 7a+ | 12m | |||||
| 6 | Dennis Caravan | {FR} 7b | 12m | |||||
| 7 | Trailer Trash | {FR} 7b | 8m | |||||
| 8 | Totally Trashed | {FR} 7b | 9m | |||||
1.4.6.3. Size isn't Everything 7 routes in Sector
- Summary:
-
Lat / Long: 56.659937, -2.834720
| Route | Grade | Style | Selected ascents | |||
|---|---|---|---|---|---|---|
| 1 | Grasping the Nettle | {FR} 6c | 10m | |||
| 2 | Welcome to the Big Pocket | {FR} 6c | 10m | |||
| 3 | Get Shorty! | {FR} 6c+ | 7m | |||
| 4 | ★ Short Haul | {FR} 7a | 7m | |||
| 5 | Spice! | {FR} 7b | 8m | |||
| 6 | Short Changed | {FR} 7b | 8m | |||
| 7 | ★★ Sold Short | {FR} 6c | 7m | |||
1.4.6.4. Main Wall Left 10 routes in Sector
- Summary:
-
Lat / Long: 56.659937, -2.834342
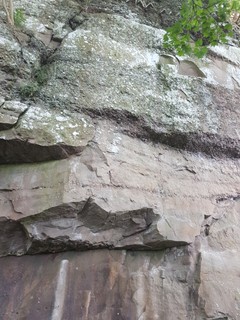 /75/cd/75cd7518072244de40322f67e8d41b88e68727d9) |
||||||||
| Route | Grade | Style | Selected ascents | |||||
|---|---|---|---|---|---|---|---|---|
| 1 | The Uninvited | {FR} 7a+ | 13m | |||||
| 2 | ★ One Foot in the Door | {FR} 7a | 12m | |||||
| 3 | Gatecrashers Galore | {FR} 7b | 13m | |||||
| 4 | ★ Grand Theft Auto | {FR} 7a+ | 12m | |||||
| 5 | ★★ Autobahn | {FR} 6c+ | 12m | |||||
| 6 | Pitscandalous (joy ride) | {FR} 7c | 14m | |||||
| 7 | ★ Need For Speed | {FR} 6c | 15m | |||||
| 8 | Fretting over nothing | {FR} 7a+ | 14m | |||||
| 9 | ★★ No respect for your elders | {FR} 6c+ | 14m | |||||
| 10 | ★ Pitscandly Chainsaw Massacre | {FR} 7a | 14m | |||||
1.4.6.5. Main Wall Right 16 routes in Sector
- Summary:
-
Lat / Long: 56.659937, -2.833934
| Route | Grade | Style | Selected ascents | |||||
|---|---|---|---|---|---|---|---|---|
| 1 | ★ Deer Hunter | {FR} 6c+ | 14m | |||||
/73/dd/73dd1f8e282865ffbaa7f25bca0d09a9af4bb89e) 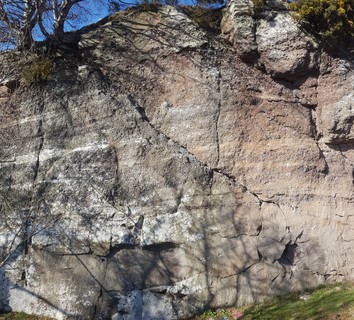 |
||||||||
| Route | Grade | Style | Selected ascents | |||||
| 2 | ★★★ Leonardo Da Pinchy | {FR} 6c+ | 14m | |||||
| 3 | D.i.v.o.r.c.e. | {FR} 6c | 14m | |||||
| 4 | ★ Forfaraway | {FR} 6b | 12m | |||||
| 5 | Italian Stallion | {FR} 6a | 14m | |||||
| 6 | Horny deer? | {FR} 5c | 12m | |||||
| 7 | Rectified | {FR} 7b | 12m | |||||
| 8 | Squeal like a piggy | {FR} 6b | 16m | |||||
| 9 | Fire on the hold | {FR} 6a+ | 12m | |||||
| 10 | Burning Desire | {FR} 6c | 12m | |||||
| 11 | ★★ High Voltage | {FR} 6b+ | 14m, 7 | |||||
| 12 | ★ Power Flower | {FR} 6c | 15m | |||||
/f1/79/f1797050a5466abc379f4722fc299d756ccf6a75) |
||||||||
| Route | Grade | Style | Selected ascents | |||||
| 13 | ★★ Going through on Aggregate | {FR} 7a | 16m | |||||
| 14 | Beyond the Call of Nature | {FR} 7a | 12m | |||||
| 15 | Loose Cannons | {FR} 6c | 16m | |||||
| 16 | R n D Dubz | {FR} 6a | 15m | |||||
1.4.6.6. The Pen 3 routes in Sector
- Summary:
-
Lat / Long: 56.660027, -2.832270
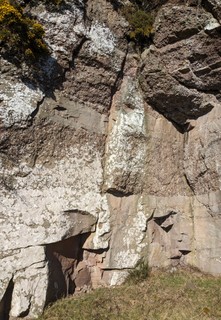 |
||||||||
| Route | Grade | Style | Selected ascents | |||||
|---|---|---|---|---|---|---|---|---|
| 1 | Spider Pig | {FR} 7a+ | 12m | |||||
| 2 | ★ Swine Flew | {FR} 6b | 12m | |||||
| 3 | ★ Harry Trotter | {FR} 6c | 9m, 5 | |||||
1.4.7. Arbroath 39 routes in Crag
- Summary:
-
All Sport climbing
Lat / Long: 56.564995, -2.543062
description
Best described as 'adventure sport climbing', with many routes requiring the leader to top out and be seconded to retrieve quickdraws. Well bolted.
approach
Free easy parking at the beginning of the cliffs. Then walk and access each sector either on foot or by abseil.
1.4.7.1. The Rut 5 routes in Cliff
- Summary:
-
Lat / Long: 56.561788, -2.548812
| Route | Grade | Style | Selected ascents | |||
|---|---|---|---|---|---|---|
| 1 | Stag Night | 5c | ||||
| 2 | Strut Yer Stuff | 6b | 5m | |||
| 3 | Burning with Anxiety | 6b+ | 6m | |||
| 4 | Road Rage | 6a+ | ||||
| 5 | Flaked Out | 5a | ||||
1.4.7.2. The Platform 0 routes in Cliff
1.4.7.3. The Tower 0 routes in Cliff
1.4.7.4. Non Tidal Wave 0 routes in Cliff
1.4.7.5. The Promontory 0 routes in Cliff
1.4.7.6. Sector Cartoon 12 routes in Cliff
- Summary:
-
Lat / Long: 56.562363, -2.547373
| Route | Grade | Style | Selected ascents | |||
|---|---|---|---|---|---|---|
| 1 | Looney Tunes | 5c | ||||
| 2 | Fred Flintstone | 3c | 6m | |||
| 3 | Disney Look Too Bad | 6a | ||||
| 4 | Cow And Chicken | 3c | 6m | |||
| 5 | Top Cat | 4a | 6m | |||
| 6 | A Grand Day Out | 4c | 6m | |||
| 7 | The Wrong Trousers | 4a | ||||
| 8 | Pinky and the Brain | 4a | 6m | |||
| 9 | 62 West Wallaby Street | 3c | 6m, 2 | |||
| 10 | The Pearls of Penelope Pitstop | 6a+ | ||||
| 11 | Rugrats Revenge | 5a | ||||
| 12 | Fantastic Four | 3a | ||||
1.4.7.7. Sector Parental Guidance 0 routes in Cliff
1.4.7.8. The Steppes 0 routes in Cliff
 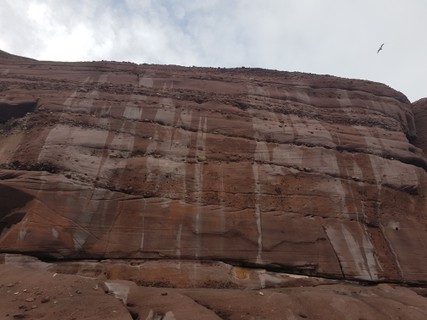 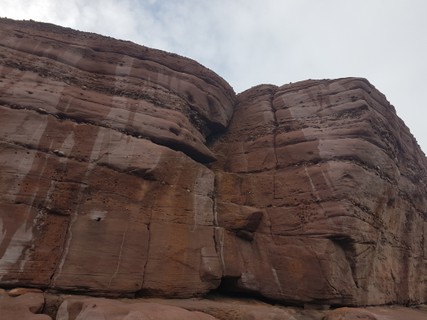 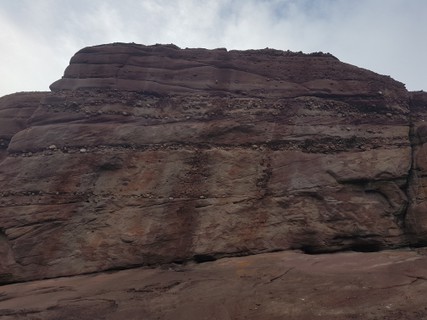 |
1.4.7.9. Sector Mini 6 routes in Cliff
- Summary:
-
Lat / Long: 56.563063, -2.545954
| Route | Grade | Style | Selected ascents | |||
|---|---|---|---|---|---|---|
| 1 | Minitial | {FR} 4a | 5m | |||
| 2 | Minitiation | {FR} 4a | 5m | |||
| 3 | Minimal | {FR} 4c | 6m | |||
| 4 | Minimical | {FR} 6a+ | 6m | |||
| 5 | Miniquity | {FR} 4c | 6m | |||
| 6 | Minitiative | {FR} 4c | 6m | |||
1.4.7.10. Conning Tower Inlet 1 route in Cliff
- Summary:
-
Lat / Long: 56.563870, -2.544648
 |
||||||||
| Route | Grade | Style | Selected ascents | |||||
|---|---|---|---|---|---|---|---|---|
| 1 | Swindler's List | {FR} 6a+ | 15m | |||||
1.4.7.11. The Haven 9 routes in Cliff
- Summary:
-
Lat / Long: 56.564119, -2.544443
| Route | Grade | Style | Selected ascents | |||
|---|---|---|---|---|---|---|
| 1 | ★ Haven Fun | {FR} 6b | 15m | |||
| 2 | A Close Shave | {FR} 6c | 14m | |||
| 3 | ★ Shaven Haven | {FR} 5 | 14m | |||
| 4 | Haven Cant Wait | {FR} 6a+ | 14m | |||
| 5 | Don't Bridget Nelson | {FR} 6b | 14m | |||
| 6 | ★★ Dark Sar-Chasm | {FR} 5+ | 14m | |||
| 7 | ★★ Knocking' on Havens Door | {FR} 7b | 15m | |||
| 8 | ★★ Vulgar Display of Power | {FR} 7b+ | 15m | |||
| 9 | ★ David's Route | {FR} 5 | 13m | |||
1.4.7.12. Battery Inlet 0 routes in Cliff
1.4.7.13. Doom Hole 1 route in Cliff
- Summary:
-
Lat / Long: 56.564496, -2.543488
 |
||||||||
| Route | Grade | Style | Selected ascents | |||||
|---|---|---|---|---|---|---|---|---|
| 1 | ★★★ The Siren | {FR} 6c | 20m | |||||
1.4.7.14. Grannie´s Garret 2 routes in Cliff
- Summary:
-
Lat / Long: 56.566131, -2.539830
| Route | Grade | Style | Selected ascents | |||
|---|---|---|---|---|---|---|
| 1 | ★★ Mushroom Treatment | {FR} 6b | 14m | |||
| 2 | ★★★ Satan's Serenade | {FR} 6b+ | 14m | |||
1.4.7.15. The Deil´s Heid 3 routes in Cliff
- Summary:
-
Lat / Long: 56.566853, -2.538491
| Route | Grade | Style | Selected ascents | |||
|---|---|---|---|---|---|---|
| 1 | ★ Between the Deil and the Deap Blue Sea | {FR} 6c | 15m | |||
| 2 | The Heidmaster | 7a+ | 14m | |||
| 3 | ★★ Deil's Heid Route | {FR} 5+ | 20m | |||