A Crag Guide gives an extensive view of all sub areas and climbs at a point in the index. It shows a snapshot of the index heirachy, up to 300 climbs (or areas) on a single web page. It shows selected comments climbers have made on a recently submitted ascent.
At a minor crag level this should be suitable for printing and taking with you on a climbing trip as an adjunct to your guidebook.
This guide was generated anonymously. Login to show your logged ascents against each route.
Warning
Rock climbing is extremely dangerous and can result in serious injury or death. Users acting on any information directly or indirectly available from this site do so at their own risk.
This guide is compiled from a community of users and is presented without verification that the information is accurate or complete and is subject to system errors. By using this guide you acknowledge that the material described in this document is extremely dangerous, and that the content may be misleading or wrong. In particular there may be misdescriptions of routes, incorrectly drawn topo lines, incorrect difficulty ratings or incorrect or missing protection ratings. This includes both errors from the content and system errors.
Nobody has checked this particlular guide so you cannot rely on it's accuracy like you would a store bought guide.
You should not depend on any information gleaned from this guide for your personal safety.
You must keep this warning with the guide. For more information refer to our:
Usage policy
Contributors
Thanks to the following people who have contributed to this crag guide:
Josh Mackenzie
Simon Dale
Barbara Zangerl
Kai
rick
Paul Frothy Thomson
mark.lutterman
Miguel Madero
Fraser
Will Vidler
The size of a person's name reflects their Crag Karma, which is their level of contribution. You can help contribute to your local crag by adding descriptions, photos, topos and more.
Table of contents
- 1.
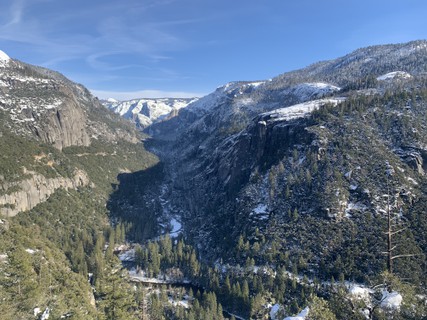
South Lower Merced Canyon
125 in Area
-
1.1.
Turtleback Dome 85 routes in Area
- 1.1.1. Super Nova Area 3 routes in Area
-
1.1.2.
The Rostrum 24 routes in Area
- 1.1.2.1. North Face 6 routes in Area
- 1.1.2.2. West Base 7 routes in Area
- 1.1.2.3. Jungle Gym 11 routes in Area
- 1.1.3. Elephant's Graveyard 6 routes in Area
-
1.1.4.
Elephant Rock 41 routes in Area
- 1.1.4.1. East Face 8 routes in Area
- 1.1.4.2. Top 12 routes in Area
- 1.1.4.3. East Side 6 routes in Area
- 1.1.4.4. Worst Error 5 routes in Area
- 1.1.4.5. West Side 8 routes in Area
- 1.1.4.6. Elephant Rock Boulders 2 routes in Area
- 1.1.5. Overview 11 routes in Area
- 1.2. Discovery View 1 routes in Area
- 1.3. Wawona Tunnel, Eastern Vent 1 routes in Area
- 1.4. Flagman Buttress 2 routes in Area
-
1.5.
Pulpit Rock 14 routes in Area
- 1.5.1. Southeast Face 6 routes in Area
- 1.5.2. Northwest Face 5 routes in Area
- 1.5.3. High Pressure Cliff 3 routes in Area
- 1.6. Wawona Tunnel, West End 8 routes in Area
- 1.7. Wawona Tunnel, West 2 routes in Area
- 1.8. Cream Area 6 routes in Area
- 1.9. The Blowhole 6 routes in Area
-
1.1.
Turtleback Dome 85 routes in Area
- 2. Index by grade
1. South Lower Merced Canyon
- Summary:
-
Mayormente Escalada en roca
Lat / Long: 37.715160, -119.702239
restricciones
As of 27/06/22:
-"A reservation will be required to drive into or through Yosemite National Park from May 20 through September 30, 2022, for those driving into the park between 6 am and 4 pm." (note this may occur through a in-park camping or accomodation permit or wilderness/bigwall permit), a permit is NOT required if entering the park outside of these hours. (ref: https://www.nps.gov/yose/planyourvisit/reservations.htm )
-"As of May 2021, a wilderness permit is required for all overnight big wall climbs. During this pilot, wilderness permits for climbers are free and there are no quotas or limits on the number of permits available." (ref: https://www.nps.gov/yose/planyourvisit/climbingpermits.htm ). See previous link for details on picking up this permit.
1.1. Turtleback Dome
- Summary:
-
Escalada en roca, Escalada clásica y otros estilos
Lat / Long: 37.715947, -119.704787
     |
1.1.1. Super Nova Area
- Summary:
-
3 routes in Area
Todo Escalada en roca
| Route | Grade | Style | Selected ascents | |||
|---|---|---|---|---|---|---|
| 1 | ★ Super Nova | 5.11a | ||||
| 2 | ★ Dime Bag | 5.10c | ||||
| 3 | ★★ Crack the Whip | 5.11b | ||||
1.1.2. The Rostrum
- Summary:
-
24 routes in Area
Escalada en roca, Escalada clásica y Escalada artificialLat / Long: 37.718790, -119.708026
1.1.2.1. North Face
- Summary:
-
6 routes in Area
Escalada en roca, Escalada clásica y Escalada artificial
| Route | Grade | Style | Selected ascents | |||
|---|---|---|---|---|---|---|
| 1 | ★★★ The Regular North Face Route | 5.11c | 900ft, 8 | |||
| 2 | ★★★ The Regular North Face Route via The Excellent Adventure | 5.13c | ||||
| 3 | ★ Mad Pilot | 5.11b A1 | ||||
| 4 | ★★★ Uprising | 5.11b | ||||
| 5 | ★★★ Alien / Alien Roof | 5.12b | 800ft, 8 | |||
| 6 | ★★★ Blind Faith | 5.11d | ||||
1.1.2.2. West Base
- Summary:
-
7 routes in Area
Todo Escalada en roca
| Route | Grade | Style | Selected ascents | |||
|---|---|---|---|---|---|---|
| 1 | ★★★ Kauk-ulator | 5.11c | ||||
| 2 | Battle-Ship | 5.10 | ||||
| 3 | The West Base Route | 5.10c | ||||
| 4 | ★★ The Notch Route | 5.4 | ||||
| 5 | ★ Loyd's Return Trip | 5.9 | ||||
| 6 | ★ Static Cling | 5.10a | ||||
| 7 | ★ Le Bachar | 5.11b | ||||
1.1.2.3. Jungle Gym
- Summary:
-
11 routes in Area
Escalada en roca y Escalada clásica
| Route | Grade | Style | Selected ascents | |||
|---|---|---|---|---|---|---|
| 1 | ★★ Breast Fest | 5.10c | ||||
| 2 | ★ Alamo | 5.11a | ||||
| 3 | Pygmy Village | 5.12 | ||||
| 4 | ★ Jungle Book | 5.10a | ||||
| 5 | Loyd's Lolly Pop | 5.9 | ||||
| 6 | Concrete Jungle (Poodle Bites) | 5.10d | ||||
| 7 | Minor Kinda Unit | 5.9 | ||||
| 8 | ★★ Flight Attendant | 5.10c | ||||
| 9 | ★ Dancing in the Dark | 5.11c | ||||
| 10 | ★★ The Viper | 5.11c | ||||
| 11 | Paddy Melt | 5.10b | ||||
1.1.3. Elephant's Graveyard
- Summary:
-
6 routes in Area
Escalada en roca y Escalada artificial
| Route | Grade | Style | Selected ascents | |||
|---|---|---|---|---|---|---|
| 1 | ★★ Razor's Edge | 5.12 | ||||
| 2 | Battlescar | 5.11d A1 | ||||
| 3 | ★ Slit Your Tires | 5.11d A1 | ||||
| 4 | ★ Pet Semetary | 5.11b | ||||
| 5 | Eagle | 5.10a | ||||
| 6 | The Elephant Guy | 5.10 | ||||
1.1.4. Elephant Rock
- Summary:
-
41 routes in Area
Escalada en roca, Escalada deportiva y otros estilos
1.1.4.1. East Face
- Summary:
-
8 routes in Area
Escalada en roca, Escalada clásica y Escalada deportiva
| Route | Grade | Style | Selected ascents | |||
|---|---|---|---|---|---|---|
| 1 |
Book of Hate
A fantastic dihedral. | 5.13d | 150ft | |||
| 2 | ★ Take Da Plunge | 5.12c | ||||
| 3 | ★ Candy-O | 5.11d | ||||
| 4 | ★ Left Guru Crack | 5.10c | ||||
| 5 | ★ Right Guru Crack | 5.10a | ||||
| 6 | ★★ Elephant Talk | 5.11b | ||||
| 7 | ★ Killing Yourself to Live | 5.12a | ||||
| 8 | ★★★ Keeper of the Flame | 5.13a | ||||
1.1.4.2. Top
- Summary:
-
12 routes in Area
Escalada en roca y Escalada deportiva
| Route | Grade | Style | Selected ascents | |||
|---|---|---|---|---|---|---|
| 1 | ★ Fly Swatter | 5.12a | ||||
| 2 | ★ Isaiah 2:21 | 5.12d | ||||
| 3 | ★★ Sky | 5.11c | ||||
| 4 | ★★ Hocus Pocus | 5.11d | ||||
| 5 | ★ Elephantiasis | 5.10d R | ||||
| 6 | ★ Pink Elephant | 5.9 | ||||
| 7 | Crack of Destiny | 5.9 | ||||
| 8 |
★★ The Hundredth Monkey
When looking out from the top of the semi-detached pillar, The Hundredth Monkey is on the right side. | 5.11b | 75ft | |||
| 9 |
★★★ Fun Terminal
This route and the following 2 start from the same rap in belay stance. This is the left-most of the 3. PA: Dimitri Barton | 5.12a | 75ft | |||
| 10 |
★★★ Wicked Gravity
The middle line. Steep and brilliant. PA: Dimitri Barton | 5.12c | 75ft | |||
| 11 |
★★★ Bucket Brigade
The right hand line. Exciting climbing and great exposure up the right hand Arete PA: Dimitri Barton-Roy McClenahan | 5.11d | 75ft | |||
| 12 | Elephant Malt | 5.9 R | ||||
1.1.4.3. East Side
- Summary:
-
6 routes in Area
Todo Escalada en roca
| Route | Grade | Style | Selected ascents | |||
|---|---|---|---|---|---|---|
| 1 | ★ Reality Check | 5.10c | ||||
| 2 | ★ Plumb Line | 5.10d | ||||
| 3 | ★ Trundling Juan | 5.10b | ||||
| 4 | ★★ Straight Error | 5.10c | ||||
| 5 | Real Error | 5.7 | ||||
| 6 | Foaming at the Crotch | 5.10a | ||||
1.1.4.4. Worst Error
- Summary:
-
5 routes in Area
Escalada en roca, Escalada clásica y Escalada artificial
| Route | Grade | Style | Selected ascents | |||
|---|---|---|---|---|---|---|
| 1 | Lost Error | 5.10a | ||||
| 2 | ★★ Crashline | 5.11b | ||||
| 3 | ★ Worst Error, Left | 5.9 | ||||
| 4 | ★★★ Hotline | 5.12b | 7 | |||
| 5 | ★★★ Fatal Mistake | 5.11a A1 | 2 | |||
1.1.4.5. West Side
- Summary:
-
8 routes in Area
Todo Escalada en roca
| Route | Grade | Style | Selected ascents | |||
|---|---|---|---|---|---|---|
| 1 | ★★★ Pink Dream | 5.10a | ||||
| 2 | ★ Nightmare Continuation | 5.11d | ||||
| 3 | ★ Right Side Route | 5.10a | ||||
| 4 | ★ Crack of Doom | 5.10a | ||||
| 5 | ★★ Hairline | 5.11b | ||||
| 6 | ★★ Moongerms | 5.12a | ||||
| 7 | Crack of Deliverance | 5.9 | ||||
| 8 | Elephant's Eliminate | 5.12d | ||||
1.1.4.6. Elephant Rock Boulders
- Summary:
-
2 routes in Area
Todo Escalada en roca
| Route | Grade | Style | Selected ascents | |||
|---|---|---|---|---|---|---|
| 1 | Monster Boulder | 5.11a | ||||
| 2 | Jaws | 5.12a | ||||
1.1.5. Overview
- Summary:
-
11 routes in Area
Todo Escalada en roca
| Route | Grade | Style | Selected ascents | |||
|---|---|---|---|---|---|---|
| 1 | ★ Spinal Tap | 5.11b | ||||
| 2 | Like a Hurricane | 5.11a | ||||
| 3 | ★ Digital Delight | 5.12a | ||||
| 4 | Bone Yard | 5.10b | ||||
| 5 | ★ Emotional Wreckage | 5.11b | ||||
| 6 | Walking on Mars | 5.12 | ||||
| 7 | ★ Inch-and-a-Quarter Blues | 5.11a | ||||
| 8 | Gorilla Grip | 5.11c | ||||
| 9 | ★ Bridwell Corner | 5.9 | ||||
| 10 | ★★★ Whipchord | 5.13c | ||||
| 11 | Country Corner | 5.9 | ||||
1.2. Discovery View
- Summary:
-
1 route in Area
Todo Escalada en roca
| Route | Grade | Style | Selected ascents | |||
|---|---|---|---|---|---|---|
| 1 | ★ Overdrive | 5.11a | ||||
1.3. Wawona Tunnel, Eastern Vent
- Summary:
-
1 route in Area
Todo Escalada en roca
| Route | Grade | Style | Selected ascents | |||
|---|---|---|---|---|---|---|
| 1 | ★ Pump Dummy | 5.11d | ||||
1.4. Flagman Buttress
- Summary:
-
2 routes in Area
Todo Escalada en roca
| Route | Grade | Style | Selected ascents | |||
|---|---|---|---|---|---|---|
| 1 | Scrub Scouts | 5.10c | ||||
| 2 | Flagman | 5.11a | ||||
1.5. Pulpit Rock
- Summary:
-
Mayormente Escalada en roca
1.5.1. Southeast Face
- Summary:
-
6 routes in Area
Mayormente Escalada en roca
| Route | Grade | Style | Selected ascents | |||
|---|---|---|---|---|---|---|
| 1 | Notch Route | 5.10b | ||||
| 2 | East Face | 5.10c | ||||
| 3 | ★★ Tree Route | 5.9 | ||||
| 4 | Improbable Traverse | 5.7 | ||||
| 5 | Original Sin | 5.10c | ||||
| 6 | ★ Pulpit Pooper | 5.10b | ||||
1.5.2. Northwest Face
- Summary:
-
5 routes in Area
Todo Escalada en roca
| Route | Grade | Style | Selected ascents | |||
|---|---|---|---|---|---|---|
| 1 | Sky Pilot | 5.10c | ||||
| 2 | ★★ The Sermon | 5.10b | ||||
| 3 | Waste of Time | 5.10c | ||||
| 4 | ★★ Magilla Gorilla | 5.11b | ||||
| 5 | ★ Gorilla Cookies | 5.10d | ||||
1.5.3. High Pressure Cliff
- Summary:
-
3 routes in Area
Todo Escalada en roca
| Route | Grade | Style | Selected ascents | |||
|---|---|---|---|---|---|---|
| 1 | ★ High Pressure | 5.11b | ||||
| 2 | Open Trench | 5.10a | ||||
| 3 | Lost of Venus | 5.7 | ||||
1.6. Wawona Tunnel, West End
- Summary:
-
8 routes in Area
Todo Escalada en roca
| Route | Grade | Style | Selected ascents | |||
|---|---|---|---|---|---|---|
| 1 | ★ A Dog's Roof | 5.12b | ||||
| 2 | ★ A Bit of OK | 5.12b | ||||
| 3 | Walk On By | 5.10a | ||||
| 4 | Your Pizza Is Ready | 5.9 | ||||
| 5 | ★ Eat at Degnan's | 5.9 | ||||
| 6 | Pohono The Barbarian | 5.10a | ||||
| 7 | Landshark | 5.12a | ||||
| 8 | Dancin' Days | 5.11c | ||||
1.7. Wawona Tunnel, West
- Summary:
-
2 routes in Area
Todo Escalada en roca
| Route | Grade | Style | Selected ascents | |||
|---|---|---|---|---|---|---|
| 1 | I Don't Know | 5.10a | ||||
| 2 | I Don't Remember | 5.9 | ||||
1.8. Cream Area
- Summary:
-
6 routes in Area
Todo Escalada en roca
| Route | Grade | Style | Selected ascents | |||
|---|---|---|---|---|---|---|
| 1 | ★★ Cream | 5.11a | ||||
| 2 | ★ Jam Session | 5.10b | ||||
| 3 | Cartwheel | 5.10a | ||||
| 4 | Monkey Do | 5.10c | ||||
| 5 | ★★★ Energy Crisis | 5.11d | ||||
| 6 | Shiver-Me-Timbers | 5.8 | ||||
1.9. The Blowhole
- Summary:
-
6 routes in Area
Todo Escalada en roca
| Route | Grade | Style | Selected ascents | |||
|---|---|---|---|---|---|---|
| 1 | ★★ Thar She Blows | 5.11a | ||||
| 2 | ★★ Honk If Your Horny | 5.10c | ||||
| 3 | ★ Wind Tunnel | 5.10b | ||||
| 4 | ★ The Fledgling | 5.10a | ||||
| 5 | ★ Fire in the Hole | 5.10b | ||||
| 6 | ★★ Variation | 5.10a | ||||