
A Crag Guide gives an extensive view of all sub areas and climbs at a point in the index. It shows a snapshot of the index heirachy, up to 300 climbs (or areas) on a single web page. It shows selected comments climbers have made on a recently submitted ascent.
At a minor crag level this should be suitable for printing and taking with you on a climbing trip as an adjunct to your guidebook.
This guide was generated anonymously. Login to show your logged ascents against each route.
Warning
Rock climbing is extremely dangerous and can result in serious injury or death. Users acting on any information directly or indirectly available from this site do so at their own risk.
This guide is compiled from a community of users and is presented without verification that the information is accurate or complete and is subject to system errors. By using this guide you acknowledge that the material described in this document is extremely dangerous, and that the content may be misleading or wrong. In particular there may be misdescriptions of routes, incorrectly drawn topo lines, incorrect difficulty ratings or incorrect or missing protection ratings. This includes both errors from the content and system errors.
Nobody has checked this particlular guide so you cannot rely on it's accuracy like you would a store bought guide.
You should not depend on any information gleaned from this guide for your personal safety.
You must keep this warning with the guide. For more information refer to our:
Usage policy
Contributors
Thanks to the following people who have contributed to this crag guide:
Tommy Krauss
Jacob Stoakes
Chris L
Brendan Heywood
Jake
Kris Penn
Mani Baker
Murray
Alec Landstra
Nick Hanson
The size of a person's name reflects their Crag Karma, which is their level of contribution. You can help contribute to your local crag by adding descriptions, photos, topos and more.
Table of contents
- 1.
Bicheno
235 in Crag
- 1.1. Whalers Lookout 2 in Area
- 1.2. Lookout Rock 4 in Area
-
1.3.
The Blowhole Area 69 in Area
- 1.3.1. Whale Boulder 6 in Boulder
- 1.3.2. Old Man / Warm Up boulders 10 in Boulder
- 1.3.3. Blowhole Walls 22 in Boulder
- 1.3.4. Blowhole Boulder 3 in Area
- 1.3.5. Exploding Crystals Boulders 16 in Boulder
- 1.3.6. Mushroom Boulder 2 in Boulder
- 1.3.7. Crab Boulders 9 in Boulder
- 1.3.8. Gaston Wall 1 in Boulder
- 1.4. Suntrap Cove 15 in Area
-
1.5.
The Block Area 57 in Area
- 1.5.1. The Wall 20 in Area
- 1.5.2. The Block 12 in Area
- 1.5.3. Grey Dog Boulder 12 in Area
- 1.5.4. The Orange Slab 5 in Area
- 1.5.5. The Black Slab 5 in Area
- 1.5.6. The White Slab 3 in Area
-
1.6.
Peggys Point 35 in Area
- 1.6.1. Abalone Boulder 14 in Boulder
- 1.6.2. Stingray Boulder 6 in Boulder
- 1.6.3. Crayfish Boulder 9 in Boulder
- 1.6.4. Squid Boulder 6 in Boulder
- 1.7. Diamond Island 41 in Area
- 1.8. Little Beach 0 in Area
-
1.9.
Harvey's farm headland 12 in Cliff
- 1.9.1. Moby dick cave 1 in Boulder
- 1.9.2. Aplite wall #1 1 in Boulder
- 1.9.3. Sliders Wall 3 in Boulder
- 1.9.4. Aplite wall #2 1 in Boulder
- 1.9.5. Black Arete Boulder 3 in Boulder
- 1.9.6. Lower Boulder 3 in Boulder
- 2. Index by grade
1. Bicheno 235 routes in Crag
- Summary:
-
Mostly 볼더링
Lat / Long: -41.887397, 148.309503
The operation and use of drones by park visitors on reserved land including national parks is not permitted
Peregrine Falcons nest from July - December each year. It’s important that climbers don’t climb near active nests during this period. Known sites (non exhaustive) are: Sand River (Far East, The Panopticon), Bare Rock (R of the Boneyard, L of Bisso of Orange), Rocky Cape, Pubic Wall/Duck Reach, Hillwood, Gunners Quoin, Lowdina.
Please note that Tasmania has notoriously patchy phone reception for particular service providers. Telstra is the most reliable. An emergency Personal Locator Beacon or similar is recommended kit when climbing in remote locations.
For more information - follow the link below for some local tips + tricks on how to better reduce your impact during your next Tassie climbing holiday
")
설명
Bicheno is a small town on the east coast of Tasmania with a population of approximately 850 people. The town is primarily a fishing port and a beach resort.
접근 문제들
Many locals continue to use community run website thesarvo.com for crag/route updates and noting any access issues. The associated app can be downloaded and used offline!
http://thesarvo.com/confluence/display/thesarvo/Tasmania
Gerry Narkowicz also produces hardcopy guides to numerous venues across the state via the 'Climb Tasmania' website
접근
Bicheno is easily accessible by car via the Tasman Highway.
숙박 장소
There is a range of places to stay in Bicheno, from hostels to luxury resorts.
윤리문제
Crag Stewards
Many Tasmanian climbing areas have Stewards assigned as a point of contact for safety or access concerns.
For more details and the list of Steward emails please visit: http://www.thesarvo.com/confluence/display/thesarvo/Introduction+to+Tasmanian+Climbing
Statewide Ethics
1.1. Whalers Lookout 2 routes in Area
- Summary:
-
모두 고전등반
Lat / Long: -41.874333, 148.307955
요약
Whalers Lookout is the northern of the two rocky hills in Bicheno.
설명
Follow the walking trail north past some slabby cliffs, until you turn right towards steeper buttresses
접근
Park in a gravel spot on Foster Street and walk up Whalers Lookout Track
| Route | Grade | Style | Selected ascents | |||
|---|---|---|---|---|---|---|
| 1 |
★ Moby Dick
On the first buttress climb boldly up thin flake to a peg in the break, small cam also, then hard over bulge. FA: N. Hancock, 2005 | 25 | 6m | |||
| 2 |
★ Qui Quegs Coffin
On the main area 50 metres further south along the trail, climb the hanging groove. FA: N., 2005 | 22 | 8m | |||
1.2. Lookout Rock 4 routes in Area
- Summary:
-
모두 고전등반
Lat / Long: -41.877986, 148.305650
| Route | Grade | Style | Selected ascents | |||||
|---|---|---|---|---|---|---|---|---|
| 1 |
Life Threatening Blood Clot
On the way up the track you'll pass a blank looking wall with a horizontal break at half height. Climb the centre of the wall via two poor #5 Rocks, and finish with trepidation. FA: N. Hancock, 2001 | 22 | 6m | |||||
  |
||||||||
| Route | Grade | Style | Selected ascents | |||||
| 2 |
★ Economy Class Syndrome
On the west face of Lookout Rock itself is a L facing flake crack. Layback up this to a move R onto the slab. Up to a ledge and tree, then climb the final wall to the top. FA: N. Hancock, 2001 | 20 | 25m | |||||
| 3 |
★★ Deep Vein Thrombosis
On the R side of the north face, up the gully to the L of Economy Class Syndrome is a thin finger crack, with hard to place wires at the top. FA: N. Hancock, 2001 | 26 | 15m | |||||
| 4 |
★ Corn Flakes
This climb is located on the path, up to the lookout, on the L. There is a wall with a Flake/crack on the R side. Follow this to top. No recording of any previous ascent. FA: David Barnes, 2005 | 17 | 12m | |||||
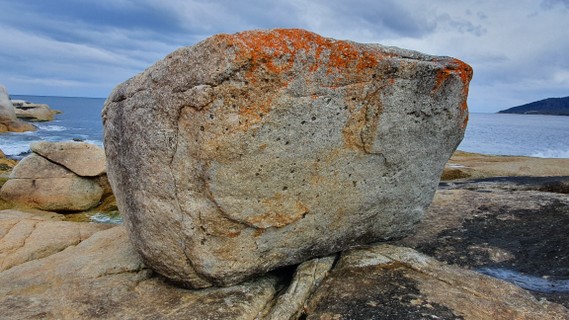
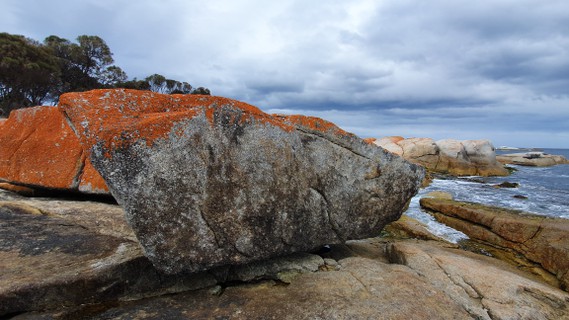
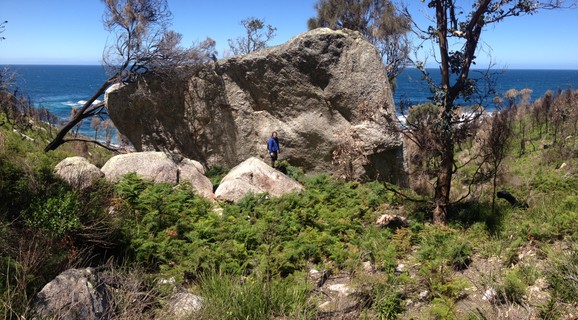
1.3. The Blowhole Area 69 routes in Area
- Summary:
-
모두 볼더링
Lat / Long: -41.879778, 148.308730
요약
There are some great problems on the freestanding boulders and walls around the blowhole.
설명
Some of the lower lying boulders such as Whale Boulder, Old Man Boulder, Warm Up Boulder and the Blowhole Walls can only be climbed on around low tide. Everything else is pretty much fine unless you happen to be there during king tide.
접근
Follow the signs off the main road to get to the the parking area for the Blowhole, then walk 50m out to the obvious block.
1.3.1. Whale Boulder 6 routes in Boulder
- Summary:
-
Lat / Long: -41.880551, 148.308761
설명
South facing slightly overhanging wall
접근
About 30 metres south of the Blowhole. Requires low tide and low swell.
 |
||||||||
| Route | Grade | Style | Selected ascents | |||||
|---|---|---|---|---|---|---|---|---|
| 1 |
★★ Sperm Whale
Sitstart on low hold, hit arete to the left and up | V6 | 3m | |||||
| 2 |
★ Right Whale
Project - Same start as Sperm Whale, blast high and right to side pull-ish feature and then up. | V10 | 3m | |||||
| 3 |
★★ Minke Whale
Sit - Up on Flakes | V3 | 2m | |||||
| 4 |
Narwhale
Sit start. Undercling and up | V1 | 2m | |||||
| 5 |
★ Blue Whale
Stand - Flakes to high topout. SDS is a project | V1 | 2m | |||||
| 6 |
★★ Humpback Arete
Sit - Classic steep arete to slopey topout on right hand end of boulder. | V5 | 3m | |||||
1.3.2. Old Man / Warm Up boulders 10 routes in Boulder
- Summary:
-
Lat / Long: -41.880734, 148.308738
설명
Boulders near the blowhole, further south of the Whale Boulder.
접근
Requires low tide and swell.
| Route | Grade | Style | Selected ascents | |||||
|---|---|---|---|---|---|---|---|---|
Old Man BoulderDirectly across from the Whale boulder | ||||||||
| 2 |
Flake to groove
SDS | V3 | 2m | |||||
| 3 |
Pockets
SDS. Pull through the shallow pockets to top out. | V4 | 2m | |||||
  |
||||||||
| Route | Grade | Style | Selected ascents | |||||
|
On the back of this boulder | ||||||||
| 5 |
Flake
SDS | V1 | 2m | |||||
Warmup BoulderThe long face behind the previous boulder | ||||||||
| 7 |
Juggy face
SDS | V0 | 2m | |||||
| 8 |
Quartz jugs
SDS | V0 | 2m | |||||
| 9 |
Quartz arete
SDS | V0 | 2m | |||||
| 10 |
Buldge
SDS - Layback off the buldge, pull up through the ridge. Set: Chris Lang, 6월 2015 | V0 | 2m | |||||
| 11 |
Layback
SDS - Layback on the crack. Set: Chris Lang, 6월 2015 | V0 | 2m | |||||
| 12 |
★ Arete
SDS 1 handed off the round arete hold, up through jugs. Can be campused for an extra grade. Set: Chris Lang | V1 | 2m | |||||
| 13 |
★ Ironing board
About 3m right of Arete, find the large horizontal overhanging flake. Start underneath, work your way around and up to top out. FA: Chris Lang, 6월 2015 | V2 | 2m | |||||
1.3.3. Blowhole Walls 22 routes in Boulder
- Summary:
-
Lat / Long: -41.880351, 148.308976
설명
There are some great vertical to slightly overhanging square cut walls below and south of the Blowhole. Most if not all of these problems depend on a low tide and swell.
접근
Directly below and South of Blowhole
| Route | Grade | Style | Selected ascents | |||||
|---|---|---|---|---|---|---|---|---|
| 1 |
V3 a
Stand start. Up the right side of the arete. Potential for sit start | V3 | 3m | |||||
| 2 |
V2
Stand start. | V2 | 3m | |||||
| 3 |
V3/4 - 1
SDS | V4 | 3m | |||||
| 4 |
V4
SDS | V4 | 3m | |||||
| 5 |
VE a
Stand | VB | 2m | |||||
| 6 |
VE b
Stand | VB | 2m | |||||
| 7 | V3 b | V3 | 2m | |||||
| 8 | Project | 3m | ||||||
| 9 | V3/4 a | V4 | 2m | |||||
| 10 | V3/4 b | V4 | 2m | |||||
| 11 | VE c | VB | 2m | |||||
| 12 | VE d | VB | 2m | |||||
| 13 | V3 c | V3 | 2m | |||||
| 14 | V3/4 c | V4 | 2m | |||||
| 15 | V3 e | V3 | 2m | |||||
|
Next is around the corner into the next little zawn, below Blowhole Boulder | ||||||||
| 17 | V2/3 | V3 | 2m | |||||
| 18 | V1 | V1 | 2m | |||||
| 19 | V? | 2m | ||||||
| 20 | There she blows | V5 | 2m | |||||
|
This is directly under Blowhole Boulder: | ||||||||
| 22 | V0 | V0 | 2m | |||||
| 23 | V1 A | V1 | 2m | |||||
| 24 | V1 B | V1 | 2m | |||||
  |
||||||||
1.3.4. Blowhole Boulder 3 routes in Area
- Summary:
-
Lat / Long: -41.880281, 148.308959
요약
The main freestanding boulder directly next to the blowhole
  |
||||||||
| Route | Grade | Style | Selected ascents | |||||
|---|---|---|---|---|---|---|---|---|
| 1 |
★★ Blow Job
Sit start on crimps and then up, classic Tassie test piece. Stand start goes at around V5 from highest crimp and the big flake in the middle of the face. | V8 | 4m | |||||
| 2 |
★★ Blown Away
On the backside of the boulder climb the left arete (ocean side) to the top. A great problem but scary at the start | V2 | 3m | |||||
| 3 |
★ There She Blows
Again on the backside of the boulder. Start in the scoop in the middle of the face trend right to jugs and follow jug rail traverse to summit. | V0 | 3m | |||||
1.3.5. Exploding Crystals Boulders 16 routes in Boulder
- Summary:
-
Lat / Long: -41.879733, 148.308552
설명
Three freestanding boulders. Rock isn't as good as some of the other boulders and tends to be a bit gravelly.
These three free standing boulders are about 40m north of the Blowhole.
접근
About 40m north of the Blowhole
 |
||||||||
| Route | Grade | Style | Selected ascents | |||||
|---|---|---|---|---|---|---|---|---|
| 1 |
★ Bohemian Crystals
Sit start on arete. Left hand in good low jug side pull and right hand on slopey face. Climb up and left. A spotter is nice | V2 | 1m | |||||
| 2 |
★ Slab 1
Left most slab towards the back then orange top out. | V0 | 2m | |||||
| 3 |
★ Slab 2
Easiest slab up the middle of the boulder, between My Brown Dog and Slab 1 | V0 | 2m | |||||
| 4 |
★ Hot Dog
Stand start the arete to the left of My Brown Dog, east and fun slab climbing | VB | 3m | |||||
| 5 |
★ My Brown Dog
Sitstart and up crack | V2 | 2m | |||||
| 6 |
★ Mantlepiece Stand
Stand start on the huge step and mantle the top of the boulder | VB | 2m | |||||
| 7 |
Mantlepiece Sit
Sit start the mantlepiece and mantle as for the stand | 2m | ||||||
| 8 |
★ Dark Crystal
Sit start on two mediocre crimps with your right foot on the good shelf like protrusion, pull up and mantle the left end of the boulder | V2 | 2m | |||||
| 9 |
★ Skeksis
Stand start and mantle straight up | VB | 2m | |||||
| 10 |
★ Mystics
Stand start and mantle towards the right hand side of the boulder | VB | 2m | |||||
 |
||||||||
| Route | Grade | Style | Selected ascents | |||||
| 11 |
V2
Stand start 2m L of V5 on sloppers and mantle over top | V2 | 2m | |||||
| 12 |
★★★ V5
V5, sit start about 1.5 metres left of left cleft. mantle onto the boulder from slopers. | V5 | 1m | |||||
| 13 |
★ Left Cleft
Start on slopey protrusions at the base of the left cleft. Slap up and left to the lip and fight upwards. | V8 | 3m | |||||
| 14 |
★★ High Tide
Sit start side pulling on the furthest left side pull/crack feature to the right of Left Cleft. Top out straight up. | V3 | 2m | |||||
| 15 |
★ Low Tide
Sit start with left hand on good flake and punch up | V1 | 3m | |||||
| 16 |
★ Drowned
Around right arete of boulder High Tide is on, pull on two slopey edges stand starting and mantle the boulder. | V4 | 1m | |||||
1.3.6. Mushroom Boulder 2 routes in Boulder
- Summary:
-
Lat / Long: -41.879609, 148.308491
설명
Obvious mushroom-like looking boulder, problem faces inland.
접근
Next to the Exploding Crystals Boulders, maybe 5m away.
 |
||||||||
| Route | Grade | Style | Selected ascents | |||||
|---|---|---|---|---|---|---|---|---|
| 1 |
★ The Mushroom
SDS - Pull up using crack and anything else, gain sloppy arete and then topout. | V7 | 2m | |||||
| 2 |
Not Much-room
Sit start at next arete right using good flake with foot on good hold. Stand up to jugs and move slightly left to mantle | V3 | 2m | |||||
1.3.7. Crab Boulders 9 routes in Boulder
- Summary:
-
Lat / Long: -41.879144, 148.308903
설명
Mostly slabby to vertical walls.
접근
These boulders are about another 50m north of the Exploding Crystals Boulders.
  |
||||||||
| Route | Grade | Style | Selected ascents | |||||
|---|---|---|---|---|---|---|---|---|
| 1 |
★ Hermit Crab
Heel hook start then up hanging arete. (SDS) | V5 | 3m | |||||
| 2 |
★ Easy Slab
(Stand) | VB | 3m | |||||
| 3 |
★ Mud Crab
(SDS) | V2 | 3m | |||||
| 4 |
★ VE
(Stand) | VB | 3m | |||||
| 5 |
North Side VE
The next few problems are on the northern side of the boulders. | VB | 3m | |||||
| 6 |
V2 Arete
Arete in the centre. (SDS) | V2 | 3m | |||||
| 7 |
★★ Giant Crab
Flakes then up centre of block. (Stand) | V2 | 3m | |||||
| 8 |
V0
(Stand) | V0 | 3m | |||||
| 9 |
Inner Slab
There are a few easy slab problems in the crack in between the boulders. (Stand) | V0 | 3m | |||||
1.3.8. Gaston Wall 1 route in Boulder
- Summary:
-
설명
Nice wall.
접근
Some way back towards the land from the Crab Boulders.
| Route | Grade | Style | Selected ascents | |||
|---|---|---|---|---|---|---|
| 1 | Project | V9 | ||||
1.4. Suntrap Cove 15 routes in Area
- Summary:
-
모두 볼더링
Lat / Long: -41.878071, 148.308417
설명
Halfway between Crab Boulders and The Block Area is a small cove with several large boulders on the southern side.
 |
||||||||
| Route | Grade | Style | Selected ascents | |||||
|---|---|---|---|---|---|---|---|---|
| 1 |
VE Arête
Sit start arête. | VB | 3m | |||||
| 2 |
★ V3 Crack
Sit start crack with LH crimp | V3/4 | 3m | |||||
| 3 |
★★ V2 Arête
Sit start with left facing flake. | V3 | 3m | |||||
| 4 |
V4 Face
Pull into undercling and up. | V4 | 3m | |||||
| 5 |
V2 Flake
Sit start on flake and head up right. | V2 | 3m | |||||
  |
||||||||
| Route | Grade | Style | Selected ascents | |||||
| 6 |
★ V1 Sit
SDS. Up on flake | V1 | 3m | |||||
| 7 |
★ V3
SDS. Ugly first move leads to crimp and highstep. Best avoided. | V3 | 3m | |||||
| 8 |
★ V1 Stand
Step onto hold/rock and head for the top. | V1 | 3m | |||||
| 9 |
★ Suntrap 1
Pull onto the face with a high foot. FA: Mike Hitchcock | V2 | 2m | |||||
| 10 |
★ Suntrap 2
Start on slopey rail and head up through more slopes. FA: Mike Hitchcock | V4 | 2m | |||||
| 11 |
★★ Angry Penguins
Sit start art with LH and RH on arête. | V5 | 3m | |||||
| 12 |
★ Suntrap 3
Start in crack using right arete. FA: Mike Hitchcock | V4 | 2m | |||||
 |
||||||||
| Route | Grade | Style | Selected ascents | |||||
| 13 |
Monkey See Monkey Do
Sit start with both hands and feet on the arete, lay back your way up to top corner of arete then trend left not using the top of the boulder until you pass the ‘disconnected’ bloc then top out to finish. FA: marlow johnson, 26 4월 2023 | VB - 1 | ||||||
| 14 |
★★ Hook Line And Sphincter
Sit down start matched on small crimp just above the obvious big undercling crimp, be smart with your feet then big move up with the right to the jug (or gaston crimp if your feeling like adding a grade), slap the top to the left of the ‘disconnected’ bloc then top out FA: marlow johnson, 26 4월 2023 | V2/3 | ||||||
| 15 |
Twinkle Toes
Sit start using the big feature with your right hand and low down crimp with your left. Stand up trusting thin feet to your on the orange face, work your way to the two side pull crimps out left, then traverse your way along the face without using any of the top holds, once you pass the obvious crack, from there top out to finish FA: marlow johnson, 26 4월 2023 | V3 | ||||||
1.5. The Block Area 57 routes in Area
- Summary:
-
Mostly 볼더링
Lat / Long: -41.876676, 148.310123
1.5.1. The Wall 20 routes in Area
- Summary:
-
모두 볼더링
Lat / Long: -41.876678, 148.310118
 |
||||||||
| Route | Grade | Style | Selected ascents | |||||
|---|---|---|---|---|---|---|---|---|
| 1 | ★ 1. V3 | V3 | 3m | |||||
| 2 |
★ 2. Another Brick in the Wall
Stand start on two obvious sloppers above head height, punch straight up to mantle over lip | V4 | 3m | |||||
| 3 | ★★ 3. V0 (SDS) | V0 | 3m | |||||
| 4 |
★★ 4. Wall of China
Start on good side pull + rail, up and left staying off the horn and corner system | V5 | 3m | |||||
| 5 | ★★ 5. Berlin Wall | V6 | 3m | |||||
| 6 | ★ 6. V0 | V0 | 3m | |||||
| 7 | ★ 7. V2 (SDS) | V2 | 3m | |||||
| 8 | 8. V8 | V8 | 3m | |||||
| 9 |
9. v0
On the next wall R. Up diagonal line. | V0 | 3m | |||||
| 10 |
★ 10. V0
The next crack/arete R of the diagonal line. | V0 | ||||||
 |
||||||||
| Route | Grade | Style | Selected ascents | |||||
| 11 |
★★ Low Wall Left
Stand stand on the good holds at head height and move upwards via good pockets. | V0 | 3m | |||||
| 12 |
★ Low Walls Sit
Sit start with left hand in good sidepull and right hand in good incut at roughly the same height. Feet on good block below and make a big move to finish up Low Wall | V2 | 4m | |||||
| 13 |
Rising Wall
Sit start the good flake and follow it up left, finishing up Low Wall | V0 | 4m | |||||
| 14 |
★★ Flake Right
Sit start on the flake and head up and right over the slabby finish | V0 | 4m | |||||
| 15 |
Black Slab
Stand start on the good incut holds and head straight up | V0 | 4m | |||||
| 16 |
Cracking Wall
Sit start the main crack and top out straight up | V0 | 4m | |||||
| 17 |
Drywall
Sit start the crack and head up to an easier finish over the lip | V3 | 4m | |||||
| 18 |
Hadrian's Wall
Stand start on good holds and head up via tricky lip section | V2 | 3m | |||||
| 19 |
Wall-E
Sit start on the pedestal and climb the crack feature to the top | V1 | 4m | |||||
| 20 |
Wall Traverse
Full traverse of the lip, right to left. | V2 | 10m | |||||
1.5.2. The Block 12 routes in Area
- Summary:
-
모두 볼더링
Lat / Long: -41.876621, 148.310238
  |
||||||||
| Route | Grade | Style | Selected ascents | |||||
|---|---|---|---|---|---|---|---|---|
| 1 |
★★ Road Block
Hang start on the side pull jug jug and pull through to the top on slopes. | V7 | 3m | |||||
| 2 |
V2
SDS. Up the corner. | V2 | 3m | |||||
| 3 |
★ V7
SDS. Start on jug, up through slopes. | V7 | 3m | |||||
| 4 |
★ Problem 2.
Pull up off thin slopes | V5 | 1m | |||||
| 5 |
★★ Block Rockin' Beats
SDS. Climb the steep left arete on pockets. | V6 | 3m | |||||
| 6 |
★ V3/4 Stand
Pull up on flake and mantle over the top of steep face | V4 | 3m | |||||
 |
||||||||
| Route | Grade | Style | Selected ascents | |||||
| 7 |
★ V2 Arete
Near left arete. | V2 | 3m | |||||
| 8 |
★ V1 Slab
Up slab | V1 | 3m | |||||
| 9 |
★ V1 Sit
SDS. Up flake. | V1 | 3m | |||||
| 10 |
★ V2 Sit
SDS. Start as for previous problem, but move right through pockets. | V2 | 3m | |||||
| 11 |
V2 Stand
Start in small depression, move up slab using underclings. | V2 | 3m | |||||
| 12 |
V7 Sit
SDS. Up using undercling and crack. | V7 | 3m | |||||
1.5.3. Grey Dog Boulder 12 routes in Area
- Summary:
-
모두 볼더링
설명
The orange slab adjacent to The Block
  |
||||||||
| Route | Grade | Style | Selected ascents | |||||
|---|---|---|---|---|---|---|---|---|
| 1 |
★ Left
Left side of slab. | V0 | 3m | |||||
| 2 |
★ Middle
Crack in middle of slab. | VB | 3m | |||||
| 3 |
Right
Right side of slab. | V0 | 3m | |||||
| 4 |
★ Grey Dog
SDS. Use the undercling to the top, then head left. | V4 | 3m | |||||
| 5 |
★ Glory Hole
In the middle of the back of the Grey Dog boulder, start down in hole, climb the nice flake. | V0 | 3m | |||||
| 6 |
V2 Sit
Start a couple of metres right of Glory Hole off the blocks. Sitstart off sidepull, move L up face. | V2 | 3m | |||||
| 7 |
★★ VE
Easy cracks to R of previous problem | VB | 3m | |||||
| 8 |
V0
SDS. Diagonal crack left of arete | V0 | 3m | |||||
 |
||||||||
| Route | Grade | Style | Selected ascents | |||||
| 9 |
★★ Shark Tooth Traverse
Start all the way left, almost around the corner on the point of the Boulder. Head rightward and top out over the highest point and as for “Jetty Shark.” FA: Tommy Krauss, 3 1월 2022 | V3 | 4m | |||||
| 10 |
★ Defence Against the Dark Sharts
Sit start on pocket-ish crimp and left hand Gaston. Pull tension move to lip and mantle. FA: Tommy Krauss, 3 1월 2022 | V4 | 2m | |||||
| 11 |
★ Jetty Shark
Sit start side pulling the crack. Straight up the via this crack and over. FA: Nick Hanson, 3 1월 2022 | V3 | 2m | |||||
| 12 |
★ Porthos
Located on the small boulder behind the grey dog, SDS,Short Overhanging crack to mantle | V3 | 3m | |||||
1.5.4. The Orange Slab 5 routes in Area
- Summary:
-
볼더링 그리고 암벽등반
Lat / Long: -41.876560, 148.310225
 |
||||||||
| Route | Grade | Style | Selected ascents | |||||
|---|---|---|---|---|---|---|---|---|
| 1 | ★ 1. V2/3 | V3 | 2m | |||||
| 2 | 2. V? Project | 3m | ||||||
| 3 | 3. V6? Project | 3m | ||||||
| 4 | ★★★ 4. Fully Sick Mate | V4 | 3m | |||||
| 5 | ★★ 5. V1 | V1 | 3m | |||||
1.5.5. The Black Slab 5 routes in Area
- Summary:
-
볼더링 그리고 암벽등반
| Route | Grade | Style | Selected ascents | |||
|---|---|---|---|---|---|---|
| 1 | V? | ? | 3m | |||
| 2 | VE | VE | 3m | |||
| 3 | ★ V1 | V1 | 3m | |||
| 4 | ★★ The Black Slab | V1 | 3m | |||
| 5 | ★ V0 | V0 | 3m | |||
1.5.6. The White Slab 3 routes in Area
- Summary:
-
모두 볼더링
| Route | Grade | Style | Selected ascents | |||
|---|---|---|---|---|---|---|
| 1 | ★ V1 | V1 | 3m | |||
| 2 | ★ V0 | V0 | 3m | |||
| 3 | ★ The White Slab | V2 | 3m | |||
1.6. Peggys Point 35 routes in Area
- Summary:
-
모두 볼더링
Lat / Long: -41.869993, 148.305986
설명
Couple of great freestanding boulders directly on the coast.
접근
Park near the Silver Sands Resort and walk across the oval and down to the coast.
1.6.1. Abalone Boulder 14 routes in Boulder
- Summary:
-
Lat / Long: -41.870545, 148.306623
설명
This is the more southerly of the two freestanding boulders. It has excellent fine grained rock.
 |
||||||||
| Route | Grade | Style | Selected ascents | |||||
|---|---|---|---|---|---|---|---|---|
| 1 |
★ Crab Stick
From jug up left to flake and topout, to the left of Piece of Flake | V3 | 2m | |||||
| 2 |
★★ Piece of Flake
up large flake to the left of Fish and Chips | V1 | 2m | |||||
| 3 |
★ Fish and Chips
arete and corner of south-east facing faces | V0 | 2m | |||||
| 4 |
★★ Ab Diver
From the curving crack pull up the face. V2 from standing. | V5 | 2m | |||||
| 5 |
★ Lemon and Garlic
Up face left of Soy Sauce, sit start is a project | V1 | 2m | |||||
| 6 |
★ Soy Sauce
Corner left of Abalone Arete | V0 | 2m | |||||
 |
||||||||
| Route | Grade | Style | Selected ascents | |||||
| 7 |
★★ Abalone Arete
Sit start at the crack on the arete two metres left of hangman. Move left to big undercling flake on the arete and up. | V4 | 2m | |||||
| 8 |
★ Flathead
Stand start the Crack left of Hangman | V1 | 2m | |||||
| 9 |
★★ Hangman
Sit start the north-west facing face using right hand pinch of the undercling on the face, pull up and gain short hanging crack. Stand start is V1 | V8 | 2m | |||||
| 10 |
★ Mullet
SDS - Crack in middle of north-west facing face. | V2 | 2m | |||||
| 11 |
V0
Stand start about one metre left of right hand end of mort-west facing face. | V0 | 2m | |||||
| 12 |
Kelpie
Stand - Crusty right hand arete of north-west facing face. | V2 | 2m | |||||
| 13 |
★ V3
Traverse the whole boulder via the top lip. | V3 | 2m | |||||
| 14 |
Mullet Sticks
Project - stand start at Mullet and traverse leftward without using the top of the boulder to finish at Crab Stick | V6 | 2m | |||||
1.6.2. Stingray Boulder 6 routes in Boulder
- Summary:
-
Lat / Long: -41.870548, 148.306428
설명
This boulder is the short, triangular boulder around 20m north of Abalone Boulder
   |
||||||||
| Route | Grade | Style | Selected ascents | |||||
|---|---|---|---|---|---|---|---|---|
| 1 |
★ Stingray
Start by compressing both slopey sides of the boulder, make a move and mantle of the highest part of the boulder FA: Tommy Krauss | V2 | 2m | |||||
| 2 |
Babyray
Sit start on the lip jug in the hanging corner to the right of Stingray, mantle the top FA: Tommy Krauss | VB | 1m | |||||
| 3 |
Dorsal Fin
Climb the slabby face, very easy yet fun, great boulder problem for kids FA: Tommy Krauss | VB- | 2m | |||||
| 4 |
Stinger Arete
Sit start the left arete of the orange face and slap your way to the highest point of the boulder and mantle FA: Tommy Krauss | V1 | 2m | |||||
| 5 |
Venom
Sit start the right arete of the orange face using the slopers on the sea-facing side and slap your way to the highest point of the boulder and mantle, trickier than it looks FA: Tommy Krauss | V2 | 2m | |||||
| 6 |
Bull Ray
Sit start the slab on the ocean facing side of the boulder and mantle FA: Tommy Krauss | V0 | 2m | |||||
1.6.3. Crayfish Boulder 9 routes in Boulder
- Summary:
-
Lat / Long: -41.869653, 148.305975
설명
This free standing boulder is less than 100m north of the Abalone Boulder, and has an overhanging east face.
  |
||||||||
| Route | Grade | Style | Selected ascents | |||||
|---|---|---|---|---|---|---|---|---|
| 1 |
★ Craypot
Up jugs on face | V1 | 2m | |||||
| 2 |
★★ Craypot direct
Start dangling on slopers over void, throw left heel into groove and mantle into left roof hold, link up onto face | V4 | 4m | |||||
| 3 |
★★ unknown
Start dangling on slopers just right of Craypot with feet dangling into void, then up through horn onto face and up. | V3 | 2m | |||||
| 4 |
★ Jamburger
Sit start L of crack, bomber but painful jam, layback and mantle. FA: 2011 | V4 | 2m | |||||
| 5 | ★ Tricky Little Bastards | V3 | 2m | |||||
| 6 |
★★ The Crayfish
Sit start up through cool weird features | V0 | 2m | |||||
| 7 |
★★ The Crawfish
As for 'The Crayfish' but eliminate the easy jug, burly undercling up to protruding corner and up. | V2 | 2m | |||||
| 8 |
★★ The Belly scraper
Jump start then easy mantle | V3 | 2m | |||||
| 9 | ★ Crackpot traverse | V3 | 2m | |||||
1.6.4. Squid Boulder 6 routes in Boulder
- Summary:
-
Lat / Long: -41.870355, 148.306329
설명
Squid Boulder is a roughly two metre tall boulder between Abalone and Crayfish
  |
||||||||
| Route | Grade | Style | Selected ascents | |||||
|---|---|---|---|---|---|---|---|---|
| 1 |
★ Squid Rings
This problem is on a boulder to the north of Abalone Boulder - SDS and up jugs on overhung face. | V0 | 2m | |||||
| 2 |
★ Fried Squid
Sit start as for Squid Rings, punch up and right and mantle over somewhat bad yet low landing FA: Tommy Krauss | V0 | 2m | |||||
| 3 |
Calamari
Sit start on the good rail around the corner of Squid Rings, pull on and gain the top of the boulder via a big move, then mantle FA: Tommy Krauss | V1 | 2m | |||||
| 4 |
Octopus Mantle
Stand start on the lip and mantle the centre of the face FA: Tommy Krauss | V0 | 1m | |||||
| 5 |
Squids Nose
Stand start on the good horn and mantle FA: Tommy Krauss | V0 | 1m | |||||
| 6 |
Southern Squid
Stand start the slopey lip and mantle FA: Tommy Krauss | V1 | 1m | |||||
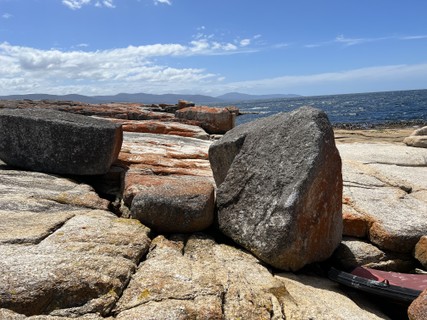
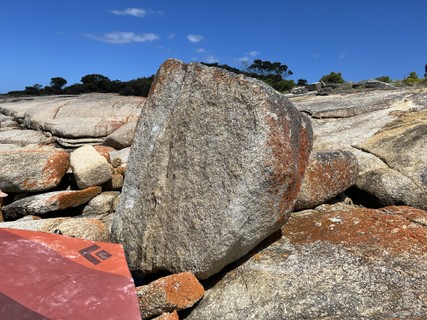
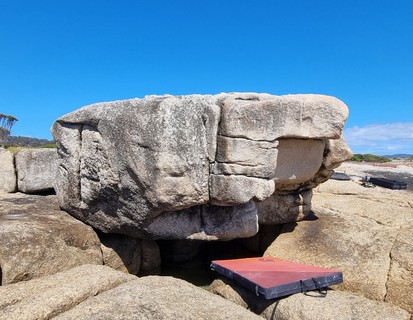
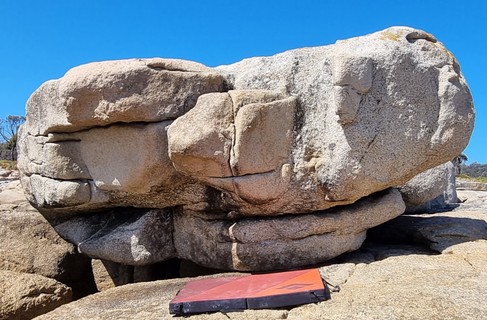
1.7. Diamond Island 41 routes in Area
- Summary:
-
모두 볼더링
Lat / Long: -41.858022, 148.289979
설명
Diamond Island has some nice freestanding boulders and walls on its seaward side.
접근
To get there park at Redbill Point and walk north along the beach to the spit which connects the island to the mainland. At low tide you should be able to easily walk across. Walk around the southern side of the island for about 5 minutes or so until you get to the south east corner where the boulders start.
윤리문제
Nesting site of many bird species including penguins. Leave the animals alone and respect the island in general.
역사
Routes collected and added to the crag. Names and grades kept as they were however Moby Dick Wall had no grades or names despite likely being climbed before.
| Route | Grade | Style | Selected ascents | |||||
|---|---|---|---|---|---|---|---|---|
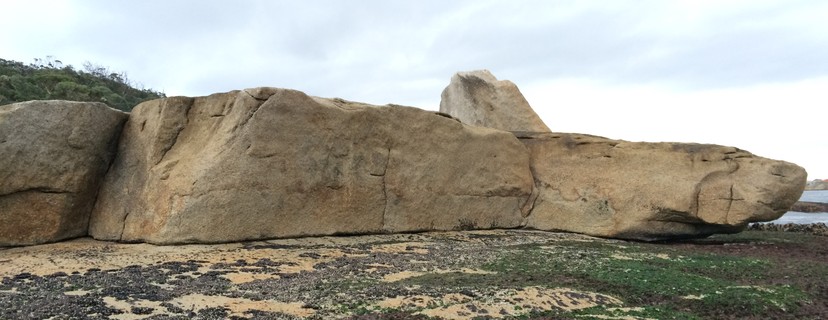
Moby Dick WallThis large sheared off wall is the first decent bit of rock you come to. | ||||||||
| 2 |
Tail End
Step off huge flake onto wall, then mantle. | V0 | 2m | |||||
| 3 |
Syke's Whale Wash
Step onto ledge and up the slabby face. | V1 | 4m | |||||
| 4 |
★★ Whale toes
Start with hands on obvious jug then move up to lip and finish out whale lips. Could be easier FA: Marco McLean, 30 1월 2023 | V8 | 4m | |||||
| 5 |
★ Whale lips
High step onto lip (hard part) then up the arete (easy part), hang start could also go. FA: Marco McLean, 30 1월 2023 | V5 | 4m | |||||
Diamond BoulderThis beautiful free standing boulder is hidden behind the red slabs to the right of the Moby Dick Wall. Landings will be effected by tide. | ||||||||
| 7 |
Don't Say it Mr Trump
Sitstart up little corner on left side of boulder | V1 | ||||||
| 8 |
VE
Easy featured slab, also the descent | VB | ||||||
| 9 |
You're Fired
Sitstart under arete, up on big jugs | V0 | ||||||
| 10 |
V2
Up face just right of arete. The thin sitstart might go. | V2 | ||||||
| 11 |
V2
Slab in middle of face. Sitstart might go. | V2 | ||||||
| 12 |
Project
Sitstart up arete to tricky slab | |||||||
|
Front of the Diamond Boulder, which faces the sea. | ||||||||
| 14 |
Project
Start on high flat hold 1m right of arete. Up to flake and topout. | |||||||
| 15 |
Jack of Diamonds
Sitstart in corner and follow ramp rightwards, then up onto ledge | V2/3 | ||||||
| 16 |
Queen Of Diamonds
Up arete from awkward sitstart | V2 | ||||||
| 17 |
King of Diamonds
Beautiful featured face. | V0 | ||||||
Barnacle Boulder30m south of the Diamond Boulder is this little roof. | ||||||||
| 19 |
Barnacle Roof
Start on hold under left side of roof. Don't use rock to the left. | V3 | ||||||
| 20 |
Barnacle Bill
Start on the right hand edge of the roof, traverse left and then up. | V3 | ||||||
Diamond in the Rough AreaFrom the Moby Dick Wall, head left down a small gulch to find this great area of freestanding boulders and walls. Most of the problems here are easy to moderate, but there are some blank slabs and walls that may or may not have been done. | ||||||||
| 22 |
V1
Face and mantle left of crack | V1 | ||||||
| 23 |
Diamond in the Rough
Crack in middle of face. The sit start is a bit awkward. Grade is an estimate.1 | V5 | ||||||
| 24 |
V3
Face using sidepulls. | V3 | ||||||
| 25 |
VE 1
Easy right arete | VB | ||||||
| 26 |
VE 2
Arete | VB | ||||||
| 27 |
VE 3
Crack | VB | ||||||
| 28 |
V3
Sitstart to jugs | V3 | ||||||
| 29 |
V3
Traverse right to left along jugs | V3 | ||||||
| 30 |
V?
Project? - hard slab up arete | |||||||
| 31 |
V0
Hand crack | V0 | ||||||
| 32 |
V? -Project
Sitstart on arete, up left | |||||||
| 33 |
V1.
Sitstart on arete, go right then up | V1 | ||||||
| 34 |
V0
Nice crack in slab | V0 | ||||||
| 35 |
V0
Nice crack in slab. Can be done as a SDS | V0 | ||||||
| 36 |
V3.
Start under little overhang, up and over. | V3 | ||||||
| 37 |
V0
Crack | V0 | ||||||
| 38 |
V2.
Nice little arete | V2 | ||||||
| 39 |
V?.
Project - start under arete on R of face, move left and up | |||||||
| 40 |
V?-Project
Cracks up face | |||||||
| 41 |
V1 .
Jugs left of arete | V1 | ||||||
| 42 |
V?- Project
Flake in middle of face, up to slab | |||||||
| 43 |
V? Project
High holds 2m right of flake, up to slab | |||||||
| 44 |
V0.
Traverse jugs in either direction from corner to corner | V0 | ||||||
| 45 |
V1 Left of Arete
Start a couple of meters left of arete on jug, pull up and mantle | V1 | ||||||
| 46 |
SDS V3
SDS, up arete | V3 | ||||||
  /75/01/750185a353aac08ed72ad30506af5e4dd67fa2ed) /1a/d6/1ad6941f765e35d77140a0d0dd4512cfabfdaf20) /f5/a8/f5a85c4848fe4385c98adb4be3d7d92a77e2f691) /4a/00/4a007f93e04cf137ff96e596f39bf6a7b50489ce) 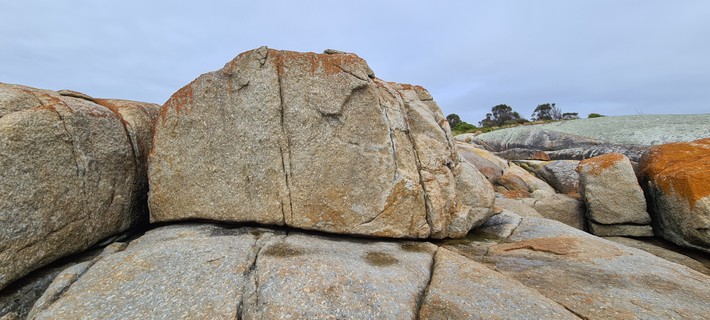 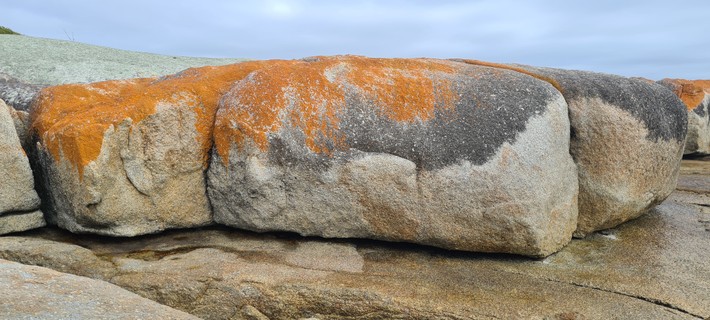 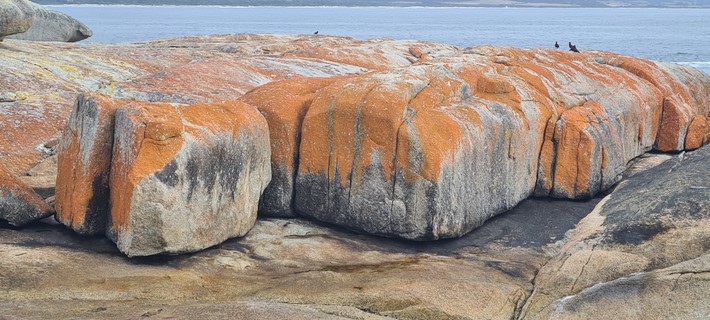 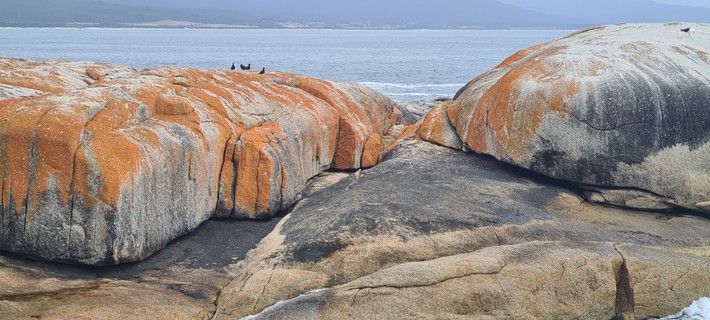 |
||||||||
1.8. Little Beach 0 routes in Area
설명
Little Beach is around 35 km north of Bicheno
접근
Several km's past the Elephant Pass turn off look for the Little Beach sign almost at the bottom of a dip. Head down to the beach, then north, the boulder is in the first alcove along the beach
1.9. Harvey's farm headland 12 routes in Cliff
- Summary:
-
모두 볼더링
Lat / Long: -41.917190, 148.322166
접근
Drive south on Harvey's Farm road, there is a small parking area next to 329 and follow the track down to the beach. Then turn right (south) and rock hop down the beach 20 minutes, roughly a km, until the headland gets more rugged.
1.9.1. Moby dick cave 1 route in Boulder
- Summary:
-
Lat / Long: -41.916648, 148.322908
설명
The first feature you come to which looks climbable, it looks like a white whale swimming towards the ocean with a cave under it's belly.
 |
||||||||
| Route | Grade | Style | Selected ascents | |||||
|---|---|---|---|---|---|---|---|---|
| 1 |
The eye
Easy but exposed mantle stepping up through the eye of the whale. | V0 | ||||||
1.9.2. Aplite wall #1 1 route in Boulder
- Summary:
-
Lat / Long: -41.916785, 148.322826
설명
Lots of potential for easy fun, and nice on your hands problems
 |
||||||||
| Route | Grade | Style | Selected ascents | |||||
|---|---|---|---|---|---|---|---|---|
| 1 | The crack | |||||||
1.9.3. Sliders Wall 3 routes in Boulder
- Summary:
-
Lat / Long: -41.916835, 148.322952
설명
The cave, while angled, is well protected, the wall underneath would have good problems if you had a bunch of pads.
 |
||||||||
| Route | Grade | Style | Selected ascents | |||||
|---|---|---|---|---|---|---|---|---|
| 1 |
Poseidon's Rage
Low sit start, follow crack feature to top out | V12 | ||||||
| 2 | 2 | |||||||
| 3 | 3 | |||||||
1.9.4. Aplite wall #2 1 route in Boulder
- Summary:
-
Lat / Long: -41.916916, 148.323096
 |
||||||||
| Route | Grade | Style | Selected ascents | |||||
|---|---|---|---|---|---|---|---|---|
| 1 | Epic traverse | |||||||
1.9.5. Black Arete Boulder 3 routes in Boulder
- Summary:
-
Lat / Long: -41.917884, 148.321726
접근
From the other cluster of problems on the headland, head straight up hill over some slabs where you might find a couple cairns. You can see the large arete boulder on the other side but have to skirt high around the steep gully.
 |
||||||||
| Route | Grade | Style | Selected ascents | |||||
|---|---|---|---|---|---|---|---|---|
| 1 |
Black Arete
Up blunt overhanging hard arete. Has a hanger at top and bottom for working. Very classic, potentially one of the harder projects in Tas? | |||||||
| 2 | Left | |||||||
| 3 | Middle | |||||||
1.9.6. Lower Boulder 3 routes in Boulder
- Summary:
-
Lat / Long: -41.917990, 148.322094
설명
This is the large boulder just below the Black Arete Boulder
접근
Approach is the same as to the Black Arete Boulder, from there just head down the gully directly to the boulder
 |
||||||||
| Route | Grade | Style | Selected ascents | |||||
|---|---|---|---|---|---|---|---|---|
| 1 | 1 | |||||||
| 2 | 2 | |||||||
| 3 | 3 | |||||||