A Crag Guide gives an extensive view of all sub areas and climbs at a point in the index. It shows a snapshot of the index heirachy, up to 300 climbs (or areas) on a single web page. It shows selected comments climbers have made on a recently submitted ascent.
At a minor crag level this should be suitable for printing and taking with you on a climbing trip as an adjunct to your guidebook.
This guide was generated anonymously. Login to show your logged ascents against each route.
Warning
Rock climbing is extremely dangerous and can result in serious injury or death. Users acting on any information directly or indirectly available from this site do so at their own risk.
This guide is compiled from a community of users and is presented without verification that the information is accurate or complete and is subject to system errors. By using this guide you acknowledge that the material described in this document is extremely dangerous, and that the content may be misleading or wrong. In particular there may be misdescriptions of routes, incorrectly drawn topo lines, incorrect difficulty ratings or incorrect or missing protection ratings. This includes both errors from the content and system errors.
Nobody has checked this particlular guide so you cannot rely on it's accuracy like you would a store bought guide.
You should not depend on any information gleaned from this guide for your personal safety.
You must keep this warning with the guide. For more information refer to our:
Usage policy
Contributors
Thanks to the following people who have contributed to this crag guide:
Scurvy
Wian van Zyl
Cormac Tooze
Matt Tranter
Marc dM
Kai
The size of a person's name reflects their Crag Karma, which is their level of contribution. You can help contribute to your local crag by adding descriptions, photos, topos and more.
Table of contents
- 1. The Shooting Gallery 5 in Crag
- 2. Index by grade
1. The Shooting Gallery
- Summary:
-
Lat / Long: -33.807186, 20.107257
요약
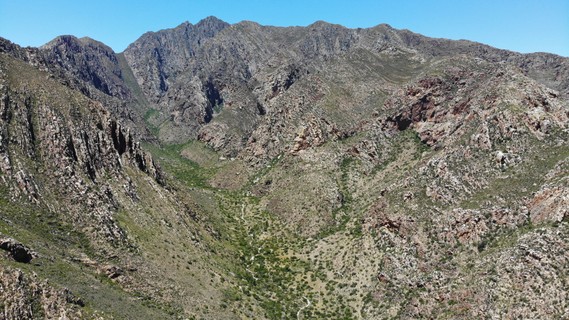
As you enter Keurkloof you will notice some tall faces high up on the left hand side of the kloof. This is the Shooting Gallery, the only walls in the kloof to receive morning shade.
설명
Host to a few routes, including a mega-long open project requiring a 80m rope. Take a 70m rope for the epic line "Ricochet" (a must do 26 when visiting Montagu). The warm up 22 "Sniper" requires one to do an exposed scramble to get up to the start of the route (in a chimney with a chockstone).
접근 문제들
No access issues
접근
Follow the main path into the kloof. Once out of the black wattle grove, continue on the path until just before it dips into the dry river bed. Look out to the left for a cairn. Weave your way between the bushes and onto the slope that leads up to the Shooting Gallery. If you are lucky you will pass a few more cairns on the way up the steep slope. About a third of the way up slope you will cross a dry riverbed. Continue aiming up the slope towards the gallery. Roughly 30~40mins of hiking.
윤리문제
To avoid any further Altercations with land owners and incorrect equipment being used, the Montagu Mountain Committee (who are responsible for the Montagu Reserve) have asked for applications to be submitted before a new route is bolted.
Applications here: http://www.climbing.co.za/bolting-information/bolting-new-routes-montagu/
 /6a/c6/6ac676f76b04a456b7a6571c0b2d6eed7cbb1e6a) |
||||||||
| Route | Grade | Style | Selected ascents | |||||
|---|---|---|---|---|---|---|---|---|
| 1 |
★★★ Ricochet
More than 30m. Use a 70m rope. FA: S. Maasch, 1993 | 26 | 35m, 14 | |||||
| 2 |
★★ Trigger Happy
FA: J. Smith, 2008 | 25 | 11 | |||||
| 3 | Project (Open) | 30m | ||||||
| 4 |
★★★ Stephan's Big Shotgun
FA: Stefan Glowacz, 1994 | 27 | 10 | |||||
| 5 |
★★ Sniper
FA: Malcolm Gowans, 1993 | 22 | 12m, 7 | |||||
2. Index by grade
| Grade | Stars | Name | Style | Pop | |
|---|---|---|---|---|---|
| 22 | ★★ | Sniper | 12m, 7 | ||
| 25 | ★★ | Trigger Happy | 11 | ||
| 26 | ★★★ | Ricochet | 35m, 14 | ||
| 27 | ★★★ | Stephan's Big Shotgun | 10 | ||
| ? | Project (Open) | 30m |