Forum
Photos
Help

Bunny Bucket Buttress and Hotel California Area

9

Seasonality

J
F
M
A
M
J
J
A
S
O
N
D

Access issues inherited from Blue Mountains

The Blue Mountains are a World Heritage listed area. The Grose Valley, the cliffs around Katoomba and much of the Narrow Neck peninsula are part of the Blue Mountains National Park which is managed by the NPWS. The Western Escarpment - where most of the climbing is - is Crown Land managed by the BMCC. While the NPWS Plan of Management nominates several locations in the National Park where rock climbing is deemed appropriate, the majority of the climbing remains unacknowledged. To maintain access our best approach is to 'Respect Native Habitat, Tread Softly and Leave No Trace'. Do not cut flora and keep any tracks and infrastructure as minimal as possible.

Practically all crags are either in National Park or in council reserve: dog owners are reminded that dogs are not allowed in National Parks at any time and fines have been issued, while for crags on council reserve the BMCC leash law requires that dogs be on-leash.

For the latest access related information, or to report something of concern, visit the Australian Climbing Association NSW Blue Mountains page at https://acansw.org.au/blue-mountains/

Approach

Two ropes and two long (double rope, approx 50m) rappels are required for the descent. Use your helmets, knot the ends of your ropes, and carry prusiks and know how to use them to ascend your ropes if you get stuck.

Approach:

Park at the Pierces Pass top carpark, at the start of the Walls Lookdown track. Walk down the Walls lookdown track for approx 10 minutes until you reach a clear footpad breaking left, about 200m before reaching the lookout. Follow this footpad left and down into a small gully with a creek at the bottom, then continue following the footpad downstream until the path wraps left onto the Lunch Ledge. Continue following the path along lunch ledge for approx 300m, past a seasonal waterfall. There are multiple possible rappel points here.

The first rappel point you come to (the Mirrorball rap) descends the top pitch of The West Face Of The Mirrorball, then the gully either side of the pinnacle. It is approached by a 3m scramble down from the main ledge to a small ledge protected by a fixed rope. On this rappel, ropes can become stuck in windy conditions. The rappel is broken into 2x pitches, with the second rappel anchor directly above the pinnacle, on your left as you descend. You can rap down either side of the pinnacle depending on the wind - left is best, but downwind is better if you don't want a stuck rope.

The next rappel point is the most spectacular and cleanest descent. It goes down just to the right of Bionic Booger Boys. Beyond the first rappel the track drops behind a large blade of rock protecting you from the drop to your right. When this blade of rock ends, exposing you once again to the drop, there is a pair of ring bolts above head height. This is the top of the second rappel point. It is a 45m rappel down and slightly left, to a large ledge a few metres to the left. While descending, manoeuvre left so you can reach the ledge rather than hopelessly looking at it while hanging in free space a few metres away. Have the first person down retain the rope ends so subsequent people can be towed to the ledge if they can't reach it. From this ledge it is a second 45m free hanging rappel to reach the valley floor.

Once at ground level, walk down and right from the cliff following a footpad below the Old Skule pinnacle and along the base of the cliff. The BBB&HC sector begins beyond this pinnacle.

Exit from the top of routes: 3 options (marked on topo):

  1. the simplest but longest exit is to head about 100m up to the top of the ridge and then follow the footpad back along the top of the ridge for a few km to Bells Line of Road, then turn left and walk 300m back to the upper carpark.

  2. rap down the top of Mirrorball to Lunch Ledge; NOT when it's windy tho, easy to lose a rope. To get to the top of the rap from BBB, go up the L side of the ridge for a few meters and then go L around the small gully to go back to cliff edge. Go west along the cliff edge to a small cairn above a short gully, walk down to rap down Mirrorball to your gear at the lunch ledge.

  3. If it's windy (or in general if you don't want the hassle of rapping) walk easily north along above the cliff for 200m to gully and walk easily down it to Lunch Ledge. This is much quicker than rapping; you can stash your bags at the base of this gully if going this way.

Escape:

To Escape! If you don't have a torch, go back and hide behind Mirrorball pinnacle.

See topo below There are 2 routes out, down the ridge below Old Skule is easy (1 hour down) but you end up at the Grose river,. Walk upstream (right) for 50m or so and find the tourist track back up (1.5 hard hours slog up = 2.5 hours).

Walking around the 'base' of the cliff is hard navigation and scrub/jungle bashing. 50m past Mirrorball is a watercourse below Critical Mass, drop down about 50m here to get below a small cliffline. Continue through a big jungle below Samarkand and another creek, stay about 20-30m below cliffline. Once you are past Walls Lookdown go up to the base of the cliffs and hope to find a good Basejumper's track (about 1 hour so far). 15 minutes along this till you drop down to the Pierces Pass track and 30 minutes up this. Less slog an much more bashing. About 2 hours but easy to get lost and have epics.

Ethic inherited from Blue Mountains

Although sport climbing is well entrenched as the most popular form of Blueys climbing, mixed-climbing on gear and bolts has generally been the rule over the long term. Please try to use available natural gear where possible, and do not bolt cracks or potential trad climbs. If you do the bolts may be removed.

Because of the softness of Blue Mountains sandstone, bolting should only be done by those with a solid knowledge of glue-in equipping. A recent fatality serves as a reminder that this is not an area to experiment with bolting.

If you do need to top rope, please do it through your own gear as the wear on the anchors is both difficult and expensive to maintain.

At many Blue Mountains crags, the somewhat close spacing of routes and prolific horizontal featuring means that it is easy to envisage literally hundreds of trivial linkups. By all means climb these to your hearts content but, unless it is an exceptional case due to some significant objective merit, please generally refrain from writing up linkups. A proliferation of descriptions of trivial linkups would only clutter up the guide and add confusion and will generally not add value to your fellow climbers. (If you still can't resist, consider adding a brief note to the parent route description, rather than cluttering up the guide with a whole new route entry).

If you have benefited from climbing infrastructure in NSW, please consider making a donation towards maintenance costs. The Sydney Rockclimbing Club Rebolting Fund finances the replacement of old bolts on existing climbs and the maintenance of other hardware such as fixed ropes and anchors. The SRC purchases hardware, such as bolts and glue, and distributes them to volunteer rebolters across the state of New South Wales. For more information, including donation details, visit https://sydneyrockies.org.au/rebolting/

It would be appreciated if brushing of holds and minimisation/removal of tick marks becomes part of your climbing routine. Consider bringing a water squirt bottle and mop-up rag to better remove chalk. Only use soft (hair/nylon) bristled brushes, never steel brushes.

The removal of vegetation - both from the cliff bases and the climbs - is not seen as beneficial to aesthetics of the environment nor to our access to it.

Remember, to maintain access our best approach is to 'Respect Native Habitat, Tread Softly and Leave No Trace'. Do not cut flora and keep any tracks and infrastructure as minimal as possible or risk possible closures.

For the latest access related information, or to report something of concern, visit the Australian Climbing Association NSW Blue Mountains page at https://acansw.org.au/blue-mountains/

Tags

Some content has been provided under license from: © Australian Climbing Association Queensland (Creative Commons, Attribution, Share-Alike 2.5 AU)

Routes

Add route(s) Add topo Reorder Bulk edit Convert grades
Grade Route
1 18 20m
2 18 20m
3 18 40m
4 8 30m
5 8 40m
6 18 40m
7 18 40m
8 13 40m

Used to be a carrot patch for the sports bunnies, with an awesome final wall. Now it has rings all the way. Carrots are still there, so take some brackets if you need to share a belay. Don't go as a party of 3 unless you are experienced, it eats too much time. If you have a pack, haul it on the second rope if you're getting tired. Don't leave toilet paper or rubbish, you're in a National Park, behave accordingly and don't get on routes like this if you don't know what that means.

People have stupid epics on this all the time. Please read :- http://www.chockstone.org/Forum/Forum.asp?Action=DisplayTopic&ForumID=15&MessageID=26665&Replies=58&PagePos=0&Sort=#NewPost

Generally safe, but run-out at times, with a few loose patches of rock. Take helmets as belayers are lashed to small ledges and can’t dodge shrapnel. Take 2 50m ropes (for rapping down, or retreating), 16 draws and a few slings.

There is a blue emergency bin below Pitch 6, with some water, food, clothing, torches, and basic shelter. Don't call 000 just because you are benighted, so the police don't have to go out at night to babysit you. Please arrange to replace anything you use.

ACCESS: It’s halfway to Hotel California from Mirrorball. Rap in as described above then walk along the track to the right (facing the cliff). After 30m, drop down around the base of Old Skule (clean arete on next pinnacle) and go 70m horizontally right thru the scrub till you hit an orange buttress. Continue down a bit and about another 70m to red rope and BBB sign:

Now scramble up and right to a ledge 15m above the track, right of a chossy white patch, just right of a short squeeze chimney. Walk 10m right on the ledge till you see the bolts at the boulder problem start. (If you go down hill to a big fallen boulder, or see a 30m high black then orange corner (Randy Rabbit Ridge), or traverse beneath a choss cave, you've gone too far).

Print out topos and route description or save them to your phone, as you probably won't have reception down there.

  1. 20m (18) Traverse out right and back left to flake, reachy. Up to ledge, 2RB.

  2. 20m (18) Right and up seam and corner to ledge. Up a move and diagonally R to arete, then R to ledge and 2RB.

  3. 40m (18) Up dirty slab and R across corner, traverse R to nose and up corner and nose to ledge. 2RB on block or walk R 8m to 2BB at base of wall.

  4. 30m (8) A hard hands-free problem, diagonally R past bolts to 2RB on block further up or tree belay at the top of the slab.

  5. 40m (8) Climb across ledges and walls (and a lot of bush...) past bolts to below orange overhang, L to 2RB below corner.

  6. 40m (18) Up choss and head out L staying low under roof. Rope drag possible, but its fine if you sling the first 4 bolts. Head up pumpy wall to big ledge. 2RB.

  7. 40m (18) Up vertical pump. Needs 15 draws. 2RB.

  8. 40m (13) Left across ledge, diagonal L past bolts and across groove. Climb loose left wall to 2RB on top. Rope drag possible, but it's fine if you sling the first few bolts.

FA: V Peterson & M Law, 2005

Obvious roof crack 5 metres right of Bunny Bucket’s pitch 6 start. Use the first 3 bolts of BBB’s pitch 6, climb up to ceiling and then traverse right (size 6 cam to protect) to enter the roof crack. Requires two 5s and one 6 size cams.

Climb easy face and finish at trad belay on obvious ledge (BD 2 and small wires).

Rope drag is manageable on a single rope with 1-2 roller carabiners and several long slings.

Rappel from trad anchor to clean face (60m rope is fine). Re-lead and then back clean roof and traverse.

FA: Matthew Robbins & Ondra, 27 Apr 2023

FFA: Matthew Robbins & Ondra, 14 May 2023

1 20 25m
2 20 20m
3 20 25m
4 18 40m
5 17 25m
6 20m
7 18 15m
8 20 30m
9 17 20m
10 18 30m
11 20 30m

A more funky version of BBB, with a bit more variety, but pumpier and more climbing. If you waste time on belays this will take a long time. Start in big black corner leading to orange wall 20m R of BBB, and 10m left of a huge sloping boulder sticking out of the ground near the track. If you are benighted, go left to the Blue emergency bin on BBB around pitch 6. See notes on BBB.

  1. 25m (19) Loose then up reachy corner. There are a few small chain hangers on the first 2 pitches, people have threaded them.

  2. 20m (19) start on left and up then airy traverse R to belay ledge. Possible to link P1 & P2.

  3. 25m (19) up weird v corner on slab to ledge

  4. 40m (18) Boulder start then up and r to corner, move around arête and up to grassy slope, up 8 m wall to belay at top

  5. 25m (17) up slope and up arête past bolts to belay on top. (second could wander up to the base of the wall after you've clipped the first ring to give you a better belay -less rope stretch- for the hard move out of the cave).

  6. 20m scramble left a move, up corner, then right to belay on tree on right. Can join P5 and P 6 but you'll have drag unless 2nd moves up as above.

  7. 15m (18) up wall on right, clip 3rd bolt (above ledge) with screwgate to limit fall

  8. 30m (19) up L to corner then huge traverse left under roof and up wall. Awesome position

  9. 20m (17) Walk L 5 m (can move belay to here) and up pumpy wall to cave

  10. 30m (18) Up wall and head right. Up slab, pass first belay and go to 2nd set of paired rings (you can link P9, 10, 11 into 2 pitch by belaying at first set of rings)

  11. 30m (19) Up and right to nose. Step R around nose to undercling and up, later unclip that bolt to reduce drag then left to arete to finish. Follow BBB access to escape

Awesome 'finger-pickin' fun, or 23 M0

Start at pillar beside track before reaching California's buttress.

  1. 25m (21)

  2. 45m (26 or 23M1)

  3. 30m (21)

  4. 30m Scramble

  5. 30m (20)

  6. 30m (20)

  7. 30m (21)

  8. 30m (18)

The Original, Classic, Epic.

FA: Batty / Allen, 2000

The first three pitches were retrobolted January 2011 entirely on RBs/UBs/FHs, so no brackets are required, although it's wise to take a couple in case you have to share belays. The first three pitches (17, 8, 19) of CC linked into the top of HC makes for a sub-20 outing.

  1. 45m (17) Low angle cracked face then slab just left of arete to ledge and anchors. Sport pitch on ringbolts.

  2. 15m (10) Short vertical crack. This pitch can be linked into pitch 1. Sport pitch on ringbolts.

  3. 40m (19) Thin black face trending slightly right to ledge. Clip high bolt (with difficulty) then crux horrible chinup/mantle onto short face and up to ledge and tree belay. Sport pitch on ringbolts.

  4. 10m Trad corner about 15m left of Hotel Cali's bolted line.

  5. 10m Short thin corner to big shale ledge. Walk 10m left to belay.

  6. 40m (22) Follow the Hotel California traverse on the top head wall for 5 bolts then head straight up the seam crack on good but spaced trad to a poor carrot belay on ledge. (U rap station 8m R and down)

  7. 45m (22) Hard moves over the bulge (two BRs) then straight up the epic trad protected juggy face. Take 8 slings. carrot and U belay. Scramble up hill to cave. Walk right and up short rock step to under chossy upper cliffline. Walk left under this clliffline and up exit gully.

FA: Michael Law, Vanessa Peterson, Mark Wilson & Zac Vertrees, 2006

Lots of fun and still an adventure, top 3 pitches of Hotel California are fabulous! You want to be solid with exposure! Start first two pitches of CC. First pitch to ledge at 40m but don't stop here, go up through bush then up 5m wall to DDR belay (60m). Second pitch 40m to ledge then traverse right along ledge onto last 10m of 3rd pitch of HC. Follow Hotel California from there.

FA: Mike Law & Co.

Pull thru on gear on first pitch and go up escape gully to avoid choss at the end of pitch 8.

Warning Rock: Loose block

1 22 45m
2 20 30m
3 17 40m
4 10 35m
5 17 30m
6 19 50m
7 20 30m
8 18 25m
9 20m
10 16 20m

10 pitch sport route (all rings or homemade stainless hangers, which some odd-ball fat nosed biners struggle with, but take bolt plates for the carrots instead incase, and for the anchor above pitch 3, and in case the belays get too crowded). Rap in as described above, then walk right past pinnacle at 40 m, hit base of cliff at 100m, drop down, then go up to cliff (near start of Big Nose). Walk round the base of buttress and drop down a bit, then go up and you can see a 8m pinnacle/flake leaning against the steep face. This is the start. About 350m walk. There is a much easier variant to the first 3 pitches by starting up Contented Cows, all rings at 17, 8 (12m), and 19.

There is a blue emergency bin below Pitch 5, with some water, food, clothing, torches, and basic shelter. Don't call 000 just because you are benighted, so the police don't have to go out at night to babysit you. Please arrange to replace anything you use.

  1. 45m (22) Up and left to ledge, through overhang, further up and left, through roof, then back right to the belay.

  2. 30m (20) Straight up the groove until easier climbing, then up and left to belay on ledge.

  3. 40m (17) Up and slightly left to ledge, then pull through roof and up. Scramble to base of next short wall, belay off homemade hanger and carrot (TAKE HANGER FOR CARROT!). Old tree anchor seems to have either degraded, or was a poor choice to begin with.

  4. 35m (10) Up short wall, then scramble up and left about 30m through vegetation to the base of the cliff corner and anchors (rescue drum here).

  5. 30m (17) Up the right wall of corner and arete, then traverse left to the ledge. Carrot + RB Belay.

  6. 50m (19) Up onto the wall then traverse right about 20m and up following rings to ledge and belay.

  7. 30m (20) Thin move to start, up to roof and jugs, pull through and up to ledge.

  8. 25m (18) Up wall, then jug haul through the bulges to the top. Belay anchors are back and right about 6m in a small cave.

  9. Scramble up and left to the base of the choss cave, then right around the base about 20m to the start of the last pitch. (You can escape left and up gully from this ledge).

  10. 20m (16) Straight up the wall to belay at anchors on top.

To exit, see notes above.

FA: Mikl Law & Ness Peterson Shaz Clarke, 2001

Did you know?

Did you know that you can create an account to record, track and share your climbing ascents? Thousands of climbers are already doing this.

Selected Guidebooks more Hide

Author(s): Simon Carter

Date: 2019

ISBN: 9780958079075

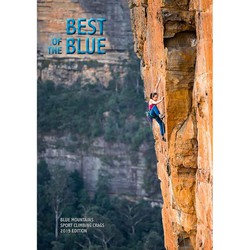
Simon Carter's "Best of the Blue" is the latest selected climbing guide book for the Blue Mountains and covers 1000 routes and 19 different climbing areas. For all the sport climbers out there, the travellers, or just anyone who doesn't want to lug around the big guide that's more than 3 times the size - cut out the riff-raff and get to the good stuff! This will pretty much cover everything you need!

Author(s): Simon Carter

Date: 2019

ISBN: 9780958079082

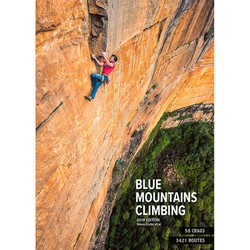
The latest comprehensive, latest and greatest Blue Mountains Climbing Guide is here and it has more routes than you can poke a clip stick at! 3421 to be exact. You are not going to get bored.

Accommodations nearby more Hide

Share this

Photos Browse all photos

Upload a photo of area

Sun 14 May
Check out what is happening in Bunny Bucket Buttress and Hotel California Area.

Get a detailed insight with a timeline showing

  • Ticks by climbers like you
  • Discussions of the community
  • Updates to the index by our users
  • and many more things.

Login to see the timeline!

Deutsch English Español Français Italiano 한국어 Português 中文