A Crag Guide gives an extensive view of all sub areas and climbs at a point in the index. It shows a snapshot of the index heirachy, up to 300 climbs (or areas) on a single web page. It shows selected comments climbers have made on a recently submitted ascent.
At a minor crag level this should be suitable for printing and taking with you on a climbing trip as an adjunct to your guidebook.
This guide was generated anonymously. Login to show your logged ascents against each route.
Warning
Rock climbing is extremely dangerous and can result in serious injury or death. Users acting on any information directly or indirectly available from this site do so at their own risk.
This guide is compiled from a community of users and is presented without verification that the information is accurate or complete and is subject to system errors. By using this guide you acknowledge that the material described in this document is extremely dangerous, and that the content may be misleading or wrong. In particular there may be misdescriptions of routes, incorrectly drawn topo lines, incorrect difficulty ratings or incorrect or missing protection ratings. This includes both errors from the content and system errors.
Nobody has checked this particlular guide so you cannot rely on it's accuracy like you would a store bought guide.
You should not depend on any information gleaned from this guide for your personal safety.
You must keep this warning with the guide. For more information refer to our:
Usage policy
Contributors
Thanks to the following people who have contributed to this crag guide:
Callum Mather
Tim Janetzki
Moby
Emmanuel Madayag
The size of a person's name reflects their Crag Karma, which is their level of contribution. You can help contribute to your local crag by adding descriptions, photos, topos and more.
Table of contents
- 1.
Fitzroy Island
23 in Area
- 1.1. Nudey Beach 0 in Area
- 1.2. Nudey Beach Track Boulders 2 in Field
-
1.3.
Summit Boulder Field 6 in Field
- 1.3.1. The Thimble 4 in Boulder
- 1.3.2. The Gruffalo Boulder 1 in Boulder
- 1.3.3. Kimbo's Slice 1 in Boulder
- 1.4. White Rocks 15 in Area
- 2. Index by grade
1. Fitzroy Island 23 routes in Area
- Summary:
-
All Bouldering
Lat / Long: -16.930681, 145.995157
summary
A pristine island off the coast of Cairns with large granite boulders scattered from the beach to the summit
description
Tropical island with beautiful beaches, rainforest, marine life and boulders.
access issues
Be wary at any coastal or riverside crags for the potential of crocodiles and if you're in the water marine stingers.
approach
Catch a ferry (45min) from Cairns to Fitzroy Island
where to stay
The island resort offers accommodation ranging from tent sites to bungalows.
ethic
National park, be very careful not to crush flora when deviating from the walking trails.
1.1. Nudey Beach 0 routes in Area
summary
Voted Australia’s best beach in 2018 it’s a cracker of a spot for climbing. To the right are tidal boulders, to the left are jungle boulders.
description
Beachside boulders to the right of the beach. Lots of potential, low tide advantageous
approach
Hike long the Nudey Beach track passing Foxy’s Bar for approx. 10-20min
1.2. Nudey Beach Track Boulders 2 routes in Field
- Summary:
-
Lat / Long: -16.933533, 145.985968
summary
Forest boulders along the path to Nudey Beach
description
Large granite forest boulders on both sides of the track. Take care not to destroy vegetation or soil when approaching the boulders.
approach
Walk past Foxy’s Bar along the Nudey Beach track
 /e4/15/e415b42b2cc9ef8133e7278c93c8ff666ccf338d) |
||||||||
| Route | Grade | Style | Selected ascents | |||||
|---|---|---|---|---|---|---|---|---|
| 1 |
★★★ Reverie
Awesome highball problem. Hand to offwidth crack trending left up the black face. Top out is vegetated so watch out for lawyer vine. FA: Tim Janetzki, 9 Sep 2021 | V3 | 11m | |||||
| 2 |
Weaver Ant’s Riposte
Look for the white scooped Boulder to the left, just before the small 7 sign. Stand start layback on large flaring crack. Up finger crack trending left. Take care when topping out, lots of lawyer vine FA: Tim Janetzki | V5 | 4m | |||||
1.3. Summit Boulder Field 6 routes in Field
- Summary:
-
Lat / Long: -16.928830, 145.996237
summary
Big Boulders at the Summit!
description
A large sprawling boulder field covering the summit and surrounds offering awesome views of the bay. Very windy
access issues
Take care when venturing off trail, stick to rock hopping to get the boulder of choice.
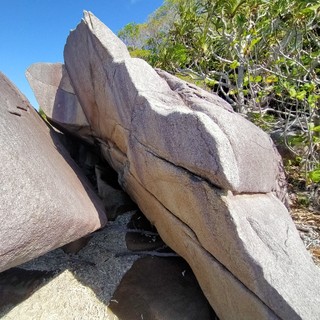
1.3.1. The Thimble 4 routes in Boulder
- Summary:
-
All Bouldering
Lat / Long: -16.928750, 145.996580
description
Huge chunk of weathered granite, slab at the back, highball overhangs at the front
approach
50m West from the summit lookout
   |
||||||||
| Route | Grade | Style | Selected ascents | |||||
|---|---|---|---|---|---|---|---|---|
| 1 |
★★★ Tall Tales
Start off high ledge on the right. Work your way up the arete via scoops and crimps. Tall and awesome. FA: Callum Mather | V2 | 8m | |||||
| 2 |
★★★ Whale Tale
Stand start on double gastons, move through the black and gold streak on small crimps. Gain the arete and finish as for Tall Tales. FA: Callum Mather | V7 | 8m | |||||
| 3 |
Excalibur
Stand start on small crimps, bust up the face to the top! | 9m | ||||||
| 4 |
★★ Nimble Thimble
Up the slab to the top, take care on the way down. | V0+ | 9m | |||||
1.3.2. The Gruffalo Boulder 1 route in Boulder
- Summary:
-
All Bouldering
| Route | Grade | Style | Selected ascents | |||
|---|---|---|---|---|---|---|
| 1 |
★★★ The Gruffalo
Stand start with slopey edge on face and pinch on arete. Move up the arete with pinches and a crimp before gaining the left arete and mantling. FA: Callum Mather | V5 | 3m | |||
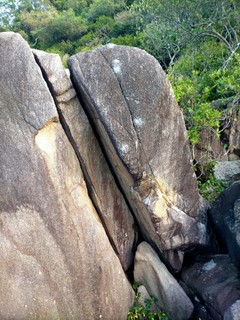
1.3.3. Kimbo's Slice 1 route in Boulder
- Summary:
-
All Bouldering
Lat / Long: -16.928846, 145.996256
description
Nice finger crack with good landing. Can be easily seen when looking towards the summit lookout when at The Thimble
/91/a7/91a79da6d79b1e733e1d1a4ea05e615da6c50908) |
||||||||
| Route | Grade | Style | Selected ascents | |||||
|---|---|---|---|---|---|---|---|---|
| 1 |
Kimbo's Slice
Stand start with fingers low in crack, jam the way up! FA: Tim Janetzki | V4 | 3m | |||||
1.4. White Rocks 15 routes in Area
- Summary:
-
description
Good climbs with reasonably easy access, everything from easy moderates to harder projects.
approach
Follow coast around past White Rock to find quality boulders scattered along the beach.
/74/39/7439cbf6f687bef622b331c6f0834190bdfa8f00)     |
||||||||
| Route | Grade | Style | Selected ascents | |||||
|---|---|---|---|---|---|---|---|---|
| 1 |
★ Jammin'
Start low in the crack at back of triangle cut out. Stem your way up and out! FA: Callum Mather | V0 | 2m | |||||
| 2 |
★★ Crab Squat
Sit start compressing arete. Smear the feet and away you go. | V1 | 2m | |||||
| 3 |
★ okinawae
Start with good right foot and right hand sidepull. Straight up the face through the flakes to an easy top out. FA: Moby | V0 | 4m | |||||
| 4 |
★★ Scoopy Doo
Start in scoop facing outward with feet on big slopey edge and palms pressing low on inside of scoop. Wrestle your way out via hard palm press in roof. FA: Callum Mather | V5 | 2m | |||||
| 5 |
Flu
Sit start with left hand slot and right heel hook, RH on whatever works. Up n' left. FA: Callum Mather | V2 | 2m | |||||
| 6 |
★★ Fly
Start on lowest good edge rail, go straight up the steepness via big moves on jugs. FA: Callum Mather | V1 | 2m | |||||
   |
||||||||
| Route | Grade | Style | Selected ascents | |||||
| 7 |
★ Greasy Traverse
Start at the bottom of the lip, traverse left and mantle just before the corner. FA: Callum Mather | V0 | 3m | |||||
| 8 |
★ The Back Scratcher Dyno
Start on jug, launch to lip. | 3m | ||||||
| 9 |
★ Elbow Grease
Start low on jug rail, use small sidepull in seam and slopey left gaston to follow the corner up and out. Goodluck keeping your left elbow from dabbing. FA: Callum Mather | V6 | 3m | |||||
| 10 |
Pedal to the Metal
Start in break above water, climb juggy crack. FA: Callum Mather | V1 | 2m | |||||
| 11 |
★★ Gelateria
Sit start on good flake, make your way out the scoop via underclings. Follow the lip left before mantling up the nothingness. FA: Callum Mather | V8 | 3m | |||||
| 12 |
★★★ Triple Scoop
Start sitting in the perfect seat feature at the back of the scoop, contort your way out before moving left and up. FA: Callum Mather | V3 | 3m | |||||
  |
||||||||
| Route | Grade | Style | Selected ascents | |||||
| 13 |
★★ 5°C
Start low right on jug, slap and squeeze your way up the perfect fridge feature. FA: Callum Mather | V4 | 3m | |||||
| 14 |
★★ The Sharkfin
Stand start compressing the aretes, slap up to the lip and follow it to the apex before mantling. FA: Callum Mather | V3 | 5m | |||||
| 15 |
★ Boat Ramp
Start up the ramp and follow the arete to the apex of the fin before mantling. FA: Callum Mather | V0 | 5m | |||||
2. Index by grade
| Grade | Stars | Name | Style | Pop | Area | |
|---|---|---|---|---|---|---|
| V0 | ★ | Boat Ramp | 5m | 1.4. White Rocks | ||
| ★ | Greasy Traverse | 3m | 1.4. White Rocks | |||
| ★ | Jammin' | 2m | 1.4. White Rocks | |||
| ★ | okinawae | 4m | 1.4. White Rocks | |||
| V0+ | ★★ | Nimble Thimble | 9m | 1.3.1. The Thimble | ||
| V1 | ★★ | Crab Squat | 2m | 1.4. White Rocks | ||
| ★★ | Fly | 2m | 1.4. White Rocks | |||
| Pedal to the Metal | 2m | 1.4. White Rocks | ||||
| V2 | ★★★ | Tall Tales | 8m | 1.3.1. The Thimble | ||
| Flu | 2m | 1.4. White Rocks | ||||
| V3 | ★★★ | Reverie | 11m | 1.2. Nudey Beach Track Boulders | ||
| ★★ | The Sharkfin | 5m | 1.4. White Rocks | |||
| ★★★ | Triple Scoop | 3m | 1.4. White Rocks | |||
| V4 | Kimbo's Slice | 3m | 1.3.3. Kimbo's Slice | |||
| ★★ | 5°C | 3m | 1.4. White Rocks | |||
| V5 | Weaver Ant’s Riposte | 4m | 1.2. Nudey Beach Track Boulders | |||
| ★★★ | The Gruffalo | 3m | 1.3.2. The Gruffalo Boulder | |||
| ★★ | Scoopy Doo | 2m | 1.4. White Rocks | |||
| V6 | ★ | Elbow Grease | 3m | 1.4. White Rocks | ||
| V7 | ★★★ | Whale Tale | 8m | 1.3.1. The Thimble | ||
| V8 | ★★ | Gelateria | 3m | 1.4. White Rocks | ||
| ? | Excalibur | 9m | 1.3.1. The Thimble | |||
| ★ | The Back Scratcher Dyno | 3m | 1.4. White Rocks |