A Crag Guide gives an extensive view of all sub areas and climbs at a point in the index. It shows a snapshot of the index heirachy, up to 300 climbs (or areas) on a single web page. It shows selected comments climbers have made on a recently submitted ascent.
At a minor crag level this should be suitable for printing and taking with you on a climbing trip as an adjunct to your guidebook.
This guide was generated anonymously. Login to show your logged ascents against each route.
Warning
Rock climbing is extremely dangerous and can result in serious injury or death. Users acting on any information directly or indirectly available from this site do so at their own risk.
This guide is compiled from a community of users and is presented without verification that the information is accurate or complete and is subject to system errors. By using this guide you acknowledge that the material described in this document is extremely dangerous, and that the content may be misleading or wrong. In particular there may be misdescriptions of routes, incorrectly drawn topo lines, incorrect difficulty ratings or incorrect or missing protection ratings. This includes both errors from the content and system errors.
Nobody has checked this particlular guide so you cannot rely on it's accuracy like you would a store bought guide.
You should not depend on any information gleaned from this guide for your personal safety.
You must keep this warning with the guide. For more information refer to our:
Usage policy
Contributors
Thanks to the following people who have contributed to this crag guide:
Bevan Ashby
mellor
Dane Evans
Nick White
Brendan Heywood
Rob Knight
James Lister
Batt Moyd
Tim Rock
Matt Schimke
The size of a person's name reflects their Crag Karma, which is their level of contribution. You can help contribute to your local crag by adding descriptions, photos, topos and more.
Some content has been provided under license from: © Canberra Climbers' Association (CC BY-SA)
Table of contents
- 1.
Corin Road Bouldering
281 in Crag
-
1.1.
Cantaloupe Hill 101 in Area
- 1.1.1. First Stopoff 3 in Sector
- 1.1.2. Glitz Rock 15 in Boulder
- 1.1.3. Warmup Slab 3 in Boulder
- 1.1.4. Prow Rock / Spruce Moose 8 in Boulder
- 1.1.5. Slab Rock 3 in Area
- 1.1.6. Number 15 boulder 3 in Boulder
-
1.1.7.
Heart Block(s) 13 in Boulder
- 1.1.7.1. Second Heart 1 in Boulder
- 1.1.7.2. The Second Prow 4 in Boulder
- 1.1.8. The Upper Ridge 22 in Sector
- 1.1.9. Sundries 8 in Area
- 1.1.10. The Ice Blocks 8 in Area
- 1.1.11. Lost World 3 in Area
- 1.1.12. The Hand 11 in Boulder
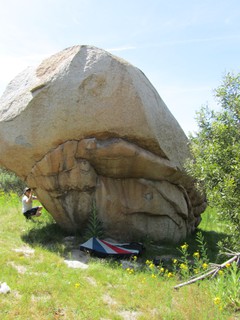
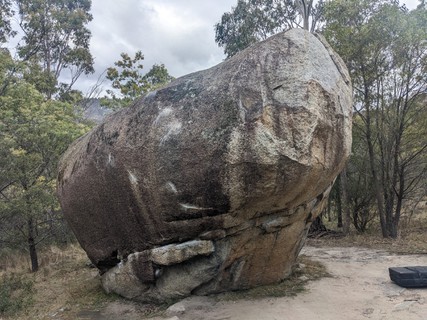
- 1.2. George's Boulder 20 in Boulder
-
1.3.
Snake Rock Boulders 69 in Area
- 1.3.1. Roadside Boulders 18 in Sector
- 1.3.2. Riverside Boulder 5 in Boulder
- 1.3.3. Cartman Boulder 15 in Boulder
- 1.3.4. Ike Boulder 9 in Boulder
- 1.3.5. Trackside Boulder 22 in Boulder
- 1.4. Strawberry Fields 27 in Field
- 1.5. Kelvin Bloc 14 in Boulder
-
1.6.
The Kelvin Field 10 in Crag
- 1.6.1. Namadgi Boulder 2 in Boulder
- 1.6.2. Citadel Wall 3 in Boulder
- 1.6.3. Throne Boulder 5 in Boulder
- 1.7. Spark Boulders 7 in Field
-
1.8.
The Hideaway 24 in Field
- 1.8.1. Banana Hill Bouldering 16 in Field
- 1.8.2. Trad Climbing 2 in Sector
- 1.8.3. Cracked Boulder 4 in Boulder
- 1.8.4. Arya Boulder 2 in Boulder
- 1.9. Scattered Boulders 7 in Field
- 1.10. Submarine Rocks 2 in Field
-
1.1.
Cantaloupe Hill 101 in Area
- 2. Index by grade
1. Corin Road Bouldering 281 routes in Crag
- Summary:
-
Mostly Bouldering
Lat / Long: -35.505109, 148.914925
summary
Best featured granite boulders (with actual holds) in Canberra.
description
A number of boulders can be found along Corin Road. Note that the crags in the Corin Road area (Bandido Wall, Hideout Wall, Square Rock etc) can be found under Gibraltar Peak. Like most of the rest of Canberra, the boulders around Corin Road are granite, and require good contact strength, balance and sometimes a fair bit of nerve to top out. Highball problems are a bit more common here, and there's a few that will test the V6 climber's nerve to the limits. The area has some potential for new problems, and some further work cataloguing existing problems, for example near Snake Rock.
George's Boulder is a good place for a quick stop-off and boulder if you're stretched for time, and if you have more time, Cantaloupe Hill holds enough to keep all but the very strong busy.
access issues
Access is along forestry roads, which in most cases seem to have been closed and gated.
approach
Either through the Cotter via Cotter Road down towards Tidbinbilla, or through Point Hut Road.
Cantaloupe Hill: turn onto Corin Road, then it's around 6km until you reach a turn-off to Woods Reserve. Around 400 metres past this, a dirt forestry track on your right leads up towards Cantaloupe Hill. Drive (the road is quite rutted) or walk straight up this road until you reach a fork where it turns left and right. Ignore these - the walking track is directly in front of you, marked with a cairn or two at the start.
George's Boulder: The second dirt track turn-off on Corin Road, found 2.6km (as the crow flies) after the turn off onto Corin Road from Tidbinbilla Road. You'll know you've found the right track from its comparatively well-kept surface, and the fact that the dirt track takes an almost immediate right turn. Park at the turn and follow a faint and blackberry-infested path north for about 80 metres.
 |
1.1. Cantaloupe Hill 101 routes in Area
- Summary:
-
Mostly Bouldering
Lat / Long: -35.475884, 148.928124
description
Cantaloupe Hill can be found alone Corin Road. It has the best collection of boulders in the valley with some stella lines spread up the hill. 200 metres after passing the turn-off to Woods Reserve, some 6km along the road, there is a forestry track on your right. This goes straight up the hill for about 200 metres, before branching left and right. Park at the fork and keep going straight up the hill, marked by a cairn or two, presuming they haven't been blown over!
As you head up the hill, you cross a gully, then there's a small group of rocks you pass on your left with no currently marked climbs, and then the first climbing area is found on your right, with a roughly marked trail giving way to overgrown brush. This leads to The Hand. If you continue up instead of turning right, you will eventually come to another right turn, and following that track you'll find Glitz Rock. You might need to wander around a bit before finding the right places to turn. Once you pass Glitz Rock, uphill and heading in a starboard direction is the fabulous Spruce Moose rock, and a little bit behind is a big blobby slab with a nice traverse.
approach
200 metres after passing the turn-off to Woods Reserve, some 6km along the road, there is a gated forestry track on your right. Follow this up the hill for about 200 metres, before a walking track appears on the left. Follow this for a few hundred meters crossing a little wooden bridge and a second synthetic bridge, after a few switchbacks on a big right hand turn a climber's track heads left (the walking track is marked with a big right arrow).
history
This area was found and developed by Chris Warner in 2003.
The area was burned in the 2020 Orroral Valley bushfire. Fortunately, the fire doesn't appear to have burned too hot and developed problems seem to be unaffected.
| Route | Grade | Style | Selected ascents | |||||
|---|---|---|---|---|---|---|---|---|
| 13 | Number 24 | V0 | ||||||
  |
||||||||
1.1.1. First Stopoff 3 routes in Sector
- Summary:
-
All Bouldering
description
As you head up the hill, there's a bunch of boulders on your left, well before you get to The Hand. A few possible lines to be done.
  |
||||||||
| Route | Grade | Style | Selected ascents | |||||
|---|---|---|---|---|---|---|---|---|
| 1 |
★★ Memories
Just enough holds for an ascent. Hard work getting off the ground, a big move to the next incut, then you're on the slab and away. FA: David Nott, 2013 | V4 | 5m | |||||
| 2 |
Project 2 - open
Technical and gut-busting. Grade is a guess. Some seriously strenuous layback moves. | V7 | 4m | |||||
| 3 |
Slab proj
Left side of the slab. Delicate! | V2 | 5m | |||||
1.1.2. Glitz Rock 15 routes in Boulder
- Summary:
-
All Bouldering
Lat / Long: -35.476278, 148.931873
description
An obvious boulder found as you wander along the path towards the Heart Block. CCA Corin Valley guide climbs 1-4, with a number of other climbs which are reverses, extensions or different lines. Climbs have recently been updated with further information from the original CCA guide. If you have climbed or know of any further climbs, please feel free to add them.
| Route | Grade | Style | Selected ascents | |||||
|---|---|---|---|---|---|---|---|---|
| 1 |
Without Words
Start in the vague scoop and grovel your way to a desperate mantle. Not great. FA: Chris Warner | V4 | 2m | |||||
| 2 |
★ Tally Ho
Sit start at the spike (same start as Vendetta). Straight up via the corner/groove. Quite messy after it's rained. FA: Chris Warner | V2 | 2m | |||||
| 3 |
★★★ Vendetta
Sit start at Tally Ho, then follow the break rightwards to the rounded arête, then mantle/rock over to the top. Progressively crimpier with thinner feet. Part of the crux footer has broken off, now a bit harder (Sept 2023).
FA: Chris Warner, 2004 | V7 | 3m | |||||
| 4 |
★★★ Cerebro
Start for Vendetta, then drop down into the underclings, make some hard moves through underclings and slopers finishing out the top of the boulder (as for Vendetta or the Joker). FA: Chris Webb | V11 | 4m | |||||
| 5 | ★ Contempt Left | V3 | 4m | |||||
| 6 |
★ Contempt
Sit start on the far left side of the underclings (just right of the start to Tally Ho), then straight up, topping out right of where Tally Ho tops out. FA: Chris Warner | V6 | 4m | |||||
| 7 |
★★ Dripping on Trips Left
Stand start at the big underclings, make a big move into the horizontal break and then traverse left to finish as for Tally Ho. FA: chris warner | V4 | 4m | |||||
| 8 |
★★ Dripping on Trips
Stand start on the big underclings and head to the crimpy rail for Vendetta and top out as for Vendetta. FA: Chris Warner | V6 | 4m | |||||
| 9 |
★★★ The Joker
A Canberra classic - the proud line diagonally up the front of the boulder as you approach on the walk in. Good positive holds, but still hard work! Note: this is a squat start - you start on the first set of good holds. FA: Chris Warner | V6 | 4m | |||||
| 10 |
★★★ The Joker - sit
Per ex-Canberran Duncan Brown - the full sit to the Joker line. Tough for the grade, possibly V8. | V7 | 4m | |||||
| 11 |
★★ Stopping All Stations
Start up The Joker, then reverse Vendetta, and finish up Tally Ho. Not as contrived as it sounds - actually a pretty nice line. The Vendetta rail is harder in this direction. Gets V9 in the guidebook, but might be a bit soft. | V9 | 8m | |||||
| 12 |
★★ Stopping Absolutely All Stations
The full link-up of the boulder. Stopping All Stations with the sit start. FA: Brendon Jones, 2 Jun 2018 | V9 | 8m | |||||
| 13 |
★★★ Stop with the Stopping Stations
Sit start the Joker, climb this, then reverse Vendetta and finish up the fingery mantle of Contempt. Sustained and consistently hard. FA: Nick White, 14 Jul 2018 | V9/10 | ||||||
| 14 |
★★ Derailment
Sit start the Joker and then when the diagonal crack runs out make hard moves to reverse Cerebro finishing up Tally Ho. FA: Ashby Cooper, 11 Oct 2020 | V10 | ||||||
| 15 |
★★ Lipstick Lesbian
Start for the Joker, then head straight up where the rock splits into two cracks. Long dyno to the big slope, match then mantel up. FA: Chris Warner | V10 | 4m | |||||
   |
||||||||
 Chris Beers
1.1.3. Warmup Slab 3 routes in Boulder
- Summary:
-
All Bouldering
description
Slabby and slightly mossy warmup
| Route | Grade | Style | Selected ascents | |||
|---|---|---|---|---|---|---|
| 1 |
Persian Rug
Nice warmup problem upslope and behind Glitz Rock | V0 | 3m | |||
| 2 |
Number 5
Right hand variant to Persian Rug (#6 in CCA guide). | V0 | 3m | |||
| 3 |
Prydain
Sit start left of persian rug on the undercling and up the "arete". Eliminate - left side rail is out. | {US} V0 - 1 | 3m | |||
1.1.4. Prow Rock 8 routes in Boulder
- Summary:
-
All Bouldering
Lat / Long: -35.475890, 148.931666
description
Prominent overhung prow upslope from warmup slab and upslope and behind Glitz Rock
   |
||||||||
| Route | Grade | Style | Selected ascents | |||||
|---|---|---|---|---|---|---|---|---|
| 1 |
★ Intrusion
Sit start problem through obvious basalt or similar intrusion on back of boulder and right of prow. FA: Chris Warner | V3 | 3m | |||||
| 2 |
★ Intrusion stand
Stand variant to intrusion. Very height-dependent. | V2/3 | 3m | |||||
| 3 |
★ Ruffian
Sit start and then go diagonally left up the seam. Falling at the end would be bad. FA: Chris warner | V3 | 5m | |||||
| 4 |
★★★ Spruce Moose - stand
Standing start to Spruce Moose - slap up the boulder. Burly.
FA: Chris Warner | V5 | 4m | |||||
| 5 |
★★★ Spruce Moose - sitstart
Sit start down on the left arete then slap out to the right side of the prow then continue up with big compression moves up the prow. FA: Chris Webb Parsons | V8 | 4m | |||||
| 6 |
Lanky Yanky
Up and left crimping under roof then up and over. | V8 | 4m | |||||
| 7 |
Throw Back
Long throw to crimp. FA: Chris Warner | V4 | 4m | |||||
| 8 |
Pubs
The slab. FA: Chris Warner | V3 | 3m | |||||
1.1.5. Slab Rock 3 routes in Area
- Summary:
-
All Bouldering
Lat / Long: -35.475776, 148.931441
description
Behind Prow Rock and slightly uphill. This is a big slabby blob of a rock.
  |
||||||||
| Route | Grade | Style | Selected ascents | |||||
|---|---|---|---|---|---|---|---|---|
| 1 |
Another
Grunt your way up the slab on the left side right in the trees. If you can be bothered. You might get a real surprise if you fall. FA: Chris Warner | V1 | 2m | |||||
| 2 |
★ Szady Slap
Traverse all the way along the slab from the right hand side of the rock as you come uphill. Hope you've got good friction in your hands! FA: Clinton Szady | V4 | 2m | |||||
| 3 |
Peter Pan
Left of the start to Szady Slap, take a run at the slab, jump, get your feet set and reach for glory. Invigorating cooldown. | V1 | 3m | |||||
1.1.6. Number 15 boulder 3 routes in Boulder
- Summary:
-
All Bouldering
Lat / Long: -35.476219, 148.931501
history
I had these problems climbing differently. Number 15 and 16 started at the far right hand side, with 15 traversing left a short way then heading up the slab, and number 16 heading all the way left (180 degrees clockwise round the boulder). Number 17 is correct - sit start up and over the bulge from the front-most corner. See topo with poor quality.
  |
||||||||
| Route | Grade | Style | Selected ascents | |||||
|---|---|---|---|---|---|---|---|---|
| 1 |
★★ Back in Black (#15)
Sit start from left of slab then traverse right and up the slab on crimps. FA: Chris Warner | V4 | 2m | |||||
| 2 |
★★ Slow and Low (#16)
Sit-start traverse the boulder left to right. FA: Chris Warner | V3 | 2m | |||||
| 3 |
Bergs / Grey Is The New Black
Sit-start the arete. FA: Chris Warner | V2 | 2m | |||||
1.1.7. Heart Block(s) 13 routes in Boulder
- Summary:
-
Mostly Bouldering
Lat / Long: -35.476350, 148.931246
description
Climbs listed left to right facing the track. Still a line or two to go here? Includes a few boulders downhill and left (if you face the hill) and uphill and right - the big protruding prow rock with a cave underneath.
| Route | Grade | Style | Selected ascents | |||||
|---|---|---|---|---|---|---|---|---|
| 1 |
Little Arete (#18)
Sit-start and up to the left or the right. Rock on the left of the track just before heart block FA: Chris Warner | V3 | 2m | |||||
  |
||||||||
| Route | Grade | Style | Selected ascents | |||||
| 2 |
★★ Drug Money for the Bunny (#19)
FA: Chris Warner | V3 | 5m | |||||
| 3 |
★ Organs in Orbit (#20)
Traverse left to right then up, finishing as for 22, the righthandmost climb. Either gaston through the crux or execute a hard cross-through. FA: Chris Warner | V6 | 10m | |||||
| 4 |
Vena Cava
start left of rocks on undercling. continue up underclings to the break and straight up 'check your head' | V7 | ||||||
| 5 |
★★★ Check Your Head (#21)
classic Highball. FA: Chris Warner | V4 | 8m | |||||
| 6 |
★★ Right Ventricle
Sit start on the crack and stay in crack then finish up and right. V5 | V5 | ||||||
| 7 |
★★ Swinging Doors (#22)
Up onto a good flat edge with crappy footers, get yourself set, dyno out left then up. FA: Chris Warner | V6 | 6m | |||||
| 10 |
Number 23
Sit-start. Looks like something has broken, as this has minimal hand holds and small feet. Looked to be a single dynamic move to the top. | V3 | ||||||
1.1.7.1. Second Heart 1 route in Boulder
- Summary:
-
All Bouldering
description
A bit further on downhill and left (if you are looking uphill) from the main heart block. At this stage, needs some cleaning.
 |
||||||||
| Route | Grade | Style | Selected ascents | |||||
|---|---|---|---|---|---|---|---|---|
| 1 |
Project 1
The crack. | V0 | 5m | |||||
1.1.7.2. The Second Prow 4 routes in Boulder
- Summary:
-
All Bouldering
description
Uphill and to the right of the heart block proper is a huge jutting prow with a cave underneath. This looks to be a rock that just keeps giving.
 |
||||||||
| Route | Grade | Style | Selected ascents | |||||
|---|---|---|---|---|---|---|---|---|
| 1 |
Vitruvian
Stand start at flake, matching hands above. Layback from there out to the edge of the slope, cut feet, find the slot and up. FA: David Nott, 2011 | V3 | 2m | |||||
| 2 |
★★ Visceral
Start as for Vitruvian, layback out right, cut feet and dangle in thin air, then turn and heel hook up in the slot just before the end of the jutting prow. V4 moves up to here... Now execute a gut-wrenching mantle with your left foot dangling in the air. Positive holds. Pretty damn contrived. On reflection, it's not worth stars, but it's fun to try and mantel over the shit foot-slot. The full line is the real prize. Don't touch the ground, obviously! FA: David Nott, 2011 | V5 | 2m | |||||
| 3 |
Project 1 - prow traverse
Traverse from the start of Vitruvian right around the boulder, heel hooking and groaning all the way. Pretty much a huge campus problem really. | V9 | 2m | |||||
| 4 |
Project 2 - the Cave
Sit start inside the cave, move to a downward-sloped rail, huge throw up to next hold. Not sure if it's possible without hitting the rock behind, but this is one for the insanely strong. | 3m | ||||||
1.1.8. The Upper Ridge 22 routes in Sector
- Summary:
-
All Bouldering
Lat / Long: -35.476219, 148.929996
description
Past Heart Block and the big blank faces. Still more to be developed here. A good area for people of all levels - beginner to hardcore.
approach
From The Heart Block head pretty well straight up the hill, veering slightly right. Youu'll get to some large boulders which you can squeeze through (to get to problems 1-3) or walk around right (to come out near Rumspringa). The track is pretty faint, but if you head uphill for 200-300m you'll get to the area easily.
There are many easily identifiable rocks and climbs here, so check the topos prior to heading out to guarantee success (in finding the area).
| Route | Grade | Style | Selected ascents | |||||
|---|---|---|---|---|---|---|---|---|
| 1 |
★ Number 1
Sit start. | V1 | 3m | |||||
| 2 |
★ Jayenne
Stand start from the bottom of the boulder. After gaining your feet, a fair sized dynamic move out left from smears will get you to the glory rail, and then finish as for #1. FA: David Nott, 2011 | V3 | 5m | |||||
| 3 | Number 2 | V0 | 3m | |||||
| 4 |
★ Nice Guys Finish Last
Slab. FA: Chris Warner | V1 | 5m | |||||
| 5 |
★★ O'Ren Ishi
Sit start. Traverse left then up. FA: Chris Warner | V7 | ||||||
| 6 |
★★ Cotten Mouth
Sit start then over onto slab. FA: Chris Warner | V4 | 3m | |||||
Rumspringa boulderGPS coordinates: -35.476030,148.930028 (approx) | ||||||||
| 8 |
★★ Rumspringa
Sit-start up the arete. Quite overhung. A great quality climb well worth the walk up to this sector just by itself. Low in the grade. FA: Chris Warner | V6 | 4m | |||||
| 9 |
★★ Fraud Landis
Sit start then traverse left onto slopes from Rumspringa. FA: Andrew Bull | V7 | ||||||
| 10 |
★★ Rumspringa stand
Seems about the same as Rumspringa as the crux balance move is in the stand, but doesn't include the heel hook above the head. | V5 | 4m | |||||
| 11 |
★ QJ WIN
Crimp and dyno. vertical problem just 5m down from 'snatch strap' FA: Chris Warner | V6 | ||||||
| 12 |
★ Snatch Strap
Sit start right side then up the curving line FA: Chris Warner | V2 | 3m | |||||
| 13 |
★ Boat Mantle
Sit start. FA: Chris Warner | V2 | 3m | |||||
| 14 |
South Paw
sit start bottom left climb right | V2 | ||||||
| 15 |
★ Blue Jeans
Sit-start then mantle. FA: Chris Warner | V1 | 2m | |||||
| 16 |
★★ More moss
Sit start. FA: Chris Warner | V2 | ||||||
| 17 |
big arete
climbed? | |||||||
Blood Makes Noise boulderGPS coordinates: -35.476420,148.930193 (approx) | ||||||||
| 19 |
★★★ Blood Makes Noise
Start with hand jam between blocks then into crack, pull lip and up right. Epic line! FA: Robert Lange | V7 | 5m | |||||
| 20 |
★★★ Scream
Start with a hand jam between blocks and then into crack, head straight up and dyno. FA: Andrew Bull | V8 | ||||||
| 21 |
Between the lines
start on flakes up and exit right with tiny crimps FA: chris warner | V4 | ||||||
| 22 |
Counter point
right arete FA: chris warner | V2 | ||||||
| 23 | Corner Bloc | V0 | ||||||
| 24 |
★★ Reality Creep
sit start then to jug and slab out FA: chris warner | V3 | ||||||
        /12/ea/12eac3040a04541790208dc4367e710f1227ee90) /80/88/808849ece30e2ebc7f4bf63ae817018f34d9c1e5)   |
||||||||
1.1.9. Sundries 8 routes in Area
- Summary:
-
All Bouldering
Lat / Long: -35.477196, 148.929890
description
A distance from the main area, walk up left past the heart block, diagonally across the side of the hill through some ferns. A hundred metres or so past the heart block are some more larger blocks - no climbing is on these yet. Walk up and around these, across and slightly up the hill for several hundred metres (there's a faint track), and then as the bush clears head uphill. The track leads you to the boulder containing Problem #2.
This area doesn't look like it's had much traffic for a while, and is starting to be reclaimed by the bush. The landing areas are growing over, and there's moss on the top outs. Some climbs also look like holds have come off, so the grades may no longer be accurate.
Walking to the Sundries is the best way to get to the Ice Blocks, which are a little further up the hill, and more to the left.
| Route | Grade | Style | Selected ascents | |||||
|---|---|---|---|---|---|---|---|---|
| 1 |
Dren
Sit start, grabbing either side of the prow. Work your way up and top out - average feet all the way. FA: Chris Warner | V2 | ||||||
| 2 |
Soot
Layback the flake to the left up onto the boulder, then top out to the right. FA: Chris Warner | V2 | ||||||
| 3 |
Rarze
Sit start. Up to the top of the first boulder, then head straight up and slightly left over the second. Once on top, downclimb round to the left. FA: Chris Warner | V3 | ||||||
| 4 |
Tauris
Sit start as per #3. Once at the top of the first boulder, follow the seam up and right. FA: Chris Warner | V2 | ||||||
| 5 |
Flicking your switch
In front of problems 3 and 4, accessed under the huge burnt tree. Difficult and blank looking layback up and left to a tricky top out. | |||||||
| 6 |
★ Chime
Sit start. Up the broken corner using many different features. | V0 | ||||||
Daddy boulderGPS coordinates: -35.477319,148.929968 (approx) | ||||||||
| 8 |
★★★ Its daddy you shit head
Sit start round to the right. Follow the good layback flake up and left round the tock, and top out straight up once at the 'ledge'. Downclimb over the back. FA: Clinton Szady | V5 | ||||||
| 9 |
★ Dance for daddy
Mantle up, starting off the block. Awkward ledge, then top out straight up. Downclimb off the back. FA: Chris Warner | V3 | ||||||
      |
||||||||
1.1.10. The Ice Blocks 8 routes in Area
- Summary:
-
All Bouldering
Lat / Long: -35.477741, 148.928885
- Update 31 July 2020:
- Location updated using GPS coordinates of Aspen Armor and Born-again Hooligan boulders. Note that the faint track and cairns mentioned in the following description have mostly been erased by the recent fires and high winds knocking trees over.
description
Highest on the hill and with the best quality, sometimes unusual looking granite. This area is underdeveloped and so climbing can be hard to find.
The developed climbs are on rock of exceptional quality, but other rock is flaky. Development of other climbs in this area (plenty of potential) will require cleaning / removal of loose flakes on the surface of some boulders.
approach
The best way to get to this area is to walk up to the Heart Block, head across the hill to The Sundries, head up a little further (there's a faint track) and at the cairn head left across the hill following more cairns. The track comes out at Aspen Armour. Heading straight up the hill from The Sundries will lead you to the summit, and you'll miss the Ice Blocks by 50m or so. If you get to the summit, head towards Corin Road until you get to an area with lots of rocks with scree between them, then head downhill 100m or so.
     |
||||||||
| Route | Grade | Style | Selected ascents | |||||
|---|---|---|---|---|---|---|---|---|
| 1 |
★ More
Sit start. Up crack in corner, trending right and round onto the top. FA: Chris Warner | V0 | ||||||
| 2 |
★★ Born-again Hooligan
Sit start up to a big sloper then up to a good edge on top. Easy top out and down climb. GPS (approx): -35.477682, 148.928839 FA: Chris Warner | V4 | 3m | |||||
| 3 |
Crete it
Sit start then up left, staying on the main block (don't escape up the crack between the boulders). FA: Chris Warner | V5 | ||||||
| 4 |
Skullduggery
Sit start as per #3. Big throw right to a jug, then up to the top. FA: Chris Warner | V4 | ||||||
Aspen Armor BoulderGPS coordinates: -35.477820,148.929039 (approx) | ||||||||
| 6 |
★★★ Aspen Armor
Hard sit start up to break, then head up ledges to top. FA: Chris Warner | V7 | ||||||
| 7 |
★★★ Skills to Pay the Bills
Sit start as per #5 to break, then traverse right on slopers to the end of the break, then head up to top. FA: Chris Warner | V10 | ||||||
| 8 |
★ Stone Cutter
Boulder down and left of Aspen arbor. Start at the bottom right of the broken circle, move left to the arete and up. FA: Chris Warner | V3 | ||||||
 |
||||||||
| Route | Grade | Style | Selected ascents | |||||
| 9 |
Price Check
Sit start up the arete, then top out. FA: Chris Warner | V5 | ||||||
1.1.11. Lost World 3 routes in Area
- Summary:
-
All Bouldering
Lat / Long: -35.476935, 148.927456
description
The most remote of the Canteloupe Hill areas - on the back side of the hill overlooking Tidbinbilla. A very decent walk for a select few problems, but a beautiful location with a unique outlook.
approach
Approach as for the Ice Blocks or Upper Ridge. Head for the summit of the hill, then over the back towards Tidbinbilla (off track either way but open and straightforward). As you get near you will see a 10m~ high freestanding pillar of rock. Once you reach this, traverse right along the top of the cliffs for a short distance to descend to the base of the cliffline. You will reach the hard project first. Walk left around the bottom of the cliffs to get to One Undisclosed Period in Paradise (V6). Approximately 45mins from the car - about 10mins from the Ice Blocks or 15mins from Upper Ridge.
  |
||||||||
| Route | Grade | Style | Selected ascents | |||||
|---|---|---|---|---|---|---|---|---|
| 1 |
★★★ One Undisclosed Period in Paradise
A solid walk for a decent problem. Sit start on obvious large flat flake to high but easy top out. To get off the top, move left and jump off onto mats. | V6 | 5m | |||||
| 2 |
Egg Project
Squat start from low diagonal undercling holds (forms an acute upside down triangle). Big pull to sloper on the lip followed by a big tension move out left to the positive arete and an easy top. Will be all time when it goes. Likely double digits. | |||||||
| 3 |
Lip Project
Left to right rising lip traverse. | |||||||
1.1.12. The Hand 11 routes in Boulder
- Summary:
-
All Bouldering
Lat / Long: -35.474842, 148.933943
description
Branching off to the right from the main track as you walk towards Glitz Rock, the Hand has some good warmup climbs. Bring a wire brush with you, the moss is fairly rampant; however, the footing is at least void of moss.
| Route | Grade | Style | Selected ascents | |||||
|---|---|---|---|---|---|---|---|---|
| 1 |
★★ Cute Kill
Sit start from the cave up holding onto a big flake. Compressive move to start. FA: Chris Warner | V3 | 6m | |||||
| 2 |
★ Pinky Cling
Contrived sit start. 6 metres, but an easy terrain crack up top. FA: Chris Warner | V4 | 6m | |||||
| 3 |
Kerl
Straight up a mossy crack. Nothing difficult. FA: Chris Warner | V0 | 5m | |||||
| 4 |
★ Thumb Mantle
Sit start. Good mantle practice. **This problem no longer exists as the entire shield that comprised it has toppled over. Geologic time includes now. FA: Chris Warner | V1 | 2m | |||||
| 5 |
Middle Finger
Up the right side of the palm. Easy terrain. FA: Chris Warner | V0 | 6m | |||||
| 6 |
★ Tickler
Sit start. The hardest V3 in the entire world? FA: Chris Warner | V5 | 4m | |||||
| 7 |
★ Skin end
Up the side of the boulder using layback-type moves. Hard work to get your feet on top. FA: Chris Warner | V2 | 4m | |||||
| 8 |
#7 RH variant
Good warmup for the burlier #6-7. | V0 | 4m | |||||
| 9 |
Divagation
It really is a word. Sit start at the opening of the cave around the corner and uphill a few metres from #7. Start on positive holds, then find the hidden hold up high to progress. The boulder behind is in - it's a cross between a chimney climb and a face climb! | V1 | 3m | |||||
| 10 |
Mellifluous
Small boulder on the way in to the hand. Warm-up sit start. | V0- | 2m | |||||
| 11 |
★ Trichiasis
Sit start for the V3, then exit out the roof and up the vertical slab. Direct might be a fair bit harder if you're willing to huck a huge dyno - not sure it's viable. FA: David Nott, 2011 | V3 | 5m | |||||
     |
||||||||
1.2. George's Boulder 20 routes in Boulder
- Summary:
-
All Bouldering
Lat / Long: -35.467671, 148.957714
description
Along Corin Road - drive around 2.5 km from first right turnoff (to the Jism and Fortress), turn right and park on a dirt road and walk around 100 metres uphill.
Google map coords for finding the rock (and the right place to park):
-35.467655,148.957705
Recently, a lovely little bench has even been added for people to sit on while watching climbers fall off 'Phone Sex'!
approach
Park at the gate, ,head up the road about 30m, turn right on another dirt road for about 40 meters, then turn left onto a subtle track just before the creek, and follow this up. Boulder is at -35.467655,148.957705
   |
||||||||
| Route | Grade | Style | Selected ascents | |||||
|---|---|---|---|---|---|---|---|---|
| 1 |
★★ Call Girls / The High Road
Sit start to the far right low down, then pull around the corner. Finish with higher traverse to jug. The warm up... FA: George Fieg | V4 | 2m | |||||
| 2 |
★★ On Hold / The Low Road
Sit start to the far right and pull around the corner. Finish with lower traverse/slopes to jug. Desperate. FA: Chris Warner | V5 | 2m | |||||
| 3 |
★★ The Tower
Sit start and up the arete. | V6 | 4m | |||||
| 4 |
★★ FIS
Sit start and straight up the thin slab | V4 | 4m | |||||
| 5 |
★★ JAS
Start on the rail and up through a few sidepulls and crimps to a slab topout | V4 | 5m | |||||
| 6 |
★ Shy moves
Up and onto the slab. Smearing moves and a few check your head moments. FA: Chris Warner | V4 | 5m | |||||
| 7 |
★★ Slopesanity
Reverse 1a/b from the start of the rail past the victory jugs, using only the slopers. Arguably better than 1a, slightly more fun moves in the opposite direction. Holds all face the wrong way to traverse in this direction though, so it's like downclimbing slopers! | V6 | 2m | |||||
| 8 |
★★ Leg Spinner
Sit start to good jug, then up to good edge (dyno or intermediate crimps) and up. A very sizeable dyno if you do it that way - bring a few mats to stack if you love your ankles. FA: Andrew Bull, 2008 | V6 | 5m | |||||
 |
||||||||
| Route | Grade | Style | Selected ascents | |||||
| 9 |
★★★ Shape Shifters
Straight up the front side of the boulder just before the end of Phone Sex. Sit start to big jug, heal hook and big chuck to crimp out left. pull hard to the high gaston and up. FA: Chris Warner, 2008 | V10 | 5m | |||||
| 10 |
★★ Happy ending
Sit start as for Shape Shifters. Up to the jugs then right along the rail to join Shy Moves, then continue right and up the slab to top out. FA: Pete, 2018 | V5 | 5m | |||||
| 11 |
★★ Phone Diddle
The start many people use when claiming 'Phone Sex'! From the scooped out area on the far side of the boulder as you walk in, start one block right on larger holds and then traverse out right to the jug for 1a/1b. Still has the hardest moves of 'Phone Sex', but the full sit is now doable as the start has been cleaned up. Requires less endurance than the full line. | V7 | 2m | |||||
| 12 |
★★ Phone Sex
Start from the scooped out area on the far side of the boulder on low slopers, hard start moves out right on crimps (You may need to clean the Blackberries as they are persistent). Many have started one block over for the sit-start, taking out the most strenuous moves of the climbs - see 'Phone Diddle'. Traverse out right and end on the jug for 1a/1b. FA: George Feig | V8 | 2m | |||||
| 13 |
★★ Phone Sex with a Happy Ending
Start at Phone Sex and continue up Happy Ending to end on top of the boulder. Nicer end to Phone Sex but not much harder. May have been climbed before (if so, feel free to claim it!). FA: Nick White, 8 Jul 2018 | V8 | 5m | |||||
| 14 |
Blood Moon
Start as for Phone Sex and finish through Shape Shifters. FA: Chris Webb Parsons, 2014 | V11 | 6m | |||||
| 15 |
★★★ Mitosis
The impossible line directly above the Phone Diddle start. Sit start at the ledge, move to some tiny crimps then up through some imaginary slopers to top out. FA: Stephen Waring, 17 Jun 2018 | V12 | 4m | |||||
| 16 |
★★★ Phone Extension
Start from the sit start on phone sex, reach the finish jug of that problem but get set up, head into the 'Leg Spinner' dyno and topout. FA: Andrew Bull, 2008 | V9 | 5m | |||||
| 17 |
★ Full Traverse
Traverse the full boulder. One for the pumpers. FA: Andrew Bull | V9 | 2m | |||||
| 18 |
Reverse Charges
Reverse 'Phone Sex'. FA: | {US} V8 | 1m | |||||
| 19 |
★ Dialed
Up the flake at the right side of the boulder as you approach it from the parking area (flake's gone so this problem is either way more difficult or just not worth the trouble). | V4 | 5m | |||||
| 20 |
★ My Toe Cyst
Do Phone Sex then keep traversing through reverse Call Girls until you reach the base of The Tower then do The Tower. FA: Dan Rooney, Apr 2021 | V8/9 | ||||||
1.3. Snake Rock Boulders 69 routes in Area
- Summary:
-
All Bouldering
Lat / Long: -35.476372, 148.952350
description
Drive about 3.5km along Corin Road (coming from Canberra) and park on the left near a telegraph poll where the power lines cross the road.
Walk about 200m down a dirt road (entrance near telegraph pole and blocked by large rocks) until you approach an open, sandy clearing, turn right, walk about 200m further until you see a cairn, turn left into bush and follow track down to creek. Cross creek and walk up tending left until you see boulders.
access issues
There are no access issues that I'm aware of. Of course, please remember the usual climbing dos and don'ts.
history
George Fieg started bouldering here not long after the 1997 ACT Granite guide was published. He and then wife Sarah developed the Trackside and Riverside Boulders. Justin Ryan and Nathan Wales developed the Cartman and Ike Boulders in 1998. Bevan Ashby developed the Roadside Boulders in 2015.
1.3.1. Roadside Boulders 18 routes in Sector
- Summary:
-
Lat / Long: -35.475369, 148.952209
description
Drive about 3.5km along Corin Road (coming from Canberra) and park on the left near a telegraph pole where the power lines cross the road.
Walk about 200m down a dirt road (entrance near telegraph pole and blocked by large rocks) until you approach an open, sandy clearing, turn right and you will see the boulders on your left.
history
People have bouldered here previously but the original names of problems (if any) have been lost to history.
Cleared, cleaned, climbed and catalogued by Bevan Ashby in 2015.
 |
||||||||
| Route | Grade | Style | Selected ascents | |||||
|---|---|---|---|---|---|---|---|---|
| 1 |
1.
Stand start left arete, climb straight up and top out. FA: Bevan Ashby, 15 Sep 2015 | V2 | 3m | |||||
| 2 |
2.
Sit start left arete, climb straight up and top out. FA: Bevan Ashby, 15 Sep 2015 | V3 | 3m | |||||
| 3 |
3.
Stand start right arete, climb straight up and top out. FA: Bevan Ashby, 15 Sep 2015 | V1 | 3m | |||||
| 4 |
4.
Sit start from bottom of crack, climb crack and top out. FA: Bevan Ashby, 15 Sep 2015 | VB | 3m | |||||
| 5 |
★ 5.
Stand start right arete, climb up and top out (boulder to left out). FA: Bevan Ashby, 15 Sep 2015 | V3 | 3m | |||||
| 6 |
6.
Stand start from bottom of slab, climb up and top out. FA: Bevan Ashby, 15 Sep 2015 | V0 | 4m | |||||
 |
||||||||
| Route | Grade | Style | Selected ascents | |||||
| 7 |
★ The Nipple Mantle
Stand start matched on rounded hold at end of horizontal block. Mantle block (opposing boulder out). FA: Bevan Ashby, 16 Sep 2015 | V6 | 2m | |||||
| 8 |
★★ The Nipple Traverse
Stand start matched on rounded hold at end of horizontal block. Traverse rightwards finishing as for route 7. FA: Bevan Ashby, 17 Sep 2015 | V5 | 3m | |||||
| 9 |
★★ The Nipple
Sit start at base of boulder beneath roof (opposing boulder out). Climb up, traverse leftwards along roof and finish as for "The Nipple Mantle". FA: Bevan Ashby, 18 Sep 2015 | V7 | 4m | |||||
| 10 |
★★ 7.
Sit start at base of boulder beneath roof (opposing boulder out). Climb straight up and top out. FA: Bevan Ashby, 18 Sep 2015 | V4 | 4m | |||||
| 11 |
★ 8.
Stand start right side of the arete, climb straight up and top out. FA: Bevan Ashby, 16 Sep 2015 | V2 | 4m | |||||
| 12 |
★★ 9.
Sit start right side of the arete, climb straight up and top out. FA: Bevan Ashby, 16 Sep 2015 | V5 | 4m | |||||
  |
||||||||
| Route | Grade | Style | Selected ascents | |||||
| 13 |
★ 10.
Sit start from base of left hand crack. Climb leftwards onto slab then straight up and top out. FA: Bevan Ashby, 18 Sep 2015 | V2 | 5m | |||||
| 14 |
11.
Sit start from base of left hand crack, climb crack and top out. FA: Bevan Ashby, 18 Sep 2015 | V1 | 4m | |||||
| 15 |
★ 12.
Sit start from base of right hand boulder, climb arete/crack and top out. FA: Bevan Ashby, 18 Sep 2015 | V0 | 4m | |||||
| 16 |
★ I'm Not Your Bitch Stand
Stand start, climb up and top out. FA: Bevan Ashby, 19 Sep 2015 | V4 | 3m | |||||
| 17 |
★★ I'm Not Your Bitch
Sit start from base of boulder. Climb up following seam topping out at its highset point. FA: Bevan Ashby, 14 Oct 2015 | V9 | 4m | |||||
| 18 |
13.
Sit start from base of boulder (leftside). Climb up and top out. FA: Bevan Ashby, 19 Sep 2015 | V6 | 2m | |||||
1.3.2. Riverside Boulder 5 routes in Boulder
- Summary:
-
Lat / Long: -35.477623, 148.952497
description
First boulder you approach after crossing creek.
approach
Drive about 3.5km along Corin Road (coming from Canberra) and park on the left near a telegraph poll where the power lines cross the road.
Walk about 200m down a dirt road (entrance near telegraph pole and blocked by large rocks) until you approach an open, sandy clearing, turn right, walk about 200m further until you see a cairn, turn left into bush and follow track down to creek. Cross creek and walk up tending left until you see boulders.
history
George Fieg and then wife Sarah started bouldering here not long after the 1997 ACT Granite guide was published.
  |
||||||||
| Route | Grade | Style | Selected ascents | |||||
|---|---|---|---|---|---|---|---|---|
| 1 |
★ 1.
Sit start right arete, climb up and top out. | V2 | 2m | |||||
| 2 |
2.
Sit start large rail, climb up and top out. | V1 | 2m | |||||
| 3 |
★ 3.
Sit start base of crack, climb up and top top. | V3 | 3m | |||||
| 4 |
★ 4.
Sit start from base of prow, climb up and top out. | V3 | 3m | |||||
| 5 |
★ 5.
Sit start from large flake. Climb up and top out. | V0 | 3m | |||||
1.3.3. Cartman Boulder 15 routes in Boulder
- Summary:
-
Lat / Long: -35.477967, 148.952528
description
Second boulder you approach after crossing creek.
approach
Drive about 3.5km along Corin Road (coming from Canberra) and park on the left near a telegraph poll where the power lines cross the road.
Walk about 200m down a dirt road (entrance near telegraph pole and blocked by large rocks) until you approach an open, sandy clearing, turn right, walk about 200m further until you see a cairn, turn left into bush and follow track down to creek. Cross creek and walk up tending left until you see boulders.
history
Justin Ryan and Nathan Wales developed the Cartman Boulder in 1998.
  |
||||||||
| Route | Grade | Style | Selected ascents | |||||
|---|---|---|---|---|---|---|---|---|
| 1 |
★ 1.
Stand start then climb up and top out. FA: Bevan Ashby, 18 Oct 2015 | V5 | 4m | |||||
| 2 |
★ 2.
Stand start then climb up and top out. | V3 | 4m | |||||
| 3 |
★★ The Summer of Nath
Stand start then climb up and top out. FA: Nathan Wales, 1998 | V6 | 5m | |||||
| 4 |
★ 3.
Stand start from base of arete. Climb arete and top out. | V4 | 5m | |||||
| 5 |
★ Sweets
Stand start then climb up and top out. FA: Bevan Ashby, 1 Nov 2015 | V9 | 5m | |||||
| 6 |
★ 4.
Stand start then climb up and top out. | V3 | 5m | |||||
 |
||||||||
| Route | Grade | Style | Selected ascents | |||||
| 7 |
Ruth
Stand start from base of arete. Climb arete and top out. FA: Justin Ryan, 1998 | V5 | 5m | |||||
| 8 |
★★★ Clementine
Stand start from base of flake. Climb flake and top out. Classic. One of the best at this grade in Canberra! FA: Justin Ryan, 1998 | V4 | 6m | |||||
| 9 |
★★ 5.
Sit start from base of flake. Climb flake and top out. FA: Bevan Ashby, 18 Nov 2015 | V7 | 5m | |||||
| 10 |
Duffy St
Stand start then climb up and top out. FA: Justin Ryan, 1998 | V4 | 5m | |||||
| 11 |
6.
Stand start then climb up and top out. | V4 | 4m | |||||
| 12 |
★ 7.
Stand start then climb up and top out. | V2 | 4m | |||||
| 13 |
8.
Stand start from base of corner. Climb corner and top out. | V1 | 4m | |||||
| 14 |
★ 9.
Stand start from base of arete. Climb arete and top out. | V4 | 3m | |||||
 |
||||||||
| Route | Grade | Style | Selected ascents | |||||
| 15 |
10.
Sit start then climb up and top out. FA: Bevan Ashby, 27 May 2015 | V4 | 2m | |||||
1.3.4. Ike Boulder 9 routes in Boulder
- Summary:
-
Lat / Long: -35.478184, 148.952565
description
Third boulder (left of walking track) you approach after crossing creek.
approach
Drive about 3.5km along Corin Road (coming from Canberra) and park on the left near a telegraph poll where the power lines cross the road.
Walk about 200m down a dirt road (entrance near telegraph pole and blocked by large rocks) until you approach an open, sandy clearing, turn right, walk about 200m further until you see a cairn, turn left into bush and follow track down to creek. Cross creek and walk up tending left until you see boulders.
history
Justin Ryan and Nathan Wales developed the Ike Boulder in 1998.
 |
||||||||
| Route | Grade | Style | Selected ascents | |||||
|---|---|---|---|---|---|---|---|---|
| 1 |
1.
Stand start then climb up and top out. | V1 | 3m | |||||
| 2 |
★ 2.
Sit start (left of arete) on rail. Climb face\arete and top out. | V2 | 3m | |||||
| 3 |
3.
Stand start corner, climb corner and top out. | V1 | 3m | |||||
| 4 |
4.
Sit start undercut arete, climb arete and top out. | V5 | 3m | |||||
| 5 |
5.
Sit start rounded arete, climb arete and top out. | V0 | 3m | |||||
 |
||||||||
| Route | Grade | Style | Selected ascents | |||||
| 6 |
6.
Stand start then climb up and top out. | VB | 3m | |||||
| 7 |
7.
Sit start then climb up and top out. FA: Bevan Ashby, 4 Nov 2015 | V2 | 3m | |||||
| 8 |
★ 8.
Sit start then traverse left across face finishing as for rounded arete. FA: Bevan Ashby, 4 Nov 2015 | V1 | 6m | |||||
| 9 |
★ The Great Speed Climbing Debate
Sit start at the left of the boulder and traverse right (staying off the top) until the right arête, then top out. | V4 | 7m | |||||
1.3.5. Trackside Boulder 22 routes in Boulder
- Summary:
-
Lat / Long: -35.478268, 148.952308
description
Fourth boulder (obvious overhanging face) you approach after crossing creek.
approach
Drive about 3.5km along Corin Road (coming from Canberra) and park on the left near a telegraph poll where the power lines cross the road.
Walk about 200m down a dirt road (entrance near telegraph pole and blocked by large rocks) until you approach an open, sandy clearing, turn right, walk about 200m further until you see a cairn, turn left into bush and follow track down to creek. Cross creek and walk up tending left until you see boulders.
history
George Fieg and then wife Sarah started bouldering here not long after the 1997 ACT Granite guide was published.
 |
||||||||
| Route | Grade | Style | Selected ascents | |||||
|---|---|---|---|---|---|---|---|---|
| 1 |
1.
Sit start from slot, climb onto back of boulder and top out. | V1 | 4m | |||||
| 2 |
★★ 2.
Sit start from slot, climb right arete and top out. | V4 | 4m | |||||
| 3 |
★★ 3.
Sit start from slot, traverse across prow, then across face at 45 degree angle topping out as for left arete. FA: Bevan Ashby, 22 May 2015 | V7 | 8m | |||||
| 4 |
★ Bev, Bath & Beyond
Linking the V6 sitstart into Frankenruby to add a bit of spice FA: Lachlan Craig | V8/9 | 4m | |||||
| 5 |
★★★ FrankenRuby
Sit start from slot at base of corner, climb prow and top out. FA: Bevan Ashby, 30 Apr 2015 | V8 | 4m | |||||
| 6 |
★★ 4.
Sit start from slot at base of corner, climb corner and top out. | V4 | 4m | |||||
| 7 |
★★ Jerk's Variant
Sit start at base of corner, climb left through corner and then across arete at 45 degree angle topping out as for left arete. Similar difficulty to 6. | V6 | 4m | |||||
| 8 |
★★ 5.
Sit start from left side pull, climb into corner and top out. | V5 | 4m | |||||
| 9 |
★★ 6.
Sit start from left side pull, then across face at 45 degree angle topping out as for left arete. FA: Bevan Ashby, 12 May 2015 | V6 | 4m | |||||
| 10 |
★ The Lanky Imp
Sit start at base of corner, climb left through corner but stay low and go directly from the big jug to the left arete, then climb arete/face and top out. | V8 | 4m | |||||
| 11 |
★ 7.
Stand start left arete, climb arete/face and top out. | V3 | 4m | |||||
| 12 |
Project
Sit start left arete, climb arete/face and top out. | 4m | ||||||
  |
||||||||
| Route | Grade | Style | Selected ascents | |||||
| 13 |
★ 8.
Stand start on edges, climb face then top out. | V2 | 3m | |||||
| 14 |
★ 9.
Stand start on edges, traverse across face at 45 degree angle topping out as for left arete. | V2 | 6m | |||||
| 15 |
★ 10.
Sit start on edges, climb face then top out. | V2 | 3m | |||||
| 16 |
11.
Stand start at base of arete, climb arete and top out (this route is also the best decent). | V0 | 3m | |||||
| 17 |
★ 12.
Stand start middle of wall, climb face and top out. | V1 | 3m | |||||
| 18 |
13.
Stand start about 2m right of left arete, climb left onto arete and top out. | V2 | 3m | |||||
| 19 |
★ 14.
Stand start at base of arete, climb arete and top out. | V3 | 4m | |||||
| 20 |
15.
Stand start about 2m left of arete, climb sloping holds and top out. | V3 | 4m | |||||
| 21 |
16.
Stand start at base of corner, climb corner and top out. | V0 | 4m | |||||
| 22 |
17.
Stand start about 2m left of corner, climb face and top out. | V1 | 4m | |||||
1.4. Strawberry Fields 27 routes in Field
- Summary:
-
All Bouldering
Lat / Long: -35.494482, 148.926322
description
Medium-sized boulder field close to Corin road with its own car parking area close to the boulders. There are two main areas (the field and the patch). All of the obvious lines have been climbed. The grades ranging from v0 to v12. There are a lot of easy warm-up boulders and a collection of harder boulders.
approach
Drive approximately a kilometer past Gibraltar falls to the access road which is on the left. Drive down this road 50 meters to an obvious area. The patch is in front of the parking towards the right a little bit. The field is to the left - to access the field take the track to the left of the road then cut left to the prominent boulders.
| Route | Grade | Style | Selected ascents | |||||
|---|---|---|---|---|---|---|---|---|
The Field | ||||||||
| 2 |
★★★ Slim Pickings
Stand start from left hand crimp and low right hand undercling, up prow to insecure top out. FA: Daniel Fisher | V12 | ||||||
| 3 |
★★ Ringo Starr
Stand start on the face with a left hand crimp, right hand side pull and climb straight up. FA: Andrew Bull, Sep 2023 | V8 | 3m | |||||
| 4 |
★★ Snakes and Ladders
Sit start on high crimps and follow line of small crimps to the top. FA: Sam Healy | V11 | 2m | |||||
| 5 |
★★ Icarus
Stand start to Snakes and Ladders from high crimp. | V7 | 1m | |||||
| 6 |
★ Gruntled
Sit start on thin horizontal crimp and head straight up finishing to the left of the V7 traverse. | V6 | 2m | |||||
| 7 |
★★ Talos
Sit start on good low edge and traverse right on small crimps to top out. | V7 | 4m | |||||
| 8 |
★★ Traverse
Stand start at bottom of feature and follow juggy rising traverse up the arete. | V1 | ||||||
| 9 |
★ Corinthian
Sit start hand crack in gully. Span out right up finger crack on poor feet | V3 | 4m | |||||
| 10 |
★★ Achilles heel
Sitstart by slots underneath huge flake, up and mantle the corner. | V6 | 3m | |||||
| 11 |
★★ Call Me Right
Sitstart the middle of face on jug. Up then trend rightward to mantle. FA: | V4 | 4m | |||||
| 12 |
★★ Open Book
Sitstart the middle of face on jug. Straight up and mantle into groove. FA: | V5 | 3m | |||||
| 13 |
4
Unknown name/ grade. Something goes up the middle, unsure if it starts on the left or right. | |||||||
| 14 |
★★ Hot Sake
Sit start and move left onto slab via long move. | V7 | 3m | |||||
| 15 |
★ Vertical Life Magazine
Stand start. Deadpoint to crimp rail and then balance top out. FA: danny Flanagan, 20 Aug 2023 | V2 | 4m | |||||
| 16 |
★ Spring Edition 2019
Sit start with left hand sharp crimp and right hand sloper (detached block at base is out). Funky moves with bad feat lead to a tricky top out. FA: Daniel Flanagan, 20 Aug 2023 | V4 | 3m | |||||
| 17 |
★★ The Queens Mantle
Stand start on right crimp and slopey edge then climb up. FA: Batt Moyd | V2 | 3m | |||||
| 18 |
★★ Left mantle
Stand start on the slopey top edge then climb up. FA: Batt Moyd | V2 | 4m | |||||
| 19 |
Cabbage
Stand on obvious ledge straight up using left sidepull and small crimps. FA: Kale | V4 | ||||||
| 20 |
★ Give it a crack
Stand start at crack and climb up. Wobbly pillar is in however it might come loose sometime. FA: Batt Moyd | V1 | 4m | |||||
| 21 |
Moss-berries
Stand start on slopy lip then mantle the corner and climb up the mossy slab. Don't brush the moss off for extra top out fun. FA: Batt Moyd | V3 | 4m | |||||
| 22 |
★ Slabezoid
Stand start and up slab between two aretes. | V2 | 3m | |||||
| 23 | Slabezoid Sit | V4 | 4m | |||||
| 24 |
★ Zaglossus Beak
Stand start and compress up pointed face. | V2 | 3m | |||||
The Patch | ||||||||
| 26 |
★ Crack warm up
Layback the crack and top out. | V0 | 3m | |||||
| 27 |
★★ Ugg Thug
Stand or jump start to good rail and continue up face to top out on good holds. | V4 | 4m | |||||
| 28 |
Another Crack Warmup
Sit start the crack and top out. | V1 | 3m | |||||
| 29 |
★★ Undocumented
Start in the break and use arete and crimp on the face to top out. | V4 | 4m | |||||
     /85/af/85af71218e49e8496321f6a2ace0934fc55653d8)      /8d/4a/8d4a23edcf75cbd5c38de1fbb242ee86b374a6dd)    /93/cf/93cfadcceb97ab22adbb0a51f2f0053e10c2c569) /0a/99/0a99a7c346167496dc76a2c26512a5dfef2c3f3b) |
||||||||
1.5. Kelvin Bloc 14 routes in Boulder
- Summary:
-
All Bouldering
Lat / Long: -35.524088, 148.896779
description
A bloc 10 metres off the road, with other boulders nearby and potential for development.
approach
9.7 kilometres past the turn-off to Woods Reserve, the Bloc can be found on the right side of the road.
history
The main bloc was developed by Matt Risutto, Glen Jones, Andrew Bull and Chris Warner in a single day.
  |
||||||||
| Route | Grade | Style | Selected ascents | |||||
|---|---|---|---|---|---|---|---|---|
|
The following lines are described clockwise around the boulder, starting from the left side when standing on the road | ||||||||
| 2 |
Fridge Lift
Start just left of the arete. Straight up to the arete, then follow it to the top | V2 | 3m | |||||
| 3 |
★ Baby Stop It
Start 1m right of Turn the Sheets, straight up to the highest point of the boulder | V2 | 4m | |||||
| 4 |
★ Turn the Sheets
Start 1m right of Payment, up on small holds to a tenuous rock over | V4 | 3m | |||||
| 5 |
★★ Payment
Sit start on the lower arete and traverse right to finish between Fridge Lift and Baby Stop it | V3 | 5m | |||||
| 6 |
★ Fridge Press
Sit start at the lower arete and mantle onto slab | V2 | 4m | |||||
| 7 |
★★ Non-Zero Possibility
Sit start on the arete left of Payment. Up to slopers then traverse left and up blunt arete | V7 | 4m | |||||
 |
||||||||
| Route | Grade | Style | Selected ascents | |||||
| 8 |
Tails of the Drift
Start as for 'Non Zero Possibility', but continue traversing to the left, finishing as for Kelvinator V6. | V9 | 8m | |||||
| 9 |
Chasing Ghosts
Sit start below Erico, into layaway and up through slopes and pinch tending right. Line on this one is approximate- seems like it may be quite contrived. If anyone has clarity on where this goes please edit the topo/ description. | V8 | 3m | |||||
| 10 |
★ Erico
Stand start on slopers. Mantle on prayers | V5 | 3m | |||||
| 11 |
★ Shut the Door
Sit start low on sidepull. Straight up through big move to a jug and mantle. | V3 | 3m | |||||
| 12 |
★ Kelvinator
Start as for Shut the Door. Traverse left staying low, and finish using the very large footer | V6 | 6m | |||||
| 13 |
Undercounter
Sit start. Proceed up on nice holds | V3 | 3m | |||||
| 14 |
Descent
On the right side of the face facing the road. Usually reversed. | V0 | 2m | |||||
| 15 |
Hard Descent
Slab and thin crack between descent and Fridge lift on the face near the road. | V0 | 2m | |||||
1.6. The Kelvin Field 10 routes in Crag
- Summary:
-
All Bouldering
Lat / Long: -35.525064, 148.897250
summary
This sector is across the road from the Kelvin Bloc and about 150 metres up the hill in the burnt patch. At present it is more or less undeveloped, but has great potential.
description
This crag is close to the road, but never seems to have been developed. There are still many more problems to go and seems to be scope for at least 30 quality problems, if not more. Get out there and get amongst it.
approach
Park as for the Kelvin Bloc, cross the road and walk up towards the outcrops you can see from the road. The proud line up the centre of the main wall in the depression of boulders is The Primis (V4).
ethic
No chipping, no bolting, keep your impact to a minimum.
history
Originally developed by Matt Rizzuto, Andrew Bull and Chris Warner in winter 2006. Development started again in May 2019, with Pete and Marco putting up a few lines.
1.6.1. Namadgi Boulder 2 routes in Boulder
- Summary:
-
description
One of the first boulders you approach as you walk into the area. A boulder perfectly cut in half with a very pronounced horizontal traverse.
 |
||||||||
| Route | Grade | Style | Selected ascents | |||||
|---|---|---|---|---|---|---|---|---|
| 1 |
Once Upon A Time in Namadgi
Stand start on the furthest right hand side of the boulder on the large horizontal. Traverse it left, under the overlap and up on good holds. FA: Peter Arcidiaco, 2019 | V5 | 8m | |||||
| 2 |
Open Project
Start matched on the horizontal and climb up. A line I was going to do but ran out of time. | |||||||
1.6.2. Citadel Wall 3 routes in Boulder
- Summary:
-
Lat / Long: -35.524883, 148.897408
approach
Walk up the hill towards the obvious buttresses. This is the large, obvious wall in the depression which faces away from you. The landing is flat and there's room for multiple lines.
history
The lines on this boulder would have been established by Matt, Andrew and Chris back in 2006. First recorded ascents in 2019.
 |
||||||||
| Route | Grade | Style | Selected ascents | |||||
|---|---|---|---|---|---|---|---|---|
| 1 |
★★ The Primis
First line done at the Field- or is it?! If not, write your lines up! Sit start on opposing sidepulls and move upwards through more opposing holds, trending left into huge gaston and then up to good slopes from where you can reach to the top. FA: Marco D'Alessandro, 15 May 2019 | V4 | 5m | |||||
| 2 |
★★ The Primis Direct
A direct finish to 'The Primis'. Start as for the Primus head directly up an mantle out. FA: Peter Arcidiaco, 17 Jun 2019 | V3 | 4m | |||||
| 3 |
★ The Electric Skin Wizard
Sit start matched on the sloper on the right hand side of the boulder. Move to a good edge then make a big move to the sloping arete. Traverse the sloping arete left and top out as for The Primus. The edge you move to is a bit suspicious. It may break. Be careful as the fall isn't the best. FA: Peter Arcidiaco, 25 Jul 2019 | V5 | 4m | |||||
1.6.3. Throne Boulder 5 routes in Boulder
- Summary:
-
Lat / Long: -35.525146, 148.897394
description
The wall with the obvious off-width splitter crack in it. Good morning session block for the warmer months. Full shade until 12:45 and 1240m elevation keep things a tad cooler than the areas lower down the road.
/1f/a9/1fa90a743c2cfb2aca142c162aedef8ac7f30eeb) /c5/c2/c5c2524af196a1c9ad8a6dce7bc594e58da5613c)  /71/11/7111973cd2d180aa54ce41bb8efd9d9819635815) |
||||||||
| Route | Grade | Style | Selected ascents | |||||
|---|---|---|---|---|---|---|---|---|
| 1 |
Warm up slab
3m Left of throne room lhs. Stand start and up trending slightly left. Watch the little rock pedestal when you're topping out. FA: James Lister, Nov 2020 | V0 | 3m | |||||
| 2 |
★★ Throne room lhs
One for the folks that don't like chicken winging. Sit start at juggy block side pull with high feet for opposition. Up to finger jugs then move the feet onto the right side of the crack and pull into the original throne room and finish up that. If you don't like the sit start, the stand from the finger jugs is a nice V3. FA: James Lister, Nov 2020 | V4 | 4m | |||||
| 3 |
★★★ Throne Room
Sit start at the back of the crack matched on the cracks undercling. Pull into the crack and climb it to the top. It isn't over until your standing on top of the boulder!. FA: Peter Arcidiaco, 2019 | V3 | 4m | |||||
| 4 |
★★ Right-Hand Aide
Sit start jug on right boulder. Compress the good slopers and straight over the front. The boulder on the left is out. | V3 | 4m | |||||
| 5 |
★ Hoochie Coochie Spaceman
Sit start at the obvious hold in the lower middle of the boulder. Move up through side pulls and slopers to the victory jug and top out. FA: James Rann, 16 Jun 2019 | V1 | ||||||
1.7. Spark Boulders 7 routes in Field
- Summary:
-
All Bouldering
Lat / Long: -35.530845, 148.888157
summary
Two large boulders very close to the road.
     |
||||||||
| Route | Grade | Style | Selected ascents | |||||
|---|---|---|---|---|---|---|---|---|
| 1 |
★★ Triple Swell
Sit start in jug sidepull. Up the bulge features to committing but easy topout. FA: Pete | V3 | 5m | |||||
| 2 |
Seam project
Sit start then up using crack in left hand and some bad slopers for the right. v10+ | 3m | ||||||
| 3 |
★ Jacques
Sit start on round arete with good flake. Long move to crimp then techy mantle. FA: Pete | V4 | 3m | |||||
| 4 |
★★★ Experiment 221
Stand start in slot. Left then up the cracks with a big dyno. FA: Pete | V7 | 5m | |||||
| 5 |
★★ Doormat
Sit start bottom right. Traverse left through jugs then a crimpy crux. FA: Pete | V6 | 6m | |||||
 |
||||||||
| Route | Grade | Style | Selected ascents | |||||
| 6 |
Bulge Project
Looks very hard but seems to have enough holds to work. Likely v12+ | |||||||
| 7 |
Skincinerator Project
Sit start bottom right of slopey crack. Traverse right to v2 mantle. Pumpy and painful. v8ish | |||||||
1.8. The Hideaway 24 routes in Field
- Summary:
-
Mostly Bouldering
Lat / Long: -35.533052, 148.880442
approach
A km or two past Kelvin block/Field on the left hand side of the road. Marked by a very large slab boulder on the side of the road with an obvious vertical crack. The boulders further up the hill are hidden by vegetation. Keep walking up and they become very obvious. Worth exploring. There is a lot here. Some very big blocs!
history
Most of the stuff here is very dirty which leads me to believe it may not have been climbed on yet.
1.8.1. Banana Hill Bouldering 16 routes in Field
- Summary:
-
All Bouldering
Lat / Long: -35.533005, 148.880868
Park on the north side of the road in small parking area GPS (-35.53260, 148.87970)
Cross the road and up the hill to the 'Arya Boulder' Please go a bit down the road and avoid the steep dirt section to help limit erosion.
From the 'Arya Boulder' go uphill in a northeast direction aiming for an obvious stack of large boulders. There is a feint path to follow.
summary
Scattered boulders with quality rock. Some huge boulders with established trad routes, see 'Trad Climbing'.
approach
   |
||||||||
| Route | Grade | Style | Selected ascents | |||||
|---|---|---|---|---|---|---|---|---|
Escape Room BoulderOne of the first boulders you see downhill on your right as you get to the large stacked rocks. GPS: (-35.53305, 148.88039) | ||||||||
| 2 |
★★ Over the Hedge
Stand start on big undercling with detached footer. Traverse right following the crack and mantle at the end. FA: Pete | V1 | 4m | |||||
| 3 |
★★★ Escape Room
Sit start matched on sloper and straight up through slopers and pinches. Once you get the crack join 'Over the Hedge' to topout. FA: Pete | V8 | 3m | |||||
| 4 |
★★ Riddle Me This
Sit start as for 'Escape room' but traverse all the way right then up into shared topout. FA: Michael Watson | V5 | 3m | |||||
Bushwacked'Bushwhacked' is downhill on the obvious arete just before you reach 'Yankee Doodle'. 'Bellyflop Mantle' is on the same boulder to the left. GPS: (-35.53327, 148.88092) | ||||||||
| 6 |
★ Bushwhacked
Double toe hook start with hands in low jug. Then up arete. FA: Pete | V5 | 2m | |||||
| 7 |
Bellyflop Mantle
Jump start to jugs then mantle. FA: Michael Watson | VB | 1m | |||||
   |
||||||||
| Route | Grade | Style | Selected ascents | |||||
Yankee Doodle AreaYankee doodle is at the base of 'Microchasm' a large boulder towards the back of the hill with a diagonal crack. The boulder with 'Cassinia' and Mind the gap variants are immediately behind this. GPS: (-35.53323, 148.88103) | ||||||||
| 9 |
★★ Yankee Doodle
Sit start matched on jug then traverse left finishing matched around the corner on jug. Finishes where 'Microchasm' starts. FA: Pete | V3 | 3m | |||||
| 10 |
★ Mind the Gap Left
Sit start with undercling then left around the corner to easy topout. FA: Pete | V1 | 3m | |||||
| 11 |
★ Mind the Gap Middle
Sit start with undercling then straight up to slopey mantle. FA: Pete | V2 | 2m | |||||
| 12 |
★★ Mind the Gap Right
Sit start with undercling then right through edges to mantle. FA: Pete | V2 | 2m | |||||
| 13 |
★ Cassinia
Stand start on high undercling with very low feet. To good edge then right and topout. FA: Pete | V6 | 2m | |||||
| 14 |
★★ Roscoe the Bear
Stand start on crimps. Straight up to slopey mantle. Start hold broke 8/2023 bringing this up 1 or 2 grades. Needs to be confirmed but surely harder than 7 now FA: Pete | V7 | 2m | |||||
   |
||||||||
| Route | Grade | Style | Selected ascents | |||||
High VoltageDirectly behind Mind the Gap you will see 'Soup Dragon' the rightward leaning offwidth. 'High Voltage' is up the gentle slab about 20m on your right (east) when looking at 'Soup Dragon'. GPS: (-35.53320, 148.88121) | ||||||||
| 16 |
Ant Ridge
Up the ridge left of 'High Voltage' FA: Pete | V0 | 8m | |||||
| 17 |
★★★ High Voltage
Up through crease following it until it ends. Then carefully onto slab and scramble the rest of the way. Highly recommend inspecting on the rope before trying. Crux is near the top. FA: Pete | V4 R | 10m | |||||
Ziggurat'Ziggurat' is on the north side of the area just as is starts to go downhill again. From mind the gap follow the 'Soup Dragon' boulder around on the left side and go through a gap in some trees and it will be directly in front of you. GPS: (-35.53299, 148.88110) | ||||||||
| 19 |
★ Ziggurat
Sit start compressing good holds then onto jugs and traverse left all the way to the top. FA: Pete | V3 | 4m | |||||
Aerial ShootingWhen passing 'Ziggurat' with it on your left continue north east between some boulders then under a cleared passageway to arrive at the 'Aerial Shooting' and 'Fireball Dyno' boulder. GPS: (-35.53295, 148.88126) | ||||||||
| 21 |
★★★ Fireball Dyno
Stand start with two good crimps and poor feet. Dyno to top then mantle. FA: Pete | V5 | 2m | |||||
| 22 |
★★ Aerial Shooting
Stand start matched on flat crimp with poor feet. Traverse right on crimps to mantle. FA: Pete, 3 Jun 2023 | V10 | 5m | |||||
1.8.2. Trad Climbing 2 routes in Sector
- Summary:
-
All Trad climbing
Lat / Long: -35.533220, 148.881062
description
Trad climbing at Hideaway. Currently 2 routes with potential for a handful more good quality lines. For a writeup of the quality bouldering see 'Banana Hill Bouldering'.
  |
||||||||
| Route | Grade | Style | Selected ascents | |||||
|---|---|---|---|---|---|---|---|---|
| 1 |
★ Soup Dragon
The curving off-width. FA: B Aikman, 2022 | 21 | 10m | |||||
| 2 |
★★ Microchasm
The leftward leaning crack with minimal gear which is best supplemented with pads. Belay off gear at top . FA: Tim Rock, Apr 2022 | 24 | 10m | |||||
1.8.3. Cracked Boulder 4 routes in Boulder
- Summary:
-
All Bouldering
Lat / Long: -35.533541, 148.879089
description
The very large slab boulder sitting on the side of the road marked with a prominent horizontal crack.
   |
||||||||
| Route | Grade | Style | Selected ascents | |||||
|---|---|---|---|---|---|---|---|---|
| 1 |
★★★ Cracked Egg / Crescent Blood Moon
Sit start crack with hands in the lowest part of it and climb it to the top. A really, really, really nice lowball crack problem! FA: Ryan Macpherson FA: Peter Arcidiaco, 2019 | V2/3 | 3m | |||||
| 2 |
★ Supermoon
Stand start with jug and up. FA: Pete, 18 Sep 2023 | V3 | 2m | |||||
| 3 |
★ Three-toed skink
Sit start in crack, follow it right and mantle. | V2 | 3m | |||||
| 4 |
Crystal Surfer
The grainy slab 5m right of Three-toed skink. FA: Pete, 3 Oct 2023 | V3 | 2m | |||||
1.8.4. Arya Boulder 2 routes in Boulder
- Summary:
-
All Bouldering
Lat / Long: -35.532754, 148.879843
description
The small boulder 50 metres left of Cracked Boulder.
  |
||||||||
| Route | Grade | Style | Selected ascents | |||||
|---|---|---|---|---|---|---|---|---|
| 1 |
★ Arya
Sit start matched on large edge. Move to the next large edge then mantle out. FA: Peter Arcidiaco, 2019 | V0 | 3m | |||||
| 2 |
★★ Entry traverse
Sit start under roof. then traverse right until you reach the end of the rail on the other side of boulder, then top out. FA: Ben | V3 | 5m | |||||
1.9. Scattered Boulders 7 routes in Field
- Summary:
-
All Bouldering
Lat / Long: -35.537115, 148.867465
description
Several single boulders or small clusters of problems along Corin Road have been recorded here.
approach
Refer to individual coordinates for problem locations.
 /c5/a0/c5a03bf24ea45f55ec7ffaa5deaa269ed3e2edbb) /22/9e/229ea81c96ea23c37240eb3987bff2d54f529e92) /b6/2c/b62ce3046b6dfc8fa4f277d63ff238d78e5c97a4)  |
||||||||
| Route | Grade | Style | Selected ascents | |||||
|---|---|---|---|---|---|---|---|---|
Treehugger RockKing line well worth the trouble. Rocks are just visible from the road edge. Head north after parking, cross the creek to pair of large rocks. Climb Location: (-35.53405, 148.87487) Parking: (-35.535399, 148.874842) | ||||||||
| 2 |
★★★ Nescient Treehugger
Sit start on good flake. Big moves through slopers avoiding the tree then traverse right through crimpy slots. High mantle to top out. Set: Justin Ryan FA: Pete, May 2022 | V7 | 6m | |||||
Cracks by the Road3 cracks 20m off the road. Might've been climbed before but they were dirty and loose when noticed in late 2020. Recorded here for lonely bored crack climbers and or people with finger injuries. Park at the pull out after the little bridge across Kangaroo creek. Walk 49 seconds to the boulder. | ||||||||
| 4 |
★ C1
Sit start with left hand fist jam, good edge for the right hand, and right heel hook. Straight up. FA: James Lister, Nov 2020 | V2 | 2m | |||||
| 5 |
C2
Sit start with hand jams straight up. Careful on the hollow stuff at the top. It didn't come off by hand but might be encouraged with leverage. FA: James Lister, Nov 2020 | V0 | 3m | |||||
| 6 |
★ C3
If you'd like to go for a long walk up the hill there are 4 little corner cracks up there 3 to 4m high. Also nice views of the valley and surrounding tors. Graded to be climbed in decent approach shoes without mats. -35.5334248, 148.8673874 FA: James Lister, Nov 2020 | V0 | 4m | |||||
Further along roadContinue past Kangaroo Creek and pull off at -35.539959, 148.859899. Boulder visable from road on south side | ||||||||
| 8 |
★ Rest and Ice
Sit start the block underneath 'Injury Denial' and up the right face. FA: Pete, 1 Feb 2023 | VB | 2m | |||||
| 9 |
★★ Injury Denial
Low stand start. Slap up either side before topping out. Large block on left is out FA: Tim Rock, Nov 2021 | V5 | 3m | |||||
| 10 |
★ Rehab
Sitstart crack left of 'Injury Denial' follow and topout. FA: Michael Watson & Pete, 2 Aug 2022 | V1 | 3m | |||||
1.10. Submarine Rocks 2 routes in Field
- Summary:
-
Bouldering and Trad climbing
Lat / Long: -35.541636, 148.870099
summary
The boulder field at the base of the ridge that runs from Corin Rd up to McKeahnie Trig.
description
Collection of boulders from the very small to the very big. One of the first boulders you encounter resembles the conning tower of a submarine hence the name.
approach
Park as for Hill 1306. Head south crossing Corin Rd then a small creek before ascending the ridge towards McKeanie Trig. Distance from Corin Rd to the submarine shaped boulder is approximately 300m. The bush is quite open here making walking fairly easy.
  |
||||||||
| Route | Grade | Style | Selected ascents | |||||
|---|---|---|---|---|---|---|---|---|
| 1 |
★★★ Sloth & Avarice
Approximately 100m south (uphill) of the Submarine is a cave formed by two boulders. S&A traverses the length of the cave following a sharp seam to finish at a an obvious jug. V5 if climbed with feet jammed in the roof, V much harder if only using the seam. FA: Oct 2023 | V5 | 8m | |||||
| 2 |
★★ Dave's Climb
The flake crack 200m south (uphill) from the submarine. Probably the only viable climb amongst the main boulders. FA: Dave McGregor & B Aikman, Oct 2021 | 16 | 20m | |||||