A Crag Guide gives an extensive view of all sub areas and climbs at a point in the index. It shows a snapshot of the index heirachy, up to 300 climbs (or areas) on a single web page. It shows selected comments climbers have made on a recently submitted ascent.
At a minor crag level this should be suitable for printing and taking with you on a climbing trip as an adjunct to your guidebook.
This guide was generated anonymously. Login to show your logged ascents against each route.
Warning
Rock climbing is extremely dangerous and can result in serious injury or death. Users acting on any information directly or indirectly available from this site do so at their own risk.
This guide is compiled from a community of users and is presented without verification that the information is accurate or complete and is subject to system errors. By using this guide you acknowledge that the material described in this document is extremely dangerous, and that the content may be misleading or wrong. In particular there may be misdescriptions of routes, incorrectly drawn topo lines, incorrect difficulty ratings or incorrect or missing protection ratings. This includes both errors from the content and system errors.
Nobody has checked this particlular guide so you cannot rely on it's accuracy like you would a store bought guide.
You should not depend on any information gleaned from this guide for your personal safety.
You must keep this warning with the guide. For more information refer to our:
Usage policy
Contributors
Thanks to the following people who have contributed to this crag guide:
Tommy Krauss
Nick Clow
Kim Walls
Brendan Heywood
Mani Baker
Nick Hanson
adam bogus
Ben Hanley
Patrick Munnings
Dylan Tubaro
The size of a person's name reflects their Crag Karma, which is their level of contribution. You can help contribute to your local crag by adding descriptions, photos, topos and more.
Table of contents
- 1.
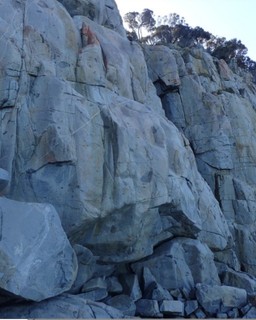
Harlequin Buttress - Bouldering
39 in Sector
- 1.1. One 1 in Area
- 1.2. Two 6 in Area
- 1.3. Bolted Boulder 3 in Boulder
- 1.4. Under the Cliff 1 in Boulder
- 1.5. Three 5 in Area
- 1.6. Four 5 in Area
- 1.7. Five 3 in Area
- 1.8. Six / Jumping block 10 in Area
- 1.9. Seven 5 in Area
- 2. Index by grade
1. Harlequin Buttress - Bouldering 39 routes in Sector
- Summary:
-
All Boulder
Lat / Long: -42.104578, 148.340762
questões de acesso
A 4WD is highly recommended to access these cliffs. Smaller cars may be able to reach the campsite at whitewater wall, however they will probably bottom out on approach. Track conditions are subject to change, particularly after heavy rains.
acesso
Continue past whitewater campsite towards the water, locate a set of stone steps just before a 'no vehicles past this point' sign and follow this down to the wall.
ética
Crag Stewards
Rock climbers please contact the Crag Steward (freycinet@climbersclubtas.org.au) if you have any queries or concerns regarding social or environmental impacts of rock climbing at this crag.
Do not email regarding general travel, seasonal advice, or lost property - this is not the Steward’s role. If you have important safety information to communicate (e.g. risks due to recent and large rock falls) please also consider updates on thesarvo forum, Facebook group and/or online guidebooks as appropriate. Please copy in cct@climbersclubtas.org.au if you feel you have a high-level concern which may imminently impact the crag or climbing community.
Non-climbers, other users, land managers: please also contact cct@climbersclubtas.org.au if you have important climbing related queries at this location.
Statewide ethics
• The operation and use of drones by park visitors on reserved land including national parks is not permitted
• Peregrine Falcons nest from July - December each year. It’s important that climbers don’t climb near active nests during this period. Known sites (non exhaustive) are: Sand River (Far East, The Panopticon), Bare Rock (R of the Boneyard, L of Bisso of Orange), Rocky Cape, Pubic Wall/Duck Reach, Hillwood, Gunners Quoin, Lowdina.
• Please note that Tasmania has notoriously patchy phone reception for particular service providers. Telstra is the most reliable. An emergency Personal Locator Beacon or similar is recommended kit when climbing in remote locations.
• For more information - follow the link below for some local tips + tricks on how to better reduce your impact during your next Tassie climbing holiday https://www.cragcaretasmania.org.au/learn
1.1. One 1 route in Area
- Summary:
-
| Route | Grade | Style | Selected ascents | |||
|---|---|---|---|---|---|---|
| 1 | 1. Traverse | V3 | ||||
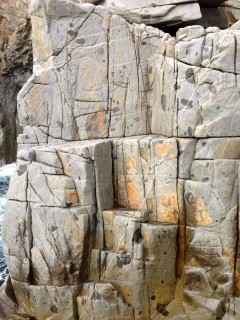
1.2. Two 6 routes in Area
- Summary:
-
descrição
Since the rockfall in late 2012, all problems in this area but 'Orange' are now unclimbable.
 |
||||||||
| Route | Grade | Style | Selected ascents | |||||
|---|---|---|---|---|---|---|---|---|
| 1 | 1. Orange | V5 | ||||||
| 2 | 2. Traverse | V2 | ||||||
| 3 | ★ 3. Slab | V4 | ||||||
| 4 | 4. Mantel | V5 | ||||||
| 5 | 5. Arete | V1 | ||||||
| 6 | 6. Project | V8 | ||||||
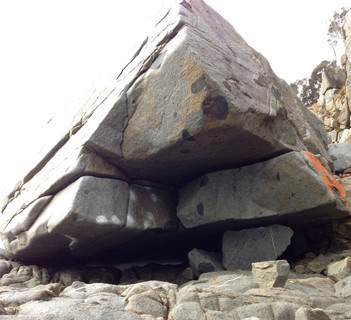
1.3. Bolted Boulder 3 routes in Boulder
- Summary:
-
Lat / Long: -42.104549, 148.340694
descrição
The large bolted orange boulder that fell from the top of Harlequin Buttress in 2012
história
| Route | Grade | Style | Selected ascents | |||
|---|---|---|---|---|---|---|
| 1 | ★★★ Better Be Safe | V4 | ||||
| 2 | Triple Circumcision | V0 | ||||
| 3 | ★ Jagged Arete | V0 | ||||
1.4. Under the Cliff 1 route in Boulder
- Summary:
-
Lat / Long: -42.104457, 148.340749
 |
||||||||
| Route | Grade | Style | Selected ascents | |||||
|---|---|---|---|---|---|---|---|---|
| 1 |
★★★ Squeeze it and Please it
Down under the main Harlequin cliff just to the right of the U bolt for Granite Planet is a horizontal squeeze crack. Enter headfirst from the left side if facing the cliff. Rotate, then exit feet first onto small ledge. Spotter highly reccomended for the exit. FA: Rye Stallard, 17 Jun 2018 | 4m | ||||||
1.5. Three 5 routes in Area
- Summary:
-
| Route | Grade | Style | Selected ascents | |||||
|---|---|---|---|---|---|---|---|---|
| 1 | 1. Traverse | V5 | 5m | |||||
 |
||||||||
| Route | Grade | Style | Selected ascents | |||||
| 2 | ★ 2.Finger Power | V4 | 3m | |||||
| 3 | ★★ 3. Balance | V3 | 3m | |||||
| 4 | ★ 4. Arete | V1 | 4m | |||||
| 5 | 5. Slab | 4m | ||||||
1.6. Four 5 routes in Area
- Summary:
-
| Route | Grade | Style | Selected ascents | |||
|---|---|---|---|---|---|---|
| 1 | 1. Roof Project | V12 | ||||
| 2 | 2. Campus | V7 | ||||
| 3 | ★ 3. Campuseis | V5 | ||||
| 4 | ★ 4. Top Out | V0 | 2m | |||
| 5 | 5. Topped Out | V0 | 2m | |||
1.7. Five 3 routes in Area
- Summary:
-
| Route | Grade | Style | Selected ascents | |||
|---|---|---|---|---|---|---|
| 1 | 1. Traverse | V1 | ||||
| 2 | ★★ 2. Slopeout | V4 | ||||
| 3 | 3. Groovy | V1 | ||||
1.8. Six / Jumping block 10 routes in Area
- Summary:
-
Lat / Long: -42.104578, 148.340788
 |
||||||||
| Route | Grade | Style | Selected ascents | |||||
|---|---|---|---|---|---|---|---|---|
| 1 | ★ 1. Traverty | V3 | 7m | |||||
| 2 |
★ 2. Flaked
Start at the end of the flake, out to the lip and up. | V5 | 2m | |||||
| 3 |
★★ 3. Campuseis
Hang-start on the lip and campus up. | V6 | 3m | |||||
| 4 |
★★★ 4. Flake Out
Sit-start deep under the roof on juggy undercling feature around 1m right of the undercling start of 'Flakey.' From the jug, head out to slopers of 'Campuseis' and finish as for 'Flakey.' | V9 | ||||||
| 5 |
★★★ Flakey
Start on undercling under the roof as for Flaked and finish via Campuseis | V8 | ||||||
| 6 |
Highball
Stand start on the good jug, up to the horizontal break and out to the arete, then to the top. Classic and committing. | V2 | ||||||
| 7 |
★★★ tits deep
The offwidth crack under the block. Start in crack with feet against the small boulder, climb offwidth through roof, no using the boulder near start of "pull", mantle up to break on flake out face and finish around the left corner. FA: Niels Tietze | V0 | 8m | |||||
| 8 |
★★★ Tease it and Squeeze it
At the back of the off width boulder crack there is a small squeeze that exits up and right. Enter headfirst face down, twisting to face towards camp and get round those angles to exit. Can also be done in reverse but is much more challenging. Be careful! Set: Levi Quilliam FA: David Tan, 17 Nov 2018 | ? | 1m | |||||
| 9 |
★ Squeeze it and Tease it
Tease it and squeeze it in reverse. Headfirst. eek. FA: David Tan, 17 Nov 2018 | |||||||
| 10 | ★ 5. Pull | V5 | ||||||
1.9. Seven 5 routes in Area
- Summary:
-
Lat / Long: -42.104531, 148.340870
 |
||||||||
| Route | Grade | Style | Selected ascents | |||||
|---|---|---|---|---|---|---|---|---|
| 1 | 1.Highball | V3 | ||||||
| 2 | 2. Highball 2 | V2 | ||||||
| 3 | 3. Crash Pad | V2 | 4m | |||||
| 4 | 4. Sitter | V4 | 4m | |||||
| 5 | 5. Lope | V3 | 2m | |||||