A Crag Guide gives an extensive view of all sub areas and climbs at a point in the index. It shows a snapshot of the index heirachy, up to 300 climbs (or areas) on a single web page. It shows selected comments climbers have made on a recently submitted ascent.
At a minor crag level this should be suitable for printing and taking with you on a climbing trip as an adjunct to your guidebook.
This guide was generated anonymously. Login to show your logged ascents against each route.
Warning
Rock climbing is extremely dangerous and can result in serious injury or death. Users acting on any information directly or indirectly available from this site do so at their own risk.
This guide is compiled from a community of users and is presented without verification that the information is accurate or complete and is subject to system errors. By using this guide you acknowledge that the material described in this document is extremely dangerous, and that the content may be misleading or wrong. In particular there may be misdescriptions of routes, incorrectly drawn topo lines, incorrect difficulty ratings or incorrect or missing protection ratings. This includes both errors from the content and system errors.
Nobody has checked this particlular guide so you cannot rely on it's accuracy like you would a store bought guide.
You should not depend on any information gleaned from this guide for your personal safety.
You must keep this warning with the guide. For more information refer to our:
Usage policy
Contributors
Thanks to the following people who have contributed to this crag guide:
Adam Rabjohns
Emmanuel Madayag
Scott Van Roy
Brendan Heywood
Matt Tranter
pert
Glenn Zucchetto
Josh Zylstra
Kris Dhar
jasper shields
The size of a person's name reflects their Crag Karma, which is their level of contribution. You can help contribute to your local crag by adding descriptions, photos, topos and more.
Table of contents
- 1.
Goulburn & Surrounds
47 in Area
- 1.1. Pejar Bouldering 34 in Crag
- 1.2. Overflow Walls 0 in Cliff
- 1.3. Marsden Weir Rocks 5 in Crag
- 1.4. Sloth Rock 8 in Cliff
- 2. Index by grade
1. Goulburn & Surrounds 47 routes in Area
- Summary:
-
Bloc, Psicobloc et autres styles
Lat / Long: -34.674873, 149.653410
Limitations de l'accès
If you have benefited from climbing infrastructure in NSW, please consider making a donation towards maintenance costs. The Sydney Rockclimbing Club Rebolting Fund finances the replacement of old bolts on existing climbs and the maintenance of other hardware such as fixed ropes and anchors. The SRC purchases hardware, such as bolts and glue, and distributes them to volunteer rebolters across the state of New South Wales. For more information, including donation details, visit https://sydneyrockies.org.au/rebolting/
 |
1.1. Pejar Bouldering 34 routes in Crag
- Summary:
-
La plupart Bloc
Lat / Long: -34.581306, 149.575922
résumé
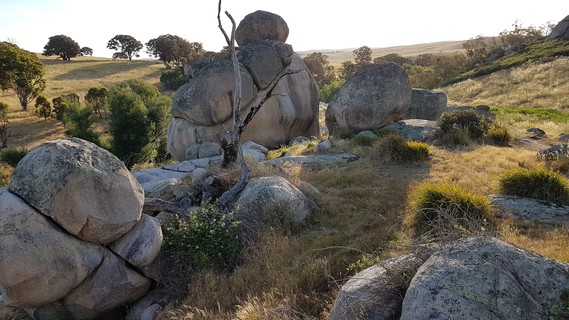
Goulburn's granite bouldering at its best. Unfortunately blackberries have covered most of the area, take a machete and gloves.
description
Boulder stacks with plenty of challenging short routes. Many short routes with RBB. Longer routes are bolted. Good boulders, bad blackberries.
Limitations de l'accès
No issues
approche
From Goulburn continue 22km on Crookwell Road. Access to the climbing area is a small dirt road on the left at the end of steel guard rail. Indicate early as traffic does not expect vehicles to enter here. Take a right past white survey marker and park at the boulders.
éthique
Bolts where needed.
   |
||||||||
| Route | Grade | Style | Selected ascents | |||||
|---|---|---|---|---|---|---|---|---|
| 1 | 01 | 3m | ||||||
| 2 | ★ 02 | 3m | ||||||
| 3 | 03 | 3m | ||||||
| 4 |
★ 04
A great problem! FA: Chas Ruffles, 2007 | V3 | 3m | |||||
| 5 |
★ Pain
Harder than it looks major hold has broken off. FA: Chas Ruffles, 2007 | V2 | 3m | |||||
| 6 |
Reach Ya Fucca
FA: Scott Zucchetto, 2007 | V1 | 3m | |||||
| 7 |
Go to Slope
Stand start on 2 bad slopers just before lip and throw/campus to lip to easy top | V5 | 2m | |||||
 |
||||||||
| Route | Grade | Style | Selected ascents | |||||
| 8 |
Mountain Oysters
Great, but don't peel. FA: Scott Zucchetto, 2007 | V1 | 3m | |||||
| 9 | 08 | 4m | ||||||
| 10 | 09 | 4m | ||||||
| 11 | Impail | V2 | 4m | |||||
| 12 | Grip Master | V1 | 4m | |||||
| 13 | ★ Lazy Boy | V2 | 4m | |||||
| 14 | Slap My Bitch | V4 | 4m | |||||
/d0/38/d038e8b42cfc8e11265a104c574021515d8f150a) /b0/df/b0dfba85c37f1c915d9fa5e38b594414da1576ef) |
||||||||
| Route | Grade | Style | Selected ascents | |||||
| 15 |
★★ The Mad Climb
Start as for The Dam Climb but climb left of the roof via good crimp rails | V3 | 3m | |||||
| 16 |
★★★ The Dam Climb
Sit start obvious jug and up through mini roof via small crimps and interesting moves to slopey top. Very good | V8 | 3m | |||||
| 17 | 14 | 4m | ||||||
| 18 | 15 | 4m | ||||||
| 19 | 16 | 4m | ||||||
| 20 | 17 | |||||||
 /6c/f3/6cf3de0723d69b91b3d29bb874278b358bd99008)   |
||||||||
| Route | Grade | Style | Selected ascents | |||||
| 21 | 18 | |||||||
| 22 | 19 | 6m, 4 | ||||||
| 23 |
★★ 20
Start on the left of the arete, moving onto the right face after the 1st bolt. Continue up to the DBBs on the top. Équip.: Chas Ruffles FA: Chas Ruffles | 20 | 6m, 4 | |||||
| 24 | 21 | 6m, 4 | ||||||
| 25 | 22 | 6m | ||||||
| 26 | 23 | 6m | ||||||
| 27 | 24 | 6m | ||||||
 |
||||||||
| Route | Grade | Style | Selected ascents | |||||
| 28 | 25 | |||||||
| 29 | 26 | |||||||
| 30 | 27 | |||||||
| 31 | 28 | |||||||
| 32 | 29 | |||||||
| 33 | 30 | |||||||
| 34 |
★★ Let me hear you say Wayo
Stand start on foot sloper rail near arete and up arete to finish as for A Great Problem | V6 | 4m | |||||
1.2. Overflow Walls 0 routes in Cliff
description
Walls cut into stone for the overflow of Pejar Dam.
approche
Continue straight on the access road until you reach a steel boom gate. Park here and walk uphill to the top of overflow walls.
informations pour la descente
Through the fence and down a steep descent gully.
1.3. Marsden Weir Rocks 5 routes in Crag
- Summary:
-
Moulinette et Escalade sportive
Lat / Long: -34.737721, 149.704026
description
Small crag 100m upstream of Marsden weir.
approche
Drive right up to the crag. If the gates on the road are closed park your car and walk to last 100m.
| Route | Grade | Style | Selected ascents | |||||
|---|---|---|---|---|---|---|---|---|
| 1 | R.A | 6m | ||||||
| 2 | S.T | 6m | ||||||
| 3 |
★ U.T
Pumpy little overhanging climb on bulletproof rock. Équip.: Adam Rabjohns, @brettweb & Brett webb, 2018 | 20 | 7m, 5 | |||||
| 4 | P | 6m | ||||||
| 5 | P.D | 6m | ||||||
      |
||||||||
1.4. Sloth Rock 8 routes in Cliff
- Summary:
-
Tous Psicobloc
Lat / Long: -34.738444, 149.664472
description
Local Deep Water Soloing Cliff.
Water levels can vary dramatically, as council can pump from here to Sooley Dam.
Always Check water depth before climbing
approche
Approach is by water only. Get your canoes out and enjoy a 2km paddle on this quiet waterway.
historique
Developed by the Goulburn Climbing Sloths.
  |
||||||||
| Route | Grade | Style | Selected ascents | |||||
|---|---|---|---|---|---|---|---|---|
| 1 |
★ Dickies Trout
Named after the mythical giant trout caught at this location generations ago. Start in crack and follow up. Swing out to the left and power up to holds over the top. Jump off to get back down. FA: Sam Boileau, Jan 2019 | 17 | 3m | |||||
| 2 |
★ Little Mans Leap
Climb out of the water and up onto platform before stepping right. Follow the major crack up to top out. Jump off to get back down. FA: Sam Boileau, Jan 2019 | 18 | 4m | |||||
| 3 |
Project 1
Start under small cave with balancey moves out and onto face. | |||||||
| 4 |
Project 4
Follow the bolted holds up this mixed climb. | |||||||
| 5 |
Project 2
Start in the left corner, moving up and right to hand traverse. Big move right onto arete. | |||||||
| 6 |
Project 3
Big moves straight up right hand arete. | |||||||
| 7 | Project 5 | |||||||
| 8 |
DANGER SUBMERGED ROCK
Submerged rock at the edge of willows. Use caution at low water levels | 1 | 1m | |||||