Help

Central Buttress

Seasonality

J
F
M
A
M
J
J
A
S
O
N
D

Description

Most of the following has been copied directly from Kieran Loughran's excellent Amphitheatre guide - thanks!

'Central Buttress' is the big somewhat scrappy looking area extending right from the Amphitheatre 'Gully', until the cliffline breaks down into a gully before the Grey & Green Walls. It offers a wide variety of climbs with a few outstanding classics. While some of the cliffs do not look particularly attractive at first sight, don't let that put you off. The highlight of this area, and the best section of the entire Amphitheatre apart from 'Taipan Wall', is the recess containing 'Simpleton', 'Missing' and 'Technical Ecstasy'.

'Central Buttress' is in the shade until early afternoon. 'Simpleton' gets sun only on summer evenings. An early start on a hot day can see you up a good climb before the heat of the afternoon. The climbs left of 'Simpleton' appear grey and amorphous but are generally quite steep and more difficult than appearances suggest.

© (willmonks)

Access issues inherited from Grampians

Climbing restrictions apply to many crags in Gariwerd/Grampians. Some of these restrictions are likely to change over time as assessments are completed. Tags are being applied to most crags to reflect their current status. Additional access-notes are provided to clarify restrictions where required (and will over-ride this notice). Current and further Parks Victoria advice can be found at https://www.parks.vic.gov.au/places-to-see/parks/grampians-national-park/rock-climbing-in-gariwerd

Approach

Follow the walking track from Flat Rock down into the Amphitheatre for about 150m past 'Epsilon Wall', avoiding any right-hand turns. Follow a faint pad on the left to soon arrive below the Amphitheatre 'Gully'. 'Central Buttress' extends from here to your right.

Descent: Descend via the abseil near 'Simpleton' or the 'Hollow Mountain' walking track towards Summer Day Valley (return into the Amphitheatre is then possible by walking beneath Amnesty, Clicke, Kindergarden and Northern Walls areas). Avoid the horrible dangerous Amphitheatre 'Gully' (which I refuse to call by its traditional name of "the descent gully"!). Parties with novice climbers are strongly advised to use the walking track for descent.

'Simpleton' Abseil Route: This is the only abseil descent from this area, and allows the awful Amphitheatre 'Gully' to be avoided, but it has its own hazards. If you have two 50m ropes, you need to use the old anchors: from the top of 'Simpleton' (near a lonely 4m pine tree), move out to the front of the cliff and scramble down 5 metres to the chains, the scramble is fairly easy but very exposed - one snapped hold or foot slip and you're facing a death fall. If in doubt, keep the rope on. Have slings ready to clip into the anchors, which are now worryingly rusty. It is a 50 metre abseil, and the first 40 metres are free hanging. Abseil ends on long ledge at the base of 'Missing'. Either scramble down the initial slabs of 'Technical Ecstasy' or do a further short abseil from trees. If you take novices on this descent (not recommended) you must be able to rescue them if they get stuck on the long free abseil section. On a pragmatic note, remember that belaying a novice on descent can take just as long as simply walking off.

In May '09 a new anchor was added at the top of the 'Simpleton' corner, and this can be accessed much less dangerously than the original anchor because you don't need to do the scary 5m downclimb. To use this new anchor you need two 60m ropes. With this abseil (using 60m ropes) you will end up on top of the first ledge of Simpleton P1, NOT on the ground. The downclimb from here is pretty easy, but its worthwhile to check it out beforehand.

Climbs are described from left to right.

© (willmonks)

Ethic inherited from Grampians

Grampians / Gariwerd access issues have emerged (2019) due to potential risk to the environment and cultural sites. Climbers need to be aware that there are significant Aboriginal sites in the Grampians, especially in cave areas. Please take time to understand the access situation. Leave no trace and climb responsibly.

Please note that due to the fact that the Grampians is a National Park, dogs and other pets are not allowed in the park except in vehicles on sealed roads and in sealed car parks.

===Cliffcare Climber’s Code===

  • Find out about and observe access restrictions and agreements.

  • Use existing access tracks to minimise erosion - keep to hard ground & rock surfaces.

  • Do not disturb nesting birds or other wildlife.

  • Protect all native vegetation, especially at the base of cliffs. Wire brushing to remove mosses and 'gardening' in cracks and gullies is not permitted. Use slings to protect trees while belaying or abseiling if belay anchors are not provided.

  • Respect sites of geological, cultural, or other scientific interest. Do NOT develop new climbs in or near Cultural Heritage sites.

  • Chalk has high visual impact - minimise your use of it. Parks Victoria have requested the use of coloured chalk in Gariwerd.

  • Minimise the placement of fixed equipment, especially where Trad gear is available. Respect any "no bolting" areas.

  • Do not leave any rubbish - take it home with you.

  • Dispose of human waste in a sanitary manner (bury, or even better pack it out). Do not pollute water supplies.

  • Off-road driving is illegal in Gariwerd.

  • Keep campsites clean, and do not light campfires outside of official metal fire pits.

For more detailed information visit https://www.cliffcare.org.au/education

Tags

Some content has been provided under license from: © Australian Climbing Association Queensland (Creative Commons, Attribution, Share-Alike 2.5 AU)

Routes

Add route(s) Add topo Reorder Bulk edit Convert grades
Grade Route

A major geological feature.

Start: Start beneath the prominent chimney.

  1. 40m (10) (crux) The line to belay below an overhang.

  2. 20m (-) Climb the overhang and continue up the line.

FA: Keith Egerton & John Chapman, 1975

Arete right of 'Incisor'. Take lots of slings for the creaking jugs.

Start: As for 'Incisor'

  1. 40m (16) Bridge up 'Incisor' for 11.22 metres until a rising traverse gains the right arête. Up arête in a spectacular position, then up the wall about 2m left of the arête until the angle eases. A short juggy arête leads to a belay at the base of the orange headwall.

  2. 25m (16) Step left and climb Incisor's overhang. Climb wall on the right to regain the arête, which is followed to the top.

FA: Keith Lockwood, Ray Lassman & Tim Lockwood, 2006

Quite good really, but the crux is a little intense. Should be OK now that the dust has cleared.

Start: Start as for 'Incisor'.

  1. 8m (20) (crux) Thin climbing on the R wall, 2 bolts, to a ledge. Large cams for belay.

  2. 25m (18) Balance to bolt and follow shallow cracks, mostly to R of cracks, until the holds R of the cracks develop into a steep arete. Follow arete with increasing ease to easy slab and move diagonally R to abseil anchor for 'Empty Pockets' (40m abseil).

FA: Kieran Loughran, Meg Sleeman & Norm Booth, 1995

This excellent buttress has been done in one pitch (not on the first ascent) but that placed the second at serious risk on the start. Add some slings, cams to #2½ and a handful of wires to the rack. Some think that the climb is worthless, that may be due to style or aesthetic preferences but they may be right. Make up your own mind.

Start: Start below slabby groove about 10m L of 'Strela', just R of the foot of the major Amphitheatre 'Gully'.

  1. 15m (22) Teeter into groove and up this and short wall to thread belay (requires nut-key to thread), five bolts, optional #2 cam.

  2. 25m (19) Many people abseil off and avoid this pitch which is a pity as it's good value. Pull up R of the belay and move back L to middle of buttress. Straight up, four bolts, #2½ cam after second bolt, to chain below overhang.

FA: Kieran Loughran & Meg Sleeman, 1995

Generally nice climbing with a spectacular move through the overhang near the top, but spoiled by the first 10m shared with 'Strela'. Could improve with traffic.

On the FA, the overhang at the top was avoided by traversing right and climbing easy ground to finish up a steep flake left of the finish of "Strela". The overhang was added by the team doing the variant start.

Start: Start as for "Strela", the first chimney-line R of the foot of the Amphitheatre 'Gully'.

  1. 25m (15) Up the dirty groove for 10m (large cams) and traverse L along sloping ledge to orange-tinged crack up buttress. Up crack to good ledge.

  2. 20m (9) Climb groove from L end of ledge to below roof.

  3. 25m (18) Swing through overhang (large nut, at least #10 wire, not cam) then wall and easy ledges to top.

FA: Kieran Loughran & Bill Andrews, 1994

Big slopes.

Start: Start 1m L of the original start.

FA: Kieran Loughran, Norm Booth & Keith Lockwood, 1994

Not a classic. The first of the major chimney lines accessible without scrambling up the descent gully. The length of this climb is preposterous but it wasn't worth repeating in full to correct the description. If you wish to do so, go ahead. The various possible lines at the top of 'Strela' have all been done as variants to 'Indentured', 'Strela' and 'Filling'.

Start: Start at the first chimney line R of the foot of the descent gully.

  1. 21m (14) (crux) The first 10m is hard but protection is OK (large cams). Ascend the chimney (crux passing a bulge of dirt) until a second chimney starts on the R. Traverse R into this chimney and continue to a ledge 4m higher.

  2. 37m (-) The bottomless chimney and follow the same line to ledge on the buttress between the two chimneys.

  3. 37m (-) Step across the L-hand chimney then traverse, and up to regain the R-hand chimney. Up to below the prows near the top of the cliff.

  4. 9m (-) Deep chimney.

FA: Dave Oldfield & John Rogers (Alt), 1967

Pitches 1 and 2 could be run together.

  1. 15m 14. Climb Strela to above the first large bulge. Step L to belay. [Indentured traverses further L along this ledge]

  2. 20m 12. Up cracks 1m L of arête, moving L to belay on good ledge.

  3. 15m 16. Up to ledge below orange overhang. Steep crack through middle of overhang to ledge.

  4. 30m 10. Up to and over overlap, up to flake crack [original finish of Indentured] and up.

FA: Peter Cody & Philip Armstrong alts, 2013

Good, though the early part of the first pitch is a bit contrived. Poorly protected in spots. All pitches are about the same grade though pitch three is probably the most serious.

Abseil as for 'Simpleton' or walk-off.

Start: Start at a small groove 3m L of 'Molar Buttress'.

  1. 25m (16) Up the groove, a move R, then up the wall with so-so protection to a good ledge.

  2. 21m (16) Take a steep, juggy crack from the ledge then follow the R edge of the compact grey rock via a series of large chicken heads to a superbly fashioned ledge on the R. Probably the best pitch on the climb.

  3. 30m (16) More chicken heads for 4m then easier but not well-protected climbing leads up leftish via a slab, corner and wall.

FA: Peter Martin & Steve Jones (alt), 1989

1 12 35m
2 9 15m
3 12 25m
4 12 25m

Something to get its teeth into you. The start and finish are enjoyable, but the middle pitches are weird, spooky and poorly protected. Take a double-length sling.

Start: Start 9m R of 'Strela' at the initials "MB" below a groove.

  1. 35m (12) Gain the groove and follow it to the first big ledge. Traverse 10m R along the ledge before belaying.

  2. 15m (9) Scramble up diagonally R. Step around the arete to gain the ramp that runs back L. Follow the ramp and then step out onto the front. Move L a bit and then up to belay on another big ledge.

  3. 25m (12) Move up a bit and then traverse L to the other side of an obvious horn of rock. Things get strange here and it's hard to work out where to go. Go L to mantle onto a huge, vibrating knob. Move up and R and back R to a weakness in the overhangs. Scuttle up this exposed break to the next big ledge.

  4. 25m (12) Quite pleasant climbing up intermittent cracks and walls. If you head up and rightward you should arrive at the abseil bolts as for Simpleton.

FA: Steve Craddock & Sue Priestly (alt) Easter, 1965

Nice arête 2m right of 'Molar Buttress', between 'Molar Buttress' and 'Herbal Sin'.

Start: Just to the right of the first pitch of 'Molar Buttress', below the right arete of a groove.

FA: Keith Lockwood, Kieran Loughran, Joe Cook, Peter Watling & Ray Lassman., 2005

An impressive overhang. Originally graded 17! Not too hard but you'ld get a nasty thump if you fell off the crux.

Start: Start 4m R of 'Molar Buttress'.

FA: Jared McCulloch & Peter Martin., 1989

Great sport first pitch and OK trad second pitch.

"And she's begging you please not to tease her with reason,

Cause all she wants to do is dance.

You're in a Disco Dilemma", Mike Rudd

Start: Two metres right of Herbal Sim below diagonal groove.

  1. 15m (22) Take R-leading groove (5 FH) to rap station, a great sport single pitch.

  2. 20m (18) Hand traverse left along the break beneath the overhang and swing left onto a steep wall. Up the clean seam to large ledge. Rap from Herbal Sim anchor.

FA: Kieran

Not a popular concept. Takes the corner out L of the main 'Simpleton' corner with a loose crux.

Start: There is a chimney/gully 10m R of Molar Buttress; start 1m R of this gully.

  1. 15m (-) Up the line in the short wall to a bushy ledge.

  2. 30m (17) (crux) Take the corner at the L end of the ledge until it fades out. Traverse L to a bushy cave.

  3. 35m (-) L to the arete. Up just L of arete with an exciting swing over a bulge.

FA: Kevin Lindorff, Phillip Armstrong (alt) & Peter Newman, 1979

20m of new climbing, traversing out left from Simpleton, up an impressive looking wall. Some of the rock is unsettlingly hollow or cracked, which may appeal to some. Seconds should take prussics and/or not unclip the first bolt until it is at their waist if this is at their limit.

To get to the start of this pitch, follow Simpleton up to the cave and continue around the roof and up the corner. You want to stop and build a belay at the small corner/ledge below the Simpleton belay (if you get to the old carrot you have gone a few metres too far).

Start: Make subtle moves up the corner to a horizontal break (cams 20-30mm). Left and up to a flake and bolt. Up to another small flake, finger traverse left to a bolt, then left and up to horizontal break. Exit left onto the arête for a rest. Up the steep but easier grey wall to the chains.

FFA: Steve Toal & Paula Greene, 2012

A magnificent climb up a great line. The first pitch can be avoided by scrambling up the slabs below 'Technical Ecstasy' and traversing in. Do the finish as described (it's worth it) and save the obvious finish for 'Technical Ecstasy'. Take 1 or 2 large cams (e.g. #4 or #5 camalot).

Start: Start as for 'Gross Encounters', 1m R of gully.

  1. 30m (8) Climb the short wall to large ledge, up to next ledge and follow overlap R to long, narrow treed ledge where the wall steepens (the scramble from 'Technical Ecstasy' comes in here from the right). Move up then L off ledge and belay on small ledge at foot of huge corner, about 7m below obvious cave.

  2. 35m (18) Up to cave and out R and up to FH at lip (a thin sling can protect the clip) and follow the line. At 25m exciting moves lead into the thin line just to the R. Belay on a great small ledge with an old (untrustworthy) carrot bolt and bomber trad.

  3. 20m (18) On until 4m below the roof. Traverse L (wildly exposed) across the wall to easy ground.

FA: Chris Dewhirst, Ian Guild & Michael Stone. FA Dave Mudie 1975, 1966

Slabba-dabba-do! An absorbing, exacting and extremely long pitch. The lengthy co-crux slab sections are unique for the 'Grampians'. Take 6 brackets, cams from micro to #3, and a few wires. There's ledge-fall potential at the 2nd FH (oops). A retrobolt above the 1st bolt (and shifting the 1st bolt a bit lower) would be welcomed. Until then, a quick safer option is to scoot up the easy first 8m of 'Simpleton', walk R to Present's 3rd bolt, and lower off it to pre-clip/pre-extend the 2nd bolt. You could also climb this as a fantastic 24/5 by starting up 'Simpleton' and linking into this pitch at the 3rd bolt. Start: Scramble up to the ledge/terrace, 2-3m R of 'Simpleton', and 8m L of the start of 'Missing'. Straight up between Simpleton & Missing, past 2 FHs, 5 carrots (glue-in stainless) & Missing's crux bolt. Join Missing only for a bodylength, namely it's crux. Up high, stay 3-4m R of Simpleton until almost at the capping roof. If your rope is "only" 60m long, you may wish to belay here to avoid simul-climbing 5m. Finish out the roof of Technical Ecstasy.

Set: Will Monks

FA: Kevin Lindorff, Michael O'Reilly & Steve Chapman

A beautiful thin line leads to a large roof at the top of the cliff. You have to be good at placing RPs and other small wires, although the advent of microcams is a boon for this route. Take a rack up to #3½ cam, add 2 sets of RPs and plenty of microcams, a couple of extra middle-size cams for belays, thin sling and many quickdraws. A bolt was placed on the first pitch around 1996 because the original starting stump disintegrated.

Start: Start by scrambling up 'Technical Ecstasy' for 15m to a terrace on the L where the real climbing starts.

  1. 15m (22) Pull onto the wall 3m L of 'Technical Ecstasy' past FH, then to flake. Continue to ledge.

  2. 35m (23) Fantastic! Step L into thin line. Up wall and follow line up wavy slab to second wave, traverse L at bulge past bolt (carrot), reach past bulge and move back R to line. Up line, dodgy protection at first, to good horizontal break which is where you join 'Technical Ecstasy'. To belay you can either (a) hand-traverse L below bulge to Simpleton's bolt; (b) take the wild crack through the bulge and then move L to belay in the 'Simpleton' corner; or (c) belay on the line, on the slab above the bulge (as shown in topo).

  3. 20m (22) Back R to line and up easy slab to roof. Step R a metre and monkey out the juggy flake through the 5m roof.

FA: Kieran Loughran, Meg Sleeman March-April. Dave Vass made the first lead of pitch 1, before any fixed gear existed. 1st continuous ascent Steve Monks & Louise Shepherd 1989., 1988

Might get bumped up a grade once the third ascentionist gets back from cleaning his undies to give us his thoughts. The 18m of new climbing is only 2-4m L of the original second pitch, and can be escaped at a few spots. Otherwise, this version of the second pitch is every bit as good as the magnificent second pitch of 'Missing'. Start: Start as for TE. 1) (25m 18) Do a short version of pitch 1 of TE, belaying above the great initial vertical crack, 5m below the fat flakes. 2) (35m 23) Blast up the classy seam 2m L of the fat flakes, eventually rejoining the original second pitch for it's wild final cracks. Needs a full rack including a #8 hex, plus extra draws & multiples of micro-cams and micro-wires (and a good ability to place them!). Can be very well protected but gear is quite tricky in 1 or 2 spots. The direttissima finish to this pitch, through the bulge onto the top slab, was also done at bold 19 (and is shown in the ACA topo) but the original finish is better. 3) (15m 18) As per the original.

FA: Kevin Lindorff, Will Monks (both lead crux & after TR rehearsal), 2009

Another great route with some pretty bold bits on the second pitch.

Start: Start at the toe of the slabs 18m R of 'Simpleton', just L of a gully.

  1. 35m (16) Up easy slabs and past blocks to the cliff proper and a nice crack system up a wall. Up the crack to a slab and belay on the second ledge on the R.

  2. 30m (20) Up short, wide, shallow crack (large cam) to a poorly protected reach and so to overhang (alternatively, move R from belay, go up and back L below overhang). Move past L side of overhang to overlap, L to thin crack, wild moves above gear lead up crack to next overlap/break. Go 4m L along this to the next crack/break over bulge (shared with Missing), then go L again to belay in 'Simpleton' corner. You can also traverse L along the major break across missing to reach Simpleton's 2nd belay (at the old carrot), but this is not as good.

  3. 20m (16) Up the last bit of the 'Simpleton' corner to the capping roof and hand traverse L.

FA: Glenn Tempest & Kevin Lindorff, 1977

Good, but not in the same class as the other climbs here. Apparently it should have been called 'Maniac'.

Start: Start as for 'Technical Ecstasy'.

  1. 35m (16) As for 'Technical Ecstasy'. An alternative to the first pitch is to belay on the R about 8m below the original belay and climb directly into the second pitch crack.

  2. 30m (13) Move R to a groove on the far side of the wall and climb the groove to belay 10m below the capping overhang.

  3. 20m (18) Up the slab, keeping just L of arete to a wildly exposed pull through the overhang.

FA: Tim Hancock, Peter McKeand 20.8.70, finishing by long traverse L to roof of Technical Ecstasy. As described: Kieran Loughran, Meg Sleeman. First pitch variant: Joel Malady & Michael Sim December 1995., 1988

Very reachy, add two grades if you're less than 190cm tall. The original climb bashed its way up to gain the line R of 'Mania' and followed this line until 24m below the top then aided the final pitch.

Start: The advisable approach is to abseil from the top of 'Mania' into the gully R of 'Mania' and do the final pitch.

FA: Andrew Thomson, Adrian Davey 19.8.70. FA Simon Mentz, Kieran Loughran & Louise Shepherd., 1991

Probably worthwhile at the grade. The route originally started as for 'Imbecile' but the route is described here with a better start.

Start: Start about 10m R of 'Mania', and 5m R of gully.

  1. 40m (10) Climb an easy groove about 10m R of 'Mania' (5m R of a gully) until forced L into the gully. Move up to below a line on the R wall of the gully. An alternative start claws directly up the horrible gully. Why would you do this?

  2. 30m (15) Follow the line past an overhang. A scary alternative (16) is to climb the left arete of the line, gained from the gully to the left, to meet the original pitch at the lip of the roof.

  3. 25m (14) On up the line to the top in a very exposed position and continue up final short wall.

FA: Andrew Thomson, Joe Friend. (pitch 1 as described: Allan Hope). (Horrible gully start: Derek Vissor, Ann Scholes).(Second Pitch variant: Ray Lassman & Kieran Loughran)., 2006

Clean slab/wall climbing all the way up to the chains on TSIC. Two BRs (hangers required!) and an assortment of cams and trad gear. Slightly contrived at the start, the hard moves past the first bolt can be avoided by easier climbing to the left, but delightful above. The second bolt is hidden until you get right to it!

Start: Five or six metres left of This Structure is closed (very contrived). Alt start - might be better starting immediately L of SIC, then trending up L towards the bolt and onwards. Won't be as contrived this way, and gear will run straighter.

FA: Keith Lockwood & Peter Canning, 2000

Despite being an excellent pitch up a superb line, this climb is over 1m high and has no hand-rails. It takes the great corner leading to the right side of the huge overhangs on 'Central Buttress'. Protection is excellent (double up cams to #2½ and throw in some larger ones for luck). Originally graded 17 it has cleaned up with traffic.

Start: Start about 30m R of 'Mania' et al on a boulder below the R edge of the corner.

FA: Kieran Loughran & Meg Sleeman, 1999

A nice word, paddock: very evocative. Not a bad climb either. A #4 cam would be handy on the final pitch.

Start: Start below the above-noted alcove (about 50m R of Cerambycid).

  1. 30m (14) Scramble up into the alcove and traverse out L along a narrow ledge to below the crack. Pull steeply into crack and up crack until it fades. Continue into the flake crack above to belay on a small ledge, about level with the top of the buttress to the R.

  2. 20m (9) Move to the L end of the belay ledge and follow the line to an area of fragile rock that leads to a terrace at 20m, below the L edge of an awning-like overhang.

  3. 15m (10) Up steeply just L of the overhang. Step back R above overhang and go up to next terrace. Traverse 5m L to belay below chimney/corner.

  4. 10m (13) Climb steeply up L wall of corner.

FA: Kieran Loughran & Meg Sleeman, 1995

Probably quite good and certainly unusual. Awkward climbing up the peapods leads to a solid, overhanging corner. A number of Aliens or similar tiny cams are needed to protect the hard move out of the peapods and protection is otherwise excellent.

Start: Start beneath the alcove, just R of 'The Long Paddock'.

FA: Louise Shepherd & Simon Mentz, 1991

Would be a reasonable, long beginners' climb if not for the ridiculously hard [and hard to protect] move around the bulge to start which is out of character with everything else on the route. After that it's hard to work out where it goes, but the climbing is generally easy.

Start: Start 10m around R of 'Body Bath'. The original description says that it starts behind a pine tree. That was 40 years ago. There is a dead pine tree resting amongst the gum trees where I think this climb starts. There used to be a dead pine tree just L of 'The Long Paddock'. I wonder if the M was put there by the first ascent party or just a guidebook editor who thought they had worked out where the route went?

  1. 40m (15) Climb up through an undercut break (crux, there is an old initial "M" at this break and poor protection), move R a little then up the buttress to belay on the highest point.

  2. 24m (9) Good holds lead up a steep wall to a wide ledge below the overhang. Climb up L of the smooth wall.

  3. 25m (4) Move 4m L, then straight to the top.

FA: Sue Priestly & Steve Craddock (alt) Easter., 1965

Essentially a variant finish to 'Median' except that it exaggerates the length, but it's hard to work out where it goes. Possibly only 10m of independent climbing. See comments for Median re the start.

Start: Start as for 'Median'.

  1. 40m (15) (crux) As for 'Median'.

  2. 24m (-) Follow 'Median' to the overhang and climb directly over the overhang.

  3. 26m (-) Traverse L to line and climb to large ledge.

  4. 30m (-) Scramble up diagonally L. Keep the rope on or not as the spirit moves you.

FA: D.Smalley & D.Holroyd (alt), 1974

Hello!

First time here?

theCrag.com is a free guide for rock climbing areas all over the world, collaboratively edited by keen rock climbers, boulderers and other nice folks.

You can log all your routes, connect and chat with other climbers and much more...

» go exploring, » learn more or » ask us a question

Selected Guidebooks more Hide

Author(s): Steve Toal

Date: 2019

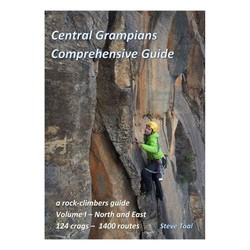
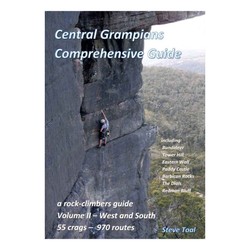
The Central Grampians Comprehensive Guide books are the most extensive climbing guide to the Grampians. With two volumes they cover the popular areas but also many of which have never been in print before.

Volume 1 of the Central Grampians guide covers the North and East regions and features over 1400 routes spread over 124 crags. Painstakingly put together by Steve Toal, his guides have now become the go-to for climbers for the area.

Author(s): Steve Toal

Date: 2019

The Central Grampians Comprehensive Guide books are the most extensive climbing guide to the Grampians. With two volumes they cover the popular areas but also many of which have never been in print before.

Volume 2 of the Central Grampians guide covers the West and South regions and features over 970 routes spread over 55 crags. Painstakingly put together by Steve Toal, his guides have now become the go-to for climbers for the area.

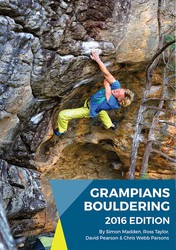
Author(s): Simon Madden, Ross Taylor, David Peason and Taylor Parsons

Date: 2016

ISBN: 9780646955544

"Australia's premier bouldering destination! The new 2016 Edition Grampians Boulder guide authored by Simon Madden, Ross Taylor, David Peason and Taylor Parsons. It contains more than 1300 problems which is double the original guide. Heaps of new information on established areas as well as the inclusion of plenty of boulders and crags not published before. It also features update idiot proof layout and expanded history and culture notes. Get one and start cranking!"

Accommodations nearby more Hide

Share this

Photos Browse all photos

Upload a photo of area

Sat 29 Apr
Check out what is happening in Central Buttress.

Get a detailed insight with a timeline showing

  • Ticks by climbers like you
  • Discussions of the community
  • Updates to the index by our users
  • and many more things.

Login to see the timeline!

Deutsch English Español Français Italiano 한국어 Português 中文