Seasonality
Description
This cliff sits directly above Halls Gap. 'Access' is relatively easy and the climbing might be of some interest if you are staying in Halls Gap and looking for routes within walking distance. With one or two exceptions quality is not very high. The cliff is shaded on summer afternoons. A rap station services several of the climbs and avoids dirty loose top pitches.
© (armstp)Access issues inherited from Grampians
Designated
Climbing restrictions apply to many crags in Gariwerd/Grampians. Some of these restrictions are likely to change over time as assessments are completed. Tags are being applied to most crags to reflect their current status. Additional access-notes are provided to clarify restrictions where required (and will over-ride this notice). Current and further Parks Victoria advice can be found at https://www.parks.vic.gov.au/places-to-see/parks/grampians-national-park/rock-climbing-in-gariwerd
Approach
From Halls Gap drive up the Mt Victory road for about a km to a small parking area and the start of the 'Chatauqua Peak' walking track on the R. Alternately walk to this point from behind the pool and car park in Halls Gap [adds about 10 mins]. Follow the track to the saddle from where a route heads up the peak. Head about 150m towards the peak then drop/scramble down on the L to the foot of the cliff. Follow the cliff L ward. Routes are described R to L as you hit them.
© (armstp)Ethic inherited from Grampians
Grampians / Gariwerd access issues have emerged (2019) due to potential risk to the environment and cultural sites. Climbers need to be aware that there are significant Aboriginal sites in the Grampians, especially in cave areas. Please take time to understand the access situation. Leave no trace and climb responsibly.
Please note that due to the fact that the Grampians is a National Park, dogs and other pets are not allowed in the park except in vehicles on sealed roads and in sealed car parks.
===Cliffcare Climber’s Code===
Find out about and observe access restrictions and agreements.
Use existing access tracks to minimise erosion - keep to hard ground & rock surfaces.
Do not disturb nesting birds or other wildlife.
Protect all native vegetation, especially at the base of cliffs. Wire brushing to remove mosses and 'gardening' in cracks and gullies is not permitted. Use slings to protect trees while belaying or abseiling if belay anchors are not provided.
Respect sites of geological, cultural, or other scientific interest. Do NOT develop new climbs in or near Cultural Heritage sites.
Chalk has high visual impact - minimise your use of it. Parks Victoria have requested the use of coloured chalk in Gariwerd.
Minimise the placement of fixed equipment, especially where Trad gear is available. Respect any "no bolting" areas.
Do not leave any rubbish - take it home with you.
Dispose of human waste in a sanitary manner (bury, or even better pack it out). Do not pollute water supplies.
Off-road driving is illegal in Gariwerd.
Keep campsites clean, and do not light campfires outside of official metal fire pits.
For more detailed information visit https://www.cliffcare.org.au/education
Tags
Plan your Trip
Some content has been provided under license from: © Australian Climbing Association Queensland (Creative Commons, Attribution, Share-Alike 2.5 AU)
Hello!
First time here?
theCrag.com is a free guide for rock climbing areas all over the world, collaboratively edited by keen rock climbers, boulderers and other nice folks.You can log all your routes, connect and chat with other climbers and much more...» go exploring, » learn more or » ask us a question


Selected Guidebooks more Hide
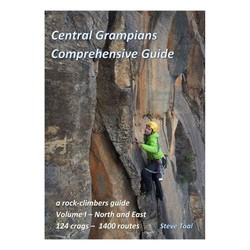
Author(s): Steve Toal
Date: 2019
The Central Grampians Comprehensive Guide books are the most extensive climbing guide to the Grampians. With two volumes they cover the popular areas but also many of which have never been in print before.
Volume 1 of the Central Grampians guide covers the North and East regions and features over 1400 routes spread over 124 crags. Painstakingly put together by Steve Toal, his guides have now become the go-to for climbers for the area.
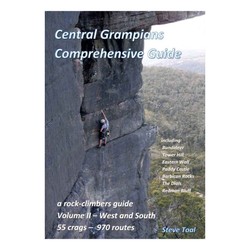
Author(s): Steve Toal
Date: 2019
The Central Grampians Comprehensive Guide books are the most extensive climbing guide to the Grampians. With two volumes they cover the popular areas but also many of which have never been in print before.
Volume 2 of the Central Grampians guide covers the West and South regions and features over 970 routes spread over 55 crags. Painstakingly put together by Steve Toal, his guides have now become the go-to for climbers for the area.
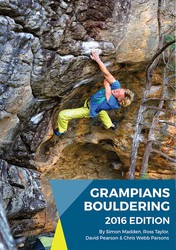
Author(s): Simon Madden, Ross Taylor, David Peason and Taylor Parsons
Date: 2016
ISBN: 9780646955544
"Australia's premier bouldering destination! The new 2016 Edition Grampians Boulder guide authored by Simon Madden, Ross Taylor, David Peason and Taylor Parsons. It contains more than 1300 problems which is double the original guide. Heaps of new information on established areas as well as the inclusion of plenty of boulders and crags not published before. It also features update idiot proof layout and expanded history and culture notes. Get one and start cranking!"
ⓘ
Accommodations nearby more Hide
Share this
Wed 26 Apr
Check out what is happening in Chatauqua Peak.
Get a detailed insight with a timeline showing
- Ticks by climbers like you
- Discussions of the community
- Updates to the index by our users
- and many more things.
Login to see the timeline!