A Crag Guide gives an extensive view of all sub areas and climbs at a point in the index. It shows a snapshot of the index heirachy, up to 300 climbs (or areas) on a single web page. It shows selected comments climbers have made on a recently submitted ascent.
At a minor crag level this should be suitable for printing and taking with you on a climbing trip as an adjunct to your guidebook.
This guide was generated anonymously. Login to show your logged ascents against each route.
Warning
Rock climbing is extremely dangerous and can result in serious injury or death. Users acting on any information directly or indirectly available from this site do so at their own risk.
This guide is compiled from a community of users and is presented without verification that the information is accurate or complete and is subject to system errors. By using this guide you acknowledge that the material described in this document is extremely dangerous, and that the content may be misleading or wrong. In particular there may be misdescriptions of routes, incorrectly drawn topo lines, incorrect difficulty ratings or incorrect or missing protection ratings. This includes both errors from the content and system errors.
Nobody has checked this particlular guide so you cannot rely on it's accuracy like you would a store bought guide.
You should not depend on any information gleaned from this guide for your personal safety.
You must keep this warning with the guide. For more information refer to our:
Usage policy
Contributors
Thanks to the following people who have contributed to this crag guide:
Mark Gamble
Simon Eschbach
Matt Tranter
Dan Kozianski
Cody waldon
Peter Martland
Jess Rayner
Lucas D
Dan Poole
Oscar Bassi
The size of a person's name reflects their Crag Karma, which is their level of contribution. You can help contribute to your local crag by adding descriptions, photos, topos and more.
Table of contents
- 1. Wildside 43 in Crag
- 2. Index by grade
1. Wildside 43 routes in Crag
- Summary:
-
Sport climbing and Trad climbing
Lat / Long: -28.162956, 153.200552
summary
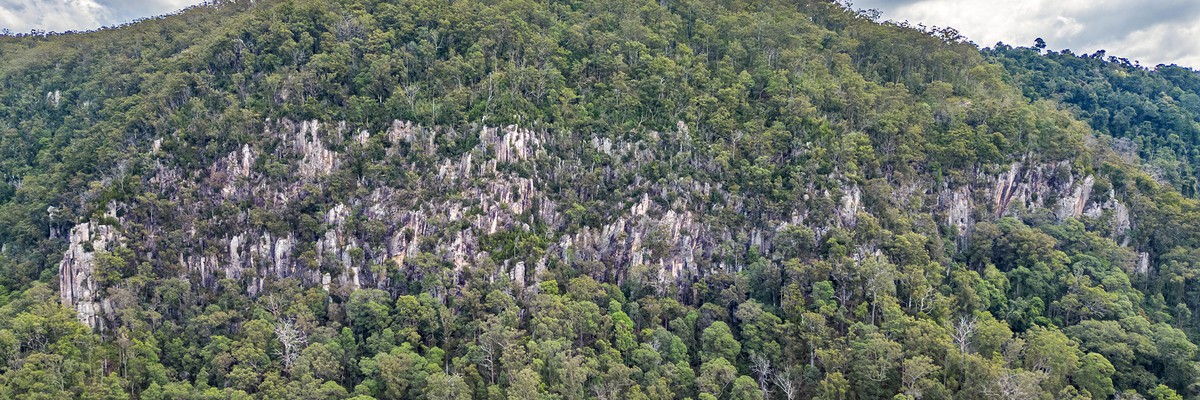
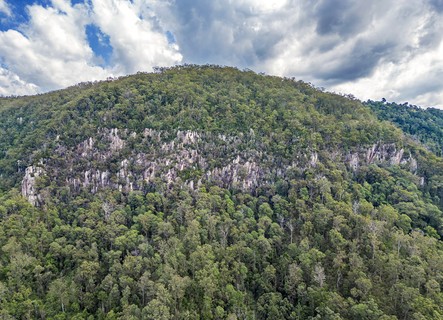
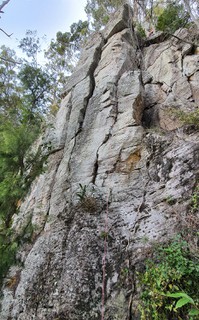
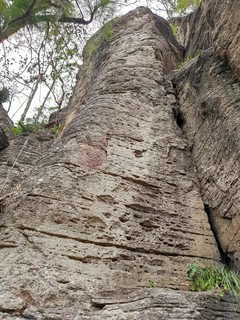
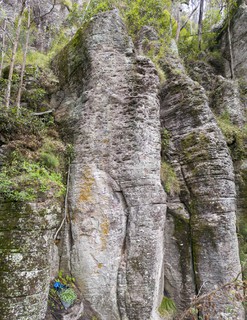
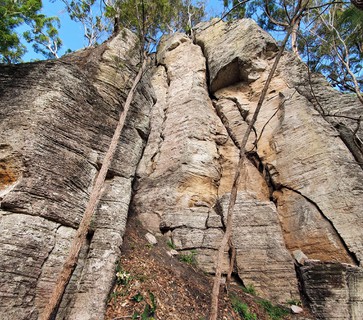
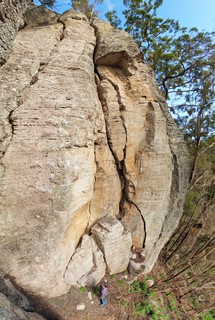
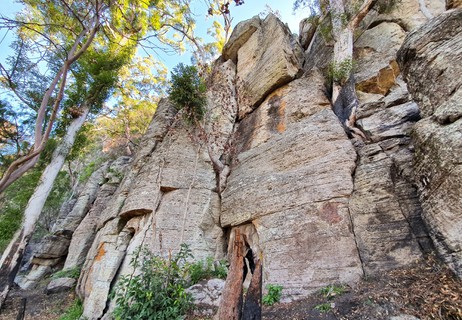
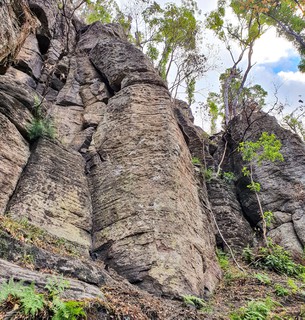
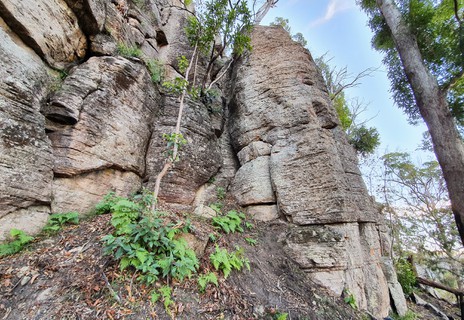
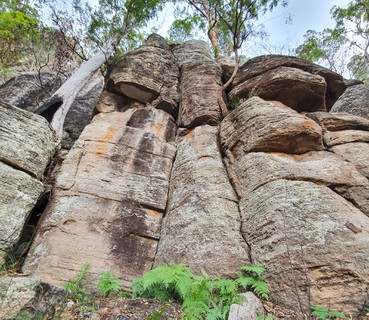
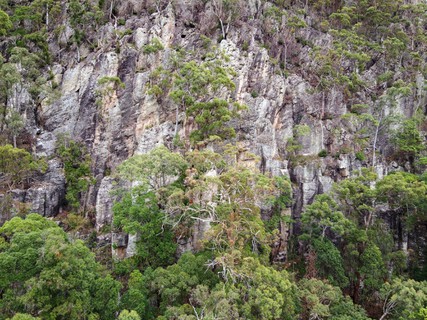
500m of rhyolite cliffs, diverse and 3D in nature combining both pillars and flat walls. Stunning views, beautiful forest and intriguing rock features make this area ideal to connect with nature.
description
Route lengths range from 12m-46m and are listed from right to left. Stick clip is highly recommended.
This land is National Park, the Nature Conservation Act applies here. Always stay on the trail. "Leave no trace" ethics must be applied.
Rock climbing is permitted as stated by A43 (page 17) of the QPWS Management Plan.
approach
Park your car on the nature strip (away from property gates) here: (-28.160739, 153.195541)
Walk 150m further up the road towards Binna Burra till you reach a yellow road sign (the approach starts here).
At the yellow (windy road) sign turn and walk into the bush here: (-28.161578, 153.196972)

Wildside - Turn at the Yellow Road Sign

Wildside - Approach Through Burnt Stump
Approach Video: https://youtu.be/EElCeIjeCDk
Follow the ridge down the steep hill for approx 300m to the start of the crag (takes approx 15-20mins). Follow the base of the cliffs south for 200m till you reach "The Bridge" sector where the first climbing routes begin.
Wildside continues for another 300m along the base of the cliffs until you turn a very pronounced corner into the start of Whitinbah Wafers (you'll see the obvious columns of the Orange Box Corner). The approach through Wildside is much easier and safer for accessing Whitinbah Wafers (and is preferred).
Note: If you are venturing further then care must be taken to not pass Whitinbah Wafers into the restricted access area of Poondahra.
history
Rock climbing on this land in the early 1970's pre-dates the QPWS acquisition.
| Route | Grade | Style | Selected ascents | |||||
|---|---|---|---|---|---|---|---|---|
Cornerstone SectorThe cliff face on the walk in to the crag from the northern end as you come around the corner. | ||||||||
| 2 | ★ Welcome | 21 | 15m | |||||
Swish WallLocated between the Cornerstone Wall and Dry Waterfall Sector and set back on an upper tier, it's hard to fully appreciate the beautiful concave profile until you're on the wall. Colourful orange, black and grey rock with endless pockets in a sweeping curve up the wall. | ||||||||
| 4 | Serpent's Lair | |||||||
Dry Waterfall Sector | ||||||||
The BridgeStarting from the end of Dry Waterfall sector until the sharp corner at the beginning of Slipstream sector. | ||||||||
| 7 |
★ Dronestrike / Nice Jugs
Thought provoking/stemming start on dihedral followed by nice moves onto the face then up through to jugs to finish. Great fun and a nice warm up route for the crag. FA: Ben Barnes, Fibonacci & Joni, 3 Jun 2020 | 16 | 16m, 4 | |||||
| 8 |
★ Golden Tick-it
Thin crux start through the first half then gets a bit easier as an abundance of glorious pockets reveal (some better than others). Options to start either left or right of the first bolt however the intended beta is a left start with traverse to the right crack then up to some committing and reachy moves. Despite it's short length this is a very enjoyable climb, way better than it looks. Great for TR too. FFA: Andy & Fibonacci, 14 Sep 2022 | 21 | 16m, 5 | |||||
Slipstream SectorThis sector starts from 'Endless Dream' and covers ~70m as it curves around to the Insanity Wall. | ||||||||
| 10 |
★ Endless Dream
Surprisingly spicy (feels like 20), a great test piece for a solid head game. From the midway ledge at the small roof there is no pro for 5m as the chimney narrows to offwidth, then get two pieces in before running out the last several metres of slightly overhung offwidth to a hanging tree belay, or use the fixed anchors of Temporal Displacement 2.5m to the left of the tree. A little chossy and adventurous but this is the Wild Side! FA: Fibonacci & Ben Barnes, 15 Aug 2019 | 19 | 21m | |||||
| 11 |
★★★ Temporal Displacement
Great variety of moves, thin, technical and committing. Wandery and fun. | 24 | 19m, 6 | |||||
| 12 |
★★ Dreamwalker
Thin vertical start off the ground to a small slab section, then up to the beginning of the sharp arete. Many options here to continue; face, crack, side pull, layback, or the most compelling option is to go bold straight out on the corner of the arete hanging one leg either side. Plenty of holds but definitely not a gimme, you'll have to explore to find jugs, pockets and crimps. Continue up the arete and/or face to anchor. Great moves and so much fun, a highlight for the sector! FFA: Ben Barnes, Fibonacci, Joni, Bethany Martland & Peter Martland, 27 Jun 2020 | 18 | 16m, 5 | |||||
| 13 |
★ Solar Flare
A great short climb with some nice moves and holds that aren't immediately obvious making for a very challenging onsight at the grade. Usually shaded but mid morning can present a cheeky challenge through the crux. Best when starting from the lowest ground level (not the higher ground to the left), but stick clip the first bolt if required. FA: Joni, Ben Barnes & Fibonacci, 12 Aug 2020 | 18 | 12m, 3 | |||||
| 14 |
Duelling Bullfrogs (RH Variant)
Start as for Duelling Bullfrogs then the route splits from above the ledge (after the second bolt). Take the right side above the curved arete that follows the obvious slabby terrain up to the tree. This is suitable for those not ready to lead the 18 left variant. | 15 | 19m, 5 | |||||
| 15 |
★ Duelling Bullfrogs
Varied climbing styles with great moves and several options through this 3D line. Start right of the little dihedral corner, up 5m to ledge, continue on the back wall up the left side of the obvious curving arete. Optional rests can be found along the curving arete before a committing to the next wall with a much sharper arete to the anchor. Belayer stay focused and watch the fall zone between bolts 5-6, potential to deck on a protruding rock below if you're not careful. FA: Ben Barnes & Fibonacci, 19 Aug 2020 | 18 | 18m, 6 | |||||
| 16 |
Rock Poppit
This is a variant start to Pop Rocket and shares the same anchor. Balancey moves with slopey crimps most of the way. Interesting clip at second so be careful. Recommend stick clip the first bolt. FA: Pete D, 17 Apr 2021 | 19 | 14m, 4 | |||||
| 17 |
★ Pop Rocket
Some nice moves through the crux sequence at the start, then a cruisy slab to the anchors. FFA: Fibonacci & Joni | 18 | 15m, 4 | |||||
| 18 |
★ Where Eagles Dare
A tricky buldge crux to negotiate near the start. Don't be tempted to use the tree right of the buldge, if you do it goes at 18 instead of 21. The middle section is slab, then the final sequence to the anchor has some small sloper pockets making it a tough finish but great fun. Named for the two eagles dueling a cockatoo during route setting. FFA: Ben Barnes, Fibonacci & Jamie, 6 May 2020 | 21 | 16m, 5 | |||||
Insanity WallThis is a nice wall of many harder routes bridging the Slipstream and Pillar sectors. | ||||||||
| 20 |
★★ Hidden Treasure
A delightful two pitch multi, quite the adventure for a sport route and while the bolts will help you navigate through the climb it meanders around a lot and requires some creative moves to get through. If you enjoy adventurous aspect of exploring and onsighting then skip the descriptions below. TR is suitable for both pitches (after leading) if required.
FFA: Fibonacci, 12 Oct 2022 | 23 | 46m, 2, 21 | |||||
| 21 |
★★★ The Perfect Getaway
Start up the obvious dihedral to an early crux through the 3rd to 4th bolt, continue following the seam trending left through a few metres of slab before committing to the arete on the left side of the roof for some spicy moves to the anchor. The variety of technique and style required to navigate this wandering route makes it especially enjoyable and rewarding, with just enough holds to get through (but not so obvious to find). Suitable for TR. FFA: Fibonacci, 12 Oct 2022 | 22 | 26m, 9 | |||||
| 22 |
Insanity
A mixed route, up the nice crack till it closes right up, has 3 bolts where pro can't be placed, continue to the top using crack, face, and anything you can find. Top out on the ledge and rap off the anchors above "Chickpeas and Lentils". | 20 | 15m, 3 | |||||
| 23 |
★ Chickpeas and Lentils
Open Project. One of the hardest lines at Wild Side. Start in front of the small ledge at head height, then up the small front facing dihedral to a little roof (crux), climb out of the left roof corner and onto the main face, continue up on thin holds and top out on the ledge with the anchor set back on the left wall. A second pitch will come later. | 19m, 10 | ||||||
| 24 |
★★ The Long Road
Start this adventurous route with tricky climbing- out of the prominent dihedral. Enjoy a fun hand crack up to a good rest in the large, yellow, open book-corner. Take a few deep breaths and tackle a brilliant roof encounter. Possibly a second pitch to come later depending on navigating the rock quality. FA: Jimmy Blackhall, 4 Feb 2020 | 23 | 22m, 8 | |||||
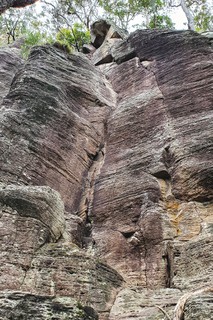
Pillar SectorThe most popular and interesting sector of pillars and unique 3D features with a good range of grades and styles to suit everyone. This is where Wild Side's journey began. | ||||||||
| 26 |
Exploding In The Dark
Possibly grade 13-15, follows the twin cracks behind the Mystery Meal pillar. | |||||||
| 27 |
★ Bubble Bath
Crux start on super thin holds from the right arete. Gets progressively easier as you climb. Two ledges splits this climb into 3 distinct sections. A fun and yet somehow challenging route. FFA: Fibonacci | 22 | 22m, 7 | |||||
| 28 |
Mystery Meal - Trad Variant
The trad start on the Mystery Meal pillar. Follow the crack on the right of the pillar (place your own pro) until the crack finishes, then traverse left onto the main pillar face and clip the obvious first bolt (roughly half way up the entire pillar). Follow the rest of the bolts up to the lower off anchors as per Mystery Meal DS. | 27m, 6 | ||||||
| 29 |
★★ Mystery Meal
Update: All the bolts on this route have been chopped by ranger. The direct start of Mystery Meal pillar, starts from the lower ground level at the middle of the pillar. Wandery crux start, climb over the buldge then head straight up the main face. At half way it links with the other two variants (the ledge on the left, and the crack on the right), just stay right for the 6th bolt and rest any chance you can 'cause it's thin and crimpy the whole way up! FFA: Dimo, 4 Feb 2020 | 25 | 26m, 11 | |||||
| 30 |
★★ Cherry Flavoured Mystery Meal
Update: All the bolts on this route have been chopped by ranger. Starting from the upper ledge just right of Cherry Popper next to the big tree, clip the first bolt from the ground before stepping off the ledge and traverse right over to the crack, then leaving the crack continue diagonally up/right following the bolts to the main face with nice exposure, continue straight up to finish at the anchor. There is also a trad variant on the right hand side of the MM pillar. | 21 | 20m, 7 | |||||
| 31 |
★★ Phantastic Phallus
Update: All the bolts on this route have been chopped by ranger. This is a really fun climb on a unique and fascinating pillar feature. A sustained thin and crimpy route so rest as often as you can. 5 bolts + lower off anchor. Easy to top out above the anchor if you want to enjoy the summit for a while. This was the first route to go up at WS. FFA: Fibonacci, Dimo & David Jefferson, 12 Jan 2019 | 18 | 18m, 5 | |||||
| 32 |
Hard AF
Update: All the bolts on this route have been chopped by ranger. On the Phallus Pillar: starts to the right of "Phantastic Phallus" on the upper level. A very hard route that links up and shares the anchor of "Phantastic Phallus". | 28 | 14m, 7 | |||||
| 33 | Reach Around | 12m | ||||||
| 34 |
Take A Hard Right
The crack 2m to the left of: Take A Walk. Follow the crack as it takes a hard right and finishes then link up with Take A Walk and continue for 2 bolts before reaching the anchor. | 19m, 2 | ||||||
| 35 |
★★ Take A Walk
Update: All the bolts on this route have been chopped by ranger. Crux start up a very thin wall, second half reveals some pockets and holds but don't be fooled it's sustained the whole way up. | 24 | 17m, 8 | |||||
| 36 |
★★ Switcheroo
Update: All the bolts on pitch 1 have been chopped by ranger. An awesome little 2 pitch multi located on the upper platform to right of "Phantastic Phallus".
Finish at the chain & ring anchor, then rap back down to the first pitch anchor. Excellent moves, good variety, great fun, nice exposure and views into the valley below. | 21 | 37m, 2, 14 | |||||
| 37 |
★ Another Way Up
Another way to get up on the ledge. Plenty of holds on either sides. Medium to big cams. Take care when passing the chockstone. Anchor-in by slinging the boulder on the left or use the cracks. FFA: Achi, 13 Apr | 15 | 17m | |||||
| 38 |
Cherry Popper
Update: All the bolts on this route have been chopped by ranger. A short but challenging route with crux start. Clip the first bolt from higher ground to the left, then come back to the middle of the column to start climbing. Dangerous drop off ledge to the right so make sure to clip that first bolt before leaving the ground. | 20 | 12m, 5 | |||||
| 39 |
Airtight Alibi
Update: All the bolts on this route have been chopped by ranger. This fun line starts by stemming across the wall for the first few metres before it turns into a rounded corner arete for the rest of the climb. Thin holds and reachy moves. A couple of finger/hand jams in a nearby crack may prove useful on the way up but stay on the arete. The last two bolts are spaced out further adding a little more spice. Feels like 21 but the moves go at 20 if you know the beta well. Belayer should stand low as a fall from a heavier climber may launch the belayer up into the left wall extrusion. A backstep onto the neighbouring Phallus Pillar is possible for those wanting a rest around the 2nd bolt. FA: Fibonacci & Ben Barnes | 20 | 21m, 5 | |||||
| 40 |
Brown Betty
Starts on the upper level left and behind the main pillar. Climb the thin vertical crack in the dihedral and follow the crack as it starts to tend right at the tuft of grass passing large pockets to a slabby break. Continue up the small slab where the crack once again becomes a dihedral this time slightly overhanging (unseen from the ground). Take a deep breath and punch through the crux to a hanging tree belay. | 19 | 30m | |||||
| 41 |
★ Praestrictus
Starts at the obvious short open crack that curves left. Continue up to the short slabby section and then up the main vertical face to the small chimney finish at the anchor. Nice variety of climbing styles throughout the route. High first bolt, recommend stick clip. | 20 | 27m, 11 | |||||
| 42 |
★★ The Observatory
A very fun line with a nice variety of features and climbing styles. Most of the route feels cruisy around 17, take your time to look around for plenty of nice pockets and small jugs, but bring your head game for the crux finish on a super exposed 45° boulder roof that goes at 20. Very reachy so for shorties it's a dyno to the roof lip. The first 10 bolts are 120mm but the final bolt on the roof is an extra long 260mm bolt to assure solid protection on the crux. Climb over the roof and clip the anchor before enjoying one of the best views at Wild Side overlooking the Phallus Pillar, but DO NOT lower off as the rope rub over the roof lip will severely wear your rope, so rap off only. Top belay is possible and comfortable. As with most routes at WS stick clip the first bolt is highly recommend. FFA: Fibonacci | 20 | 29m, 11 | |||||
Phoenix Sector | ||||||||
| 44 |
★★ Fire In The Hole
Warning Flora and Fauna: Wasps Interesting rock features and varied styles of climbing make this route a fun little adventure. Can be done as a 2 pitch multi (recommended) or as a single pitch by skipping the first pitch anchors.
FFA: Jamie, Fibonacci & Ben Barnes, 6 May 2020 | 22 | 42m, 2, 15 | |||||
| 45 |
★★ Synergetic
Excellent climbing on an outstanding mixed route nestled amongst the trees. Start on trad following the obvious splitter but beware of the 4m section of crumbly choss, don't rely on gear placements here. Climb gingerly through the choss then the splitter gets solid again offering great hand jams till the crack ends at the ledge. From the ledge finish the route as sport (3 bolts + chain anchor) continuing up the left rounded arete on thin holds with crux finish. The crack goes at around 17-18 and the arete finish goes at 22. | 22 | 29m, 3 | |||||
| 46 |
★★★ Enter The Phoenix
Incredible route with nice features, varied climbing styles and great moves! One of the best gems at Wild Side. Start to the right of crack on the little rooflet, up the crack to ledge, then continue up the wide rounded arete to the anchor. Some super thin, pumpy and committing moves through the crux, watch out for the tree behind you if you're taking a whip, and when above the ledge make sure your belayer has no slack. Stick clip the first bolt unless you're solid at the grade or comfortable with crack. | 23 | 25m, 8 | |||||
| 47 | Ta Prohm | |||||||
| 48 |
★ From The Ashes
Thought provoking three dimensional climbing up the flake and corner system leads to a stellar move through the bulge. Gear is good where you need it, lower half requires a bit of focus around spaced gear (#5 won't go astray, but not required). FA: Paul Norris, Gaston, Tmang & Andy | 18 | 18m | |||||
| 49 |
★★★ Ineffable Flow
An incredibly beautiful line that can only be truly appreciated from the upper head wall where the moves flow ineffably. Climbs very close to the right arete but stay on the face, you don't need the arete anyway. Interesting features to explore throughout the route and stunning views from the top. Highly recommended. | 23 | 27m, 13 | |||||
| 50 |
★ Two Headed Dragon
Starts as the first 3 bolts of Hawk-Eye then from the ledge follow the far right line. Be sure to clip the 3rd bolt of Hawk-Eye to eliminate rope drag over rock. The last move to the anchor gives the grade. TR only, access anchor right of Hawk-Eye FA: Fibonacci & Ben Barnes | 17 | 18m | |||||
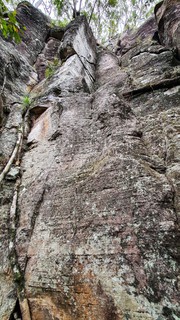
| 51 |
★ Hawk-Eye
Great fun route with plenty of holds on the main face and an interesting eye feature near the top. Well suited for top rope if that's your thing. FFA: Ben Barnes & Fibonacci | 15 | 17m, 6 | |||||
The Neutral ZoneThe last sector (and least interesting) of Wild Side on the southern end. | ||||||||
Whitinbah WafersWhitinbah Wafers is a Trad only crag. | ||||||||
              /1d/3b/1d3b9a90041fa0bc590d9edd5427518d48e8bf8b) 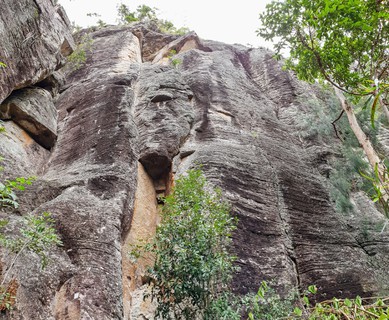 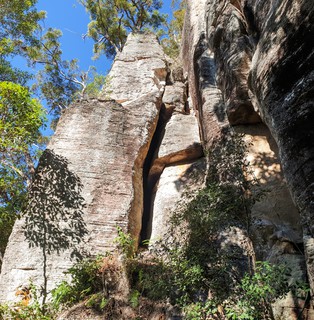 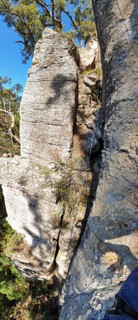 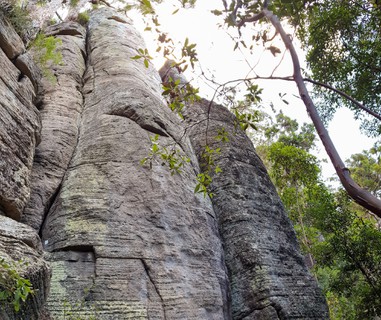 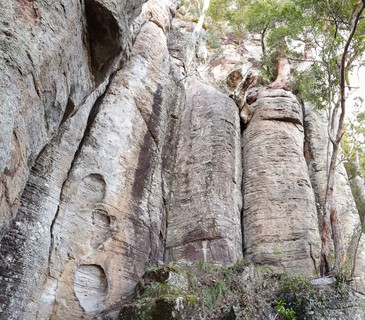 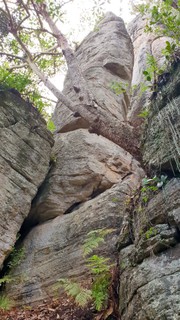 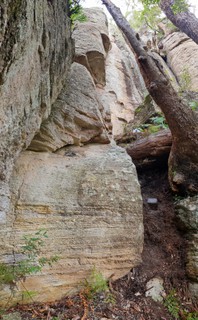 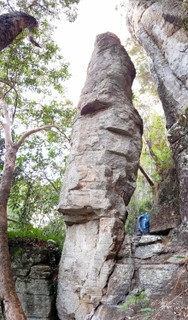 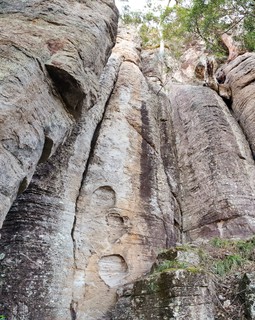  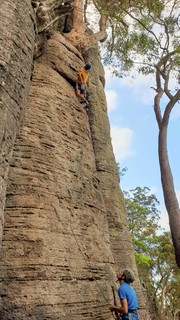 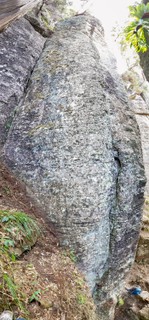 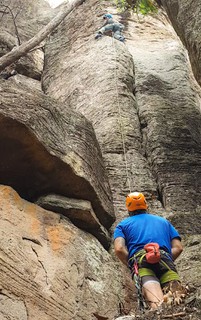   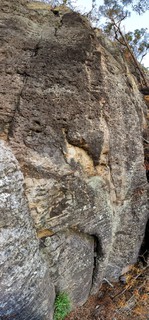 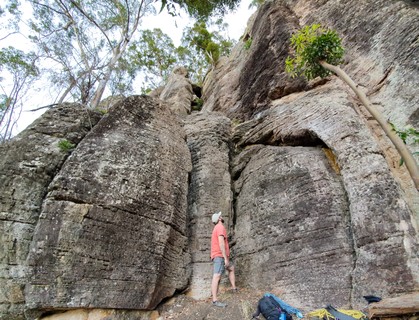 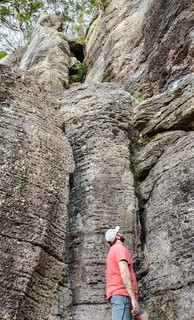 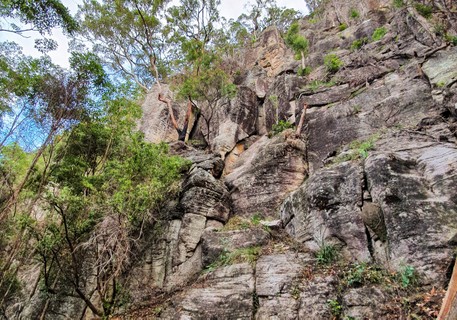 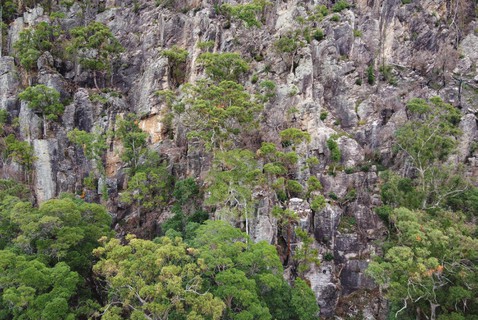 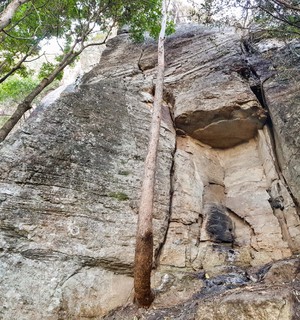 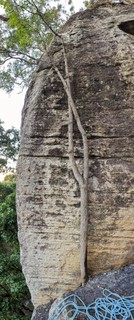 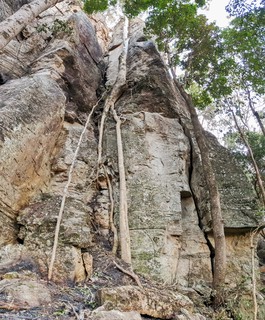 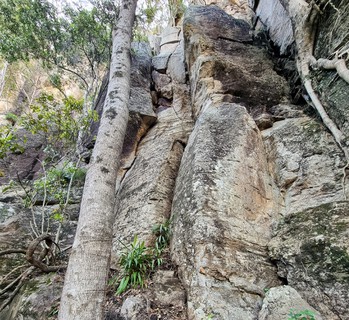 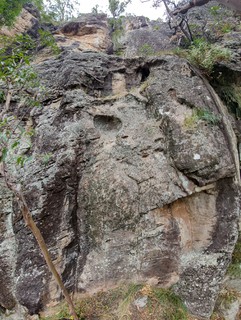 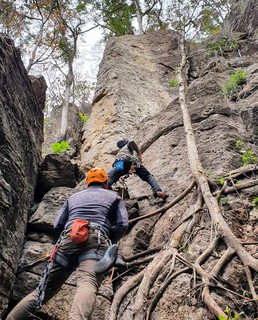 |
||||||||