A Crag Guide gives an extensive view of all sub areas and climbs at a point in the index. It shows a snapshot of the index heirachy, up to 300 climbs (or areas) on a single web page. It shows selected comments climbers have made on a recently submitted ascent.
At a minor crag level this should be suitable for printing and taking with you on a climbing trip as an adjunct to your guidebook.
This guide was generated anonymously. Login to show your logged ascents against each route.
Warning
Rock climbing is extremely dangerous and can result in serious injury or death. Users acting on any information directly or indirectly available from this site do so at their own risk.
This guide is compiled from a community of users and is presented without verification that the information is accurate or complete and is subject to system errors. By using this guide you acknowledge that the material described in this document is extremely dangerous, and that the content may be misleading or wrong. In particular there may be misdescriptions of routes, incorrectly drawn topo lines, incorrect difficulty ratings or incorrect or missing protection ratings. This includes both errors from the content and system errors.
Nobody has checked this particlular guide so you cannot rely on it's accuracy like you would a store bought guide.
You should not depend on any information gleaned from this guide for your personal safety.
You must keep this warning with the guide. For more information refer to our:
Usage policy
Contributors
Thanks to the following people who have contributed to this crag guide:
Sam Bycroft
Crofty11
Aaron Thomas
The size of a person's name reflects their Crag Karma, which is their level of contribution. You can help contribute to your local crag by adding descriptions, photos, topos and more.
Table of contents
- 1.
The Point
48 in Area
- 1.1. The Tip 18 routes in Sector
- 1.2. The Iceberg 15 routes in Sector
- 1.3. The Mollusc 5 routes in Sector
- 1.4. The Beaches 10 routes in Sector
- 2. Index by grade
1. The Point
- Summary:
-
All Bouldering
Lat / Long: -0.002451, 148.354143
The operation and use of drones by park visitors on reserved land including national parks is not permitted
Peregrine Falcons nest from July - December each year. It’s important that climbers don’t climb near active nests during this period. Known sites (non exhaustive) are: Sand River (Far East, The Panopticon), Bare Rock (R of the Boneyard, L of Bisso of Orange), Rocky Cape, Pubic Wall/Duck Reach, Hillwood, Gunners Quoin, Lowdina.
Please note that Tasmania has notoriously patchy phone reception for particular service providers. Telstra is the most reliable. An emergency Personal Locator Beacon or similar is recommended kit when climbing in remote locations.
For more information - follow the link below for some local tips + tricks on how to better reduce your impact during your next Tassie climbing holiday
")
summary
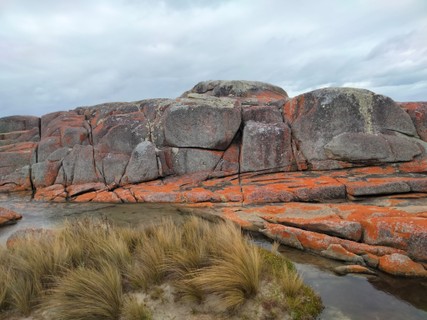
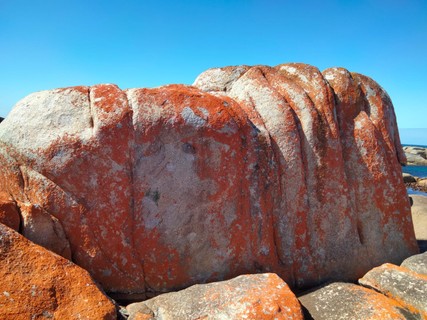
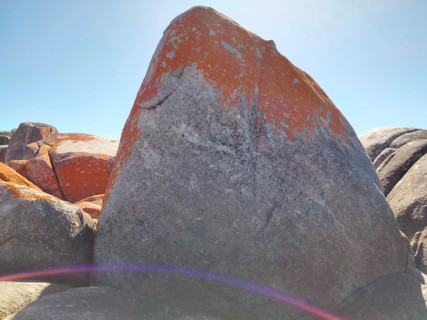
This is the stretch of rocky coast between Beerbarrel Beach and The little Beaches.
access issues
Many locals continue to use community run website thesarvo.com for crag/route updates and noting any access issues. The associated app can be downloaded and used offline!
http://thesarvo.com/confluence/display/thesarvo/Tasmania
Gerry Narkowicz also produces hardcopy guides to numerous venues across the state via the 'Climb Tasmania' website
approach
Park at either the boat ramp or Beerbarrel Beach and walk around the front or on the track to your boulder.
ethic
Crag Stewards
Many Tasmanian climbing areas have Stewards assigned as a point of contact for safety or access concerns.
For more details and the list of Steward emails please visit: http://www.thesarvo.com/confluence/display/thesarvo/Introduction+to+Tasmanian+Climbing
Statewide Ethics
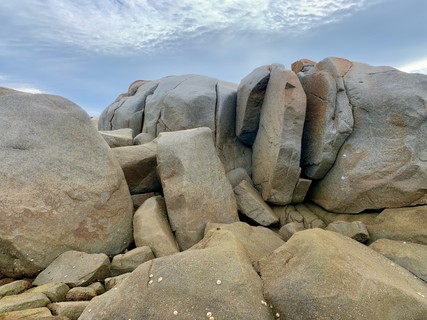
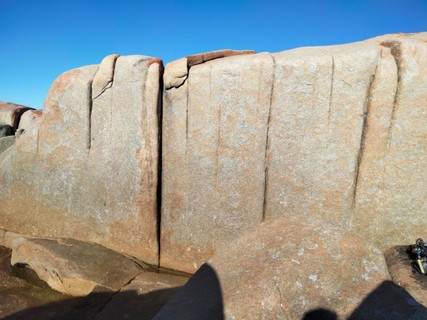
1.1. The Tip
- Summary:
-
Lat / Long: -41.274657, 148.356748
   |
||||||||
| Route | Grade | Style | Selected ascents | |||||
|---|---|---|---|---|---|---|---|---|
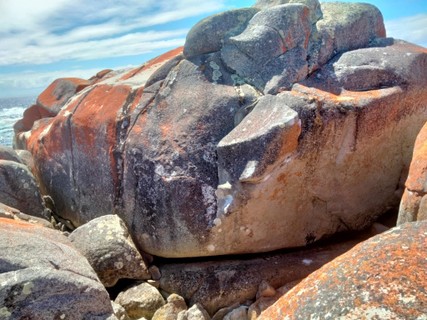
Bubbles CragA small crag with a boulder in the middle that is surrounded on two sides with a wall | ||||||||
| 2 |
★★ Soggy Chai-Chalk
Sit start on the juggy undercling in the cave with funky feet (no bat hangs). Climb over the bulge then finish up the fun face on great holds. FA: Sam Bycroft, 20 Mar 2023 | V5 | 4m | |||||
| 3 |
★★ Soggy Chai-Chalk (Batman Style)
Climb as per Soggy Chai Chalk but start in a bathang. | V4 | 4m | |||||
| 4 |
★★ Project Power
SDS on the juggy crack and power up the arete. | V4 - 6 | 4m | |||||
| 5 |
★★ Chubby Bunnys
Stand start on the arete, climb up through good holds and topout. FA: Sam Bycroft, 20 Mar 2023 | VB | 3m | |||||
| 6 |
★★ Reverb
SDS on whatever holds feel comfortable. Powerful first move out right to the crimpy undercling then throw to micro crimps rail. move out right to establish the jug then go up and left to the horn and topout above the start. FA: Sam Bycroft, 1 Dec 2023 | V4 | 4m | |||||
  |
||||||||
| Route | Grade | Style | Selected ascents | |||||
| 7 |
Project Slap
Sit start on whatever holds are comfortable. huge through up to slopy crimp on the lip, match and head up through holds on the left. | V6 - 8 | 3m | |||||
| 8 |
Project Shoulder
Start same as Project Slap but after establishing the slopey crimp, traverse out left on tiny crimps and knobs to the arete and mantle to topout. | V9 - 13 | 5m | |||||
| 9 |
Project Shoulder Stand
SS on the arete and throw upwards through bad holds to topout | V7 - 10 | 3m | |||||
| 10 |
Project Popit
SDS with the jug and crimp. Pop out to the sloped crimps and knobs on the face then Pop to good topout holds. | V8 - 11 | 4m | |||||
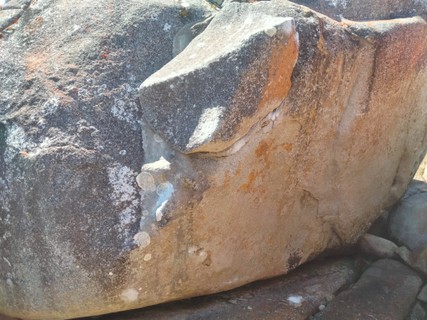
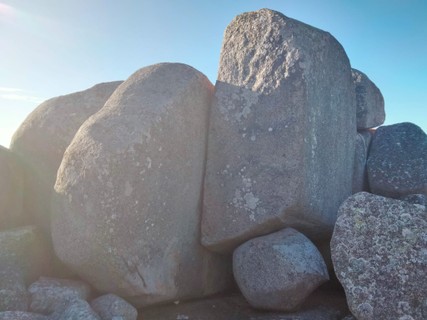
The SardineAppropriately Named | ||||||||
| 12 |
★ Sardines
Sit start on rock using the great foot hold with hands where the orange meets the white. climb up the diagonal rail then traverse to the arete to topout. FA: Sam Bycroft, 20 Mar 2023 | V4 | 3m | |||||
  |
||||||||
| Route | Grade | Style | Selected ascents | |||||
Piano Wall | ||||||||
| 14 |
Mozart
SS left hand side pull and right undercling. go up the layback or just throw to the top and topout. FA: Sam Bycroft, 1 Dec 2023 | V1 | 2m | |||||
| 15 |
Project Crimps
SS on the face crimps or undercling on the right side of the face and climb up. | V7 - 11 | 2m | |||||
| 16 |
Marys Lamb
VB sit start. as easy as a SDS gets. SDS on the obvious jug on the bottom right of the face and standup to topout. FA: Sam Bycroft, 1 Dec 2023 | VB | ||||||
| 17 |
Weis
SS on the arete and climb up the arete to topout | V1 | 2m | |||||
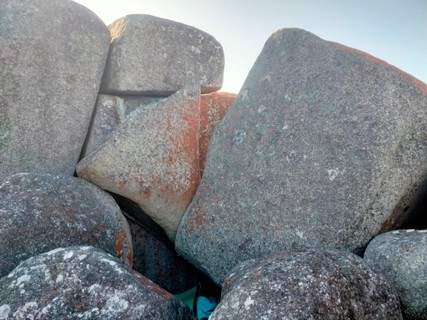
Serendipity WallA vertical wall with two faces | ||||||||
| 19 |
Serendipitite
ser-en-dip-it-dite. Stand start L hand on high juggy sidepull and R hand wherever feels natural. climb up and topout just to the left of the juggy sidepull. the good flake to the left for feet is out. FA: Sam Bycroft, 20 Mar 2023 | V2 | 2m | |||||
| 20 |
★★ Serendipity
Ser-en-dip-ity. Start the same as Serendipitite, traverse right through the blank section on amazing micro edges. Keep traversing right with sustained difficulty moves and finish up Serendipititous. FA: Sam Bycroft, 20 Mar 2023 | V4 | 5m | |||||
| 21 |
★ Serendipititous
Ser-en-dip-it-tie-tus. Stand Start on good foot and hands wherever. climb up the slopey tufa looking thingos and topout on great holds. FA: Sam Bycroft, 20 Mar 2023 | V2 | 3m | |||||
 |
||||||||
| Route | Grade | Style | Selected ascents | |||||
| 22 |
★ Serendipititousology
Ser-en-dip-it-tie-tus-ology. Stand start around the corner on the juggy feature. climb up the gradually getting worse arete then finish with a scary topout FA: Sam Bycroft, 20 Mar 2023 | V2 | 3m | |||||
1.2. The Iceberg
- Summary:
-
Lat / Long: -41.277365, 148.358237
approach
Park at Beerbarrel carpark. Take the walking trail North after approx 300m there is beach access to the Mollusc, then another 400m and it opens to the Iceberg bolder which is visible from the trail.
 |
||||||||
| Route | Grade | Style | Selected ascents | |||||
|---|---|---|---|---|---|---|---|---|
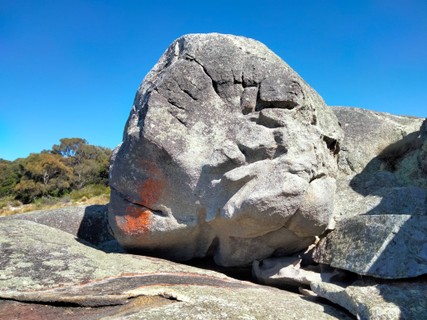
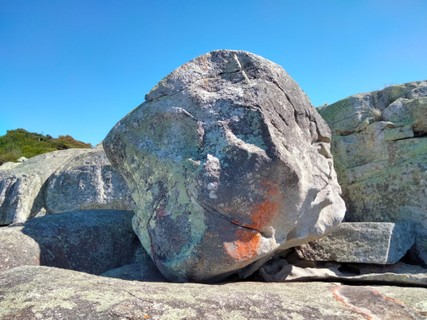
The IcebergThe main boulder in this sector. Access from main walking track. easy to spot as in peaks over the treeline. | ||||||||
| 2 |
Shivering Caroline
SS on the crimps in the horizontal running crack at about shoulder height. feet on the headwall and throw to the juggy crimp out left then up to topout. FA: Sam Bycroft, 1 Dec 2023 | V4 | 3m | |||||
| 3 |
Iceberg Lettuce
SS on the juggy ledge and climb straight up to topout. FA: Sam Bycroft, 1 Dec 2023 | V0- | 4m | |||||
| 4 |
Underwater Iceberg Caving
SS on good holds to the right of Iceberg Lettuce. climb up through the megajug and topout. FA: Sam Bycroft, 1 Dec 2023 | VB | 4m | |||||
| 5 |
★ Cold Alabama
SS on the blank wall to the right of Underwater Iceberg Caving. through great trust in feet it is possible to scale this wall. FA: Crofty11, 8 Jan 2022 | V4 | 3m | |||||
| 6 |
Alabama Dyno
SS on the far right side of the boulder with R hand sharp crimp horn and good right foot. lean your left foot out to a selection of horrible feet and dyno to out left the topout sloper for Cold Alabama. FA up for grabs, felt like v5. | V5 | 3m | |||||
| 7 |
Icey Grip
SS same as Alabama Dyno But instead of dynoing, layback your way up the slopey rail to reach the topout sloper for Cold Alabama. FA: Sam Bycroft, 1 Dec 2023 | V2 | 3m | |||||
  |
||||||||
| Route | Grade | Style | Selected ascents | |||||
Lentil CrevasseA cool wall that is slightly overhung. | ||||||||
| 9 |
Crack Bean
stand start on easy crack with good feet. climb up and easy topout. | VB | 2m | |||||
| 10 |
Easy Bean
Stand start on good hold. climb up and topout. FA: Sam Bycroft, 11 Feb 2022 | V0 | 3m | |||||
| 11 |
★ Legume
Sit start on good hold with bad feet. Throw up to juggy crack and topout over easy slab. FA: Sam Bycroft, 11 Feb 2023 | V2 | 3m | |||||
| 12 |
★ Chai-Smelling Squawk
Sit start same as Legume but travers right through the crack with slopers and gaston crimps. finish by topping out. FA up for grabs. | V5 | 3m | |||||
| 13 |
Chai-Smelling Squawk (Stand)
Stand start R hand on crimpy gaston pocket thing and L hand on slopey crimp. topout directly over the start. FA: Sam Bycroft, 11 Feb 2023 | V4 | 3m | |||||
| 14 |
Project/Open
start somewhere on crimps and climb up | 3m | ||||||
 |
||||||||
| Route | Grade | Style | Selected ascents | |||||
O.K.A wall with easy problems | ||||||||
| 16 |
Crissy Wake Up
sit start on left crack and climb up to topout. | V0 | 2m | |||||
| 17 |
Easy Sleazy
sit start on middle crack and follow it up to topout. | V0 | 2m | |||||
| 18 |
Breezy Peasy
Sit start hands in crack and follow the crack up to topout. FA: Sam Bycroft, 11 Feb 2023 | V0 | 2m | |||||
1.3. The Mollusc
- Summary:
-
5 routes in Sector
Lat / Long: -0.002451, 148.358710
approach
From the Beerbarrel car park, walk North along the trail for approximately 300m until you see the first clear open area on your right (East) where you can access the beach. The Limpet boulder is down and to the left (North).
  |
||||||||
| Route | Grade | Style | Selected ascents | |||||
|---|---|---|---|---|---|---|---|---|
| 1 |
Limpet Ledge
Up the centre of the boulder past the horizontal and up trending ledge at mid height, mantle over the top. FA: Crofty11, 11 Mar | V1 | 3m | |||||
| 2 |
Cuttlefish Crack
Crack in the middle with nice pinch fin up the centre. FA: Crofty11, 11 Mar | V0 | 3m | |||||
| 3 |
Hermits Hump
Nicely up the flake and over the hump to finish. Not using the "fin" from Cuttlefish Crack. FA: Crofty11, 11 Mar | V1 | 3m | |||||
| 4 |
Clamshell Crack
Moves up the crack and over the top FA: Crofty11, 11 Mar | V1 | 3m | |||||
| 5 |
★★ Resolution
Beautiful moves starting with undercling, then committing at the top with high feet. Onwards to glory. FA: Crofty11, 11 Mar | V3 | 3m | |||||
1.4. The Beaches
- Summary:
-
Lat / Long: -41.275050, 148.351789
  |
||||||||
| Route | Grade | Style | Selected ascents | |||||
|---|---|---|---|---|---|---|---|---|
Crackers WallHas three main vertical cracks | ||||||||
| 2 |
★ Cheese
stand start holding the big crack, climb up the crack an topout on great holds FA: Sam Bycroft, 11 Mar 2023 | V0- | 3m | |||||
| 3 |
Salami
Stand start holding the thin crack in the middle climb up that crack and topout. FA: Sam Bycroft | V3 | 3m | |||||
| 4 |
★★ Pom-Poms
Start hands in the crack to the left of Salami then throw up to the top hold of Salami and topout. FA: Sam Bycroft, 11 Mar 2023 | V2 | 3m | |||||
Hole Punch Corner | ||||||||
| 6 |
★ Chompa Stomp
Stand start on good feet and the good ledge. travers to the right to the crack and finish up Chompa Chomp FA: Sam Bycroft, 11 Feb 2023 | V2 | 5m | |||||
| 7 |
Project/Open
Start as per Chompa Stomp, climb up the slopey top of the L boulder. dont bridge out to the wall to the R. | 3m | ||||||
| 8 |
★★ Chompa Chomp
Sit start on underclings at the base of the crack. work your way up the crack and topout. FA: Sam Bycroft, 11 Mar 2023 | V2 | 4m | |||||
| 9 |
Project/Open.
Start as per Chompa Chomp, climb up the crack until you are standing on the good foothold the reach to the R for the arete and compression your way up the boulder toping out at the highest point. | 5m | ||||||
| 10 |
Chompa Chomp Stand
Stand start on good foot hold with hands in the crack and work your way up the crack to topout FA: Sam Bycroft, 11 Mar 2023 | V1 | 3m | |||||
  |
||||||||
| Route | Grade | Style | Selected ascents | |||||
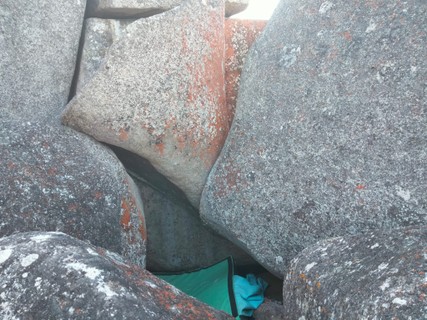
The Cat CaveLocated around to the Right of Hole Punch Corner. | ||||||||
| 12 |
★★★ Happy Cat
This is a cool climb with unique moves that starts in the depths of a granite boulder cave. Start at the back of the cave holding the juggy undercling. Move R into juggy gaston then move around the gaston onto the slab face and layback your way to victory. This climb technically hasn't been topped because I wussed out and finished up Scaredy Cat so FA is up for grabs. | V4 | 4m | |||||
| 13 |
Scaredy Cat
Climb as per Happy Cat but escape to the boulder to the L as you finish up the slab. FA: Sam Bycroft, 11 Mar 2023 | V3 | 3m | |||||