Help

South Side

Seasonality

J
F
M
A
M
J
J
A
S
O
N
D

Description

Unlike the more forbidding Looking Glass areas, the South Side has something for everybody. Beginners can hop on easier climbs like Lichen or Not or Good Intentions; moderate leaders can hone their skills on great lines like Gemini Crack; and seasoned climbers can push themselves on harder routes like Dinkus Dog. Most of the routes at the South End are multi-pitch, but route-finding is straightforward and descent options include plentiful bolted rap stations.

*Routes complete, not in order

Approach

From the road fork, continue up the gravel road a short distance to the Slickrock Falls trailhead, located where the road takes a hard left. Hike up the trail, following switchbacks, for about three-quarters of a mile, ending at the base of the wall in the Bloody Crack area.

Routes

Add route(s) Add topo Reorder Bulk edit Convert grades
Grade Route

A great route that can be done in 2 long pitches.

  1. (200ft, 5.7) Climb the 1st pitch crack to its end using jams, stems and lay-a-ways, step right and belay on a nice ledge. Natural belay.

  2. (130 ft. 5.7) 2nd pitch has 2 options. 1st- Move right and finish on the Unfinished Concerto crack. 2nd- (better option) From the belay move up and left aiming for a notch. Pull the notch and face climb aiming for a couple of slung hemlock trees at 130ft.

Descent: Rap straight down Chaos out of Control. Double rope rap.

Location:Obvious wide crack left of Unfinished Concerto.

Protection: Nuts, double cams to 3 inch(optional 4-6 inch piece), many runners

A nice warmup for the other great South Face climbs, but not a casual route for the grade. Put thoughts like "this doesn't feel like 5.6" out of your mind and enjoy the friction climbing.

  1. Starting below right-slanting crack, follow it up and right; after the crack peters out, continue straight up on mainly friction moves to the tree ledge above. If you don't feel like rapping at this point, you can move to the left end of the ledge to the start of Afterbirth (which will take you to the Gemini rap station).

Location: Starts about 25' left of Left Up at an obvious slanting crack. Rap from rap rings at the ledge.

Protection: Small to medium gear; tricams are handy.

  1. (100ft, 5.9) Climb the obvious hand crack up a ramp that steepens into an overhang. Pull the overhang with good gear and follow the slab to a bolted belay.

  2. (170ft, 5.8) Follow the crack system until you run out of rope! Gear belay .

  3. (100ft, 5.5) Slab off to the right.

A challenging climb with a thin crack in a stemming corner. Linking P2 and P3 is the way to go as long as you have a 60-meter rope.

  1. (120', 5.8) Starting on low-angle slab, scramble up to a crack and continue through a right-facing corner with a fingertip-sized crack. Belay at a rounded ledge with good gear in the widening crack.

  2. (170', 5.5) Continue up the crack on easier ground, moving up and right until the corner ends and find a good spot to belay (or continue up and right to the anchors).

  3. (60', 5.5) Climb up and right on good friction using cracks and eyebrows for pro until you get to the new upper rap anchors for Gemini Crack.

Location:Starts just left of Second Coming. Rap from upper Gemini ring anchors to the Sentry Box Ledge, then a second rap to the ground.

Protection: Small to medium nuts and cams. No fixed gear.

FA: Stan Wallace, John Ferguson, Jim McEver & Ron Cousins, 1973

  1. (90', 5.7) Climb easy ground, allowing yourself to be funneled to the crux. As the crack reaches vertical you will definitely begin to realize where the difficulty is. Immediately after the crux, belay on the ledge. Gear anchor. It looks like there were bolts there at one time.

  2. (180', 5.7) Continue up the easing crack to a belay in some vegetation.

Location: This is one of two obvious right-arching dihedrals well to the left of Gemini Crack (the other is Rats Ass).

Protection: Standard rack. Rappel from either of two new sets of ring anchors (near the old rap tree) above Gemini Crack. Gemini can be crowded.

FA: Stan Wallace, Ron Cousins, Art Williams & Jim McEver, 1972

  1. Climb the face past horizontals to a big ledge.

Location: Close to where the approach trail meets the right side of the South Face, beneath the middle of Stage Ledge.

To get down, either rappel off the dead, fallen tree on Stage Ledge or do the "North Carolina 3rd class" down-climb off the climber's right side of the ledge.

Protection: light rack, hands to fingers, no anchors

Thin moves down low lead past the crux and to a thin corner. Climb this corner aiming for the larger corner system. Follow up and to the right to the Gemini Rappel anchors. A double rope rappel puts you back on Sentry Box Ledge.

Location: First Return is the left most route of the three routes (Gemini Crack and Zodiac) located on Sentry Box Ledge.

Protection: Standard NC rack with some small gear (aliens, nuts), long runners, double ropes. Rap anchors at top.

The route goes directly up from the Sentry Box Ledge Rappel rings. Start on small crimpers to a flake that provides some bad protection. Move past the flake on some small crips and smears to a delicate move into an eyebrow under cling. Once you establish your feet paddle up to belay at the bulge on ring anchors. From the bulge stand carefully on the flake and move up through eyebrows that are a bit run out. Join First Return and head to the rappel station.

(edit March 27, 2016) The route now has 2 bolts and a set of anchors for a much more appealing and safe adventure.

Rappel with one 70m rope. First Ascent: Jeff Lorch, Karsten Delap, December 2015

Set: Karsten Delap

FFA: Karsten Delap & jeff Lorch, Dec 2015

One of three routes starting from the Sentry Box Ledge, Gemini Crack is an excellent line with a thought-provoking but well-protected crux. Though officially it's a two-pitch climb, there's no good reason not to do it in one long pitch. Don't miss this classic if you're climbing the South Side.

  1. (100', 5.8) Climb crack up to a stance where you can set a natural gear belay.

  2. (100', 5.8) Climb the steepening crack system and traverse right into some train track type cracks. Face climb up and into a slab. Bolted belay.

Location: Starts on the Sentry Box Ledge just left of Zodiac. An alleged 3rd class scramble (more of a 5.easy free solo) will get you to the ledge. Double-rope rap from new ring bolts just below the old belay tree gets you back to the Sentry Ledge, then a single-rope rap to the ground.

Protection:Medium gear; cams, tricams and nuts.

FA: Jim McEver & David Broemel, 1973

This lesser climbed route at the South Face deserves mention, not only because the FA party included the late, great Doc Bayne, But it also packs quite a punch in the first 40 ft. or so with a long, scary runout on 5.8+.

Location: Climb up to Sentry Box Ledge, then start a few feet to the right of Gemini Crack on a fairly steep slab. Climb straight up the slab to a point where where you can finally get something in, then wander to the top on somewhat easier ground.

Protection: I gave this route an R because of the first 40ft., but the protection gets a little better after that first pro placement. Take some smaller stuff.

FA: Buddy Price & Doc Bayne, 1977

Can you see yourself in the starting holds? Generations of muddy-booted toproping campers have polished the footholds beyond all hope of repair.

  1. (50',5.7+ / 5.8) Look for a handcrack that doesn't quite reach the ground. Avoiding the snot-slick opening feet by smearing arbitrarily on the face, thug your way into the crack proper and jam up to Stage Ledge. If you are a guide, or a camp counselor, rue the chopping of the convenience bolts and tediously rig a belay in the corner. Toss your toprope off, and spend the day encouraging your young charges to trust their feet despite the clearly impossible nature of the exhortation.

  2. Follow the corner off the left end of the ledge, escaping before it arches over. Belay in eyebrows when you feel like it.

  3. (150', ?) Meander left to the Gemini raps.

Location: Bloody Crack is located near the right end of the South Face, below a large ledge with 4th-class access at the right end.

Protection: No fixed gear. Standard rack.

FA: Stan Wallace, Jim McEver & Ron Cousins, 1973

Readily climbed as one long pitch:

  1. Climb up a slab with eyebrows that eases in difficulty the higher you get. Mantle onto a block and pull some face moves to access the P1 ledge (can stop here).

  2. From there climb through a bulge via a short hand crack (crux)to another ledge. Move to climbers right and high step up over the bulge. Trend up and left to a good ledge with tat slung around a hollow flake.

Location: From the standard South Face approach, cut to climbers right following a trail that drops down and back up along the rock. Pass a large chimney and belay at the base of the slab.

2 ropes to get down. As of October 8th 2011 there is some tat around a hollow flake with two 'biners. Bring some webbing and a knife to switch out for fresh tat.

Protection: standard NC rack, #2 and #3 for belay at top of P2

Popular beginner climb. Many parties do only the first pitch.

  1. (90', 5.5) Head up the ramp/corner, and then continue up the face, trending left a bit, to bolt anchors.

  2. (100', 5.5) Head up and slightly right toward a big tree at the top.

Descent: Use two ropes to rappel to the P1 anchors from slings around the tree. One 60m rope will get you from the P1 anchors to the ground.

Location: From where the approach trail meets the South Face beneath the Stage Ledge, head about 100 feet to the right. Look for a right-facing corner/ramp with a crack in it.

Protection: standard rack, bolts at top of P1, slings and rings on tree at top of P2

Climb the face past horizontals to a big ledge.

Location: Close to where the approach trail meets the right side of the South Face, beneath the middle of Stage Ledge.

Descent: To get down, either rappel off the dead, fallen tree on Stage Ledge or do the "North Carolina 3rd class" down-climb off the climber's right side of the ledge.

Protection: light rack, hands to fingers, no anchors

Left Up climbs a great finger and hand size crack just left of Stage Ledge. This climb serves as a great introduction to Looking Glass granite. Be careful the feet on the beginning of this climb are polished.

Location: Left up is located just left of Stage Ledge, Bloody Crack, etc. Look for the obvious finger/hand crack that climbs to a ledge

Protection: Standard NC rack (finger/hand sized), runners, single rope. Slings on the tree.

A slightly harder version of Left Up. Can be a quick fun route if things are busy at the South Face area.

Location: Located just to the right of Left Up and just left of Stage Ledge, etc.

Protection: Standard NC rack, runners, 1 rope. Slings on tree for rappel.

Possibly one of the best 5.10 traditional face climbs in the state! The route climbs in-cut eyebrows and features bomber gear. The Select guidebook claims the second pitch as the crux, but the first pitch seems to be more sustained and delicate.

  1. Begin on a low angle slab that turns into a 80 degree face under a roof. Pull over and left of the roof and continue straight up to a hanging belay, passing several distinct crux moves between gear.

  2. The second pitch wanders to the left slightly with a slight runout near the top after the route turns less difficult and more slabby. Finish at a sloping ledge with a double bolt anchor.

Location: Scramble up toward the golden-brown rock to the left of Rats Ass to an often rattler-infested ledge below Unfinished Concerto. Dinkus Dog begins to the left, off a slab, beneath the right end of a small roof.

Protection: The gear on this climb is very good, with bomber placements at decent stances at least every 10 feet or so. Nuts are not really needed, but double tcu's #1 and #2 and double Camalots from .5 purple up to a number 2 gold are what you need. The route doesn't wander too much, so long slings aren't really necessary, except maybe on a piece at the roof, of course. There are rings at bolts at the top of the second pitch to rap off of with double 60 meter ropes. Take 2-3 more Camalots in the .75 to 2 range if you choose to do it all as one pitch.

FA: Jeep Gaskin & Jeff Burton, 1979

This could be the best 5.10 face route on the Glass. Chaos offers sustained climbing on flawless rock. The gear is good and a bit spaced out at times but nothing death defying.

The Lambert guide describes this route in two pitches but it can be done in one long pitch. You'll need 2 60m ropes to rap.

Location: Left side of the South Side. This route is located up on the ledge with Dinkus Dog and Unfinished Concerto. Locate the obvious twin water grooves located to the right of Dinkus Dog and Parachute Woman.

Protection: You might need a large hand size (#2 or #3) piece down low. Lots of TCU's, a few bolts, tri cams are always helpful at the Glass.

FA: Monty Reagan & Ken Pitts, 1987

This is probably the worst of the three routes of Dinkus Dog and Chaos Out of Control. Lots of hollow gear placement on the first pitch (including the belay) and there is only one bolt on the first pitch instead of two as the guide book suggests Location: In between Dinkus Dog and Chaos Out Of Control. Rap Chaos with 2 60s to descend.

Protection: Standard Looking Glass rack. One bolt on P.1

Name comes from a Bat encounter on the First Ascent.

  1. Clip bolt for crux. Thin crisp edges lead to lower angle terrain. Trend up and right to 2 bolt anchor. 80ft. 5.10+

  2. Climb straight up into minor right facing corner. Great climbing and great gear lead to a 2 bolt anchor. 90ft. 5.9. Rap with one rope.

Location:On the wall between "Rat's Ass" and "Unfinished". More specifically between the routes "Integration By Parts" and "Child Prodigy"

Protection: Gear to #1 camalot. extra TCU's

This line blasts through the steep bulge to the right of Second Coming. It is a sustained and heady climb that links up to the second pitch of Second Coming. A spicy alternative if you have done most of the stuff at the S. Face.

  1. Start the same as Second Coming. Instead of moving left to Second Coming's crack, stay on the right most crack until you reach the base of the steep section directly below a white splotch. Traverse right at the base of the steepness, plug the horizontal for pro. This is the last pro before reaching the horizontal at the end of bulge and is the R section, DON'T BLOW IT. Falling before getting the difficult pro at the roof will result in a nasty slab splash. Climb up directly below a left facing crescent shaped jug. Plug the gear at the end of the bulge using the difficult hands and make the long move over the bulge to gain the face above. Climb short broken cracks until you can traverse left on top of the flakes that end P1 of Second Coming. Belay on gear.

  2. Finish P2 of Second Coming.

Location: Rap from belay station to the left of Gemini Tree with 2 60m ropes.

Protection: Standard multi-pitch rack. Doubles of .75 Camalot and smaller, tri-cams.

Hello!

First time here?

theCrag.com is a free guide for rock climbing areas all over the world, collaboratively edited by keen rock climbers, boulderers and other nice folks.

You can log all your routes, connect and chat with other climbers and much more...

» go exploring, » learn more or » ask us a question

Selected Guidebooks more Hide

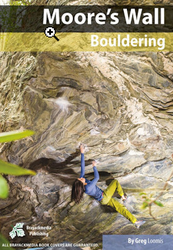
Author(s): Greg Loomis

Date: 2019

ISBN: 9780990782124

For year-round bouldering fun in the Piedmont region of North Carolina, your next exciting challenge awaits in the Moore's Wall Bouldering guide, featuring over 500 fantastic problems.

  • Full-color guide details over 500 problems, with helpful topo overviews to help get you oriented and awesome action photographs to inspire you before lifting off
  • Printed in color

Accommodations nearby more Hide

Share this

Wed 26 Apr
Check out what is happening in South Side.

Get a detailed insight with a timeline showing

  • Ticks by climbers like you
  • Discussions of the community
  • Updates to the index by our users
  • and many more things.

Login to see the timeline!

Deutsch English Español Français Italiano 한국어 Português 中文