A Crag Guide gives an extensive view of all sub areas and climbs at a point in the index. It shows a snapshot of the index heirachy, up to 300 climbs (or areas) on a single web page. It shows selected comments climbers have made on a recently submitted ascent.
At a minor crag level this should be suitable for printing and taking with you on a climbing trip as an adjunct to your guidebook.
This guide was generated anonymously. Login to show your logged ascents against each route.
Warning
Rock climbing is extremely dangerous and can result in serious injury or death. Users acting on any information directly or indirectly available from this site do so at their own risk.
This guide is compiled from a community of users and is presented without verification that the information is accurate or complete and is subject to system errors. By using this guide you acknowledge that the material described in this document is extremely dangerous, and that the content may be misleading or wrong. In particular there may be misdescriptions of routes, incorrectly drawn topo lines, incorrect difficulty ratings or incorrect or missing protection ratings. This includes both errors from the content and system errors.
Nobody has checked this particlular guide so you cannot rely on it's accuracy like you would a store bought guide.
You should not depend on any information gleaned from this guide for your personal safety.
You must keep this warning with the guide. For more information refer to our:
Usage policy
Contributors
Thanks to the following people who have contributed to this crag guide:
Chris L
Tommy Krauss
Brendan Heywood
o_g
Alex Hartshorne
Jake
Nick Morgan
topher
Kevin J
Tiburonny
The size of a person's name reflects their Crag Karma, which is their level of contribution. You can help contribute to your local crag by adding descriptions, photos, topos and more.
Alcuni contenuti sono stati forniti sotto licenza da: © Australian Climbing Association Queensland (Creative Commons, Attribution, Share-Alike 2.5 AU)
Table of contents
- 1.
Mount Wellington / kunanyi
918 in Crag
-
1.1.
The Organ Pipes 403 routes in Crag
- 1.1.1. Broken Buttress 16 routes in Area
- 1.1.2. University Buttress 31 routes in Area
- 1.1.3. Bulging Buttress 31 routes in Area
-
1.1.4.
Teardrop Gully 33 routes in Area
- 1.1.4.1. Summertime Buttress 0 routes in Sector
- 1.1.5. Step Tier 12 routes in Area
- 1.1.6. Great Tier 35 routes in Area
- 1.1.7. Central Buttress 73 routes in Area
- 1.1.8. Flange Buttress 31 routes in Area
- 1.1.9. The Columns 60 routes in Area
- 1.1.10. Rockaway and Amphitheatre 21 routes in Crag
- 1.1.11. Northern Buttress 44 routes in Crag
- 1.1.12. Far North 16 routes in Area
-
1.2.
Lost World Area 136 routes in Area
- 1.2.1. Lost World 55 routes in Crag
- 1.2.2. New World 14 routes in Crag
- 1.2.3. Test World 1 routes in Area
- 1.2.4. Micro World 13 routes in Area
-
1.2.5.
Big Bend Boulders 53 routes in Area
- 1.2.5.1. Lost World Boulders 16 routes in Area
- 1.2.5.2. Lost block 3 routes in Boulder
- 1.2.5.3. Western Front 34 routes in Area
-
1.3.
Summit Boulders 212 routes in Area
- 1.3.1. Fence area 56 routes in Area
- 1.3.2. Snowflakes Area 12 routes in Area
- 1.3.3. Lookout Boulders 16 routes in Area
- 1.3.4. Dildo blocks 7 routes in Field
- 1.3.5. Asylum Years Area 9 routes in Area
- 1.3.6. Ticktack land 22 routes in Area
- 1.3.7. Penal Colony 3 routes in Field
- 1.3.8. Second Hill 39 routes in Boulder
- 1.3.9. First Valley 0 routes in Area
- 1.3.10. Patient Lady 2 routes in Area
-
1.3.11.
Sub-Pinnacle 7 routes in Area
- 1.3.11.1. Leaning Boulder 3 routes in Boulder
- 1.3.11.2. Panorama Track 2 routes in Area
- 1.3.11.3. Sweet Science Area 2 routes in Area
- 1.3.12. Invisible Area 6 routes in Area
-
1.3.13.
The Promised Land 33 routes in Field
- 1.3.13.1. April Boulders 6 routes in Boulder
- 1.3.13.2. First Stop Boulder 3 routes in Boulder
- 1.3.13.3. Spannend Boulder 3 routes in Boulder
- 1.3.13.4. Mist Boulder 1 routes in Boulder
- 1.3.13.5. Shattered Plains Boulder 2 routes in Boulder
- 1.3.13.6. Fish Boulder 1 routes in Boulder
- 1.3.13.7. Bad Dreams Boulder 4 routes in Boulder
- 1.3.13.8. Seams Alright Boulder 2 routes in Boulder
- 1.3.13.9. Himmel Boulder 1 routes in Boulder
- 1.3.13.10. Strawberry Fields Boulder 4 routes in Boulder
- 1.3.13.11. Spring Bean Boulder 2 routes in Boulder
- 1.3.13.12. Waterguns Boulder 1 routes in Boulder
- 1.3.13.13. Penguin Boulder 2 routes in Boulder
- 1.3.13.14. South Ridge 1 routes in Field
- 1.4. Wellington Craglets 6 routes in Area
-
1.5.
The Springs 62 routes in Area
- 1.5.1. Lookout Boulder 5 routes in Boulder
- 1.5.2. Symbiosis Boulder 23 routes in Boulder
- 1.5.3. Gorby's Corner 1 routes in Cliff
- 1.5.4. Lilo & Two Mat boulders 19 routes in Boulder
- 1.5.5. Jungle Block 5 routes in Boulder
- 1.5.6. Reids Track Boulder 0 routes in Boulder
- 1.5.7. Rocky Whelan's Cave 9 routes in Area
-
1.6.
Sphinx Rock 60 routes in Crag
- 1.6.1. Main face 35 routes in Cliff
- 1.6.2. Sphinx's Nose 12 routes in Boulder
- 1.6.3. Nerm's Boulder 13 routes in Boulder
- 1.7. Crocodile Rock 10 routes in Crag
-
1.8.
Neika 29 routes in Area
- 1.8.1. Green Cliffs 6 routes in Sector
- 1.8.2. Blade Runner buttress 9 routes in Unknown
- 1.8.3. Trad Wankers Buttress 0 routes in Area
- 1.8.4. Back On Track Buttress 2 routes in Area
- 1.8.5. Big Roof Buttress 3 routes in Area
- 1.8.6. Blizzard Buttress 4 routes in Unknown
- 1.8.7. Kick Start Area 5 routes in Area
-
1.1.
The Organ Pipes 403 routes in Crag
- 2. Index by grade
1. Mount Wellington
- Summary:
-
Arrampicata trad, Bouldering e altri stili
Lat / Long: -42.908395, 147.235737
descrizione
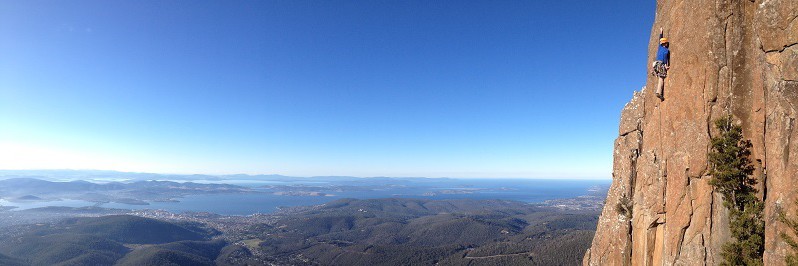
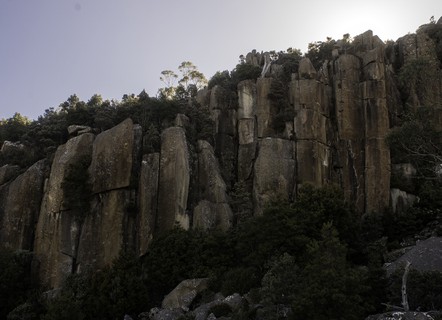
Mt Wellington / kunanyi, the grand old lady of Tasmanian climbing. A series of buttresses and tiers that bring grown men to tears and where climbers make pacts with God, Neon or otherwise. There is a lot of history to this crag, listed in successive guidebooks, magazine articles and the web. When using guidebooks, past or present, read between the lines. Any route description which says "thought provoking," "bold" or "great if you're a percussionist" has a high chance of excitement.
The Mountain is the best of Australian suburban crags. It has an alpine flavour and with huge exposure – sitting on a lonely belay ledge, 1400m above Hobart, is cathartic. The rock, dolerite, has been lifted by volcanic processes, frozen by snow and baked by sun. It is friable, it is not uncommon to hear a hollow sound come from under your desperate paws. Visitors tend to stick to the classics because most of the bad stuff has been pulled off by some poor sod before you.
Many start at the Northern Buttress, others head to the Fiddlesticks or Moonraker for their multi-pitch fix, some seek out forgotten routes with rusted pitons and flaring cracks. The tiers through the middle have varied climbing on tall buttresses. Whatever draws you here, be sure to bring a helmet, a fleece, and your courage.
Arrive early on a sunny day as the climber’s carpark only fits about five vehicles - park to maximise this. Take care climbing in early spring as the snow melt and freezing over winter will loosen rock. Be prepared for all weather at any time. Most importantly, enjoy the Pipes experience – it's unique.
limitazioni per l'accesso
Many locals continue to use community run website thesarvo.com for crag/route updates and noting any access issues. The associated app can be downloaded and used offline!
http://thesarvo.com/confluence/display/thesarvo/Tasmania
Gerry Narkowicz also produces hardcopy guides to numerous venues across the state via the 'Climb Tasmania' website
avvicinamento
Situated a 15 minute drive above Hobart.
etica
Crag Stewards
Rock climbers please contact the Crag Steward (kunyani@climbersclubtas.org.au) if you have any queries or concerns regarding social or environmental impacts of rock climbing at this crag.
Do not email regarding general travel, seasonal advice, or lost property - this is not the Steward’s role. If you have important safety information to communicate (e.g. risks due to recent and large rock falls) please also consider updates on thesarvo forum, Facebook group and/or online guidebooks as appropriate. Please copy in cct@climbersclubtas.org.au if you feel you have a high-level concern which may imminently impact the crag or climbing community.
Non-climbers, other users, land managers: please also contact cct@climbersclubtas.org.au if you have important climbing related queries at this location.
Other
• The operation and use of drones by park visitors on reserved land including national parks is not permitted
• Peregrine Falcons nest from July - December each year. It’s important that climbers don’t climb near active nests during this period. Known sites (non exhaustive) are: Sand River (Far East, The Panopticon), Bare Rock (R of the Boneyard, L of Bisso of Orange), Rocky Cape, Pubic Wall/Duck Reach, Hillwood, Gunners Quoin, Lowdina.
• Please note that Tasmania has notoriously patchy phone reception for particular service providers. Telstra is the most reliable. An emergency Personal Locator Beacon or similar is recommended kit when climbing in remote locations.
• For more information - follow the link below for some local tips + tricks on how to better reduce your impact during your next Tassie climbing holiday https://www.cragcaretasmania.org.au/learn
1.1. The Organ Pipes
- Summary:
-
Arrampicata trad, Arrampicata sportiva e altri stili
Lat / Long: -42.896453, 147.240786
sommario
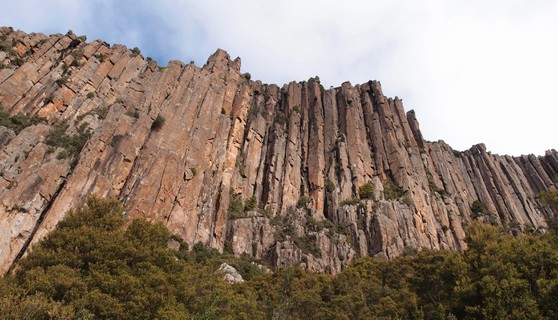
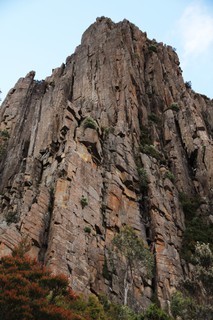
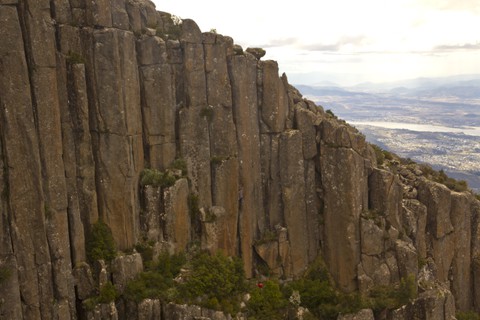
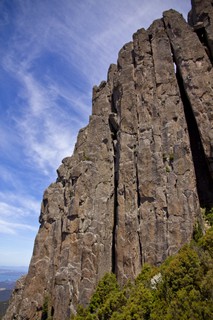
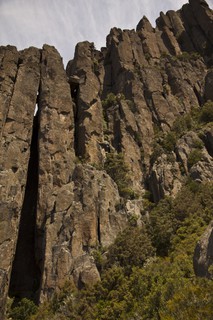
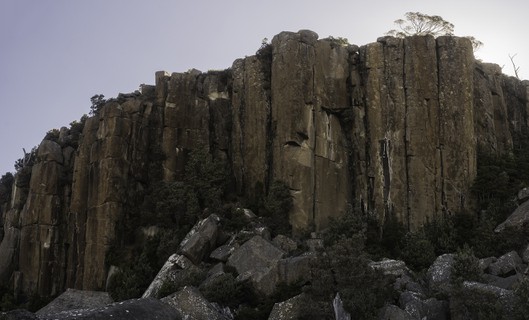
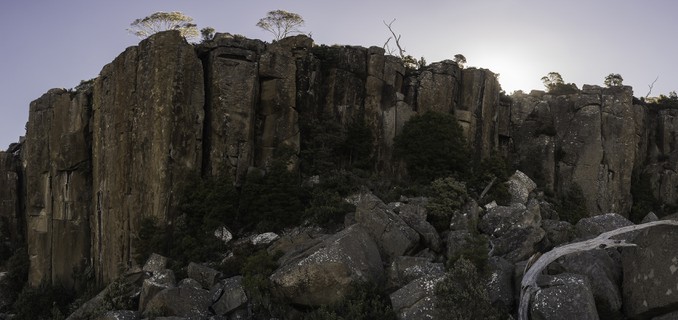
One of the iconic climbing areas in Australia. Vertical dolerite columns with up to 120m in height!
descrizione
Climbing the Organ Pipes is a serious adventure! Occasional loose rock, complex route finding and a sense of exposure heightened by the kilometre drop down to sea level all contribute to a wilderness adventure. As Phil Robinson once said: "In terms of mileage of routes, skinned knuckles, expenditure of effort and annual traffic, the Organ Pipes is the major focus of climbing activity in Tasmania."
 |
1.1.1. Broken Buttress
- Summary:
-
16 routes in Area
Arrampicata trad e Arrampicata sportivaLat / Long: -42.898511, 147.239816
| Route | Grade | Style | Selected ascents | |||||
|---|---|---|---|---|---|---|---|---|
| 1 | Van Diemen Buttress | 11 | ||||||
| 2 |
Spurline
FA: R. Alsop, M. Douglas, A. Keller, Mar 1968. Direct Finish: R. Mansfield, P. Robinson, Sep 1980. & R. Mansfield, 1968 | 16 | 48m | |||||
Seamstress Buttress | ||||||||
| 4 | ★★ Seamstress | 25 | 25m | |||||
| 5 | ★★ Assault Course | 23 | ||||||
| 6 |
Start Me Up
FA: N. Deka & S. Bunton, 1987 | 19 | 30m | |||||
| 7 |
Crestline
FA: U. Aurelli, D. Cox & P. Sands, 1961 FFA: P. Robinson & R. Mansfield, 1980 | 16 | 45m | |||||
Good, Excellent and Ugly ButtressThis quiet south facing wall is a bit of a hike, but features three good quality sports routes. | ||||||||
| 9 |
★★ The Truth
The left of the classic Parkyn trilogy offers 15m of strenuous and technical laybacks to reach a welcome rest. The intimidating bulge above can then be climbed to the left, directly, or to the right. Good luck. FA: Roger Parkyn | 22 | 20m | |||||
| 10 |
★★ The Way
The centre line. A bouldery and strenuous start. Hope you can lock off and gaston. Try to avoid using the corner crack to the right of the initial wall (or take a 22 grade if you do). After the initial wall, either finish at the anchors of 'The Truth' or continue up the interesting but slightly lichenous wall above to the top of the buttress. FA: Roger Parkyn | 24 | 35m | |||||
| 11 |
★ No Way
A cop out to avoid the crux of The Way. But still good climbing. | 23 | ||||||
| 12 |
★ The Light
Our Lord described himself as 'The Truth, The Way and The Life'. The Parkyn trilogy features 'The Truth, The Way, and The Light'. It is unclear if Roger has just got the quote wrong, or if he is proclaiming himself as our new saviour. Either way, this punchy number will raise your spirits. FA: Roger Parkyn | 23 | 15m | |||||
| 13 |
★ The Good, The Excellent and The Ugly
FA: D. Stephenson & N. Deka, 1988 | 22 | 30m | |||||
| 14 |
Prodigal
FA: G. Kowalik & P. Robinson, 1981 | 15 | 130m, 5 | |||||
| 15 | ★ Blind Faith | 21 | 35m | |||||
Redneck RidgeUpper reaches of Fools Couloir, best accessed from the summit carpark. | ||||||||
| 17 | ★★ Tired Cliches | 18 | 20m | |||||
| 18 | Brand New Lies | 12 | 15m | |||||
| 19 | ★★ Rick the Redneck | 18 | 25m | |||||
1.1.2. University Buttress
- Summary:
-
31 routes in Area
Arrampicata trad, Arrampicata sportiva e Con corda dall'altoLat / Long: -42.898282, 147.240542
| Route | Grade | Style | Selected ascents | |||||
|---|---|---|---|---|---|---|---|---|
| 1 |
★★ Mountain Rocket
Sustained pitch with some excellent moves. FA: Dave H Jon N, 2017 | 22 | 25m, 13 | |||||
| 2 | ★ Two Angry Young Men | 21 | 50m, 2 | |||||
| 3 |
★★ Hold That Thought
Excellent face climbing. Access by climbing Well Actually. | 24 | 27m | |||||
| 4 |
Well Actually
Access pitch for Hold That Thought | 16 | 15m | |||||
| 5 | Sisyphus | 16 | 55m, 2 | |||||
| 6 | ★★ Pete's Power Plummet | 19 | 70m, 3 | |||||
Triclinicty Buttress | ||||||||
| 8 |
★ Cleavage
Cracks left of the Triclinicity corner, to DBB. | 18 | 20m | |||||
| 9 |
★ Triclinicity
The clean hand crack. Either step left at the roof (grade 17) or continue direct up the crack (grade 19). Belay anchors at top. FA: P. Robinson, K. Bischoff & Mar 1981., 1981 | 18 | 20m | |||||
| 10 |
★★ Wide Boy
FA: R. Parkyn & O. Gervasoni, Feb 2015 | 21 | 24m, 2 | |||||
| 11 | ★★ Ozymandias | 15 | 65m | |||||
| 12 |
★ Blind Vision
FA: R Parkyn, Mar 2015 | 22 | 47m, 2 | |||||
| 13 | ★★ Blank Generation | 22 | 60m, 2 | |||||
Avalanche Couloir - Sunny Side | ||||||||
| 15 | Rebel Without Claws | 24 | 25m | |||||
| 16 |
★★★ Chancellor Direct
Start: Starts at the clean RH facing corner near the foot of Avalanche Couloir
FA: I. Lewis & L. Closs, 1972 | 17 | 60m, 2 | |||||
| 17 |
★ Chancellor
Takes the prominent corner line immediately right of Chancellor Direct about 8m up the left side of Avalanche Couloir. Start in the big broken right facing corner as for Vice Chancellor or start up the short wall just right of Chancellor Direct to meet the big corner after 8m. This second option doesn't add much other than the possibility of a painful ground fall.
FFA: Unknown FA: M. Douglas & T. Terry, 1967 | 16 | 55m, 2 | |||||
| 18 |
Vice Chancellor
Starts as for Chancellor in the big right facing corner between Chancellor Direct and Carpe Diem.
FA: G.Batten, M. Douglas & R. Mansfield, 1968 | 11 | 56m, 3 | |||||
| 19 |
★★★ Carpe Diem
Brilliant face climbing. A double set of small/medium wires very useful. About 10m right of CD is a recessed column. Scramble up to the base with care. Up, till you can step right onto the column proper. Follow shallow r facing corner till the gear fizzles out, then reach righ to gain hidden flake. Follow this up to gain top of column. There is a DBB a few metres up and left. | 19 | 45m | |||||
| 20 |
★★ Piping Hot
Crack to right of carpet diem with roof at 20m. | 20 | 30m | |||||
| 21 |
★★ Terra Nullis
Bolted arete up and right from Cape Diem. DBB. | 21 | 30m, 9 | |||||
| 22 | Sphygmus | 18 | 18m | |||||
| 23 | Clench Your Fist and Think of England | 20 | 18m | |||||
Avalanch Couloir - Shady Side | ||||||||
| 25 | ★★ Kwang Hwa Lantern | 27 | 20m | |||||
| 26 | ★ Torre | 25 | 8m | |||||
| 27 | ★ Falstaff | 19 | 25m | |||||
Aperitif ButtressThis small buttress is in between University Buttress and Avalanche Gully, right next to the main path. | ||||||||
| 29 |
Canapes
1a. A tasty morsel climbing the left-hand arete. Thoughtful moves past the bolts, then over the small roof, with a trad hand crack to the DBB (17m). 1b. Extra Nibbles. (17) If you want a little more trad action, climb the alternative start up the crack just around to the left of Canapes, joining the original route above the roof. FA: B. Bull, T. McKenny & I. Crossland, Dic 2016 | 18 | 17m, 2 | |||||
| 30 |
★ The Cocktail Hour
The arete directly off the walking track. Good but spaced protection. FA: Tony McKenny & Bob Bull, 2016 | 18 | 17m | |||||
| 31 |
Aperitif
Starts directly from the track between Bulging Buttress and University Buttress. Climb right side of arete on flakes and horizontals. | 17 | 30m | |||||
| 32 |
★ Catch the Sun in Flight
Wall climbing immediatly left of Sun Stealer. FA: Mar 2015 | 16 | 12m, 4 | |||||
| 33 |
★ Sun Stealer
Up black streak immediatly left of 19 Shades. Shares last bolt and DBB with that route. | 19 | 14m, 6 | |||||
| 34 |
★★ 19 Shades of Grey
Located on small buttress next to track between Bulging Buttress and University Buttress, at the base of Avalanche Couloir. Climb the right side of short black streaked wall to DBB. | 19 | 15m, 6 | |||||
| 35 |
★ Sparkle
2m R of '19 Shades of Grey.' Through the roofs. Head left under the roof and crank up the arete, to skip the broken hold crux FA: T. McKenny, O. Gervasoni & D. Stephenson | 23 | 10m, 5 | |||||
 /f4/18/f41812102db7592a7db8d4bd8927637c04dabd08)  /dd/f0/ddf06bc206219d604d0b279df7210584bc5e95e8) /28/30/2830ff6fde676933423370b5c3f918cf16311b47) 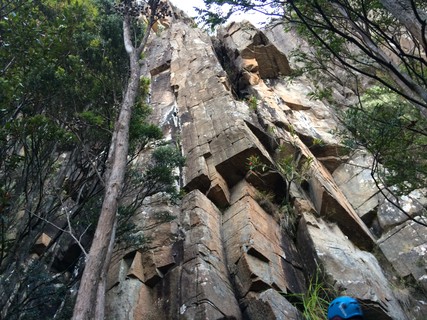 |
||||||||
1.1.3. Bulging Buttress
- Summary:
-
Per lo più Arrampicata trad
31 routes in Area
Lat / Long: -42.897836, 147.241402
| Route | Grade | Style | Selected ascents | |||||
|---|---|---|---|---|---|---|---|---|
SSSSI WallAccess to this face requires climbing 50m up Avalanche Couloir and scrambling back R to the base of the wall | ||||||||
| 2 | ★★★ (S.S.S.S.I.) Seriously Searching for Sanity but Suiciding Instead | 22 | 32m | |||||
| 3 |
★★★ Mildly Amused
The first 10m is gear protected, the remaining is fully bolted. | 25 | 35m, 9 | |||||
| 4 |
★★★ Beaten and Abused
FA: D. Stephenson, N. Deka & P. Steane, 1989 | 22 | 40m | |||||
| 5 |
★★ Crazed and Confused
FA: N. Deka, D. Stephenson & Feb 1989, 1989 | 22 | 40m | |||||
Black Magic Area | ||||||||
| 7 |
★ What's Left
A direct variant to Whatever. Start as for that route, but after the roof continue direct staying left of the arete, eventually finishing up the last couple of bolts of Whatever. | 23 | ||||||
| 8 |
★ Whatever
Starts at the highest point of the gully, climbing to the base of the climb is a bit precarious. Face climbing to the roof, then move right with great technical climbing up the arete using oddly angled flakes. FA: Roger Parkyn, 22 Nov 2015 FFA: Chris L, 24 Nov 2015 | 21 | 20m | |||||
| 9 | ★★ The Wizard | 18 | 80m, 3 | |||||
| 10 | ★★ Cold Power | 21 | 30m | |||||
 |
||||||||
| Route | Grade | Style | Selected ascents | |||||
| 11 |
★★★ Heat Pump
The second pitch is a Pipes classic. Steep, featured, and pumpy.
There is a lower-off at the top of the 2nd pitch. With a 60m rope and care, the belayer can lower the climber to the ground, then abseil to the ground using the climber as a counterweight. | 22 | 30m, 2, 12 | |||||
| 12 |
★ Smokin'
Climbs the steep thin crack-line about 6 m R of Heat Pump. DBB lower-off. | 20 | 15m | |||||
| 13 |
★★ Warm Glow
Line of bolts right of Heat Pump. Climb P1 of Heat Pump to access ledge. Follow the corner to a ledge, then continue up face and arete on some sharp holds | 21 | 20m, 7 | |||||
| 14 | ★ Lignum Vitae | 14 | 100m | |||||
| 15 |
★★★ Black Magic
Climb the slab, trending left of the prow to a lightly overhanging hand crack. Follow this up and over several spears of rock to a ledge (a belay can be set-up here to split the route into two pitches). From here, head to the crack on the left and follow it up and to the right, stepping right around the corner when it ends to DBB and rap-station. FA: Kim Carrigan & Ian Lewis, 1975 | 18 | 55m | |||||
| 16 | Magic Mushroom Variants | 17 | 50m | |||||
| 17 | ★★ Malignant Mushroom | 19 | 50m | |||||
| 18 | ★★ Equipoise | 22 | 30m, 1 | |||||
| 19 |
★★ Isonomy
FA: A. Donoghue & H. Jackson, 2014 | 24 | 30m | |||||
Jelly Wall | ||||||||
| 21 | Eye for a Line | 16 | 34m | |||||
| 22 |
★ Jelly Roll
Cracked face just to the right of the prow, 2m left of the tree. Great if you are a percussionist. For the rest of us, however, the tone emitted by tapping the flakes on this route is a tad scary (but the gear is good). Finishes with double bolt belay at the Black Magic step. FA: S. Parsons, P. Bigg & Apr 1978., 1976 | 17 | 35m | |||||
| 23 | Breakneck | 14 | ||||||
| 24 | ★ Smoke and Mirrors | 19 | 35m | |||||
| 25 |
Dal Nulla
Poorly protected Climbs the obvious corner, grovel through the mossy overhang section, finish up the dirty chimney, Bolted loweroff FA: P. Robinson, C. (Basil) Rathbone & May 2013, 2013 | 13 | 30m | |||||
| 26 | ★★ Crucio | 17 | 30m | |||||
| 27 | Humpty Dumpty | 14 | 30m | |||||
Breaker Spur Area | ||||||||
| 29 |
Breaker Chimney
FA: T. Terry & K. Hall, 1968 | 14 | 110m, 4 | |||||
| 30 | ★★ Breaker Spur | 13 | 100m, 4 | |||||
| 31 |
★★ Indian Summer
FA: T. McKenny & P. Robinson, 2013 | 16 | 49m, 3 | |||||
| 32 |
Spice Trade
FA: L. Martin & T. Smith, 2014 | 19 | 19m | |||||
| 33 |
★★ Cracked Pepper
FA: I. Snape, T. McKenny (alt.) & A. Adams, 2012 | 17 | 46m, 2 | |||||
| 34 |
Breakout
FA: G. Kowalik & P. Robinson, 1979 | 13 | 110m, 3 | |||||
| 35 |
Hormesis
FA: H. Jackson & A. Donoghue, 2014 | 20 | 48m | |||||
1.1.4. Teardrop Gully
- Summary:
-
33 routes in Area
Arrampicata trad e Arrampicata sportivaLat / Long: -42.897351, 147.241398
/f0/cd/f0cd719aa90fac811465a31c2af09f599512a722) |
||||||||
| Route | Grade | Style | Selected ascents | |||||
|---|---|---|---|---|---|---|---|---|
Summertime ButtressThe first buttress at the base of the gulley. A series of shorter routes tucked away in the shade. Best accessed in summer as the area appears to be a major runoff of water from above. | ||||||||
| 3 |
The Bentwood
The leftmost climb, short and sweet with steep climbing on good rock. Walk back after top out to rap station. FA: T. McKenny, B.Bull & B.Maddison, Gen 2017 | 16 | 12m, 3 | |||||
| 4 |
Dave's Wall
On the wide wall, 2m right of The Bentwood. Starting low to the left, climb the left hand side of the wall. Finally move right at the top to DBB. FA: D.Humphries & J.Nermut, 2014 | 18 | 12m | |||||
| 5 |
Thor
Climbs the right hand side of the wide wall to DBB. Good protection in horizontal cracks. FA: T.McKenny, B.Maddison & B.Bull, Gen 2015 | 15 | 11m | |||||
| 6 |
Jon's Crack
Crack immediately right of the large wall. Fun climb with abundant options for protection. Good for someone learning to lead. Recommend rap from top, lowering will drag rope. FA: J.Nermut, 2014 | 13 | 11m | |||||
| 7 |
★ Sleeping Dogs
Bolted line 3m right of Jon's Crack. Fun climbing on solid rock. Move straight up the rounded arete to DBB found 2m back from climb. DBB is up quite high on uneven ground, take care. FA: B.Bull, T.McKenny & I. Crossland | 18 | 12m, 5 | |||||
| 8 |
★ Gone Viral
Bolted line, close to the "waterfall". Shares DBB with Sleeping Dogs. FA: B. Maddison, B. Bull. & T. McKenny, Gen 2017 | 18 | 12m, 5 | |||||
/75/bb/75bb378a515eb847522340c010546ee9f40ff3e5) |
||||||||
| Route | Grade | Style | Selected ascents | |||||
| 9 |
★ The Unrideable Chicken
On the right hand side of the gully. Great moves with a spicy crux. FA: B. Maddison, T. McKenny, S. Scott & B. Bull, Gen 2017 | 19 | 10m, 4 | |||||
Farewell To Arms Buttress (LH Side) | ||||||||
| 11 |
Out Of The Frying Pan
chimney left of FTA | 17 | 32m | |||||
| 12 |
★★ Farewell to Arms
The obvious crack system on the south face of the first buttress, clearly visible from the track. ACCESS: Either scramble up 60m of vegetated ledges OR (Much better) climb Sleeping Dogs at Summertime Buttress then scramble up and left to the base of the butress. Start at the base of the buttress and climb up to the left of the prow. Move onto the left face and up the sustained, flared cracks to belay on a ledge just below the top of the buttress. Tape abseil to descend. FA: D. Stephenson & N. Deka, 1989 | 21 | 30m | |||||
| 13 |
★★ Into the Fire
A sustained route following the prominent corners on the north side of the first buttress, clearly visible from the Organ Pipes Track. Climb with difficulty into a shallow scoop using insecure small wires for protection (a peg was used here originally). Continue through a bulge using layaway holds to one more queasy experience, a sloping jug. Continue up to belay at a ledge. FA: Simon Parsons & Kim Bischoff, 1981 | 22 | 30m | |||||
| 14 |
Farouche
the crack right of ITF | 15 | 26m | |||||
Wootang Ledge | ||||||||
| 16 |
★★ Five-Nil
No natural gear required. Access from the top of the mountain is probably easiest.
FA: D. McConnell, 2007 | 25 | 45m, 2 | |||||
| 17 |
★ Cornered
Start approximately 5m left of Wootang. Climb the thin crack line just right of the arête, protected by small to mid-sized cams (some people think these small cams are quite dodgy), then continue up the shallow corner above past 3 FH to a DBB at the ledge. A. Williams, early 2005. FFA: A. Williams, 2005 | 23 | 20m, 3 | |||||
| 18 |
★★ Wootang
A dedication to Lois Scarr. Start on the right-hand side of the wide face above the ledge at a DBB. Layaways on the face for the first 10m (crux) lead to a small ledge, continue up the face above to a DBB on the ledge at 35m. A short pitch (18) past one FH provides access to the top DBB if required. A. Williams, Oct 2002. | 25 | 45m | |||||
| 19 |
★★★ Shaolin
The line of bolts to the left of The Colour of Magic. Scramble up the large corner then step right to gain the second bolt. Climb the shallow corner then move right into the thin layaway seam, following this to tricky topout. | 27 | 25m | |||||
| 20 | ★★ The Colour of Magic | 26 | 25m, 7 | |||||
 |
||||||||
| Route | Grade | Style | Selected ascents | |||||
Dark SideAKA Teardrop Wall | ||||||||
| 22 |
Dave's Climb / Deano's Climb
The crack climb to the niche, then awkward and thoughtful climbing to the top. FA: D. James & D. Rollins, 2010 | 17 | 10m | |||||
| 23 | ★★ Ano's Sojourn | 18 | 10m | |||||
| 24 | Fire and Forget | 17 | 12m | |||||
| 25 | Turkey Slap | 24 | 12m | |||||
| 26 |
Funemployment
The crack 2m right from Turkey Slap. Start in the crack with stemming options, through the leftwards jag, then to the top of Turkey slap pinnacle. Extend the DBB from Turkey Slap or easily continue to the top. FA: Chris Lang & Madi Roseavear, Nov 2020 | 16 | 14m | |||||
| 27 |
★ You are not my Friend
Starts just uphill of the pinnacle in an offwidth crack. Climb three offwidth sections to belay in base of chimney. Scramble out. FA: Deano & Topher, 2012 | 17 | 20m | |||||
| 28 | Sweepings | 13 | 20m | |||||
| 29 | ★ Ceci N'est Pas Une Pipe | 19 | 10m | |||||
| 30 | Cocksure propultion | 21 | 20m | |||||
| 31 | ★★★ Suzerain | 18 | 32m | |||||
| 32 | ★★ Built like a donkey | 18 | 22m | |||||
| 33 | Live Fast, Die Young | 24 | 18m | |||||
| 34 | ★★ Sunk by a pink torpedo | 22 | 18m | |||||
| 35 | Fat snatcher | 8 | 14m | |||||
| 36 | Pretty septic | 17 | 14m | |||||
| 37 | ★ Sheeza | 18 | 17m | |||||
| 38 | ★★ The Virus | 21 | 12m | |||||
1.1.4.1. Summertime Buttress
descrizione
The first buttress at the base of the gulley. A series of short walls with a waterfall at the top of the gulley. Cold and dark during winter but lovely in the summer heat.
avvicinamento
Head up Bulging Buttress track, moving right when the track splits. Move right until a scree scramble upwards to the waterfalls base.
1.1.5. Step Tier
- Summary:
-
Per lo più Arrampicata trad
12 routes in Area
Lat / Long: -42.897526, 147.241724
descrizione
Step Tier is a place that maintains its popularity simple becasue it houses some of the best kick-ass natural climbing on the Mountain. The apex of the climbing is, Moonraker. This climb really is a middle grade, photogenic,magic number that sermounts the step and then blasts straight up into the heavens. Even the rap down is a doozey. Step Tier also has easy access from the Organ Pipes Track and can be easily pin-pionted from there. It is about a four minute walk (left) from the Northern Butress track junction.
| Route | Grade | Style | Selected ascents | |||
|---|---|---|---|---|---|---|
| 1 | ★★★ Left Out | 21 | 30m | |||
| 2 | ★★ Sucked In | 24 | ||||
| 3 | Mothers on Adrenalin | 20 | 25m | |||
| 4 | ★★★ Moonraker | 16 | 70m, 3 | |||
| 5 |
★★★ Moonraker variant
Alternative to the first two pitches of Moonraker. Pitch 1: Climb the crag for 10m, traverse right in the horizontal break to the cave and keep going as for Moonraker Pitch 2: Follow original variant until below the chimney, then step right to a small ledge and continue with the steep crack until you reach the original line again. Pitch 3: to rap station as for Moonraker | 17 | 77m, 3 | |||
| 6 | ★ One Way to the Moon | 19 | 40m | |||
| 7 |
★★ Xenophanes
Nice line, take a #4 and #5. FA: I Lewis & D Hain, 1974 | 17 | 81m, 3 | |||
| 8 |
★★★ Lone Stranger
FA: Kim Carrigan & Ian Lewis, 1974 | 19 | 78m, 3 | |||
| 9 | ★★ Opthalmia | 18 | 80m | |||
| 10 |
★★ Bokeh
The bolted line 3m to the right of Lone Stranger p1.
| 24 | 63m, 2 | |||
| 11 | ★ Peacepipe | 16 | 80m | |||
| 12 | Sunday Morning Fever! | 17 | 25m | |||
1.1.6. Great Tier
- Summary:
-
Per lo più Arrampicata trad
35 routes in Area
Lat / Long: -42.897178, 147.241618
| Route | Grade | Style | Selected ascents | |||||
|---|---|---|---|---|---|---|---|---|
Zoloft Wall | ||||||||
| 2 | ★★ Static Journey | 19 | 50m | |||||
| 3 | Choc-o-Block | 17 | 25m | |||||
| 4 | ★★ Zoloft | 19 | 45m | |||||
| 5 | ★★ Dynamic Journey | 20 | 25m | |||||
Suicide Sadness AreaRoutes in the Suicide Sadness area start at the left hand end of the ramp immediately beyond the big step midway along the ramp. | ||||||||
| 7 | ★★ Melancholy Mania | 16 | 100m, 3 | |||||
| 8 |
★ Manic Melancholy
A less vegetated variant for Melancholy Mania. Takes the rib if rock to the L of the second pitch of Melancholy Mania. Scramble around from Suicide Sadness to avoid the first pitch of the above climb and belay at the base of the chimney. Climb up cracks and shallow corner past rooflet and blocky sections up the belay for Melancholy Mania. | 17 | 50m | |||||
| 9 | ★★ Tsing Gai | 20 | 65m | |||||
| 10 |
★★ Janzoon
Pitch 2+3 can be combined. FA: I.Lewis & B.Kennedy, 1974 | 17 | 60m, 3 | |||||
| 11 | ★ Massacre Madness | 21 | 40m | |||||
| 12 | ★★★ Suicide Sadness | 18 | 60m | |||||
| 13 | ★ Terror Firmer | 25 | 20m | |||||
| 14 |
★★ Nefertiti
FA: J Moore & P Stranger, 1968 | 15 | 77m, 2 | |||||
| 15 |
★★ Clouds of Obsession
Black streaked buttress, up and left from Slow Combustion. Awesomly sustained and balancy face climbing, to a DBB. Well protected if you have doubles of micro cams. | 22 | 30m | |||||
| 16 |
Passiona
FA: V. Kennedy & J. Moore, 1968 | 13 | 66m, 2 | |||||
| 17 |
★★ G Pillar
Climbs pillar between Clouds of Obsession & Slow Combustion. Excellent climbing, let down somewhat by a hard first 5m, and scrubby last 5m. Good protection. At top of pillar, traverse 4m to rap of Clouds of Obsession chain (25m). | 15 | 52m | |||||
 |
||||||||
| Route | Grade | Style | Selected ascents | |||||
| 18 |
★★ Slow Combustion
Start a few meters after the big step in the access ramp at the right-hand end of the Suicide Sadness area.
50m abseil from the bolted anchor on the right end of the ledge to the start of the climb. FA: T. McKenny, P. Robinson & B. Rathbone, 1979 | 15 | 52m, 2 | |||||
| 19 |
★ Slow Combustion Direct
Starts 1.5m Right of Slow Combustion. Traverse left for 2m below dark roof to rejoin Slow Combustion. FA: H.Jackson, 1998 | 16 | 52m | |||||
| 20 |
★★ Twist in My Sobriety
FFA: I. Snape & T. McKenny FA: Pitches 1, 2: T. McKenny, A. Beech. Pitch 3: I. Snape & T. McKenny, 2011 | 18 | 50m, 3 | |||||
| 21 | Doldrums | 14 | 120m, 4 | |||||
Blue Meridian areaRoutes in the Blue Meridian area start right of the big step midway along the ramp | ||||||||
| 23 |
★★ Schizophrenic
Three pitch sport route starting 10m up the ramp from BM.
FA: J Nermut & D Humphries, 2012 | 21 | 70m, 3, 24 | |||||
| 24 | ★★ Roaring Forties | 15 | 80m | |||||
| 25 | Feeble Fifties | 15 | 120m, 4 | |||||
| 26 |
Shaky Flakes
FA: D. Fife & P. Mackenzie, 1983 | 18 | 10m | |||||
| 27 |
★★★ Blue Meridian
A must do if you are in this area of the Pipes. Trad with DBB anchor stations at the top of both pitches. | 17 | 90m, 2 | |||||
| 28 |
Prime Meridian
second pitch alternative to Blue Meridian or Fine Time | 23 | 45m | |||||
| 29 |
★★ Fine Time / Slime Time
FA: D. Stephenson & N. Deka, 1988 | 21 | 92m, 2 | |||||
The Lower TierTake the signposted track up to Great Tier; where the track meets the cliff take the left fork that is signposted to Step Tier | ||||||||
| 31 | Janzoon Direct | 15 | 38m, 2 | |||||
| 32 | Thirsty Thirties | 20 | 33m | |||||
| 33 |
★★ Skyfall
About 20m left of Kabling is a short inset wall.
FA: T McKenny & P Robinson, 2013 | 20 | 40m, 2 | |||||
| 34 |
★ Quantum of Solace
Precarious and pumpy climbing. Start on the ledge as for Skyfall (can be accessed via the short bolted wall, or by scrambling up the vegetated corner to gain right side of ledge). Climb several metres right of Skyfall, blasting up up the seam and through the large roof passing the DBB of Solace to the rest ledge. From the ledge, clip the bolt up and left on the hanging arete, then commit to moving up and left (crux) above the void. Balance up arete to a DBB FA: O Gervasoni & T McKenny, 2013 | 23 | 32m, 16 | |||||
| 35 |
★ Solace
as for QoS; stop at DBB after roof | 22 | 20m, 14 | |||||
| 36 |
Procrastination
3m left of Kabling is a right facing corner. Up this then slightly left to top of yellow fin. Fiddle in some gear and climb the short crux wall, to a belay on the main ramp. FA: T Mckenny, A Beech & O Gervasoni FFA: 2013 | 17 | 35m | |||||
| 37 |
★★ Kabling
On the lower tier, 15m left of where the track meets the tier, is a compact black streaked wall leading to a featured roof. Excellent face climbing past a FH to a ledge. Up corner above before moving right and through the big roof, then the face and arete above to DBB. Scramble a further 10m to the base of G Pillar. Micro cams important. FA: O. Gervasoni & B. Ikin, 2012 | 17 | 25m, 1 | |||||
| 38 |
★ Master Class
FA: T. McKenny, B. Bull, T. McKenny & B. Bull, Feb 2017 | 18 | 20m, 2 | |||||
| 39 |
The Trump Tower
FA: B. Bull, T. McKenny, B. Maddison & S. Scott, Feb 2017 | 20 | 24m, 7 | |||||
1.1.7. Central Buttress
- Summary:
-
Arrampicata trad, Arrampicata sportiva e altri stili
73 routes in Area
Lat / Long: -42.896665, 147.242061
descrizione
The most extensive buttress on the Pipes. The RH end of 'Central Buttress' is broken and scrubby (Pooch 'Gully', a vegetated trough that separates Flange and Central Buttress). The LH end of the 'Central Buttress' is steeper and cleaner providing routes of greater quality.
avvicinamento
Continue on the 'Organ Pipes' Track past the access track to 'Flange Buttress' for roughly another 50m, passing a large horizontal flat boulder before cutting up R. (GPS: E0519827 N5250667) This is usually marked by a small cairn.
| Route | Grade | Style | Selected ascents | |||||
|---|---|---|---|---|---|---|---|---|
The ArenaAmphitheatre at upper LH end of Central Buttress. Best accessed by walking down from summit carpark and rapping in. | ||||||||
| 2 | ★ Menhir | 20 | 40m | |||||
| 3 | ★★ Asterix | 15 | 27m | |||||
| 4 | The Den | 16 | 35m | |||||
| 5 | ★ Gladiator | 21 M1 | 35m | |||||
| 6 | ★ Catacomb | 17 | 30m | |||||
| 7 | ★★ Centurion | 18 | 30m | |||||
| 8 |
★ The Spear
Exciting moments to be had on the prominent hanging pillar R of Centurion. Bridge the offwidth corner 5m R of Centurion for 8m to a small roof. Traverse R under this onto the face of the column. Climb the finger crack past a problematic niche, surmount the large flake above, and continue more easily to the top. FA: D. Stephenson & N. Deka, 1989 | 21 | 30m | |||||
| 9 | Circus Maximus | 20 | 30m | |||||
| 10 | Circus Minimus | 17 | 30m | |||||
| 11 | Obelix | 18 | 40m | |||||
| 12 | ★★ Legionary | 17 | 35m | |||||
| 13 | ★ Caledonian Variant | 19 | 45m | |||||
| 14 | Caledonian | 16 | 45m | |||||
| 15 | The Steps | 12 | 25m | |||||
| 16 | ★★ Cheers to Dave | 21 | 35m | |||||
| 17 | Telopea | 20 | 25m | |||||
| 18 | Shrapnel | 21 | ||||||
| 19 | The Spirit | 19 | 30m | |||||
South Central Buttress | ||||||||
| 21 |
★★ Shrapnel
Climbs a pillar located about 10m right of where the access path to Blue Meridian turns steeply left. Fully bolted, however a finger sized cam may help add confidence for the slopey top-out. | 21 | 25m, 9 | |||||
| 22 |
★★ Halleluja
Starts at Phil's Crack just around right and up the gully from the start of Shrapnel. Ends by topping out on the Arena. FA: P. Robinson, K. Robinson & C. Rathbone | 20 | 120m, 5 | |||||
Below Battle Cruiser Ledge | ||||||||
| 24 |
★ Bad Back
Below Battle Cruiser ledge. Bolted route slightly uphill left & around the corner from "The Three Stooges." FA: J. Nermut & D. Humphries | 18 | 12m, 5 | |||||
/4d/af/4daf9075d9f83a844243f95df12e31202e040fbd) |
||||||||
| Route | Grade | Style | Selected ascents | |||||
| 25 |
★ The Three Stooges
Obvious bolted face below Battle Cruiser ledge, located up side track between Great Tier & Central Buttress access. Mantle near top & across some loose ground to rap station. FA: T. McKenny, S. Scott & B. Bull | 18 | 20m, 7 | |||||
| 26 |
★ Living the Dream
20m R of The Three Stooges up secondary track. Tricky start then up arete. FA: M. Bailey, B. Bull, T. McKenny & D. Bruce | 18 | 12m, 4 | |||||
Battle Cruiser Ledge | ||||||||
| 28 |
★★★ Improbability Drive
A stellar route, made awkward by its access. Best to do a route (Battlecruiser etc) that abseils down the Linda Chimney (or just climb the chimney). Either way your heading to the large ledge 10m up and left from the Abseil point 25m up the chimney (at the chockstone).
FA: S. Parsons, D. Fife & Phil Steane, 1982 | 20 | 40m, 2 | |||||
| 29 |
Linda
Pitch 1: Ground level to obvious large chockstone (rap anchors present) Pitch 2: Up chimney and belay at base of huge corner Pitch 3: 3 variants - Direct (18) - Left of huge corner which becomes offwidth Chimney (15): Climb R wall for 5m, thenstep R up to ledge and finish up chimney FA: J Moore & J Veasey, 1968 | 15 | 90m, 3 | |||||
| 30 |
★ Five Easy Pieces
The small buttress to the left of the Linda chimney, capped by overhangs. Belay at far left end of Battlecruiser Ledge. Step left across Linda chimney and follow 6 U bolts up wall and blind corner capped by overhangs to double U belay on small ledge above. FA: Dave Stephenson & Neale Smith, 23 Apr 2019 | 22 | 15m, 6 | |||||
| 31 |
★ Hyperspace
FA: N Deka, D Bruce & D Batten, 1988 | 20 | 35m | |||||
| 32 |
★★ Starship Trooper
The arete left of Battle Cruiser.
| 22 | 74m, 2 | |||||
| 33 | ★★ Major Tom | 22 | 28m | |||||
| 34 |
★★★ Space Cowboy
An alternative 2nd pitch to Starship Trooper and Battle Cruiser – start from the belay ledge shared by both routes at the top of their first pitches. Climb directly above the belay into a small left-facing corner to the right of the arête. Layback the flake above to a spectacular rest below a small overhang. Move straight up the arete, or slightly easier, step right and climb straight up a short wall (crux) to join Battle Cruiser at the diagonal trending flake. Continue up the rest of Battle Cruiser to the rap station. FA: D. Stephenson & J. Otlowski, 1989 | 20 | 30m | |||||
| 35 |
★★★ Battle Cruiser
Both pitches are awesome. Start: Shares the same start as Twice.
FA: M. Law & D. Bowman., 1978 | 18 | 74m, 2 | |||||
| 36 |
Twice
| 18 | 90m, 3 | |||||
| 37 |
★ Once
A direct version of Twice. Start 2m right of Battle Cruiser. Follow thin cracks up and through roof to belay at BC ledge. Continue up the corner of Twice. | 20 | 30m | |||||
| 38 |
Thrice
Alternative start to Faust which avoids some inital chimneying but involves some alarming flakes. Start up flakes 2m L of chimney and continue directly up the wall, eventually stepping right into Faust at the Hakea. Continue up Faust from here. | 15 | 30m | |||||
| 39 |
Bumps and Angels
The thin line between Faust and Twice, up the thin seam through two overlaps. Looks bold. | 23 | 80m, 2 | |||||
| 40 |
★★ Faust
The big left-facing chimney.
FA: J. Moore & R. Williams | 16 | 85m, 2 | |||||
| 41 |
★ Cognitive Dissonance
The line up the face and arête between Faust and Spartan Ethics. There is a thin and balancy crux between the 2nd and 3rd bolts, and another tricky move at the roof, the rest is about 20. FA: J. Nermut, D. Humphries & Jan 2015., Gen 2015 | 22 | 28m, 12 | |||||
| 42 |
★★ Thesaurus
Steep start then keep following the U's FFA: Heather & Nick Hancock FA: Roger, James Parkyn, Heather, Nick Hancock & May 2016., Mag 2016 | 21 | 24m, 10 | |||||
| 43 |
★★ Spartan Ethics
Sustained and consistent. An inverted small L-shaped roof/flake marks the start of this route.
FA: (1) S. Parsons, D. Bowman, Dec 1979. (2) D. Bowman, R. Wells, Feb 1978. (3) N. Deka, D. Stephenson & Apr 1988. | 20 | 100m, 3 | |||||
| 44 | Youth With a Mission | 18 | ||||||
| 45 | Youth With a Mission Direct Start | 19 | ||||||
Third Bird Area | ||||||||
| 47 |
★★★ Third Bird
Up the corner from the natural belay bench. Challenging, sustained, airy climbing with good gear.
Rap from DBB anchors (2 raps). Tracciata: Ian Lewis & Lyle Closs, 1973 | 18 | 80m, 2 | |||||
| 48 |
Banana Republic
Start 3m right of Third Bird
FA: D. Stephenson & N. Deka, 1988 | 18 | 95m, 3 | |||||
| 49 |
★★ Butt Funky
An average first pitch is a necessary task to access the excellent, airy arete of pitch 2.
| 20 | 110m, 3 | |||||
| 50 |
High Flyers
Climbs up the hand crack directly above the bolts at the top of pitch 2 of Acid Test. | 18 | 42m | |||||
| 51 |
★ Acid Test
Located 2m R of the Butt Funky fist crack, 2m L of a deep chimney.
FA: G. Phillips & D. Fife, 1996 FA: T. McKenny & J. Nermut, 2013 | 20 | 120m, 4 | |||||
| 52 |
★★ Heat
The line of bolts just right of Acid Test. Take a few mid-size cams for 15m of easy scrambling at the top of the third pitch to get to the start of the final pitch. All belays are spacious ledges with DBBs.
| 21 | 100m, 4, 35 | |||||
| 53 |
★★ Wedgetail
The line of FH right of Heat. Nice, pumpy climbing on some sharp rock. FA: Dave Humphries & Jon Nermut, 2014 | 22 | 28m, 13 | |||||
Kacktus Buttress | ||||||||
| 55 |
★★ Peregrine
The line of bolts 5m left of Rememberance and Roast Chicken | 23 | 48m, 2 | |||||
| 56 | ★ Roast Chicken | 14 | 130m | |||||
| 57 |
★★ Remembrance
Well conceived line up a sharp arete.
FA: D Humphries & J Nermut, 2012 | 21 | 45m, 2, 20 | |||||
| 58 |
★★ V
A fun little sport climb starting 5m R of Remembrance and climbing to the same anchor. Climb up and into shallow R facing corner, continue up to steep bulge. Jugs lead to good side-pulls on the face above. Step back L to lower-off. Trickier if you are short. However is defo 25. FA: Simon Young, 2013 | 25 | 17m, 8 | |||||
| 59 | ★ Pugnacious | 22 | ||||||
| 60 |
★★ Oopsy Daisy
MIxed route left of Kacktus. Climb loose chimney on natural gear until top of pinnacle is reached. Step onto the right wall and follow fully bolted wall to ledge and DBB. There is a short extention to a second DBB. | 23 | 40m, 9 | |||||
| 61 | ★★ Kacktus | 20 | 40m | |||||
| 62 |
Alpine Style
Up manky chimney then orange face Access left of Drama Queen and Princess on flange buttress FA: D. Humphries & J. Nermut | 20 | 22m, 8 | |||||
| 63 | Starseeker | 13 | 100m | |||||
Circus WallRH upper end of Central Buttress. Best accessed by walking down from summit carpark and rapping in. | ||||||||
| 65 |
Scotch Mist
| 17 | 30m, 2 | |||||
| 66 |
Faith, Hope and Deliverance
| 17 | 30m, 2 | |||||
| 67 |
On the Road Again
| 18 | 55m, 2 | |||||
| 68 |
High Wire
| 19 | 55m, 2 | |||||
| 69 | Clowning Around | 18 | 60m | |||||
| 70 | What a Circus | 19 | 58m, 3 | |||||
| 71 |
★★ Clown Face
Classy face climbing on the lowest tier of Circus Wall. Can be accessed by climbing the first 3 pitches of Heat and then scrambling across scrubby ledge. | 23 | 20m, 9 | |||||
| 72 | ★★ Centre Stage | 18 | 20m | |||||
| 73 |
★★ Circus Taz
| 18 | 60m, 3 | |||||
| 74 |
★★ Circus Interruptus
Nice arete with the crux at the top | 21 | 16m, 6 | |||||
| 75 | ★★ All The Way | 20 | 15m | |||||
| 76 |
★★★ Arthur's Circus
| 18 | 55m, 2 | |||||
| 77 | ★ Line Tamer | 19 | 50m | |||||
| 78 | Polymorpha | 18 | 35m | |||||
| 79 | Double Trouble or Triple Treat | 17 | 37m | |||||
| 80 |
Empty, Unfilled, Bare
Contrived but good! | 24 | 6 | |||||
1.1.8. Flange Buttress
- Summary:
-
Arrampicata trad e Arrampicata sportiva
31 routes in Area
Lat / Long: -42.895976, 147.241835
avvicinamento
Reddish buttress at the southern end of columns
| Route | Grade | Style | Selected ascents | |||||
|---|---|---|---|---|---|---|---|---|
| 1 |
★ Drama Queen
Face/arete left of princess. Starts up a crack. Only to top half is bolted. | 24 | 20m | |||||
| 2 |
★★ Princess
On the face to the right of Drama Queen. FA: R Parkyn, Nov 2014 | 19 | 25m, 12 | |||||
| 3 | ★★ Influenza | 21 | 28m, 12 | |||||
| 4 | ★★ Nefarious | 22 | 25m, 12 | |||||
| 5 |
★★ Slippery Sensation
Climb RH crack for 7 m, then move into LH crack and up to below a bush. Traverse L and onto arete to Nefarious anchor. Start: Crack to the right of bolted arete (Nefarious 22) FA: S Parsons, K Bischoff & A Wing, 1981 | 20 | 25m | |||||
| 6 | ★★ Slipper | 20 | 30m | |||||
| 7 | ★ Ring of Fire | 21 | 15m | |||||
| 8 |
★ Just a Little Bit Longer
A serious but rewarding single pitch route up the wall to the left of the obvious chimney ("Bert's Fear"). The first half of the route follows the line of least resistance up, trending leftwards, to the obvious large jug on the arete. The climbing on this section is sustained face climbing, with care needed to be taken with some loose rock to be avoided, and some devious gear placements to be found. Small wires very important. From the jug on the arete, the climbing is easier, following a series of short blockly corners up and trending back right to a ledge with two small trees and a cluster of fixed tat. From this tat, a single 60m rope will get you back to the deck (although you're probably better of leading the route on double ropes). | 19 | ||||||
| 9 |
★★ Berts Butter Menthol
Contentious, original done as a trad route the unknowingly bolted a week later. Climbs the line left of the bolts, it is possible to go right of the bolt at the roof at grade 23. Climb the wall left of "Bert's Fear", starting at the base of the "Bert's Fear" chimney. There is thin crux at the second U and then a pumpy hike to the top (all sport). FFA: Roger Parkyn & Owen Gervasoni, 2013 | 22 | 30m | |||||
| 10 |
★★ Bert's Fear
Starts 16m downhill of Fiddlesticks at the obvious body chimney in a shallow corner. FA: U. Aurelli, D. Cox & J. Fairhall | 12 | 120m, 4 | |||||
| 11 |
★ On Bended Knees / Bert's Fear P4 Variant
From the belay at the top of Brown Madonna, wander up rock face on the left and continue straight up hand cracks to the left of the chimney. Traverse right at top to Bert's Fear DBB | 16 | 35m | |||||
| 12 | ★★ Precarious | 20 | 40m | |||||
| 13 |
★ Alex's Thing
Sporty route between CSTS and P. Can be done as a second pitch to P, or a single pitch starting as for CSTS and using the DBB for that route to descend. Bring a light rack for the start and the finish FA: A Wilson, 2004 | 22 | 40m, 6 | |||||
| 14 |
★ Chop Sticks
Originally a short, bold, route connecting the Fiddlesicks ledge to the 1st belay of Precarious. A retro-bolt or two (as part of the logical arete line CSTS) have tamed the route, which is now normally done as part of AT or CSTS. FA: H Jackson & M Jackson, 2000 | 17 | 8m | |||||
| 15 |
★★ Chop Sticks The Sequel
Mostly sport route up the prominent arete left of Fiddlesticks. Start at the base of Fiddlesticks, and move left to arete (wire and small cam) to gain line of u-bolts. Balancy arete climbing on great rock. You'll probably place another wire & small cam up high before gaining a DBB. FA: A Williams & D Grey, 2004 | 25 | 30m, 10 | |||||
| 16 |
★★ Fiddlesticks
Starting at a prominent corner with twin cracks.
Continue as for "Bert's Fear" (45m) up the ridge or rap down your choice of three anchors right from ledge - Brown Madonna / Pleasant Screams. FA: Tom Terry & Geoff Wyatt, 1967 | 14 | 65m, 2 | |||||
| 17 |
★★★ Neon God
Best done as one pitch however, the easier first pitch to this ultra classic is an excellent route in its own right.
FA: Sam Edwards, 1997 | 25 | 50m, 2 | |||||
| 18 | ★★ The Holy Road | 23 | 25m | |||||
| 19 |
★★ Big Sticks and Beatings
Follow the finger crack to the right of Neon God. Continue until a solid stance 2/3rds of the way up, resist the urge to move towards the Neon god bolts and head right up the small corner. Traverse left to clip once level with the anchors of of Neon God (pitch one). | 21 | 25m | |||||
| 20 |
★ The Cuts
This route now has a direct start and finishes called 'The Directors Cut' 21 | 20 | 25m | |||||
| 21 | ★ The Directors Cut | 21 | 48m, 2 | |||||
| 22 |
★★★ Digitalis
Start: Crack system to the L, around arete of Brown Madonna.
FFA: D Bowman & M. Steane FA: J. Moore & R. Williams, 1977 | 18 | 62m, 2 | |||||
| 23 |
★★★ After Midnight
Absolute classic. Up the arête to the left of Brown Madonna. Consistent, exposed, technical moves. Double ropes can reduce drag, but aren't mandatory. | 24 | 50m | |||||
| 24 |
★★ Pleasant Screams
Start at the bottom of the face moving towards the R arête after 10 m and back L to a hanging belay. The second pitch was climbed at 27 by moving into Brown Madonna at 2/3 height. Nowadays rarely done as Pleasant Screams Direct is a significantly better option. FA: S. Edwards, 1996 | 25 | 20m | |||||
| 25 |
★★★ Pleasant Screams Direct
One of the best climbs on the pipes. Climb Pleasant Screams to just below the midway anchor then follow the line of bolts to the top in one mega pitch. Avoid moving into After Midnight and Brown Madonna, not as contrived as it sounds. FA: S. Parsons, 2007 | 29 | 50m | |||||
| 26 | ★★ Brown Madonna | 19 | 50m | |||||
| 27 |
★★ Pink Car / Brown Madonna
Avoids the chimney at the bottom. Climb the chimney 1m right of Brown Madonna to the hanging flake on the left where you can move back left into that route. | 19 | 50m | |||||
| 28 | ★ Pink Car | 16 | 50m, 2 | |||||
| 29 | ★★ The Great Bitch | 19 | 55m, 2 | |||||
| 30 | ★★ Canis Minor | 18 | 62m, 2 | |||||
| 31 |
★★★ The Tower of Power
The tall overhanging column to the right of Brown Madonna, 60m single pitch route, sustained arete climbing as good as it gets. Take a no.1 camalot to avoid a runout at about 3/4 height. 19 quickdraws plus rap chains FA: nick hancock | 25 | 60m, 19 | |||||
/18/d5/18d5ae3d955ba75b247e8756d0ec6a47698f83c4) /e9/13/e9136416438e3e9eb696b0471a3b3ad7870b01bd) /37/9b/379b2a32753173b1d854043709cfd3af6cfce4eb) /57/f1/57f157196ca289ce0bc4c84e7171508f3ccef980)  /66/2d/662db13a11998d85e92670085c2b724deb0364e1) /b1/21/b12101e46d7f689be9f5608ed228c2130de6b3b5) 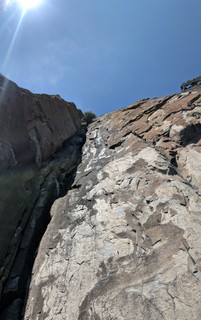 |
||||||||
1.1.9. The Columns
- Summary:
-
Arrampicata trad, Arrampicata sportiva e Arrampicata su roccia
60 routes in Area
Lat / Long: -42.895572, 147.241336
| Route | Grade | Style | Selected ascents | |||||
|---|---|---|---|---|---|---|---|---|
Cairn Column | ||||||||
| 2 | ★ Best Route in the Gorge | 24 | 15m, 4 | |||||
| 3 | Birthday Treat | 18 | 27m | |||||
| 4 | Piccolo | 16 | 90m, 4 | |||||
| 5 | Serendipity | 19 | 40m, 2 | |||||
| 6 | Firebird | 18 | 65m, 3 | |||||
| 7 | ★ Pooh Corner | 17 | 72m, 2 | |||||
| 8 | ★ He Spoke Human | 24 | 32m | |||||
| 9 | Whodunnit | 19 | 130m, 4 | |||||
| 10 |
★★ Anomia
| 24 | 60m, 2, 22 | |||||
| 11 | ★★★ Aphasia | 24 | 28m, 12 | |||||
| 12 | ★ Cymbal | 20 | ||||||
| 13 | ★ No Beginning and No End | 19 M0 | 20m | |||||
| 14 |
★★★ Tularaemia
1 30m 25, 20 bolts 2 20m 24, 15 bolts FA: C Hewer & K Robinson, 2012 | 25 | 50m, 2, 35 | |||||
| 15 |
★★★ The Brush Tail Extension
Two pitch extension of 'Tularaemia' adds 30m of additional climbing and increases the grade. 3 15m 27, 8 bolts 4 15m 28, 8 bolts | 28 | 30m, 2, 16 | |||||
| 16 | ★ Firebrand | 20 | 80m | |||||
| 17 | F-Sharp | 18 | 100m, 3 | |||||
Battlements ColumnBattlements Column is a forward-standing column capped by three turret-like rocks that is situated in the centre of the Columns. When viewed in profile, a large slab of rock caps the detached summit tower, connecting it with the main cliff. Routes on Battlements Column are predominantly accessed using a top-down approach. | ||||||||
| 19 | Armchair Ethics | 23 | 35m | |||||
| 20 |
★★ Once in a Lifetime
Avvertimento Attrezzatura fissa: Loose Bolts | 26 | 55m, 18 | |||||
| 21 |
★★ Daedalus
Mega off-width pitch, take some big gear. | 20 | 55m | |||||
| 22 | ★★ Cruel But Fair | 23 | 25m | |||||
| 23 | Claret Corner | 16 | 110m | |||||
| 24 |
★★★ Icarus
Sustained on a impressive line, up higher at least... The steep crack on the S face of Upper Battlements Column. Most people rap in and climb the top 2 pitches only.
FA: C. Dewhirst & J. Ewbank | 20 | 120m, 4 | |||||
| 25 |
★★ Freedom
Probably the hardest route on the Pipes and a magnificent line, taking the arête and wall to the R of of Icarus. Access via a 30m abseil from rap station above the slab that caps Battlements Column, to the Middle Battlement (top of pitch 2 of Battlements). A reachy and powerful boulder problem at half-height offers some amazing moves in an outrageous position. A finger-sized cam can be handy to protect the post crux section. FA: Jake Bresnehan, 2010 | 30 | 25m | |||||
Battlements LowerBet accessed from below, from the Northern Buttress track | ||||||||
| 27 |
★★★ Close to the Sun
| 23 | 48m, 2, 23 | |||||
| 28 | ★★ Bismark | 24 | 100m, 3 | |||||
| 29 | Incision | 18 | 100m | |||||
| 30 |
★ Sirius
Clip the first two bolts on Dark Nebula, then step left and up past a few more bolts. A long traddy ramble follows (single set of cams and wires), before a thin finish past another 3 bolts to DBB. | 20 | 40m, 8 | |||||
| 31 |
★★ Dark Nebula
A long and sustained pitch of face climbing on good rock. One of the better sports routes at the grade in southern Tasmania. FA: R Parkyn, Dic 2016 | 21 | 32m, 17 | |||||
| 32 |
Ford Prefect
The left of the two short sport routes between DN and PS. FA: R Parkyn & O Gervasoni, Gen 2017 | 16 | 12m, 6 | |||||
| 33 |
★ Datsun Sunny
Technical and interesting climbing up the short wall left of PS. FA: O Gervasoni & R Parkyn, Gen 2017 | 17 | 14m, 8 | |||||
| 34 | ★ Battlements Direct | 17 | 40m | |||||
| 35 |
★★ Plymouth Satellite
More fine dolerite face climbing 15m right of Dark Nebula | 23 | 23m, 11 | |||||
| 36 | Battlements | 15 | ||||||
Split ColumnImmediately right of Battlements Column when viewed from below | ||||||||
| 38 | ★★ Sandy Bay Road | 18 | 35m | |||||
| 39 | ★★★ Holiday in Cambodia | 21 | 35m | |||||
| 40 | ★★ Ultrahard | 26 | 30m, 4 | |||||
| 41 | ★★★ Ultrasound | 23 | 35m | |||||
| 42 | ★★★ Split Column | 19 | 40m | |||||
| 43 | ★★ Soliton | 18 - 20 | 35m | |||||
| 44 | ★ Face What You Fear | 23 | 20m | |||||
| 45 | ★ Fear Inoculum | 22 | 30m | |||||
Double Column | ||||||||
| 47 | ★★ Strange Angels | 23 | 40m, 16 | |||||
| 48 |
★★ Double Column Central
The crack / chimney up the centre of the column is a varied classic adventure. FA: M Douglas & T Terry, 1967 FFA: B Kennedy & L Closs, 1970 | 17 | 77m, 4 | |||||
| 49 | ★★ Minds Eye | 24 | 70m, 2, 20 | |||||
| 50 | The Cordoban | 15 | ||||||
Cossack ColumnRight of Double Column is a wide curving stretch of wall that ends at a closely joined twin column that is 65m high. Two large wedge shaped blocks cap the summit. Routes are predominantly accessed using a top-down approach. Top-Down Access Cossack Column is located about 40m left of the patch of snow gums as viewed looking towards Hobart. The Cossack Column rap station is located here (1 x 6m; 1 x 50m) and is used to access routes in the vicinity of Sky Rocket. Access for Hakea and its neighbours: just before Cossack Column (if heading towards the amphitheatre), locate a narrow gully below and build a trad anchor. It is suggested to fix a rope off this, running it down the sloping ramp to a small ledge at the top of Hakea. From here, either rap of the Hakea tree, or better from an anchor point on your fixed rope. Rap from the Hakea tree/ledge is about 45m. | ||||||||
| 52 |
★★ Duckling
The line just left of Killer Canary. Up corner crack via. stems and laybacks to a flared crack on the face. Awesome but runout climbing past fiddly gear leads to a short flared crack before joining Killer Canary after it's traverse. Small offset Aliens pretty much essential to protect adequately. You can start from the grassy ledge at wide 16ish but it's not that great, a small ledge about 12m up is comfy and avoids it. FA: Feb 2019 | 27 R | 30m | |||||
| 53 |
★★★ Killer Canary
A nice line up the crack and arête just L of Where Eagles Dare Not. Probably best to approach from above to avoid the fist pitch.
FA: S. Parsons, 1982 | 22 | 50m | |||||
| 54 | Bad Attitude | 18 | ||||||
| 55 | Days of Future Past | 20 | 50m | |||||
| 56 |
★★★ Hakea
A steep, sustained and challenging crack that varies from a small seam to hand width, including v-grooves and a short chimney. Seeps longer than most climbs in the area. Climb the wall and thin seam to a thin corner, passing the bulge with finger jams. Continue up the thin-hands v-groove to pass another bulge at half height. Continue jamming up the second v-groove (thin seam) and short chimney above, then pull around a huge overhanging flake to a stance at the Hakea tree near the top. Either ascend your fixed rope for ~8m (recommended approach), climb awkwardly past the tree, or abseil-off the tree back to the ledge where you can abseil from bushes or down climb (grade 14) back to the base of Cossack column. The crack has been thoroughly cleaned as of Jan 2023, which should keep it tidy from moss for the coming years. | 23 | 40m | |||||
| 57 |
★★ Sassanach
Starts off the Hakea ledge about 3m left of Hakea. Best accessed by rapping in (~55m). Lots of wide hands and fists, with perfect knee jams, and a couple of shrubberies. | 19 | 50m | |||||
| 58 | The Word Was Made Flesh | 20 | ||||||
| 59 |
★★★ Tartarus
The crack-line up the front of Cossack Column.
FA: Ian Lewis & Kim Carrigan, 1974 | 21 | 60m, 2 | |||||
| 60 |
★ A Step Back
The corner and offwidth left of Tartarus. 2 pitches split at the 60s hex and tat | 19 | 55m | |||||
| 61 |
★★★ Sky Rocket
The prominent crack up the front of Cossack Column. One of the best routes at the Organ Pipes.
FFA: Simon Parsons, Phil Bigg & Phil Cullen, 1982 | 20 | 60m, 2 | |||||
| 62 |
★★★ In Flagrante Delicto
Two pitch bolted arete right of Sky Rocket. Final pitch takes a few pieces of gear.
| 24 | 50m, 2 | |||||
| 63 | ★ Potem Tole | 19 | 50m | |||||
| 64 | ★★ The Shield | 20 | 2 | |||||
| 65 |
Battle Axe crack
In the recess just R of Cossack Column there is a large black chimney with a large chockstone 20m up. Scramble up 12m to the base of the chimney.
FA: M. Tillema & G. Batten, 1971 | 12 | 62m, 3 | |||||
| 66 |
Voluntary Vomit
Old school bulimia? Follows the crack and groove lines that starts on a grassy ledge in a recess just R of Cossack Column.
FA: I. Lewis & A. Hogarth, 1974 | 17 | 75m, 3 | |||||
1.1.10. Rockaway and Amphitheatre
- Summary:
-
21 routes in Crag
Arrampicata trad, Arrampicata sportiva e altri stiliLat / Long: -42.894968, 147.241394
| Route | Grade | Style | Selected ascents | |||||
|---|---|---|---|---|---|---|---|---|
Amphitheatre Ledge | ||||||||
| 2 | Afterburner | 21 | 20m | |||||
| 3 |
Early Bird
Rap in from two carrots (hangerless expansion bolts) at head of the amphitheatre. Goes on gear with one carrot. Two FHs for belay. | 25 | 30m | |||||
| 4 | Exit Entry | 7 | ||||||
| 5 | ★★ James's Arête | 25 | 15m | |||||
 |
||||||||
| Route | Grade | Style | Selected ascents | |||||
| 6 | Richard Scraper | 11 | 30m | |||||
| 7 | The Munt | 14 | 30m | |||||
| 8 |
★★★ Resurrection Shuffle
FA: Ian Lewis & Kim Carrigan, 1975 | 20 | 30m | |||||
| 9 |
★★★ Second Coming
Start up Resurrection Shuffle until you can traverse right to the finger crack. Tight finger jamming leads to the top. FA: J. Kennedy & S. Parsons, 1985 | 25 | 25m | |||||
| 10 | ★ Ethnic Cornflake | 19 | 30m | |||||
| 11 | ★★ Bella Donna | 21 | 30m | |||||
| 12 | Bob Gnarly And The Nailers | M5 | 25m | |||||
| 13 | Beast | 20 | 25m | |||||
| 14 | ★★ Galah Performance | 20 | 20m | |||||
| 15 | Reds Route | 8 | 30m | |||||
Rockaway Gully | ||||||||
| 17 | ★★★ Punk | 19 | 25m | |||||
| 18 |
★ Fall Out
The awkward face and crack facing Albert's Tomb. FA: G. Phillips | 24 | 15m | |||||
| 19 | Albert's Tomb | not graded | ||||||
| 20 |
★★★ Priapism
Climbs the arête left of Slap Dancer. Reach dependant compression moves to barn door hell. Brilliant! FA: G. Phillips & Mar 2011, 2011 | 29 | 10m, 6 | |||||
| 21 |
★★★ Slap Dancer
Some of the best moves on the pipes. The two north facing arêtes of Albert's Tomb. Tricky mantle to fridge hugging finish. FA: S. Edwards, 1997 | 27 | 10m, 5 | |||||
| 22 | ★★★ Completion Backwards Principle | 26 | 27m | |||||
| 23 |
★ The Fifth Elephant
The bolted blunt arête starting just right of Completion Backwards Principle. Wanders back and forth via. 3 distinct boulder problems. Possibly 28. FA: A. Williams, 2001 | 27 | 25m | |||||
1.1.11. Northern Buttress
- Summary:
-
44 routes in Crag
Arrampicata trad e Arrampicata sportivaLat / Long: -42.894790, 147.241728
descrizione
The first major buttress at the right hand end of the organ pipes
| Route | Grade | Style | Selected ascents | |||||
|---|---|---|---|---|---|---|---|---|
The Darkside | ||||||||
| 2 |
★★ Side Saddling Cheescake
Great series of sustained moves up the short bolted arete to DBB. | 23 | 12m, 5 | |||||
| 3 | Jackson's Apprentices | 24 | ||||||
| 4 |
★ Skyline Minor
FA: J Peterson & D Webber, 1958 | 9 | 120m | |||||
| 5 | Pelf | 18 | 12m | |||||
| 6 | ★ Pommy Slide | 20 | 15m | |||||
| 7 | Bollard Chimney | 15 | 12m | |||||
| 8 | Sorrow | 23 | ||||||
| 9 | Great Pets | 23 | 18m | |||||
| 10 |
★ Skyline Major
FA: lots | 16 | 90m | |||||
 |
||||||||
| Route | Grade | Style | Selected ascents | |||||
Lower Cliff | ||||||||
| 12 |
★★ Raspberry Jam and Crackers
Face climbing. Start: wall L of Andromeda FA: Body, Kennedy & Closs, 1972 | 18 | 25m | |||||
| 13 | ★★ Frostbite's for Wusses | 20 R | 25m | |||||
| 14 |
★ Andromeda
Old fashioned chimney right of RJ&C. FA: T Christie & G Wyatt, 1965 FFA: R Williams, 1967 | 14 | 24m | |||||
| 15 | ★★ Discipline | 20 | 32m | |||||
| 16 |
★★ All Systems Go
The wall left of the Pulpit. Climb up the crack on L of Pulpit for 3m them move L and straight up wall to small roof. Turn roof on R continue up crack to ledge then follow the hand crack to bolted belay at 32m. Originally continued up Skyline Minor but most people rap off here. Be careful rapping off on 60m rope! FA: Muhlen & B Kennedy | 18 | 32m | |||||
| 17 |
★ Reluctance
From the top of the Pulpit, continue straight up to gain finger crack. Up then left to finish at chains as for All Systems Go. FA: N Deka & J Richardson, 1980 | 20 | 36m | |||||
| 18 |
★ The Pulpit
FA: FA Unknown | 13 | 50m | |||||
| 19 |
★★ Pulpit Chimney
The obvious chimney. Most people belay on spacious ledge above the huge chockstone. | 12 | 60m, 2 | |||||
| 20 | Pulpit Crack | 20 | 60m, 2 | |||||
| 21 |
★★ Tearaway
On of best pitches of 18 on the Mountain, following the arete to the right of Pulpit Chimney.
| 18 | 55m, 2 | |||||
| 22 |
★★ Subterfuge
Start at thin crack between Pulpit Chimney and Pegasus | 20 | 55m | |||||
| 23 |
★★ Conflict In The Cabal
Spicy. Start as per Subterfuge, but continue directly up the face without straying into Pegasus or the arete on the left. | 20 | 50m | |||||
| 24 |
★★ Pegasus
A quality route on steep, clean rock (original 2 pitches). Start 4m to the R of Pulpit Chimney at a squeeze chimney with two chockstones. Follow the chimney directly and climb to the top of the huge detached flake, (Belay possible) Climb the short crack to a ledge (possible to traverse L to join Skyline Minor (11)) continue directly up the steep crack to belay just short of the Buttress Pinnacle. | 14 | 48m | |||||
| 25 | ★ Xanthos | 19 | 48m | |||||
| 26 |
★★★ Centaur
Thin crack through hand sizes and off width near top. Wires useful in first half. Belay and Abseil Point 45m from ground. FA: R Cross & Lawson, 1965 FA: Ewbanks & Kennedy, 1968 | 17 | 48m | |||||
| 27 | ★ Adventure before Dementia | 19 | 18m | |||||
| 28 |
★★ Sideshow
Short finger crack on the left wall of the Chasm, climbs up to DBB FA: D.Fife, A.Adams & Phil Steane | 18 | 12m | |||||
| 29 | ★★★ Crasm Chack | 20 | 30m | |||||
| 30 | ★ The Chasm | 11 | 48m | |||||
| 31 |
★★★ Mira Mira
The line of bolts on the R side of the chasm. Brilliant steep bouldery moves lead to easier arete climbing before joining Vanity. All bolts apart from an optional 0.3 cam on the face traverse of Vanity at mid height. FA: N. Perndt, 2013 | 28 | 35m | |||||
| 32 | The Labyrinth | 9 | 56m, 6 | |||||
| 33 | Project 1 - Simon Young | |||||||
 |
||||||||
| Route | Grade | Style | Selected ascents | |||||
| 34 |
★★ Vanity
Starting on the right side of the chasm, follow seams (wires) to bolts on face. Traverse right into (somewhat concerning) undercling flake after clipping the 3rd bolt, then blast up the right arete past 3 more bolts to the top. | 25 | 35m, 6 | |||||
| 35 | ★ Excellence | 22 | 35m | |||||
| 36 | Little Chasm Buttress | 10 | 22m | |||||
| 37 | ★★ Boys Games | 22 | 30m, 9 | |||||
| 38 |
★ Game On
Intricate route finding up the next pillar right of Boy's Games to DBB (shared with Climbing Edge Memorial Climb). A difficult onsight. | 21 | 28m, 10 | |||||
| 39 |
★ Pension Day
FA: S. Scott & T. McKenny, Feb 2016 | 20 | 20m, 9 | |||||
| 40 | Plomat | 16 | 40m | |||||
| 41 |
★ Climbing Edge Memorial Climb
Mixed Route | 22 | 36m, 2 | |||||
| 42 |
★★ Osteomen
The arête right of CEMC. The first section can be climbed on either side of the arête, leading to a good rest before the steep finish. The crux is passing the last bolt. FA: D. Stephenson, S. Scott & T. McKenny, Mag 2018 | 23 | 20m, 10 | |||||
Climbs from the Notch | ||||||||
| 44 | ★★ Sentinel Ridge | 14 | 70m | |||||
| 45 |
★★ Yugi Crack
Climb the super thin crack, passing a small overlap at the bottom. No loweroffs so take a biner for the last bolt if there's not one already there. | 26 | 18m | |||||
Upper Cliff | ||||||||
| 47 | ★★★ Cascade Crack | 25 | 27m | |||||
| 48 | Kakapo Corner | 21 | ||||||
1.1.12. Far North
- Summary:
-
16 routes in Area
Per lo più Arrampicata tradLat / Long: -42.894472, 147.241725
descrizione
An isolated 40 ft. tower to the north of the 'Northern Buttress'. A faint trail heads right from near the Chasm and runs around the 'Lost World' and uphill to the "Knob". There are 2 or 3 ways to the top. Descent by abseil.
First climbed Sept. '61.
| Route | Grade | Style | Selected ascents | |||||
|---|---|---|---|---|---|---|---|---|
Toy Town | ||||||||
| 2 | ★ War toy | 21 | 10m | |||||
| 3 | Childs play | 20 | 10m | |||||
| 4 | ★★ Nancy boys | 21 | 10m | |||||
| 5 | Boys toy | 20 | 8m | |||||
| 6 | ★★ Virgin Boys | 18 | 11m | |||||
Johnston's Knob Area | ||||||||
| 8 | ★ Shelter from the Storm | 17 | 20m | |||||
| 9 | ★ Pipedream | 16 | 15m | |||||
| 10 |
★ Sergeant Slaughter
Great climb on a large block with ringbolts visible from Johnstone's Knob. 4 BRs plus rap station. G. Phillips, Oct. 1995. | 21 | 12m, 4 | |||||
| 11 |
★★ Great Red Pointer
Great sport climbing on the Hobart side of Johnstones Knob involving both aretes and passing a knife blade to a ledge with rap anchor. Protected by 3 carrots. | 19 | 12m, 3 | |||||
| 12 |
Johnstone's Knob
The prominent 12m spire that casts a spell on climbers and entices them over. There are several ways to the top. Rap station. Unknown, Sept. 1961. | 12 | 12m | |||||
DNA Land | ||||||||
| 14 | Pancakes | 12 | 8m | |||||
| 15 | Simple Minds | 8 | 8m | |||||
| 16 | Rheumatism | 17 | 10m | |||||
| 17 | ★★ Gear Freak | 16 | 10m | |||||
| 18 | ★★ D.N.A. | 16 | 10m | |||||
| 19 | Adolescent Drifters | 14 | 15m | |||||
1.2. Lost World Area
- Summary:
-
Arrampicata trad, Bouldering e Arrampicata sportiva
Lat / Long: -42.883701, 147.222445
1.2.1. Lost World
- Summary:
-
55 routes in Crag
Per lo più Arrampicata tradLat / Long: -42.883709, 147.225145
sommario
Shorter dolerite columns 15m to 30m high, known for steep and relentless climbing.
descrizione
The Lost World is located close to the big bend on Pinnacle Road.
It's more sheltered than the pipes and can get quite hot on a sunny day.
avvicinamento
Park on the big bend on Pinnacle Road.
Access by crossing the road and the small creek and follow a muddy track slightly uphill for about 50m. Look for a less used track to your right, often marked with a cairn. Follow this track through trees for about 5min down to a boulder field and the top of the cliff.
20m directly opposite where you emerge from the trees is the ledge above Savage Journey, easily identified by a nice gum tree.
There is a bolted rap station here, just above Lactos, at the end of the ledge.
A 5min walk around the northern end of the crag will get you back to the top.
| Route | Grade | Style | Selected ascents | |||||
|---|---|---|---|---|---|---|---|---|
| 1 |
★★ The Rabbit Hole
Nestled in a hole within the southern end of the Lost World boulder field is an overhanging boulder split by a finger crack. Begin at the beginning. The best way to explain it is to do it. FA: t.fulton, Ago 2022 FFA: s. bischoff, Nov 2022 | 6m | ||||||
 |
||||||||
| Route | Grade | Style | Selected ascents | |||||
| 2 | ★ Good Behaviour | 18 | ||||||
| 3 | ★★ Electric Chair | 19 | 20m | |||||
| 4 | Incredible Journey | 17 | 10m | |||||
| 5 | ★ CC's | 22 | 20m | |||||
| 6 | Tacho | 20 | 20m | |||||
 |
||||||||
| Route | Grade | Style | Selected ascents | |||||
| 7 | Black Cherry | 20 | 25m | |||||
| 8 |
★★ Face It
Climb the crack past two blocky ledges to just below the base of a small vee groove near the top. Hand traverse left and finish up a short crack. FA: M. Law, G. Child & S. Parsons, 1978 | 20 | 25m | |||||
| 9 |
★★ Face It (Direct)
Up Face It to traverse. plug in a couple of hand size cams in break and continue up weird shallow groove. FA: Alex Hartshorne, Gen 2019 | 22 | ||||||
| 10 | Quarryman | 18 | 25m | |||||
| 11 |
★★ Play Dirty
The lightly vegetated, thin flared crack 3m right of the vegetated corner of Quarryman. Climb the crack and the shallow corner above. A #4 Camalot make the top out more palpable. FA: G. Child & K. Carrigan, 1978 | 23 | ||||||
| 12 | ★★ Metal Mania | 25 | 16m | |||||
| 13 | ★ Glam | 19 | 15m | |||||
| 14 |
The Space Of Disse
Thin crack finishing at one (rusty) bolt. | 22 | 10m | |||||
| 15 |
★★★ Atlantis
hand, fist, finger crack Start: L of Savage Journey is a dirty corner chimney and L of this is a fine looking north facing crack. FA: Joe Friend | 21 | 25m | |||||
| 16 | ★ Proteus | 20 | 28m | |||||
| 17 | ★★ Hejira | 23 | 30m | |||||
| 18 |
★★★ Savage Journey
FA: Henry Barber | 22 | 30m | |||||
| 19 |
★★ Cruise Air
FA: P. Bigg & S. Parsons | 22 | 30m | |||||
 |
||||||||
| Route | Grade | Style | Selected ascents | |||||
| 20 |
★★ Cheshire Cat
The obvious arête right of Cruise Air and left of Lactos. Many holds have broken, originally 29, possibly now in the region of grim 30/31. FA: K. Robinson & Jan 2004., 2004 | 25m | ||||||
| 21 | ★ Lactos | 21 | 20m | |||||
| 22 |
★ Hoot
Brilliant fun little chimney - stay near the entrance. First ok nut placement is 12m up, so top-roping is recommended | 12 | 22m | |||||
| 23 |
Garry Phillips Project
Contrived but cool climbing with an as-yet impossible topout. | 22m | ||||||
| 24 | ★ Carhookia | 26 | 20m | |||||
| 25 |
★ Heavenly Headjob
FA: Phil Steane | 18 | 20m | |||||
| 26 |
★ Stone the Crows
FA: Lyle Closs & Ian Lewis | 17 | 25m | |||||
 |
||||||||
| Route | Grade | Style | Selected ascents | |||||
| 27 |
★ Cloaca
not sure how this has been listed as 8 meters? unless you want to bring some tat and do a sketchy rap at halfway Climb offwidth for 8 meters, step left up slabby boulder into hand crack, medium cams for anchor, scramble off down the gully to the right. FA: D. Gray | 15 | 20m | |||||
| 28 |
Drayton
Stem and jamb the thin corner left of Back on the boarderline FA: David Gray & Danny Rossen, 1992 | 21 | 20m | |||||
| 29 |
★ Back on the borderline
Up wall past 2 bolts, into thin had crack FA: David Gray & Alison Hall, 1990 | 20 | 20m, 2 | |||||
| 30 |
★ Time Lapse
The offwidth/ squeeze chimney between BOB and NF. A no 5 big bro and a #9 cam help. FA: David Gray & Vanessa Wills, 2017 | 20 | 20m | |||||
| 31 | Naked Flame | 23 | 18m | |||||
| 32 | Commoner's Crown | 17 | 25m | |||||
| 33 |
★★ Cries and Whispers
hand crack Start: The front of the buttress to the R of the central gully FA: K. Lindorff & K. McConnell | 19 | 25m | |||||
| 34 |
★★ Raiders Of The Lost World
"Devoid of any natural gear" | 16 | 25m | |||||
| 35 |
Minstrel In The Gallery
15m right of the central gully, twin cracks with an overhang halfway up the cliff. Jam the cleaner righthand crack (though it is still often slippery). | 19 | 15m | |||||
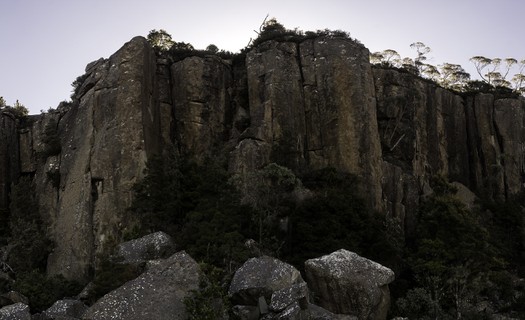 |
||||||||
| Route | Grade | Style | Selected ascents | |||||
| 36 | ★ Blood On The Racks | 21 | 20m | |||||
| 37 | Technicolour Zawn | 12 | ||||||
| 38 |
★★ Lost Wanderer
Climb short crack on L, traverse R and then into main crack Start: Wall with two horizontal breaks about 50m R of the central gully. FA: I. Lewis & K. Carrigan, 1974 | 18 | 25m | |||||
| 39 |
★★ Lost Wanderer Direct Start
first placement is about 6 meters up. not for the feint of heart. beware the semi-loose microwave-sized blocks high up in the crack. FA: Lyle Closs, 1975 | 20 R | 25m | |||||
| 40 |
★★ Gargamell
Bolted arête right of Lost Wanderer. Sustained and powerful. FA: Al Williams, 2004 | 28 | 25m | |||||
| 41 | Hurricane | 14 | 27m | |||||
| 42 |
★★ Hufflepuff
The cleaned, well-protected crack just right of Hurricane. Desperate, sustained and technical flared finger/hand jamming leads to sustained bridging and jamming to the top from about halfway. Crux at the first bulge around 8m. A good test-piece before tackling Albatross at Lowdina. FA: Christoph Speer & Martin Brown, Feb 2023 | 23 | 20m | |||||
| 43 | ★ Great Southern Land | 21 | 20m | |||||
 |
||||||||
| Route | Grade | Style | Selected ascents | |||||
| 44 |
★★ Endorphine
The bolted arête to the left of Dyazide and right of Great Southern Land, starting from the ledge at half height. FA: K. Robinson & Jan 2004., 2004 | 26 | 20m, 6 | |||||
| 45 |
★★ Opioid
Short finger and laback crack below Endorphin. A couple of bouldery moves, small/medium wire protects the middle. Ends on ledge, or link into Endorphin! Possibly 24 if your tall with small fingers. FA: Alex Hartshorne, 13 Dic 2017 | 25 | 14m | |||||
| 46 | ★ Dyazide | 17 | 12m | |||||
| 47 |
★★ Don't Eat Yellow Snow
Absorbing climbing. An old aid line that was freed in fine style. The second crack left of Adolf. The thin crack up the striped wall. Climb the crack with increasing difficulty. Small cams required. FFA: M.Jackson, 1995 | 25 | 15m | |||||
| 48 | Peaches En Regalia | 20 | 15m | |||||
| 49 | ★★ Adolf Builds A Bonfire | 18 | 15m | |||||
| 50 | ★ Opportunity | 20 | 15m | |||||
| 51 |
★★★ Rosy Pink Cadillac
The original free version. Starts up the off-width on the left before stepping right into the finger crack. Finishes around on the left at the end in an easy corner. FFA: Mike Law, 1978 | 23 | 20m | |||||
| 52 |
★★★ Rose Pink Cadillac Direct
The way to do it. Climb via both the Direct Start (25) past 2 bolts, and the Direct Finish (25) past another bolt. DRB. | 25 | 20m, 3 | |||||
| 53 |
Closed Project
Closed Project Line of bolts right of Rosy Pink Cadillac James scarborough | 20m | ||||||
| 54 |
★ Paladin
FA: P. Morris & P. Cullen | 17 | 16m | |||||
| 55 |
★★ Agent Orange Sunset
Unique and weird. Do it for the entertainment value. Tackles the prominent diagonal left leaning flake at the right end of the cliff. Struggle up the off-width chimney 3m left of Paladin until you can traverse out left at the flake. Move up the flake to a roof, swing left around the arête and finish up an easy chimney. FA: Phil Steane & Nov 1982., 1982 | 19 | 18m | |||||
1.2.2. New World
- Summary:
-
14 routes in Crag
Per lo più Arrampicata tradLat / Long: -42.882261, 147.226129
| Route | Grade | Style | Selected ascents | |||
|---|---|---|---|---|---|---|
| 1 |
★★★ Stigmata
The small little roof crack on the yellow dot path to new world. Perfect hand crack with crux pulling the lip. | 22 | 5m | |||
| 2 | ★ Cranky Girl | 24 | 10m, 3 | |||
| 3 | ★ Dvorak Goes Mental | 20 | 3 | |||
| 4 | ★ Friends With Cameras for Eyes | 16 | 15m | |||
| 5 | Catcher in the Rye | 15 | 16m | |||
| 6 | ★ Quintessence of Clarity | 20 | 15m, 2 | |||
| 7 | ★ Pinkinsane | 16 | 16m | |||
| 8 | ★ Would Jesus Play Guitar in a Thrash Metal Band | 24 | 15m, 2 | |||
| 9 | ★★ Procol Harum | 15 | 16m | |||
| 10 | ★★ Toxastoma Par Excellence | 23 | 15m, 4 | |||
| 11 | ★ Tales Of Power | 17 | 16m | |||
| 12 | ★ Semi Detached Reality | 17 | 16m | |||
| 13 | Parkynsane | 20 | 20m | |||
| 14 | Barbwire Canoe | 6 | 16m | |||
1.2.3. Test World
- Summary:
-
1 route in Area
Tutti Arrampicata tradLat / Long: -42.884984, 147.225416
| Route | Grade | Style | Selected ascents | |||
|---|---|---|---|---|---|---|
| 1 | Six Months In A Leaky Test Tube | 17 | ||||
1.2.4. Micro World
- Summary:
-
13 routes in Area
Arrampicata trad e Arrampicata sportiva
| Route | Grade | Style | Selected ascents | |||
|---|---|---|---|---|---|---|
| 1 | ★ Smear Like a Madman | 20 | 8m, 3 | |||
| 2 | ★ Georgie's Climb | 21 | 8m | |||
| 3 | Dirty Dog | 14 | 10m | |||
| 4 | ★ Little Ripper | 21 | 8m, 3 | |||
| 5 | Rough as Guts | 20 | 8m, 1 | |||
| 6 | ★ Hawk Eye | 20 | 8m, 5 | |||
| 7 | ★★ Dying Breed | 26 | 12m, 3 | |||
| 8 | ★ Flood Control | 17 | 10m | |||
| 9 | Lost and Found | 14 | 10m | |||
| 10 | ★ Collar Cool | 22 | 8m, 3 | |||
| 11 | I'd Rather Be Eating a Super Schnitzel | 15 | 6m | |||
| 12 | Short Climb 2 | 21 | 6m, 1 | |||
| 13 | Expectorant | 18 | 6m, 2 | |||
1.2.5. Big Bend Boulders
- Summary:
-
Lat / Long: -42.884202, 147.221843
1.2.5.1. Lost World Boulders
- Summary:
-
16 routes in Area
Lat / Long: -42.883658, 147.225561
sommario
Steep dolerite boulders along the approach to and in the Lost World ampitheatre
avvicinamento
From the climbers car park, keep heading up pinnacle road past 'The Chalet' until you reach the parking spaces at the 'Big Bend.' All these areas are off numerous rough tracks leading to the main cliff.
1.2.5.2. Lost block
- Summary:
-
3 routes in Boulder
Lat / Long: -42.884069, 147.221475
descrizione
A very nice looking overhanging block with two striking aretes.
avvicinamento
Follow lost world trail across the stream. ~30m after the stream cut off left across the talus.
1.2.5.3. Western Front
- Summary:
-
34 routes in Area
Lat / Long: -42.883853, 147.218351
sommario
All information taken from thesarvo.
There is another group of boulders on the far side of the hill with some fun moderate problems.
avvicinamento
To get there walk up the gravel fire trail from the big bend about two or three hundred metres, to just before the road reaches its highest. There should now be a relatively open area on your right. The boulders can seen up the hill to the right about 80 metres from the road (the boulders that can be seen are the ones around and above The Somme). A small cairn marks the start of a vague track that heads via the boulders to a hut. A good reference point is the highest boulder on the hill, which is the top of Shell Shock (see Shell Shock for GPS data).
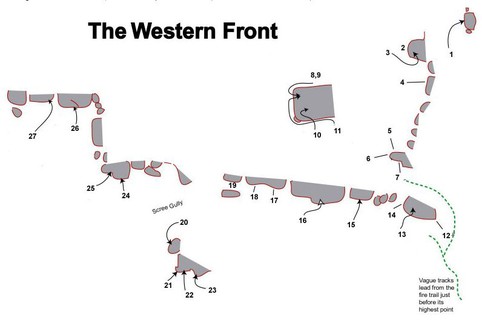 |
1.3. Summit Boulders
- Summary:
-
Tutti Bouldering
Lat / Long: -42.902072, 147.237213
1.3.1. Fence area
- Summary:
-
56 routes in Area
Lat / Long: -42.896846, 147.238333
sommario
This covers the boulders between Stella's arete and the fencing for the pinnacle tower.
avvicinamento
Walk to the gate of the pinnacle tower. Turn left, walk past the 'climbers only' sign and follow the fence around to the first of the boulders.
etica
Please avoid damaging the alpine plants. Clean tick marks. Pick up your rubbish.
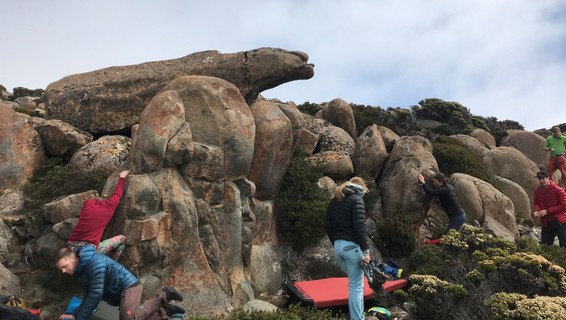 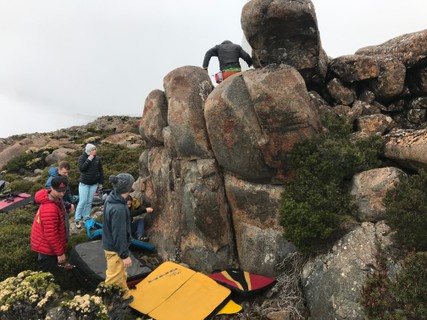 |
||||||||
| Route | Grade | Style | Selected ascents | |||||
|---|---|---|---|---|---|---|---|---|
Fence bouldersThere are a couple of groups of small pinnacles in the vicinity of the mesh fence along side of the broadcast centre. The simplest method is to reach these boulders is to walk down the fence. If heading from Stella's arete area head towards the broadcast centre under the tower. | ||||||||
| 2 |
VE
Sit start FA: Roxy, 10 Feb 2019 | VB | 3m | |||||
| 3 |
V0
Sit start FA: Mike Hitchcock, 10 Feb 2019 | V0 | 3m | |||||
| 4 |
V0a
Sit start FA: Tommy Krauss, 10 Feb 2019 | V0 | 3m | |||||
| 5 |
★★ V1
Sit start, up the crack FA: Chris L, 10 Feb 2019 | V1 | 3m | |||||
| 6 |
V5
Sit start. FA: Tommy Krauss | V5 | 3m | |||||
| 7 |
★ Death from above
An enjoyable mix of low-ball and high-ball climbing. Start under and pull around the diving platform. FA: Chris L, 10 Feb 2019 | V2 | 4m | |||||
| 8 |
V2
FA: Mike Hitchcock, 10 Feb 2019 | V2 | 3m | |||||
   |
||||||||
| Route | Grade | Style | Selected ascents | |||||
|
The next three boulders are 10m directly downhill from the Fence Boulders | ||||||||
| 10 |
V4 x
Entertaining climb; avoid using neighboring boulders. FA: Mike Hitchcock, 10 Feb 2019 | V4 | 3m | |||||
| 11 |
★ Campus
Sit start on jugs to top out FA: Mike Hitchcock, 10 Feb 2019 | V3 | 3m | |||||
| 12 |
V0 x
Sit start FA: Chris L, 10 Feb 2019 | V0 | 3m | |||||
| 13 |
v1 x
Sit start FA: Chris L, 10 Feb 2019 | V1 | 4m | |||||
| 14 |
V0 left
FA: Mackenzie Lovell, 10 Feb 2019 | V0 | 4m | |||||
| 15 |
Details unknown 2
FA: 10 Feb 2019 | 4m | ||||||
| 16 |
Right Arete
FA: Mackenzie Lovell, 10 Feb 2019 | VB | 4m | |||||
 |
||||||||
| Route | Grade | Style | Selected ascents | |||||
Fatman BouldersTraverse to these by heading 10m north from the Fence boulders (towards Stella's Arete and the lookout). | ||||||||
| 18 |
★★★ Raiders of the lost Compost
Elevated overhanging pillar to the left (south) of Fatman. FA: Mike Hitchcock | V1 | 4m | |||||
| 19 |
★★★ Fatman
Sit start on flake in middle of block, move left and up to mantle via left arete and right sidepull above flake. Surprisingly good problem! Don't use holds to the right of left block. FA: Tommy Krauss, 2014 | V6 | 3m | |||||
| 20 |
★ Fatman and Robin
Sit start on flake as for Fatman but move straight up. Don't back of block on right and mantle via Fatman block FA: Tommy Krauss, 2014 | V3 | 3m | |||||
| 21 |
★ Robin
Hang start one move into F&R, use arete on back right to move up, mantle top. FA: Michelle Young, 2017 | V2 | 4m | |||||
| 22 |
V3
Sit start FA: Tommy Krauss, 2019 | V3 | 4m | |||||
| 23 |
V1 b
Sit start FA: Chris L & Mackenzie, 10 Feb 2019 | V1 | 4m | |||||
| 24 |
★ V3 a
Sit/hang start on good crimp FA: Tommy Krauss, 10 Feb 2019 | V3 | 3m | |||||
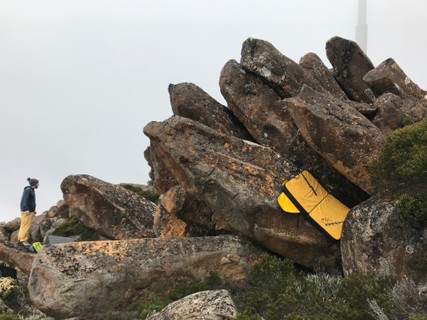 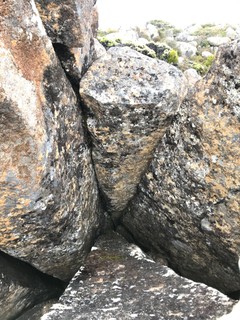 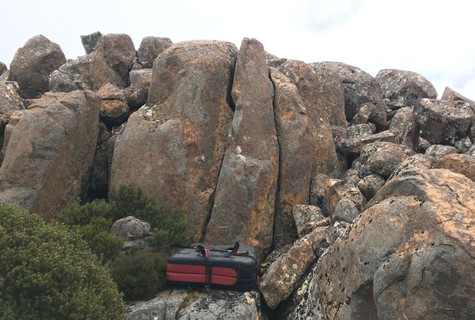 |
||||||||
| Route | Grade | Style | Selected ascents | |||||
| 25 |
V4
Sit start. Traverse along the edge. FA: Tommy Krauss | V4 | 4m | |||||
| 26 |
V1 c
Sit start FA: Chris L, 10 Feb 2019 | V1 | 3m | |||||
| 27 |
★ Easy overhanging finger crack
Sit start. Climb the over-hanging finger crack to mantle out. FA: Chris L, 10 Feb 2019 | V1 | 3m | |||||
| 28 |
V2 a
Start on the bottom of the diving platform, climb out and around. FA: Chris L, 10 Feb 2019 | V2 | 3m | |||||
| 29 |
V0 a
FA: Alex Lawson, 10 Feb 2019 | V0 | 3m | |||||
| 30 |
V1 e
Sit start, up the fist crack. FA: Chris L, 10 Feb 2019 | V1 | 3m | |||||
| 31 |
VE b
Sit start, up the face between the cracks. FA: Chris L, 10 Feb 2019 | VB | 3m | |||||
| 32 |
V1 f
Sit start, up the finger/hand crack. FA: Chris L, 10 Feb 2019 | V1 | ||||||
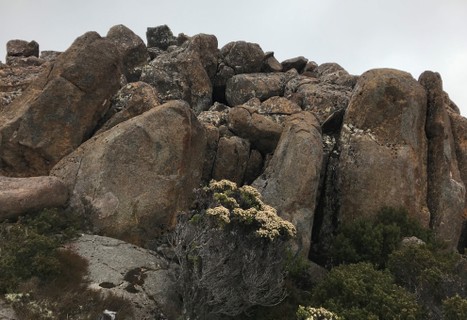  |
||||||||
| Route | Grade | Style | Selected ascents | |||||
| 33 |
★ V1 g
Sit start, layback and heel hook the flake. FA: Chris L, 10 Feb 2019 | V1 | 3m | |||||
| 34 |
VE c
Sit start up the crack. FA: Alex Lawson, 10 Feb 2019 | VB | 4m | |||||
| 35 |
V2/3
Sit start. Work up and around the diving platform. FA: Mike Hitchcock, 10 Feb 2019 | V2/3 | 3m | |||||
| 36 |
Project
Up the overhanging fingercrack to mantle. Hard - >V5 FA: 10 Feb 2019 | |||||||
| 37 |
V1 h
Sit start. Work up and around the diving platform. FA: Chris L, 10 Feb 2019 | V1 | 3m | |||||
 |
||||||||
| Route | Grade | Style | Selected ascents | |||||
Sugarlumps areaJust down from ute mat boulder. | ||||||||
| 39 |
★★★ Sugarlumps
This problem is as exposed as it looks. Well, you won't fall to Hobart, but there is a several meter drop onto some ugly rocks. FA: J. Trainer, 2010 | V8 | ||||||
| 40 |
★ Flexibility
From obvious sit/hang start on flake, tricky mantle to slab FA: Fraser, Mag 2019 | V2 | 3m | |||||
| 41 |
open proj v7+
very shouldery moves up proud overhanging arete, to tricky mantle. same starting flake as flexibility | 4m | ||||||
| 42 |
★★ V6
"Either a two star v6 or a one star v7." Sit start, up the face on unlikely looking holds which all seem to face the wrong direction. FA: Tommy Krauss, 10 Feb 2019 | V6/7 | 5m | |||||
| 43 |
Push the bush
Shares start with V6 but goes right. Some footholds are hidden by the bushes at the base. FA: Mackenzie Lovell, 10 Feb 2019 | V2 | 3m | |||||
| 44 |
V5 a
Sit start, up the face from low left hand side pull and foot very low on small chip. FA: Tommy Krauss, 10 Feb 2019 | V3 | 4m | |||||
| 45 |
V1 i
Sit start, up the left edge. FA: Mike Hitchcock, 10 Feb 2019 | V1 | 4m | |||||
 |
||||||||
| Route | Grade | Style | Selected ascents | |||||
| 46 |
Project a
Sit start, up the right edge. FA: 10 Feb 2019 | |||||||
| 47 |
VE d
Sit start, up the left edge. FA: Tommy Krauss, 10 Feb 2019 | VB | 4m | |||||
| 48 |
V0 b
Sit start, up the right edge. FA: Chris L, 10 Feb 2019 | V0 | 4m | |||||
| 49 |
The chode
Sit start kind of, from a bush. Up the underside and around the chode. FA: Chris L, 10 Feb 2019 | V1 | ||||||
| 50 |
VE e
Hand crack maybe? Couldn't read my notes. FA: Mike Hitchcock, 10 Feb 2019 | VB | 3m | |||||
  |
||||||||
| Route | Grade | Style | Selected ascents | |||||
Cradle RocksThe line of cliffs in a lightly bushy gully, just north of Ute Mat boulder. | ||||||||
| 52 |
Double mantle
Double mantle FA: Mike Hitchcock, 10 Feb 2019 | VB | 4m | |||||
| 53 |
VE f
FA: Tommy Krauss, 10 Feb 2019 | VB | 4m | |||||
| 54 |
VE g
FA: Mike Hitchcock | VB | 3m | |||||
| 55 |
Slab
"V3 but V2 with a better brush." FA: Tommy Krauss, 10 Feb 2019 | V2 | 3m | |||||
| 56 |
★ V1 j
FA: Alex Lawson, 10 Feb 2019 | V1 | 4m | |||||
| 57 |
VE h
FA: Mike Hitchcock, 10 Feb 2019 | VB | 4m | |||||
| 58 |
V1 k
FA: Mike Hitchcock, 10 Feb 2019 | V1 | 4m | |||||
| 59 |
VE i
FA: Chris L, 10 Feb 2019 | VB | 4m | |||||
| 60 |
Crack with bush
FA: Chris L, 10 Feb 2019 | V0 | 4m | |||||
| 61 |
VE j
FA: Mike Hitchcock, 10 Feb 2019 | VB | 3m | |||||
1.3.2. Snowflakes Area
- Summary:
-
12 routes in Area
descrizione
Another small group further down and to the south of Stella's Arete.
 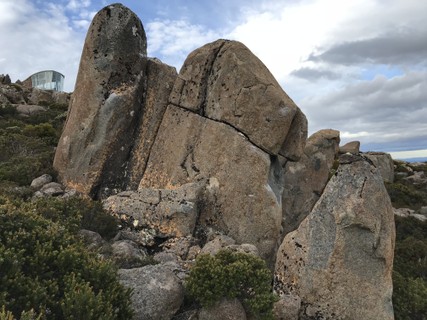 |
||||||||
| Route | Grade | Style | Selected ascents | |||||
|---|---|---|---|---|---|---|---|---|
| 1 |
Snowflakes
Stand start with left hand on good crimp, right hand on lowest part of sloper rail. Punch straight up and mantle over left hand arete of boulder. FA: Tommy Krauss, 2017 | V3 | 3m | |||||
| 2 |
★ Pancakes
Start as for Snowflakes but traverse the big undercling roof feature to the right and mantle the centre of the top slab. FA: Tommy Krauss, 2017 | V4 | 3m | |||||
| 3 |
★ Kaiserschmarrn
Start on middle of big sloper, punch straight up into roof and top out as for Pancakes FA: Mike Hitchcock | V7 | 7m | |||||
| 4 |
★ Firing Line
Start on big detached boulder and climb wide crack feature to the right of Pancakes. | V0 | ||||||
| 5 |
★★★ Hamburger Pie
Start left hand on low sidepull, right hand on the nice crimp rail. Then climb to the top keeping to the line of the arete. FA: David Tan, 15 Feb 2019 | V5 | 3m | |||||
| 6 |
★★ Muffled Optimist
Sit start as low under overhanging pillar as possible, feet on large slopey feature, slap your way to the top, mantle nose lip FA: Tommy Krauss, 2017 | V3 | 2m | |||||
| 7 |
★ Optimistic Nihilism
Climbs the rail on the right of the Muffled Optimist boulder, tops out right of the prow. FA: Mackenzie Lovell, 24 Feb 2019 | V3 | 2m | |||||
| 8 |
Optimist Project
Big pillar, similar in style and difficulty to Western Fronts Time Flies. Stand start slap your way to the top. Grade unknown. | |||||||
| 9 |
Pessimistic Optimist
FA: Raul Schwarz, 2019 | V5 | 4m | |||||
| 10 |
Hot Chocolate
Hands free walk up the summit side of the boulder. For best possible style, no knee/rock contact. FA: Kim Walls, 15 Feb 2019 | V1 | 3m | |||||
| 11 |
★ Freefall Forewarned
Classic for the grade. Stand start on good feet, reaching left to break, right around to slopers. Straight up and mantle via good holds up high. FA: Tommy Krauss, 2017 | V1 | 3m | |||||
| 12 |
★★ Freefall Anyway
Stand start on left hand sloper, big moves up right, then straight up for top. FA: Tommy Krauss, 2017 | V4 | 3m | |||||
1.3.3. Lookout Boulders
- Summary:
-
16 routes in Area
Lat / Long: -42.895873, 147.238780
descrizione
Various groups of boulders located on the slopes downhill of the main lookout building.
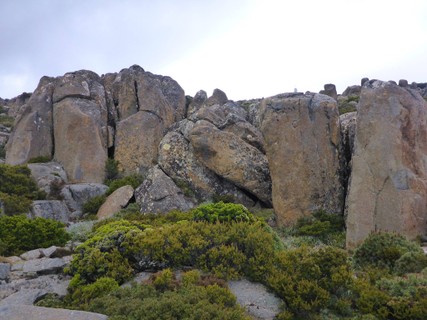 |
||||||||
| Route | Grade | Style | Selected ascents | |||||
|---|---|---|---|---|---|---|---|---|
Stella's Arete AreaThis is the main group of boulders and is ~50 metres south of the lookout, and 30-40m south of the track. Stella's Arete is a landmark, and a bunch of the other boulders are described from here. | ||||||||
| 2 | VE | VB | 5m | |||||
| 3 | VE 2 | VB | 5m | |||||
| 4 | ★★ V3 | V3 | 4m | |||||
| 5 |
This Big
Arm spanning slab & blocks at top. | V3 | ||||||
| 6 |
Wobbles
Around R of 'This Big.' Slab into hand crack. Be careful - as the left block moves!! | V0 | ||||||
| 7 |
★ Get Up
SDS - Up prow of slanting block. | V2 | ||||||
| 8 |
★ The Primis
Sit start on the jug, move along to and over the tip | V5 | 4m | |||||
| 9 |
★★★ Squirm til it's firm
Peer under the start jug for the primus. See the dank hole? Breathe out, squeeze in, harden up. FA: Rye Stallard, 19 Gen 2019 | 4m | ||||||
| 10 |
Grovel
From the Primis jug up | V3 | 4m | |||||
| 11 |
★★★ Stella's Arete
Steep arete | V4 | 4m | |||||
| 12 | Proj | 5m | ||||||
| 13 |
★★ Nice Job
L facing arete on boulder just R of Stella's Arete. | V1 | 5m | |||||
| 14 |
★ Nice Face
Climb the easy face of the final R boulder. | V0 | ||||||
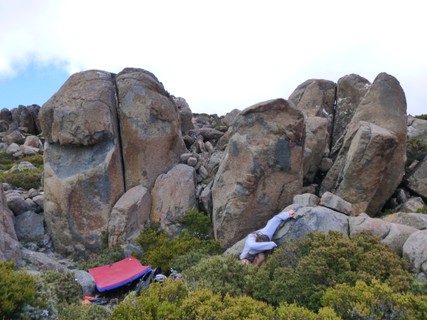 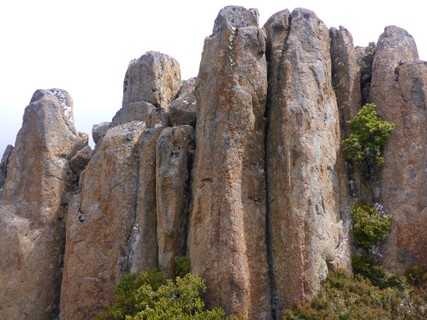 |
||||||||
| Route | Grade | Style | Selected ascents | |||||
| 15 |
★ Firing Line
Down & slightly right from Stella's Arete area. Fist crack which widens at the top. | V0 | ||||||
| 16 | VE 3 | VB | 5m | |||||
| 17 |
★★ Postcards
Located directly in front of the glass shelter - opposite the open air boarded lookout. Climb the hand crack. | V0 | ||||||
1.3.4. Dildo blocks
- Summary:
-
7 routes in Field
Lat / Long: -42.894427, 147.237300
descrizione
A collection of short boulders north of the lookout.
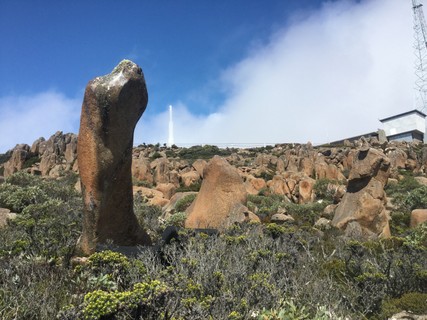 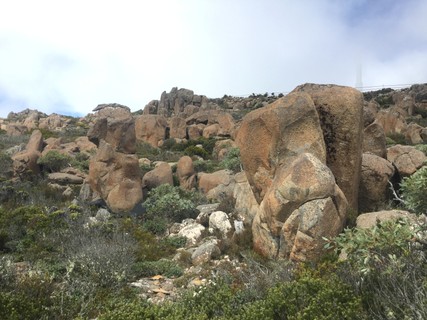 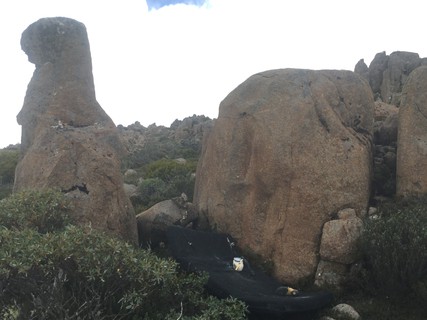 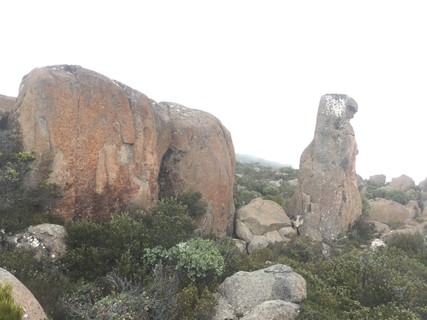 |
||||||||
| Route | Grade | Style | Selected ascents | |||||
|---|---|---|---|---|---|---|---|---|
| 1 |
★★★ The Dildo
Up the 45 degree overhung side of the obvious dildo. | V5 | 4m | |||||
| 2 |
★ The Dalek
Hard sit start into easier moves. | V4 | 3m | |||||
| 3 |
★ V1 Pinnacle
Sit start in the rock scar. | V1 | 4m | |||||
| 4 |
★ Davros
Stand start the slopers and face. | V2 | 4m | |||||
| 5 |
V1 Face
Sit start the face 4m left of Davros. Originally done as a stand start. | V1 | 3m | |||||
| 6 |
V1
Sit start the face on the boulder to the left of Davros boulder. | V1 | 3m | |||||
| 7 |
★★ Demented Dalek
Climb the broken pinnacle from a stand start. All sides are as easy as each other. | VB- | 4m | |||||
1.3.5. Asylum Years Area
- Summary:
-
9 routes in Area
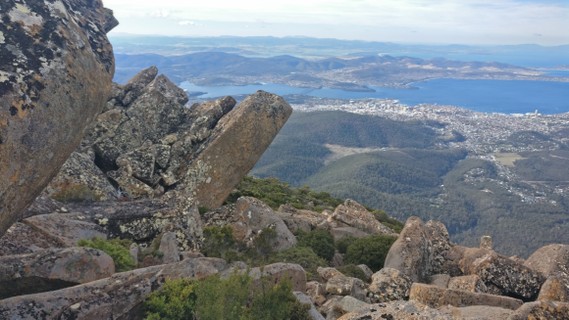 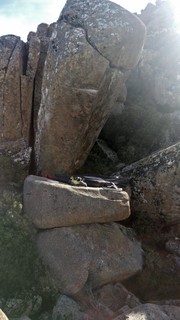 |
||||||||
| Route | Grade | Style | Selected ascents | |||||
|---|---|---|---|---|---|---|---|---|
| 1 |
★★★ The Asylum Years project
The Asylum Years Project Rumoured to be Tassies hardest project. Tried by J. Trainer back in the day Good landing for first couple of moves, the higher up the spicier it gets. https://flic.kr/p/a3egtU | |||||||
| 2 |
★★★ Le Petit Pillier
This block is located just up the hill from Asylum Years. Compression moves to big sloper to top straight up. | V4 | 5m | |||||
| 3 |
★★ Le Grand Pillier
Sit start the right hand arete of the pillar, hard moves off ground follow arete to mantle top. | V11 | ||||||
| 4 |
★★ This High To RIde
Behind pelier boulder. SDS on the chockstone on the right. Using both aretes sidepull and toehook your way up to a climatic finish. Worth bringing an extra pad to stuff in the hole. Grade is very height dependant. FA: Fraser, Ott 2021 | V6 | 3m | |||||
| 5 |
★★ Le Grande Pincèe
5 metres to the right of Le Petit Pillier is a very nice compression line. Sit start with a hand on each arete and a good left foot, strenuous from there. Stay away from the ominous hole on the left and top out straight via slightly sketchy but fun mantle directly up the lower face. | V6 | 4m | |||||
| 6 |
Aimless pillar stand
Stand start to Aimless Pillar, start with good sidepull on left at around half height and slopers on the right, top out straight up via mantle | V4 | 3m | |||||
| 7 |
Aimless pillar project
Sit start the pillar as low as possible, left hand on okay sidepul, right hand on bad slopers, feet on tiny crystal indentations, hard first move to crux when meeting stand start position, finish as for stand start. | |||||||
| 8 |
Treetops
Hang start of single hand slot in horizontal crack, move up and right to mentle the slab top. | V3 | ||||||
| 9 |
★★ Spanned out
20m down the hill. Sit start with a hand on each arete (if you can reach!) and feet on smears. This problem can either be done by moving to the right arete (which may be slightly easier) or by using both aretes the whole way and toe hooks to help. | V3 | ||||||
1.3.6. Ticktack land
- Summary:
-
22 routes in Area
| Route | Grade | Style | Selected ascents | |||
|---|---|---|---|---|---|---|
| 1 |
Lord Ticktack
FA: Mike Hitchcock, 2019 | V1 | 4m | |||
| 2 |
Diary of a whip snake
FA: Mike Hitchcock, 2019 | V3 | 3m | |||
| 3 |
Unnamed V1
FA: Mike Hitchcock | V1 | ||||
| 4 |
Unnamed VE
FA: Mike Hitchcock | VB | ||||
| 5 |
Unnamed V2
FA: Mike Hitchcock | V2 | ||||
| 6 |
Cucumba
FA: Mike Hitchcock | V1 | ||||
| 7 |
Espaller
FA: Mike Hitchcock | VB | ||||
| 8 |
The Judge of the Apex
FA: Mike Hitchcock | V2 | ||||
| 9 |
Inferior Judgements
FA: Mike Hitchcock | VB | ||||
| 10 |
Quasi-judicial tribunal
FA: Mike Hitchcock | VB | ||||
| 11 |
Superior verdicts
FA: Mike Hitchcock | VB | ||||
| 12 |
Higher Kinda High
FA: Mike Hitchcock | VB | ||||
| 13 |
Split tack
FA: Mike Hitchcock, 2017 | VB | 4m | |||
| 14 |
Tick
FA: Mike Hitchcock, 2019 | V0 | 5m | |||
| 15 |
Tack
FA: Mike Hitchcock, 2019 | VB | 5m | |||
| 16 |
Toe
FA: Mike Hitchcock, 2019 | VB | 4m | |||
| 17 |
Like a Leech
FA: Mike Hitchcock, 2019 | V3 | 6m | |||
| 18 |
Ada
FA: Mike Hitchcock, 2017 | V0 | 4m | |||
| 19 |
The graceful disappearance of Mike
FA: Mike Hitchcock, 2017 | VB | 4m | |||
| 20 |
Frictional AF
FA: Mike Hitchcock, 2017 | V0 | 3m | |||
| 21 |
Ticktack crack
FA: Mike Hitchcock, 2017 | VB | 4m | |||
| 22 |
Namaste Bitch
FA: Mike Hitchcock, 2017 | V3 | 4m | |||
1.3.7. Penal Colony
- Summary:
-
3 routes in Field
descrizione
Not much more then high, scary, epic boulders here. Multiple pads or big stones almost mandatory.
avvicinamento
As you walk past Second Hill head left through a slight gully, rather then following the path up and right.
storia
Found by Tommy K and friends, circa 2011. Originally called 'Second Valley,' before they forgot how to get there, when they changed the name to 'Lost Valley.' When (re)discovered in 2018 by a new crew it gained the name 'Penal Colony.'
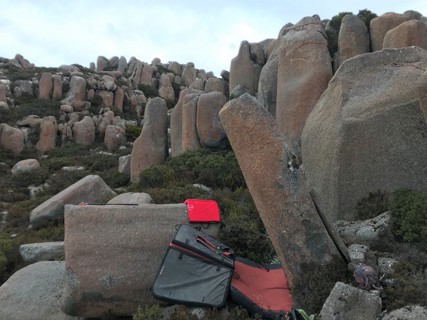 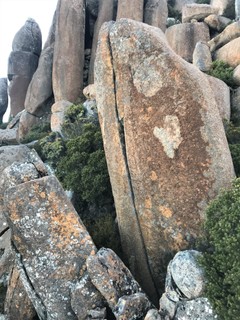 |
||||||||
| Route | Grade | Style | Selected ascents | |||||
|---|---|---|---|---|---|---|---|---|
| 1 |
★ Big Boy
Up the underside/rightside of the pillar, out over the tip FA: Chris L, 11 Nov 2018 | V3 | 6m | |||||
| 2 |
★★★ Write up your damn climbs Tommy!
Sit start as low as possible and climb the left hand side of the split pillar. Avoid the crack or right hand side split rock and fridge hug the left part to the top. FA: Tommy Krauss, 2011 | V4 | 7m | |||||
| 3 |
Plumbers Crack
The breathtaking, standout line in the valley. Bigger than it looks as it starts 3m below ground. Classic jamming. Grade might need adjusting as the first ascensionist isn't a crackhead by trade. FA: Tommy Krauss, 2011 | V0 | 7m | |||||
1.3.8. Second Hill
- Summary:
-
39 routes in Boulder
| Route | Grade | Style | Selected ascents | |||||
|---|---|---|---|---|---|---|---|---|
| 1 |
1
FA: Mike Hitchcock, 2019 | V1 | 3m | |||||
| 2 |
Sun-drenched mouse
FA: Mike Hitchcock, 2019 | V3 | 7m | |||||
| 3 |
3
FA: Mike Hitchcock, 2019 | VB | 5m | |||||
| 4 |
Almost Content
FA: Mike Hitchcock, 2019 | V3 | 6m | |||||
| 5 |
Pineapple Grenade
FA: Mike Hitchcock, 2019 | V1 | 6m | |||||
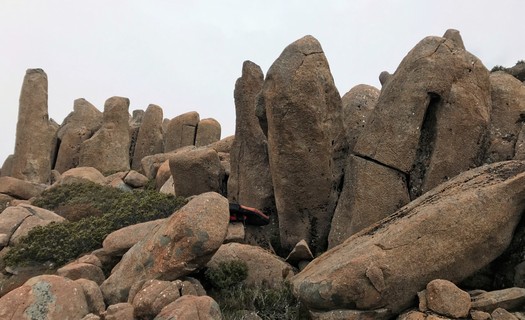 |
||||||||
| Route | Grade | Style | Selected ascents | |||||
| 6 |
★★ To bolt or Buck UP
FA: Mike Hitchcock, 2019 | V4 | 7m | |||||
| 7 |
7
FA: Mike Hitchcock, 2019 | V1 | 5m | |||||
| 8 |
Whoop!
FA: Mike Hitchcock, 2019 | VB | 4m | |||||
| 9 |
Chimney for Chumps
FA: Mike Hitchcock, 2019 | VB | 5m | |||||
| 10 |
10
FA: Mike Hitchcock, 2019 | V1 | 4m | |||||
| 11 |
Gripples
FA: Mike Hitchcock, 2019 | V4 | 4m | |||||
| 12 |
★ Fisting Journeys
FA: Mike Hitchcock, 2019 | VB | 4m | |||||
| 13 |
Choritzo
Up the underside, top out over the tip, or escape easier to the left FA: Chris L, 11 Nov 2018 | V2/3 | 4m | |||||
| 14 |
Polla
Start left, head up the underside right. Spicy! FA: Chris L, 11 Nov 2018 | V1/2 | 5m | |||||
| 15 |
Quickie
Top of the rock ramp, a fun move up FA: Chris L, 11 Nov 2018 | V1 | 3m | |||||
| 16 |
Tipped Pillar
FA: Mike Hitchcock, 2019 | V1 | 6m | |||||
| 17 |
First of Forty-something
FA: Mike Hitchcock, 2019 | VB | 5m | |||||
| 18 |
15
FA: Mike Hitchcock, 2019 | VB | 4m | |||||
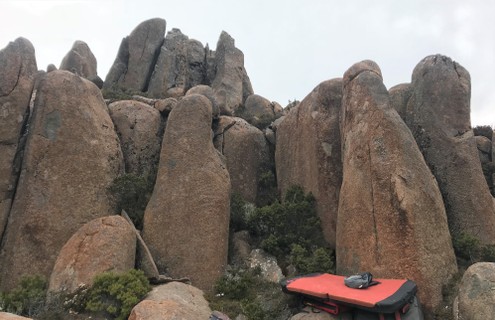 |
||||||||
| Route | Grade | Style | Selected ascents | |||||
| 19 |
★ Slap Happy
Hug the face to the top FA: Chris L, 11 Nov 2018 | V3 | 5m | |||||
| 20 |
★ Tip Top
Good value seam. surprisingly good FA: Chris L, 11 Nov 2018 | V3 | 4m | |||||
| 21 |
Cracking Stuff
Nice jammy crack FA: Chris L, 11 Nov 2018 | V0 | 4m | |||||
| 22 |
Goodo
Seam slightly left of the arete, plus arete FA: Chris L, 11 Nov 2018 | V1 | 5m | |||||
| 23 |
Alegro
Up the juggy arete FA: Chris L, 11 Nov 2018 | V0 | 5m | |||||
| 24 |
21
FA: Mike Hitchcock, 2019 | V0 | 4m | |||||
| 25 |
22
FA: Mike Hitchcock, 2019 | VB | 3m | |||||
| 26 |
23
FA: Mike Hitchcock, 2019 | VB | 3m | |||||
| 27 |
24
FA: Mike Hitchcock, 2019 | VB | 3m | |||||
| 28 |
25
FA: Mike Hitchcock, 2019 | VB | 3m | |||||
| 29 |
26
FA: Mike Hitchcock, 2019 | VB | 3m | |||||
| 30 |
27
FA: Mike Hitchcock, 2019 | VB | 3m | |||||
| 31 |
28
FA: Mike Hitchcock, 2019 | VB | 3m | |||||
| 32 |
29
FA: Mike Hitchcock, 2019 | VB | 3m | |||||
| 33 |
30
FA: Mike Hitchcock, 2019 | VB | 3m | |||||
| 34 |
31
FA: Mike Hitchcock, 2019 | VB | 3m | |||||
| 35 |
32
FA: Mike Hitchcock, 2019 | V0 | 3m | |||||
| 36 |
33
FA: Mike Hitchcock, 2019 | V1 | 4m | |||||
| 37 |
Ben Whyte
FA: Mike Hitchcock, 2019 | V4 | 4m | |||||
| 38 |
Paint me like one of your girls
FA: Mike Hitchcock, 2019 | V0 | 3m | |||||
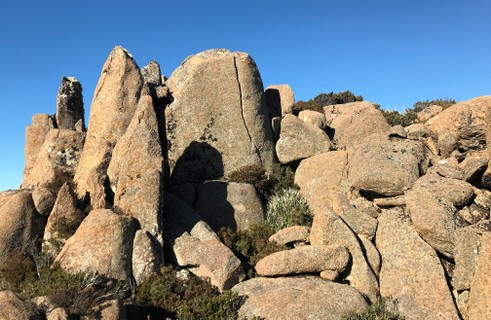 |
||||||||
| Route | Grade | Style | Selected ascents | |||||
| 39 |
Fine Line
FA: Chris L, Dic 2018 | V1 | ||||||
1.3.9. First Valley
1.3.10. Patient Lady
- Summary:
-
2 routes in Area
| Route | Grade | Style | Selected ascents | |||
|---|---|---|---|---|---|---|
| 1 | Water Amoung Sand | V5 | 6m | |||
| 2 |
★★★ New Theory
Start with hands in horizontal crack. A great climb with some lovely moves. | V3 | ||||
1.3.11. Sub-Pinnacle
- Summary:
-
7 routes in Area
sommario
The Sub-Pinnacle is a small pinnacle above the road at Luckman's hut with a range of scattered boulders.
avvicinamento
Park at the last roadside pull-in before the summit carpark. Leaning boulder is accessed by scrambling across the rocks at the eastern end of the pull-in.
etica
Please avoid damaging the alpine plants. Clean tick marks. Pick up your rubbish.
1.3.11.1. Leaning Boulder
- Summary:
-
3 routes in Boulder
Tutti Bouldering
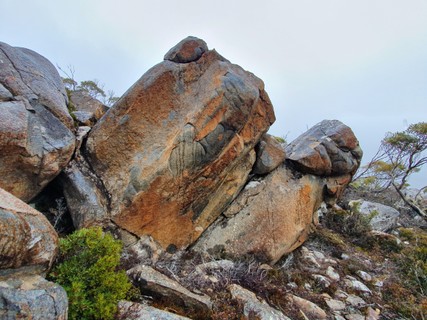 |
1.3.11.2. Panorama Track
- Summary:
-
2 routes in Area
Tutti Bouldering
sommario
Just up the road from Luckman's hut, the Panorama Track heads off down the hill. This area has some nice dolerite problems with easy access.
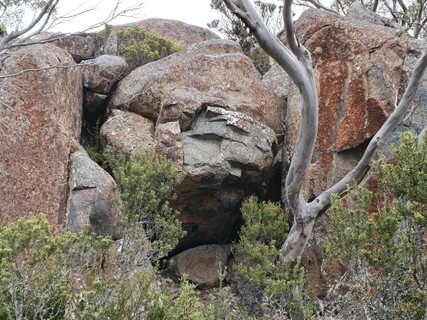 /1c/6c/1c6c39a9b9a1d13dfb006fb67c95c82d09b43a9a) |
1.3.11.3. Sweet Science Area
- Summary:
-
2 routes in Area
Tutti Bouldering
sommario
Area 150-200m North of the Dildo Blocks.
avvicinamento
Easiest approach is to park in the pinnacle carpark, walk back down the road for ~250m until you reach the last sealed pull-in (unfortunately cannot park here anymore; no standing zone), then cross the guard rail and walk down hill trending slightly right. First boulder you will find is Ringside after about 50m.
/cf/d5/cfd5c96f425d5cff3bd28902a0ccfcbaf3af6b59) |
1.3.12. Invisible Area
- Summary:
-
6 routes in Area
avvicinamento
From Stella's Arete head straight down the hill past a lump of rock with no problems, and keep going to the scree. Once you've crested the wave of scree, try and find the Invisible boulder which is one of the first of the overhanging pillars, and is just a bit to the north. This area is a landmark. It's pretty much down the hill from the lookout.
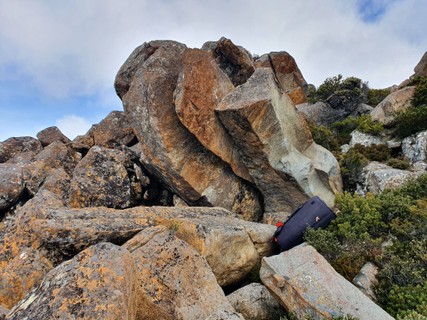 |
||||||||
| Route | Grade | Style | Selected ascents | |||||
|---|---|---|---|---|---|---|---|---|
| 1 |
★★★ Invisible Passports Sit
Sit start low on steep pillar with hard compression, move up and out via burly climbing. Might be easier, grade needs confirming FA: James Trainer | V11 | 3m | |||||
| 2 |
★★ Invisible Passports
Start low on steep pillar with a high heel cam, move up and out via burly climbing. It was originally climbed without the heel at V11. FA: James Trainer | V9 | 3m | |||||
| 3 |
Project
Start as for invisible passports and climb out on to sword and finish up planned aspiration. | 3m | ||||||
| 4 |
Planned Aspiration
Sit start the double crack feature of the hanging sword, climb out and up the sword. | V9 | 3m | |||||
| 5 |
★★ Trinamic
Sit start with feet on ramp and left hand on low sidepulls, right hand on far right slopers. Climb straight out via compression following both opposing aretes. Finish by mantling over nose. Great steep problem! | V5 | 3m | |||||
| 6 |
★ Exfoliation
Start as for Trinamic, match on large exfoliated ledge on right hand side and move directly up to slopes before reaching over to top out jugs. | V3 | 3m | |||||
1.3.13. The Promised Land
- Summary:
-
33 routes in Field
Lat / Long: -42.909257, 147.235899
sommario
This is a large area of featured dolerite. It has potential to hold some of the best and hardest lines on the mountain. Only a small number of the potential lines have been developed so far.
avvicinamento
To find The Promised Land follow the south wellington track for about half an hour until you reach the signpost for the rocking stone (The sign is missing). Follow the cairned route towards the rocking stone for about 100m then head right towards the edge of the plateau. Scramble down the the boulder field staying left of the vegetated gull and right of any other vegetation patches. Keep going until the size of the boulders increases again, this is the Main Ridge area. The good sized boulders continue down to the tree line.
storia
This area was first discovered in late 2022
1.3.13.1. April Boulders
- Summary:
-
6 routes in Boulder
Tutti Bouldering
descrizione
These are the highest boulder on the ridge you walk down on to access the area. They are on the right just before you reach First Stop
/28/71/2871592e78d77fdf4366975f6cffb6b54b78bf92) /b5/87/b5871ebe8b4eef941c045cd4d313b0255d102cb5) /69/f3/69f3fc8d2560714cd199459214529be1b998acdf) 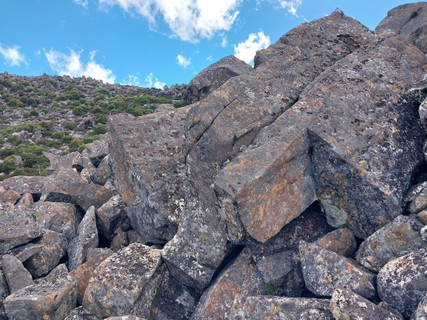 |
1.3.13.2. First Stop Boulder
- Summary:
-
3 routes in Boulder
Tutti Bouldering
descrizione
The first boulder you reach when heading down the ridge is First Stop Boulder. Climbs are located on the steep, downhill side of the boulder. Potential for about 5 lines.
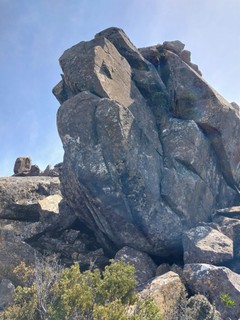 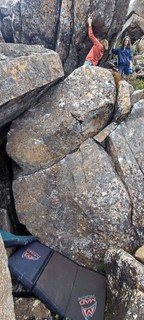 |
1.3.13.3. Spannend Boulder
- Summary:
-
3 routes in Boulder
Tutti Bouldering
descrizione
A bit further down and left from First Stop is Spannend
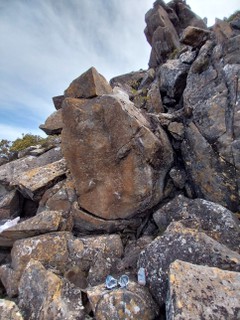 |
1.3.13.4. Mist Boulder
- Summary:
-
1 route in Boulder
Tutti Bouldering
descrizione
A bit further down hill is a boulder with a single hard project on it
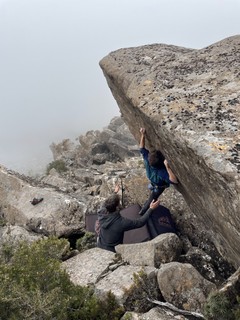 |
1.3.13.5. Shattered Plains Boulder
- Summary:
-
2 routes in Boulder
Tutti Bouldering
descrizione
If you continue down hill from the Mist project you arrive at at shattered plains
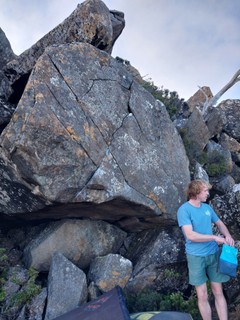  |
1.3.13.6. Fish Boulder
- Summary:
-
1 route in Boulder
Tutti Bouldering
descrizione
On the small ridge directly below Raul's Bad Dreams
 |
1.3.13.7. Bad Dreams Boulder
- Summary:
-
4 routes in Boulder
Tutti Bouldering
descrizione
There is a nice featured prow on the right at the same level as the Mist Boulder.
 |
1.3.13.8. Seams Alright Boulder
- Summary:
-
2 routes in Boulder
Tutti Bouldering
descrizione
Continue south on the same level as Arctic Blast Boulder to reach some boulders at base of a highball face.
1.3.13.9. Himmel Boulder
- Summary:
-
1 route in Boulder
Tutti Bouldering
descrizione
Just past the Seams Alright Boulder, head up the hill to find a steep overhanding prow
 |
1.3.13.10. Strawberry Fields Boulder
- Summary:
-
4 routes in Boulder
Tutti Bouldering
descrizione
Further south of Himmel Boulder and slightly down hill is an obvious slab with several problems on it
 |
1.3.13.11. Spring Bean Boulder
- Summary:
-
2 routes in Boulder
Tutti Bouldering
descrizione
Up hill from the slab back towards the cliff line is a small face
 |
1.3.13.12. Waterguns Boulder
- Summary:
-
1 route in Boulder
Tutti Bouldering
descrizione
From Spring Bean Boulder, keep following the cliff line up hill until you reach a featured face
 |
1.3.13.13. Penguin Boulder
- Summary:
-
2 routes in Boulder
Tutti Bouldering
descrizione
Continue past Waterguns. The Penguin boulder in located just past a highball face.
/77/2a/772a825b7c65fb5a4b56be6d5d6ecf95df5e4587) |
1.3.13.14. South Ridge
- Summary:
-
1 route in Field
Tutti Bouldering
sommario
This is the next ridge south, across the vegetated gully. There is potential for some good lines near the bottom of the ridge.
avvicinamento
This boulder is located across the gully from Waterguns.
 |
1.4. Wellington Craglets
- Summary:
-
Per lo più Arrampicata trad
| Route | Grade | Style | Selected ascents | |||||
|---|---|---|---|---|---|---|---|---|
South Wellington | ||||||||
| 2 | Iceman | 8 | 15m | |||||
| 3 | Choc Ice | 17 | 40m | |||||
Frustration Buttress | ||||||||
| 5 | Terminal Germ | 11 | ||||||
| 6 | Dominator | 20 | 12m | |||||
Roadside Buttress | ||||||||
| 8 | Y=1/(1+X2) | 16 | ||||||
| 9 |
Edge of Largess
FA: David Barnes, 2009 | 20 | 12m | |||||
1.5. The Springs
- Summary:
-
Per lo più Bouldering
Lat / Long: -42.916095, 147.250071
1.5.1. Lookout Boulder
- Summary:
-
5 routes in Boulder
Tutti BoulderingLat / Long: -42.917262, 147.250606
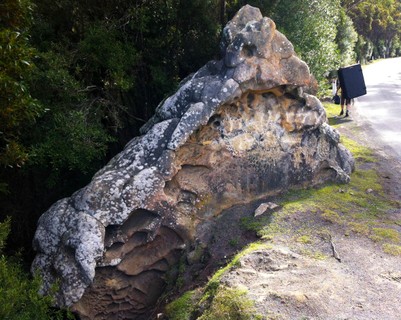 |
||||||||
| Route | Grade | Style | Selected ascents | |||||
|---|---|---|---|---|---|---|---|---|
| 1 |
Blunt nose
SDS right on good side pull, left hand opposed on sloper. Keep slapping left up and directly mantle eliminating all the easy stuff to the right. | V3 | 2m | |||||
| 2 | ★ Sitstart at bottom of boulder and up and to the right | V2 | 5m | |||||
| 3 | Sitstart on back of boulder | V0 | 3m | |||||
| 4 | ★ Sitstart further left. | V1 | 3m | |||||
| 5 |
★★ Karma, dude
On the boulder below the lookout boulder. Stand start. | V5 | ||||||
1.5.2. Symbiosis Boulder
- Summary:
-
Tutti Bouldering
23 routes in Boulder
Lat / Long: -42.916888, 147.250435
avvicinamento
Just off Pinnacle road at the lookout bend, lightly hidden behind a screen of trees.
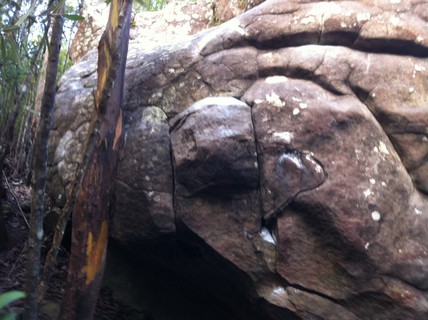 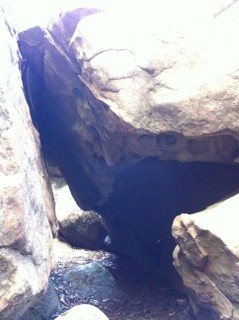 |
||||||||
| Route | Grade | Style | Selected ascents | |||||
|---|---|---|---|---|---|---|---|---|
Symbiosis boulder | ||||||||
| 2 |
Chip Butty
Cramped SDS under furthest lefthand 'wall'. Stays left of the crack, and the block footer lower left is out. Up wall, using left arete. FA: CW | V1 | ||||||
| 3 |
★★ Left of tree
Start under bulge left of tree. Left and up to great hold. V3 if you start with right hand above the bulge. | V5 | 3m | |||||
| 4 | ★★ Symbiosis | V6 | 4m | |||||
| 5 |
★ Slabby arete
4m right of Symbiosis | V0 | 3m | |||||
The grotty cave | ||||||||
| 7 |
★★ Spider Pig
Start crouched, both hands on back wall of grotty cave. Undercling/jamb/layback/twist etc to come up and out of cave, across the gap, and finish up the right-hand wall. FA: CW | V5 | 5m | |||||
| 8 |
Charlotte Sometimes
Sit start crouched as for Spider Pig, move left and up and out, staying on the left wall - everything on right side is off limits. Low-down, trickier than it looks. FA: CW | V3 | ||||||
| 9 |
★★ Three-horned bird
Start in back of cave on two flat sidepulls. Move up through small v-slot to a tricky mantle. Named after the three-horned bird orchid's growing on the adjacent boulder. FA: Alex Hartshorne | V7 | ||||||
| 10 |
Astrobaby
Start with both hands on the good flat hold on right side of main cave, pull into and thrutch/grovel THROUGH the slot to finish up the V0 arete (to the right of Symbiosis). Feet can work along the back wall of the "grotty cave". Not the most pleasant experience, but kind of fun. (Starting hold now broken off.) FA: CW | V1 | 4m | |||||
| 11 |
Slab right of cave
High step onto slab on right side of cave, just left of chockstone block. SDS is a project. | V3 | 3m | |||||
| 12 |
The Undergate
Start under V3 just left of chockstone block, traverse left to corner, finish up Spider Pig. FA: CW | V4 | 3m | |||||
| 13 |
Right arete
Arete to the right, stand start | V2 | 3m | |||||
| 14 |
Mini Cave Wave
Behind the chockstone block is a small 'cave'. SDS on right, move left and up and over slopey lip. Don't use either of the small boulders on the ground. | V0 | 3m | |||||
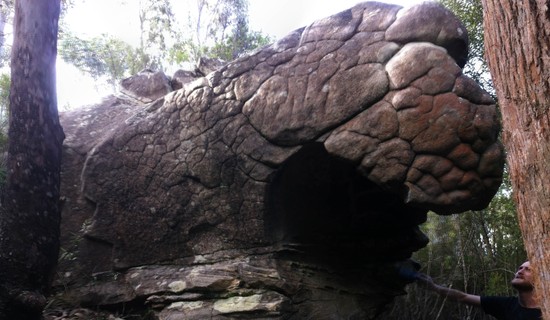 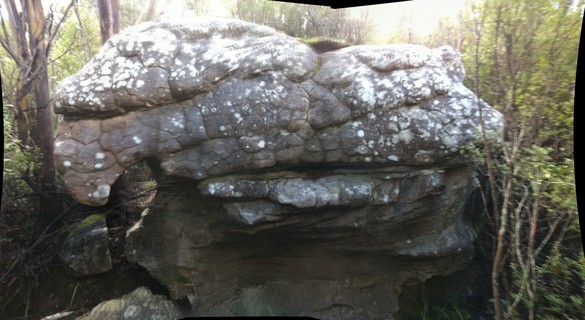 |
||||||||
| Route | Grade | Style | Selected ascents | |||||
Font nose boulderAnother 5-10m right, has a big obvious hooked nose feature. Routes seem complicated but really this is mostly a lot of variations on only a few start and finish points, and going around/under the nose. | ||||||||
| 16 |
★ Warmup 1
SDS to topout using big holds at the top | V1 | 2m | |||||
| 17 |
Warmup 2
SDS to topout to the right, tops out past the dish (which sometimes has water in it). | V1 | 3m | |||||
| 18 |
Fontanel Commencer á Gauche
Start with both hands on the finishing jugs for Full Fontal. Traverse right to finish up Fontanel. FA: CW | V2 | ||||||
| 19 |
★★ Fontanel
Start with both hands on the right-hand edge of the o/hung 'nose' at the left end of the main face. Traverse around outside of nose then straight up via match and mantle on edge of dish/bowl (often wet) .Don't use the big block under the arête. FA: CW | V2 | 4m | |||||
| 20 |
★★ Right of nose
Start on the undercling to the right side of the nose, straight up through slopers to the dish on top. Non obvious beta, but not too hard once you figure the trick out. | V3 | 4m | |||||
| 21 |
Training for Font 3
Start with both hands on the right-hand edge of the o/hung 'nose' at the left end of the main face. Traverse right along good slopey rail and around arête to finish up Training for Font 1. FA: CW | V2 | 6m | |||||
| 22 | ★★ Full Fontal (par grotte) | V3 | 4m | |||||
| 23 |
★ Full Fontal Full Fontal (atour arete arrondie)
Start as for Training for Font 1, traverse left along good rail, pull up and go around outside of the nose on the arête (feet under). Finish as for previous problem. Don't use the big block under the arête. FA: CW | V2 | 6m | |||||
| 24 |
Fontanel Éxtension
Start as for Training for Font 1, traverse left along good rail to finish as for Fontanel. Don't use the big block under the arête. FA: CW | V2 | 6m | |||||
| 25 |
★ Training for Font 2
SDS just left of right arete. Up via slopey holds, finish as for Training for Font 1. FA: CW | V2 | 3m | |||||
| 26 |
★ Training for Font 1
Right wall of the right arête. Straight up using good holds top left, pull through to dish (wet) FA: CW | V1 | 3m | |||||
1.5.3. Gorby's Corner
- Summary:
-
1 route in Cliff
Tutti Arrampicata sportivaLat / Long: -42.916464, 147.250865
descrizione
Directly under the lookout 50m south east of the Springs
| Route | Grade | Style | Selected ascents | |||
|---|---|---|---|---|---|---|
| 1 |
★★ Termination
FA: G. Narkowicz, 1981 | 19 | 6 | |||
1.5.4. Lilo & Two Mat boulders
- Summary:
-
19 routes in Boulder
Tutti BoulderingLat / Long: -42.915131, 147.251481
avvicinamento
From the spring walk south east to the lookout. About 10m before the lookout is a mossy clearing on the left, from here follow an overgrown track north for 250m keeping right at the fork.
| Route | Grade | Style | Selected ascents | |||||
|---|---|---|---|---|---|---|---|---|
| 1 |
Bad as
Separate boulder to Lilo and Two Mat boulders, which is on the right as you walk in. Up through the crappy dirty holds to a crappy dirty finish. Easy and unsatisfying, and yet it's also unreasonably dangerous for the grade. Tracciata: Chris Lang | VB | 3m | |||||
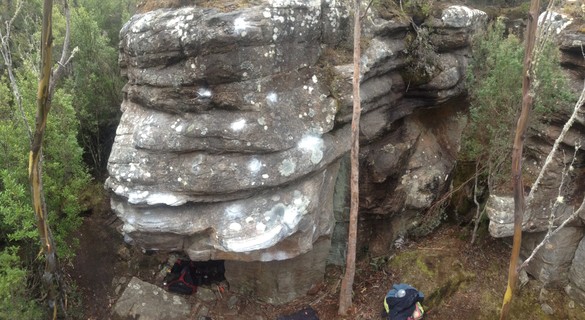 |
||||||||
| Route | Grade | Style | Selected ascents | |||||
Lilo Boulder | ||||||||
| 3 |
★ Horizontal break
Sit start under rooflet, move out from the left of the rooflet and up to little slot and up edges/slopers. | V3 | 4m | |||||
| 4 | ★ All's Fair in Love and War | V4 | 4m | |||||
| 5 |
★★ Adi Kodrat
Start on good hold under bulge, move to lip hold and slopers. Transcend gravity. Stand start goes at about V3/4 | V5 | 4m | |||||
| 6 |
★ I kneed this
Start under cave on good jugs, right slap then to slopers, technical knee bar using nubin on the right then directly up. The nice sloper hold next to the nubin is off route and probably doesn't help anyway. | V5 | 4m | |||||
| 7 |
★★ Right of arete
Sit start between arete and tree, up to right crimp, left sloper, bigger move to high jug and up. | V3 | 4m | |||||
| 8 |
Penyerehan
Start in easy crack then link through into 'Adi kodrat' | V5 | 5m | |||||
| 9 |
Dirty crack
Up easy crack | V1 | 4m | |||||
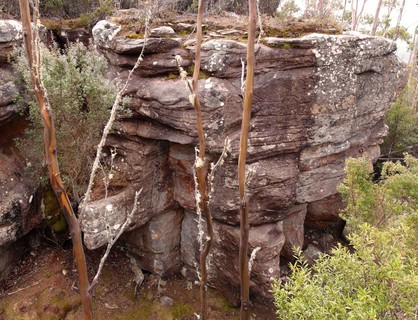 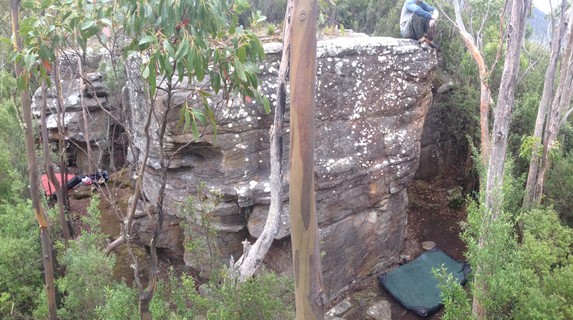  |
||||||||
| Route | Grade | Style | Selected ascents | |||||
Two mat boulderAfter a small break is the Two Mat boulder, which starts with a prominent protrusion. | ||||||||
| 11 |
★ Small cave
Sit-starts under the obvious protrusion at chest height. Finishes after a mantle onto the cave. | V2 | 1m | |||||
| 12 |
★ Pedestal to diagonal
Sit start up the juggy arête, drift diagonally left after this. | V1 | 5m | |||||
| 13 |
Pedestal to slot
Sit Start, head up the juggy arete to the obvious angled ridge. Top out from here. | V2 | 5m | |||||
| 14 | ★ Up jugs | V2 | 4m | |||||
| 15 | ★ Relic | V1 | 4m | |||||
| 16 | Right of Relic | V0 | 4m | |||||
| 17 | ★ Middle of face | V2 | 4m | |||||
| 18 | ★★ Left of arete | V3 | 4m | |||||
| 19 | ★ Thoughtless | V2 | 4m | |||||
| 20 |
★ Stammer
Traverse all of Two Mat from left to right and finish up Thoughtless | V3 | 10m | |||||
| 21 | ★ Crimps | V2 | 4m | |||||
1.5.5. Jungle Block
- Summary:
-
5 routes in Boulder
Tutti Bouldering
| Route | Grade | Style | Selected ascents | |||
|---|---|---|---|---|---|---|
| 1 | Ferny | V2 | 3m | |||
| 2 | Traverse | V2 | 3m | |||
| 3 | Slotted | V5 | 3m | |||
| 4 | Arete | V4 | 3m | |||
| 5 | Right face | V1 | 3m | |||
1.5.6. Reids Track Boulder
1.5.7. Rocky Whelan's Cave
- Summary:
-
9 routes in Area
Tutti Bouldering
avvicinamento
Drive up the pinnacle road approximately 2km. Park in the parking bay 10m past the end of the track. Walk up the track until you see the Rocky Whelan Cave sign, approx. 3 min.
| Route | Grade | Style | Selected ascents | |||||
|---|---|---|---|---|---|---|---|---|
| 1 |
VE
Far left end of the crag. Start on jug, straight up. | VB | ||||||
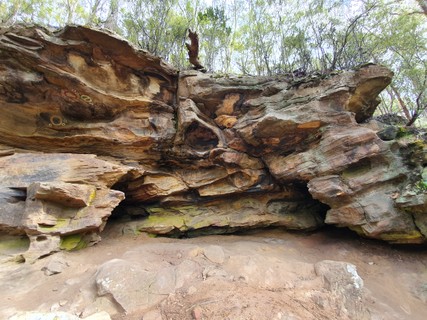 |
||||||||
| Route | Grade | Style | Selected ascents | |||||
| 2 |
★ Physical Romance
SDS. Start on the holds at the back of the little cave, with foot on the rail. Climb out and up on big holds to the send jug. | V0 | ||||||
| 3 |
Kat Leonie
SDS. Start on the lower rail, climb to the hole then finish up PR. | V0 | ||||||
| 4 |
★★ Matt Loves Nat
Hang on the Matt loves Nat holds. Climb straight through the hole then finish on PR send jug. This has a great double handed dyno from the starting holds worth doing just for that. | V1 | ||||||
| 5 |
★★ Cheating Heart
Start as for Physical Romance and finish up Mat loves Nat (keep feet above the undercut, not as contrived as it sounds). | V3 | ||||||
| 6 |
★ Big A
Hang from the holds on the lip under the big A. Head for the incut ledge and finish right. | V1 | ||||||
| 7 |
Glen Loves Eva
SDS. Start with both hands on the low rail, up to Big A. | V2 | ||||||
| 8 |
2018
SDS. Start on the prominent jug inside the cavelet, climb out and then up. | V3 | ||||||
| 9 |
★★ Left to Right Traverse
Sit start on the pedestal on the left side of the cave, traverse the entire cave finishing on the head-height jug on the far right. | V3 | ||||||
1.6. Sphinx Rock
- Summary:
-
Arrampicata sportiva, Bouldering e Arrampicata trad
Lat / Long: -42.905201, 147.247807
1.6.1. Main face
- Summary:
-
Arrampicata sportiva e Arrampicata trad
35 routes in Cliff
Lat / Long: -42.905298, 147.247707
avvicinamento
15 minutes
note per la calata
From the top, walk back through the child gate, turn right at the tee and after 20m turn right and walk down the stone stairs.
/5d/60/5d60a333bb4592815ebe0e886428aea6190f144c) |
||||||||
| Route | Grade | Style | Selected ascents | |||||
|---|---|---|---|---|---|---|---|---|
| 1 |
★ Charles' Climb
Left hand line of bolts about two metres left of white arete. DBB shared with Akhenaten FA: J. Nermut, 2013 | 22 | 9m, 3 | |||||
| 2 |
Akhenaten
Right hand line of bolts about one metre left of white arete up slightly overhang face. DBB shared with Charles' Climb FA: J. Nermut, 2013 | 20 | 9m, 2 | |||||
| 3 |
Cheops
Start below the arête 4m L of a mossy corner and climb to its R to an old carrot bolt runner near the top. FA: S. Parsons, P. Bigg & J. Parsons, 1980 | 12 | 9m | |||||
| 4 |
Blue Nile
The chimney crack 7m L of White Nile. Straight up the crack. FA: S. Parsons, P. Bigg & J. Parsons, 1980 | 9 | 9m | |||||
| 5 |
Get A Grip
2m L of Gandhi, the LH side of the face. Three BR's with lower-off. FA: N. Selby, 2000 | 21 | 12m, 3 | |||||
| 6 |
Ghandi
The RH side of the face to the L of the grotty cave where SSSH starts. Two BR's with lower-off. FA: N. Selby, 2000 | 20 | 12m, 2 | |||||
| 7 |
White Nile
The overhanging corner crack on the left of the SSSH cave. Escape L. FA: S. Parsons & P. Bigg, 1980 | 16 | 10m | |||||
| 8 |
Short, Sharp and Shit Scared
Fun and games left of SSSH. The fun, start on the rock as for SSSH but head left to the pockets. The games begins after the fourth bolt, suck it up and clip the anchors. Please leave the draw for the next ascent. FA: D. Humphries, 2013 | 23 | 10m, 4 | |||||
| 9 |
Short Sharp and Shit Hot
Some people leave off the "Hot" in their description. Located 40m L of Phoenix at the grotty cave. Climb the steep wall, moving R past two bolts to a rap station with a fixed biner FA: G. Phillips, 1996 | 24 | 8m | |||||
| 10 |
Mr Wiggles
The prow R of Short, Sharp and Shit Hot, using natural gear. Finish as for SSSH. FA: K. Robinson, 1997 | 25 | 8m | |||||
| 11 |
Firewire
Short and intense, starts 5m right of SSSH. Bolts through overhang. FA: G. Phillips, 2004 | 26 | 8m | |||||
| 12 |
Araldite, Goddess Of Bondage
Start 10m L of Tutankhamen next to a large gum tree at a face with a couple of stainless carrots in it. Climb the short wall past 2BRs to a large platform (wire and camming placement here). Continue up from the R hand end of the platform past two more BRs to the top. FA: O. Prall & R. Vincent, 1992 | 17 | 12m | |||||
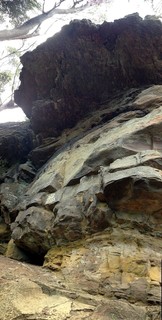 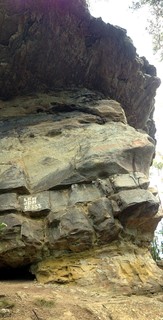 /e0/67/e0672669cd6b5d44439b2b3a2b015539cffabf60) |
||||||||
| Route | Grade | Style | Selected ascents | |||||
| 13 |
★★ Scandal Savage
Climbs the line of U bolts up the face then through the large 7m roof to a dbb 2 meters around the lip of roof. Nice technical face, then a tough 4 move boulder problem getting into the roof jugs then crank through to the dbb. Back jump to clean, dont lower off the bolts over the lip as there is lots of rope drag. FA: adam bogus, 3 Apr 2016 | 28 | 15m, 10 | |||||
| 14 |
Pharos
A 7m excursion across the roof flake immediately L of Tutankhamen. Climb the slanting weakness, 5m L of Tut, up to the first bulge. Over this and R slightly to the roof flake (BR). Traverse the diagonal flake out to the lip. Surmount the lip and continue to the top. Again, needs re-bolting. FA: P. Bigg, S. Parsons & K. Carrigan, 1982 | 24 | 24m | |||||
| 15 |
Tutankhamen
Around the corner from Phoenix, 3m L of the crumbly arête formed where the cliff changes direction to face southeast. Move up a shallow corner to an old bolt and traverse diagonally R towards a small ledge on the arête. Climb the arête to the roof, move diagonally R across the roof and round the lip to a small cave. Surmount the final overhang to the top. Could do with some re-bolting. FA: P. Bigg, 1980 | 21 | 20m | |||||
| 16 |
★★ Horus
Take the first four bolts of Phoenix, then shoot out climbers left to the project bolt. Needs careful extensions (slinging bolt 4 is a must). Finish there on a rainy day, or pull onto the headwall and head for the anchor. FA: Chris L, 26 Ott 2018 | 24 | 24m | |||||
| 17 |
★★ Phoenix
The mega roof is straightforward. Getting established on the headwall is not. Take a longer sling for the bolt on the lip. Finish directly up to single U bolt, or traverse right to DBB with WLAE. | 24 | 12m, 5 | |||||
| 18 |
★★ Walk Like an Egyptian
Shares 2 bolts with Phoenix, before cranking through the right side of big roof to a DBB. | 22 | 12m, 5 | |||||
| 19 |
★★ Mindbeast
The difficulties on this are psychological. The impressive hand crack, which splits the main overhang 20m from the RH end. Up the initial slab, then climb the crack through the overhangs. FA: I. Lewis & P. Reynolds, 1974 | 18 | 20m | |||||
| 20 |
★ The Pie Man
Long moves between good holds. The 'chain' is level with the last bolt, about a metre r of the hole at the top. | 22 | 8m, 5 | |||||
| 21 |
★ Fear Factory
Avvertimento Attrezzatura fissa: 2nd bolt missing plate and nut As for Pieman, traverse roof lip to bolt then up. | 23 | 10m, 4 | |||||
| 22 |
★★ First Blood
Climb Fear Factory then drop down and continue traversing along lip past another five U-bolts to a rap station. FA: S. Edwards, 1997 | 26 | 20m | |||||
| 23 |
★ Ignition Sequence Start
Start 3m R of Fear Factory and follow the bolts past a hard pull at half height. FA: C. Veal, 2004 | 24 | 8m | |||||
| 24 |
★ Storm Trooper
Start as for Calm Before the Storm but go direct through the roof and to the chains of Ignition Sequence Start. FA: G. Phillips, 2004 | 27 | ||||||
| 25 |
★★ Calm Before The Storm
Located 2m R of Ignition Sequence Start. Scramble up the slab and crank through the bulge and then move R to lower from the chains of Rambo. FA: G. Phillips, 2004 | 28 | 15m | |||||
| 26 |
★★ Spaced Out
Links Space Invader in to Storm Trooper, a very sustained piece of climbing. FA: Jake Bresnehan, 2005 | 31 | 15m | |||||
| 27 |
★★ Space Invader
Starts as for Rambo but heads direct. FA: G. Phillips, 2004 | 30 | 12m | |||||
| 28 |
★★ Rambo
Uses the same start as Lean Mean Fighting Machine. However from the corner cut back hard left and finish through the steep roof on underclings. Exciting mantle awaits. FA: G. Phillips, 2004 | 25 | 15m, 5 | |||||
| 29 |
★★ Lean Mean Fighting Machine
A desperate endeavour 10m R of Fear Factory. Crank through the bulging wall to a rest in the corner. Traverse R along the break and then up via a desperate boulder problem finish. FA: G. Phillips, 2004 | 28 | 15m | |||||
| 30 |
★ Lean Mean Fighting Machine Direct
Direct start to Lean Mean Fighting Machine FA: G. Phillips, 2005 | 28 | 15m | |||||
| 31 |
Mogul
The bottomless crack which forms the RH extremity of the main overhang. Pull up and mantel to the start of the crack. Climb the crack and face above to the top. FA: I. Lewis & P. Reynolds, 1974 | 17 | 15m | |||||
| 32 |
Duckpond
Start as for Mogul. Pull up and mantel onto the ledge at 4m, Move a couple of metres R to a crack/groove, and continue up this to the top to a DBB or topout into the bush. FA: L. Closs & I. Lewis, 1973 | 14 | 15m | |||||
| 33 |
The Honey Gobbler
Takes the arete above where the walking track meets the cliff. The first bolt is a high stick clip to protect the bouldery start. Head up the arete then left at the top to the DBB above Duckpond. FA: Jon Nermut & Dave Humphries, 2013 | 22 | 10m | |||||
| 34 |
★★ Rent a Forearm
Slightly overhanging climbing with a single bolt up high. DBB. FA: S. Parsons, 1985 | 22 | 10m, 1 | |||||
| 35 |
Morning Raid
On the overhanging north facing wall by the track down to the main cliff. Climb the centre of the wall with 3 U-bolts and a rap station. You may want to stick clip the first bolt. A bit awkward at the top. FA: S. Parsons, E. Peacock & J. Kennedy, 1985 | 24 | 10m | |||||
1.6.2. Sphinx's Nose
- Summary:
-
12 routes in Boulder
Tutti BoulderingLat / Long: -42.905037, 147.248730
descrizione
Fun boulder, gets the snow melt and rain running right over the top of it, so is likely to climb best in late spring/summer after a dry spell.
avvicinamento
Head to the bottom of sphinx rock and walk to the far end, the buttress with Charles' Climb and Akhenaten. Walk down the rotten log and deviate left a little - you'll be following a natural path. Pass a small moss covered boulder on the right, and the proper boulder will loom up in front of you. Climb under the nose to access the climbing faces. Two minutes walk without bouldering mats.
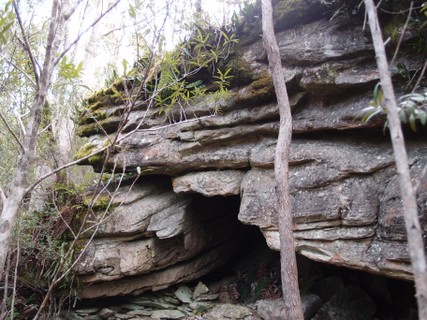   |
||||||||
| Route | Grade | Style | Selected ascents | |||||
|---|---|---|---|---|---|---|---|---|
| 1 |
★★★ Bat Cave
Follow the roof through the cave by using the pockets along both edges of the roof. It's possible to climb most of the way to the exit, you'll need to touch down to finish through the squeeze exit. FA: Chris Lang | V1 | ||||||
| 2 |
Trajectory
Start on jugs to the left of the cave. Nice jug hauling that needs a little commitment at the top. | V0 | ||||||
| 3 |
Tip Top
Start on slopey sidepull. Nice. | V1 | 5m | |||||
| 4 | ★★★ Shallow Grave | V5 | 6m | |||||
| 5 |
Unremembered
Start on the rail under the arete. Great climbing from bottom to top rockover. Stand is V2. | V4 | 5m | |||||
| 6 |
Al's Traverse
Can't remember too many details of this. It started at Unremembered or Crimpfest and continued to the top out right. | V8 | ||||||
  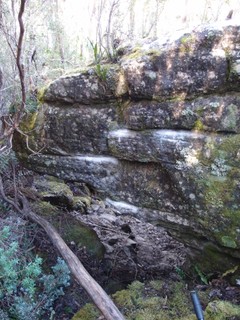 |
||||||||
| Route | Grade | Style | Selected ascents | |||||
| 7 |
Crimpfest
Start on pockets, pop to crimp and up. Main issue these days is not dabbing the tree. | V4 | 4m | |||||
| 8 |
★ Hushed by an Angel
Long low traverse along the edge, under the nose and up and out the entrance. Named after the Philtrum. FA: Mike Hitchcock, 2019 | V7 | 8m | |||||
| 9 |
★★ The Duchess
Start in two shallow pockets near the tree and head up and right to the finish of the V2. FA: T. Krauss, 2014 | V3 | 4m | |||||
| 10 |
★★ Redknapp
Start in the left two of three obvious pockets. Work up to the good finishing jug beneath the moss. FA: T. Krauss, 2014 | V2 | 4m | |||||
| 11 |
★★ Roman
Start half a meter right of v2. Move up under the undercling press, through obvious U shaped ridge to finish on the same large jug as v2. FA: S. Young, 2014 | V4 | 4m | |||||
| 12 |
Ski-Jump
Sit start in the large pockety jug about 1 metre before the 'entrance' ramp on the very right of the boulder. (This problem is the finish of Mirren) FA: T. Krauss, 2014 | V2 | 4m | |||||
1.6.3. Nerm's Boulder
- Summary:
-
13 routes in Boulder
Tutti BoulderingLat / Long: -42.904617, 147.246891
descrizione
This freestanding boulder is one of the best on the mountain.
avvicinamento
Once you reach Sphinx Rock cliff base, turn left to continue on the trail heading downhill, after 30meters you'll find a large straight fallen log on the left. About 30mtrs along the log you'll find Nerms.
 |
||||||||
| Route | Grade | Style | Selected ascents | |||||
|---|---|---|---|---|---|---|---|---|
| 1 |
★ Blood stains
Sit start and pull up from the small cave on the left side of the boulder | V3 | 4m | |||||
| 2 |
★ Traverse
Sit start as for Blood Stains, and traverse rightwards (fairly high) across the whole boulder to finish up the arete. | V4 | ||||||
| 3 |
★★ Blood Letting
Do the first move of Blood Stains then head right into the V0 via some powerful moves. FA: Joe Schwarz | V7 | ||||||
| 4 |
★★ The Vampire Song
A fun linkup. Start as for Blood Letting then reverse The Turd Burglar and finish up Yoshimi. FA: Joe Schwarz | V9 | ||||||
| 5 |
★ Up jugs
Stand start, climb up on big jugs. Be aware of loose rocks on top. | V0 | 4m | |||||
| 6 |
★★ The Turd Burglar
Sit start as for Yoshimi and move left to sidepulls then up to jugs | V5 | 4m | |||||
| 7 |
★ The Turd Burglar Direct
Sit start on crimps just left of Yoshimi, crank up right to good edge then continue as for Turd Burglar. FA: Joe Schwarz | V6 | ||||||
| 8 |
★★★ Yoshimi...
Sit start off good jug just above left hand end of low rail. Straight up to pocket and sidepulls and over bulge | V6 | 4m | |||||
| 9 |
★ Baba
Sit start at right hand end of low rail, straight up. Watch the hollow sounding jugs at the top | V3 | 4m | |||||
| 10 |
★★ Deda
Sit start as for Yoshimi, move right across the line of pockets to the arete and finish up Ganamatronix | V5 | 8m | |||||
| 11 |
★★★ Ganamatronix
Sit start at sidepull 2m left of the arete. Move right to the arete and climb up the steep side of the arete, moving right at the top. FA: Morgen Hosking, 2005 | V6 | 5m | |||||
| 12 |
Slab right of arete
Slab just right of arete. Stand start. | V0 | ||||||
| 13 |
Slab further right
Slab 3m right of arete. Stand start. | V0 | ||||||
1.7. Crocodile Rock
- Summary:
-
Per lo più Con corda dall'alto
Lat / Long: -42.887053, 147.247030
descrizione
Another small outcrop in the same band of Triassic sandstone as Sphinx Rock. A small number of short top-roped climbs, with plenty of suitable trees for anchors.
avvicinamento
Park at the Chalet and descend on the Hunter's Track toward Junction Cabin. The walk crosses two impressive dolerite boulder fields before the crag comes into view, ~20m uphill of the track. Times: ~25 mins in, ~35 min out
| Route | Grade | Style | Selected ascents | |||||
|---|---|---|---|---|---|---|---|---|
| 1 |
★ Thestral
FA: P.Robinson, 2004 | 18 | 10m | |||||
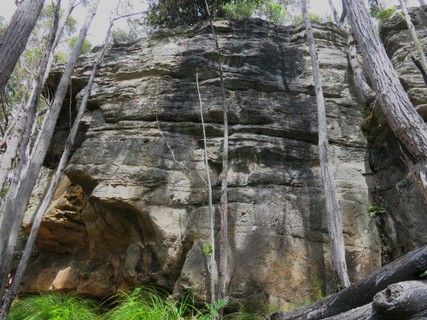 |
||||||||
| Route | Grade | Style | Selected ascents | |||||
| 2 |
Muggar
Up the crack in the cave. R onto juggy lip and continue up the arête. FA: P.Robinson, 2003 | 18 | 10m | |||||
| 3 |
★★ Mad Eye Moody
Gets a little highbally. Sit start, up the holds to the right of the crack (don't use the crack) to the high finishing flake. | V2 | 5m | |||||
| 4 |
Hedwig
Start as for Muggles in shallow corner. Traverse left on pockets then up the wall. FA: P.Robinson, 2003 | 16 | 10m | |||||
| 5 |
★ Muggles
Start as for Hedwig in shallow corner. Continue up the yellow wall avoiding black lichen on R. FA: P.Robinson, 2003 | 13 | 10m | |||||
| 6 |
Tomi
Straight up the dark, lichenous streak in the middle of the wall. FA: P.Robinson, 2003 | 15 | 10m | |||||
| 7 |
Gharial
Start just L of the corner. Straight up the wall on thinner holds. FA: P.Robinson | 17 | 10m | |||||
| 8 |
Slitherin
FA: P.Robinson, 2003 | 18 | 7m | |||||
| 9 |
Mungo
FA: P.Robinson, 2003 | 13 | 7m | |||||
| 10 |
Firenze
FA: P.Robinson, 2003 | 17 | 7m | |||||
1.8. Neika
- Summary:
-
Per lo più Arrampicata sportiva
Lat / Long: -42.934364, 147.238015
descrizione
A collection of short sandstone cliffs accessed from Huon Road in Ferntree.
1.8.1. Green Cliffs
- Summary:
-
6 routes in Sector
Per lo più Arrampicata sportiva
descrizione
A collection of short routes, that climb better than you would suspect on first viewing.
avvicinamento
Approximatly 80 metres uphill and left from Bladerunner Buttress. The track meets the cliff band at the crack route 'Old School', then moves left under the remaining routes before heading up to the Middle Tier.
note per la calata
Typically double U bolt belays.
| Route | Grade | Style | Selected ascents | |||
|---|---|---|---|---|---|---|
| 1 |
★ Being Green
A very hard crank out the left end of the overhang leads to a mantle then good moves right and up the face. FA: Dave Humphries & Jon Nermut, 2011 | 21 | 10m, 4 | |||
| 2 |
★ Supermassive Black Hole
Climb through the 'hole' left of C to DBB (shared with unnamed project up arete). FA: Jon Nermut, 2011 | 22 | 10m, 4 | |||
| 3 |
★ Confabulation
Up right side of 2nd buttress L of Old School. Another hard start, then nice thin crimping. FA: D. Humphries & J. Nermut, 2011 | 20 | 10m, 5 | |||
| 4 |
★ Bad Books
Follow bolts up right side of 1st buttress L of Old School. FA: Jon Nermut & Dave Humphries, 2011 | 22 | 10m, 3 | |||
| 5 |
Harden Up
Immediately left of Old School. Stick clipping the first bolt may be wise. FA: Dave Humphries & Jon Nermut, 2010 | 21 | 8m, 3 | |||
| 6 |
★ Old School
Thin crack line. FA: Dave Humphries & Jon Nermut, 2010 | 19 | 10m | |||
1.8.2. Blade Runner buttress
- Summary:
-
9 routes in Unknown
Tutti Arrampicata sportiva
descrizione
The buttress where the track hits the cliff
| Route | Grade | Style | Selected ascents | |||
|---|---|---|---|---|---|---|
| 1 |
★ The scared Turtle
Narrow buttress where track meets cliff to crimpy, mossy top FA: Nermut/Humphries, 2011 | 22 | 15m | |||
| 2 |
Fly Blown
L side of cave and slab FA: G Phillips, 2006 | 21 | 10m | |||
| 3 |
Itchy Fingers
Start as for FB but traverse right at jugs and then up FA: G Phillips | 22 | 12m | |||
| 4 |
★★★ Future Shock
Start at offwidth/chimney and head steeply right FA: Jake Bresnehan, 2006 | 31 | 8m | |||
| 5 |
★★★ Blubber Boy
Awesome final section. As for Blade Runner but keep heading leftwards. FA: G.Phillips, 2006 | 29 | 15m | |||
| 6 |
★★ Blade Runner
Starts up New C4's to the last bolt then traverses L along a break on tiny holds to a hard boulder problem finish. FA: G.Phillips, 2006 | 28 | 15m | |||
| 7 |
★ New C4s
Climb directly up the slightly overhanging wall passing a thin section (crux) at two thirds height. The rock gets better with height (thankfully). FA: G.Phillips, 2005 | 21 | 15m | |||
| 8 |
★★ Sand Blaster
Starts up New C4s then traverses R along the break and up the cool looking arête. FA: G.Phillips, 2006 | 24 | 15m | |||
| 9 |
★ You are Such a Grub
Straight above where you scramble up, climb the face to the R of the corner to a little roof. 3 U's to a DBB. FA: Jon Nermut, 2014 | 20 | 10m, 3 | |||
1.8.3. Trad Wankers Buttress
1.8.4. Back On Track Buttress
- Summary:
-
2 routes in Area
Tutti Arrampicata trad
| Route | Grade | Style | Selected ascents | |||
|---|---|---|---|---|---|---|
| 1 |
★ Urban Wasteland
Medium cams protect the bottom part | 20 | 22m, 9 | |||
| 2 |
Back On Track
Take some medium cams for the bottom | 22 | 22m, 9 | |||
1.8.5. Big Roof Buttress
- Summary:
-
3 routes in Area
Tutti Arrampicata sportiva
| Route | Grade | Style | Selected ascents | |||
|---|---|---|---|---|---|---|
| 1 | ★ Scotch Finger | 19 | 15m | |||
| 2 | Chalk | 26 | 15m | |||
| 3 | Cheese | 26 | 15m | |||
1.8.6. Blizzard Buttress
- Summary:
-
4 routes in Unknown
Tutti Arrampicata sportiva
| Route | Grade | Style | Selected ascents | |||
|---|---|---|---|---|---|---|
| 1 |
★ Chucky Chuck
Nice easy climbing following the LH line of bolts to a slopey finish. | 18 | 10m, 4 | |||
| 2 |
★ No Name Yet
Same start as for Chucky Cheek but continuing up the RH line. | 19 | 10m, 4 | |||
| 3 |
★★ Happy anniversary sweetie
Prominent line on the right of the wall. Pumpy start and technical climbing above | 22 | 10m, 4 | |||
| 4 |
Birthday party
Balancey moves up the left hand side of the wall with the crux at the last move. Too dirty to be any good. FA: Jon Nermut, 2012 | 21 | 10m | |||
1.8.7. Kick Start Area
- Summary:
-
5 routes in Area
Arrampicata sportiva e Arrampicata trad
| Route | Grade | Style | Selected ascents | |||
|---|---|---|---|---|---|---|
| 1 |
★★ kickstart
Hard line up the good looking arete, great boulder problem. FA: garry phillips | 29 | 15m, 7 | |||
| 2 |
★ Sleep, Eat, Bolt, Climb, Repeat
Slightly overhanging wall R of Kickstart. 5 Bolts to lower off. Technical crux midway leading to juggier finish. FA: A. Lewis & S. Young, 2010 | 26 | 15m, 5 | |||
| 3 |
★★ Belay Bunny
Line of bolts leading from the small ramp at the base of the wall to the DBB just right of the Ice House corner. FA: G. Phillips, S. Young & 5 Mar 2007., 2007 | 22 | 12m | |||
| 4 |
★ Andre Zanada
Two converging cracks in the corner R of Frigid Digit. Climb either crack then layback the thin flake and traverse R under final headwall then up the headwall - or go right to bolts for lots of box. FA: P.B. Steane & P.A. Steane, 1981 | 17 | 15m | |||
| 5 |
Lots of Box
The line of 5 bolts up the wall and roof just right of the Andre Zanada corner. FA: Jon Nermut, 2012 | 21 | 12m, 5 | |||