A Crag Guide gives an extensive view of all sub areas and climbs at a point in the index. It shows a snapshot of the index heirachy, up to 300 climbs (or areas) on a single web page. It shows selected comments climbers have made on a recently submitted ascent.
At a minor crag level this should be suitable for printing and taking with you on a climbing trip as an adjunct to your guidebook.
This guide was generated anonymously. Login to show your logged ascents against each route.
Warning
Rock climbing is extremely dangerous and can result in serious injury or death. Users acting on any information directly or indirectly available from this site do so at their own risk.
This guide is compiled from a community of users and is presented without verification that the information is accurate or complete and is subject to system errors. By using this guide you acknowledge that the material described in this document is extremely dangerous, and that the content may be misleading or wrong. In particular there may be misdescriptions of routes, incorrectly drawn topo lines, incorrect difficulty ratings or incorrect or missing protection ratings. This includes both errors from the content and system errors.
Nobody has checked this particlular guide so you cannot rely on it's accuracy like you would a store bought guide.
You should not depend on any information gleaned from this guide for your personal safety.
You must keep this warning with the guide. For more information refer to our:
Usage policy
Contributors
Thanks to the following people who have contributed to this crag guide:
The size of a person's name reflects their Crag Karma, which is their level of contribution. You can help contribute to your local crag by adding descriptions, photos, topos and more.
Table of contents
- 1. Flare Boulders 3 in Boulder
- 2. Index by grade
1. Flare Boulders 3 routes in Boulder
- Summary:
-
All Bouldering
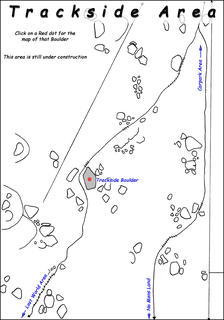
Lat / Long: -30.463884, 151.371231
description
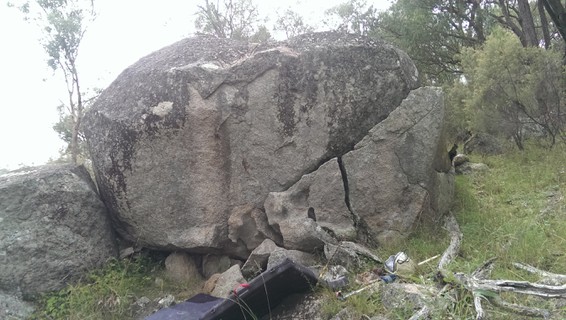
A small cluster of boulders 200m South of the Trackside Boulder, with a prominent detached flake at the base of the largest boulder.
access issues
The majority of the bouldering and climbing at Yarrowyck is located on private property, and the land owner was a climber and has granted access to all climbers anytime, EXCEPT for all crags east of the ridge line which are too close to the land owners house and are off limits, in particular 'Captain Pugwash Memorial Buttress'.
Please do not leave garbage around, leave gates as you find them and do not harass stock. Climbing at Yarrowyck is a privilege, not a right.
The access tracks are in the Nature Reserve which is managed by NPWS which takes you to the Aboriginal Rock Art site. Bouldering or climbing in the reserve is not clear so please avoid this and check the boundaries when exploring.
https://www.nationalparks.nsw.gov.au/visit-a-park/parks/mount-yarrowyck-nature-reserve
approach
Head towards the Trackside Boulder, cutting off the track and straight up the hill for about 50m. Easily visible from the main walking track.
    |
||||||||
| Route | Grade | Style | Selected ascents | |||||
|---|---|---|---|---|---|---|---|---|
| 1 |
2 Stage Flare
Sit start on the blocks at the base of the detached flake. Up and left-ish to the lip, then a fun mantle and wander up the runnels. FA: Russ Best, 25 Mar 2017 | V2 | 3m | |||||
| 2 |
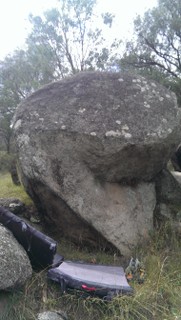
★ Slap and Tickle
Stand start pinching the left arete. Some balancey, technical moves to get you established on the only feature on the face, then smear and slap your way to victory. FA: Russ Best, 25 Mar 2017 | V4 | 3m | |||||
| 3 |
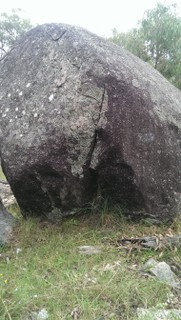
Baby Crack
A novel little crack around the back of Slap and Tickle. FA: Russ Best, 25 Mar 2017 | V0 | 2m | |||||
2. Index by grade
| Grade | Stars | Name | Style | Pop | |
|---|---|---|---|---|---|
| V0 | Baby Crack | 2m | |||
| V2 | 2 Stage Flare | 3m | |||
| V4 | ★ | Slap and Tickle | 3m |