A Crag Guide gives an extensive view of all sub areas and climbs at a point in the index. It shows a snapshot of the index heirachy, up to 300 climbs (or areas) on a single web page. It shows selected comments climbers have made on a recently submitted ascent.
At a minor crag level this should be suitable for printing and taking with you on a climbing trip as an adjunct to your guidebook.
This guide was generated anonymously. Login to show your logged ascents against each route.
Warning
Rock climbing is extremely dangerous and can result in serious injury or death. Users acting on any information directly or indirectly available from this site do so at their own risk.
This guide is compiled from a community of users and is presented without verification that the information is accurate or complete and is subject to system errors. By using this guide you acknowledge that the material described in this document is extremely dangerous, and that the content may be misleading or wrong. In particular there may be misdescriptions of routes, incorrectly drawn topo lines, incorrect difficulty ratings or incorrect or missing protection ratings. This includes both errors from the content and system errors.
Nobody has checked this particlular guide so you cannot rely on it's accuracy like you would a store bought guide.
You should not depend on any information gleaned from this guide for your personal safety.
You must keep this warning with the guide. For more information refer to our:
Usage policy
Contributors
Thanks to the following people who have contributed to this crag guide:
Niko Eltarenko
Mattias Braach-Maksvytis
Woody
Tom C
Sebastian Sakowicz
Phil Neville
Phillip Booth
boulderakov
Simon Li
Aidan
The size of a person's name reflects their Crag Karma, which is their level of contribution. You can help contribute to your local crag by adding descriptions, photos, topos and more.
Some content has been provided under license from: © Australian Climbing Association Queensland (Creative Commons, Attribution, Share-Alike 2.5 AU)
Table of contents
- 1. Crumbly 37 in Crag
- 2. Index by grade
1. Crumbly
- Summary:
-
All Bouldering
Lat / Long: -33.779884, 151.215637
description
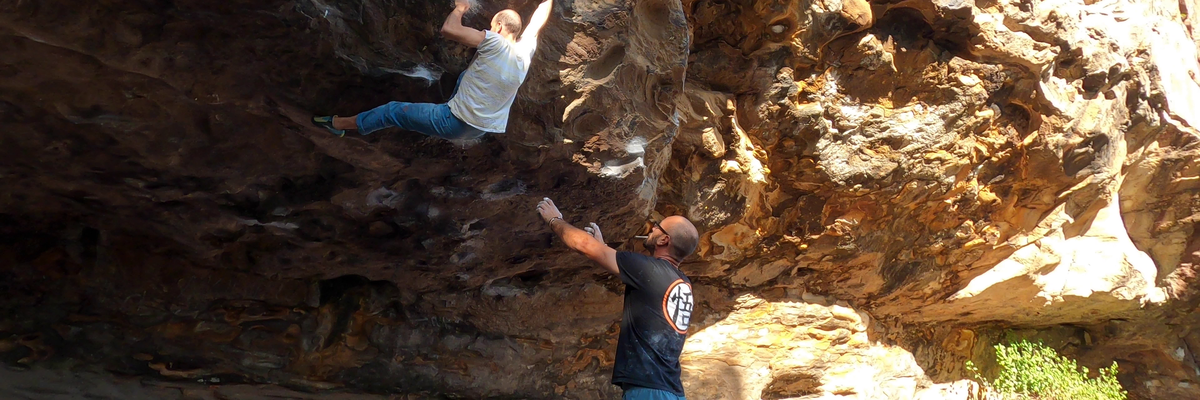
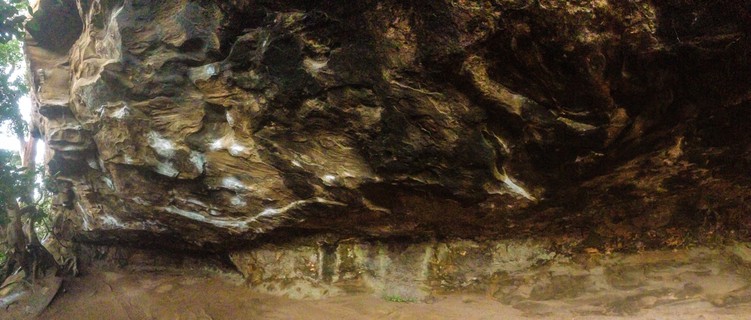
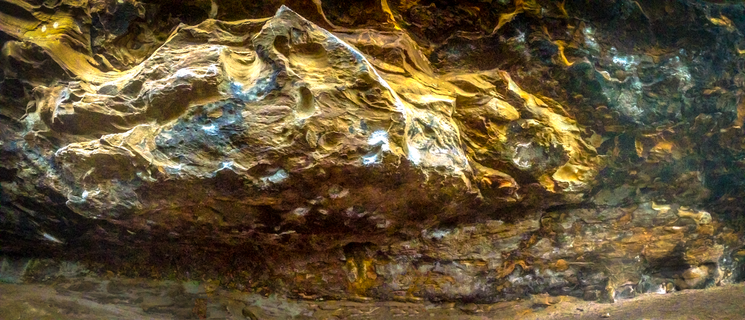
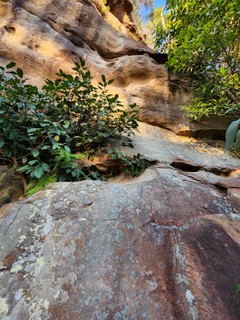
The cave faces SSW so it never actually gets the sun on it making it great for summer and winter alike. The cave is so large that it never gets wet in the rain but it does seep occasionally. While there is one "crumbly" section of rock the majority of the crag is some of the best quality sandstone in Sydney. There are lovely sandy landings under every problem but beware of the broken glass - the sand has been completely raked twice by the developers but local hooligans ensure it returns every time!
access issues
If you have benefited from climbing infrastructure in NSW, please consider making a donation towards maintenance costs. The Sydney Rockclimbing Club Rebolting Fund finances the replacement of old bolts on existing climbs and the maintenance of other hardware such as fixed ropes and anchors. The SRC purchases hardware, such as bolts and glue, and distributes them to volunteer rebolters across the state of New South Wales. For more information, including donation details, visit https://sydneyrockies.org.au/rebolting/
approach
Turn into Starkey St, Killarney Heights, off Warringah Rd and follow it for about a km then turn right into Connemara Rd. At the end turn right again into Killarney Dr, follow it for 100m and park on the grass on the left at the top of the Mosman Rowing Club steps. Just to the right of these steps is an ugly man made driveway cut right through the natural sandstone. Follow this driveway down for quicker access or alternatively, follow the Rowing Club steps down for about 50m to the Flat Rock walking track and turn right along the track. After about 50m you'll see the headwall of a big cave up on your right and a faint track heading up the hill to it. This is it.
There are more direct paths that can be taken from the parking but with a crashpad they are pretty dangerous so the above approach is suggested.
ethic
Respecting the enviroment and keeping crags clean will maintain a healthy and important relationship between the climbing community, local councils and National Parks. Carry out what you take in and enjoy what the North Shore has to offer.
If you come across an area that is being developed or you think could be under development, please show all due respect to the developers and do not climb the projects listed on thecrag.com.
history
Crumbly was first developed as a climbing crag by Peter Martin et al but they overlooked the big horizontal roof starts to all the routes opting for cheater stones and jump starts. It was so named because of a large crumbly section on the right where there was no climbing possible. Then Mike and Dave Kellermann independently discovered the crag on one of their regular boat trips up middle harbour and with the help of Tim O'Neill they realised the potential it held for great boulder problems. There are about 10 problems now ranging from V5 to V13. All the problems are steep and the best are actually horizontal - Chaos and Disorder V11? and Anorexic V5 are arguably the best problems for their style and grade in Sydney!
 |
||||||||
| Route | Grade | Style | Selected ascents | |||||
|---|---|---|---|---|---|---|---|---|
| 1 |
★ Nasty
Start on two underclings at the far left side. Make a big move and head up and slightly left to finish. Don't dab the tree! Not great.
FA: D.Kellerman, 2000 | V6 | 3m | |||||
| 2 |
Reading Between The Lines
Start as for Nasty but continue up passed its finishing holds and traverse high and right to end up on the finish holds of genesis. | V8 | ||||||
| 3 |
Urban Koala
Start as for nasty and go directly upwards finishing last moves as for RBTL. FA: Tom Farrell | V12 | 4m | |||||
| 4 |
Tushi Strain
Low traverse, starting at Nasty and following jugs right to finish on Sushi Train's starting jug FA: Dave Hughes | V4 | ||||||
| 5 |
★ Edo Style
Link Tushi Strain into Sushi Train | V8/9 | ||||||
| 6 |
★★★ Genesis
Start on the big flake jug and make a very tough move up using the tiny crimp. A heel thrown onto the rail of 'Sushi Train' appears to help. FA: D.Kellerman, 2000 | V13 | ||||||
| 7 |
Genius
Start 'Abacus' finish 'Genesis'. FA: Chris Webb Parsons, 2008 | V13 | ||||||
| 8 |
★★★ Catalyst
"9 moves all up. Hard to grade." Mushi Brain finishing up Genesis FA: Chris Webb Parsons, 2007 | V13/14 | ||||||
| 9 |
★★★ Sushi Train
Start on the big undercling with your feet on the back wall and blast straight up, finishing matched on the huge jug left of the spike. Crafty toe-hooks are the key. FA: S.Langris/T.O'Neill, 2000 | V8 | 4m | |||||
| 10 | ★★ Sushi Train (Standing start) | V6 | 3m | |||||
| 11 |
★★★ Mushi Brain
Start as for Nasty and make big moves out rightwards, finishing up 'Sushi Train'. Pumpy. FA: T O'Neill, 2000 | V11 | ||||||
| 12 |
★★★ Flame
A.k.a. Phlegm starting at Sushi Train. After the crux of Sushi Train bust out right to finish up Abacus. | V10 | ||||||
| 13 |
★★ Phlegm
Link 'Mushi Brain' into the last two moves of 'Abacus' FA: J.Scarborough, 2000 | V12 | ||||||
| 14 |
★★★ Abacus
Start on the undercling just right of Sushi Train's start and power up using the obvious poor pinch. FA: T.O'Neill, 2000 | V12 | ||||||
| 15 |
★★ Abacus(stand)
Standing Start FA: T.O'Neill, 2000 | V11 | ||||||
| 16 |
Logical Progression
Extension to 'Abacus'. Need some spotters and mats for this one, its high and dynamic moves above your spotters heads. FA: Chris Webb Parsons, 2008 | V13 | ||||||
| 17 |
Sugoi
Links 'Mushi Brain' into start of 'Abacus'. Sugoi is a word that's typically used when you're left awestruck out of excitement or feel overwhelmed. It can also be used to express that something is terrible or dreadful. FA: Chris Webb Parsons, 2007 | V13 | ||||||
| 18 |
Progressive Aggression
'Sugoi' into 'Logical Progression'. Or start 'Mushi Brain' into 'Abacus' finishing high. FA: Chris Webb Parsons, 2008 | V14/15 | ||||||
| 19 |
★★ Life Changes
Do the first move of Abacus, then traverse backwards through Mushi Brain to finish up Nasty. No traversing straight into the Sushi Train start holds. FA: Chris Webb Parsons, 2010 | V11 | ||||||
| 20 |
★★ Life Changes (Sushi start)
Life Changes but starting as for Sushi Train. LC originally started as for Abacus. | V10 | ||||||
 |
||||||||
| Route | Grade | Style | Selected ascents | |||||
| 21 |
★★★ Chaos and Disorder
Start of the underclings and make some bizarre contortions (including doing a full 180 degree spin) through the roof. Probably one of the coolest and most unique problems in Sydney. FA: D.Kellerman, 2000 | V10 | ||||||
| 22 |
★★★ Black Magic
Start on the big undercling in front of 'Mull up'. Launch out through the roof and link into the last few moves of 'Anorexic'. Double toe-hooks are the trick for the funky 'drop down' move. FA: M.Kellerman, 2000 | V8 | 4m | |||||
| 23 |
★★★ Blacker Magic
Link 'Black Magic' into the finish of 'Exodus'. | V9 | ||||||
| 24 |
★★ White magic
Anorexic finishing on the start hold of Black Magic | V8 | 4m | |||||
| 25 |
★★★ Anorexic
One of the best problems of this grade & style. Start at the back wall and pull straight out the roof, passing the big hole, make a long throw and finish MATCHED on the huge jug. FA: T.O'Neill, 2000 | V5 | 4m | |||||
| 26 |
★★★ Anorexic (Extension)
After reaching the finishing jug, keep going a few moves further and finish on an even higher jug, up and left of the spike on 'Exodus'. Scary! | V7 | ||||||
| 27 |
The Monster Anorexic Link
Link the Traverse into 'Anorexic' and finish as for the 'Anorexic' extension. V7' ish but probably deserves a sport grade. | V7 | ||||||
| 28 |
Exodus
Start slighty right of 'Anorexic'. Move through the roof with your hands staying clear of the holds on 'Anorexic' although your feet may stray over. Keep going past the old bolt and slap up the sloping prow to finish on the the big spike. Unrepeated since a hold broke? FA: T.O'Neill, 2000 | V10 | ||||||
| 29 | ★★ Anorexodus | V8 | ||||||
| 30 |
The Traverse
Start a few metres right (just before the rock gets bad) and traverse left into the start of 'Anorexic'. FA: T.O'neill, 2000 | V6 | ||||||
/20/54/2054ae702c6cb0171929d54b3a65a62e5f5964a2) 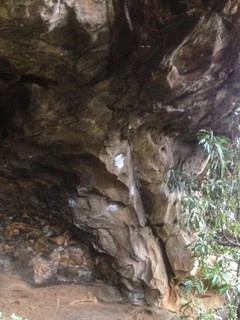 |
||||||||
| Route | Grade | Style | Selected ascents | |||||
| 31 |
Genicus
Low start on crimp rail straight up to finish matched on slopey rail. Cleaned up nicely. FA: marc landers, 27 Jan 2015 | V5 | ||||||
| 32 |
★ Genicus Copernicus
Start at Genicus and go up through crimp rail to slopey rail. Traverse rightwards till the holds end then make a big move out to jug in the roof. FA: Phil Neville, 27 Jan 2015 | V5 | ||||||
| 33 |
Leviticus
Sit start on an incut RH crimp and LH slopey crimp. Go up to the break and traverse right to the big bucket jug. Head straight out the roof to the last jug via some big spans. | V10 | ||||||
| 34 |
The Prow
Starts as a sit/crouch start on the chalk at the far right of the crumbly cave and then up the “v3” and into the roof to finish on the last big jug (same finish as leviticus) FA: Chris Webb Parsons | V12 | ||||||
| 35 |
★ Get down on it
Sit start on undercling. Finish matched on sloper to right. | V3 | 3m | |||||
| 36 |
★ Give it to me baby
A sit start problem near the bottom of the dicey access gully FA: Kyle Dunsire, 2000 | V3 | ||||||
 |
||||||||
| Route | Grade | Style | Selected ascents | |||||
| 37 |
Tom's pee passage
Start both hands on side pull, go up to the flat. Go right and reach for the left jug (end). Downclimb, i'm too scared to go further. No room for pads. FFA: Tom C, 2023 | VB | 3m | |||||
 Phillip Booth
2. Index by grade
| Grade | Stars | Name | Style | Pop | |
|---|---|---|---|---|---|
| VB | Tom's pee passage | 3m | |||
| V3 | ★ | Get down on it | 3m | ||
| ★ | Give it to me baby | ||||
| V4 | Tushi Strain | ||||
| V5 | ★★★ | Anorexic | 4m | ||
| Genicus | |||||
| ★ | Genicus Copernicus | ||||
| V6 | ★ | Nasty | 3m | ||
| ★★ | Sushi Train (Standing start) | 3m | |||
| The Traverse | |||||
| V7 | ★★★ | Anorexic (Extension) | |||
| The Monster Anorexic Link | |||||
| V8 | ★★ | Anorexodus | |||
| ★★★ | Black Magic | 4m | |||
| Reading Between The Lines | |||||
| ★★★ | Sushi Train | 4m | |||
| ★★ | White magic | 4m | |||
| V8/9 | ★ | Edo Style | |||
| V9 | ★★★ | Blacker Magic | |||
| V10 | ★★★ | Chaos and Disorder | |||
| Exodus | |||||
| ★★★ | Flame | ||||
| Leviticus | |||||
| ★★ | Life Changes (Sushi start) | ||||
| V11 | ★★ | Abacus(stand) | |||
| ★★ | Life Changes | ||||
| ★★★ | Mushi Brain | ||||
| V12 | ★★★ | Abacus | |||
| ★★ | Phlegm | ||||
| The Prow | |||||
| Urban Koala | 4m | ||||
| V13 | ★★★ | Genesis | |||
| Genius | |||||
| Logical Progression | |||||
| Sugoi | |||||
| V13/14 | ★★★ | Catalyst | |||
| V14 to V15 | Progressive Aggression |