Help

The Slabs

Seasonality

J
F
M
A
M
J
J
A
S
O
N
D

Description

Approximately 1100ft (335m) long slabs along the right-side of White Horse Ledge. Lots of gorgeous friction climbing, with generally little protection.

Approach

Park below the hotel, along the access road for the maintenance buildings, rather than in the main hotel parking area. Walk up towards the hotel, along the right-most edge, where the parking/ramp curves back towards the hotel, there is an obvious track up towards the cliffs. Continue up to the cliff, an easy 5 minute hike.

Descent notes

From the top, walk along the trail to climbers right, descending the col between this and Cathedral Ledge. Initially follow blue blazes, until the trails meet, then follow yellow blazes back to the base of the ledge.

With two ropes, some of the routes can be descended by rappel, e.g. "The Slabs Direct" or "Standard Route", "The Quartz Pocket" variant.

Routes

Add route(s) Add topo Reorder Bulk edit Convert grades
Grade Route

A good rewarding, though not sustained route up the slabs. There are but a few moves of 5.5, and only a few sections of 5.4 climbing -- most of the climbing is 5.3 and easier. But, often with long run-outs at the easier grades, requiring confident leading at that grade. The "Standard Route" is a better-protected choice.

Start below a large isolated pine tree about 35m up near the right side of the slabs.

  1. 120ft (5.2). Climb the easy slab to a 2 ring-bolt anchor left of the pine tree.

  2. 140ft (5.4) From the anchor follow a vertical crack over the left side of an overlap, then up a narrow vertical dike up a steeper slab past 2 bolts to a small stance with 2 ring-bolts on the left.

  3. 110ft (5.1 R). Continue up an easy low-angled groove to another double-bolt anchor.

  4. 90ft (5.2) Follow a prominent right-slanting arch until it ends at a double-bolt anchor above a small flake.

  5. 140ft (5.5, 5.4R) Step up from the anchor through the headwall (5.5) then up and left (5.4 R) to and past a few hidden pockets (gear!) then up to a Grinch-face belay ledge with double-bolt anchor.

  6. 100ft (5.4). Go up and right into a left-facing groove with a lay-back flake, then up the flake for about 50ft. Then step up and right, then up a 20-foot head wall with old pitons. Belay on a good ledge just above the head wall , and below the last big overlap.

  7. 100ft (5.3). Traverse left from the anchor past a detach block to a gently rising ramp, then past an old bolt (good for route-finding an keep the rope off the ledge, but wouldn't trust it to catch a fall). Continue until you can break right on good holds through the overlap then up to a tree anchor.

  8. 4th class. Follow the obvious dike up the next section of slab.

  9. 4th class (one 5.1 move). Follow the dike diagonally up and right through the next section of slab.

  10. 4th class (a couple 5.0 moves). Friction up the easy slab to the summit. One slightly steep friction section.

The last three pitches are usually climbed un-roped as a scramble.

1 5.7 X
2 5.5
3 5.4
4 5.7

0: Get to the starting anchor somehow.

  1. Depart the anchor and clip a pin. Follow flake, then continue up and left to a two bolt anchor.

  2. Climb past a bolt in the swell. Continue up to another bolted anchor.

  3. Climb up and left to a small vertical section that leads to the lunch ledge .

  4. Climb easy terrain to a bolt. Surmount the slick slab. Continue up to a belay.

Finish up 'Standard Route'

FA: Paul Ross, Ben Wintringham & Marion Wintringham, 1973

From the right end of the lunch ledge, climb up the left-facing dihedral to a piton, then step right below a bolt. After clipping make some delicate moves (crux) rightwards and up to the the ramp, then continue leftwards up the ramp and layback corner to tree belay above.

Variant of the "Standard Route", replacing pitches 2-4 with a shorter, more direct, 2 pitches of climbing.

This climbs the obvious right-facing arch up the cliff, then up through (crux) overlaps and finishing on the upper slabs. From near the center base of the slabs:

Pitch 0: 45m (5.0?) Scramble 150ft up an easy depression to the starting ledge.

  1. 24m (5.3) From the right end of the starting ledge, friction up and right to a large pothole called the Toilet Bowl. Two bolt anchor. (Be careful, the bowl is often wet inside, where you stand... and leading friction with wet shoes is exciting.)

  2. 27m (5.2) Up and left past a flake to good ledges at the base of the obvious arch. Double ring bolt anchor.

  3. 42m (5.4) Climb up the arch, gentle laybacks to a possible piton & gear semi-hanging belay. (Or combine with next pitch on a 70m rope.)

  4. 28m (5.2) Continue up and right along the arch and up easy slabs to a sloping belay stance on fixed slings around a natural thread anchor.

  5. 44m (5.3) Continue up easy slabs up and right to the end of the arch, then up easy climbing at the natural break in the head wall to the Lunch Ledge. 2 Bolt anchor.

  6. 45m (5.5) The crux pitch: up 15' from the right end of the Lunch Ledge, one friction move right to a bolt, down climb a ramp for 10', step right onto a brownish spot foothold, to another bolt, then delicate slab onto a left-diaganolling ramp. Possibly belay here (rope-drag issues later) or continue up the ramp to a short layback corner. (Nut anchor.)

  7. 25m (5.2) Friction 40' left traversing an easy slab beneath an overlap to an easy dike, then up to the comfortable ledge above. (Tree belay, or nut.)

  8. 43m (5.2 or 5.5). Follow the easy, stepped, dike up to the left of a tree to an overlap, bypass on the left to a tree ledge (5.2 R) or climb directly over the ledge at a double crack (protectable, one 5.5 move).

  9. 70m (5.2 R) Finish up the upper slabs to trees, following either of the two upper dikes. The easier is up the left-hand that has a bolt without hangar visible from the belay, and then a second later bolt. (With less than a 70m rope, either belay somewhere, possible the bolt, possibly the later gear placement, or possibly trees off to the left about 2/3 way up -- or simul-climb for a bit.)

Walk off to the (climber's) right.

FA: Alain Comeau & Kim Smith

To the left of the "launch pad" ledge where several climbs start are two patches of trees. This climb starts below the left most of the pair.

  1. 125', 5.2. Climb unprotected slab.

  2. 125', 5.2. Continue climbing without belay or protection to the patch of trees.

  3. 150', 5.3. Climb a few slightly harder moves off the tree patch, then more unprotected 5.2 slab to a bolted anchor.

  4. 70', 5.6. Climb up steepening slab to a bolt, then to a horizontal crack at the base of a steep face. Traverse right to a good ledge.

  5. 70', 5.7. Climb up a lay-back crack angling rightwards, then up a tricky corner past a bolt, then step right to a good ledge with an anchor.

  6. 100', 5.5. Go up the obvious groove with flakes and good gear to the right end of the tree ledge. Strongly consider rappelling from this point. Strongly consider it. Seriously, do it. You're done with clean rock and mostly done with any good climbing.

  7. 100', 5.6 Continue up the right side of the trees to dirty slab. Angle up and left past a tree to a short, dirty rough corner that breaks through the next overlap protected by several old pins and an old bolt with a loose aluminum hanger (and some gear). Be careful of rope drag. (Handren, 2012 suggests moving the belay left to a tree leaning against the steep face, then stemming up that tree -- the tree does not seem to exist as of 2018. This description more closely matches Webster, 1996.) Now, really, turn back.

  8. 90', 5.2(ish) Angle up and right through dirt, trees, shrubs, and dirty slabs. This wouldn't even be fun in hiking boots.

  9. 90 ', 5.2(ish). Angle up and right through dirt, trees, shrubs, and dirty slabs. This wouldn't even be fun in hiking boots.

  10. 170', 5.2(ish). Finally find some clean slab, angle up and right to the dike that is the final pitch of Standard Route, then follow it up and left.

Fine climbing up to the end of pitch 6. Pitch 7 is dirty, but of some interest. The rest is crap.

Near the left side of the slabs are a pair of slowly converging dikes running up the slab. This routes starts up the right-most of the dikes.

Pitch 0: friction the slab to the large sloping ledge. (Most climbers rope up on this ledge.) Guide says to belay from pin at right side of ledge, but pin did not seem to be present as of August/2012.

  1. 125' (5.2) Climb the easy but poorly protected dike to a cozy belay pocket with two bolt anchor.

  2. 150' (5.2) Follow the dike past a double-ring bolt anchor (top of pitch one of "Pathfinder" to a large tree ledge. Scramble up and left to the high point and belay.

  3. 90' (5.6) Continue up to the base of a narrow right-rising arch. Belay on a natural thread and gear.

  4. 100' (5.6) Layback part way up the arch then pull up left over the arch onto slab then up to a double ring-bolt anchor below the huge upper roofs.

  5. 80' (5.5) Traverse right below the big roofs to a double ring-bolt anchor on a small ledge.

  6. 65' (5.6) Continue right around the corner, and climb the final overlap by way of shallow right-facing corner to a big pine.

  7. (5.2) Up and right through 4th class terrain, the occasional slab and treed ledges.

  8. (5.2) Up and right through 4th class terrain, the occasional slab and treed ledges, to finish near the end of "Standard Route".

A rappel descent can be made from the end of pitch 4 on a single 70m rope. (Barely, 5 rappels, using the "Pathfinder" pitch 1 anchors.) A rappel descent can be made from the end of pitch 5 with double-rope rappels (2 50m ropes).

Did you know?

Did you know that you can create an account to record, track and share your climbing ascents? Thousands of climbers are already doing this.

Selected Guidebooks more Hide

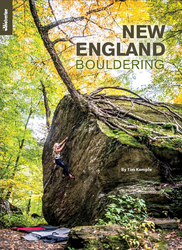
Author(s): Tim Kemple

Date: 2018

ISBN: 9781938393303

From the granite blocks of Lincoln Woods, Rhode Island, to the schist of Smugglers' Notch, Vermont, you're bound to find your next problem in the New England Bouldering guidebook.

  • Comprehensive, revised 3rd edition features more than 1,200 boulder problems at some of the best bouldering areas throughout New England
  • Detailed maps help you find your next bouldering challenge with ease

Accommodations nearby more Hide

Share this

Photos Browse all photos

Upload a photo of area

Fri 28 Apr
Check out what is happening in The Slabs.

Get a detailed insight with a timeline showing

  • Ticks by climbers like you
  • Discussions of the community
  • Updates to the index by our users
  • and many more things.

Login to see the timeline!

Deutsch English Español Français Italiano 한국어 Português 中文