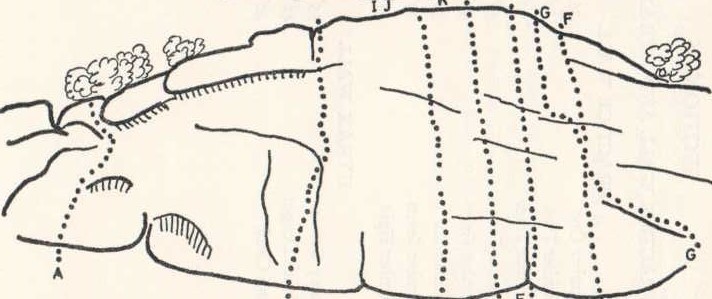
A Crag Guide gives an extensive view of all sub areas and climbs at a point in the index. It shows a snapshot of the index heirachy, up to 300 climbs (or areas) on a single web page. It shows selected comments climbers have made on a recently submitted ascent.
At a minor crag level this should be suitable for printing and taking with you on a climbing trip as an adjunct to your guidebook.
This guide was generated anonymously. Login to show your logged ascents against each route.
Warning
Rock climbing is extremely dangerous and can result in serious injury or death. Users acting on any information directly or indirectly available from this site do so at their own risk.
This guide is compiled from a community of users and is presented without verification that the information is accurate or complete and is subject to system errors. By using this guide you acknowledge that the material described in this document is extremely dangerous, and that the content may be misleading or wrong. In particular there may be misdescriptions of routes, incorrectly drawn topo lines, incorrect difficulty ratings or incorrect or missing protection ratings. This includes both errors from the content and system errors.
Nobody has checked this particlular guide so you cannot rely on it's accuracy like you would a store bought guide.
You should not depend on any information gleaned from this guide for your personal safety.
You must keep this warning with the guide. For more information refer to our:
Usage policy
Contributors
Thanks to the following people who have contributed to this crag guide:
Mountain Club of Kenya
Ian Thorpe
Nicky
Joel M
Crushy McCrush Face
The size of a person's name reflects their Crag Karma, which is their level of contribution. You can help contribute to your local crag by adding descriptions, photos, topos and more.
Einige Inhalte wurden unter folgender Lizenz bereitgestellt: © Mountain Club of Kenya (Copyright Mountain Club of Kenya)
Table of contents
- 1. Practice Wall / Sword Cliff 8 in Sector
- 2. Index by grade
1. Practice Wall
- Summary:
-
Alle traditionelles Klettern
Lat / Long: -1.479604, 37.071743
Beschreibung
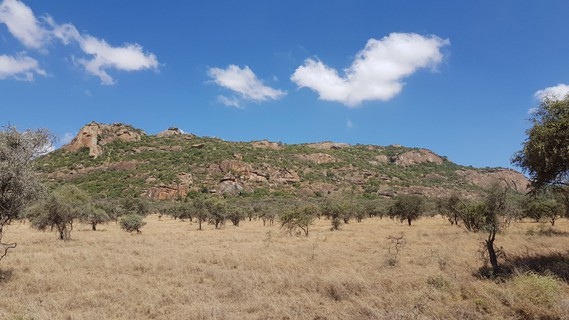
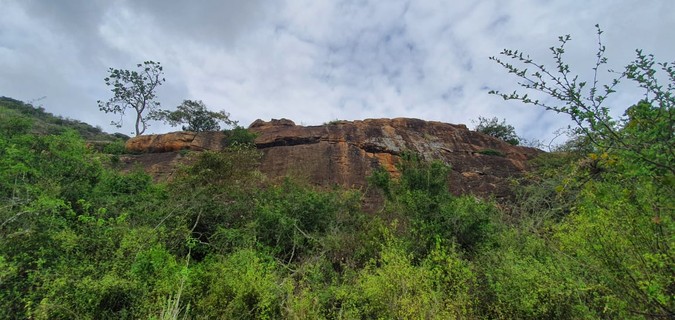
About 200m right of the North Picnic Tree along the base of the cliff line is a small crag.
Recommended routes: Number Two — V.S. Number Three — S
A 2000 MCK Bulletin mentions a 'new' crag called Sword Cliff with 3 routes, but this is a mistake - Sword Cliff is Practice Wall.
Einschränkungen
Lukenya is owned by the Mountain Club of Kenya and entrance is free for members. Non-members have to pay for daily membership (KES400 for Kenyan citizens, KES800 for others, payable by Mpesa Paybill No. 880926, account: guest fee). No commercial groups are allowed without prior agreement from MCK. Some climbs are occasionally off-limits when eagles are nesting (in particular Eagle's Nest Face). If this is the case it is normally communicated on a notice in the sign-on book at the gate, through a climber Whatsapp group and on the relevant page on theCrag. There are many other wild animals that call Lukenya home, including a resident leopard, snakes, hyenas. In general, these will all stay well out of your way, but be aware at night and avoid confrontations with bigger grazers like giraffes or eland. This is a wild place, so treat it with respect, pack out any rubbish, and bury human waste at least 30 cm underground (bring a spade or trowel!).
Zustieg
Park at North Picnic Tree (Main Wall parking) and head right parallel to the wall along goat tracks.
Ethik
Lukenya is mostly trad, with some specific sport crags. No bolting is allowed without special permission from the Mountain Club of Kenya - get in touch with them if you think you have spotted a sport route, think there should be an extra bolt on a climb, see some degraded equipment, etc. Avoid cutting down any vegetation beyond a few bush branches - if you think a particular tree poses a real danger to climbers please bring this to the attention of MCK. Don't harass any of the local, sometimes rare wildlife.
   |
||||||||
| Route | Grade | Style | Selected ascents | |||||
|---|---|---|---|---|---|---|---|---|
| 1 |
Number One
Start at left-hand end of crag, some 2m left of sharp corner, at two pocket holds. Move right under bush and take wall above direct. Erstbegehung: Grading Committee, 1959 | S | 8m | |||||
| 2 |
Number Five
Start 4m to right of crack mentioned in Number Three. | VD | 16m | |||||
| 3 |
Number Six
Start 2m to right of Number Five where there is a mantleshelf about 1m up. Continue climbing, passing to right of a small bush near the top. | D | 16m | |||||
| 4 |
Number Seven
Start at right-hand end of crag. Up pile of boulders 3m to platform. Traverse left along wide ledge to hole ascend wall above passing to right of bush. Traverse left above bush, straight up to finish. | M | 11m | |||||
| 5 |
Number Eight
Start 6m from right angle junction of blocks at end of face. A minute crack running straight up. | S | 8m | |||||
| 6 |
★ Number Two / Perfect Tramlines
Start some 20m right of Number One at two parallel rock faults. Climb left-hand fault 4.5m then move to right- hand fault and follow to top. Erstbegehung: Grading Committee, 1959 | VS 5a AU:16 | 16m | |||||
| 7 |
Number Three / Two Into One Does Go
Start 2m to left of 1m dark vertical crack at base of rock. After a thin start move left under middle of red overhang, which is taken direct. Erstbegehung: Grading Committee, 1959 | VS | 16m | |||||
| 8 |
Number Four / Accidents Can Happen
Start immediately to right of vertical crack mentioned in Number Three. Ascend wall direct. Erstbegehung: Grading Committee, 1959 | VD | 16m | |||||
2. Index by grade
| Grade | Stars | Name | Style | Pop | |
|---|---|---|---|---|---|
| M | Number Seven | 11m | |||
| D | Number Six | 16m | |||
| VD | Number Five | 16m | |||
| Number Four | 16m | ||||
| S | Number Eight | 8m | |||
| Number One | 8m | ||||
| VS | Number Three | 16m | |||
| VS 5a | ★ | Number Two | 16m |