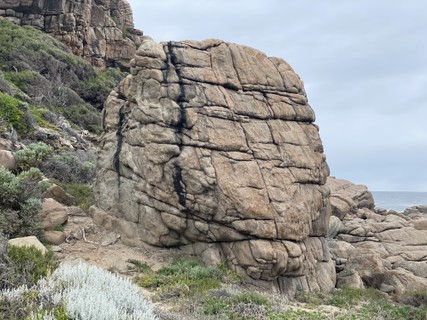
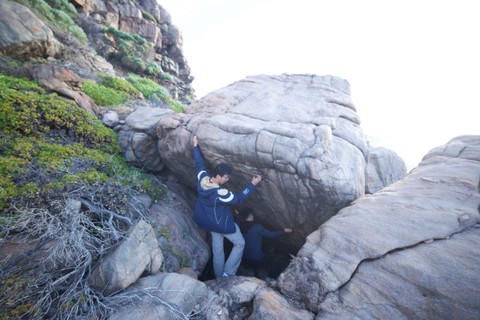
A Crag Guide gives an extensive view of all sub areas and climbs at a point in the index. It shows a snapshot of the index heirachy, up to 300 climbs (or areas) on a single web page. It shows selected comments climbers have made on a recently submitted ascent.
At a minor crag level this should be suitable for printing and taking with you on a climbing trip as an adjunct to your guidebook.
This guide was generated anonymously. Login to show your logged ascents against each route.
Warning
Rock climbing is extremely dangerous and can result in serious injury or death. Users acting on any information directly or indirectly available from this site do so at their own risk.
This guide is compiled from a community of users and is presented without verification that the information is accurate or complete and is subject to system errors. By using this guide you acknowledge that the material described in this document is extremely dangerous, and that the content may be misleading or wrong. In particular there may be misdescriptions of routes, incorrectly drawn topo lines, incorrect difficulty ratings or incorrect or missing protection ratings. This includes both errors from the content and system errors.
Nobody has checked this particlular guide so you cannot rely on it's accuracy like you would a store bought guide.
You should not depend on any information gleaned from this guide for your personal safety.
You must keep this warning with the guide. For more information refer to our:
Usage policy
Contributors
Thanks to the following people who have contributed to this crag guide:
Michael B
Chris
Martin Danger
Jiri Stastny
Ashley Felton
Kym.H
Mark_K
Zhangter P
Brendan Heywood
Sarah Lynn
The size of a person's name reflects their Crag Karma, which is their level of contribution. You can help contribute to your local crag by adding descriptions, photos, topos and more.
Table of contents
- 1.
Wilyabrup
308 in Crag
-
1.1.
The Far North 66 in Crag
- 1.1.1. The Book Shelf 40 in Area
- 1.1.2. The Brickyard 0 in Sector
- 1.1.3. The Playground 13 in Area
- 1.1.4. The Lost Buttress 13 in Area
-
1.2.
Northern Crag 57 in Area
- 1.2.1. The Terrace 13 in Area
- 1.2.2. Banana Wall 12 in Area
- 1.2.3. The Meltdown Sector (Bouldering) 19 in Area
- 1.2.4. Peach Face 8 in Area
- 1.2.5. Far North 5 in Sector
-
1.3.
Middle Crags 51 in Area
- 1.3.1. The Organ Pipes 20 in Area
- 1.3.2. Driftwood Bay 11 in Area
- 1.3.3. Beginners Wall 20 in Area
-
1.4.
Main Crags 134 in Area
- 1.4.1. Inner Space Wall 22 in Area
- 1.4.2. Fat Chance Wall 22 in Area
- 1.4.3. One For The Road 16 in Area
- 1.4.4. Hope Buttresses 19 in Area
- 1.4.5. Steel Wall 22 in Area
- 1.4.6. Stormcock Area 12 in Area
- 1.4.7. Million Ways to Try bloc and surrounds 21 in Area
-
1.1.
The Far North 66 in Crag
- 2. Index by grade
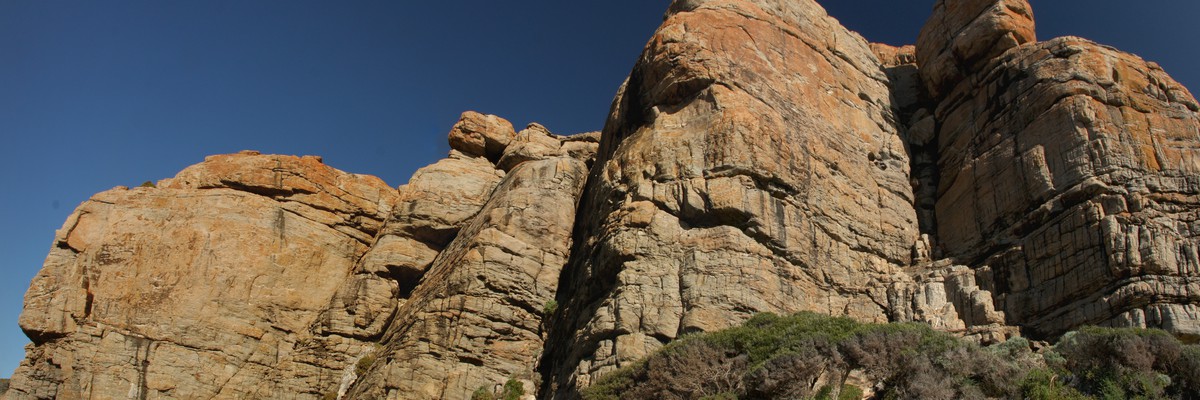
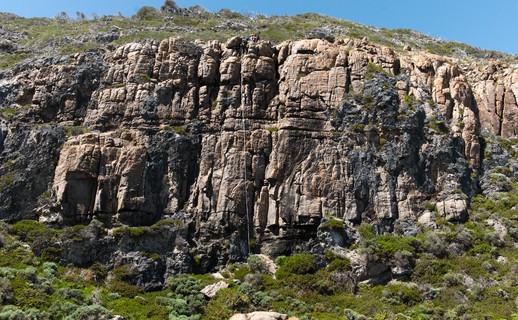
1. Wilyabrup 308 routes in Crag
- Summary:
-
Trad climbing, Bouldering and other styles
Lat / Long: -33.804953, 114.998780
summary
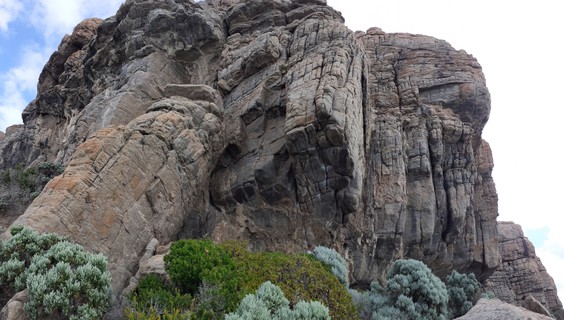
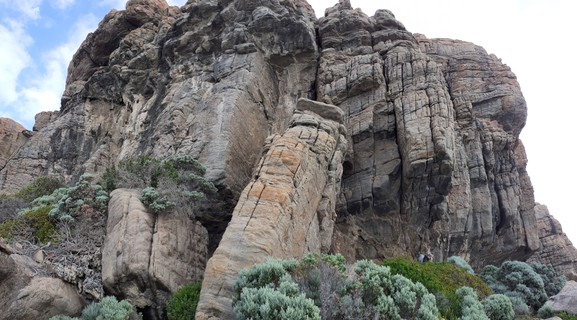
Sea cliffs with amazing views and the opportunity to see dolphins playing in the surf and migrating whales.
description
Sea Cliffs, great atmosphere and exposure. Sure, they are not as high as other cliffs on the South Coast, but they are amazing!
access issues
Access is through private property firebreak/trail. Please don't litter. There is a long drop toilet in the National Park with an amazing view. National Park, so no fires, no camping and no dogs. Please ensure all litter is removed and climbers are seen to be doing the right thing.
approach
Car access is best down Wilyabrup Road off Caves Road. Follow track to a small parking area. Park here, cross a fence using the stile, follow the fire break down and across a stream and back up the other side. Stick to the path and walk towards the sea. Cross another fence utilising the stile to access the National Park. The Cape to Cape Track can be utilised to access the northern crags, but for the main area, pass the toilet on the left and head down the track to arrive at the top of the sea cliffs. From here, the track winds left along the southern end of the cliff and finds you at Inner Space Wall.
where to stay
Camp at Gracetown Caravan Park. There are many other options. Margaret River Town is relatively nearby too.
ethic
The local climbing association has published some Ethics\Guidelines which apply. http://www.climberswa.asn.au/cawa/cawa-code-of-bolting-and-new-route-development/
1.1. The Far North 66 routes in Crag
- Summary:
-
Rock climbing, Trad climbing and Bouldering
Lat / Long: -33.798436, 114.999810
summary
Great place to practice trad on easier routes with plenty of protection available.
description
Not often climbed so there is plenty of loose rock and some of it is big enough to squash an unlucky belayer. Plenty of loose rock on top too so a safety line is a must if redirecting a top rope anchor. Plenty of cam placements to make a trad anchor on top if the carrots won't do. Beware the single RB - spins freely and lifts out half way.
approach
High clearance 4WD road access - After reaching the car park, continue down the gravel road which quickly turns to ruts or sand etc. Drive until you get to a National Park sign and take a left. Take your next left at an awkward and tight junction. Park at the end of this track in a mini parking area. Or walk the Cape to Cape walk track. From the parking area, DO NOT walk down using the limestone path on the side of the hill (makeshift path that is causing huge erosion). Instead, take the path that goes under the trees. Have a good look around and find a narrow gap in the scrub that goes directly west and take that along a weakness in the scrub that goes north and down. Some scrambling to get to the anchors to abseil down or some more scrambling to get to the base.
1.1.1. The Book Shelf 40 routes in Area
- Summary:
-
Rock climbing and Trad climbing
Lat / Long: -33.799290, 114.999176
summary
As per SW Rock (2016)
| Route | Grade | Style | Selected ascents | |||
|---|---|---|---|---|---|---|
| 1 | Monkey Bar | 20 | 5m | |||
| 2 | Grease Gun | 20 | 5m | |||
| 3 | Second's Prize | 19 | 5m | |||
| 4 | Stepping Out | 10 | 6m | |||
| 5 | Think About It | 11 | 6m | |||
| 6 | Down Grading | 11 | 6m | |||
| 7 | Down Grading | 11 | 6m | |||
| 8 | Monkey Business | 6 | 6m | |||
| 9 | Cheeky Monkey | 12 | 6m | |||
| 10 | Deceptive | 12 | 6m | |||
| 11 | Good Ship SSS | 8 | 6m | |||
| 12 | The Bulge | 8 | 6m | |||
| 13 | Layered Cake | 11 | 6m | |||
| 14 | A Cracking Line | 12 | 6m | |||
| 15 | Balance Beam | 11 | 6m | |||
| 16 | Round the Corner | 12 | 6m | |||
| 17 | Smoking | 8 | 6m | |||
| 18 | Glory Boy | 8 | 6m | |||
| 19 | It's All There | 10 | 6m | |||
| 20 | Not So Thin | 10 | 6m | |||
| 21 | Bad Flake | 11 | 6m | |||
| 22 | Good Flake | 13 | 6m | |||
| 23 | Self-Cleansing | 9 | 5m | |||
| 24 | Grease Lightening | 17 | 4m | |||
| 25 | The Mechanic | 18 | 4m | |||
| 26 | Group Session | 8 | 4m | |||
| 27 | Ask Me Later | 8 | 4m | |||
| 28 | I Don't Know | 10 | 5m | |||
| 29 | Liquid Tension Experiment | 15 | 15m | |||
| 30 | Fourth Gear | 15 | 5m | |||
| 31 | Tick and Flick | 10 | 5m | |||
| 32 | Snow Pea | 14 | 5m | |||
| 33 | Cracked Pepper | 16 | 5m | |||
| 34 | Chicken Wing | 13 | 5m | |||
| 35 | A Shame | 8 | 5m | |||
| 36 | Past It | 11 | 5m | |||
| 37 | Just Because | 5 | 5m | |||
| 38 | One Too Many | 16 | 5m | |||
| 39 | Bronze Medal | 18 | 5m | |||
| 40 | Smear Factor | 20 | 5m | |||
1.1.2. The Brickyard 0 routes in Sector
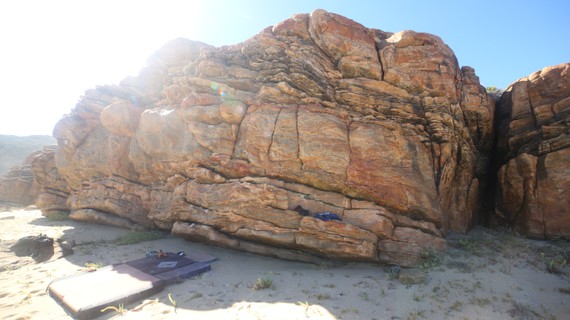
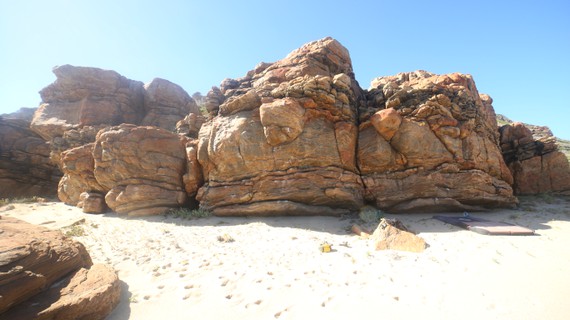
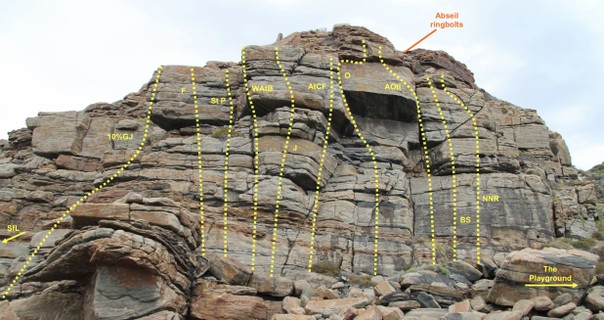
1.1.3. The Playground 13 routes in Area
- Summary:
-
Mostly Bouldering
Lat / Long: -33.797130, 114.999583
summary
A contender for the best warm up wall in the south west! Sunset bouldering here is magic!
description
A well featured wall over a sandy landing makes for a great place to chill out. With so many holds there are plenty of fun contrivances, traverses and link ups. What is listed here are some of the obvious straight up lines. There are a few more that probably have been done. Boulder grades have been assigned here. The wall is tall in places but there are plenty of good holds and options for down climbing.
  |
||||||||
| Route | Grade | Style | Selected ascents | |||||
|---|---|---|---|---|---|---|---|---|
| 1 |
★ Chimpanzee
Sit start on the short face on the right wall. Up and trending left to finish on the obvious crack. FA: Morgan Warren, Apr 2015 | VB | 6m | |||||
| 2 |
★ Stand tall
Sit start. Stand on the obvious ledge then straight up with vertical cracks. | V0 | 6m | |||||
| 3 |
★★ Cookie Monster
Sit start. Up vertical crack and then top out trending right. FA: Morgan Warren, Apr 2015 | V0 - 1 | 6m | |||||
| 4 |
★★ Cookie Monster left
Sit start. Up trending left and avoiding the vertical right crack. Lots of different betas. https://youtu.be/cZPA0ZbEgTE?t=9 | V2 | 6m | |||||
| 5 |
Tubular Swells
Starts under the big hanging rock, up and leftish. FA: Apr 2015 | 6m | ||||||
| 6 |
★★ Slime Ball
Sit start under the obvious slopey block with flat ledge. Then trend right under the block with underclings. FA: Krish Seewraj, 2013 | V3 | 6m | |||||
| 7 |
★★★ The All Time Super Duper V4
Sit start. Head straight up through the slopey block with rad moves avoiding escaping left or right. https://youtu.be/cZPA0ZbEgTE?t=84 FA: Andy Lampard | V4 | 6m | |||||
| 8 |
★★ The Slicer
Sit start, up and from the slopey block trend left with crimps. FA: Krish Seewraj, 2013 | V3/4 | 6m | |||||
| 9 |
★★★ No Locking
Sit start then up compressing the two parallel cracks and then through slopers. A bit contrived but mega rad. https://youtu.be/cZPA0ZbEgTE?t=167 Link up into 'The Slicer' or 'The All Time Super Duper V4' is also rad! FA: Andy Lampard | V5 | 6m | |||||
| 10 |
★★ Locked and Loaded
Up finger crack on the left. FA: Krish Seewraj, 2013 | V4 | 6m | |||||
| 11 |
★★ Low Hanging Fruit
Sit start. Straight up | VB | 3m | |||||
| 12 |
★★★ Tunnel Vision
Steep start. Mantles and fingerlocks with the thin crack then through the small roof. FA: Fischer Hartley, Apr 2015 | 18 | ||||||
| 13 |
Thug Life
Up short face on the right wall of the gully then up the left facing corner crack. FA: Hartley Fischer, Apr 2015 | 12 | ||||||
1.1.4. The Lost Buttress 13 routes in Area
- Summary:
-
All Trad climbing
Lat / Long: -33.795735, 115.000127
description
Mini-guide available from CAWA website: https://www.climberswa.asn.au/climb/mini-guides/
| Route | Grade | Style | Selected ascents | |||||
|---|---|---|---|---|---|---|---|---|
| 1 |
Scarred for Life
Up the left hand end of the wave-washed wall just north of Lost Buttress. Good horizontal breaks followed by small positive holds lead up the often wet wall. FA: 2013 | 12 | 7m | |||||
 |
||||||||
| Route | Grade | Style | Selected ascents | |||||
| 2 |
10% Gym Junky
Start low down at the base of the easy arête at the far left end of the crag. Amble up the arête to reach to ledge, then ape up the hanging arête. FA: 2013 | 18 | 20m | |||||
| 3 |
Flashback
Pleasant moves up the bottom wall, clip the BR followed by tricky moves to get established on the head wall. FA: 2013 | 17 | 12m | |||||
| 4 |
★★ St Patrick
Weave your way up the lower wall heading left, right or over the bush. From the ledge, the face provides great climbing. FA: 2013 | 12 | 12m | |||||
| 5 |
★★ St Patrick's Corner
Weave your way up the lower wall heading left, right or over the bush. From the ledge, bridge up the corner. FA: 2013 | 10 | 12m | |||||
| 6 |
★ Washing Away the Blues
Enjoyable, varied climbing. Head straight up the face immediately right of the arête that offers a well-protected out there feeling. FA: 2013 | 15 | 15m | |||||
| 7 |
★★ Jenga
A great, consistent and airy climb. Up the wall, then balance over the blocks before committing moves up the flake. FA: 2013 | 14 | 15m | |||||
| 8 |
★★★ As the Crow Flies
The classic of the crag up the steepening wall with increasing difficulty before an outrageous move to get established on the final headwall. FA: 2013 | 22 | 15m | |||||
| 9 |
★★ Overexposed
A committing climb with good holds and gear. Up the slab and over the small overlap, then scramble up into the corner under the big roof. Traverse left into an exposed position and climb up into shallow corner. Step right along the horizontal break before finishing through the small three-tiered roof. FA: 2013 | 16 | 18m | |||||
| 10 | Leap Frog | 12 | 18m | |||||
| 11 |
★★ Airtime Over the Indian
A committing climb with good holds and gear. Up the slab and over the small overlap, then scramble up into the corner under the big roof. Traverse left into an exposed position and climb up into shallow corner. Step right along the horizontal break before finishing through the small three-tiered roof. FA: 2013 | 17 | 18m | |||||
| 12 |
★ Baby Shower
Fun consistent climbing, up the unprotected slab, then make a bee line for the top on great holds. FA: 2013 | 13 | 15m | |||||
| 13 |
★ No Nuts Required
A wonderful line, the bottom slab is protected by a BR (bolt plate required) after which the gear and holds come with some thought provoking moves in-between. Finish up the flake. FA: 2013 | 13 | 15m, 1 | |||||
1.2. Northern Crag 57 routes in Area
- Summary:
-
Trad climbing, Bouldering and other styles
Lat / Long: -33.803677, 114.999462
approach
Walk north along the Cape to Cape Track. Just before the staircase, you can turn left on a sandy track to access the cliff top or continue down towards the creek to access the base of the cliff (just turn left at the Cape To Cape sign post). You can also access it from the bottom of the Main Crag along a track at sea level but it takes longer 10 mins or more - the sea level path is overgrown, vague and winding.
1.2.1. The Terrace 13 routes in Area
- Summary:
-
Mostly Trad climbing
Lat / Long: -33.803768, 114.999031
| Route | Grade | Style | Selected ascents | |||||
|---|---|---|---|---|---|---|---|---|
| 1 |
★★ Disintegration
Starts a bit further south of the main wall and can be accessed the same way by abseiling further down the south side.. Trad belay at the base is recommended.. Up the wall passing some gear to a thin section and a bolt (hanger required). Through the small roof (gear) then easier ground to the top. FA: S. Richardson, 1990 | 23 | 15m, 1 | |||||
| 2 |
★★ Time and space
Start just left of disintegration. Up the face passing 2 bolts (crux), then pull into the flake and continue up the wall past another br and some gear.. Finishes at the DBB.. Take hangers. FA: K. Hartley & J. O'Herlihy, 2011 | 19 | 15m, 4 | |||||
 |
||||||||
| Route | Grade | Style | Selected ascents | |||||
| 3 |
★ Golden Smiles
Large blocky hold at about 3/4 distance is extremely fragile. Be very careful placing gear behind it or cranking on it hard | 14 | 15m | |||||
| 4 | ★★ Silver | 19 | 15m | |||||
| 5 | ★★★ Precious Metals | 25 | 15m, 2 | |||||
| 6 |
★★ Grunge Metals
Grunge Metal (24)** 15m Classic, steep and pumpy ! Start just left of Precious Metals and head up past 4 bolts. Trad gear needed for belay. Kate Swain, Neil Gledhill 16/12/6 FA: Kate Swain | 24 | 20m | |||||
| 7 | ★ The Future Grins | 22 | 15m | |||||
| 8 | ★ Finish Fatale | 22 | 15m | |||||
| 9 |
★★ Bearded Dolphin
Bearded Dolphin (21)** 15m Between Finish Fatale and Thrice Bitten. Great climbing up faces and through two small roofs. Follow the line of 6 bolts and some trad if you feel the need (but not required – except for belay). Bouldery start and multiple cruxes. May seem desperate… but can be finessed down to around grade 21. A classic route for the punters ! Kate Swain, Neil Gledhill 16/12/6 FA: Kate Swain | 21 | 20m | |||||
| 10 | ★★ North Chimney | 10 | 15m | |||||
| 11 | ★★ Thrice Bitten | 17 | 15m | |||||
| 12 | ★ Metamorphic Sausage | 13 | 15m | |||||
| 13 | Thin Crack | 14 | 8m | |||||
1.2.2. Banana Wall 12 routes in Area
- Summary:
-
Mostly Trad climbing
Lat / Long: -33.803326, 114.999224
 |
||||||||
| Route | Grade | Style | Selected ascents | |||||
|---|---|---|---|---|---|---|---|---|
| 1 |
Jug Abuse
Start up steep black wall. Clean sand away before placing big cams, and jug to glory. | 21 | 20m | |||||
| 2 | Northwall | 11 | 30m | |||||
| 3 |
Happy Feet
Note: this line was climbed to retrieve the trad anchor of Jug Abuse about 12m down and right of the optional belay of Happy Feet. Have others found a better way to clean the anchor of Jug Abuse (see drawing on S. Richardson’s guide)? Perhaps, many have been wise enough to stay away from Jug Abuse altogether 😉 https://www.climberswa.asn.au/topic/wilyabrup-northern-buttress-happy-feet-25m-14/ FA: Remi Vignals & Delphine Chabanne, 2012 | 14 | 25m, 2 | |||||
| 4 |
★★ Banana Split
Great beginner route. Climb up easy corner/roof section to reach wide banana shaped crack. Jam your way to the top. Well protected with small to medium cams and nuts. FA: Hobbs & Waterfall, 1973 | 14 | 30m | |||||
| 5 |
★★★ Dessert
Superb face climbing on excellent rock. Bolts are carrots requiring hangers, small to medium cams and wires can protect the start and middle of the climb. | 25 | 25m, 6 | |||||
| 6 |
★★ Use No S.L.C.D.'s
Sustained. Climb obvious crack route up middle of face. Small cam/nut required for top section. Desperately look for the good hold to reach bolt (hanger required), then squirm your way over the top. DBB (ringbolts) can be found on top and to the left. FFA: Mark Gommers, 1985 | 19 | 20m, 1 | |||||
| 7 |
★★ Corpus Delecti
Nice climb up the corner with nice finishing jugs. DBB belay at top means you can rap back down! FA: Pete McKenzie, 1982 | 18 | 20m | |||||
| 8 |
★★ Digital Delecti
Really enjoyable face climb. Start under and right of roof (look for rusty bolt in roof). First bolt placement is too high and awkward for a safe clip. Use a small/medium cam to get there. Also a little run out on top. FA: Kate Swain | 18 | 20m | |||||
| 9 |
Block and Tackle
Start up 'Digital Delecti' then before the layback flakes on this traverse left to the arete and finish up this FA: Mike Smith | 18 | 20m | |||||
| 10 | ★ Baited Frenzy | 18 | 20m | |||||
| 11 |
Book of Confusion
We got a little lost trying to ascend BoF and ended up on this great line! start on West face, move slightly right to clip the first bolt. Long move up and right and into good rail beneath roof. Powerful pull through this up the left weakness, and then climb straight to the top, passing through slight open-book. The top half of the route shares the line of Baited Frenzy (18) with marginal protection. FA: lance gelden, Oct 2018 | 23 | 20m, 1 | |||||
| 12 |
Book of Funk
funky heel hooking through the roof to finish up easy wall above. One bolt, wires and small camming devices. FA: Richardson, 1992 | 26 | 20m, 1 | |||||
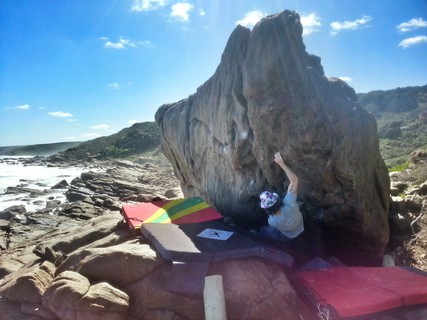
1.2.3. The Meltdown Sector (Bouldering) 19 routes in Area
- Summary:
-
All Bouldering
Lat / Long: -33.802728, 114.999407
summary
PDF version of The Meltdown Sector. Uploaded on 2020-01-20 15:27:35. https://gofile.io/?c=VFKqDf
description
Lovely boulders in a fantastic setting. There are more problems to the north of this sector - names and grades unknown.
| Route | Grade | Style | Selected ascents | |||||
|---|---|---|---|---|---|---|---|---|
| 1 |
Slab 1
Easy ocean facing slab with lots of jugs. More of a scramble. | VB | ||||||
| 2 |
Slab 2
More easy slab. Lots of options. | VB | ||||||
| 3 |
★ Cheese Melt
Sit start on jug. Up with good holds on arete and left face. | V0 | 3m | |||||
| 4 |
Middle face
Sit. Up middle of the face. | V0 | 3m | |||||
| 5 |
Left arete
Sitter and up. | V0 | 2m | |||||
| 6 |
★ Tectonic
Sit start on low holds. Up into good holds. | V1 | 3m | |||||
| 7 |
States of Matter
Sit start with crimps. | V1/2 | 3m | |||||
| 8 |
★ Molten
Sit start under the roof on good slots. Out to the slopey lip and then exit left. | V5 | 2m | |||||
| 9 |
Lava
Sit start the crack and up | V1 | 2m | |||||
| 10 |
★★★ Pinch, Crimp, Glory
Sit start in the cave on the sidepulls (left flatty, right crimp). Big moves up to positive left pinch then right crimp with poor feet. Awesome feature. FA: Andy Lampard | V11/12 | ||||||
| 11 |
★★★ Unnamed / Proud Line
Sit start low. VHARD. Stand is straight forward but the sit looks all time and hard... Andy has already done it. FA: Andy Lampard | |||||||
| 12 |
★ Salted
Start low on two left side pulls, big move from left undercling to finger lock pinch before travese left and top out. https://vimeo.com/104922569 FA: Andy Lampard | V7 | 3m | |||||
| 13 |
★★ Salted, Low
Lower start to Salted deeper in the cave (although there is still potential for an even lower start). Come up and right before re-joining 'Salted'. Estimated V9+ FA: Andy Lampard | V9 | ||||||
| 14 |
Saltier proj
Rock blocking the low start has been removed - making a start deep in the cave under the salted boulder possible. | |||||||
| 15 |
★★★ Newton's Arm Wrestle
Three moves... sit start on positive holds, up to sidepull then catch the massive barndoor with slopey undercling. Powerful. https://vimeo.com/136427795 FA: Andy Lampard, Aug 2015 | V11 | 4m | |||||
| 16 |
★ Thumb War
Sit start with low right hand undercling and left hand pinch (somewhat contrived). Up edges to easy top out. | V4 | 3m | |||||
| 17 |
Newtons Low Start
Sit start far left of the boulder as for 'Thumb War' and traverse into Newton's Arm Wrestle. Adds some pump and the traverse in itself has a nice sequence (~V5/6ish) - likely adds a grade due to pump | |||||||
| 18 |
★★★ Wookie and the Mad Hatter
Start on juggy undercling down low and move right before big moves at the lip. https://vimeo.com/104922569 FA: Andy Lampard | V8 | 5m | |||||
| 19 |
★★ Wookie and The Mad Hatter, right variant
Start as for Wookie but exit out right before the powerful moves at the lip. | V6 | 5m | |||||
            |
||||||||
1.2.4. Peach Face 8 routes in Area
- Summary:
-
Trad climbing, Bouldering and Aid climbing
Lat / Long: -33.803109, 114.999454
 |
||||||||
| Route | Grade | Style | Selected ascents | |||||
|---|---|---|---|---|---|---|---|---|
| 1 | Trust Yours Instingts | 19 | 20m, 2 | |||||
| 2 | Power Your Mind | 21 | 20m, 3 | |||||
| 3 |
★★ Green Stone
FFA: Mark Gommers, 1985 | 21 | 20m, 1 | |||||
| 4 | ★★ Well Stoned | 23 | 20m, 1 | |||||
| 5 |
Peaches (Free)
https://loganclimbsrocks.blogspot.com/2016/06/the-waiting-game.html FA: Pat Turner | 28 | ||||||
| 6 |
Peaches
FA: Peter McKenzie, 1983 | 17 M2 | 20m | |||||
| 7 | Nameless | 13 | 15m | |||||
/d1/ca/d1ca20f12753a992f2c2975f958f28f4bef14996) |
||||||||
| Route | Grade | Style | Selected ascents | |||||
| 8 |
★★ Salad Fingers
FA: Woody133, 18 Feb 2018 | V7 | ||||||
1.2.5. Far North 5 routes in Sector
- Summary:
-
All Trad climbing
Lat / Long: -33.803158, 114.999519
description
Some loose rock has been removed and worthy routes uncovered. Easy to moderate trad and mixed climbing. Good rock and good pro, go!
approach
From the top of the crag head north east to a moderate scramble down to the base at the far end. Start walking.
| Route | Grade | Style | Selected ascents | |||
|---|---|---|---|---|---|---|
| 1 |
True North
The first corner system you reach as you head south west along the path. FA: L. Fischer & C. Wiggins. Jan 2015 | 10 | 10m | |||
| 2 |
Missing Frog
Nice climbing up the thin crack and face to the ledge. Step left and continue up the finger crack in the headwall. FA: K. Hartley, 2011 | 16 | 15m | |||
| 3 |
★ Graciousness
Head up MF to the ledge, clip the br (plate required) and head up and right to an airy finish. FA: C. Wiggins & C. Johnson, Jul 2015 | 18 | 15m, 1 | |||
| 4 |
★★ Naming Rights
Traverse out right from the start of MF along the thin crack which takes a micro cam. Clip the bolt and crank up the face and fingercrack, through the bulge and onto the large ledge. Enjoyable climbing up the arete passing a bolt (plate required) and some natural gear to the top. FA: K. Hartley K. Seewraj, Jan 2015 | 23 | 15m, 2 | |||
| 5 |
★ Ain't no slouch
Instead of clipping the bolt on NR, continue traversing right along the horizontal crack until at the base of the flared black groove. A few nice jams up past the chockstone to reach easier ground and the large ledge. Climb the easy face on nice rock passing a br (plate required). FA: K. Hartley & C. Johnson | 20 | 15m, 1 | |||
1.3. Middle Crags 51 routes in Area
- Summary:
-
All Trad climbing
Lat / Long: -33.804834, 114.999056
1.3.1. The Organ Pipes 20 routes in Area
- Summary:
-
Lat / Long: -33.805273, 114.998986
 |
||||||||
| Route | Grade | Style | Selected ascents | |||||
|---|---|---|---|---|---|---|---|---|
| 1 | Dry Reach | 14 | 12m | |||||
| 2 |
Sprint Finish
Fun stemming up the wide chimney left of Crab Arête. https://www.climberswa.asn.au/topic/the-organ-pipes/ FA: Howe & Seewraj, 21 Dec 2017 | 10 | 15m | |||||
| 3 | Crab Arete | 12 | 10m | |||||
| 4 |
Reaper Man
Top Roped by Krish in 2014 and included in the South West guide as an open project. Krish came back and lead it in 2022. https://www.climberswa.asn.au/topic/wilyabrup-the-organ-pipes/ FA: Seewraj, 2014 FA: Krish Seewraj, 28 Jan 2022 | 19/20 | 17m | |||||
| 5 | ★ Heaven Calling | 16 | 17m | |||||
| 6 |
Knocking on Heaven’s Door
Knocking on Heaven’s Door 15m 17 The wall between Heaven Calling and Spraying leads to a fine steep orange headwall, after placing gear at the break knock on each flake before committing with no more gear in sight. Seewraj, Wiggins 26/08/18 https://www.climberswa.asn.au/topic/organ-pipes/ FA: Seewraj & Wiggins, 26 Aug 2018 | 17 | 15m | |||||
| 7 | ★ Spraying | 14 | 15m | |||||
| 8 | ★ Spraying Arete | 12 | 15m | |||||
| 9 |
Rupert’s Ramble
The narrow chimney left of Spraying Arête, finishing up the right wall. Howe, Seewraj 21/12/17 https://www.climberswa.asn.au/topic/the-organ-pipes/ FA: Howe & Seewraj, 21 Dec 2017 | 6 | 15m | |||||
| 10 |
It Still Counts
It Still Counts 15m 4 The narrow cleft right of Oral Discharge widens with height. Howe, Seewraj 21/12/17 https://www.climberswa.asn.au/topic/the-organ-pipes/ FA: Howe & Seewraj, 21 Dec 2017 | 4 | 15m | |||||
| 11 |
Honesty Box
Honesty Box 10m 18 The back wall in-between It Still Counts and Oral Discharge. This wall was climbed independent of the side walls, with an airy and exciting finish into the unknown. A great sustained line with some interesting challenges, but requiring honesty to stay on route as it is sadly easily escapable. Doe, Seewraj 14/05/20 https://www.climberswa.asn.au/topic/wilyabrup-organ-pipes/ FA: Doe & Seewraj, 14 May 2020 | 18 | 10m | |||||
| 12 | Oral Discharge | 10 | 10m | |||||
| 13 | Vomitting Frogs | 14 | 12m | |||||
| 14 | English Summer | 15 | 17m | |||||
| 15 | Sunny Arete | 12 | 15m | |||||
| 16 |
New Kids on the Block
New Kids on the Block 10m 14 A fun well protected route, after the slab follow the crack and wall. Fischer, Sullivan, Seewraj 21/08/16 https://www.climberswa.asn.au/topic/willyabrup-the-organ-pipes/ FA: Fischer, Sullivan & Seewraj, 21 Aug 2016 | 14 | 10m | |||||
| 17 |
Short and Sharp
FA: Seewraj & Sterling, 2014 | 17 | 10m | |||||
| 18 |
The Grunter
The Grunter 15m 16/14 Approx. 5m left of Shot and Sharp the base of the crag is overhung. Grunt your way up the bouldery moves via the break in the rooflet. Keep your composure and balance to mount the slab, with a potential ground fall for those who falter. Trend right up the slab to the narrow crack line that splits the buttress to the right of the chimney. Easier, well protected climbing awaits. The bouldery start can be avoided by accessing the slab a meter or so to the left making a more consistent grade 13 route. Doe, Seewraj 14/05/20 https://www.climberswa.asn.au/topic/wilyabrup-organ-pipes/ FA: Doe & Seewraj, 14 May 2020 | 16 | 15m | |||||
| 19 |
10K
10K 15m 8 Approx. 10m left of Short and Sharp an easy slab leads to the left edge of the upper wall, which provides a fun well protected crack. Howe, Seewraj 21/12/17 https://www.climberswa.asn.au/topic/the-organ-pipes/ FA: Howe & Seewraj, 21 Dec 2017 | 8 | 15m | |||||
| 20 |
The Screamer
The Screamer 15m 17 X Start as for 10K trending right up the slab before taking on the steep face. Small but good gear low down in the face is soon a distant memory, and while true to the grade with fun climbing it gets very run out (even by the Organ Pipes standards). Seewraj, Doe 14/05/20 https://www.climberswa.asn.au/topic/wilyabrup-organ-pipes/ FA: Seewraj & Doe, 14 May 2020 | 17 X | 15m | |||||
1.3.2. Driftwood Bay 11 routes in Area
- Summary:
-
Lat / Long: -33.804891, 114.999299
 |
||||||||
| Route | Grade | Style | Selected ascents | |||||
|---|---|---|---|---|---|---|---|---|
| 1 | Crab Slab | 11 | 20m | |||||
| 2 | ★ Sure Footed | 15 | 20m | |||||
| 3 | Turkish Delight | 13 | 20m | |||||
| 4 | Pick Pocket | 11 | 20m | |||||
| 5 | ★ Old Crate | 13 | 20m | |||||
| 6 | On the Face of It | 17 | 20m | |||||
| 7 | ★★ Integrity | 13 | 20m | |||||
| 8 | Cauliflower Soup | 13 | 20m | |||||
| 9 | Cool Breeze | 11 | 20m | |||||
| 10 | Groove | 13 | 20m | |||||
| 11 | Drifter | 12 | 10m | |||||
1.3.3. Beginners Wall 20 routes in Area
- Summary:
-
Lat / Long: -33.804460, 114.998953
  |
||||||||
| Route | Grade | Style | Selected ascents | |||||
|---|---|---|---|---|---|---|---|---|
| 1 | ★ Close Call | 14 | 10m | |||||
| 2 | Windy Wall | 14 | 10m | |||||
| 3 | Claw Fish | 14 | 10m | |||||
| 4 | Fishy Finger | 12 | 10m | |||||
| 5 | The Stairs | 5 | 10m | |||||
| 6 | Leg Up | 6 | 8m | |||||
| 7 | Looking for Chewie | 5 | 8m | |||||
| 8 | Cat Walk | 5 | 8m | |||||
| 9 | Crab Crawl | 12 | 8m | |||||
| 10 | Blurred Vision | 10 | 8m | |||||
| 11 | Standing to Attention | 10 | 8m | |||||
 |
||||||||
| Route | Grade | Style | Selected ascents | |||||
| 12 | ★ Comic Strip | 12 | 8m | |||||
| 13 | Barely There | 18 | 7m | |||||
| 14 | ★ Seaside Circus | 15 | 7m | |||||
| 15 | ★★ Layback Jack | 17 | 7m | |||||
| 16 | Nose Job | 23 | 5m | |||||
| 17 | Hot | 15 | 5m | |||||
| 18 | Spicy | 13 | 5m | |||||
| 19 | Second Chance | 15 | 7m | |||||
| 20 | Worthy | 13 | 6m | |||||
1.4. Main Crags 134 routes in Area
- Summary:
-
Trad climbing, Bouldering and other styles
Lat / Long: -33.806009, 114.998075
1.4.1. Inner Space Wall 22 routes in Area
- Summary:
-
Mostly Trad climbing
Lat / Long: -33.806434, 114.997794
 |
||||||||
| Route | Grade | Style | Selected ascents | |||||
|---|---|---|---|---|---|---|---|---|
| 1 | Gargoyle | 17 | 12m | |||||
| 2 |
Grotesque
A companion route to Gargoyle. As per the way Fairy Floss was first climbed but instead of stepping left into the crack continue up the arête. https://www.climberswa.asn.au/topic/willyabrup-4/ FA: Seewraj & Malone, 15 Sep 2018 | 11 | 10m | |||||
| 3 |
★ Fairy Floss
Climb up the middle of the face of the block facing Norh. Little bit challenging at the start but rewards you with a ledge before challenging you again. | 12 | 10m | |||||
| 4 | ★ Brepus | 10 | 10m | |||||
| 5 |
★★ Unknown
Start 2 meters to the left of Brepus and straight up the face. | 18 | 10m | |||||
| 6 |
★ Woman Accept It For What It Is
FFA: Mark Gommers, 1985 | 20 | 10m | |||||
| 7 | ★★ Gritstone Reminiscence | 18 | 10m | |||||
| 8 | ★ English Ethic | 20 | 10m | |||||
 |
||||||||
| Route | Grade | Style | Selected ascents | |||||
| 9 |
★ Twenty Questions
Climb follows crack with some old school jamming required for the vertically challenged. | 12 | 10m | |||||
| 10 | ★ Left Hand Crack | 16 | 10m | |||||
| 11 | ★★ M.A.S.C.'ed Boschman | 25 | 15m, 3 | |||||
| 12 | Mid Wall Crisis (Link up) | 20 | 20m | |||||
| 13 | ★★ The Spin of It | 24 | 15m, 3 | |||||
| 14 |
★★ Stormbringer
FA: George Firth | 22 | 20m, 3 | |||||
| 15 | ★★ Inner Space | 17 | 15m | |||||
| 16 |
★★ Arc Du Tri'umph
Start at the bottom of the right trending ramp before heading up the main crack and then traverse back left along the hand crack. FA: Brian Tan & Peter Zhang | 17 | 20m | |||||
| 17 |
★★ Totally Awesome
Go up thin seams left of Inner Space. Avoid the desire to step left. | 19 | 17m | |||||
| 18 |
★ Waterfall's Second Folly
Directly up the thin crack below the Inner Space flake, then traversing left at the second large horizontal break and directly up the larger flake to the left. Make sure to extend your gear either end of the traverse or the rope drag will conspire against you and your delicate slopey top-out. | 15 | 17m | |||||
| 19 |
★★ The Space Between
Tough move to start below then straight up with crux in the middle (otherwise a 17 if you use the flake on the left). Trad anchor possible if you want to lower off but save yourself the hassle and just walk down (2 min). | 20 | 4 | |||||
| 20 |
★★ Waterfall's Second Folly Direct Start
Tough first move and committing last move make this a great mental challenge. If you're crimping, careful of the wind on top... | 17 | 17m | |||||
| 21 | ★ Rockfish Dreaming | 19 | 20m, 1 | |||||
| 22 | Outer Space | 25 | 6m, 1 | |||||
1.4.2. Fat Chance Wall 22 routes in Area
- Summary:
-
Mostly Trad climbing
Lat / Long: -33.806188, 114.997916
  |
||||||||
| Route | Grade | Style | Selected ascents | |||||
|---|---|---|---|---|---|---|---|---|
Top of the cliffThe following climbs are located above the 'Inner Space' / 'Fat Chance' walls, before the walk to the bottom of the cliff. | ||||||||
| 2 |
Space Race
Follow the twin cracks | 12 | 4m | |||||
| 3 | ★ Head Read | 15 | 5m | |||||
| 4 | Lost in Space | 14 | 5m | |||||
| 5 | ★ Let Them Fall | 12 | 5m | |||||
| 6 |
Galactic Void
Follow ring bolts up arete FA: Barber | 24 | 6m, 2 | |||||
| 7 | Outer Space | 25 | 6m, 1 | |||||
| 8 | Drop Arete | 16 | 6m | |||||
  |
||||||||
| Route | Grade | Style | Selected ascents | |||||
Bottom of the cliffThe following climbs are located at the bottom of the cliff after walking down and past the 'Inner Space' wall. | ||||||||
| 10 | ★ Tom Thumb | 11 | 14m | |||||
| 11 | ★ Tom Thumb Direct Finish | 15 | 13m | |||||
| 12 |
★ Setting Sun
3 ring bolts with optional (recommended) medium cam to protect top section | 15 | 13m, 3 | |||||
| 13 |
★ unknown / Out of Thin Air
Thin face climb with a high first clip and a long runout between the first and second bolts. Some trad pro needed after second bolt. | 15 | 13m, 2 | |||||
| 14 | ★ Fat Crack | 15 | 15m | |||||
| 15 |
★★ Fat Chance
Follow crack line on right side of wall, past the bolts to break. Up delicately to top out. | 20 | 15m, 3 | |||||
| 16 | ★ Battling the Bulge | 19 | 15m | |||||
| 17 |
★ Slapping the Fat
Reach large jugs and either statically or dynamically reach crack system. Take a bolt plate to protect the top section. | 17 | 15m | |||||
| 18 |
The Sullivan’s
A sneaky and completely independent line between Slapping the Fat and Gutted on the Fat Chance Wall. Hard bouldery moves off the deck, up the front of the large blocks that form the corner of Gutted. From the ledge straight up and over the overlaps, avoiding the temptation to drift right or left onto the easier moves of Slapping the Fat or Gutted. https://www.climberswa.asn.au/topic/wilyabrup-main-area/ FA: K Seewraj & A Gale, 15 May 2021 | 16 | 15m | |||||
| 19 | ★ Gutted | 16 | 15m | |||||
| 20 | ★ Blubber Boy | 18 | 15m | |||||
| 21 | ★ Orryjohn | 8 | 15m | |||||
| 22 |
★ Hole World
FA: Ross Weiter & Pantic, 2004 | 16 | 18m | |||||
| 23 | Exodus | 20 | 15m | |||||
| 24 | Dinner Plate | 22 | 15m | |||||
1.4.3. One For The Road 16 routes in Area
- Summary:
-
Mostly Trad climbing
Lat / Long: -33.806001, 114.997980
/3d/4c/3d4cf4fd2fb50bce84ce73cad314758ffbfa7f1d) |
||||||||
| Route | Grade | Style | Selected ascents | |||||
|---|---|---|---|---|---|---|---|---|
| 1 | ★ Hitching | 14 | 16m | |||||
| 2 | ★★ Road Trip | 15 | 16m | |||||
| 3 | ★ Top Gear | 19 | 22m | |||||
| 4 |
Escape Route
Same route as one for the road. But when you get to the overhang escape off to the right to the ledge. | 14 | 18m | |||||
| 5 |
★★★ One For The Road
Start from the platform and climb up the major crag of the wall. The crux is at the roof with good gear and great holds. Build the anchor over the big boulder with enough rope or some cams, nuts or hexes under the two boulders on top with you sitting snug between them. FA: MacArthur, 1978 | 18 | 18m | |||||
| 6 |
★ Booze Bus
Climb the line of bolts left of One for the Road. | 21 | 20m, 4 | |||||
/9b/62/9b62fea8ef550c4853084f1c299756a45d43a412) |
||||||||
| Route | Grade | Style | Selected ascents | |||||
| 7 | Chockstone Chimney | 9 | 15m | |||||
| 8 | Thunder Thighs | 11 | 15m | |||||
| 9 | ★ Sinuosity | 14 | 20m | |||||
| 10 |
★★ Percy Pigsville
Start as for Thunder Thighs / Sinuosity for 5m. Then traverse left 5m in large horizontal break, clipping second bolt of Dolphin Smiles. Finish up last 3 bolts of Fishing with Dynamite. | 19 | 25m, 4 | |||||
| 11 |
The Unbolted and The Beautiful
Start 2m right of Dolphin Smiles, up and right using the corner system. From the shelf and 2m left of Sinuosity head straight up the wall using flakes and then further up horizontal pocket, joining Sinuosity to finish (Krish Seewraj, Andrew Malone 27/03/11). https://www.climberswa.asn.au/topic/new-climb-at-willyabrup/ | 15 | 20m | |||||
| 12 |
★★ Dolphin Smiles
FA: rob hayns | 21 | 20m, 3 | |||||
| 13 |
★★ Dolphin Smiles Alternate Finish
After the 3rd bolt, head right towards the darker rock and crack. | 18 | 20m, 3 | |||||
| 14 |
★★★ Fishing With Dynamite
Start 2m L of Dolphin Smiles and follow 6 RBs to the top. Slightly overhanging, pumpy and interesting all the way. A #0.5 Camalot is optional between first and second bolt with the other option being a guaranteed ground fall. Be warned, this in not a sports route. Easy to mistake for Golden Buttress if using old guidebook. Discussion around bolting and local ethics: https://www.climberswa.asn.au/topic/new-climb-at-willyabrup/ FA: Ross Weiter, Peter Thomas & Angela Separovic, 2011 | 19 | 24m, 6 | |||||
| 15 | ★★ Golden Buttress | 17 | 30m | |||||
| 16 |
★★ Golden Buttress Direct
Direct version goes straight up below first bolt. Medium nuts and cams required for protection. | 19 | 30m | |||||
1.4.4. Hope Buttresses 19 routes in Area
- Summary:
-
All Trad climbing
Lat / Long: -33.805883, 114.998190
 |
||||||||
| Route | Grade | Style | Selected ascents | |||||
|---|---|---|---|---|---|---|---|---|
| 1 |
★★ Glory Direct
Bouldery start from the roof to join Glory then continue up arete. | 21 | 30m | |||||
| 2 |
★ Glory
FA: 1992 | 14 | 30m | |||||
| 3 | ★★ Hope | 14 | 30m | |||||
| 4 | Faith | 20 | 25m, 2 | |||||
| 5 | Charity | 21 | 25m, 2 | |||||
| 6 | Malaria | 7 | 20m | |||||
| 7 |
A Pocket Full of Nothing
See SW Rock (2016) | 18 | 25m | |||||
| 8 | Dunlop Special Alternate Start | 11 | 30m | |||||
| 9 | ★ Dunlop Special | 15 | 30m | |||||
| 10 |
Hollow Promise
Up the wall left of Malaria (as for Dunlop Special Alternate Start in SW Guide), trend right to the middle of the wall and then up the bulging headwall on pockets (large cams needed). https://www.climberswa.asn.au/topic/possible-new-routes-at-willys/ FA: Krish Seewraj & Ryan Doe, 2011 | 18 | 25m | |||||
| 11 | Slippery Slab | 13 | 30m | |||||
| 12 | ★ First Climb | 11 | 30m | |||||
| 13 |
Rhys’s Rapid Retreat
Start as for Hoopsnake, trend up and right passing a large flake until forced to join the arête. https://www.climberswa.asn.au/topic/possible-new-routes-at-willys/ FA: Krish Seewraj & Craig Johnson, 2006 | 16 | 30m | |||||
| 14 | ★ Hoopsnake | 14 | 30m | |||||
| 15 | Rattlesnake | 7 | 30m | |||||
| 16 | Peanut Crumble | 10 | 30m | |||||
| 17 | Buttress Corner | 5 | 25m | |||||
| 18 | ★ Glory | 14 | 30m | |||||
| 19 | Glory Direct | 21 | 30m | |||||
1.4.5. Steel Wall 22 routes in Area
- Summary:
-
Mostly Trad climbing
Lat / Long: -33.805703, 114.998378
 |
||||||||
| Route | Grade | Style | Selected ascents | |||||
|---|---|---|---|---|---|---|---|---|
| 1 |
★★ Steel Yourself
Start from gully right of Stainless Steel and step left to a bolt. Continue up headwall past a second bolt. FA: K. Carrigan, R. Tyson & D. Cook, 1986 | 21 | 15m, 2 | |||||
| 2 |
Still More Steel
Start as Stainless Steel, but head right past bolt and up right side of ramp. FA: D. Wagland & Mark Gommers, 1986 | 20 | 26m, 1 | |||||
| 3 |
★★★ Stainless Steel
Follow right trending crack with bomber gear placements to below first bolt. Delicate face climbing past three carrot bolts (need hangers - bolt heads are just a fraction larger than usual so try harder before giving up) before arriving at the roof. Follow crack up roof to finishing jugs. Important to place more pro than usual early on (before 1st bolt) because the distance to the ground reduces as you climb right trending crack before heading up. FFA: Mark Gommers, 1985 | 21 | 30m, 3 | |||||
| 4 |
★★ Washed Up Punks
Start as Heavy Metal, but at crux, trend right to enter sustained crux section and big run out towards top. | 23 | 30m | |||||
| 5 |
★★★ Heavy Metal
Start in crack as for Stainless Steel. Place cam and move directly up to FH. Crux is reaching 4th FH. Exit with big moves over roof and top out. | 24 | 30m, 6 | |||||
| 6 |
★★ Simply Suicide
Start as Sirius, but when Ulster Madness is reached on large ledge, head right up ramps to horizontal break. Has almost no protection. FA: K. Carrigan & F. Marshall, 1986 | 20 | 35m | |||||
| 7 |
★★ Sirius
P1: Climb diagonal crack and horizontal break to the large ledge. Belay in corner. P2: Follow corner up into easy arête. | 14 | 40m, 2 | |||||
| 8 | ★★★ Acid Didj | 25 | 30m, 5 | |||||
| 9 |
★★ Pascal's Route
The line left of Simply Suicide with a mix of ring bolts and fixed hangers. Take some gear for the horizontal breaks in the middle and near the top. | 20 | 35m, 7 | |||||
| 10 |
★★ Ulster Madness
P1: Right of Delving Devoids is a thin seam with a distinctive bolt (needs replacing). Go straight up to ledge. P2: Continue straight up wall above FA: P. McKenzie & C. Cartwright | 24 | 35m, 2, 1 | |||||
| 11 |
★★ Delving Devoids
Entails some sinister moves P1 Stick clip bolt on lip of overhang and launch leftwards to a small corner and continue up to first belay of Sirius. P2: Continue as for Sirius, up easy arête. FA: D. Wagland & N. Hayes, 1986 | 25 | 40m, 2, 1 | |||||
| 12 |
★★ Delving Devoids Direct Finish
Alternate finish for Delving Devoids. Continue straight up wall from belay with marginal protection. | 18 | 40m | |||||
| 13 | ★ Kubla Khan | 24 | 40m | |||||
  |
||||||||
| Route | Grade | Style | Selected ascents | |||||
| 14 |
★★ Mobjob
Up corner roof section. Really hard start leads to enjoyable climbing up corner. Can be done in two pitches to minimise rope drag. Grade has gone up to 21 after a hold broke. | 21 | 40m | |||||
| 15 | ★★ Blow Job | 24 | 20m, 4 | |||||
| 16 |
★★ Hand Job
Start the climb the same as for Mobjob, and once through the first roof traverse diagonally left and upward staying to the left of both ring bolts. Pull through the small roof on the arete 5 metres to the left of blowjob to top out. The climb is mixed with two bolts and the rest natural pro. https://www.climberswa.asn.au/topic/willyabrup-new-route/ FA: Olly Morell, Feb 2015 | 25 | 28m, 2 | |||||
| 17 |
★ Rape and Pillage
"Fantastic climbing. A cairn can be used to reach first holds, then up corner through overhangs and roofs to the top." Ends up following the same top half as "Hand Job" however traversing left below the 2nd roof under the bolt. | 23 | 40m | |||||
| 18 | Pas de Levitation | 23 | 40m | |||||
| 19 | In the Crack or on Your Back | 25 | 40m | |||||
| 20 |
★ Verbosity
The chimney/crack corner that turns into a pleasant face climb up the right wall. Start by following the crack that takes big gear and has a terrible lumpy and soft limestone covering (you can use smaller gear in places, just look hard and be creative). Use the right face to finish (avoiding the staircase gully to the left). | 13 | 20m | |||||
| 21 | Escape Hatch | 24 | 20m | |||||
| 22 |
★★ K.G.B.
Up prominent overhang roof on deceptively 'good' holds. Continue over roof on easy finish. @1min 30sec https://youtu.be/MSN7b6HeLA4 | 26 | 25m | |||||
1.4.6. Stormcock Area 12 routes in Area
- Summary:
-
Mostly Trad climbing
Lat / Long: -33.805429, 114.998577
 |
||||||||
| Route | Grade | Style | Selected ascents | |||||
|---|---|---|---|---|---|---|---|---|
| 1 |
★★ Blondes Have More Fun
Just left of K.G.B. there is an overhanging jamming crack. Jam this. | 22 | 25m | |||||
| 2 | Bottoms Up | 22 | 25m | |||||
| 3 | The Great Temptress | 19 | 25m | |||||
| 4 | ★ Consolation Prize | 16 | 30m | |||||
| 5 |
★ Stormcock
Old climb, very little traffic, runout in areas. Climb face of large boulder leaning on the face. Start is a little runout but you can find protection after 2m. On the top of the boulder you step onto the face and traverse right under a small roof across to the arete then up to finish. There are loose blocks on the upper ledges.on top. | 12 | 30m | |||||
 |
||||||||
| Route | Grade | Style | Selected ascents | |||||
| 6 | ★ Sombre | 18 | 25m | |||||
| 7 |
Organic Carrots
Arete with carrots bolts just left of the leaning block. Finish up Welcome to Arapiles | 21 | ||||||
| 8 | ★ Welcome to Arapiles | 21 | 25m | |||||
| 9 | Northern Roof | 25 | 30m | |||||
| 10 |
High Reel Direct Finish
Follow 'High Reel' to the terrace before the roof (possible belay), then go up the face on the right rather than up the loose slab. Very short lived but good moves on good rock - the hardest part is placing protection to avoid hitting the ledge. FA: Evan Gaudet & Michael B, 8 Jun 2020 | 19 | 35m | |||||
| 11 |
High Reel
A few metres before the track turns right and goes up, there’s a left trending crack - start here. Aim for the left side of the 2 rectangular blocks then straight up to below the roof, right to the top of the block then up a short crack. Sparse pro options on top for anchor so either sling a boulder way back from the edge or, if you want to see your second, make it a 2 pitch climb at the top of the second rectangular block. | 14 | 35m | |||||
| 12 | Cymbal | 18 | 35m | |||||
1.4.7. Million Ways to Try bloc and surrounds 21 routes in Area
- Summary:
-
All Bouldering
Lat / Long: -33.805808, 114.997970
summary
PDF version of Million Ways to Try bloc and surrounds. Uploaded on 2020-01-20 15:29:41. https://gofile.io/?c=4i9Lmr
description
Giant boulder at the base of the main crag as you come down from the walk in. Home to some rad steep problems.
| Route | Grade | Style | Selected ascents | |||||
|---|---|---|---|---|---|---|---|---|
| 1 |
★★ A Million Ways to Warm Up
Sit start. Up with jugs trending right to top out around the corner. FA: Andy Lampard | V1 | ||||||
| 2 |
★★ A Million Ways to Die
Sit start. Up the obvious seam. Tall FA: Andy Lampard | V1 | ||||||
| 3 |
★★ Andys Hard Start
Cruxy sit start on crimps. Out to good sidepull undercling then up to the obvious transverse crack on the massive east face, to join the highball seam of 'A Million Ways To Die'. FA: Andy Lampard | V5/6 | ||||||
| 4 |
★★★ Arete with pockets
Sit start.Corner arete on the left of the giant face. FA: Andy Lampard | V5 | ||||||
| 5 |
★ Boomer
Rad little warm up. Sit start down in the hole and straight up the face using good edges and jugs. | V3 | ||||||
| 6 |
★★ T-Rex Crossing
Sit start on the left with good flake. Traverse rightwards along the obvious feature to top out on the right. FA: Andy Lampard | V4 | ||||||
| 7 |
★★★ Million Ways to Try, Left
Stand start on undercling on the left and cross up to good edge and out right to a jugged up topout. https://vimeo.com/156231039 FA: Andy Lampard, Feb 2016 | V8 | 6m | |||||
| 8 |
★★★ Million Ways to Try, Left sit
Hard sit start on slopey rail into the left variant. | |||||||
| 9 |
★★★ Million Ways to Try, Right
Sit start with left hand on the slopey rail, right hand on the crimpy undercling. Gain the left hand triangle crimp and trend right to the pinch-block. Finish with a committing dyno, then top out as per other variants. Eliminates the jugs to the right of the thin crack next to the right start hold. https://vimeo.com/156231039 FA: Andy Lampard, Feb 2016 | V11 | ||||||
| 10 |
★ Million Ways to Try, Direct
Sit start as per the Right Variant (and avoids jugs out right). Go directly up with left hand to a small crimp with thumb-catch, then bump in with right hand to a higher under-cling. With awkward feet, bump left hand up to decent (but far-away) jug. Finish as per other variants. FA: Robin Yang | V10 | ||||||
| 11 |
★ Ripples In The Pool
Sit start with slopey ripples and low foot. Up to jugs and an easy top. Fun. FA: Andy Lampard | V0 | 2m | |||||
| 12 |
★ Left
Sit. | VB | ||||||
| 13 |
★ Middle
Sit. | V1 | ||||||
| 14 |
Right
Sit. | V0 | ||||||
| 15 |
★★ Boxed In
Sit start with left hand on flat hold and right hand on the arete. Tricky moves up the arete. Cool FA: Andy Lampard | V3 | ||||||
| 16 |
★★★ Footloose and Fancy Free
Stand start on the right and follow the blocky features on the lip of the roof. Compress your way to a big cut loose move near the end and transition to the face, do a couple easier moves up and rightish to gain the flat finishing jug up high. A drop off and a tad contrived - but awesome powerful movement on good holds. FA: Andy Lampard, Dec 2015 | V8 | ||||||
| 17 |
★ Sea Spray
Sit start low with good holds. Up through the face with crimp and slopey sidepull into an east top. FA: Andy Lampard | V2 | ||||||
| 18 |
Direct?
Start on the left of the juggy rail. Up to slopey hold and then big move to the seam. Andy Probably done it... | |||||||
| 19 |
★★★ The Iceberg
Sit start low on the obvious jugs on the left and go right for a highball finish on the impressive prow. https://youtu.be/E-c8pnD_v3c FA: Andy Lampard, Sep 2015 | V7 | ||||||
| 20 |
★ Andys Steep Radness
Sit start with right hand in good slot. Powerful move to gain the blocky jugs and quest up the face to topout. FA: Andy Lampard, Sep 2015 | V7/8 | ||||||
| 21 |
Low Swell Roof
Andy may have done it on a low swell day? | |||||||
 /e9/c5/e9c53dfa9ade87c3bda53554dbf8a170a9da7f62)                 |
||||||||