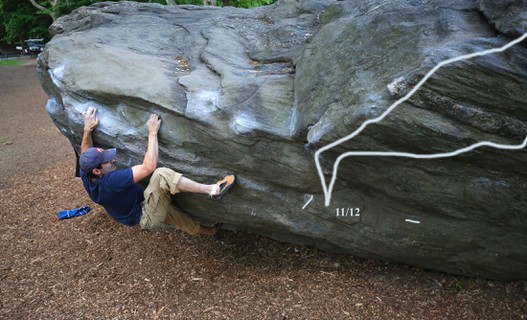
A Crag Guide gives an extensive view of all sub areas and climbs at a point in the index. It shows a snapshot of the index heirachy, up to 300 climbs (or areas) on a single web page. It shows selected comments climbers have made on a recently submitted ascent.
At a minor crag level this should be suitable for printing and taking with you on a climbing trip as an adjunct to your guidebook.
This guide was generated anonymously. Login to show your logged ascents against each route.
Warning
Rock climbing is extremely dangerous and can result in serious injury or death. Users acting on any information directly or indirectly available from this site do so at their own risk.
This guide is compiled from a community of users and is presented without verification that the information is accurate or complete and is subject to system errors. By using this guide you acknowledge that the material described in this document is extremely dangerous, and that the content may be misleading or wrong. In particular there may be misdescriptions of routes, incorrectly drawn topo lines, incorrect difficulty ratings or incorrect or missing protection ratings. This includes both errors from the content and system errors.
Nobody has checked this particlular guide so you cannot rely on it's accuracy like you would a store bought guide.
You should not depend on any information gleaned from this guide for your personal safety.
You must keep this warning with the guide. For more information refer to our:
Usage policy
Contributors
Thanks to the following people who have contributed to this crag guide:
Marc
Brendan Heywood
Sergey Komarov
Dylan Edwards
Rahn Laird
Hidenori Shinohara
johnny hotpants
L-P
Mike Dixon
Dan Carlo
The size of a person's name reflects their Crag Karma, which is their level of contribution. You can help contribute to your local crag by adding descriptions, photos, topos and more.
Table of contents
- 1. North Side / West Side 13 in Area
- 2. Index by grade
1. North Side 13 routes in Area
- Summary:
-
Alle Bouldern
Lat / Long: 40.769329, -73.977779
 |
||||||||
| Route | Grade | Style | Selected ascents | |||||
|---|---|---|---|---|---|---|---|---|
| 1 | Plague Rat | V2 | 10ft | |||||
| 2 | ★ Buttcrack Attack | V0- | 10ft | |||||
| 3 | ★ Rat Rock Traverse / Unknown 2 | V0 | 10ft | |||||
| 4 | ★ Crack For Kids | V0- | 10ft | |||||
| 5 | ★ Banana Boogie / Y-Crack Left | V0- | 10ft | |||||
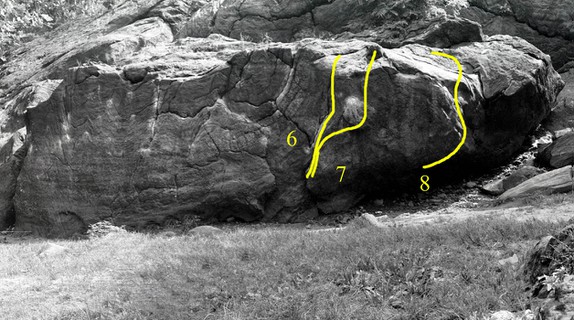
| 6 |
Layback
Start: At the extreme low point of the crack mentioned in Low Traverse. Go: Layback the crack to the top of the boulder. | V1 | 10ft | |||||
| 7 |
★ Little Overhang
Start: Same as Layback. Go: Instead of laybacking the crack, move up a little and then reach out right for a hold at the bottom of the starter flake. Move feet right and bring the left hand over to a side pull on the starter flake. Power to the top. | V0- | 10ft | |||||
 |
||||||||
| Route | Grade | Style | Selected ascents | |||||
| 8 |
★★ Overhanging Traverse (aka Polish Traverse) / Fugg's Delight / The Polish Traverse
Start: At the bottom of the right-leaning crack, just left and below the "starter" flake. Go: Move up and traverse right past the "starter" flake following hand holds just below or at the lip. Traverse right onto the small holds of the small west face and continue to a crack. Finish by moving right along the lip of the rock and step off. | V5 | ||||||
| 9 |
★ Highway Connector / Y-Crack Traverse
Start: As one ends the left-to-right version of Rat Rock Traverse or the High Traverse. Go: Stay high as you move right toward the right-leaning crack. Use holds above the "starter" flake and below the lip to link up with the Overhanging Traverse. | V2 | ||||||
| 10 |
★★ Koma's Roof (aka Rat Trap) / Koma's Roof
Start: Sitting beneath the large overhang on the right side of the north face. Hands matched on undercling. Go: Out, up and over. | V10 | ||||||
| 11 |
★★ Smack the Dragon / Bruce Lee / Slap the Dragon
Start: Beneath last dark overhang that marks the end of the Polish Traverse. Left hand on side-pull, right hand on low, tiny crimp. Go: Up and right. A powerful move with the left hand to the small prominent flake beneath the obvious large one. Continue moving up and right using the larger holds along the lip of the overhang. Use the front sloper to topout | V6 | ||||||
| 12 |
★ Ashima Mandala
Start: Same start as for Smack the Dragon. Go: Make the same opening move with the left hand as Smack the Dragon. Then move right, staying low on tiny crimpers and then moving up on more tiny crimpers until you are forced to top out at the far end of the overhang. | V8 | ||||||
| 13 | ★ Unknown 1 | V4 | ||||||
2. Index by grade
| Grade | Stars | Name | Style | Pop | |
|---|---|---|---|---|---|
| V0- | ★ | Banana Boogie | 10ft | ||
| ★ | Buttcrack Attack | 10ft | |||
| ★ | Crack For Kids | 10ft | |||
| ★ | Little Overhang | 10ft | |||
| V0 | ★ | Rat Rock Traverse | 10ft | ||
| V1 | Layback | 10ft | |||
| V2 | ★ | Highway Connector | |||
| Plague Rat | 10ft | ||||
| V4 | ★ | Unknown 1 | |||
| V5 | ★★ | Overhanging Traverse (aka Polish Traverse) | |||
| V6 | ★★ | Smack the Dragon | |||
| V8 | ★ | Ashima Mandala | |||
| V10 | ★★ | Koma's Roof (aka Rat Trap) |