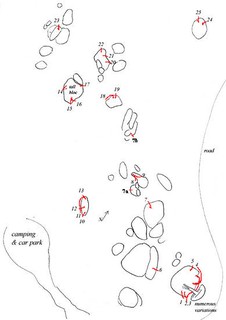
A Crag Guide gives an extensive view of all sub areas and climbs at a point in the index. It shows a snapshot of the index heirachy, up to 300 climbs (or areas) on a single web page. It shows selected comments climbers have made on a recently submitted ascent.
At a minor crag level this should be suitable for printing and taking with you on a climbing trip as an adjunct to your guidebook.
This guide was generated anonymously. Login to show your logged ascents against each route.
Warning
Rock climbing is extremely dangerous and can result in serious injury or death. Users acting on any information directly or indirectly available from this site do so at their own risk.
This guide is compiled from a community of users and is presented without verification that the information is accurate or complete and is subject to system errors. By using this guide you acknowledge that the material described in this document is extremely dangerous, and that the content may be misleading or wrong. In particular there may be misdescriptions of routes, incorrectly drawn topo lines, incorrect difficulty ratings or incorrect or missing protection ratings. This includes both errors from the content and system errors.
Nobody has checked this particlular guide so you cannot rely on it's accuracy like you would a store bought guide.
You should not depend on any information gleaned from this guide for your personal safety.
You must keep this warning with the guide. For more information refer to our:
Usage policy
Contributors
Thanks to the following people who have contributed to this crag guide:
Bevan Ashby
Rob Knight
Martijn van Eijkelenborg
Luke Yerbury
Stephen
Christopher Lean
Lachlan Craig
Matt Schimke
Dane Evans
Kate Ferguson
The size of a person's name reflects their Crag Karma, which is their level of contribution. You can help contribute to your local crag by adding descriptions, photos, topos and more.
Table of contents
- 1. Main Area 54 in Area
- 2. Index by grade
1. Main Area 54 routes in Area
- Summary:
-
All Bouldering
Lat / Long: -35.446189, 149.543932
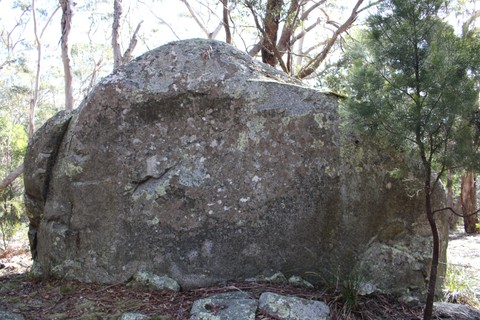
description
From the intersection, turn left and head up the road. This is the first area on the left. There is a small boulder you pass with four problems on it. You can either turn off to the left and park or follow the road as it curves around the boulders to the right and park.
access issues
These boulders lie in a national park. While there are no current access restrictions, please respect the nature of the park and aim to minimise your impact. Refer to the NPWS alerts page for the park for up-to-date access information.
| Route | Grade | Style | Selected ascents | |||||
|---|---|---|---|---|---|---|---|---|
| 1 |
★ Horsing About
Sit start in big low slot. Don't use the big detached flakes for feet. FA: Angus, Jan 2023 | V0 | ||||||
| 2 |
★ On the Fly
Start on 2 holds in middle of slab face and up. FA: Clair, Jan 2023 | V0 | ||||||
| 3 |
Lefthand Arete
Sit start and straight up the arete. | V1 | 2m | |||||
| 4 |
★ Balancy
Start on the left, top out on the right. Better if you eliminate the step down the bottom. (It is by the road on the walk from the Hill to the Main area). FA: Chris L | V1 | 3m | |||||
| 5 |
★★ Sarah's Seven / #1
Sit start and up the outside of the boulder using holds facing the wrong way (!) FA: Sarah Fieg | V7 | 3m | |||||
| 6 |
★ Preps / #2
Sit start. FA: George Fieg | V3 | 2m | |||||
| 7 |
★★ Slow and Low / #3
Sit start on jugs on left side of boulder. Lowball, bunched start traversing right under tree. Continue traversing right and finish up TC at the far right of the boulder. Pumpy. FA: George Fieg | V5 | 2m | |||||
| 8 |
★ Ride It Slow
As for Slow and Low, then top out as for Let Me Ride. | V4 | 4m | |||||
| 9 |
★★ Let Me Off
As for Let Me Ride, but top out just right of the V-groove. | V3 | 3m | |||||
| 10 |
★ Let Me Ride / #4
Sit start. FA: Sarah Fieg | V4 | 2m | |||||
| 11 |
★ The Chronic / #5
Sit start. | V3 | 2m | |||||
| 12 |
★ Nuthin But A Huckleberry Thang
Sit start 1m right of TC on jug, big move straight up. | V1 | 2m | |||||
| 13 |
★ Baby Boy
Stand start up the arete/face left of the Thin Green Line FA: Stephen, 4 May 2018 | V7 | ||||||
| 14 |
Thin Green Line / #6
Stand start then climb up and top out. FA: Sarah Fieg | V3 | 3m | |||||
| 15 |
★ Thin Green Line Sit
Sit start then climb up and top out. FA: Bevan Ashby, 16 Dec 2018 | V5 | 3m | |||||
| 16 |
9 PSI
Sit start from left side of short arete then climb up and top out. FA: Bevan Ashby, 29 Nov 2018 | V2 | 2m | |||||
| 17 |
★ Marbled
Stand start and up the narrow slabby wall. FA: Pete, 2016 | V0 | 5m | |||||
| 18 |
Parkour
Up and across the easy diagonal line, right of Marbled, to the notch in the profile (on the opposite side to Bolt Ons). | VB | 3m | |||||
| 19 | ★ Paul's Slab / #7 | V3 | 4m | |||||
| 20 |
Sideshow
Stand start at the jug just right of Thin Green Line, then up and slightly right into the scoop. An optional sit start is possible, traversing in past the bush a few metres to the right. FA: Pete, 2016 | V1 | 4m | |||||
| 21 |
Bolt Ons
Up jugs to the notch in the profile, a few metres right of Sideshow. An easy descent off this boulder. | VB | 3m | |||||
| 22 |
★ Easy Arete LHV
Up the easy arete, right of Bolt Ons. FA: Pete | VB | 3m | |||||
| 23 |
Easy Arete RHV
Stand start and up, staying right of the arete and rib. FA: Pete, 2016 | V0 | 3m | |||||
| 24 |
Jam Tart
Sit start at the good spike and straight up the short wall, on the boulder behind Bolt Ons. FA: Pete, 2016 | V1 | 2m | |||||
| 25 |
Pop Tart
Sit start and pop left to the scoop, then up. FA: Pete, 2016 | V3 | 2m | |||||
| 26 |
★ Alien Craft
Sit start. FA: Duncan Brown | V3 | 5m | |||||
| 27 |
★ UFO ridge
Sit start matched on the block and trend right by following the arete ridge. Step out right towards Alien Craft and top out. | V1 | 3m | |||||
| 28 |
★★ Stand to Attention / #8
Standing start. FA: George Fieg | V4 | 3m | |||||
| 29 |
★★★ Nob Jockey / #9
Sit start and fridge hug the body of the boulder. FA: Leeson Rose | V8 | 4m | |||||
| 30 |
★ Stone's throw back
On the back of the Stones Throw boulder. Stand start matched on scoop crimps at the left and go up trending right to top out. FA: Martijn van Eijkelenborg, 11 Nov 2016 | V0 | 3m | |||||
| 31 |
★ Stones Throw / #10
FA: Duncan Brown | V0 | 3m | |||||
| 32 |
★★ Trust the Opposition / #11
Low traverse from a sit start then up through crimps or via the arete. Goey. FA: Duncan Brown | V4 | 5m | |||||
| 33 |
★ Up the Middle / #12
FA: Andrew Richards | V3 | 3m | |||||
| 34 |
★ Left Arete / #13
Pretty standard stand start then up the arete. Getting off the boulder is the fun bit. FA: Ky Wittich | V3 | 3m | |||||
| 35 |
★ The Way Down / #14
A few variants of this are possible through the various crack-lines at the front and back of the boulder holding 'Zac's Arete', including down-climbing #17. FA: Duncan Brown | V1 | ||||||
| 36 |
★★★ Zac's Arete / #15
Also called 'the nothing'. V8 in the guide which depends on beta that goes out right before heading up the arete. If you stick purely to the arete you could probably add a grade. FA: Zac Vertrees | V8 | 5m | |||||
| 37 |
★★★ Zac's Arete Direct / #16
The direct version of 'Zac's Arete' heading up some minging crimps and poor feet out to the arete. FA: Chris Webb Parsons | V10 | 5m | |||||
| 38 |
The Face / The Arete
Variant of #17. 6+? On sidepulls and using the arete (toe hook/heel hook) but not the opposing boulder. 6 in the new guide but possibly harder. | V6 | ||||||
| 39 |
★★ Jaws of Death / #17
Up the crackline using the arete/crack to ascend. FA: Ky Wittich | V2 | 3m | |||||
| 40 |
★ Stiff Upper Lip
Stand start at the arete and up, using the arete and the face to the right (the other block is out, otherwise you're doing Jaws of Death). FA: Pete | V3 | 3m | |||||
| 41 |
The Open Book
Sit start then climb up and top out. | V3 | 2m | |||||
| 42 |
★ The Lowball Traverse / #18
Traverse slopers from a sit start to finish at the mantle for 'Mini Mantle'. | V5 | 2m | |||||
| 43 |
Mini Mantle / #19
Mantle problem. Straight up to a rail then a goey mantle depending on your height. FA: Duncan Brown | V3 | 2m | |||||
| 44 |
★ Desperado / #20
Sit start from crack then climb up trending rightwards and top out. FA: Duncan Brown | V4 | 3m | |||||
| 45 |
★ Desperado Direct
Sit start from sloping rail then climb up and top out. FA: Bevan Ashby, 25 Nov 2018 | V5 | 3m | |||||
| 46 |
★★ Socks / #21
Sit start. FA done in, you guessed it, socks. FA: Chris Webb Parsons | V5 | 3m | |||||
| 47 |
★ Shoes
Sit start from right side of flake then climb up trending rightwards and top out. FA: Bevan Ashby, 25 Nov 2018 | V4 | 3m | |||||
| 48 |
★ Blue Balling / #22
Mantle problem. Crimps and up, fairly standard. FA: Duncan Brown | V5 | 2m | |||||
| 49 |
★★ Free Balling
Sit start from lefthand sidepull then climb up and top out. No stacking pads. FA: Bevan Ashby, 23 Nov 2018 | V10 | 3m | |||||
| 50 |
Blood Sacrifice
Start right of the arete and work your way up FA: Lachlan Craig, 16 May 2021 | V3 | 4m | |||||
| 51 |
★ Heidi McKnight / #23
FA: Duncan Brown | V3 | 3m | |||||
| 52 |
★★ Bum Nut
Desperate. Has only been climbed twice. Need to be tall, or wicked strong. FA: Ky Wittich | V5 | 4m | |||||
| 53 |
Run, Forest, Run / #24
Run and jump to slopers! FA: George Fieg | V7 | ||||||
| 54 |
Slow it Down / #25
FA: George Fieg | V1 | ||||||
      /af/bd/afbdfecab3dd0adca195a831adc766305715cd6e) /d0/5c/d05c9c9e263886fd817d98fb52f4a02d6c9d829f) /e3/8c/e38c7cea7b7e9ea34827fd4849b3fd3e7ecf254c)    /ee/32/ee32ac4eb96f8d265d08c8255afabb8424029980)     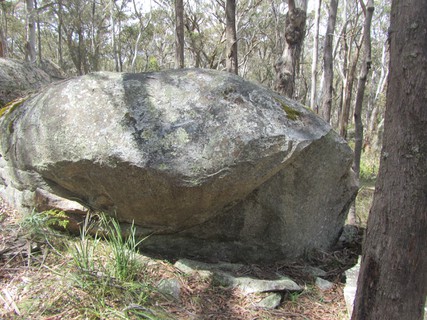 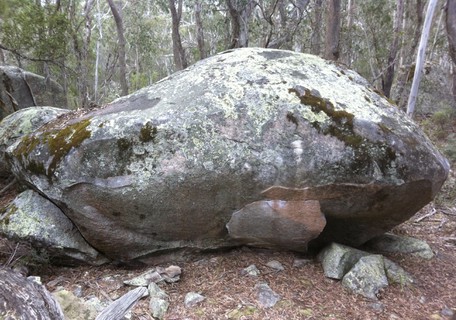 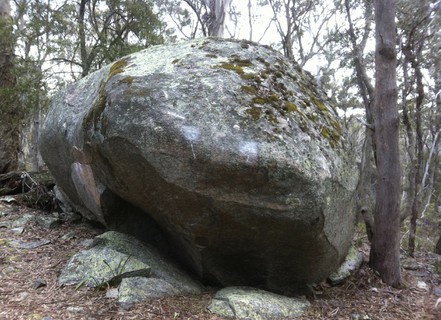 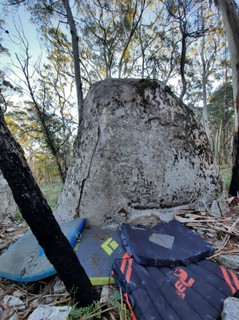 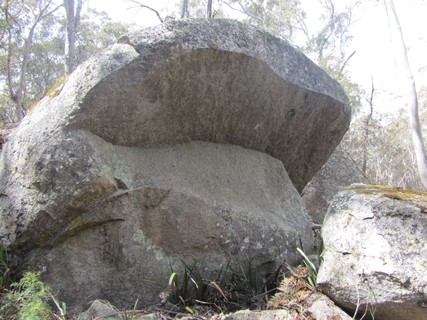 |
||||||||
 Chris Beers
2. Index by grade
| Grade | Stars | Name | Style | Pop | |
|---|---|---|---|---|---|
| VB | Bolt Ons | 3m | |||
| ★ | Easy Arete LHV | 3m | |||
| Parkour | 3m | ||||
| V0 | Easy Arete RHV | 3m | |||
| ★ | Horsing About | ||||
| ★ | Marbled | 5m | |||
| ★ | On the Fly | ||||
| ★ | Stone's throw back | 3m | |||
| ★ | Stones Throw | 3m | |||
| V1 | ★ | Balancy | 3m | ||
| Jam Tart | 2m | ||||
| Lefthand Arete | 2m | ||||
| ★ | Nuthin But A Huckleberry Thang | 2m | |||
| Sideshow | 4m | ||||
| Slow it Down | |||||
| ★ | The Way Down | ||||
| ★ | UFO ridge | 3m | |||
| V2 | 9 PSI | 2m | |||
| ★★ | Jaws of Death | 3m | |||
| V3 | ★ | Alien Craft | 5m | ||
| Blood Sacrifice | 4m | ||||
| ★ | Heidi McKnight | 3m | |||
| ★ | Left Arete | 3m | |||
| ★★ | Let Me Off | 3m | |||
| Mini Mantle | 2m | ||||
| ★ | Paul's Slab | 4m | |||
| Pop Tart | 2m | ||||
| ★ | Preps | 2m | |||
| ★ | Stiff Upper Lip | 3m | |||
| ★ | The Chronic | 2m | |||
| The Open Book | 2m | ||||
| Thin Green Line | 3m | ||||
| ★ | Up the Middle | 3m | |||
| V4 | ★ | Desperado | 3m | ||
| ★ | Let Me Ride | 2m | |||
| ★ | Ride It Slow | 4m | |||
| ★ | Shoes | 3m | |||
| ★★ | Stand to Attention | 3m | |||
| ★★ | Trust the Opposition | 5m | |||
| V5 | ★ | Blue Balling | 2m | ||
| ★★ | Bum Nut | 4m | |||
| ★ | Desperado Direct | 3m | |||
| ★★ | Slow and Low | 2m | |||
| ★★ | Socks | 3m | |||
| ★ | The Lowball Traverse | 2m | |||
| ★ | Thin Green Line Sit | 3m | |||
| V6 | The Face | ||||
| V7 | ★ | Baby Boy | |||
| Run, Forest, Run | |||||
| ★★ | Sarah's Seven | 3m | |||
| V8 | ★★★ | Nob Jockey | 4m | ||
| ★★★ | Zac's Arete | 5m | |||
| V10 | ★★ | Free Balling | 3m | ||
| ★★★ | Zac's Arete Direct | 5m |